

If you’re passionate about growing your plant collection, setting up the right environment is key to successful propagation. Whether you’re an experienced gardener or a beginner, propagation station setup ideas can help you create the perfect space to nurture new plants from cuttings. Imagine having a dedicated area where your plant babies thrive, with everything they need for root development—proper light, humidity, and airflow. In this article, we’ll explore creative and practical ideas to design a propagation station that ensures your houseplants flourish, making your gardening journey even more enjoyable and rewarding.
Why a Propagation Station is Essential
A propagation station is an invaluable tool for anyone looking to expand their plant collection and ensure healthy growth. Here’s why it’s essential:
Efficient Propagation Process
A dedicated propagation station creates the ideal environment for plant cuttings to root. By providing consistent moisture, light, and airflow, you increase the success rate of rooting, reducing the trial and error often associated with propagation.
Maximizes Space
Using a propagation station allows you to save space while growing multiple plants at once. Whether you’re working with small cuttings or larger plants, it optimizes your growing area, especially in small homes or apartments.
Prevents Disease Spread
By keeping cuttings in a separate, controlled area, a propagation station minimizes the risk of spreading pests or diseases to your mature plants. This creates a safe, isolated space where plants can thrive without interference.
Cost-Effective
Instead of purchasing new plants, propagation lets you grow new ones from existing stock. This makes it an economical choice for plant enthusiasts who want to expand their collection without breaking the bank.
Improved Plant Health
By propagating in a controlled space, you can monitor each cutting closely, ensuring it receives the right nutrients and conditions for growth. This leads to stronger, healthier plants that are more likely to thrive long-term.
In short, a propagation station is not just a convenience; it’s a game-changer for plant care, making the propagation process more efficient, cost-effective, and enjoyable.
Key Elements of a Successful Propagation Station
Creating a successful propagation station is essential for growing healthy plants from cuttings or seeds. To set up an effective station, focus on these key elements:
Proper Lighting
Light is crucial for plant growth. Use natural sunlight or grow lights with a full spectrum to mimic the sun’s rays. A south-facing window works well, but if you’re propagating indoors, consider LED grow lights to ensure your plants receive the right amount of light for healthy growth.
Humidity Control
High humidity is vital for keeping cuttings hydrated. A humidity dome or plastic cover over your propagation tray helps maintain the necessary moisture levels. Alternatively, using a misting bottle or a humidifier in the room can help control the humidity.
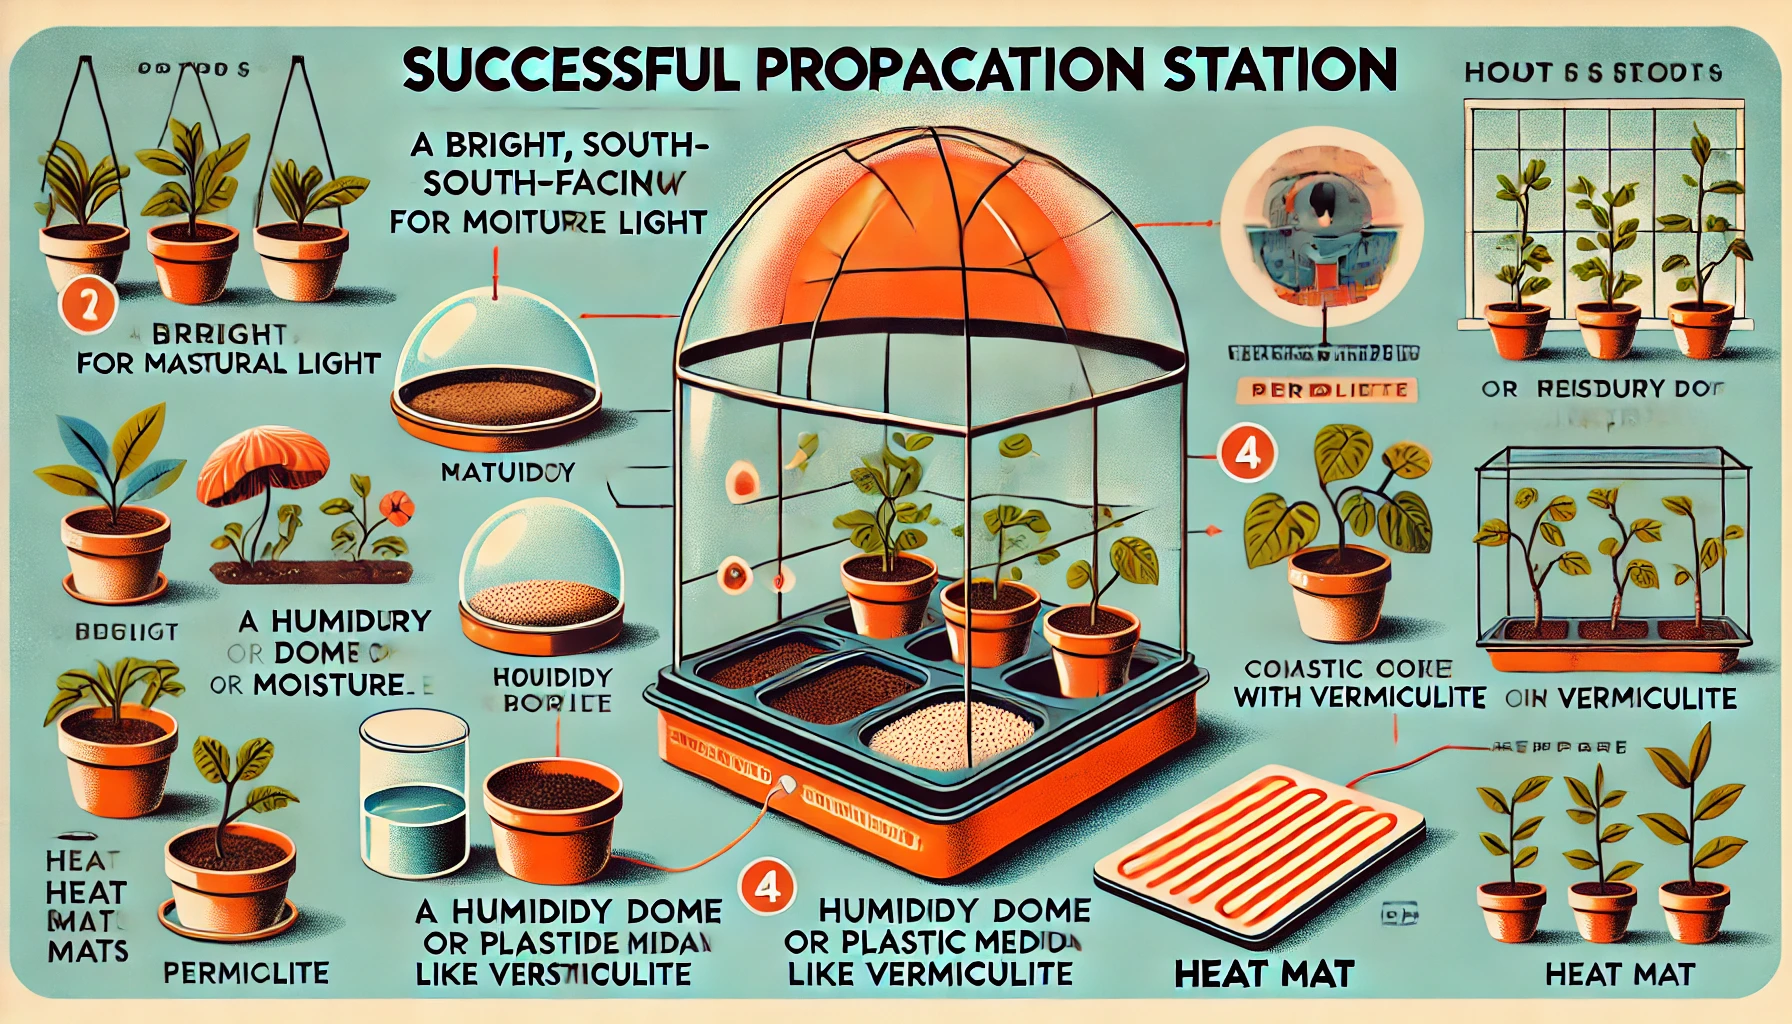
Well-Draining Medium
Choose a well-draining growing medium like perlite, vermiculite, or a mix of peat and coarse sand. A good medium ensures water doesn’t pool around the roots, which can cause rot. Ensure that the medium is moist but not waterlogged.
Temperature Regulation
Most plants prefer a consistent temperature range of 65-75°F (18-24°C) during propagation. A heat mat under your propagation tray can help maintain the ideal temperature, especially in cooler environments. Avoid exposing your cuttings to drafts or extreme temperatures.
Clean and Sterile Environment
Cleanliness is crucial to prevent the spread of diseases. Sterilize your tools and containers regularly to reduce the risk of infection. This is especially important when propagating from cuttings, as they are more susceptible to bacterial and fungal infections.
Air Circulation
Good air circulation prevents mold and mildew buildup, which can harm your plants. Ensure your propagation station has enough ventilation or place a small fan nearby to keep air moving gently around the plants.
By setting up a propagation station with these essential elements, you can ensure your cuttings and seeds thrive, leading to healthy, vigorous plants. Keep things simple, stay consistent, and watch your garden grow!
Choosing the Right Containers and Tools
When it comes to growing a healthy garden, selecting the right containers and tools is crucial. The right choices will not only support plant growth but also make your gardening tasks easier and more efficient. Here’s how to get started:
Containers:
- Size Matters: Choose containers that provide enough room for your plant’s roots to grow. A pot that is too small can restrict growth, while one that is too large may lead to waterlogging. Aim for a container that’s at least one size larger than the root ball of your plant.
- Drainage: Always select containers with drainage holes. Proper drainage prevents water from accumulating at the bottom, which can lead to root rot. If your pot doesn’t have holes, drill some yourself.
- Material: Containers come in various materials, such as plastic, clay, ceramic, and wood. Plastic is lightweight and retains moisture, while clay pots offer good airflow but may dry out quickly. Choose based on your plant’s needs and your personal preferences.
- Self-Watering Pots: Consider self-watering pots if you’re often away or forget to water. These pots help maintain consistent moisture levels, ensuring your plants get the right amount of water.
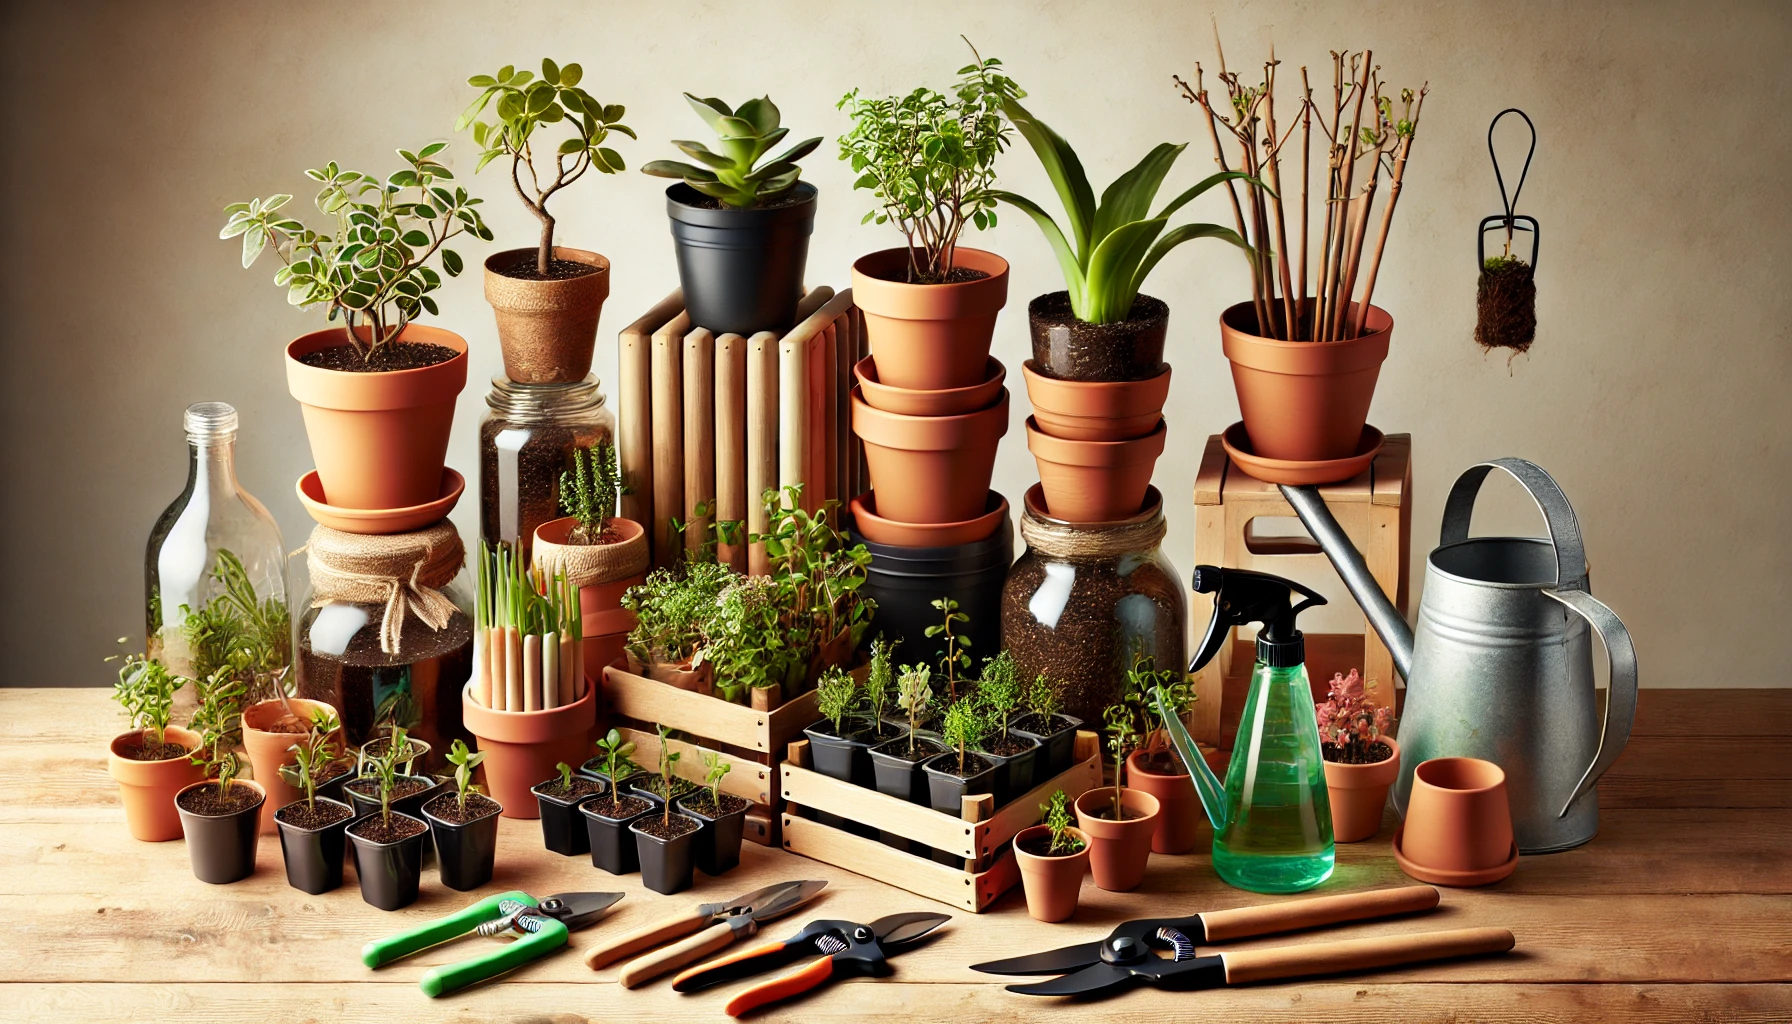
Tools:
- Basic Tools: For everyday gardening, ensure you have a good set of basic tools: a hand trowel for digging, pruning shears for trimming, and a watering can or hose with an adjustable nozzle.
- Quality and Durability: Invest in tools made from high-quality materials, such as stainless steel or rust-resistant alloys. These will last longer and perform better, reducing the need for frequent replacements.
- Ergonomic Designs: Look for tools with ergonomic handles to reduce strain on your hands and wrists, especially if you garden for extended periods.
- Soil Test Kits: A soil test kit can help you understand your soil’s pH and nutrient levels. This ensures that you provide your plants with the right care, from fertilization to watering.
Choosing the right containers and tools doesn’t have to be complicated. Focus on functionality and your plant’s specific needs to set yourself up for gardening success.
Setting Up the Physical Space for Your Propagation Station
Creating the ideal environment for your propagation station is key to ensuring your plants thrive. Here’s how to set up the perfect space for your propagation efforts:
Choose a Location with Proper Lighting
A well-lit spot is crucial for plant growth, especially for seedlings and cuttings. Ideally, place your propagation station near a window with bright, indirect sunlight. If natural light is limited, consider investing in grow lights to mimic sunlight. LED grow lights with a balanced spectrum can be an excellent option.
Control Temperature and Humidity
Most plants propagate best in a warm and humid environment. Aim for a temperature between 65°F and 75°F (18°C to 24°C). To maintain humidity, use a humidity dome, clear plastic cover, or a small greenhouse. If you’re working with many plants, consider placing your station in a small room or closet where you can control the temperature and humidity more easily.
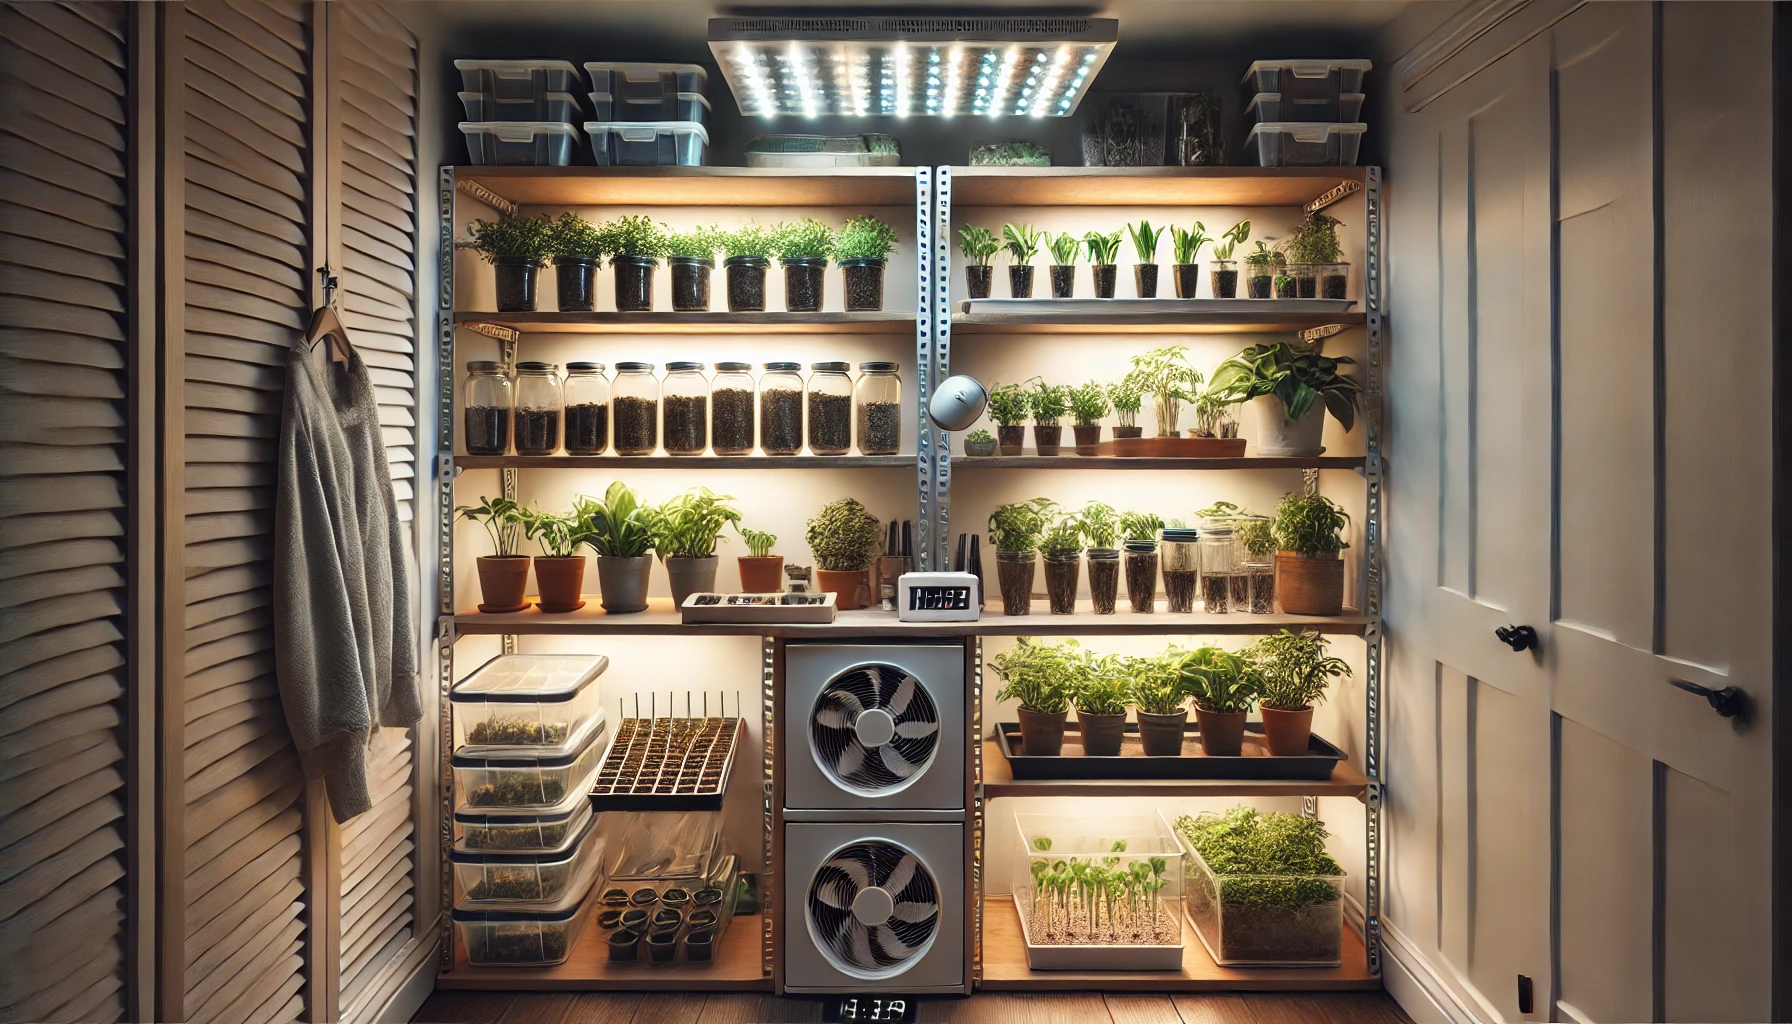
Organize with Shelving or Trays
Keeping your propagation station organized can make a huge difference. Use shelves, trays, or small racks to keep your plants in rows or clusters. This will not only help maximize space but also prevent overcrowding and ensure each plant gets the attention it needs. Ensure the shelving units are sturdy enough to hold your pots and containers.
Use a Watering System
Adequate moisture is essential for successful propagation. You can manually water your plants or install a self-watering system. Consider using a misting bottle or a shallow tray of water for cuttings that need to be kept moist. If your propagation station is inside, a humidity tray with pebbles can help maintain consistent moisture levels.
Ensure Good Air Circulation
Proper airflow is necessary to prevent mold and fungal growth. Position your propagation station in an area with natural ventilation or use a small fan to circulate the air. Be careful not to place your plants in direct drafts, as this could stress them.
By creating a well-lit, warm, and humid environment with proper airflow and organization, you’ll provide the perfect foundation for your propagation station to succeed.
Creative Propagation Station Setup Ideas
Creating a dedicated propagation station can be both fun and practical. Here are some creative ideas to set up an efficient and aesthetic propagation station that supports your plant-growing journey.
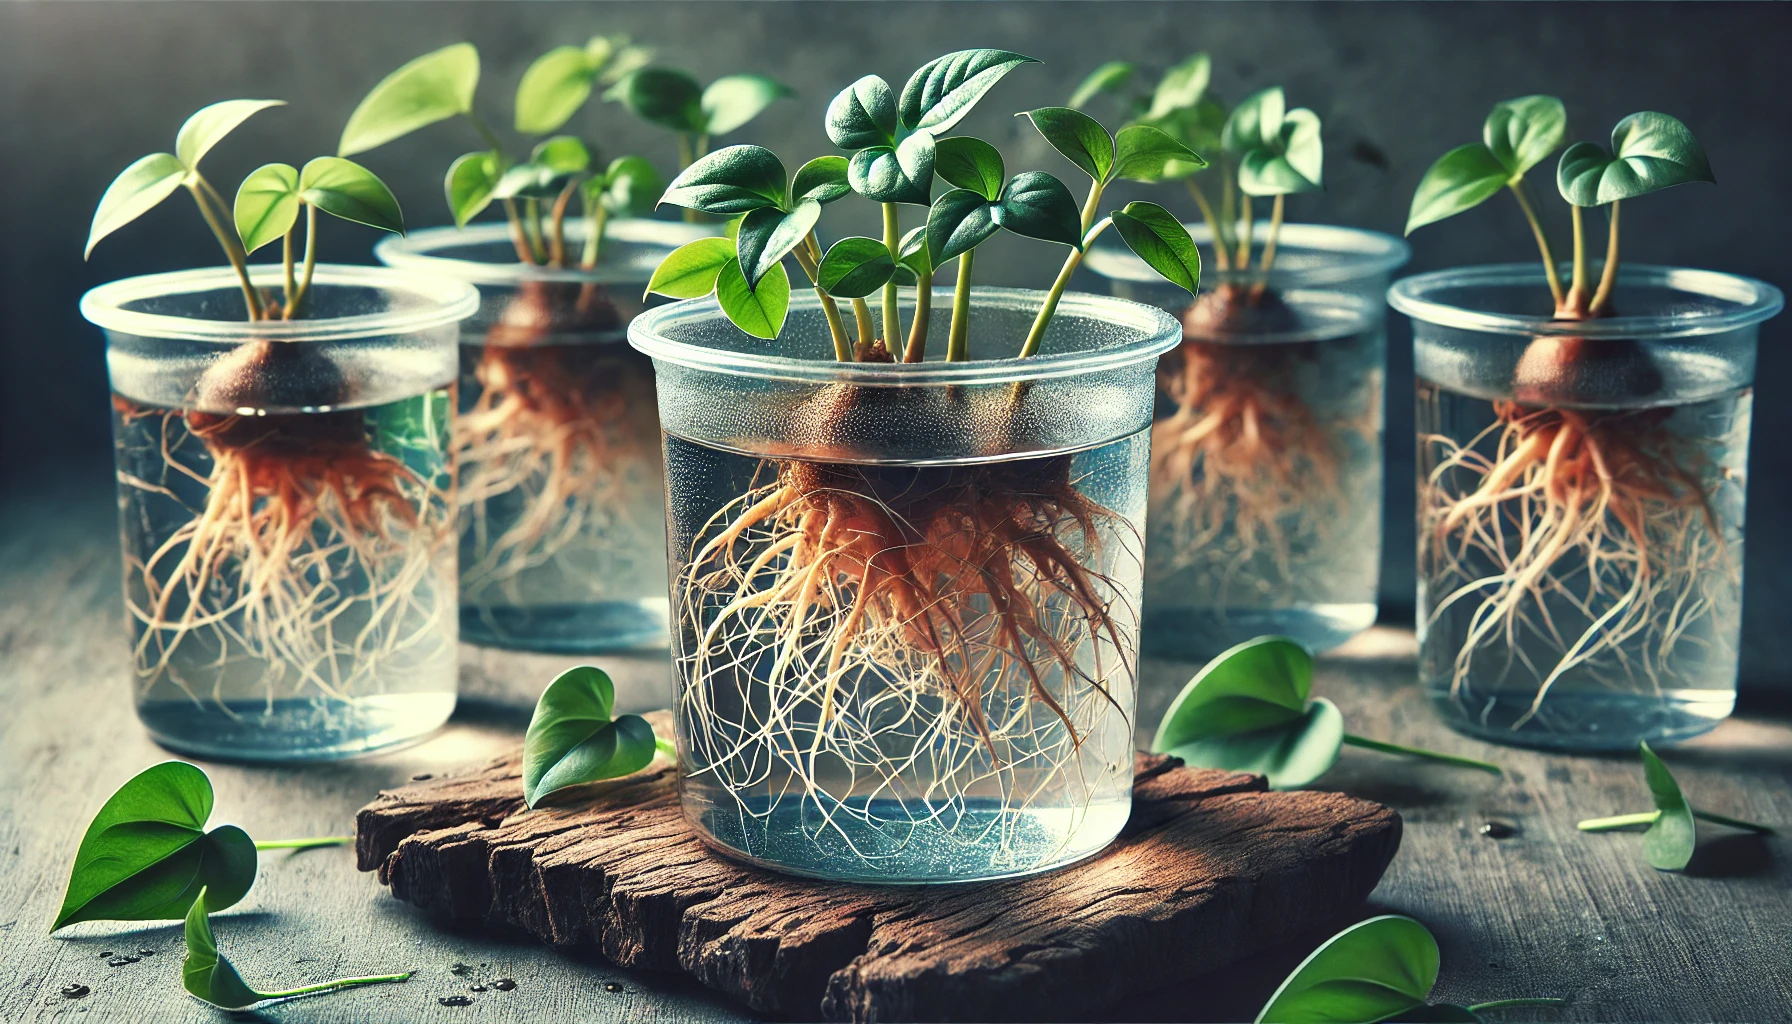
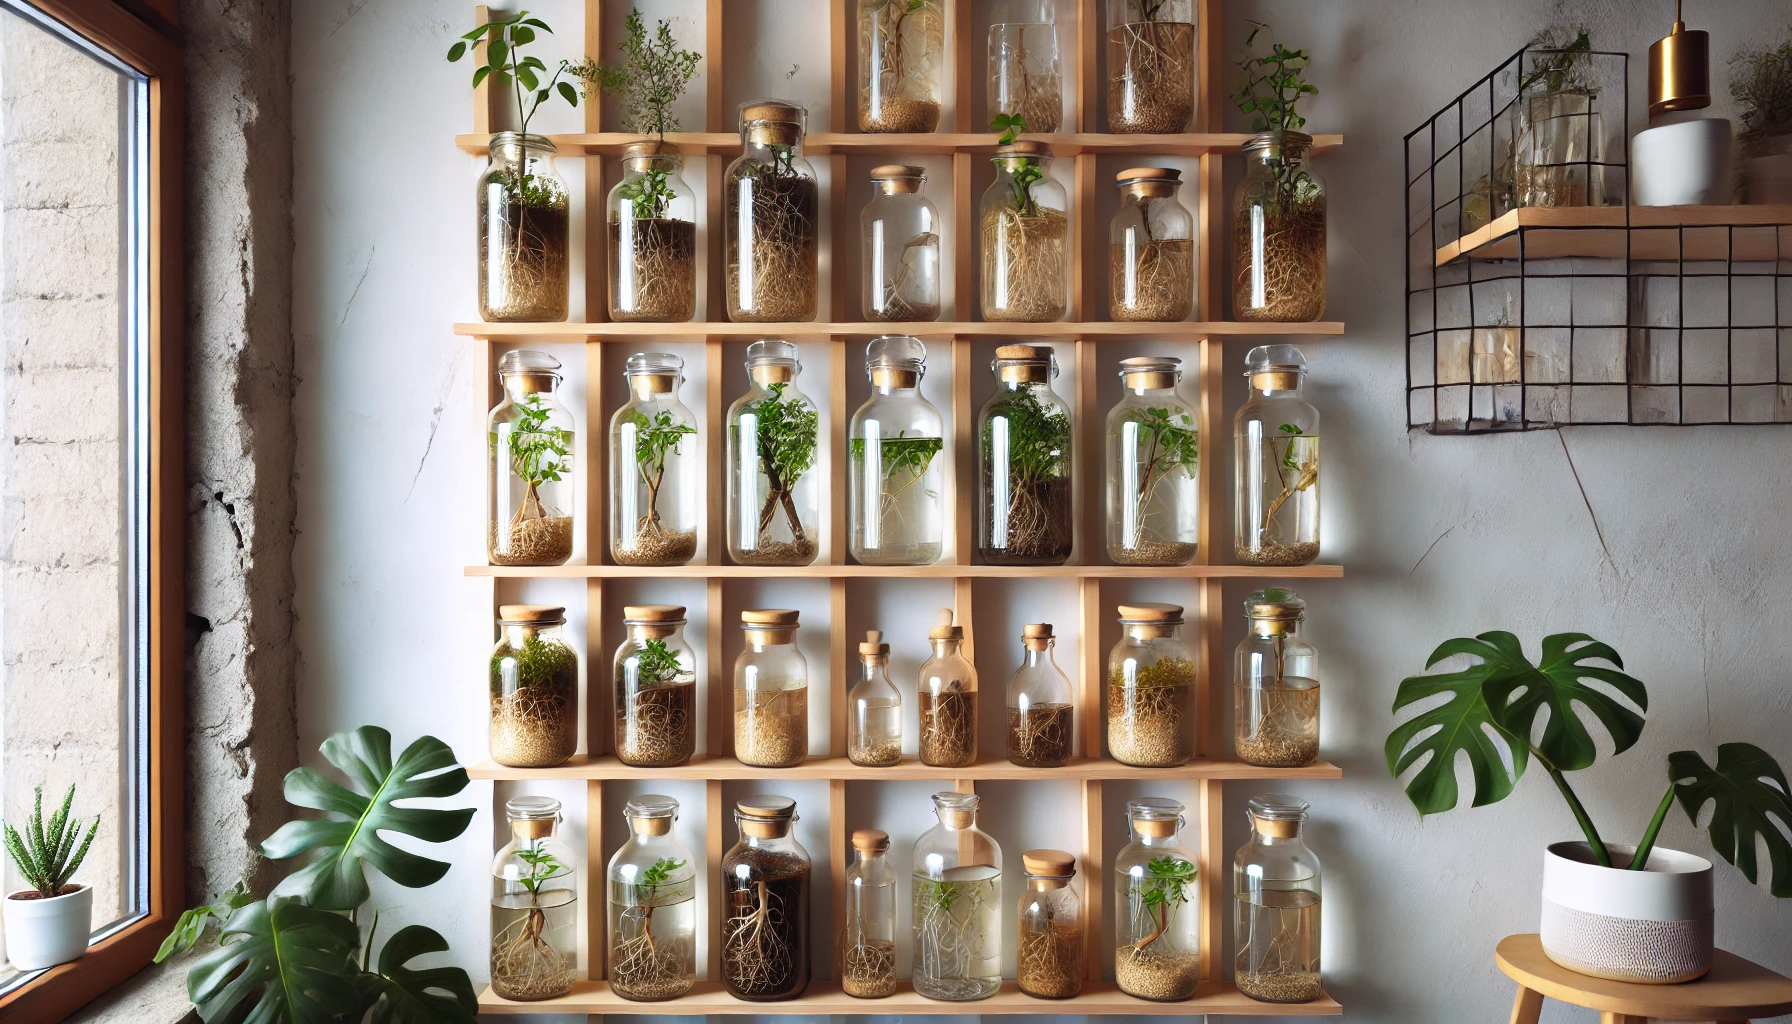
Utilize Clear Containers for Visibility
Clear glass or plastic containers allow you to observe root development in real-time. Mason jars, old glass bottles, or clear plastic cups work well for growing cuttings in water. Being able to monitor the roots ensures you know when it’s time to transplant them into soil.
Repurpose Old Trays or Shallow Boxes
For multiple cuttings, use shallow trays or wooden boxes. These can be lined with waterproof liners to prevent water spillage. You can arrange multiple propagation jars or pots in one area, which saves space and keeps your cuttings organized.
Use a Temperature-Controlled Environment
Plants propagate best in consistent warmth. Consider setting up your station near a heat source or using a heating mat under your propagation tray. A temperature-controlled environment speeds up root growth, especially for plants like succulents or tropical varieties.
Hang a Propagation Wall
For a unique touch, install a vertical propagation wall using a series of small hanging containers or pockets. This setup saves space, keeps the area tidy, and adds a decorative element to your space. You can use wall-mounted planters or repurpose old shoe organizers for this purpose.
Add Grow Lights for Optimal Growth
Many plants, especially in low-light areas, benefit from added light. Place small grow lights above your propagation station to ensure your cuttings get enough light to root successfully. LED grow lights are energy-efficient and perfect for indoor spaces.
Keep a Simple Journal for Tracking Progress
While not part of the physical setup, maintaining a journal near your propagation station helps track progress. Write down when you took the cuttings, their progress, and any special needs (like misting or extra light). This helps you stay organized and ensures successful propagation.
With these creative setup ideas, you can enhance your propagation process while keeping it functional and visually appealing. Whether you’re a beginner or experienced, these tips will help ensure your plants thrive.
Tips for Successful Plant Propagation in Your Station
Propagating plants can be a rewarding and cost-effective way to expand your garden. Here are expert tips for ensuring success in your plant propagation efforts:
Choose the Right Time
Propagation works best during the plant’s active growing season, typically spring or early summer. This is when plants are most vigorous, ensuring better growth and root development.
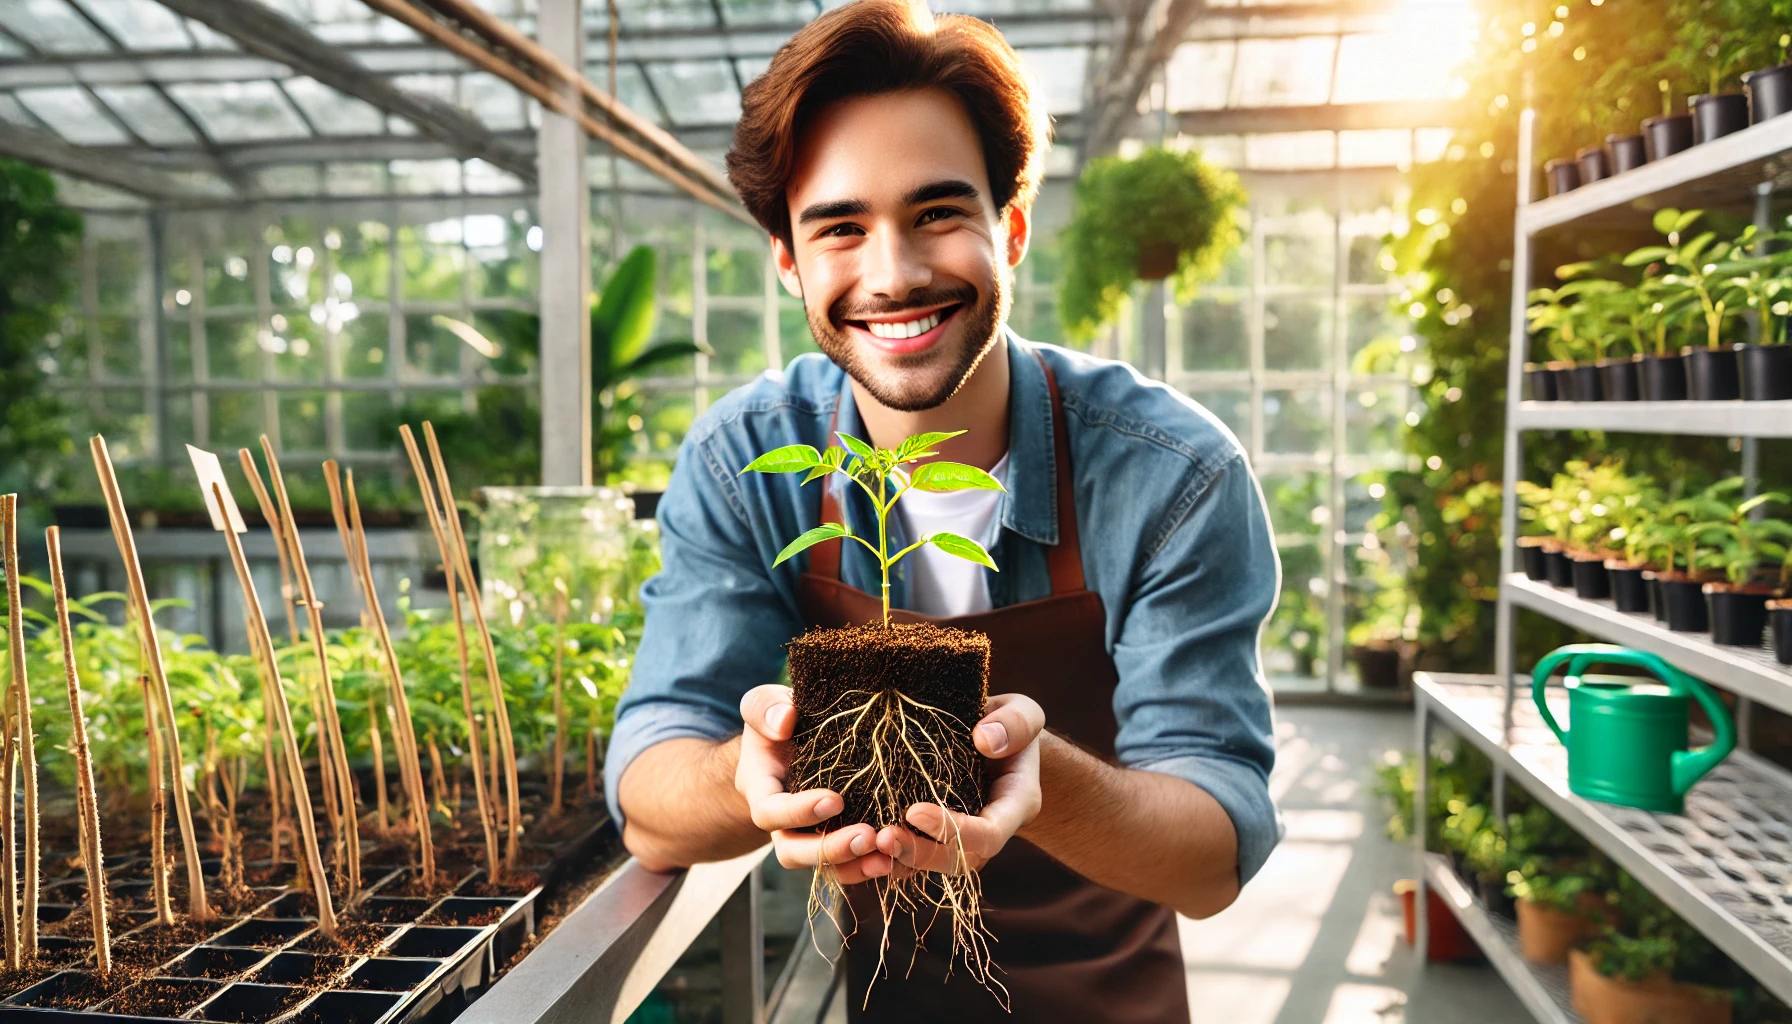
Select Healthy Parent Plants
Ensure that the plant you’re taking cuttings from is healthy and free from pests or disease. A strong parent plant leads to stronger, healthier new plants.
Use Clean, Sharp Tools
To avoid introducing diseases, always use clean, sharp scissors or pruning shears. Disinfect your tools before and after each use to maintain hygiene.
Consider the Propagation Method
Different plants require different methods. Some propagate best through stem cuttings, while others may prefer leaf or root division. Research your plant species to choose the best method.
Provide Proper Growing Medium
Use a well-draining, sterile potting mix to prevent root rot. A mixture of perlite and peat moss is often ideal for most plant cuttings.
Maintain Humidity
Keep your cuttings in a humid environment to prevent wilting. You can cover them with a plastic dome or place a clear plastic bag over the pot to trap moisture.
Ensure Proper Lighting
Most plants need bright, indirect light for successful propagation. Avoid direct sunlight, which can overheat and stress the cuttings.
Keep Soil Moist but Not Waterlogged
Overwatering is a common mistake in propagation. Water your cuttings lightly to keep the soil moist, but ensure it’s not soggy. Good drainage is key.
Be Patient
Rooting can take anywhere from a few weeks to several months, depending on the plant species. Resist the urge to disturb the cuttings; they need time to establish roots.
By following these tips, you’ll improve your chances of successful propagation, creating thriving plants for your garden or home.
Setting up a propagation station is one of the best ways to improve your success with growing new plants and expanding your indoor garden. By ensuring proper light, temperature, humidity, and air circulation, you can create an ideal environment for your plant cuttings to thrive. Whether you have a spacious room or a small apartment, there are propagation station setup ideas to suit every space and style.
Now that you have the tools and knowledge to create your own propagation station, it’s time to get started! Experiment with different setups, choose the right plants to propagate, and watch your green collection grow. A little time and effort invested in the right setup will reward you with healthier, more vibrant plants, and a fulfilling propagation experience. Happy gardening! 