
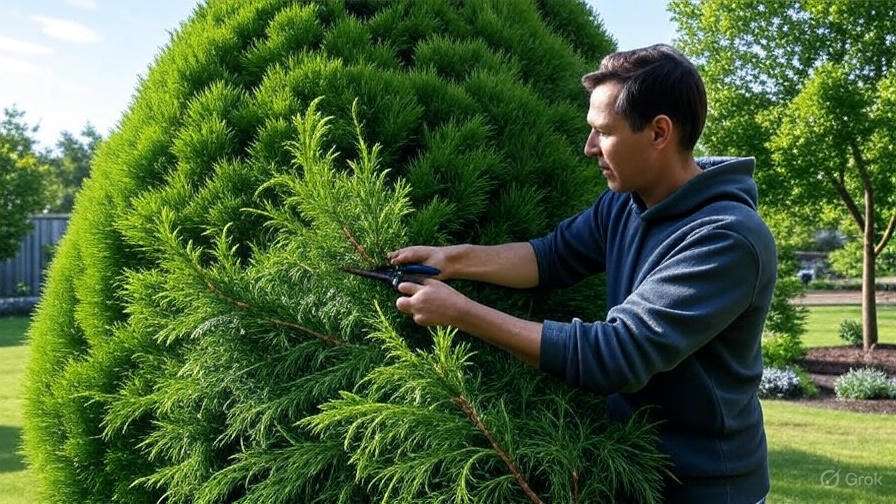
Pruning cedar trees might seem like a daunting task, but it’s one of the most important steps in ensuring your tree stays healthy, beautiful, and properly shaped. Whether you’re dealing with overgrown branches, dead wood, or simply want to encourage fuller growth, pruning cedar trees is essential to their overall health and appearance.
But how do you know when, why, and how to prune effectively?  Too little pruning can lead to weak branches and poor air circulation, while too much can stress the tree or damage its natural form. In this guide, we’ll walk you through everything you need to know—from the best time to prune to expert tips on shaping your cedar for optimal growth.
By the end of this article, you’ll feel confident in your ability to care for your cedar tree and help it thrive. Ready to learn how to master pruning cedar trees? Let’s dive in! 
What Is Pruning, and Why Should You Prune Cedar Trees?
Pruning is the process of removing specific parts of a tree, like branches or stems, to improve its health, shape, and overall appearance. When it comes to cedar trees, pruning is essential to ensure they grow strong, look tidy, and maintain their natural beauty  .
.
Cedar trees, with their lush, dense foliage, need occasional attention to thrive. Here’s why pruning is important:
- Promotes Healthy Growth
Pruning removes dead or diseased branches, which can prevent the spread of illness and allow the tree to focus its energy on healthy growth. By cutting away any weak or damaged areas, you give the tree a better chance of thriving. - Improves Shape and Structure
Over time, cedar trees can become overgrown or uneven. Pruning helps maintain their natural shape and encourages a balanced structure. Whether you’re aiming for a more uniform look or simply want to keep the tree from becoming too unruly, pruning is key .
. - Increases Airflow and Light Penetration
By thinning out the branches, pruning ensures better air circulation and sunlight reaching the inner parts of the tree. This is vital for preventing fungal infections and promoting healthier growth in the long run .
. - Enhances Aesthetic Appeal
Regular pruning keeps your cedar tree looking neat and well-maintained. Whether it’s for your backyard or a decorative feature in your landscape, a well-pruned cedar tree adds beauty and elegance to any space .
. - Safety Concerns
Sometimes, branches can become too large or hang too low, posing potential risks to nearby structures or people. Pruning helps remove these branches before they become a hazard .
.
By following a proper pruning routine, you’ll ensure that your cedar tree remains healthy, visually appealing, and safe for years to come. Stay tuned for more expert tips on how to prune cedar trees like a pro!
When Is the Best Time to Prune Cedar Trees? 
Pruning cedar trees at the right time is essential for their health, growth, and overall appearance. Get the timing wrong, and you could stress the tree, hinder growth, or even invite diseases. Let’s dive into the best times to prune your cedar trees so they thrive.
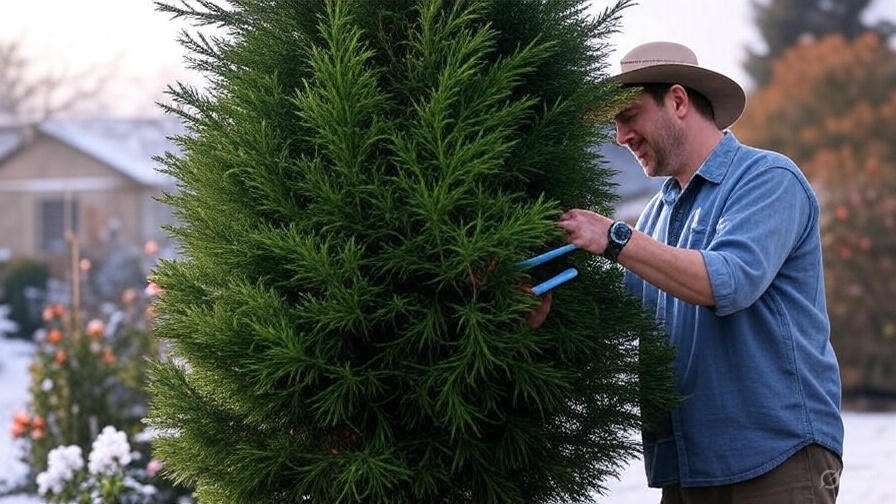
1. Prune in Late Winter or Early Spring
The ideal time to prune cedar trees is during their dormant period, which typically falls between late winter and early spring (before new growth begins). This is when the tree is least stressed, and pruning will help stimulate healthy new growth once the warm weather arrives.
Pruning during this time allows you to:
- Minimize the risk of disease.
- Encourage fresh, strong growth in the spring.
- Shape the tree without interfering with its active growing season.
2. Avoid Pruning in Fall 
Pruning in fall can be tempting, but it’s not recommended. Cutting your cedar tree too late in the season may encourage new growth just before winter sets in. This can leave the new growth vulnerable to freezing temperatures and damage the tree’s overall health. Instead, wait until the coldest months have passed.
3. Avoid Pruning During the Growing Season 
Pruning during the growing season (spring to early summer) can stress the tree, especially if you remove too much. While light maintenance pruning to remove dead or damaged branches is okay, avoid heavy pruning during this period. Your tree is putting its energy into growth, and cutting it back can limit its vitality.
4. Consider Your Local Climate 
The timing of pruning can vary depending on where you live. For instance, in warmer climates, you may find that late winter pruning is more effective, while in cooler regions, early spring may be the best choice. Pay attention to your local frost dates and adjust your pruning schedule accordingly.
Key Takeaways 
- Best time: Late winter to early spring (before new growth starts).
- Avoid: Pruning in fall or during the growing season.
- Always: Monitor your local climate for the best results.
By pruning at the right time, you ensure your cedar tree stays healthy, vibrant, and well-shaped year after year.
Tools You’ll Need for Pruning Cedar Trees 
Pruning your cedar trees is a rewarding task, but having the right tools will make the job much easier and safer. Below, we’ve broken down the essential tools you’ll need to get started, along with some tips on how to use them effectively.
1. Pruning Shears
Pruning shears are your go-to tool for trimming smaller branches (up to ¾ inch in diameter). They provide a clean cut and are great for fine-tuning your tree’s shape. Opt for bypass pruners (where the blades cross like scissors) for the best results. Keep them sharp for smooth, efficient cuts!
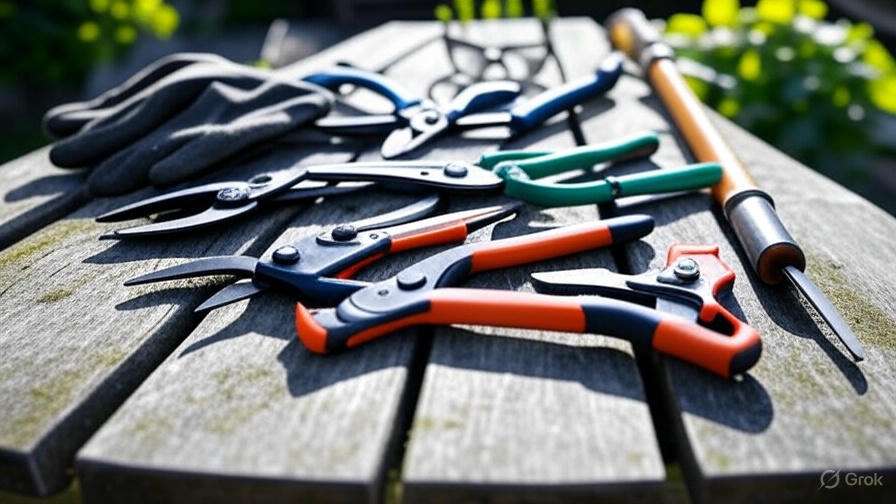
2. Loppers
For thicker branches (1 inch to 2 inches in diameter), loppers are a must-have. They offer more leverage than pruning shears, allowing you to cut with less effort. Choose telescoping loppers for extended reach—perfect for trimming higher branches without a ladder.
3. Pruning Saw 
When dealing with larger branches (over 2 inches in diameter), a pruning saw will do the trick. A curved saw with sharp teeth is ideal for making clean cuts and minimizing damage to the tree. Look for a saw that’s easy to handle and specifically designed for pruning.
4. Pole Pruner
For those hard-to-reach areas, a pole pruner is invaluable. This tool lets you trim branches up high without using a ladder. It’s a great choice for pruning cedar trees that have grown taller over time. Make sure the pole is long enough to give you the reach you need!
5. Safety Gear 
While pruning, safety is a top priority. Wear protective gloves to avoid splinters and thorns, safety glasses to protect your eyes from flying debris, and sturdy boots to keep your feet safe while working. A hard hat is recommended for extra protection, especially when working near tall trees or overhead branches.
6. Cleaning Tools 
After pruning, it’s essential to clean your tools to prevent the spread of diseases. Use a disinfectant like rubbing alcohol or bleach to wipe down your shears, loppers, and saws. This will ensure that you’re not transferring any harmful pathogens between plants.
7. Garden Cart or Tarp 
As you trim away branches and debris, having a garden cart or tarp nearby can make clean-up easier. You’ll be able to gather and remove all the cuttings quickly, leaving your garden neat and tidy.
Ready to Get Pruning?
With the right tools in hand, you’ll be set to prune your cedar trees effectively and safely. Each tool plays a crucial role, ensuring that you make the right cuts while maintaining the health of your trees. Happy pruning! 
Step-by-Step Guide to Pruning Cedar Trees
Pruning cedar trees is an essential part of maintaining their health, shape, and size. With the right techniques, you can ensure your tree thrives while avoiding damage. Here’s a simple, step-by-step guide that will make pruning cedar trees easy and stress-free for you!
Step 1: Gather Your Tools
Before you start pruning, make sure you have the right tools. For most cedar trees, you’ll need:
- Bypass pruning shears for small branches.
- Loppers for medium-sized branches.
- Pruning saw for larger branches.
- Gloves to protect your hands from sharp needles.
Make sure your tools are clean and sharp for the best results.
Step 2: Choose the Right Time to Prune 
The best time to prune cedar trees is in late winter or early spring before new growth begins. Pruning during dormancy helps the tree heal faster and reduces the risk of disease. Avoid pruning during hot summer months or when the tree is actively growing, as it may stress the plant.
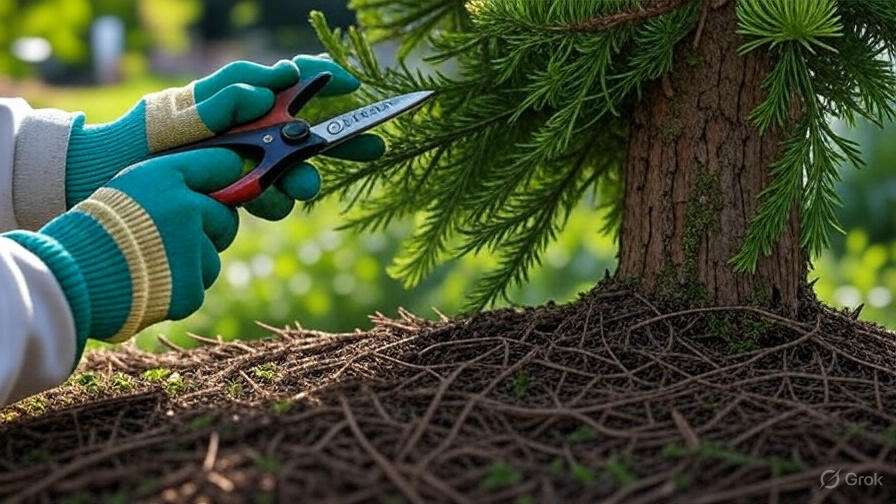
Step 3: Remove Dead or Damaged Branches
Start by removing any dead, damaged, or diseased branches. These are easy to spot—they’ll often appear brown, brittle, or broken. Cutting these branches back promotes healthier growth and prevents disease from spreading.
- Cut the branches at their base where they connect to the main trunk or another healthy branch.
- Always use sharp tools to make clean cuts.
Step 4: Shape the Tree
Next, focus on shaping your cedar tree. You’ll want to remove any overgrown or unsightly branches that disrupt the natural shape of the tree. Keep these tips in mind:
- Avoid cutting too much off the top or outer edges, as this can lead to a sparse-looking tree.
- Trim back branches that cross or rub against each other. These can create wounds that invite pests and diseases.
- If your tree has a central leader (a single main stem), make sure it remains dominant. Cut back any competing branches that are growing taller than the leader.
Step 5: Thin Out the Interior 
Cedar trees thrive with good airflow, so thinning the interior helps prevent disease and encourages healthy growth. Look for dense areas where branches are too crowded, and carefully remove some to open up the canopy. This ensures the tree gets enough sunlight and air circulation, leading to stronger, healthier growth.
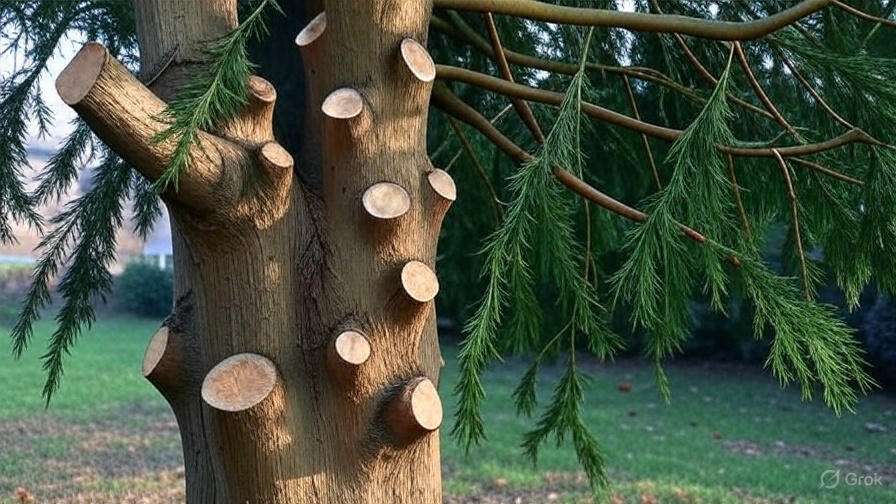
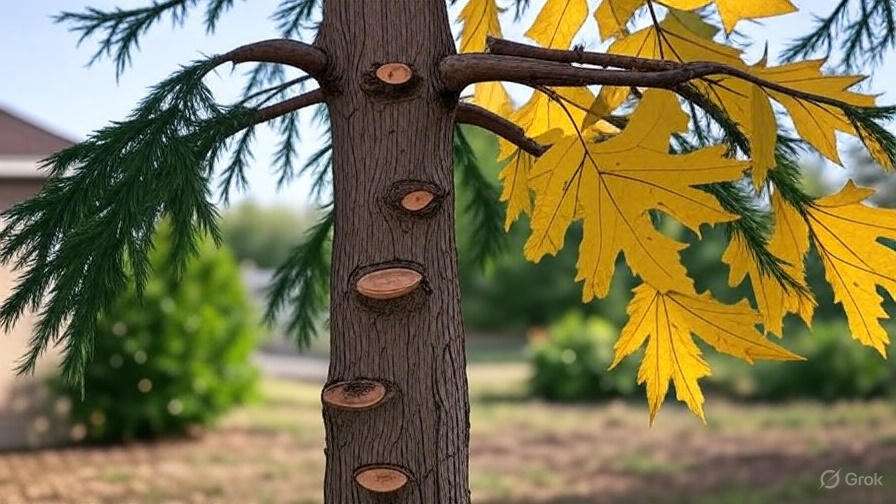
Step 6: Make Clean Cuts
When you make cuts, aim for clean, angled cuts that heal quickly. Avoid leaving stubs, as they can be a breeding ground for pests and diseases. Always cut just above a bud or lateral branch, and make cuts at a slight angle to help water drain away from the wound.
Step 7: Step Back and Assess 
After you’ve pruned, step back and take a look at your work. Make sure the tree looks balanced and natural. It’s easy to get carried away, but remember: less is more! You don’t need to remove too much. The goal is to improve the tree’s health, not drastically change its shape.
Step 8: Clean Up and Dispose of Debris 
Once you’re done pruning, clean up the area around the tree. Remove any fallen branches or debris to prevent pests from nesting. If you’ve removed diseased branches, be sure to dispose of them properly—don’t just throw them in your compost bin, as this can spread diseases.
Tips for Ongoing Cedar Tree Care
- Water regularly: Especially during dry spells, ensure your cedar tree gets enough water.
- Mulch around the base: Mulching helps retain moisture and keeps weeds at bay.
- Inspect periodically: Check your tree regularly for signs of disease or pests.
Pruning cedar trees is an easy and rewarding task that helps your tree stay healthy and attractive. Follow this step-by-step guide, and you’ll be a pro in no time! 
Common Mistakes to Avoid When Pruning Cedar Trees 
Pruning cedar trees is a delicate task, and even small mistakes can lead to long-term issues. Here’s a list of the most common errors people make when pruning, along with tips to help you avoid them:
1. Pruning at the Wrong Time of Year 
Cedar trees should be pruned during their dormant season, typically late winter or early spring before new growth starts. Pruning during the growing season can stress the tree, making it vulnerable to disease and pests. Avoid pruning in late fall, as it can lead to frost damage.
2. Cutting Too Much at Once
Cedar trees are sensitive to heavy pruning. Cutting away too much foliage at once can cause shock, and the tree may struggle to recover. Aim to remove no more than 20-30% of the tree’s total growth in a single session. If your tree needs significant shaping, spread the pruning over several years.
3. Leaving Stubs or Uneven Cuts 
Always make clean cuts, and avoid leaving stubs. A stub is a branch that is cut too short, which can create an entry point for diseases and pests. Use sharp pruning shears or saws and cut back to a healthy bud or branch junction. This ensures proper healing and reduces the risk of damage.
4. Pruning Too Close to the Trunk
Pruning too close to the trunk can harm the tree. Leave a small collar when making cuts near the main stem. This collar helps the tree heal faster and protects it from infections. Always cut just outside the collar to avoid damaging the tree’s natural defense system.
5. Ignoring the Tree’s Natural Shape 
Cedar trees have a natural, graceful shape that should be respected. Avoid excessive shaping or pruning for aesthetic reasons. Focus on removing dead, damaged, or crossing branches to maintain the tree’s health and natural form. Over-pruning for shape can lead to weak growth and an unnatural appearance.
6. Not Using the Right Tools 
Using dull or inappropriate tools can make the job harder and damage your tree. Always use sharp pruning shears for smaller branches and a pruning saw for larger ones. Clean your tools before and after use to prevent the spread of diseases.
7. Neglecting to Disinfect Tools 
After pruning diseased or damaged branches, always disinfect your tools to prevent transferring pathogens to healthy parts of the tree. A simple solution of rubbing alcohol or bleach diluted with water works perfectly to sanitize your tools between cuts.
8. Overlooking Tree Health Signs 
Before you start pruning, check for signs of disease or pest infestation. Pruning a tree that is already stressed can make it worse. Look for discolored or wilting branches, and if you notice any issues, address those before pruning. Sometimes, it’s better to consult an arborist if you’re unsure about the tree’s condition.
9. Failing to Maintain Proper Branch Structure
When pruning, focus on maintaining the tree’s strong structure. Remove weak, narrow-angled branches that could break easily. Keep the central leader (the main trunk) free of competition to ensure the tree’s strength and stability.
By avoiding these common mistakes, you can ensure your cedar trees stay healthy, vibrant, and beautifully shaped for years to come. Happy pruning!
How to Deal with Common Problems After Pruning Cedar Trees
Pruning cedar trees is an essential part of keeping them healthy and well-shaped, but sometimes problems can arise after you trim them. Don’t worry! Here are some practical tips on how to tackle common post-pruning issues and ensure your cedar trees thrive.
1. Yellowing or Browning of Leaves
After pruning, you might notice that some of the cedar’s leaves or needles turn yellow or brown. This can happen due to stress from cutting back too much, exposure to extreme weather, or improper watering.
Solution:
- Make sure to water the tree deeply and consistently. Cedar trees like well-drained soil, so avoid waterlogging.
- If the weather is hot and dry, increase water frequency to prevent dehydration.
- Trim lightly in the future to avoid over-pruning, which can stress the tree.
2. Dieback of Branch Tips
Dieback occurs when the tips of the branches turn brown or black after pruning. This could be due to cutting branches too far back or leaving open wounds exposed to pests and disease.
Solution:
- When pruning, avoid cutting back to bare wood. Always leave some healthy foliage to allow the tree to heal.
- Consider using a wound sealant on large cuts to protect them from disease.
- Keep the tree healthy by regularly checking for pests and diseases, which can exacerbate dieback.
3. Excessive Sap Flow 
If you prune during late winter or early spring, you may notice sap dripping from the cuts. This is a common issue for cedar trees, especially when cuts are made during sap flow periods.
Solution:
- While sap loss is typically harmless, avoid cutting in spring or early summer if possible.
- If sap flow becomes excessive, you can wrap the tree’s cuts with a breathable bandage or apply a tree wound dressing to minimize sap leakage.
4. Slow Recovery or Growth 
Sometimes, cedars take longer to bounce back after pruning. The tree may look sparse or show slow growth for a while, especially if a lot of material was removed.
Solution:
- Be patient! Cedars are slow-growers, and it may take time for them to recover. Ensure you provide proper care by maintaining a healthy watering schedule and fertilizing once the tree starts showing new growth.
- Avoid additional pruning for at least a year to give the tree time to heal fully.
5. Increased Pest Activity 
Pruned trees can sometimes attract more pests because of exposed cuts and weakened areas.
Solution:
- Regularly inspect your cedar tree for signs of pests like aphids, spider mites, or scale.
- Use organic pest control methods like neem oil or insecticidal soap to keep pests at bay.
- Prune during the right season (early spring or late fall) to avoid attracting pests that are more active in warmer months.
6. Shape and Aesthetic Issues 
After pruning, your cedar tree may not look as symmetrical as before. Some branches might grow unevenly or in unexpected directions.
Solution:
- If you notice uneven growth, gently trim back the branches that are growing too quickly or in unwanted directions.
- Avoid heavy pruning in one go; instead, prune gradually over time to shape the tree naturally and prevent drastic changes to its appearance.
7. Root Stress and Weakness
In rare cases, pruning may affect the roots, especially if the tree has been stressed or over-pruned in the past. A weakened root system can lead to stunted growth or instability.
Solution:
- Ensure the tree has well-established roots before heavy pruning. If unsure, wait a year after planting before doing any significant cuts.
- Mulch around the base of the tree to maintain moisture levels and protect the roots from stress.
Final Thoughts 
Pruning cedar trees is a great way to enhance their health and appearance, but it’s important to recognize and address common problems that may follow. By understanding the causes of issues like yellowing leaves, dieback, and slow recovery, you can take proactive steps to help your tree thrive. Be patient, stay vigilant with care, and your cedar tree will be back to its beautiful self in no time!
Conclusion 
Pruning your cedar trees is a rewarding task that promotes healthier growth and a more attractive shape. While challenges may arise after pruning, understanding the common problems and knowing how to address them will help you maintain a thriving tree.

By following the right pruning techniques, being mindful of timing, and providing proper care, you’ll ensure your cedar trees stay strong, vibrant, and beautiful for years to come. Remember to be patient, as trees need time to recover and grow back after a good trim.
With these tips in mind, you’re now equipped to handle any post-pruning issues with confidence. Keep up with regular maintenance and your cedars will continue to stand tall, looking their best! 