
Picture this: You step into your backyard in late winter, pruners in hand, excited to shape your favorite apple tree or tame that overgrown lilac bush. After an hour of enthusiastic cutting, you step back… only to realize your tree now looks like a spiky mess of water sprouts, or your shrub is producing fewer flowers than ever before. 😩
Sound familiar?
The problem isn’t that you pruned too much — it’s that you probably used the wrong type of pruning cut.
In professional arboriculture and horticulture, every single pruning decision comes down to understanding just two fundamental techniques: heading cuts and thinning cuts. These two pruning cuts — heading vs. thinning — are the building blocks of proper tree and shrub care, and knowing when to choose one over the other can transform weak, overcrowded plants into strong, healthy, beautiful specimens that produce more fruit, better flowers, and live much longer.
In this complete guide, we’ll break down exactly what heading and thinning cuts are, how each one dramatically changes plant growth, when professional arborists and experienced gardeners choose one technique over the other, and how to make perfect cuts every time — no more guesswork, no more regret! 💚
Whether you’re caring for fruit trees, ornamental landscape trees, flowering shrubs, or even roses and hedges, mastering pruning cuts: heading vs. thinning is one of the highest-ROI skills you can learn as a home gardener.
Let’s dive in.
What Are Pruning Cuts? The Basics Every Serious Gardener Needs to Know 🌳
Pruning is far more than just “cutting back” plants. Every time you make a pruning cut, you’re directly influencing plant hormones — especially auxin (produced in shoot tips) and cytokinins (produced in roots).
This hormonal balance controls something called apical dominance — the natural tendency of the plant to grow strongest from the uppermost tip.
There are only two basic ways to remove wood from a plant:
- Heading cut — You remove only a portion of a branch or shoot, usually just above a bud or node.
- Thinning cut (also called removal cut) — You remove an entire branch or shoot all the way back to its point of origin (the trunk, a larger branch, or the branch collar).
All other types of cuts (reduction cuts, pinching, shearing, pollarding, etc.) are variations or combinations of these two fundamental pruning cuts.
Understanding the dramatic difference in plant response between heading vs. thinning is the key that separates amateur gardeners from those whose trees and shrubs always look healthy, well-structured, and productive. 🌟
Heading Cuts Explained: What They Do & Why They’re So Powerful (and Dangerous) ⚡
Definition A heading cut removes the terminal portion of a branch or shoot, typically cutting back to an outward-facing bud. This is the classic “tip pruning” most people think of when they imagine pruning.
How the plant responds When you remove the tip — the main source of auxin — you suddenly release the lateral buds below the cut from apical dominance. These buds “wake up” and grow vigorously, often producing several new shoots right near the cut point.
Main effects of heading cuts
- Creates bushier, denser growth near the pruning site
- Stimulates lateral branching
- Temporarily reduces height (but only until the new shoots grow back — often longer and faster!)
- Encourages formation of fruiting spurs on certain apple and pear varieties
- Can rejuvenate old, overgrown shrubs when used strategically
Common uses of heading cuts (when professionals actually recommend them)
- Training young fruit trees (developing strong scaffold branches)
- Encouraging spur development on spur-type apples and pears 🍎
- Rejuvenation pruning of overgrown forsythia, spirea, potentilla, and similar shrubs
- Creating compact hedges or topiaries (when combined with frequent shearing)
- Pinching annuals and perennials to make them bushier
The dark side of heading cuts (why arborists cringe when they see excessive heading)
- Produces weak branch attachments (new shoots often form narrow angles)
- Causes excessive regrowth of water sprouts and suckers
- Can create “witches’ broom” appearance on older wood
- Increases risk of sunscald and decay entry on large heading cuts
- Often leads to the dreaded “topping” look — flat-topped, ugly trees with weak structure
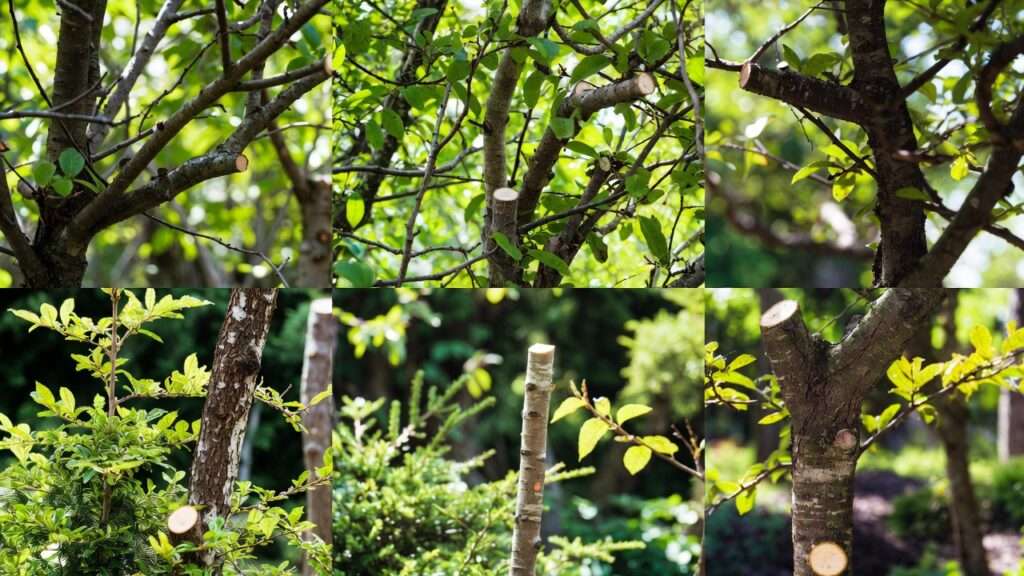
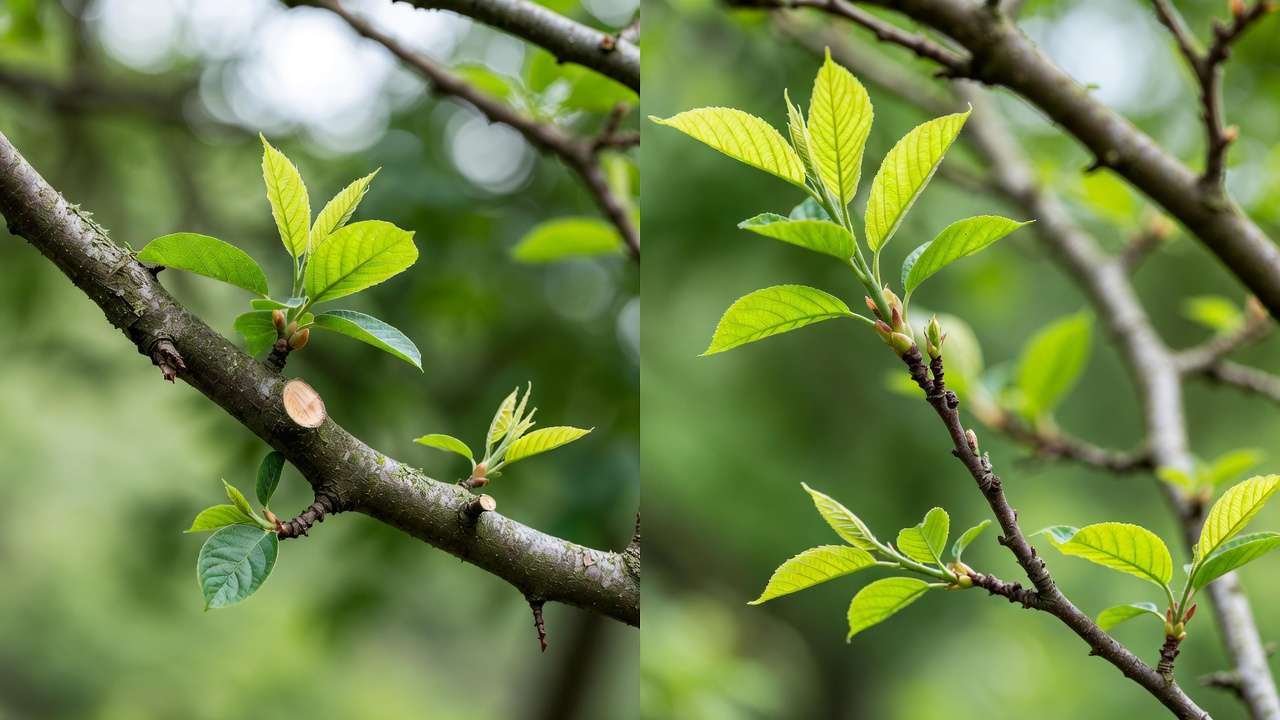
Visual examples of heading cuts in action Here are classic before-and-after examples of heading cuts on fruit trees and shrubs:
Notice how many new shoots explode from just below each cut — that’s the classic heading response!
Thinning Cuts Explained: The Gold Standard for Long-Term Tree Health 🌳💪
Definition A thinning cut (or removal cut) removes an entire branch back to its point of origin — either the trunk, a larger limb, or the branch collar (that slightly swollen area where branch meets trunk).
How the plant responds Because the growing point is completely removed, there is no sudden release of lateral buds near the cut. Growth energy is simply redistributed to remaining branches. The tree responds with moderate, balanced regrowth instead of an explosive burst.
Main benefits of thinning cuts
- Dramatically improves light penetration and air circulation throughout the canopy
- Produces stronger branch structure with wider crotch angles
- Significantly reduces risk of fungal diseases (powdery mildew, fire blight, black knot, etc.)
- Maintains the tree’s natural shape and graceful form
- Improves fruit quality and flower production (more energy to fewer fruits/flowers)
- Allows for large amounts of material to be removed without creating a mess of water sprouts
When professionals almost always prefer thinning cuts
- Opening up crowded, mature fruit trees
- Removing dead, diseased, damaged, or crossing/rubbing branches
- Developing strong, permanent scaffold structure in young trees
- Pruning large shade trees and ornamentals (oaks, maples, flowering cherries, etc.)
- Maintaining open-centered vase shapes in peaches, nectarines, and plums
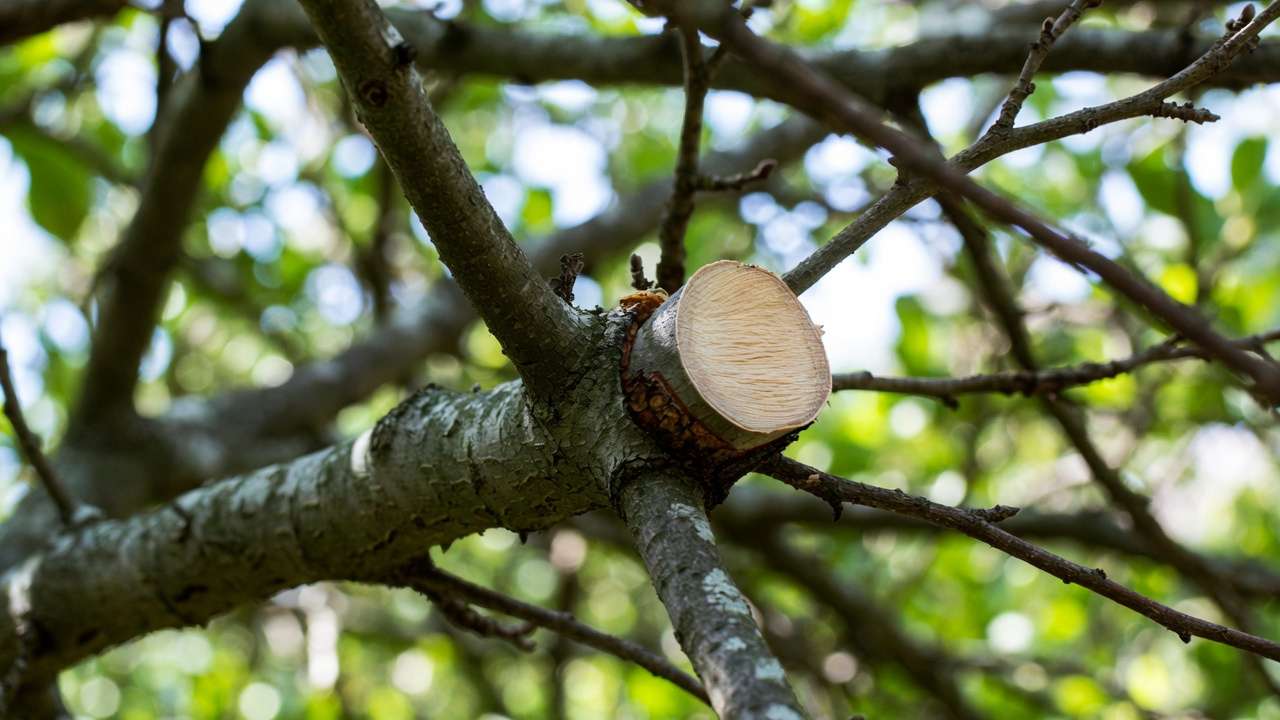
Visual examples of proper thinning cuts These photos show textbook thinning cuts — clean, natural-looking removal right at the branch collar:
Notice how open and healthy the canopy looks after proper thinning — beautiful structure and excellent light penetration!
Heading vs. Thinning: Head-to-Head Comparison Table ⚖️
To make the differences crystal clear, here’s a side-by-side comparison that arborists and horticulturists use when teaching pruning workshops:
| Aspect | Heading Cuts | Thinning Cuts |
|---|---|---|
| What it removes | Portion of a branch (tip or section) | Entire branch back to origin/collar |
| Growth response | Vigorous, bushy regrowth near the cut | Moderate, balanced regrowth elsewhere |
| Primary purpose | Stimulate density, branching, size control | Improve structure, light/airflow, health |
| Best for | Young trees, spur development, rejuvenation | Mature trees, opening canopy, natural shape |
| Branch strength | Often creates weak, narrow-angled shoots | Promotes strong, wide-angled attachments |
| Disease risk | Higher (dense growth traps moisture) | Lower (better airflow & drying) |
| Fruit/flower quality | Can increase quantity, but smaller size | Better quality, larger & better-colored |
| Recommended use | Strategic & limited | Primary method for most pruning |
| Common mistake | Overuse leads to “topping” & weak trees | Too conservative – tree stays overcrowded |
Key takeaway from the table: Thinning cuts are the preferred method for long-term health in 80–90% of pruning situations, according to guidelines from university extension services (e.g., University of California, Purdue, Cornell) and the International Society of Arboriculture (ISA). Heading cuts are powerful tools — but only when used intentionally and sparingly. 🌟
Here are excellent visual diagrams that perfectly illustrate the difference
These side-by-side illustrations show exactly how each cut affects the branch structure!
When to Choose Heading Cuts vs. Thinning Cuts (Your Ultimate Decision Guide) 🌱⚖️
The real magic happens when you know which cut to make in each situation. Here’s the practical, expert-level decision framework:
Choose Heading Cuts When You Want To:
- Train young fruit trees (1–4 years old) to develop strong scaffold branches — a short heading cut on the leader encourages wide-angled laterals.
- Stimulate fruiting spurs on spur-bearing apple and pear varieties (e.g., ‘Honeycrisp’, ‘Bartlett’).
- Rejuvenate overgrown deciduous shrubs (forsythia, spirea, potentilla, butterfly bush) — cut back hard in late winter/early spring to encourage fresh growth from the base.
- Control height or create compact form in small gardens or containers (roses, lavender, dwarf fruit trees).
- Pinch soft annuals/perennials for bushiness (e.g., chrysanthemums, coleus).
Choose Thinning Cuts When You Want To:
- Open up a crowded mature canopy for sunlight and air circulation — critical for fruit quality and disease prevention.
- Remove dead, diseased, damaged, crossing, or rubbing branches (the famous “3 Ds + C” rule).
- Develop and maintain strong permanent structure — remove competing leaders or weak branches early.
- Preserve the natural shape of landscape trees (maples, oaks, dogwoods, flowering cherries) — heading ruins their form!
- Improve light penetration to inner branches for better fruit coloring and ripening (especially apples, peaches, plums).
Quick species-specific cheat sheet:
- Apples/Pears (spur types) → Mix: heading young + heavy thinning mature 🍎
- Peaches/Nectarines → Mostly thinning for open-center vase shape
- Stone fruits (cherries, plums) → Thinning only — hate heading!
- Ornamental flowering shrubs → Rejuvenation with heading every 3–5 years
- Shade trees (oak, maple, birch) → Thinning only — never head!
Seasonal timing bonus tip:
- Dormant season (late winter) → Best for both types (clear view of structure)
- Summer → Light thinning for vigor control; avoid heavy heading (causes sunburn)
Here’s a beautiful example of a well-pruned open-center fruit tree (mostly thinning cuts) compared to an overgrown one:

Notice the excellent light and air access — that’s the power of strategic thinning! 🌞
Step-by-Step: How to Make Perfect Heading & Thinning Cuts 🛠️✂️
Now that you know when to use each type of cut, let’s get into the how — because technique matters just as much as strategy. Poor execution can invite disease, create weak branches, or ruin the natural look of your tree.
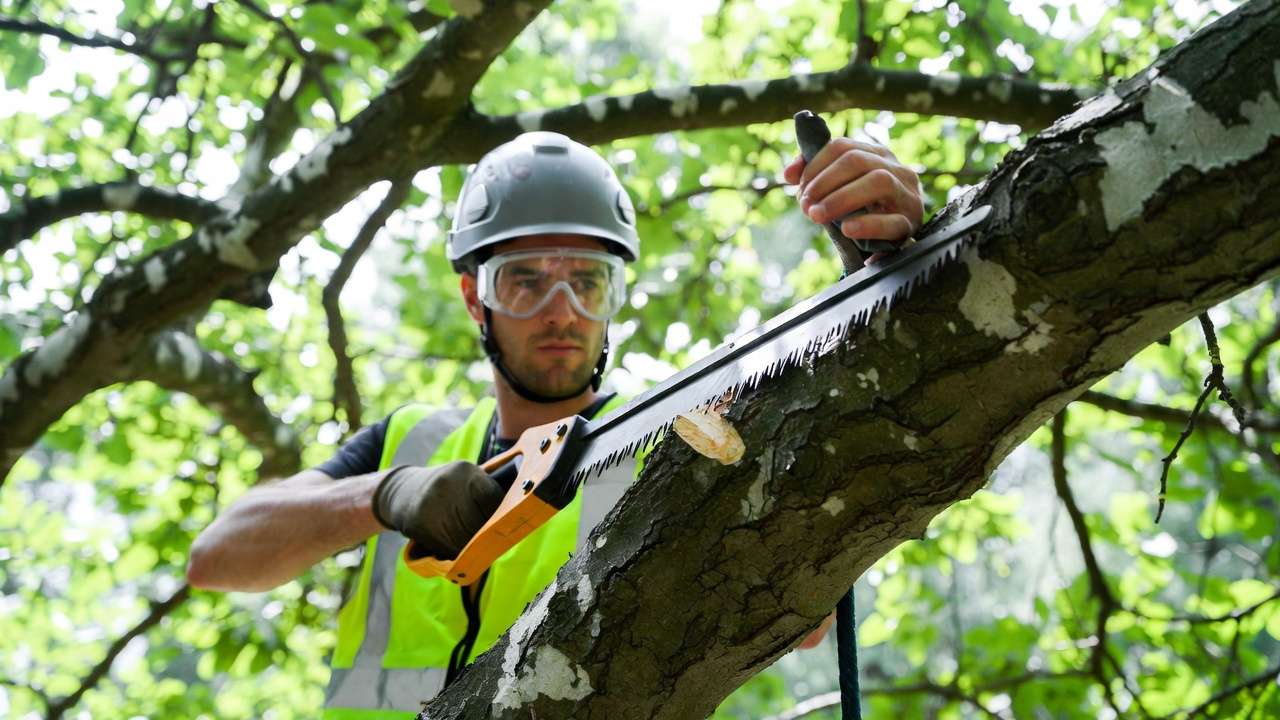
Essential Tools You’ll Need
- Sharp bypass pruners (for branches up to ½–¾ inch)
- Loppers (for ¾–1½ inch branches)
- Pruning saw or folding saw (for larger limbs)
- Disinfectant (70% alcohol or bleach solution — clean tools between trees!)
- Gloves and eye protection
Always use sharp tools — dull blades tear tissue and invite pathogens.
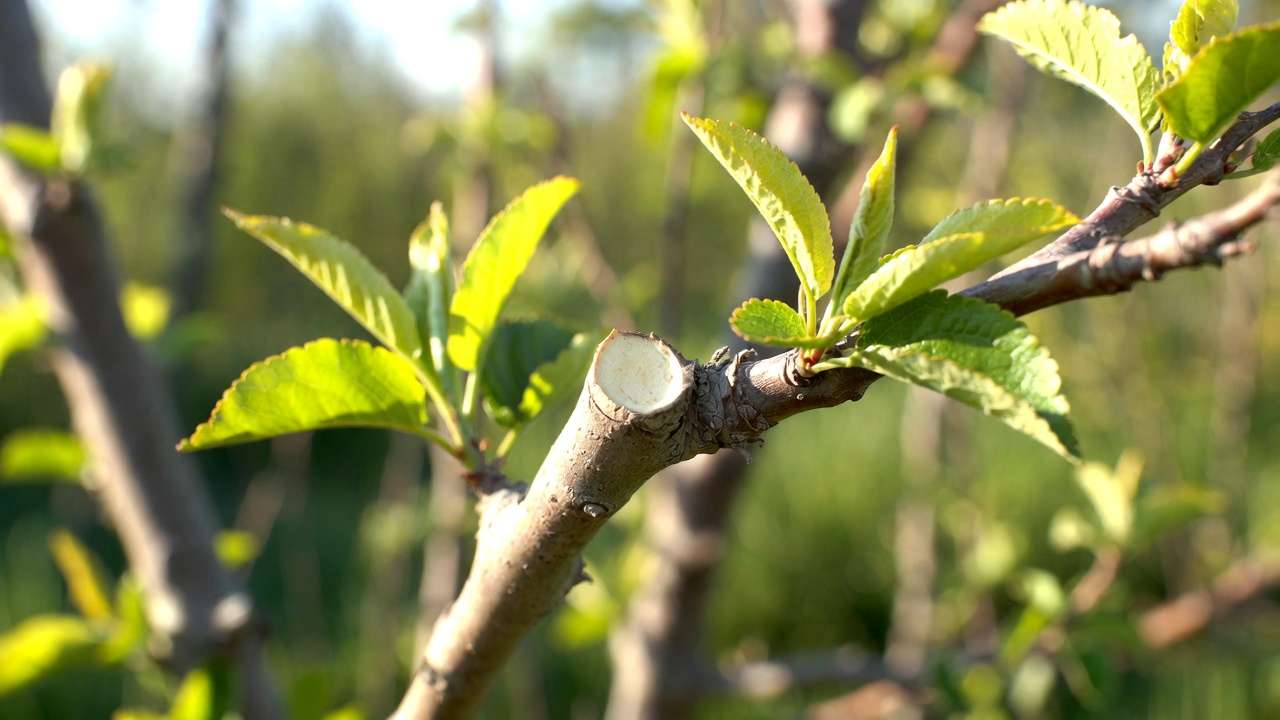
How to Make a Perfect Heading Cut
- Identify the branch or shoot you want to shorten.
- Locate a healthy, outward-facing bud (this directs new growth away from the center).
- Cut at a 45-degree angle, about ¼–½ inch above the bud.
- Too close → bud may die
- Too far → leaves a long stub that dies back and looks ugly
- Angle the cut so water runs off the bud (not toward it).
- Never leave stubs — they rot and become entry points for decay.
Visual guide to heading cut technique Here are clear step-by-step illustrations of proper heading cut placement:
Notice the clean angle and close-but-not-too-close cut — that’s textbook!
How to Make a Perfect Thinning Cut (The 3-Cut Method for Larger Branches) For small branches:
- Cut straight through just outside the branch collar (that swollen ring where branch meets trunk — don’t cut into it!).
- Angle slightly away from the trunk so water sheds properly.
For branches >1½–2 inches (use the famous 3-cut method to prevent tearing):
- First undercut — about 12–18 inches out from the trunk, cut upward about ⅓ through the branch.
- Second top cut — a few inches farther out, cut downward completely through the branch (it will break cleanly at the undercut).
- Final cut — remove the stub just outside the branch collar.
Common Mistakes to Avoid (and How to Fix Them)
- Flush cuts — Cutting too close removes the protective collar → decay spreads fast.
- Leaving stubs — They die back and attract insects/disease.
- Topping — Heading back large branches creates weak regrowth and ugly shape.
- Over-pruning — Never remove more than 25–30% of live canopy in one year (except for severe rejuvenation of shrubs).
Pro safety tip — For branches over your head, use pole pruners or hire a certified arborist. Never use a ladder and a chainsaw together — that’s how most serious pruning injuries happen! ⚠️
Real-World Examples & Case Studies 🌳🍎
Let’s see these principles in action with common garden scenarios:
Example 1: Young Apple Tree Training (Mostly Heading + Strategic Thinning) A 3-year-old semi-dwarf apple on M26 rootstock has a tall, whip-like leader and only a few weak laterals. Solution:
- Heading cut on the central leader to encourage wide-angled scaffolds
- Thinning cuts to remove narrow-angled or competing shoots Result after 2 seasons: Strong, open vase shape with excellent future fruiting potential.
Example 2: Overgrown Mature Peach Tree (Heavy Thinning) A 12-year-old peach tree is a dense thicket — small, shaded fruit and brown rot problems every year. Solution:
- Remove 25–30% of wood using mostly thinning cuts
- Open the center completely (vase shape)
- Thin out water sprouts and inward-growing shoots Result: Larger, better-colored peaches, much less disease, tree looks elegant again.
Example 3: Landscape Red Maple (Thinning Only!) Homeowner wants to “reduce size” of a 25-foot red maple near the house. Wrong approach: Heading/topping → creates weak regrowth, sunscald, decay pockets. Right approach: Selective thinning cuts to remove crossing branches and raise the crown gradually over 3–5 years. Result: Safer clearance, beautiful natural form preserved, tree stays healthy for decades.
Here’s a powerful before-and-after of a mature fruit tree that received proper thinning-focused pruning:
The difference in light, air, and structure is night and day! 🌞
Expert Tips & Pro Insights from Years of Experience ⭐
After decades of working with home gardeners, professional orchardists, and certified arborists, here are the little-known “pro moves” that make the biggest difference:
- Follow the “Rule of Thirds” for reduction pruning: Never remove more than one-third of a branch’s length in a single heading cut. This prevents excessive shock and weak regrowth.
- On mature trees (>10–15 years old), avoid heading cuts almost entirely — they almost always lead to decay pockets and structurally weak water sprouts.
- Use summer pruning (late June–early August) for thinning cuts only when you want to slow vigorous growth and improve fruit color — heading in summer causes sunburn on exposed branches.
- Always prune to an outward-facing bud on heading cuts for fruit trees and ornamentals — this creates a naturally spreading, open shape.
- Watch for watersprouts (those vigorous, vertical shoots that appear after heavy heading). Remove them immediately with thinning cuts — they steal energy and ruin structure.
- For older, neglected shrubs, use the “one-third rejuvenation method”: Each year for three years, remove one-third of the oldest wood with thinning cuts down to the ground. You’ll get fresh, vigorous growth without shocking the plant.
These small tweaks separate average results from truly exceptional trees and shrubs. 🌟
Frequently Asked Questions (FAQs) ❓
Q: Is heading the same as topping? A: No — and topping is extremely harmful! Topping is heading back large branches to stubs, creating massive decay and weak regrowth. Proper heading is strategic, small cuts just above buds on younger wood.
Q: Can I use heading cuts on evergreens? A: Very rarely and very carefully. Most evergreens (pine, spruce, fir) do not respond well to heading — they often produce “dead zones” behind the cut. Thinning or pinching candles (new growth) is usually better.
Q: How much can I safely prune at one time? A: The golden rule is never remove more than 25–30% of the live canopy in a single season on established trees. Exceptions: severe rejuvenation of overgrown shrubs (up to 50–70% removal in stages) or corrective pruning after storm damage.
Q: What’s the best time of year for heading vs. thinning cuts? A: Late winter/early spring (dormant season) is ideal for both — best visibility of structure. Summer thinning works well for vigor control. Avoid heading in late summer/fall — it stimulates tender growth that may winter-kill.
Q: Do these principles apply to citrus, roses, or formal hedges? A: Yes, with tweaks! Citrus prefers light thinning + pinching. Roses benefit from heading cuts to encourage branching and big blooms. Formal hedges use repeated heading (shearing) to maintain density.
Conclusion: Master These Cuts for Thriving Trees & Shrubs 💚🌳
Congratulations — you’ve just unlocked the single most important skill in all of pruning!
Remember the golden rule: Use thinning cuts as your primary tool for structure, health, light penetration, and natural beauty. Reserve heading cuts for specific, strategic purposes — young tree training, spur development, and controlled rejuvenation.
When in doubt… thin rather than head. Your trees will reward you with stronger branches, better disease resistance, higher-quality fruit and flowers, and a graceful, natural appearance that neighbors will envy.
Now it’s your turn: Pick one tree or shrub in your garden this season, decide which cut it really needs, and make those perfect cuts with confidence. You’ve got this! ✂️🌱


