
The Purple Passion Plant, also known as Gynura Aurantiaca, is a stunning and unique houseplant that can add a pop of color to any indoor space. However, caring for this plant can be a bit tricky if you’re not familiar with its specific needs. In this post, we’ll cover everything you need to know about caring for your Purple Passion Plant at home, from watering and sunlight requirements to common issues and how to troubleshoot them. Whether you’re a seasoned plant parent or a beginner looking to add some greenery to your home, this guide will help you master the art of Purple Passion Plant care.
Getting to Know the Purple Passion Plant
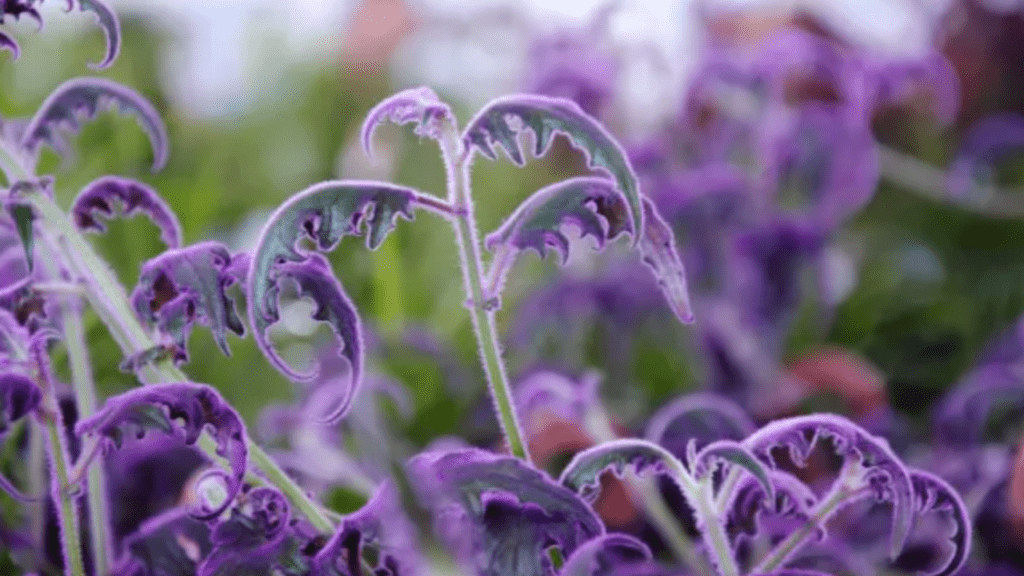
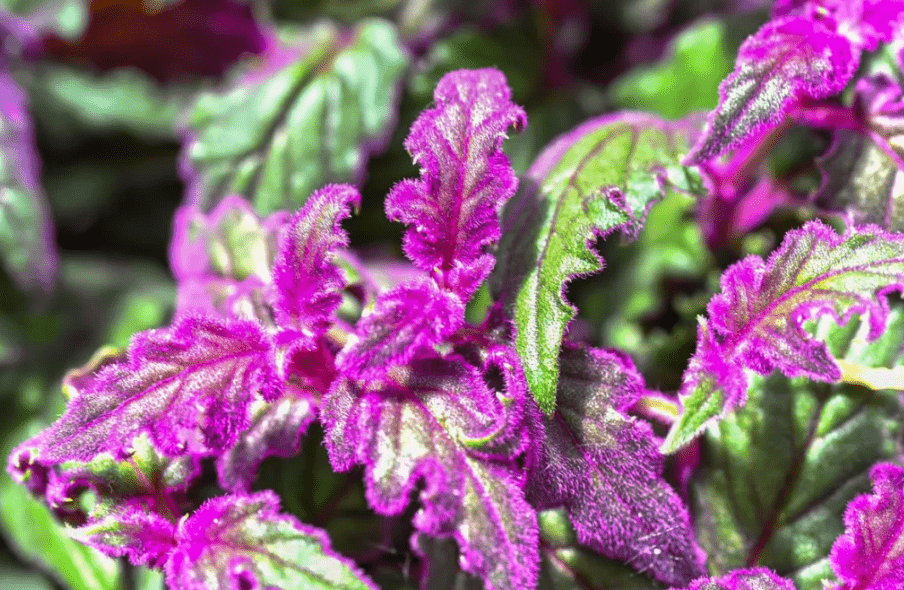
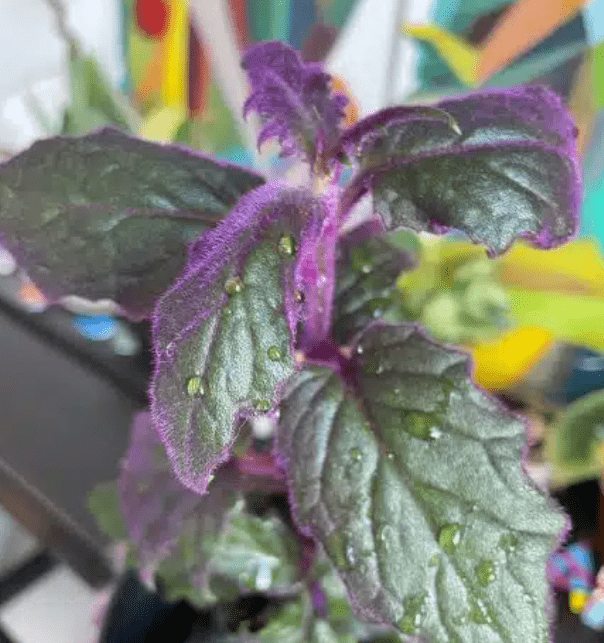
The Purple Passion Plant, also known as Gynura Aurantiaca, is a visually striking houseplant with fuzzy, purple leaves that can add a unique touch to any indoor space. This plant is relatively easy to care for and is a great option for both experienced and beginner plant owners. It thrives in bright, indirect sunlight and likes to be kept in a warm and humid environment. When it comes to watering, it’s important to keep the soil consistently moist but not waterlogged. To prevent any issues, it’s important to keep an eye on the leaves and check for any signs of drooping or discoloration. Overall, the Purple Passion Plant is a beautiful and low-maintenance addition to any indoor plant collection.
Creating the Ideal Environment
Light Requirements
Importance of bright, indirect light for maintaining vibrant colors.
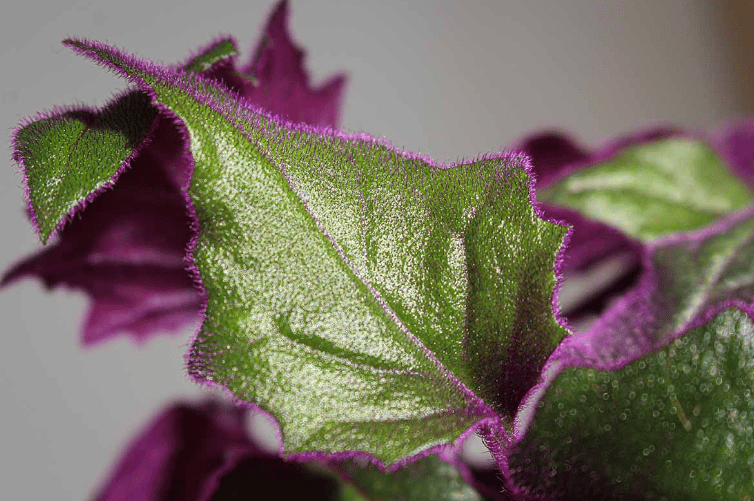
The Purple Passion Plant is a visually striking houseplant that adds a unique touch to any indoor space. To keep its colors vibrant and beautiful, it’s important to ensure that it receives bright, indirect light. This type of light helps the plant to thrive and maintain its striking appearance. Placing the plant near a window where it can receive plenty of bright, filtered sunlight is ideal. If the plant is not receiving enough light, its colors may fade and its growth may be stunted. In addition to light, it’s important to keep the Purple Passion Plant care in a warm and humid environment to promote healthy growth. By providing the right conditions, you can enjoy the beauty of this unique plant in your home.
Tips for finding the right spot in your home.
When looking for the right spot in your home for your Purple Passion Plant, it’s important to consider the lighting and temperature needs of the plant. Look for a spot that receives bright, indirect light, as this will help the plant thrive and maintain its vibrant colors. Placing it near a window where it can receive plenty of filtered sunlight is ideal. Additionally, the Purple Passion Plant care thrives in warm and humid environments, so consider placing it in a room with higher humidity levels, such as a bathroom or kitchen. Be mindful of drafts and cold temperatures, as the plant prefers a warmer climate. By finding the right spot with the ideal lighting and temperature conditions, you can ensure that your Purple Passion Plant care stays healthy and visually striking in your home.
Temperature and Humidity
Ideal temperature range for healthy growth.
The ideal temperature range for the healthy growth of a Purple Passion Plant is between 60-80 degrees Fahrenheit. It’s important to find the right spot in your home that meets these temperature requirements. Look for a location that receives bright, indirect light, as this will help the plant thrive and maintain its vibrant colors. Placing it near a window where it can receive plenty of filtered sunlight is ideal. In addition to light, the Purple Passion Plant thrives in warm and humid environments, so consider placing it in a room with higher humidity levels, such as a bathroom or kitchen. Be mindful of drafts and cold temperatures, as the plant prefers a warmer climate. By finding the right spot with the ideal lighting and temperature conditions, you can ensure that your Purple Passion Plant care stays healthy and visually striking in your home.
How to create and maintain suitable humidity levels indoors.
One way to create and maintain suitable humidity levels indoors is to use a humidifier. Humidifiers add moisture to the air, which can help to increase humidity levels in your home. You can also place a tray of water near your plants to help increase humidity levels, or mist the leaves of your plants with water. Another method is to group your plants together, as they release moisture through their leaves which can increase humidity levels in the surrounding area. Additionally, you can use a pebble tray by placing a layer of pebbles in a shallow tray and adding water to just below the top of the stones. Then, place your plants on top of the pebbles, making sure the water does not touch the bottom of the pots. As the water evaporates, it will increase humidity levels around the plants. Monitoring the humidity levels with a hygrometer is also important to ensure that they stay within the ideal range for your plants. By implementing these methods, you can create and maintain suitable humidity levels indoors to provide a healthy environment for your plants.
Soil and Potting Needs
Choosing the Right Soil
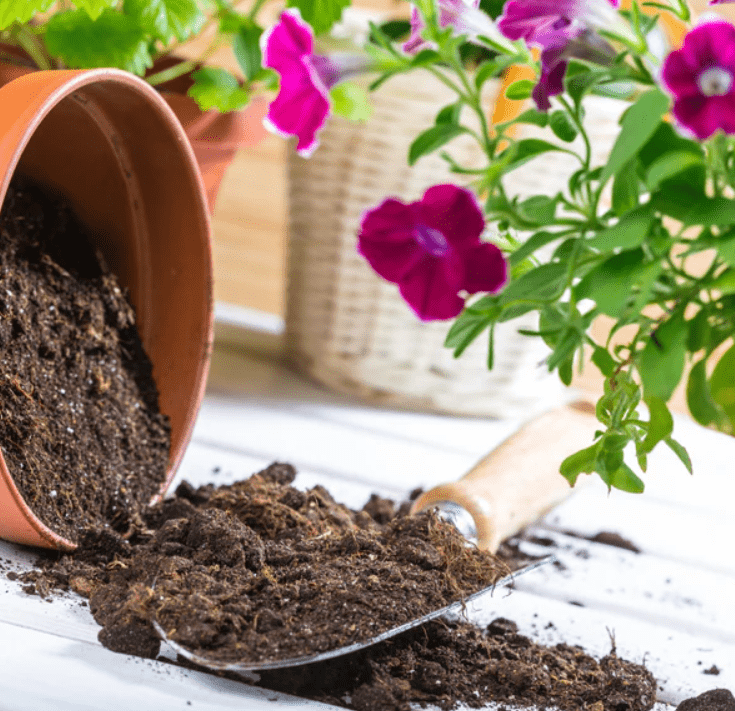
Recommended soil type and why well-draining soil is essential.
When it comes to indoor plants, choosing the right soil is essential for their growth and health. Well-draining soil is important because it prevents water from accumulating at the roots, which can lead to root rot and other issues. The ideal soil for indoor plants is a mix of potting soil, perlite, and vermiculite, which provides good aeration and drainage for the roots. This type of soil allows excess water to drain away from the roots, while still retaining enough moisture for the plants to thrive. It’s important to avoid using regular garden soil for indoor plants, as it can become compacted and hinder proper drainage. When repotting or planting new indoor plants, be sure to choose a soil mix that is specifically formulated for indoor use to ensure the best growing conditions for your plants.
Pot Selection
Importance of pot size and drainage holes.
When it comes to potting indoor plants, the size of the pot and the presence of drainage holes are crucial factors to consider. The pot size directly affects the growth and health of the plant because it determines the amount of space the roots have to grow. A pot that is too small can lead to root-bound plants, stunting their growth and causing them to become unhealthy. On the other hand, a pot that is too large can hold excess water, leading to root rot. It’s important to choose a pot that provides enough space for the roots to grow and has drainage holes to allow excess water to escape. The presence of drainage holes is essential for preventing water from accumulating at the bottom of the pot, which can lead to root rot and other issues. Without proper drainage, the roots can become waterlogged and deprived of oxygen, leading to the decline of the plant. When selecting a pot for your indoor plants, be sure to choose one that is the right size for the plant and has adequate drainage holes to promote healthy growth.
Watering Your Purple Passion Plant
Watering Frequency
Guidelines on how often to water based on the season and indoor conditions.
The frequency of watering your indoor plants can vary depending on the season and indoor conditions. During the growing season, which is typically spring and summer, you may need to water your plants more frequently, as they are actively growing and using more water. In the winter, when plants are not actively growing, you may need to water less often. It’s important to check the soil moisture before watering. Stick your finger into the soil about an inch deep, and if it feels dry, it’s time to water. If the soil still feels moist, you can wait a little longer before watering again. Indoor conditions such as temperature, humidity, and air circulation can also affect the frequency of watering. In dry, heated indoor environments, plants may need more frequent watering, while in cooler, more humid environments, they may need less. It’s important to monitor your plants closely and adjust your watering schedule based on their individual needs. Remember, it’s better to underwater than overwater, as overwatering can lead to root rot and other issues. Proper watering is essential for the health and growth of your indoor plants, so be sure to pay attention to the guidelines for your specific plant species and the conditions in your home.
Signs of Overwatering or Underwatering
Common symptoms and how to avoid them.
When it comes to watering your plants, it’s important to pay attention to the soil and adjust your watering schedule based on the specific needs of your plants. Stick your finger into the soil about an inch deep, and if it feels dry, it’s time to water. If the soil still feels moist, you can wait a little longer before watering again. Indoor conditions such as temperature, humidity, and air circulation can also affect the frequency of watering. In dry, heated indoor environments, plants may need more frequent watering, while in cooler, more humid environments, they may need less. It’s important to monitor your plants closely and adjust your watering schedule based on their individual needs. Remember, it’s better to underwater than overwater, as overwatering can lead to root rot and other issues. Proper watering is essential for the health and growth of your indoor plants, so be sure to pay attention to the guidelines for your specific plant species and the conditions in your home. Common symptoms of overwatering can include yellowing or wilting leaves, mold or algae growth on the soil, and a foul odor. To avoid overwatering, make sure to allow the soil to dry out between waterings and use pots with good drainage. Underwatering can cause symptoms such as drooping or curling leaves, dry and brittle soil, and slow growth. To avoid underwatering, make sure to water your plants thoroughly when needed and provide adequate humidity and air circulation. By paying attention to your plants and their specific needs, you can avoid common watering issues and help your plants thrive.
Proper Watering Techniques
Best practices to ensure your plant gets the right amount of water.
Watering your plants properly is essential for their health and growth. The best practice is to remember that it’s better to underwater than overwater, as overwatering can lead to root rot and other issues. It’s important to pay attention to the specific watering guidelines for your plant species and the conditions in your home. Overwatering can cause symptoms such as yellowing or wilting leaves, mold or algae growth on the soil, and a foul odor. To avoid overwatering, make sure to allow the soil to dry out between waterings and use pots with good drainage. On the other hand, underwatering can cause symptoms such as drooping or curling leaves, dry and brittle soil, and slow growth. To avoid underwatering, make sure to water your plants thoroughly when needed and provide adequate humidity and air circulation. By paying attention to your plants and their specific needs, you can avoid common watering issues and help your plants thrive. Proper watering techniques are crucial for the health and growth of your indoor plants, so be sure to follow these best practices to ensure they get the right amount of water.
Fertilizing for Optimal Growth
Choosing the Right Fertilizer
Recommended fertilizers and their benefits.
When it comes to fertilizing your plants, it’s important to choose the right kind of fertilizer for the specific needs of your plants. There are different types of fertilizers, such as organic and synthetic, and each type has various benefits. Organic fertilizers are derived from natural sources and are beneficial for improving soil structure and promoting the growth of beneficial microorganisms. They also provide a slow release of nutrients, which can help prevent over-fertilization. On the other hand, synthetic fertilizers are made from chemical compounds and provide a quick release of nutrients, which can promote rapid plant growth. However, they can also have negative effects on the environment if not used properly. It’s important to consider the specific needs of your plants and choose the right fertilizer accordingly. Additionally, when fertilizing your plants, it’s important to follow the recommended guidelines for application and dosage to avoid over-fertilization, which can harm your plants. By choosing the right fertilizer and following proper application techniques, you can ensure optimal growth and health for your indoor plants.
Fertilization Schedule
How often to fertilize and the best times of year.
Organic fertilizers derived from natural sources are beneficial for improving soil structure and promoting the growth of beneficial microorganisms. They also provide a slow release of nutrients, which can help prevent over-fertilization. On the other hand, synthetic fertilizers made from chemical compounds provide a quick release of nutrients, which can promote rapid plant growth but can also have negative effects on the environment if not used properly. When it comes to fertilizing your plants, it’s important to consider the specific needs of your plants and choose the right fertilizer accordingly. It’s also important to follow the recommended guidelines for application and dosage to avoid over-fertilization, which can harm your plants. As for the fertilization schedule, it’s best to fertilize your plants during their growing season, typically in the spring and summer months. You may also want to fertilize your plants every 4-6 weeks during this time, depending on the specific needs of your plants. In the fall and winter months, when plant growth slows down, you can reduce the frequency of fertilization or stop altogether to allow your plants to rest. By following a proper fertilization schedule and using the right type of fertilizer, you can ensure optimal growth and health for your indoor plants.
Pruning and Maintaining the Purple Passion Plant
Pruning Techniques
How to trim and shape the plant to encourage healthy growth.
Pruning and shaping your plants is an important part of encouraging healthy growth. When it comes to the Purple Passion plant, it’s important to trim it regularly to promote bushy and compact growth. You can start by trimming any leggy or overgrown stems to maintain a balanced and attractive shape. You can also prune any yellow or discolored leaves to promote new growth. When pruning, make sure to use clean and sharp pruning shears to avoid damaging the plant. It’s also important to remove any dead or diseased parts of the plant to prevent the spread of pests or diseases. Additionally, you can pinch off the growing tips of the plant to encourage branching and fullness. Overall, regular pruning and shaping of the Purple Passion plant care will help maintain its health and appearance.
Routine Care
Tips for removing dead leaves, dusting, and overall plant hygiene.
When it comes to the Purple Passion plant, there are a few tips for removing dead leaves, dusting, and overall plant hygiene. Dead leaves should be removed regularly to prevent the spread of disease and to maintain the plant’s appearance. You can simply use your fingers or a pair of clean and sharp scissors to trim off any dead or yellowing leaves. It’s important to also dust the leaves of the plant to keep them clean and free from any dust or dirt build-up. You can use a soft cloth or a gentle spray of water to clean the leaves. Additionally, it’s important to maintain the overall hygiene of the plant by regularly inspecting for pests or any signs of disease. If you notice any issues, you can use natural remedies or insecticidal soap to treat the plant. Overall, regular maintenance and care will keep your Purple Passion plant healthy and thriving.
Common Problems and How to Solve Them
Pest Control
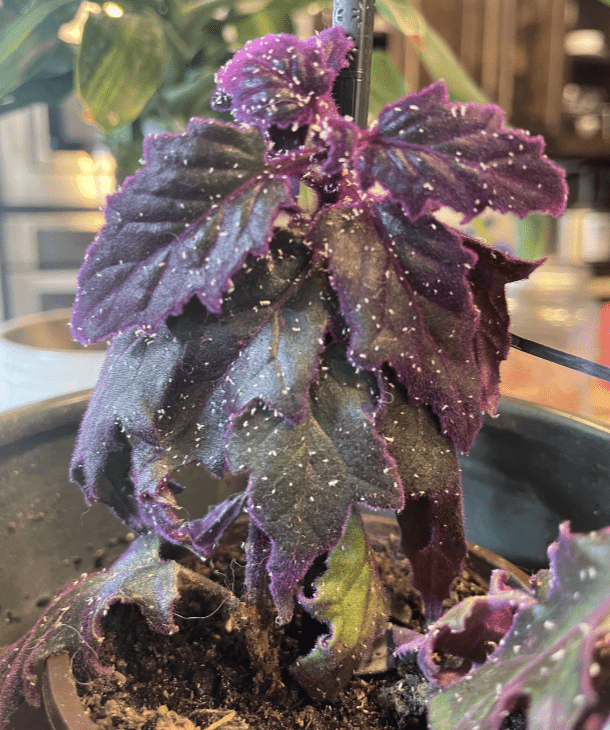
Identify common pests and how to manage them effectively.
There are several common pests that can affect plants, including aphids, mealybugs, spider mites, and scale insects. These pests can cause damage to the foliage and stems of the plant, as well as spread disease. To manage these pests effectively, it’s important to regularly inspect the plant for any signs of infestation. You can use natural remedies such as neem oil or insecticidal soap to control and eliminate these pests. Additionally, you can also introduce beneficial insects such as ladybugs or lacewings to help control the pest population. It’s important to address pest infestations as soon as they are noticed in order to prevent further damage to the plant. Regular monitoring and proactive pest control measures are key to effectively managing common pests and keeping your plants healthy.
Dealing with Leaf Discoloration
Causes of color fading or yellowing leaves and solutions.
There are several causes of color fading or yellowing leaves in plants. One common cause is nutrient deficiencies, such as a lack of nitrogen, iron, or magnesium. This can be addressed by using a balanced fertilizer to provide the necessary nutrients to the plant. Another cause is overwatering or underwatering, which can lead to root rot or nutrient imbalances. It’s important to water plants consistently and ensure proper drainage to prevent these issues.
Additionally, environmental stressors such as extreme temperatures, inadequate light, or air pollution can also lead to leaf discoloration. Providing the right growing conditions and protecting plants from harsh environmental factors can help prevent color fading or yellowing leaves.
To address these issues, it’s important to monitor the plant’s growth and health, adjust watering and fertilizing practices as needed, and ensure the plant is receiving adequate light and protection from extreme temperatures. In some cases, treating the plant with a foliar spray of micronutrients or using organic soil amendments can help improve leaf color and overall plant health. Regular maintenance and addressing issues promptly can help prevent and resolve leaf discoloration in plants.
Propagating the Purple Passion Plant
Propagation Methods
Step-by-step guide to propagating through cuttings.
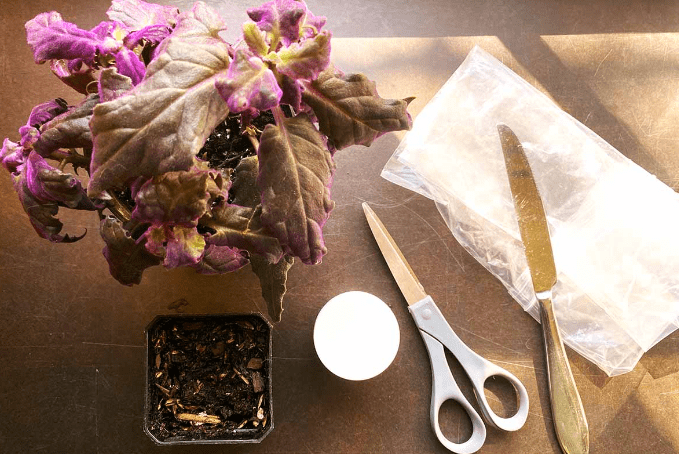
Propagating plants through cuttings is a great way to expand your plant collection and share your favorite plants with friends. Here is a step-by-step guide to propagating through cuttings:
- Start by selecting a healthy and mature plant to take cuttings from. Choose a stem that is not flowering and has several sets of leaves.
- Use a clean and sharp pair of scissors or pruning shears to take a 4-6 inch cutting from the stem. Make the cut just below a leaf node, which is where the leaf meets the stem.
- Remove the leaves from the lower half of the cutting, leaving a few leaves at the top to help with photosynthesis.
- Dip the cut end of the stem in rooting hormone to promote root development.
- Plant the cutting in a small pot filled with well-draining soil. Keep the soil moist but not waterlogged, and place the pot in a warm and bright location with indirect sunlight.
- After a few weeks, check for root development by gently tugging on the cutting. If there is resistance, it means roots have formed.
- Once the cutting has established roots, you can transplant it into a larger pot with regular potting soil and care for it as you would a mature plant.
By following these steps, you can successfully propagate plants through cuttings and create new plants to enjoy and share.

Best Time to Propagate
When and how to successfully propagate your plant.
Propagating plants through cuttings can be a rewarding and cost-effective way to expand your garden or share your favorite plants with friends and family. The best time to take cuttings for propagation is in the spring or early summer when the plant is actively growing. Start by taking a 4-6 inch cutting from a healthy, mature plant using clean, sharp scissors or pruning shears. Remove any lower leaves from the cutting and dip the cut end in rooting hormone to promote root development. Plant the cutting in a small pot filled with well-draining soil, keeping the soil moist but not waterlogged. Place the pot in a warm and bright location with indirect sunlight. After a few weeks, check for root development by gently tugging on the cutting. If there is resistance, it means roots have formed. Once the cutting has established roots, you can transplant it into a larger pot with regular potting soil and care for it as you would a mature plant. By following these steps, you can successfully propagate plants through cuttings and create new plants to enjoy and share.
Conclusion
In conclusion, taking care of your purple passion plant at home requires attention to detail and patience. By following the tips and guidelines provided in this post, you can ensure that your plant receives the proper care it needs to thrive. With the right watering schedule, adequate sunlight, and well-draining soil, you can enjoy the beauty of your purple passion plant care for years to come. Remember to monitor for any potential issues and address them promptly to keep your plant healthy and happy.