
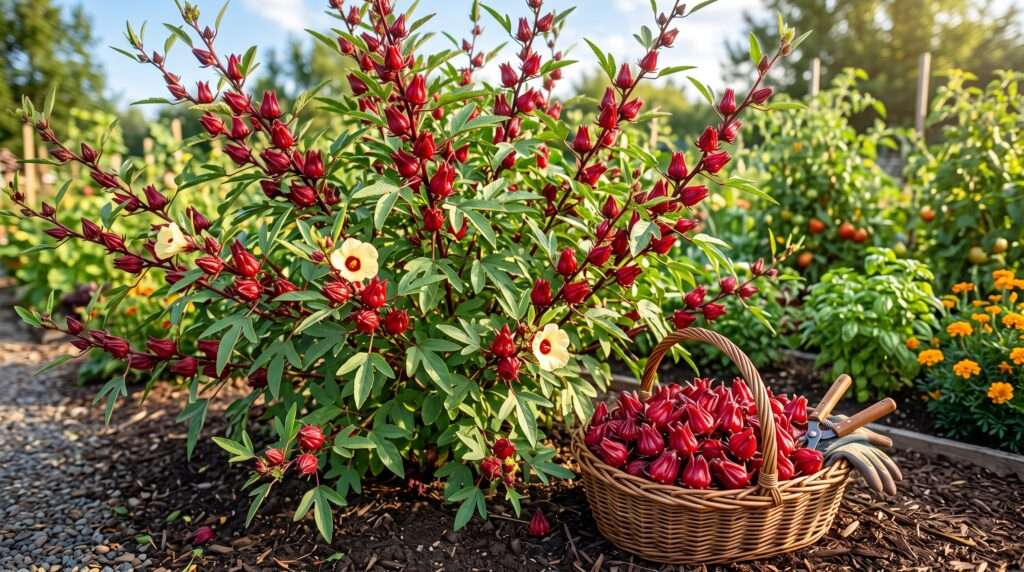
Imagine brewing a vibrant, ruby-red cup of hibiscus tea using calyces harvested fresh from your own backyard. For many gardeners, cultivating a high-yielding roselle plant is the ultimate goal, but achieving that massive harvest often comes with frustrating hurdles like stunted growth, dropped blooms, or foliage-heavy plants with zero usable fruit. After years of testing different soil amendments, pruning techniques, and watering schedules in my own garden, I have developed a foolproof framework for growing Hibiscus sabdariffa that produces overflowing baskets of plump, juicy calyces. This comprehensive guide covers everything from seed scarification to the final harvest, ensuring your plants thrive from spring to autumn.
🌱 What is a Roselle Plant? (And Why You Need One)
Before diving into soil types and fertilizers, it is crucial to understand exactly what you are growing. Many beginners confuse the roselle plant with the classic ornamental tropical hibiscus (Hibiscus rosa-sinensis), which produces massive, colorful flowers but lacks the edible calyces sought after for teas and jams.
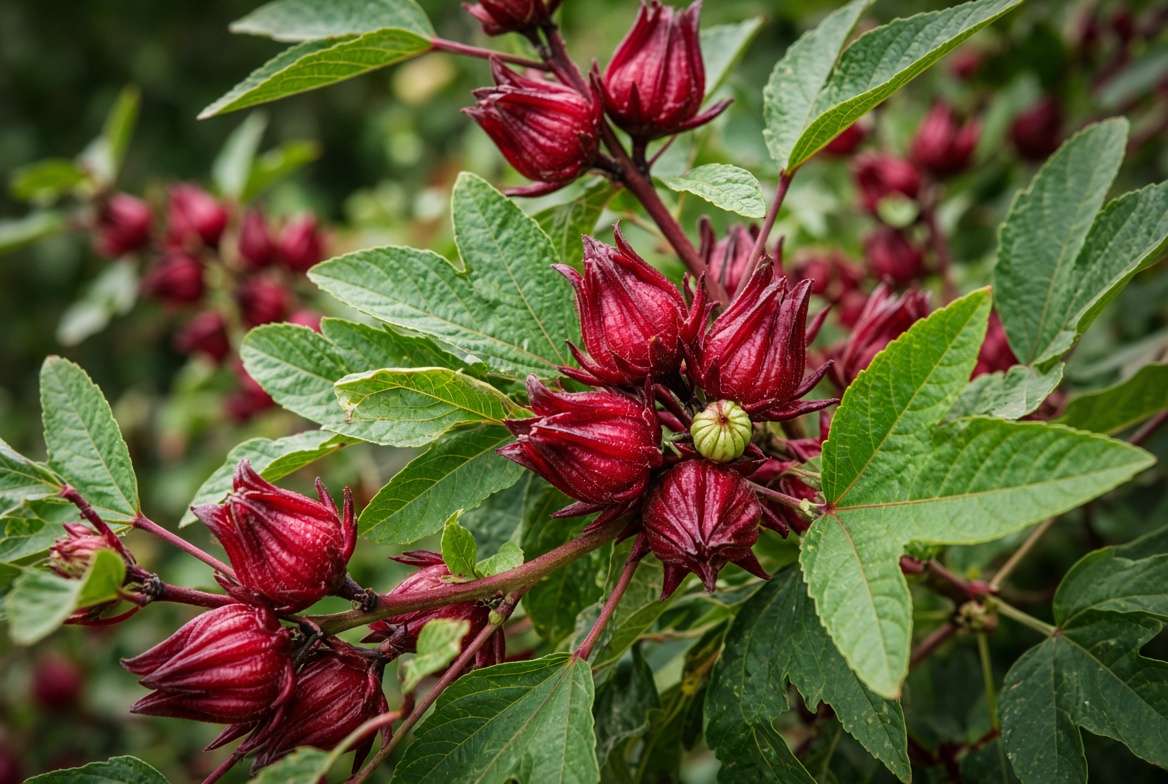
The Botanical Breakdown 🧬 The plant we are focusing on is Hibiscus sabdariffa, a robust, fast-growing annual (or tender perennial in zones 10-11) belonging to the Malvaceae family. Depending on your region, you might hear it referred to by a variety of common names, including Florida cranberry, Jamaica sorrel, red sorrel, or simply hibiscus. Instead of growing this plant for its petals, the prized harvest is the “calyx”—the fleshy, bright red cup that forms at the base of the flower and wraps around the seed pod after the bloom drops.
3 Reasons Every Gardener Should Grow Roselle 🌿
-
High-Yield Edible Landscaping: Roselle is visually striking. With its deep ruby-red stems, lobed green leaves, and pale yellow flowers boasting dark crimson centers, it doubles as a stunning focal point in ornamental beds while providing a functional food harvest.
-
Nutritional Powerhouse: The harvested calyces are exceptionally high in Vitamin C, anthocyanins, and powerful antioxidants. Brewing the dried or fresh calyces yields a tart, cranberry-like beverage known globally for supporting healthy blood pressure and reducing inflammation.
-
Incredible Pest Resistance: Compared to traditional vegetable garden staples like tomatoes or squash, Hibiscus sabdariffa is remarkably hardy. Its thick stems and robust growth habit make it naturally resistant to many common garden pests, dramatically reducing the need for chemical interventions.
🗓️ Seed to Sprout: How to Plant Roselle the Right Way
Getting your seeds off to a strong start dictates the trajectory of your entire growing season. Because these plants are native to tropical regions of West Africa, they demand warmth and a remarkably long growing season to reach maturity.
Decoding the Growing Zones & Timing 🗺️ Roselle requires between 140 and 160 frost-free days to produce a harvestable yield. It is highly frost-sensitive; even a mild freeze will instantly kill the foliage.
-
For Northern Climates (Zones 4-7): You must start your seeds indoors under high-quality grow lights 6 to 8 weeks before your last anticipated spring frost. Use a seedling heat mat to maintain soil temperatures around 75°F to 80°F.
-
For Southern Climates (Zones 8-11): You have the luxury of direct sowing. Wait until all danger of frost has entirely passed and the soil temperature has consistently warmed to at least 75°F before planting seeds directly into your garden beds.
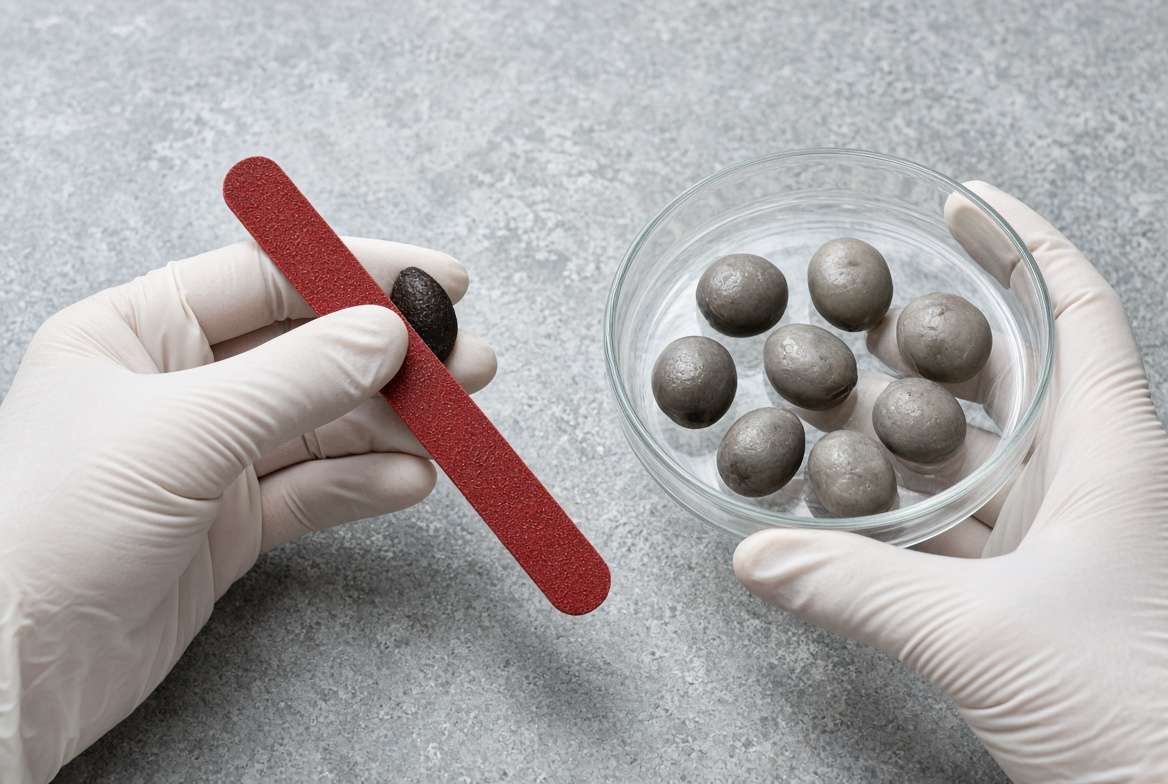
The “Scarification” Secret for Rapid Germination 💧 One of the most common reasons roselle seeds fail to sprout is their incredibly tough, woody outer seed coat. In nature, this coat protects the seed through harsh dry seasons, but in your garden, it prevents moisture from reaching the embryo. To break dormancy quickly, you must employ a technique called scarification. Take a piece of fine sandpaper or a nail file and gently scuff the rounded edge of the seed just enough to dull the surface. Next, soak the seeds in a shallow bowl of warm water for 12 to 24 hours. You will notice the seeds swell slightly as they absorb water. Once soaked, plant them immediately in damp seed-starting mix. This simple step can reduce germination time from three weeks down to just 4 or 5 days.
Ground vs. Container Planting 🪴 Hibiscus sabdariffa grows aggressively. Under ideal conditions, a single plant can reach 6 to 8 feet in height and 4 feet in width.
-
In the Ground: Space your seedlings an absolute minimum of 3 feet apart. Crowding them restricts airflow, which invites fungal diseases, and forces the roots to compete for vital nutrients.
-
In Containers: If you are short on yard space or gardening on a patio, roselle adapts surprisingly well to container life—provided the pot is large enough. Select a heavy, well-draining container that holds a minimum of 10 gallons of soil (half-whiskey barrels are excellent). Smaller pots will stunt the taproot, resulting in a miniature plant that produces only a handful of calyces.
☀️ The “Thrive Formula”: Essential Care & Pruning
Once your seedlings are successfully established, their requirements shift. Hibiscus sabdariffa craves 6 to 8 hours of intense, direct sunlight daily. While the plants tolerate heat well into the 90s (°F), their taproots despise standing water. Keep the soil consistently moist but never soggy to prevent root rot.
The Great Fertilizer Trap 💩 The most frequent reason a roselle plant fails to produce a harvest is improper feeding. If you apply a high-nitrogen vegetable fertilizer late in the season, the plant will explode with lush green foliage but completely fail to form flowers. Plant in loamy, well-draining soil with a pH of 5.8 to 6.8. Once mid-summer arrives, switch exclusively to a high-phosphorus and potassium bloom booster to encourage rapid bud development.
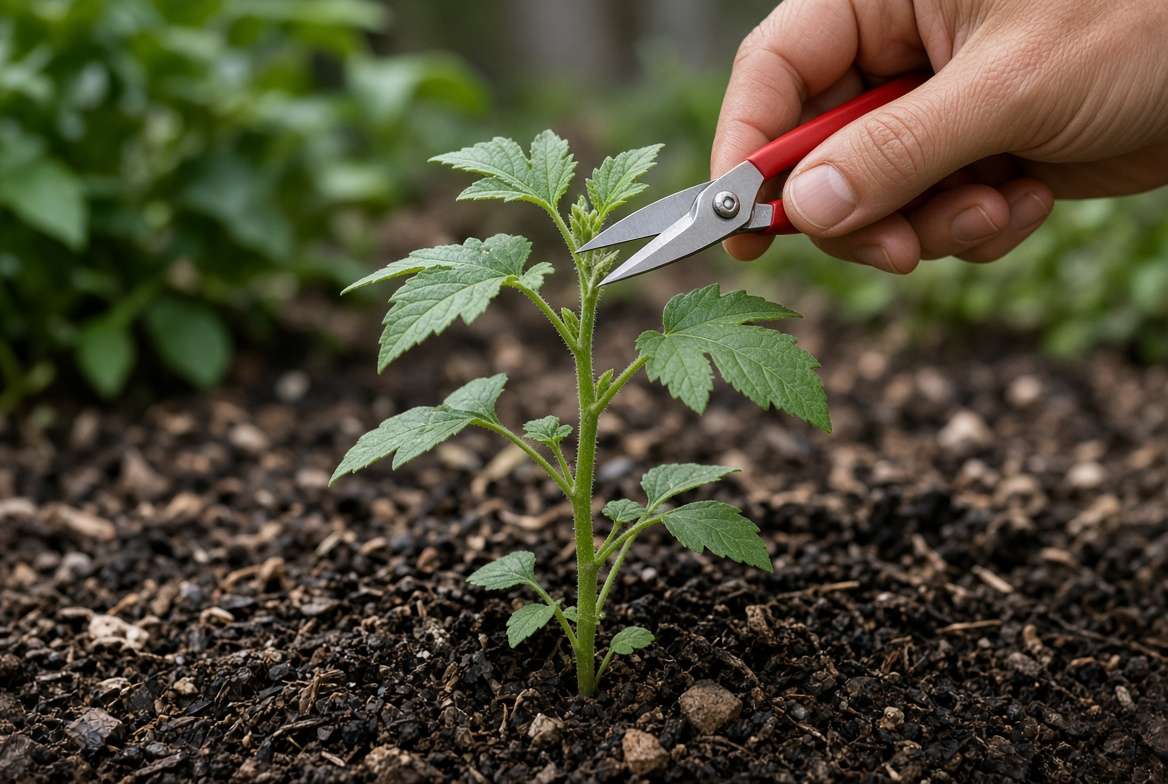
The “Pinching” Technique for a Bushier Plant 🤏 Because roselle has strong apical dominance, it naturally wants to grow as a single, towering stalk. When your plant reaches 18 to 24 inches tall, gently pinch or snip off the top 2 inches of the main central stem. This vital step forces the plant to push its energy into lateral branching. More branches mean significantly more flowering nodes, directly multiplying your overall yield. Throughout the season, monitor for aphids and root-knot nematodes; regular neem oil applications and companion planting with marigolds offer excellent organic defense.
🧺 Harvesting Your Calyces & Common Questions
Timing your harvest perfectly ensures the best flavor and the highest natural pectin content for making jams.
-
When to Harvest: ⏳ Wait exactly 10 to 14 days after the pale yellow flower blooms and naturally falls off. The remaining red fleshy calyx should feel plump, crisp, and fully encapsulate the green seed pod inside. Never wait until the pod turns woody and brown.
-
The Clean Cut: ✂️ Use sharp bypass pruners to snip the calyx stem. Avoid pulling or twisting by hand, which can strip the main stalk and introduce disease. Harvesting frequently actively signals the plant to continue pushing out new blooms!
Common Roselle FAQs:
-
Why is my plant not flowering? Roselle is day-length sensitive. It requires the shortening days of late summer and early autumn (less than 12 hours of sunlight) to trigger its blooming cycle.
-
Are the leaves edible? Yes! Young, tender leaves feature a spicy, tart flavor that is a perfect addition to curries, stir-fries, and fresh salads.
-
Is it a perennial? It grows as a perennial strictly in tropical zones 10 and 11, but must be treated as a warm-season annual everywhere else.
Are you planning to dry your upcoming harvest for traditional Agua de Jamaica tea, or will you boil the fresh calyces down into a thick, tart jam?
🥣 Processing Your Harvest: Separating the Calyx from the Seed Pod
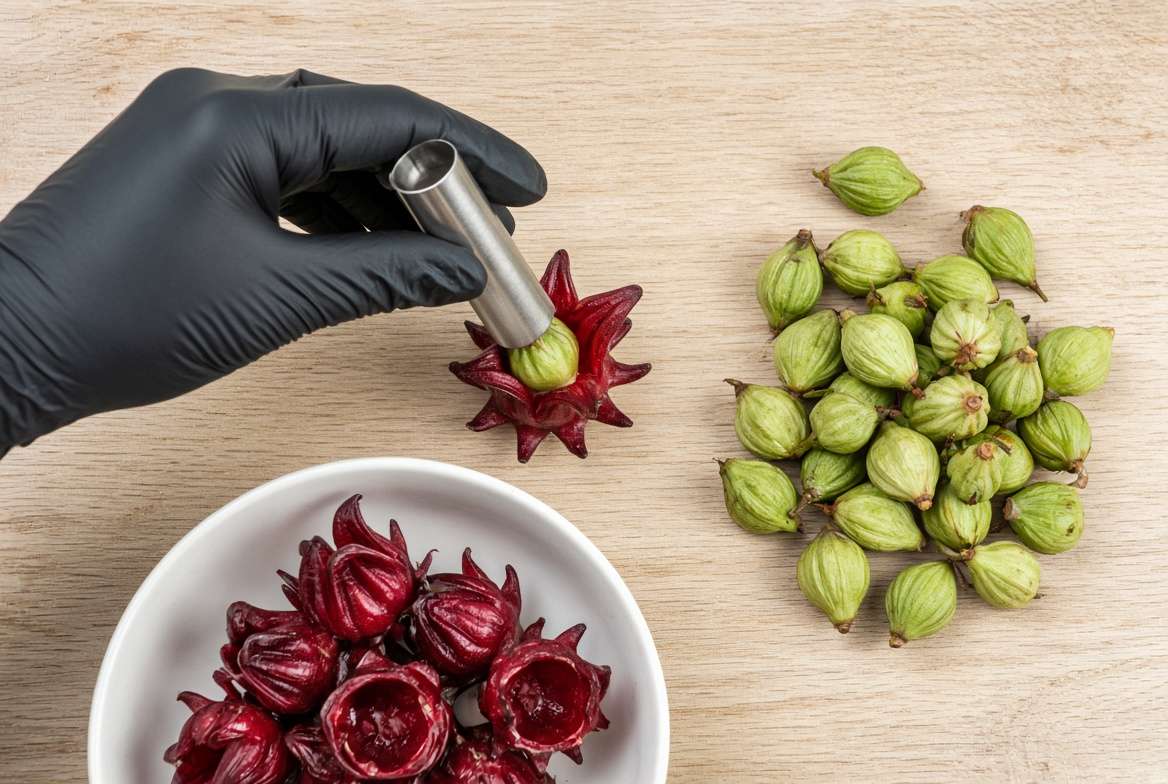
Once you have gathered your massive harvest of roselle, the next critical step is processing. You cannot simply toss the whole pod into a pot of boiling water; the inner green seed pod must be removed, as it imparts a bitter, woody flavor to your teas and jams.
The “Coring” Method 🔪
-
Wash the Harvest: Rinse your freshly picked calyces in a colander under cool water to remove any garden dust or hidden insects.
-
Slice the Base: Take a sharp paring knife and slice off the very bottom stem-end of the calyx (just enough to detach the leaves from the hard base).
-
Pop the Pod: Once the base is removed, you can usually use your thumb to push the green, marble-sized seed pod straight out the top of the red calyx. Alternatively, a simple apple corer or metal straw works wonders. Simply push the corer through the bottom, and the seed pod pops right out.
-
Save the Pods (Optional): Don’t throw those green pods away just yet! If you want to grow more roselle plants next year, you can leave a few pods on the plant until they dry and turn brown, then harvest them for seed saving.
☀️ Drying and Storing for Year-Round Use
A truly successful roselle plant will produce far more calyces than you can consume fresh. Preserving your harvest allows you to enjoy the immune-boosting benefits of hibiscus tea in the dead of winter.
-
Using a Food Dehydrator: This is the most reliable method. Spread the separated red calyces on your dehydrator trays in a single layer. Set the temperature to 95°F – 105°F and let them dry for 12 to 24 hours. They are completely dry when they feel brittle and snap easily between your fingers.
-
Oven Drying: If you don’t own a dehydrator, set your oven to its absolute lowest setting (usually around 150°F). Prop the oven door open slightly with a wooden spoon to allow moisture to escape. Place the calyces on a parchment-lined baking sheet and bake for 2 to 4 hours, checking frequently to ensure they do not scorch.
-
Storage: Store your dried roselle in airtight glass mason jars in a cool, dark pantry. Properly dried, they will retain their vibrant color, tart flavor, and nutritional value for up to 18 months.
☕ Bonus: What to Do With Your Massive Harvest
Now for the best part—enjoying the fruits (or rather, calyces) of your labor!
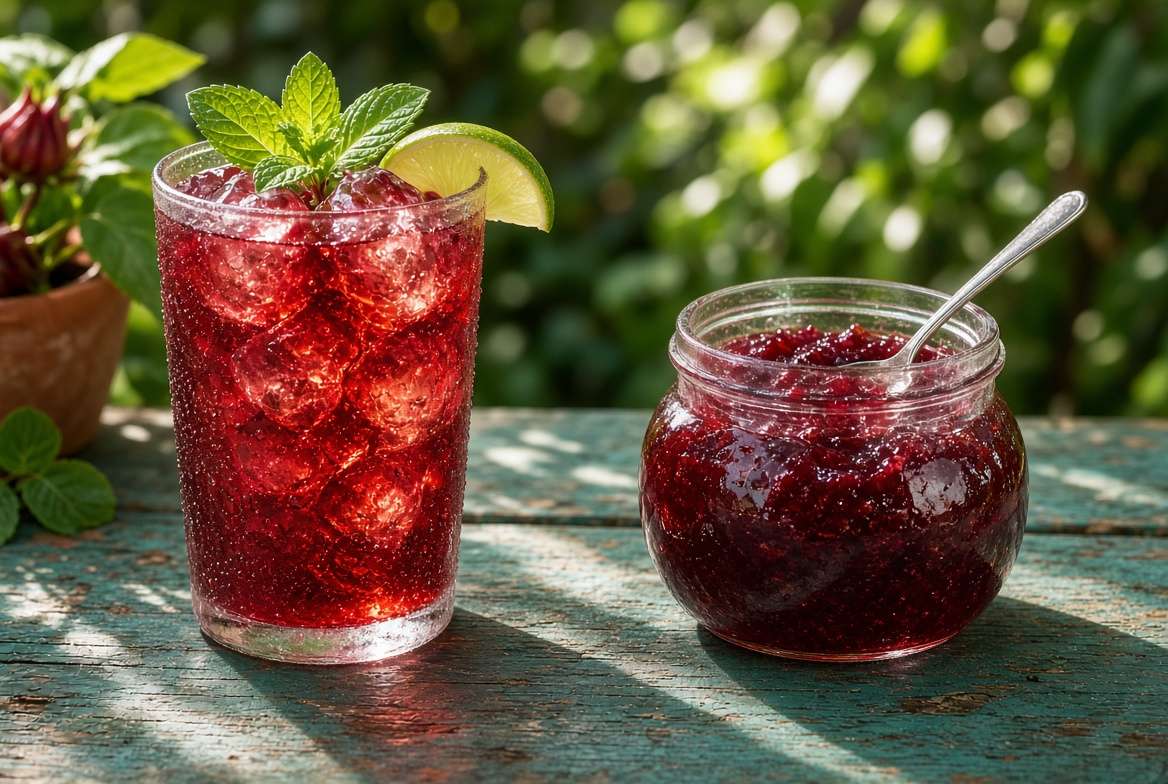
The Classic “Agua de Jamaica” (Hibiscus Tea) Recipe 🧊 This traditional Mexican and Caribbean beverage is incredibly refreshing, deeply hydrating, and packed with vitamin C.
-
Ingredients: 1 cup of dried roselle calyces (or 2 cups fresh), 8 cups of water, 1/2 cup of raw sugar or honey (adjust to taste), and a squeeze of fresh lime juice.
-
Instructions: Bring 4 cups of the water to a rolling boil. Remove from heat, add the roselle, and let it steep for 15-20 minutes. The water will turn a magnificent, opaque ruby red. Strain the liquid into a large pitcher, discarding the spent calyces. Stir in your sweetener while the liquid is still warm. Add the remaining 4 cups of cold water and the lime juice. Serve over ice with a sprig of fresh mint.
Roselle Jam (The “Florida Cranberry” Sauce) 🍯 Because Hibiscus sabdariffa is incredibly rich in natural pectin, you do not need to buy store-bought pectin to make a thick, luxurious jam.
-
Instructions: Chop 4 cups of fresh, washed calyces. Place them in a heavy-bottomed saucepan with 1 cup of water. Simmer on medium-low heat until the calyces completely break down and melt into a thick paste (about 15 minutes). Stir in 3 cups of sugar and a pinch of salt. Bring to a boil, stirring constantly until the jam sheets off the back of a spoon. Carefully pour into sterilized canning jars. It tastes identical to a spiced cranberry sauce and pairs beautifully with roasted poultry or spread over warm, buttery biscuits!
🌱 Securing Next Year’s Crop: How to Save Seeds
To create a truly sustainable garden cycle, you should save seeds from your most robust, highest-yielding roselle plant. Instead of harvesting every single calyx, leave 5 or 6 plump ones on your strongest plant near the end of the season. Allow them to remain on the stem until the red calyx shrivels and the inner green pod turns completely brown, dry, and begins to crack open at the tip.
Snip these dried pods off the plant. Break them open over a white paper plate; you will see dozens of small, kidney-shaped, dark brown seeds fall out. Store these seeds in a cool, dry paper envelope labeled with the date, and you are officially ready for next year’s growing season!
Growing a roselle plant is one of the most rewarding endeavors a gardener can undertake. By providing plenty of heat, mastering the pinching technique, and avoiding the trap of high-nitrogen fertilizers, you will be rewarded with a spectacular, dual-purpose plant. Have you decided how you will use your harvest this year? Drop a comment below and let me know if you are team “Hibiscus Tea” or team “Roselle Jam”! 🌺











