
Have you ever carefully mixed your own potting soil from compost, peat moss, perlite, and garden loam—only to watch your precious seedlings collapse overnight from damping-off, or find tiny fungus gnats swarming your indoor plants weeks later? 😔 It’s one of the most frustrating setbacks for home gardeners, whether you’re nurturing houseplants, starting seeds for the vegetable patch, or repotting young trees.
The good news? Sterilizing homemade potting mix can dramatically reduce these issues by eliminating harmful pathogens, fungal spores, weed seeds, insect eggs (including those pesky fungus gnat larvae), and other pests that lurk in untreated soil components. This simple step creates a clean, safe growing medium that gives your plants the healthy start they deserve—leading to stronger roots, better germination rates, and fewer headaches down the line.
In this comprehensive guide, we’ll cover why sterilization matters, when it’s truly necessary, the most effective home methods (backed by university extension recommendations and practical gardener experience), step-by-step instructions, safety tips, pros/cons of each approach, alternatives if full sterilization isn’t ideal, and even ways to restore beneficial microbes afterward. By the end, you’ll have the knowledge to make informed choices for healthier plants in your home garden or indoor collection. 🌱
Why Sterilize Homemade Potting Mix? Understanding the Real Risks
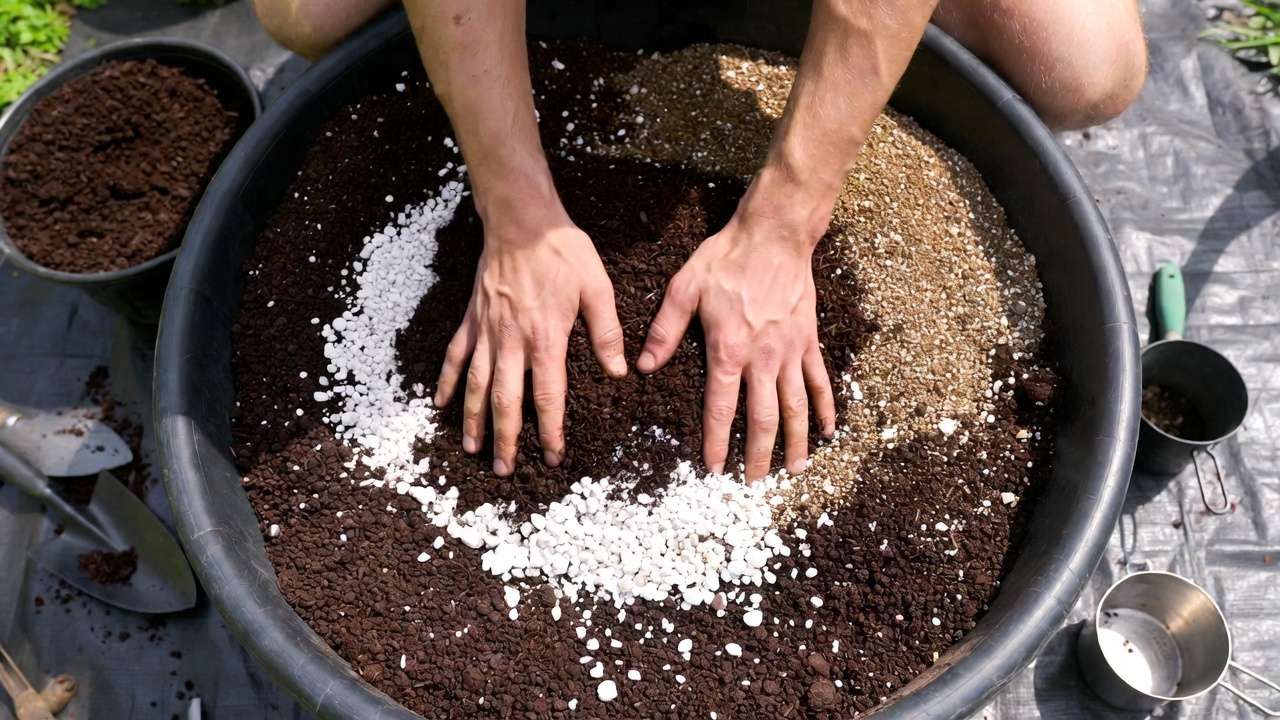
Homemade potting mix—often a custom blend of organic matter like compost, leaf mold, coconut coir, peat moss, vermiculite, perlite, and sometimes field soil—offers excellent nutrition, structure, and water retention. But unlike most commercial potting soils (which are typically heat-treated or steam-pasteurized during manufacturing), DIY mixes can harbor unwanted guests:
- Fungal pathogens → Cause damping-off, a soil-borne disease where seedlings rot at the soil line and topple over. Common culprits include Pythium, Rhizoctonia, and Fusarium species.
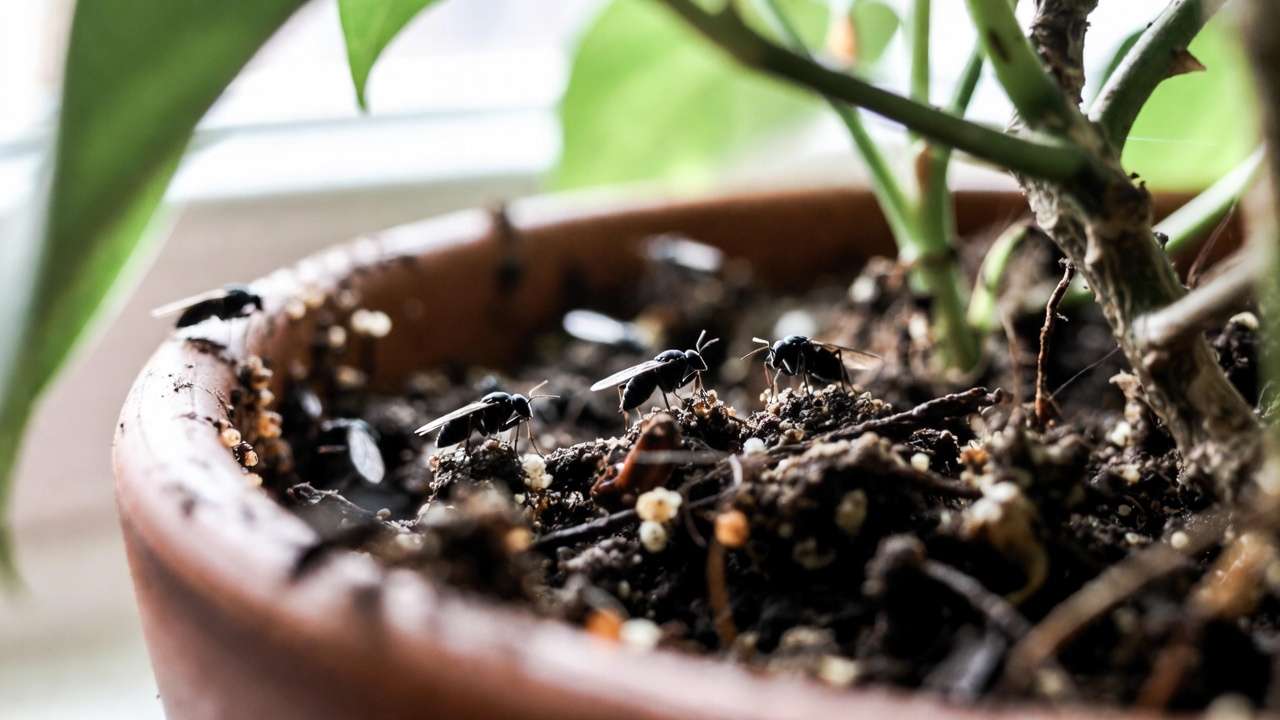
- Fungus gnats → Their larvae feed on roots and organic matter, stressing plants and opening doors to secondary infections. Adults are annoying indoors!
- Weed seeds → Can sprout unexpectedly, competing with your intended plants.
- Other pests → Nematodes, root aphids, or insect eggs from reused soil or homemade compost.
- Bacterial issues → Less common but possible in moist, organic-rich mixes.
University extensions (like Penn State and LSU AgCenter) emphasize pasteurization or sterilization for homemade media, especially for seed starting or sensitive plants. Heat to 180°F (82°C) for 30 minutes kills most pathogens, insects, and weed seeds without fully “sterilizing” (which requires higher temps and kills everything, including beneficials). True sterilization (e.g., autoclaving at 250°F+) is overkill for home use and wipes out good microbes too.
Not every situation demands it: If you’re using fresh, high-quality soilless components or mature plants in well-drained conditions, risks drop. But for seedlings, cuttings, indoor tropicals, or when reusing soil—sterilization is a game-changer. 🌿
When Should You Sterilize Your Homemade Potting Mix?
- Always for seed starting trays or germination (damping-off prevention is critical).
- When incorporating garden soil, homemade compost, or leaf mold (potential contamination sources).
- Reusing old potting mix from previous seasons.
- Indoor houseplant repotting where fungus gnats have been a problem.
- Growing sensitive species like orchids, carnivorous plants, or young tree seedlings.
Skip or minimize if using sterile commercial bases, or for established outdoor plants where natural balances help.
The Best Home Methods for Sterilizing Homemade Potting Mix
Here are the most reliable, accessible techniques—ranked from easiest/quickest to more involved. All aim for moist soil (damp like a wrung-out sponge) to conduct heat effectively and reach 180°F internally for at least 30 minutes.
1. Microwave Method (Quickest for Small Batches – Ideal for Beginners)
Perfect for 1–5 quarts at a time—great for seed starting or small houseplant projects.
Steps:
- Moisten the mix evenly (add water gradually until it holds shape when squeezed but no excess drips).
- Place in a microwave-safe container or heavy-duty zip-top bag (vent slightly or leave open to avoid explosions).
- Microwave on high in 2–3 minute bursts, stirring between each.
- Use a meat thermometer to check center temperature—aim for 180–200°F and hold for 30 seconds to 1 minute (total time varies by wattage; often 5–10 minutes total).
- Let cool completely with cover on to maintain sterility.
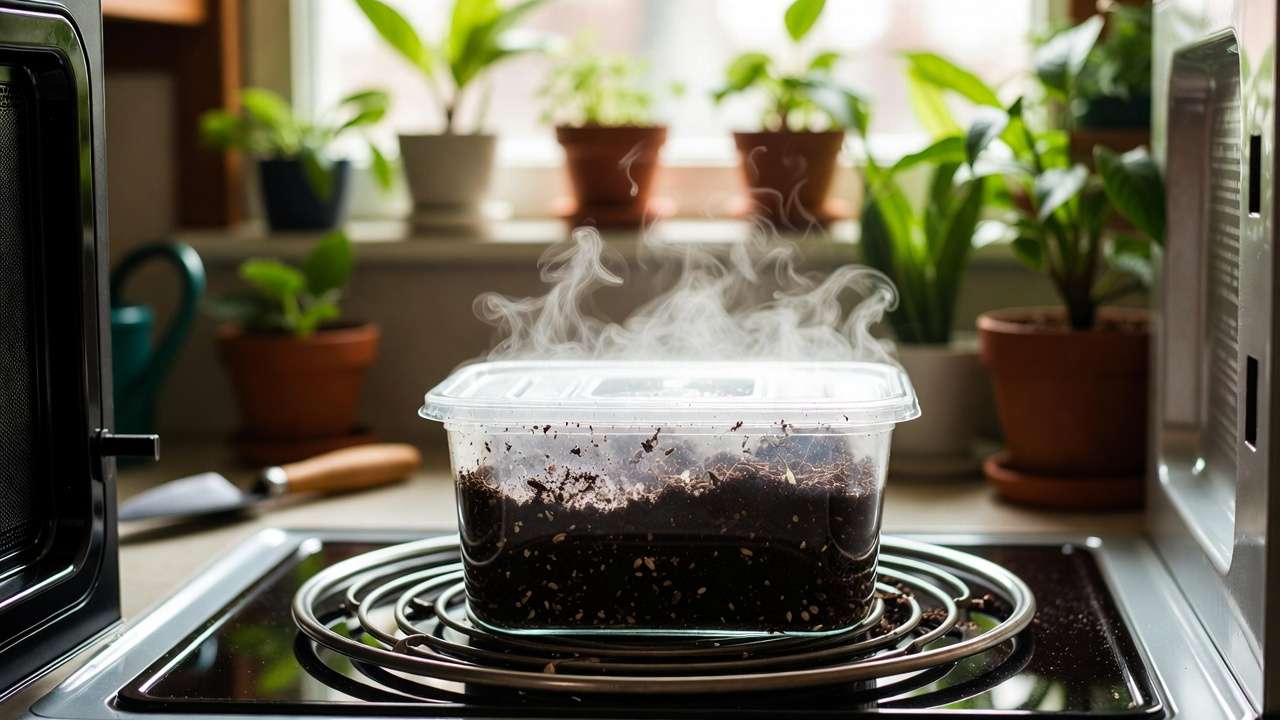
Pros: Fast, no odor in kitchen if bagged properly, minimal equipment. LSU AgCenter highlights it as effective and inexpensive. Cons: Uneven heating possible; small batches only; plastic smell if overheated. Tip: Do in short bursts to prevent scorching. 😊
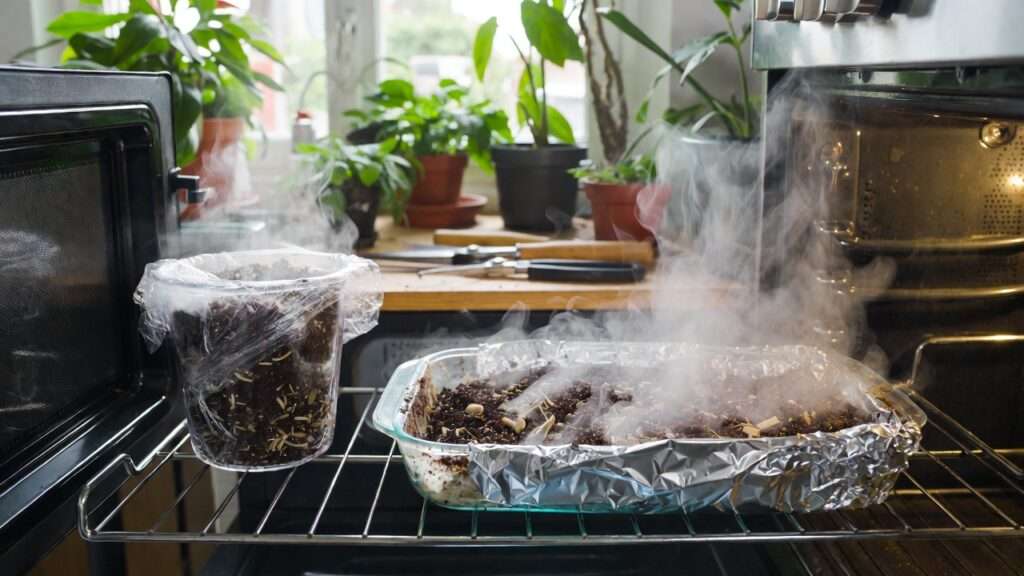
2. Oven Method (Best for Medium Batches – Most Reliable for Consistent Results)
Handles 5–20 quarts easily—popular among extension services.
Steps:
- Preheat oven to 180–200°F (82–93°C).
- Spread moist mix 3–4 inches deep in oven-safe pans or roasting bags (poke holes if sealed).
- Cover tightly with aluminum foil to trap moisture and prevent drying.
- Insert thermometer probe into center.
- Bake until soil reaches 180°F, then maintain for 30 minutes.
- Cool covered; store in sealed containers.

Pros: Even heating, kills pathogens thoroughly, good for larger amounts. Cons: Earthy/musty odor (do when windows open or spouse away!); longer process (1–2 hours). Tip: Use old pans—foil lining helps cleanup. Many gardeners swear by this for damping-off prevention.
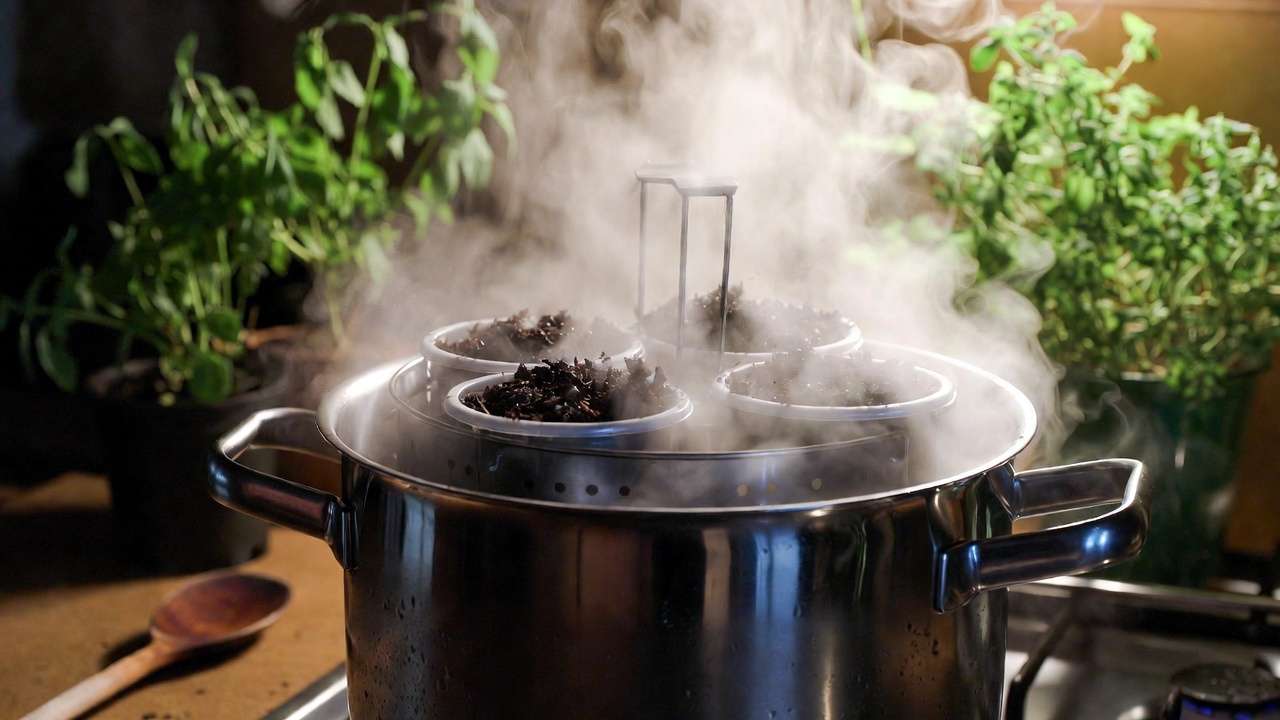
3. Steam Method (Top Choice for Effectiveness – Extension-Recommended)
Considered one of the best by sources like Gardening Know How and Mississippi State Extension—kills without as much odor.
Steps:
- Use a large pot with a rack or steamer basket.
- Add water below rack; place moist soil in heat-proof containers or wrapped in cheesecloth on top.
- Bring to boil, then steam 30–60 minutes (internal temp 180°F+).
- For pressure cooker: Follow similar, but use low pressure for safety.
- Cool covered.
Pros: Superior pathogen kill; less smell than oven; preserves some structure. Cons: Requires equipment; time-intensive; watch for over-wetting. Tip: Great for organic gardeners avoiding dry heat issues.
4. Boiling Water Method (Simple, No Heat Source Needed – Quick Fix)
Good for spot-treating or small pots.
Steps:
- Place mix in heat-safe container.
- Slowly pour boiling water over until saturated (excess drains).
- Cover and let sit 30 minutes (heat dissipates slowly).
- Cool before use.
Pros: Easy, no appliances; kills surface pests quickly. Cons: Uneven (may not reach full depth); not as thorough for deep pathogens. Tip: Combine with peroxide for boost (see below).
5. Solarization (Eco-Friendly for Large Batches – Passive Option)
Spread moist mix thinly between clear plastic sheets in direct sun for 4–6 weeks (hot climates best).
Pros: Chemical-free, solar-powered. Cons: Slow, weather-dependent; less effective in cooler areas like Dhaka winters.
Bonus: Chemical Alternatives (If Heat Isn’t Feasible)
- 3% Hydrogen Peroxide → Mix 1/2 cup per gallon water, drench soil, let sit. Kills some pathogens/eggs without heat.
- Not a full replacement—use as supplement.
After Sterilization: Rebuilding a Healthy Mix
Sterilization kills bad and good microbes, so amend post-cool:
- Add compost tea or worm castings for beneficials.
- Incorporate mycorrhizae inoculants.
- Use organic fertilizers sparingly at first.
Store sterilized mix sealed in bins to avoid recontamination.
Common Mistakes to Avoid + Safety Tips
- Don’t over-dry soil before heating—moisture is key.
- Never exceed safe temps (avoid fire risk).
- Ventilate during oven/steam—odors strong!
- Clean tools/pots with 10% bleach solution.
- Test small batches first.
With these methods, you’ll enjoy pest-free, disease-resistant potting success. Your plants will thank you with vibrant growth! 🌿✨
Troubleshooting Common Issues After Sterilization
Even with careful execution, things can go sideways. Here’s how to handle the most frequent problems gardeners encounter—drawing from real-world experience and extension service advice.
- Strong, lingering earthy odor in your kitchen/oven → This is common with the oven method due to volatilized organic compounds. Run your oven’s self-clean cycle afterward or place an open box of baking soda inside overnight. For future batches, try the steam or microwave method instead—these produce far less smell. Many gardeners in humid climates like Dhaka note that doing oven batches during cooler, drier months (November–February) helps vent odors outdoors more easily. 😅
- Soil comes out too dry or baked hard → Over-drying before heating prevents even heat penetration. Always start with moist soil (it should clump when squeezed but not drip water). If it dries excessively during processing, mist lightly and re-heat briefly.
- Uneven heating (some parts still buggy) → Stir thoroughly between microwave bursts or use a probe thermometer in multiple spots for oven/steam. For larger batches, divide into smaller portions.
- Fungus gnats still appear weeks later → Sterilization kills eggs and larvae present at the time, but adults can fly in from houseplants, drains, or overwatered pots. After using sterilized mix, cover soil surfaces with a ½-inch layer of sand, gravel, or diatomaceous earth to block egg-laying. Yellow sticky traps catch adults early. Overwatering is the #1 trigger—let the top 1–2 inches dry out between waterings.
- Seedlings still damping off → Causes include poor drainage, overly wet conditions post-planting, or recontamination from dirty pots/tools. Always sterilize containers too (soak in 10% bleach solution for 30 minutes, rinse well). Use bottom watering for seedlings and ensure good airflow with a small fan.
- Plants seem stunted or yellow after repotting → Full sterilization kills beneficial microbes, leading to temporary nutrient lockout or poor root colonization. Re-inoculate with compost tea, worm castings (1–2 cups per 5 gallons mix), or mycorrhizal fungi powder. Start with diluted liquid fertilizer after 2–3 weeks.
Homemade Potting Mix Recipes Optimized for Sterilized Components
Once your mix is sterilized and cooled, customize it for specific needs. These recipes use common, affordable ingredients available in Dhaka markets (peat moss/coco coir from nurseries, perlite/vermiculite from agricultural stores, compost from home or local suppliers). Proportions are by volume.
- All-Purpose Seed Starting Mix (Excellent for preventing damping-off)
- 2 parts sterilized coco coir or peat moss
- 1 part perlite
- 1 part vermiculite
- Optional: ½ part finely sifted worm castings (add after cooling for microbes) → Light, sterile, excellent drainage. Ideal for vegetable seeds, flower starts, or tree seedlings.
- Houseplant/Tropical Potting Mix (Great for indoor collections, reduces fungus gnat habitat)
- 2 parts sterilized coco coir
- 1 part perlite
- 1 part orchid bark or pine bark fines
- ½ part activated charcoal (helps absorb toxins, prevents odors) → Well-aerated, retains moisture without sogginess—perfect for monstera, pothos, or young fruit trees indoors.
- Tree & Shrub Seedling/Repotting Mix (For mango, jackfruit, or ornamental trees)
- 1 part sterilized garden loam/topsoil (if using field soil—sterilize thoroughly!)
- 1 part sterilized compost
- 1 part coco coir or peat
- 1 part perlite or coarse sand
- Add 1–2 tbsp dolomitic lime per gallon if pH is low (test first) → Balanced nutrition and structure for strong root development in Bangladesh’s clay-heavy soils.
- Succulent/Cacti Mix (Fast-draining to avoid rot)
- 1 part sterilized coco coir
- 1 part perlite
- 1 part coarse sand or pumice
- Optional: small amount of crushed gravel → Prevents over-retention that invites gnats or fungal issues.
Mix in a large tarp or bin outdoors for cleanliness. Store unused sterilized mix in sealed buckets or bags in a cool, dry spot to prevent re-infestation.
FAQs: Answering Real Gardener Questions
Is sterilizing really necessary if I buy commercial potting soil? Most bagged mixes are already pasteurized, but cheap or old bags can harbor gnats. If fungus gnats plague your home, sterilizing even commercial soil helps.
Can I skip sterilization for mature plants? Yes—established plants in good conditions usually handle minor pathogens. Reserve full sterilization for seeds, cuttings, or problem-prone setups.
Does sterilization kill nutrients? It doesn’t destroy minerals, but organic matter breaks down slightly. Add slow-release organic fertilizer or compost after cooling.
What’s the best method for Dhaka’s hot, humid climate? Microwave for small batches (quick, low odor); steam if you have equipment (effective in humidity); oven works but vent well. Avoid solarization in monsoon season—too inconsistent.
How long does sterilized mix stay “clean”? Sealed and stored properly: 6–12 months. Once opened, use within a few months or re-sterilize if mold appears.
Are there eco-friendly alternatives to heat? Hydrogen peroxide drench (1 part 3% H₂O₂ to 4 parts water) or beneficial nematodes target gnats without full kill-off. Solarization works in dry, sunny periods.
Final Thoughts: Grow with Confidence
Sterilizing homemade potting mix isn’t just a chore—it’s an investment in healthier, more resilient plants. By eliminating the root causes of damping-off and fungus gnats early, you’ll see higher germination rates, fewer losses, and vigorous growth whether you’re tending a windowsill collection or starting trees for your balcony garden.
Start small: Try the microwave method on your next seed tray, track the results, and scale up. Your plants (and your sanity) will thank you. Happy gardening, Shuvo—here’s to pest-free pots and thriving greenery! 🌿💚🥰


