

Imagine this: Spring finally arrives in your garden, the soil is warming, buds are swelling on your favorite trees, and you’re excited to get planting. You reach for your trusty bypass pruner or sharp spade… only to find orange rust creeping along the blades or a cracked wooden handle that’s now useless. 😩 Ouch! That frustrating (and expensive) moment happens to far too many gardeners every year because winter’s sneaky combo of moisture, freeze-thaw cycles, and neglect takes a heavy toll on unprotected tools.
Storing garden tools for winter properly isn’t just busywork—it’s one of the smartest investments you can make in your garden. Quality tools (pruners, loppers, shovels, and more) can cost $50–$300 each, and replacing them season after season adds up fast. But with the right steps, you can prevent rust, keep blades sharp, protect wooden handles from cracking, and ensure everything is ready to perform like new when spring calls. As a plant care and tree care specialist with over 15 years of hands-on experience helping home gardeners and arborists maintain their gear through harsh seasons, I’ve seen firsthand how these simple preparations save money, reduce frustration, and lead to healthier plants (clean, sharp cuts mean less disease entry in trees and perennials!).
In this comprehensive guide, you’ll get pro-level, step-by-step methods used by experienced horticulturists—far beyond basic “wipe and hang” advice. We’ll cover thorough cleaning, sharpening, the best rust preventatives, tool-specific care, ideal storage spots, space-saving organization ideas, common pitfalls to avoid, and even a spring startup checklist. By the end, you’ll have everything you need to protect your investment and start next season strong. 🌱 Let’s dive in and winter-proof those tools!
Why Proper Winter Storage Matters More Than You Think 📊
Winter doesn’t just pause gardening—it actively damages tools if left unchecked. Moisture from snow, rain, or even humid air combines with temperature swings to accelerate rust formation on metal parts. Freeze-thaw cycles cause wooden handles to expand and contract, leading to splits and cracks. Soil residues hold onto water like a sponge, inviting corrosion, while dull blades from summer use tear plant tissue instead of making clean cuts—inviting fungal diseases in trees and shrubs.
Extension services and university horticulture resources note that neglected tools can lose 30–50% of their lifespan. The good news? Following a structured winter prep routine dramatically extends tool life, keeps them sharper for precise pruning (crucial for tree health), and saves you hundreds in replacements. Myth busted: Simply tossing a tarp over tools outside or leaving them in a damp corner is not protection—moisture still sneaks in. ❌ Proper storage in a dry, ventilated space is key.

(These show the heartbreaking result of neglected storage—rusty, weathered tools vs. what we want to avoid!)
Step 1: Thorough Cleaning – The Foundation of Rust Prevention 🧼
Cleaning is non-negotiable; it’s the single biggest defense against rust. Dirt, sap, and plant debris trap moisture and create perfect conditions for corrosion.
General cleaning process for all tools Start by removing obvious soil, mud, and residue with a putty knife or stiff brush. For stubborn clumps, use a garden hose with moderate pressure—avoid high-pressure washers that can damage handles or force water into joints. Scrub metal parts thoroughly, then rinse and dry immediately with a clean rag or old towel. Never store wet tools!
Tool-specific cleaning tips 🔍
- Pruners, loppers, shears: Disassemble if possible (remove blades from handles). Scrub off sap with warm soapy water or citrus-based degreaser—sap is notoriously sticky and moisture-holding.
- Shovels, spades, hoes: Scrape off compacted soil, then wire-brush any light rust spots.
- Rakes and forks: Clear tines of debris; check for bent metal.
- Garden knives & hori-hori: Wipe blades carefully to avoid nicks.
- Power tool exteriors (string trimmers, hedge clippers): Wipe down with a damp cloth—never submerge.
Pro tip: If tools were used on diseased plants, disinfect with a 10% bleach solution (1 part bleach to 9 parts water) or 70% rubbing alcohol. Rinse and dry fully to prevent blade pitting.
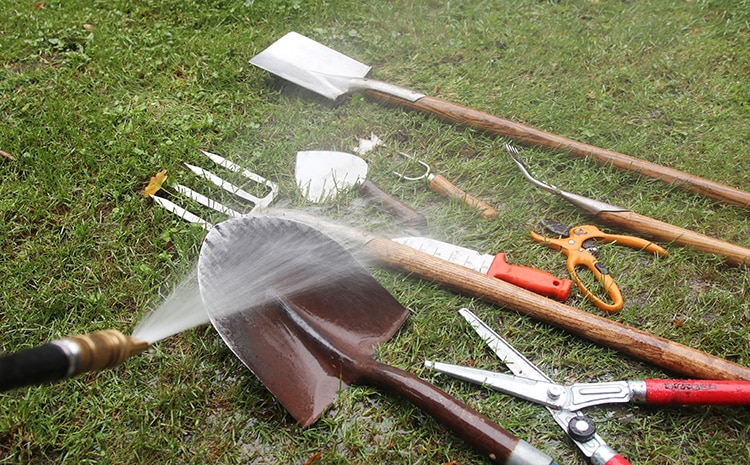
(Visuals of cleaning in action—hose off dirt and disinfect properly!)
This step alone prevents most winter rust issues. Once clean and bone-dry, you’re ready for the next protective layers.
Step 2: Sharpening Blades – Don’t Skip This Spring-Saving Step ⚙️✨
After cleaning and drying, the next critical task is sharpening. Dull blades from a full season of use don’t just make gardening harder—they cause real harm. Jagged, torn cuts on tree branches, rose stems, or perennial foliage create ragged wounds that invite pathogens like fungal diseases (think black spot, fire blight, or canker in trees). Sharp tools make clean, precise cuts that heal faster and promote healthier plant growth. 🌳
Why sharpen now? Winter is the perfect time: tools are already disassembled/clean, you’re indoors anyway, and you’ll start spring with razor-sharp gear—no rushing or frustration.
Easy at-home sharpening methods For beginners: Use a handheld sharpening tool like the Fiskars or Felco sharpener (quick and foolproof). For better results: A fine mill file or diamond file + whetstone combo.
Step-by-step for bypass pruners/loppers (most common):
- Secure the tool and focus on the beveled cutting blade only (the curved one that slices).
- Match the existing bevel angle (usually 20–25°).
- File with smooth, even strokes away from the edge, 10–15 passes per side.
- Remove burrs with a fine stone or leather strop.
- Test: It should slice paper cleanly.

(These show proper filing technique on the bevel and the finished sharp edge—notice how the blade gleams!)
When to replace instead If the blade has deep nicks, pitting from rust, or the edge is too thin/worn, sharpening won’t restore performance. Invest in quality replacements (Felco, ARS, Corona) for long-term value.
Safety tips Wear cut-resistant gloves, secure the tool in a vise if possible, and always file away from your body. Never sharpen the hook/anvil on bypass tools—that flattens the surface and ruins the cut.
This step alone can make your tools feel brand new and significantly improve plant health next season.
Step 3: Rust Prevention & Protection Treatments 🛡️
With tools clean and sharp, apply a protective barrier to block moisture and oxygen—the main rust culprits.
Best oils & protectants (ranked by effectiveness and gardener preference):
- Camellia oil 🌸 — Top choice for high-end pruning tools (non-toxic, low odor, excellent film).
- Boiled linseed oil — Great for wooden handles and light metal coating (natural, but takes time to dry).
- Mineral oil or 3-in-1 oil — Affordable, widely available, good all-purpose.
- WD-40 Specialist Corrosion Inhibitor or similar long-term sprays — Excellent for heavy tools, but avoid regular WD-40 (it attracts dust). Pros/cons: Camellia is premium but pricier; mineral oil is cheap but needs reapplication.
How to apply to metal parts Wipe a thin, even coat with a lint-free cloth or rag. For crevices/joints, use a small brush. Let excess drip off—too much oil attracts dirt. Reapply if storing longer than 4–5 months.
(Examples of oil application—notice the light sheen that protects without gumming up!)
Treating wooden handles Sand lightly if rough/cracked, then rub in boiled linseed oil or tung oil. Multiple thin coats (dry 24h between) prevent cracking from humidity changes.
The famous “sand bucket trick” 🪣 Fill a 5-gallon bucket with clean, dry play sand mixed with a cup of mineral oil or motor oil. Plunge clean tool heads in—the abrasive sand removes light residue while the oil coats and protects. Ideal for shovels, hoes, and forks.
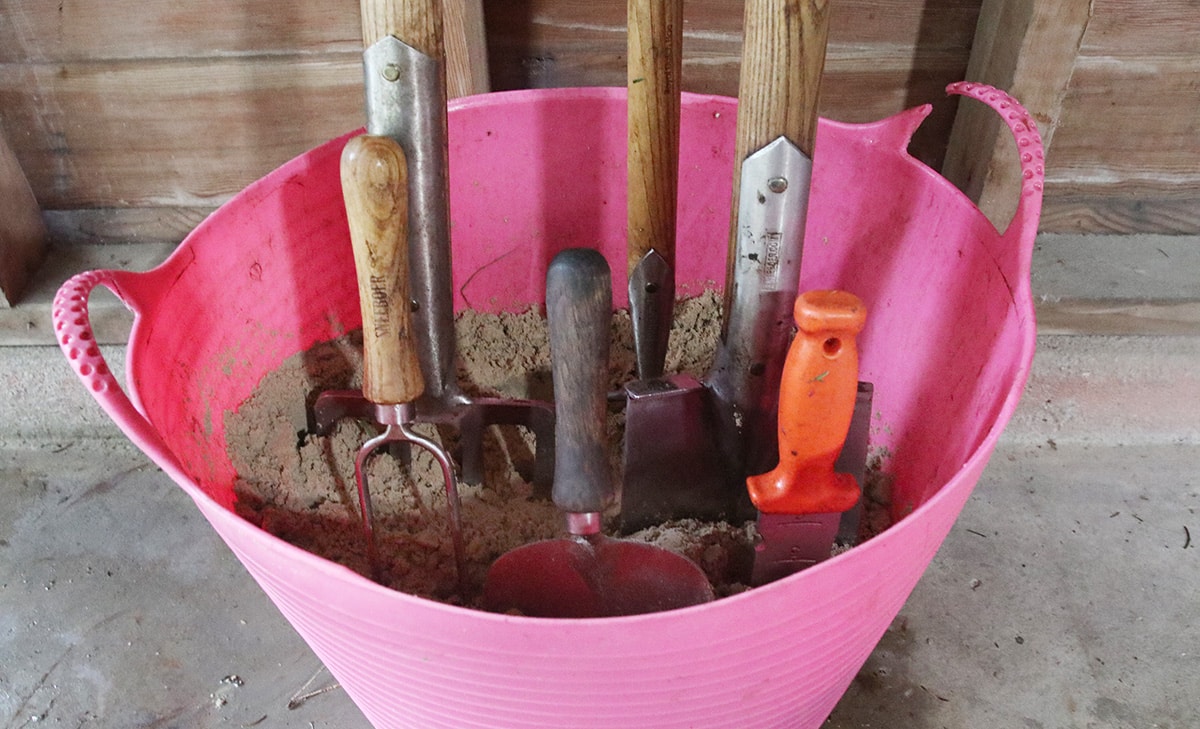
(Real setups—sand bucket keeps tools upright, oiled, and ready!)
Disinfecting bonus For tools exposed to disease, a quick 70% isopropyl alcohol wipe after oiling ensures sterility.
Step 4: Special Care for Different Tool Types 🛠️
Not all garden tools are created equal—different materials, uses, and designs require tailored winter prep. Treating them generically is one of the biggest reasons tools fail prematurely. Here’s expert-level care for the most common categories gardeners rely on for plant and tree maintenance.
Long-handled tools (shovels, spades, hoes, forks, rakes) These heavy hitters spend the season digging, turning soil, and moving mulch—meaning lots of soil contact and potential blade damage.
- After the sand bucket treatment (Step 3), check for bent tines or cracked welds.
- Lightly oil the metal socket where the handle meets the head to prevent rust creep.
- Stand them upright (never lean on blades) to avoid warping handles.
- If the handle is fiberglass, a quick wipe with a damp cloth is usually enough—no oil needed.
Pruning tools & saws (bypass pruners, anvil pruners, loppers, pole pruners, folding saws, bow saws) These are your precision instruments for tree and shrub health—protecting them is non-negotiable.
- Disassemble where possible (many Felco and ARS models have removable parts).
- Oil pivot points and springs lightly—use a dropper or precision applicator to avoid gumming.
- For folding saws, wipe teeth and apply a thin coat of camellia or mineral oil.
- Store pole pruners with the blade detached or protected in a sheath if available. Pro arborist tip: High-end pruners (Felco #2, ARS, Okatsune) last decades with this care—many professionals I’ve worked with still use tools from the 1990s!
Hoses & watering equipment – draining + coiling secrets 💦 Frozen water inside hoses is a leading cause of splits and bursts.
- Drain completely: Disconnect from faucet, raise one end high, then walk the length to force water out.
- Coil loosely in figure-8 pattern (prevents kinks) and hang on a wide hose reel or wall hooks—never tightly coil in a small circle.
- Store indoors or in an insulated shed; even a garage is better than outside.
- Sprayers & nozzles: Empty, rinse, and store dry.
Power tools & small engines (string trimmers, hedge clippers, chainsaws, leaf blowers, lawn mowers) Gas-powered tools need extra attention to avoid spring startup headaches (or engine damage).
- Fuel stabilization: Add fuel stabilizer (STA-BIL or similar) to fresh gas, run the engine 2–3 minutes to circulate, then drain the carburetor bowl if possible.
- Oil changes: Change engine oil (and air filter if dirty).
- Battery care (for cordless models): Charge to ~60–80%, store in a cool, dry place (ideally 50–70°F / 10–21°C). Remove batteries from tools.
- Wipe down exteriors, oil any exposed metal, and cover air intake to keep dust out.
- Chainsaws: Clean bar & chain, remove chain, clean bar groove, apply bar & chain oil, wrap in oiled paper or plastic, store separately.
Specialty items (soil augers, tree stakes, grafting tools, bulb planters)
- Auger bits: Clean soil from flutes, oil generously, store upright.
- Grafting knives: Extra-sharp sharpening + camellia oil coat—store in a dedicated sheath or box.
- Tree stakes & ties: Rinse off soil, dry, bundle neatly.
Taking these extra minutes per tool type ensures nothing gets overlooked.
Step 5: Choosing the Perfect Winter Storage Location 🏠
Even the best cleaning, sharpening, and oiling can be undone by a poor storage environment. Ideal conditions: cool (above freezing), dry (humidity <60%), good airflow, protected from direct sun and temperature extremes.
Best spots ranked (from most to least ideal):
- Insulated garage or workshop – temperature-stable, dry, easy access.
- Dedicated garden shed (with ventilation and raised floor).
- Basement or utility room (if dry and not too humid).
- Covered porch or enclosed patio (better than outdoors, but monitor for moisture).
What to avoid ❌
- Damp concrete floors (use pallets or shelves to elevate).
- Unventilated plastic bins or sealed totes (traps moisture → rust).
- Direct ground contact.
- Unheated outdoor sheds in freeze-thaw zones (wood handles crack, metal rusts faster).
Humidity control tips for humid climates (like parts of Bangladesh or coastal areas)
- Use a small dehumidifier or silica gel packs in enclosed spaces.
- Install a hygrometer to monitor—aim for 40–55% RH.
- Ensure good ventilation: Crack a window or use a fan periodically.
Step 6: Smart & Space-Saving Storage Solutions 📦✨
Once your tools are clean, sharp, protected, and ready for hibernation, the final piece is organizing them so they stay that way—and are easy to grab next spring. Good storage prevents damage from stacking, improves airflow (reducing any residual moisture risk), and saves your sanity when the gardening bug bites again.
Wall-mounted pegboards & hooks The gold standard for most home gardeners.
- Install a 4×8 ft pegboard in the garage or shed.
- Use sturdy metal hooks, S-hooks, and custom holders for long-handled tools (shovels, rakes, hoes hang vertically).
- Small tools (pruners, trowels, gloves) go on smaller pegs or magnetic strips. Benefit: Everything is visible, off the floor, and air circulates freely. 🌬️
Hanging systems & magnetic strips
- Heavy-duty slatwall panels with hooks and bins (great for heavier items).
- Magnetic knife strips or bars mounted horizontally—perfect for metal garden knives, hori-hori, and small hand tools.
- Hose reels mounted high on the wall keep hoses kink-free and elevated.
Vertical pallet organizers (DIY favorite) Repurpose an old wooden pallet:
- Mount it vertically on the wall.
- Add shelves from scrap wood or brackets for pots, small tools, and seed packets.
- Hang long tools from the slats using bungee cords or zip ties. Low-cost, eco-friendly, and surprisingly sturdy.
Rolling carts for heavy tools
- A heavy-duty utility cart or old tool chest on wheels lets you move shovels, forks, and power equipment easily.
- Line drawers with oil-soaked rags for extra protection.
Bucket organizers for hand tools
- Keep a 5-gallon bucket (the same sand bucket from Step 3 works double duty) filled with clean sand/oil mix.
- Plunge hand tools (trowels, cultivators, pruners) in upright—ready to grab and already protected.
Creative repurposed storage ideas
- Old wooden ladder leaned against the wall → rungs become perfect hangers for hoses, extension cords, and lightweight tools.
- Vintage toolbox or ammo cans for small specialty items (grafting knives, sharpening stones).
- PVC pipe sections glued to a board → custom holders for pole pruners or long-handled tools.
Pro tip: Label & zone your storage Group by use: “Pruning Zone,” “Digging Zone,” “Watering Zone.” Add simple labels (waterproof tags or painter’s tape). Next spring, you’ll find everything in seconds—no more “Where did I put the loppers?!” moments. 😄
Common Mistakes to Avoid ⚠️
Even experienced gardeners slip up sometimes. Here are the top 8 winter storage errors I see most often:
- Storing wet or dirty tools – Moisture + soil = instant rust party. Always dry completely.
- Leaving fuel in power equipment – Gas goes stale, gums up carburetors → expensive repairs.
- Stacking heavy tools on blades – Bends edges and dulls them instantly.
- Ignoring wooden handles – They crack without oil; a 5-minute linseed rub saves hundreds.
- Using sealed plastic bins without ventilation – Traps humidity → mold and rust.
- Storing outside under a tarp – Wind-driven rain still gets in; freeze-thaw wrecks wood and metal.
- Forgetting to stabilize fuel or drain hoses – Leads to cracked hoses and dead engines.
- Over-oiling – Excess attracts dust and turns gummy—thin, even coats only.
Avoid these, and your tools will thank you (and last decades longer).
Spring Startup Checklist – Get Back to Gardening Fast 🌷
When the first warm days arrive, don’t just grab and go. Spend 10 minutes with this quick routine:
- Inspect every tool for new rust, cracks, or loose parts.
- Wipe off excess oil/sand with a clean rag.
- Re-sharpen if needed (especially pruners after heavy winter storage).
- Tighten any loose screws/bolts.
- For power tools: Add fresh stabilized fuel, check spark plug, test run briefly.
- Lubricate moving parts (pruner pivots, hedge clipper blades).
- Enjoy the feeling of tools that cut like butter on day one! 🚀
Expert Insights & Pro Tips from Years in the Field 🌟
- Regional variations: In very cold climates (like northern Europe or parts of North America), bring power tools indoors entirely. In milder humid zones (like Dhaka or coastal South Asia), prioritize dehumidification and ventilation over insulation.
- Eco-friendly rust preventatives: Try pure camellia oil or a beeswax-based balm—both biodegradable and safe around plants.
- Arborist secret: Many professional tree climbers coat high-end pruners with a thin layer of gun oil or Ballistol—long-lasting and non-sticky.
- Urban/apartment gardeners: Use a wall-mounted pegboard in a balcony shed or even inside near a window. Vertical space is your friend!
FAQs – Storing Garden Tools for Winter ❓
Can I store garden tools outside if they’re covered? No—tarps and sheds without ventilation still allow moisture buildup. Indoors or in a dry, ventilated space is best.
How often should I oil wooden handles? Once in fall and once in spring is usually enough. More if they look dry or cracked.
What’s the absolute best oil for blades? Camellia oil for premium tools; mineral oil or 3-in-1 for everyday use. Avoid cooking oils—they go rancid.
Do I really need to empty gas from mowers and trimmers? Yes—stale fuel is the #1 spring repair issue. Stabilize or drain.
Will sand bucket storage work for pruners? Better for long-handled tools. Pruners do best hung or in a toolbox with light oil.
How do I stop rust from coming back mid-winter? Check humidity, ensure airflow, and re-oil if you see any spots forming.
Is it okay to store batteries in the cold? No—lithium-ion batteries prefer 50–70°F (10–21°C). Keep them indoors.
Can I use WD-40 instead of oil? Regular WD-40 is a water displacer, not long-term protection. Use WD-40 Specialist Corrosion Inhibitor for better results.
Conclusion 🎯
Storing garden tools for winter the right way is one of the highest-ROI tasks in gardening. A few hours of cleaning, sharpening, oiling, and smart organizing prevents rust, extends tool life by years, saves you hundreds of dollars in replacements, and sets you up for healthier plants and trees next season—clean cuts mean less disease, better pruning results, and a more enjoyable spring.
Take these steps now while the weather keeps you indoors, and next March you’ll walk out to tools that feel brand new and perform like champions. Your garden (and your wallet) will thank you. 🌱❄️
Ready to get started? Grab that bucket of sand, your favorite oil, and let’s protect those hardworking companions. Happy winter prepping—and see you in the garden come spring! 😊


