
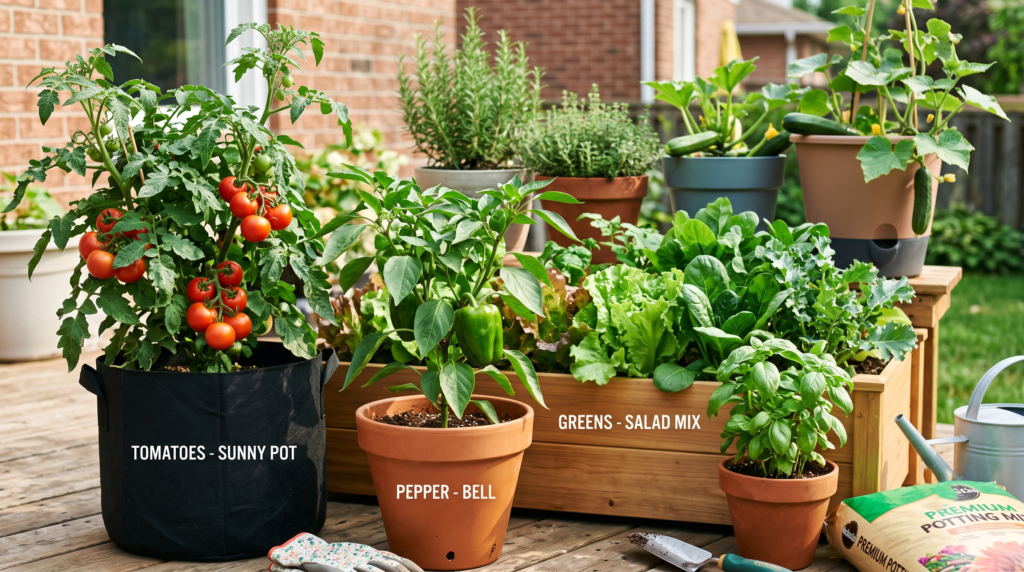
We’ve all been there. You envision stepping out onto your sunny balcony or patio, basket in hand, to pluck vine-ripened tomatoes, crisp bell peppers, and fresh herbs right from your own pots. You buy a beautiful seedling, pot it up with high hopes, and wait for the magic to happen. But a few weeks later, reality hits: the leaves are turning a sickly yellow, the blossoms are dropping off before they can fruit, and your plant looks absolutely miserable.
If this sounds familiar, take a deep breath. You do not have a “black thumb.”
The truth is, growing vegetables in pots is entirely different from traditional in-ground or raised-bed gardening. A pot is a closed, artificial ecosystem, meaning the plant is 100% reliant on you for its food, water, and environment. If you want a bumper crop this season, avoiding the top 5 mistakes in container vegetable gardening is your first step to success.
In this comprehensive guide, we will diagnose exactly why your potted veggies are struggling and provide expert, actionable solutions to turn your container garden into a thriving, high-yielding paradise. Let’s dig in! 🧤✨
Mistake #1: Choosing the Wrong Container Size (and Skimping on Drainage) 🪣🚫
The foundation of a healthy plant lies out of sight—in its root system. One of the most common heartbreaking errors beginners make is cramming a vegetable with massive potential into a tiny, restrictive pot.
The “Too Small” Trap 🌱
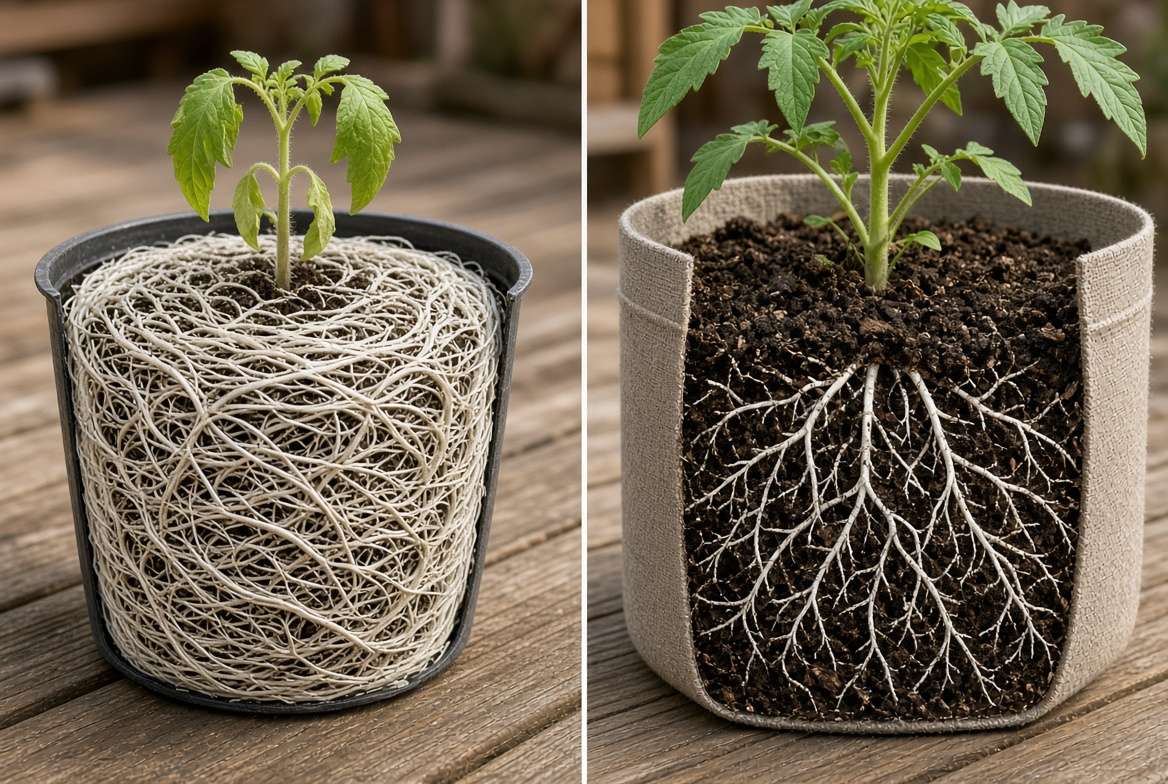
Vegetables are aggressive growers. When you plant an indeterminate tomato or a sprawling zucchini in a 2-gallon bucket, the roots quickly run out of room. This creates a “root-bound” plant where roots circle the bottom of the pot, choking themselves.
A pot that is too small also means there is very little soil volume. Less soil means less moisture retention, leading to rapid drying on hot summer days. Your plant will experience wild swings between dehydration and saturation, which stresses the plant, stunts its growth, and causes blossom end rot in fruiting vegetables.
The Drainage Disaster 💧
Have you ever heard the old gardening myth that putting a layer of gravel at the bottom of a pot without holes will provide “drainage”? Stop doing this immediately! 🛑
Water does not move easily from a fine-textured material (like potting mix) into a coarse material (like gravel) unless the soil is completely saturated. This creates a “perched water table”—a zone of soggy, oxygen-deprived soil sitting right at the bottom of your pot. Without drainage holes, water pools at the bottom, literally drowning your plant’s roots and inviting deadly fungal diseases like root rot. Every single container you use must have adequate drainage holes.
Material Matters: Terracotta vs. Plastic vs. Grow Bags 🏺
The material of your container also plays a massive role in root health. Here is a quick breakdown to help you choose the right home for your veggies:
Expert Insight / Actionable Fix 🛠️: When in doubt, go bigger. As a general rule of thumb:
Micro-greens & Radishes: 1–2 gallons (shallow pots are fine).
Leafy Greens & Bush Beans: 2–3 gallons.
Peppers & Eggplants: 5 gallons minimum.
Tomatoes & Squash: 10–15+ gallons.
Mistake #2: Using Heavy Garden Soil Instead of Potting Mix 🛑🌍
If you’ve ever tried to save a few dollars by shoveling dirt from your backyard into a pot, you’ve likely learned this lesson the hard way. “Dirt” and “potting mix” are fundamentally different things.
The Compaction Problem 🧱
Garden soil or topsoil relies on a vast, underground ecosystem of earthworms, insects, and deep natural drainage systems to stay aerated. When you put heavy garden dirt into a container, that ecosystem is destroyed.
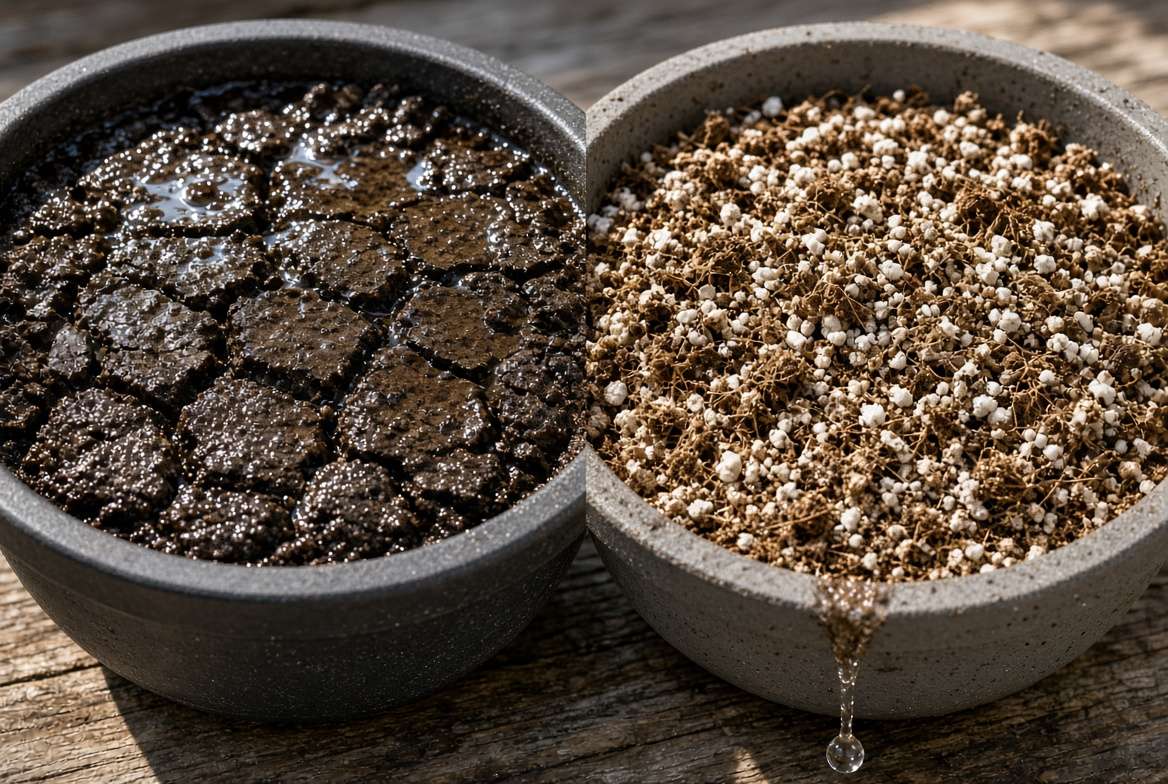
Every time you water, the dirt compacts down, squeezing out all the microscopic air pockets. Eventually, the soil becomes as hard as a brick. Plant roots need oxygen just as much as they need water. In compacted dirt, roots suffocate, water runs straight down the sides of the pot without penetrating the root ball, and the plant slowly starves to death.
Weed Seeds and Pathogens 🦠
Another hidden danger of yard dirt is the hitchhikers. Natural topsoil is full of dormant weed seeds, fungal spores (like blight), and microscopic pests (like root-knot nematodes). In the ground, nature balances these out. In a warm, isolated container environment, they can multiply rapidly and decimate your fragile vegetable seedlings.
Building the Perfect Container Mix ✨
For container vegetable gardening, you need a high-quality, lightweight potting mix (often completely soil-less). A premium mix is specifically engineered to balance moisture retention with excellent aeration.
Look for these three critical components in your mix:
-
Moisture Retainers: Peat moss or coconut coir (coco coir is the more sustainable option).
-
Aerators: Perlite (those little white volcanic rocks) or pumice to keep the mix fluffy and ensure excess water drains fast.
-
Nutrients: Aged compost, worm castings, or decomposed pine bark to provide a base level of fertility.
Author’s Tip: The DIY Budget Potting Mix 💡 Buying premium bagged soil for large 15-gallon pots can get expensive. Make your own expert-level mix by combining:
1 part rehydrated Coconut Coir
1 part coarse Perlite
1 part high-quality sifted Compost Mix thoroughly in a wheelbarrow, and you have a world-class, well-draining medium for a fraction of the cost!
Mistake #3: The Watering Seesaw (Overwatering & Underwatering) ⚖️💦
Watering issues are undeniably the number one killer of potted vegetables. In a traditional garden, plant roots can dig deep into the earth to seek out hidden moisture reserves during a drought. In a container, they are entirely at your mercy.
Why Containers Dry Out So Fast ☀️
Unlike the ground, which stays insulated, containers are exposed on all sides. The sun beats down on the sides of the pot, and the wind whips across the foliage, causing rapid evaporation. A black plastic pot sitting on a sunny patio can easily reach 100°F inside the soil, baking the moisture out in a matter of hours. This leads to underwatering, characterized by crispy, brown leaf edges and drooping stems that perk up quickly once watered.
The Dangers of “Drowning” Your Veggies 🛟
On the flip side of the seesaw is overwatering, which usually stems from “loving your plants to death.” Paradoxically, a drowned plant looks a lot like a thirsty plant. When soil is constantly waterlogged, roots suffocate and begin to rot. Because the rotting roots can no longer uptake water, the leaves wilt!
If your plant is wilting, the leaves are turning a pale, sickly yellow, and the soil smells slightly swampy or sour, you are overwatering. Step away from the watering can!
The “Finger Test” and Deep Watering Techniques ☝️
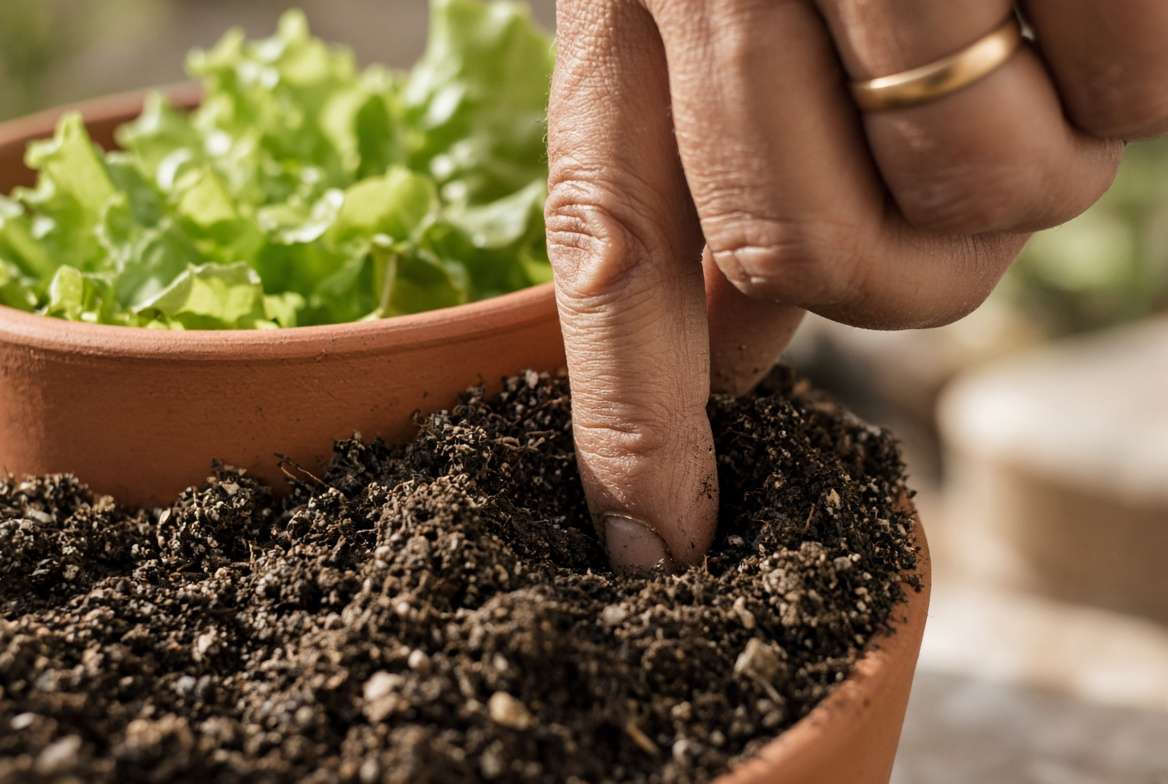
Throw out your watering schedule. Never water simply because “it’s Tuesday.” Instead, you must water based on the plant’s actual needs using the Finger Test.
Stick your index finger into the potting mix up to your second knuckle (about two inches deep).
-
If it feels dry at your fingertip, it’s time to water.
-
If it feels moist, wait another day.
When you do water, water deeply. Pour water evenly over the surface until a steady stream runs out of the bottom drainage holes. This deep soaking ensures the entire root ball is hydrated and flushes out excess fertilizer salts that can build up in the soil.
Pro-Tip 🏆: If you struggle with the watering seesaw, invest in self-watering planters (which have a built-in reservoir at the bottom) or install a simple automated drip irrigation system. Also, add a one-inch layer of organic mulch (like straw or shredded leaves) to the top of your pots to drastically reduce surface evaporation!
Mistake #4: Starving Your Plants (The Nutrient Flush Effect) 🍽️🍅
Vegetables—especially fruiting varieties like tomatoes, peppers, and cucumbers—are incredibly heavy feeders. It takes a massive amount of energy to produce those juicy fruits.
Why Pre-Fertilized Soil Isn’t Enough 📉
Many beginners buy a premium bag of potting mix that boasts “Feeds for up to 6 months!” printed proudly on the bag. Unfortunately, in a vegetable garden, that is mostly marketing fluff.
Because containers require frequent watering, every time water drains out the bottom of the pot, it takes some of the soluble nutrients with it. This is known as the nutrient flush effect. Even the best pre-fertilized soil will run out of gas after about 4 to 6 weeks. If you don’t step in to replenish those nutrients, your plants will suffer from stunted growth, pale foliage, and a total lack of harvest.
Macronutrients 101: N-P-K for Veggies 🧪
When shopping for vegetable fertilizers, you will see three numbers on the bottle (e.g., 5-10-5). These represent Nitrogen, Phosphorus, and Potassium. Here is the expert breakdown of what they do:
-
Nitrogen (N): Promotes lush, green leaf growth. (Great for lettuce, but too much will give you a massive tomato plant with zero tomatoes).
-
Phosphorus (P): Crucial for strong root development and, most importantly, flower and fruit production.
-
Potassium (K): Supports overall plant health, disease resistance, and water regulation.
Setting Up a Winning Feeding Schedule 📅
To achieve a massive harvest, you need a two-part feeding strategy:
-
At Planting: Mix a slow-release, granular organic fertilizer into the potting soil. This provides a steady baseline of nutrients.
-
During the Season: Once the plant begins to set flowers, supplement with a diluted, liquid fertilizer (like fish emulsion, kelp extract, or a liquid tomato feed) every 1 to 2 weeks. Liquid nutrients are immediately available to the plant roots.
Expert Insight 🧐: Beware of fertilizer burn! Over-fertilizing with synthetic chemical fertilizers can scorch plant roots, leaving your plants with crispy, burned leaf tips. Always follow the dosage instructions on the label. Remember: It is always better to under-fertilize slightly than to over-fertilize.
Mistake #5: Ignoring Microclimates and Sunlight Needs 🌤️📍
One of the biggest perks of container gardening is mobility. You can put a pot anywhere! However, the mistake lies in placing the plant where you want it to look pretty, rather than where the plant actually needs to be.
The “Full Sun” Requirement 🌞
Almost all fruiting vegetables require “full sun.” In the gardening world, full sun means a minimum of 6 to 8 hours of direct, unobstructed sunlight per day. If you place a sun-loving pepper plant on a shaded north-facing balcony, it will grow incredibly tall and spindly (leggy) as it stretches desperately for light, and it will likely never produce fruit.
If your space only gets 3 to 4 hours of sun, don’t force tomatoes. Pivot your strategy to shade-tolerant crops like spinach, kale, lettuce, and cilantro.
Beware the Pavement Bake (Heat Stress) 🔥
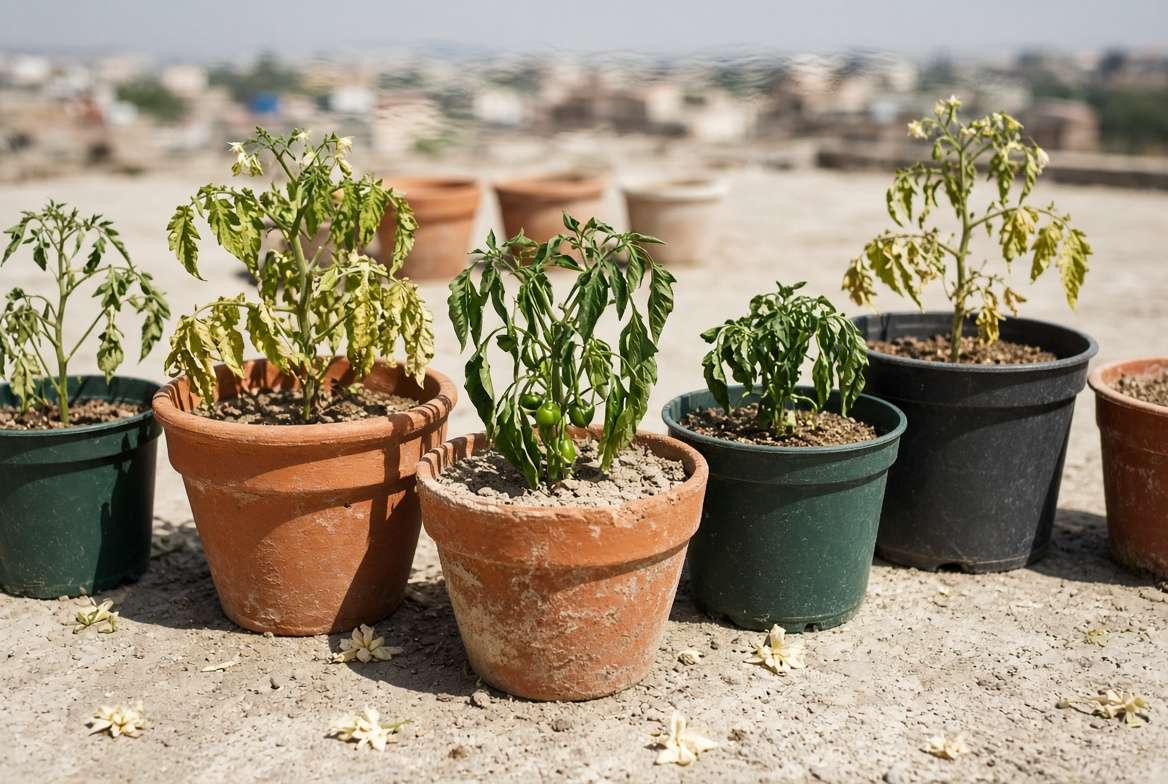
Urban microclimates are tricky. A concrete patio, brick wall, or asphalt driveway absorbs massive amounts of heat during the day and radiates it back out. If your pots are sitting directly on hot pavement in the middle of July, the roots can literally cook.
Signs of heat stress include blossoms drying up and falling off (blossom drop) and leaves rolling inward to conserve moisture.
Shadow Chasing and Pot Placement 🪴
To mitigate heat stress, elevate your pots. Use plant stands, wooden pallets, or wheeled plant caddies to get them off the hot ground and improve airflow underneath.
Wheeled caddies are particularly amazing because they allow you to “chase the sun.” As the summer progresses, the angle of the sun changes. What was a sunny corner in May might be shaded by a tree in August. Putting heavy pots on wheels allows you to easily glide them into the optimal microclimate.
🌟 Bonus Skyscraper Tip: Overcrowding & Ignoring Companion Planting 👯♀️
Because space is limited in container gardening, the temptation to cram three tomato seedlings, two peppers, and a squash into one planter is strong. Resist the urge!
Overcrowding causes intense competition for water and nutrients. Furthermore, tightly packed foliage blocks airflow. Poor airflow combined with trapped humidity is an open invitation for fungal diseases like powdery mildew and blight. Give your plants the breathing room they deserve.
Instead of cramming the same type of heavy feeders together, practice smart companion planting. If you have a large pot with a tall tomato plant, utilize the empty real estate at the soil level by planting a low-growing herb like basil. Basil doesn’t compete deeply for nutrients, acts as a living mulch to shade the soil, and its strong scent helps deter pests like tomato hornworms!
Conclusion: Your Roadmap to a Thriving Container Garden 🗺️🥕
Growing your own food in containers is one of the most rewarding hobbies you can undertake. Nothing beats the taste of a vegetable harvested just feet from your kitchen door.
By avoiding these top 5 mistakes in container vegetable gardening—choosing appropriately sized pots with great drainage, investing in high-quality potting mix, mastering the watering seesaw, feeding your heavy-hitters consistently, and optimizing their sunlight exposure—you are setting yourself up for incredible success.
Remember, gardening is a constant learning curve. A yellow leaf or a dropped blossom isn’t a failure; it’s simply your plant communicating with you. Adjust your care, observe the results, and enjoy the delicious fruits of your labor!
Frequently Asked Questions (FAQ) 🤔💬
How often should I water my vegetable container garden?
There is no set schedule. It depends on your local weather, the size of the pot, and the type of plant. During peak summer heat, small pots or fabric grow bags may need watering every single day, while large 15-gallon pots might only need water every 3 days. Always rely on the “Finger Test” to check moisture 2 inches below the surface before watering.
Can I reuse old potting soil for vegetables next year?
Yes, but you cannot use it exactly as is! By the end of the season, old soil is depleted of nutrients and compacted. To reuse it, dump it into a wheelbarrow, remove any old roots and debris, and revitalize it by mixing in 25-30% fresh compost or worm castings, a handful of slow-release organic fertilizer, and some fresh perlite for aeration. (Note: If a plant died from a fungal disease like blight, discard that soil immediately to avoid spreading the pathogen).
Why are the blossoms falling off my potted tomatoes before they turn into fruit?
This is called “blossom drop,” and it is usually caused by environmental stress. The most common culprits are extreme temperatures (nighttime temps above 75°F or daytime temps above 90°F), inconsistent watering (letting the pot dry out entirely), or a lack of pollination due to high humidity or a lack of wind/bees. Ensure consistent watering and give the stems a gentle shake in the morning to help release pollen!











