
Have you ever looked at your bonsai and thought, “This tree has beautiful branches and nice movement, but the trunk just looks too skinny and young”? 😩 You’re not alone — this is one of the most common frustrations among bonsai enthusiasts. The trunk is the foundation of any great bonsai; it conveys age, strength, and natural power. A thin trunk can make even a well-styled tree appear immature, no matter how perfect the nebari, taper, or ramification.
Training trunk thickness in bonsai is the key to transforming that youthful sapling into a majestic, ancient-looking specimen — and the good news is you don’t have to wait decades passively. With proven, active techniques like sacrifice branches, ground growing, large training pots, and strategic chopping, you can accelerate trunk development dramatically. In this in-depth guide, we’ll cover the science, step-by-step methods, species-specific tips, common pitfalls, and real-world examples so you can achieve thicker, more tapered trunks faster than standard advice suggests. Let’s turn that pencil-thin trunk into a powerful base worthy of admiration! 💪🌲
Understanding How Trunk Thickness Develops in Bonsai 🧠🌿
Trunk girth in bonsai (and trees in general) comes from secondary growth in the cambium layer — the thin, living tissue just under the bark that produces new wood and phloem each growing season. The more energy the tree produces through photosynthesis, the thicker the trunk becomes over time.

Key drivers of rapid thickening include:
- Massive foliage volume — More leaves = more energy production and downward flow to the trunk.
- Unrestricted root space — Larger pots or in-ground planting allow explosive root growth, supporting vigorous top growth.
- Heavy nutrition & sunlight — Full sun (6+ hours daily) and balanced, high-nitrogen fertilizers fuel fast cambium activity.
- Species genetics — Fast growers like Trident maple (Acer buergerianum), Chinese elm (Ulmus parvifolia), or ficus respond quickest, while slower conifers like pines and junipers need patience but reward with durability.
A good rule of thumb for mature-looking proportions: Trunk base diameter should be about 1/6 to 1/10 (or up to 1/12–1/15 for slender styles) of the tree’s total height. For example, a 60 cm (24″) bonsai ideally has a 6–10 cm base trunk for realistic taper and presence. Without active thickening, many hobbyists stay stuck with inverse taper or uniform thinness forever. 🚫
Myth busted: Small bonsai pots don’t “force” miniaturization magically — they severely limit root expansion and thus trunk growth. To build thickness, think big roots first!
Essential Preparation Before Starting Trunk Training 📋🛠️
Before diving into techniques, set yourself up for success:
- Select strong starting material — Young nursery stock, collected yamadori, or air-layered branches with good basal flare potential work best. Avoid weak, leggy seedlings unless you’re fusing trunks.
- Species considerations — Deciduous trees (maples, elms, hornbeams) thicken quickly with aggressive growth. Conifers (pines, junipers) benefit from sacrifice leaders but heal slower from chops.
- Tools & supplies — Large colanders/pond baskets, Anderson flats, or deep training pots; akadama/pumice/lava mix for drainage; high-N slow-release fertilizer; sharp concave cutters, saws, wound sealant; tiles or slabs for nebari if ground-growing.
- Set goals — Measure current trunk caliper at soil level. Decide target thickness (e.g., +2–4 cm), final height, and style. Realistic timeline: 2–8 years depending on method/species.
Core Techniques for Training Trunk Thickness in Bonsai (Ranked by Speed & Control) ⚡🌱
1. Ground Growing / In-Ground Development (Fastest for Maximum Thickness) 🌍🚀
Nothing beats unrestricted roots for explosive growth — many pros consider this the gold standard for serious trunk building.
Step-by-step:
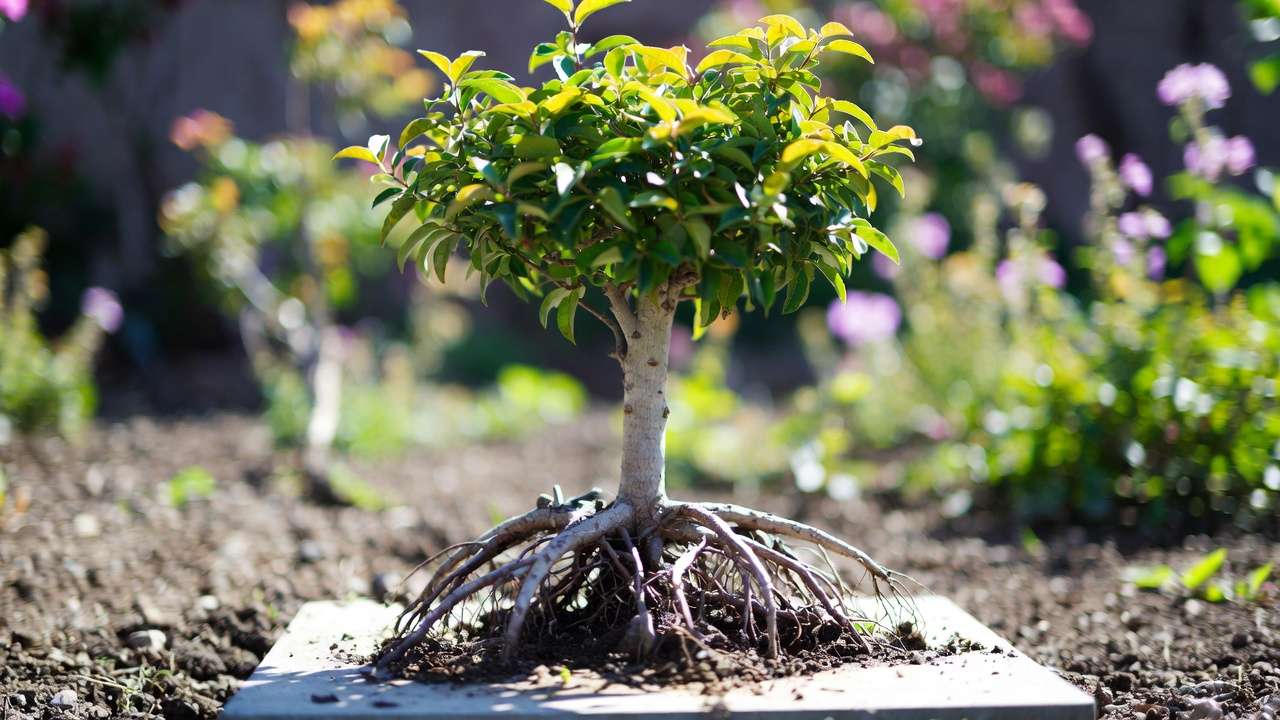
- Plant in open garden soil (rich, well-draining) or over a buried tile/slab to force radial nebari and prevent deep taproots.
- Let grow freely 3–10+ years with minimal pruning (just tip pinch to encourage branching density).
- Fertilize heavily spring–fall; water deeply; full sun.
- Harvest when trunk reaches ~2/3 desired thickness — dig up carefully, prune roots aggressively to bonsai standards.
Pros: Fastest girth gains, excellent nebari, natural taper from wind stress. Cons: Space needed, harder to monitor, potential pest issues. Real example: A Trident maple starter can go from 1 cm to 8–10 cm base in 5–7 years in-ground! 📈
2. Large Training Pots or Pond Baskets (Best for Most Hobbyists) 🪴💨
Controlled yet accelerated — ideal if you lack garden space.
Guidelines:
- Use colanders, pond baskets, or oversized pots (2–3x current root ball) for air-pruning and root spread.
- Soil: 70% inorganic (pumice/akadama) + organics for vigor.
- Encourage growth: No heavy pruning early; heavy feeding (e.g., Biogold or liquid NPK); full sun.
- Up-pot as roots fill; expect 2–5x faster thickening than standard bonsai pots.
This method bridges ground growing and refinement perfectly. 🌟
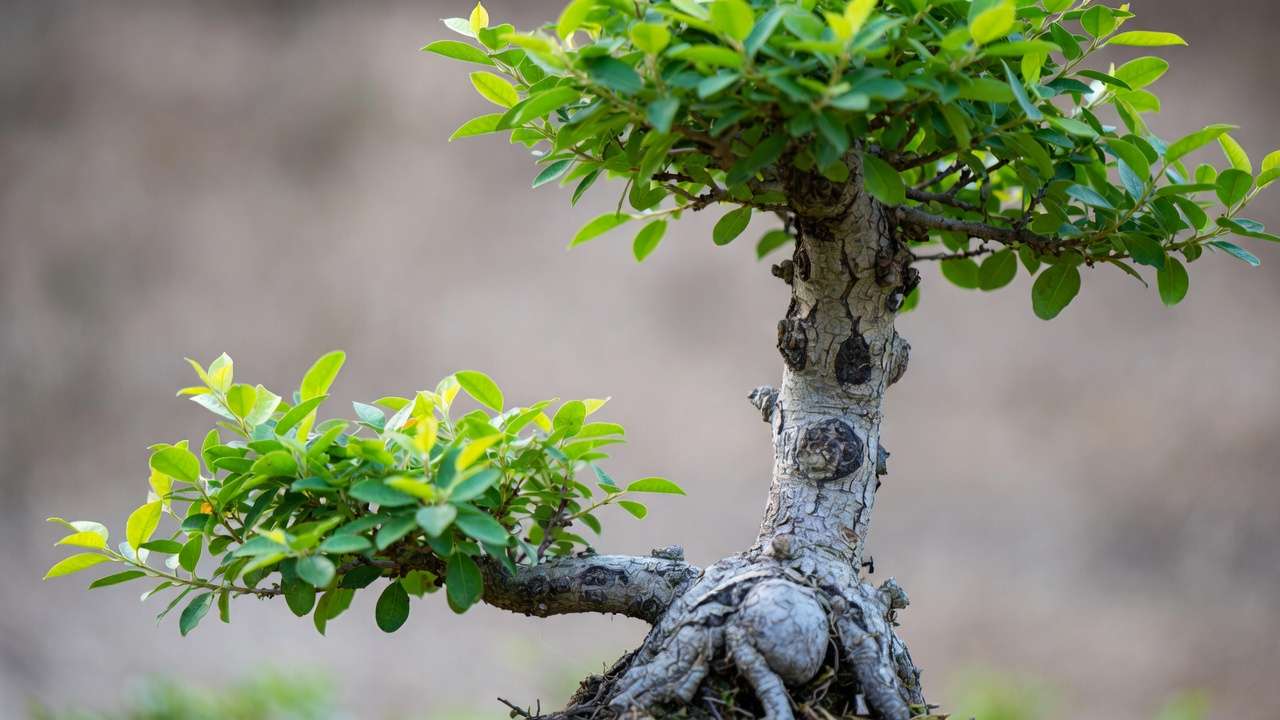
3. Sacrifice Branches & Sacrifice Apex/Leader Method (Controlled & Versatile) 🌿🔧
The most popular controlled technique — leave strong, non-design branches or a leader to grow wildly, pumping energy downward to thicken below.
Step-by-step:
- Identify position: Lower branches thicken base/nebari area; apex/leader thickens entire trunk evenly (preferred for uniform girth).
- Let grow freely 1–3 seasons — no pinching; allow 1–2 m extension.
- Monitor caliper increase below attachment point.
- Remove when target reached: Cut flush/concave, seal large wounds; allow back-budding to heal scar.
Advanced: Use multiple sacrifices sequentially or simultaneously for even development (e.g., 2–3 low branches for base flare). Species tips: Junipers — future jin material; pines — balance with decandling; maples — prune hard post-removal.
This builds beautiful taper without massive chops. 😍
4. Grow-and-Chop / Trunk Chopping Technique (For Dramatic Taper & Thickness) ✂️🔥
This powerful method is especially loved by bonsai artists who want both significant thickness and beautiful natural taper in a relatively short time. It involves letting the tree grow vigorously, then chopping the trunk back hard to stimulate new leaders from lower down — repeating the process to build segmented, tapering sections.
Why it works so well Each chop removes the upper portion (which has become thinner), forcing the tree to push energy into new buds below the cut. The lower section thickens rapidly during the next growth cycle because it now supports a full canopy again. Over 3–6 cycles, you create pronounced taper while gaining substantial girth.
Step-by-step process:
- Grow the tree freely in a large pot or in-ground until the trunk reaches roughly ⅔ of your desired final thickness at the base.
- In late winter/early spring (before buds swell), make a clean, angled cut with a sharp saw or concave cutters — typically at ⅓ to ½ the current height, leaving enough trunk for future branches.
- Seal large wounds immediately with cut paste or wound sealant to prevent drying and infection.
- Encourage back-budding: Place in full sun, fertilize heavily, water consistently. New shoots will emerge from dormant buds along the remaining trunk.
- Select the strongest new leader(s) to become the future apex; remove or subordinate the rest.
- Repeat the process every 1–3 years until you reach target thickness and taper.
Healing & scar minimization tips:
- Cut slightly above a node or branch union to promote callus roll-over.
- On species that heal slowly (pines, junipers), leave a small “step” or collar to encourage faster rolling.
- Apply rooting hormone or cytokinin paste to stimulate buds on stubborn species.
Risks & how to mitigate:
- Dieback: Avoid chopping during hot summer or weak health periods.
- Inverse taper: Always chop higher than previous cuts to maintain base dominance.
- Weak recovery: Support with shade cloth first 2–4 weeks post-chop if needed.
Real example: Many Japanese maple and Chinese elm bonsai reach impressive 8–12 cm bases in just 6–10 years using repeated grow-and-chop cycles combined with sacrifice branches. 📏
(Image: Before-and-after of a Trident maple trunk showing dramatic thickening and taper development after two major chops)
5. Combining Techniques for Optimal Results (Hybrid Approaches) 🔄🌟
The fastest, most impressive results usually come from smart combinations rather than relying on one method alone.
Popular powerful hybrids:
- Ground grow + sacrifice branches → Plant in-ground, develop multiple low sacrifice branches for nebari flare while letting a tall leader thicken the mid/upper trunk.
- Large training pot + grow-and-chop → Build initial thickness in a pond basket, then start chopping once you have enough girth to work with.
- Sacrifice apex + periodic heavy root pruning → Keep the leader growing wildly while gradually reducing pot size every 2 years to transition toward refinement without stalling growth entirely.
- Species-specific combo example: For black pine — sacrifice leader for thickness, followed by decandling + needle-plucking to refine ramification once trunk is set.
These layered approaches can cut development time by 30–50% compared to single-method strategies.
Maintaining Health & Avoiding Common Mistakes During Thickening Phase ⚠️🛡️
Rapid trunk building stresses the tree — keeping it vigorous is non-negotiable.
Nutrition & watering best practices:
- Spring–summer: High-nitrogen fertilizer (e.g., 20-5-5 or organic fish emulsion) every 2–4 weeks.
- Late summer–fall: Switch to balanced (e.g., 10-10-10) to harden off growth.
- Water deeply but allow slight drying between — never let roots stay soggy.
Pest & disease vigilance: Strong, fast-growing trees resist better, but monitor for aphids, scale, spider mites, fungal issues (especially after chops).
Pruning balance rule: Never remove more than ~30–40% of foliage at once during thickening phase — the leaves are your trunk-building factory!
Top 8 mistakes that ruin trunk-building progress:
- Leaving the tree in a tiny bonsai pot too soon 😭
- Wiring and styling too early (restricts cambium expansion)
- Over-pruning foliage to “shape” prematurely
- Insufficient sunlight (less than 6 hours direct)
- Under-fertilizing during peak growing season
- Chopping during active sap flow (bleeding weakens tree)
- Ignoring species needs (e.g., junipers hate heavy N)
- Giving up too early — real thickness takes seasons!
Transitioning to Refinement: From Thick Trunk to Finished Bonsai 🎨✂️
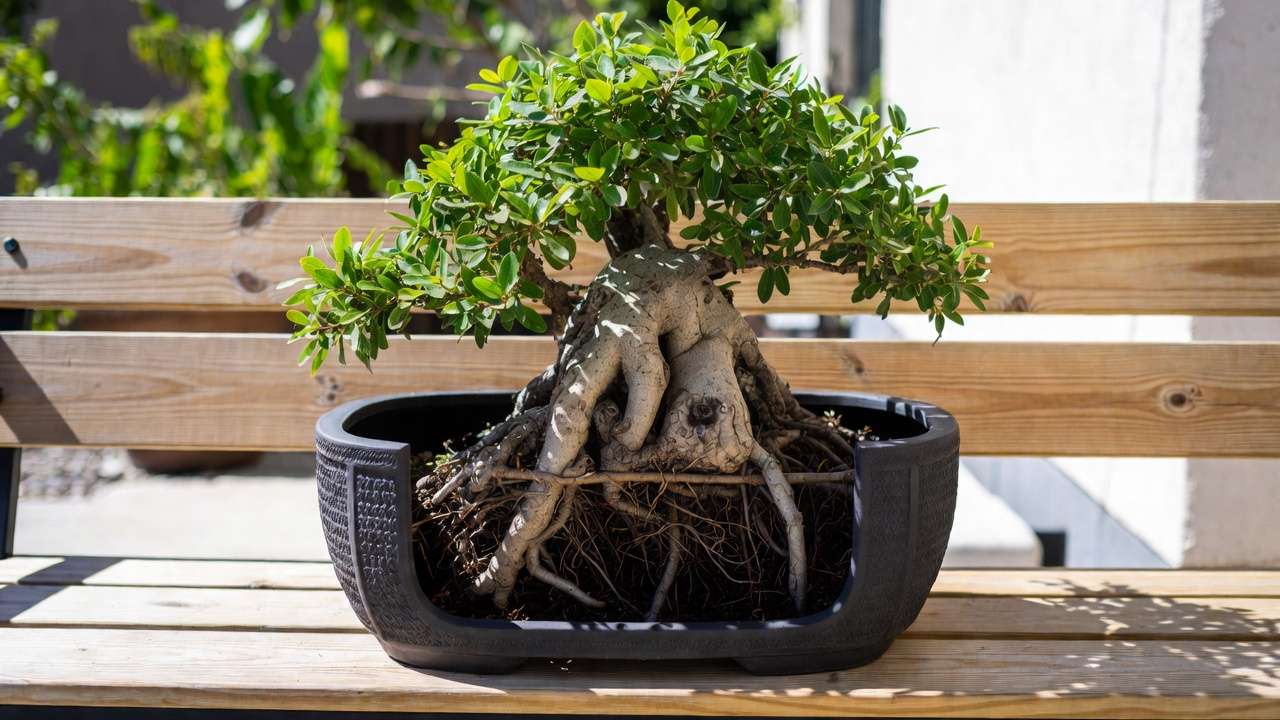
Once your trunk reaches ~80–90% of target caliper and shows nice taper/nebari:
- Remove final sacrifice branches/apex — cut flush, seal, encourage back-budding.
- Begin structural pruning: Select primary branches, create movement.
- First wiring: Set basic shape while wood is still flexible.
- Downsize pot gradually: Move to intermediate training pot, then true bonsai pot after 1–2 seasons of root reduction.
- Shift focus: Ramification, leaf/needle reduction, bark texture enhancement.
This is where the tree truly becomes “bonsai” — but only possible because you invested in a strong trunk foundation first. 🌲👑
Real-World Examples & Case Studies 📖🌟
Seeing is believing — here are some practical, inspiring examples drawn from established bonsai communities, professional demonstrations, and common hobbyist journeys. These illustrate how the techniques above come together in real life.
Case 1: Trident Maple from Nursery Stock to Impressive Trunk (5–7 Years) Started as a 1-year-old field-grown whip (~1 cm base).
- Years 1–3: Planted in-ground over a tile + two low sacrifice branches allowed to grow unchecked. Heavy feeding with organic fertilizer.
- Year 4: Dug up (base now ~5 cm), moved to large pond basket, added a tall sacrifice leader.
- Years 5–6: One major trunk chop at ⅓ height + removal of lower sacrifices. Strong back-budding produced new apex and branches.
- Result: 8–9 cm base diameter, excellent nebari flare, natural taper. Now in intermediate pot and entering refinement. This hybrid approach is one of the most replicated success stories for fast-growing deciduous species.

Case 2: Juniper procumbens ‘nana’ Sacrifice Apex Method (8–12 Years) Common nursery stock started thin and leggy.
- Primary method: Kept a single strong vertical leader growing freely for 4–6 seasons in a deep training pot while developing lower branching structure.
- Secondary: Periodic light root pruning to keep vigor high without stalling.
- Sacrifice leader removed in stages over 2 years once trunk thickened sufficiently.
- Outcome: Solid 6–7 cm base with beautiful deadwood potential (the old leader becomes future jin/shari). The slow-but-steady thickening suits conifers perfectly.
Case 3: Chinese Elm Grow-and-Chop Marathon (6–9 Years) Multiple chops every 1–2 years in large colander pots. Each cycle: Grow tall and bushy → chop back hard → repeat. Combined with high-nitrogen spring feeding and full sun exposure in a subtropical climate. Result: Dramatic basal flare (10+ cm possible), segmented trunk with excellent movement, and rapid callus healing typical of elms.
These examples show that while timelines vary by species, climate, and care intensity, consistent application of active thickening techniques reliably produces results far beyond passive pot culture.
(Image: Side-by-side before-and-after of a Chinese elm showing dramatic trunk thickening after repeated grow-and-chop cycles)
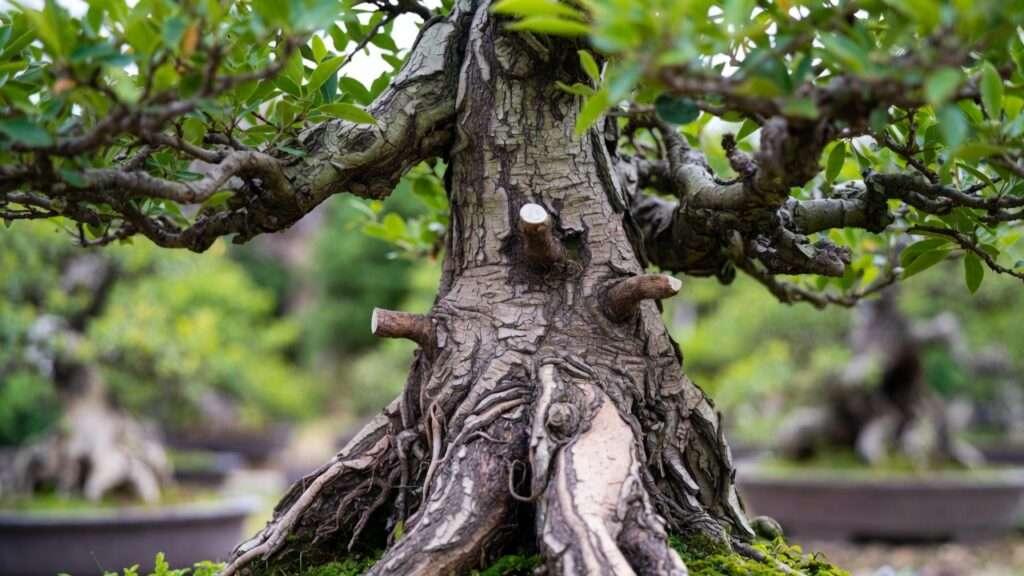
(Image: Close-up of a Trident maple nebari and base flare developed through ground growing over a tile)
FAQs: Training Trunk Thickness in Bonsai ❓💬
How long does it take to thicken a bonsai trunk realistically? It depends on species and method: Fast deciduous (maple, elm) can gain 2–5 cm in 3–7 years with aggressive techniques. Conifers often take 8–15+ years for similar gains. Active methods cut passive waiting time by 50–70%.
Can I thicken a trunk while keeping it in a small bonsai pot? Not effectively. Small pots severely restrict root mass and thus energy production. For serious thickening, use large training containers, colanders, or in-ground until the trunk is nearly finished.
What’s the best species for fast trunk development? Top performers: Trident maple, Japanese maple, Chinese elm, ficus (subtropical/tropical), cotoneaster, privet, some hackberries. Among conifers: Japanese black pine and some junipers respond reasonably well with sacrifice leaders.
Will sacrifice branches ruin my tree’s final design? No — if removed properly. They are temporary tools. Strategic placement and clean removal (with back-budding encouraged) leave minimal scarring. Many future jins, deadwood features, or branch pads come from old sacrifice growth.
How do I fix inverse taper that develops during thickening? Prevent it by always maintaining stronger growth below any branch unions or chop points. If it happens: Use sacrifice branches lower on the trunk or perform a low trunk chop to re-establish base dominance.
Is heavy fertilizer safe during trunk building? Yes — when balanced and species-appropriate. High nitrogen drives vegetative growth (which we want), but taper off in late summer to harden wood. Over-fertilizing weak or recently chopped trees can cause tip burn.
Conclusion & Next Steps 🔥🌲
Building trunk thickness is the single biggest investment you can make in your bonsai’s future beauty and presence. A powerful, well-tapered trunk with good nebari turns an average tree into a showpiece that commands attention — and it’s achievable much faster than most beginners realize.
The key takeaways:
- Prioritize foliage mass, root space, sunlight, and nutrition above all else during the thickening phase.
- Choose the right method (or hybrid) for your species, space, and timeline — ground growing wins for speed, sacrifice branches for control, grow-and-chop for dramatic taper.
- Be patient but proactive: Measure progress yearly, avoid early refinement, and protect tree health fiercely.
Start today — even one strong sacrifice branch or a move to a larger training pot can set your tree on a dramatically better trajectory. Your future self (and every visitor to your display table) will thank you.
What technique are you planning to try first? Drop a comment below with your species and current trunk size — I’d love to give personalized pointers! 👇🌿
Happy thickening, and may your bonsai grow strong and majestic! 🌳💚


