
Imagine this: Your spring garden is bursting with crisp lettuce, vibrant spinach, tender peas, and broccoli heads ready for harvest. But as temperatures climb and days lengthen, those once-lush greens start bolting, turning bitter, and going to seed faster than you can say “summer salad.” 😩 Suddenly, your beds look sparse, production drops, and you’re left wondering how to fill the gap without losing precious growing time.
This is the exact moment many home gardeners face a frustrating transition slump. The good news? Transitioning from cool-weather crops to warm-weather crops doesn’t have to mean bare soil or missed harvests. With smart planning, you can create a seamless shift that keeps your garden productive, your soil healthy, and your plate full of fresh produce all season long.
In this in-depth guide, I’ll walk you through every step of successfully transitioning from cool-weather crops (like leafy greens and brassicas) to warm-weather crops (think tomatoes, peppers, cucumbers, and beans). As a horticulturist with over 15 years of experience working with home gardeners, university extension programs, and sustainable farming practices, I’ve helped countless people avoid common pitfalls and maximize their yields. We’ll cover timing, soil prep, interplanting techniques, pest management, and more — drawing from proven methods recommended by sources like Penn State Extension and experienced kitchen gardeners.
Whether you’re in a raised bed setup, traditional rows, or even containers, this skyscraper-level resource will give you more actionable insights than typical blog posts. Let’s turn that seasonal handoff into your most abundant garden yet! 🍅🌶️

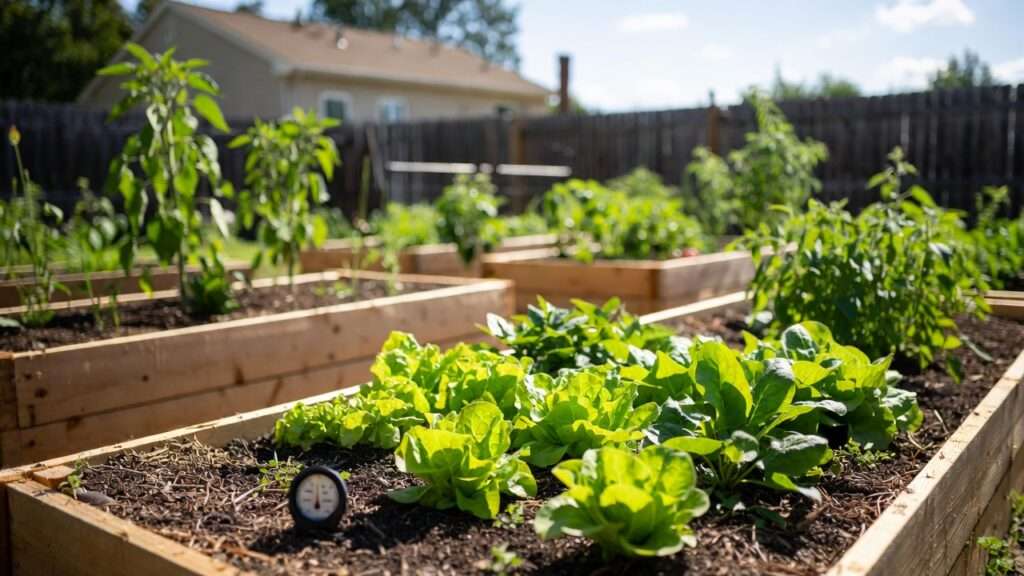
(These images show beautiful raised bed transitions and productive vegetable layouts to inspire your own garden makeover! 🌿)
Understanding Cool-Weather vs. Warm-Weather Crops 🥬 vs. 🌶️
To transition successfully, you first need to know exactly what you’re working with. Cool-weather crops and warm-weather crops have vastly different needs, and misunderstanding them leads to the most common failures.
What Are Cool-Weather Crops? (And Why They Bolt in Heat)
Cool-season vegetables thrive in temperatures between 40–70°F (4–21°C), preferring mild days and cool nights. They’re fast growers that excel in spring and fall but struggle when heat arrives. Many are prone to bolting — when plants rush to flower and seed in response to rising temperatures or long days, making leaves bitter and tough.
Common examples include:
- Leafy greens: Lettuce, spinach, kale, Swiss chard, arugula
- Brassicas: Broccoli, cauliflower, cabbage, Brussels sprouts
- Roots: Radishes, carrots, beets
- Legumes: Peas, fava beans
- Others: Cilantro, dill, parsley
Signs it’s time to transition: Bolting stems, bitter flavor, yellowing leaves, slowed growth, or pest buildup as plants weaken.
What Are Warm-Weather Crops? (Heat Lovers That Thrive in Summer)
Warm-season (or hot-season) crops demand soil temperatures above 60°F (15°C) and air temps consistently over 70°F (21°C). They’re frost-sensitive and love full sun, warm nights, and plenty of heat units to produce fruit.
Popular examples:
- Nightshades: Tomatoes, peppers, eggplant
- Cucurbits: Cucumbers, zucchini, squash, melons
- Beans: Bush beans, pole beans
- Others: Corn, okra, basil, sweet potatoes
These plants are tender and won’t survive frost, so timing is critical — plant too early, and cold shock stunts or kills them.
Understanding these differences helps you decide what stays, what goes, and when to introduce the heat lovers. This knowledge alone prevents many transition disasters!
Timing Your Transition Perfectly ⏰
The biggest secret to a smooth shift? Timing. Get this right, and your garden stays productive; get it wrong, and you risk lost weeks or dead plants.
Know Your Local Last Frost Date (And First Heat Waves)
Your average last frost date is the key calendar marker. Find it via local agricultural extension services, tools like the Old Farmer’s Almanac, or apps (e.g., USDA Plant Hardiness Zone Map). For safety, wait 1–2 weeks past this date for tender warm-season crops.
Also track upcoming heat waves — many cool crops bolt when daytime highs exceed 80–85°F consistently.
Monitor Soil Temperature – The Real Game-Changer
Air temperature gets the headlines, but soil temperature dictates germination and root growth. Most warm-season seeds need soil at 65–70°F (18–21°C) minimum; tomatoes prefer 60–65°F+, peppers 70–85°F.
Use a soil thermometer (inexpensive and essential!) Insert it 4–6 inches deep in the morning for an accurate reading.
Tips to warm soil faster:
- Black plastic mulch to absorb heat
- Raised beds (warm quicker than ground level)
- Dark compost layers
- South-facing slopes

(These photos show soil thermometers in action — a simple tool that prevents planting too early! 📏🌡️)
Watch for Seasonal Cues in Your Garden
Beyond dates, observe your plants: Bolting greens, peas finishing, or spinach wilting signal go-time for warm crops.
Step-by-Step Transition Process (Core How-To) 🚀
Now comes the actionable part you’ve been waiting for. Follow these five detailed steps to make your seasonal handoff smooth, productive, and nearly gap-free. This method draws from intensive gardening techniques like those used in biointensive and French intensive systems, plus recommendations from cooperative extension services across the U.S.
Step 1: Assess What Can Stay (Don’t Rip Everything Out!)
Resist the urge to clear every bed at once — that’s a common mistake that creates unnecessary bare soil and lost production. Many cool-season crops can handle early summer heat or even benefit from partial shade provided by incoming warm-season plants.
What to keep:
- Heat-tolerant greens: Mature kale, collards, Swiss chard, and certain mustard greens often continue producing into early summer.
- Root crops: Carrots, beets, and parsnips can stay in the ground longer; harvest as needed.
- Biennials/perennials: Some brassicas (like sprouting broccoli) or herbs may rebound in fall.
- Quick finishers: Pull radishes, spinach, or lettuce heads that are bolting or done.
Quick decision checklist:
- Is the plant still producing edible parts? → Keep harvesting.
- Is it bolting badly and shading new transplants? → Remove.
- Does it show disease/pest pressure? → Compost or dispose (don’t compost diseased material).
By leaving strategic “nurse” plants, you maintain living roots that protect soil structure and feed beneficial microbes.
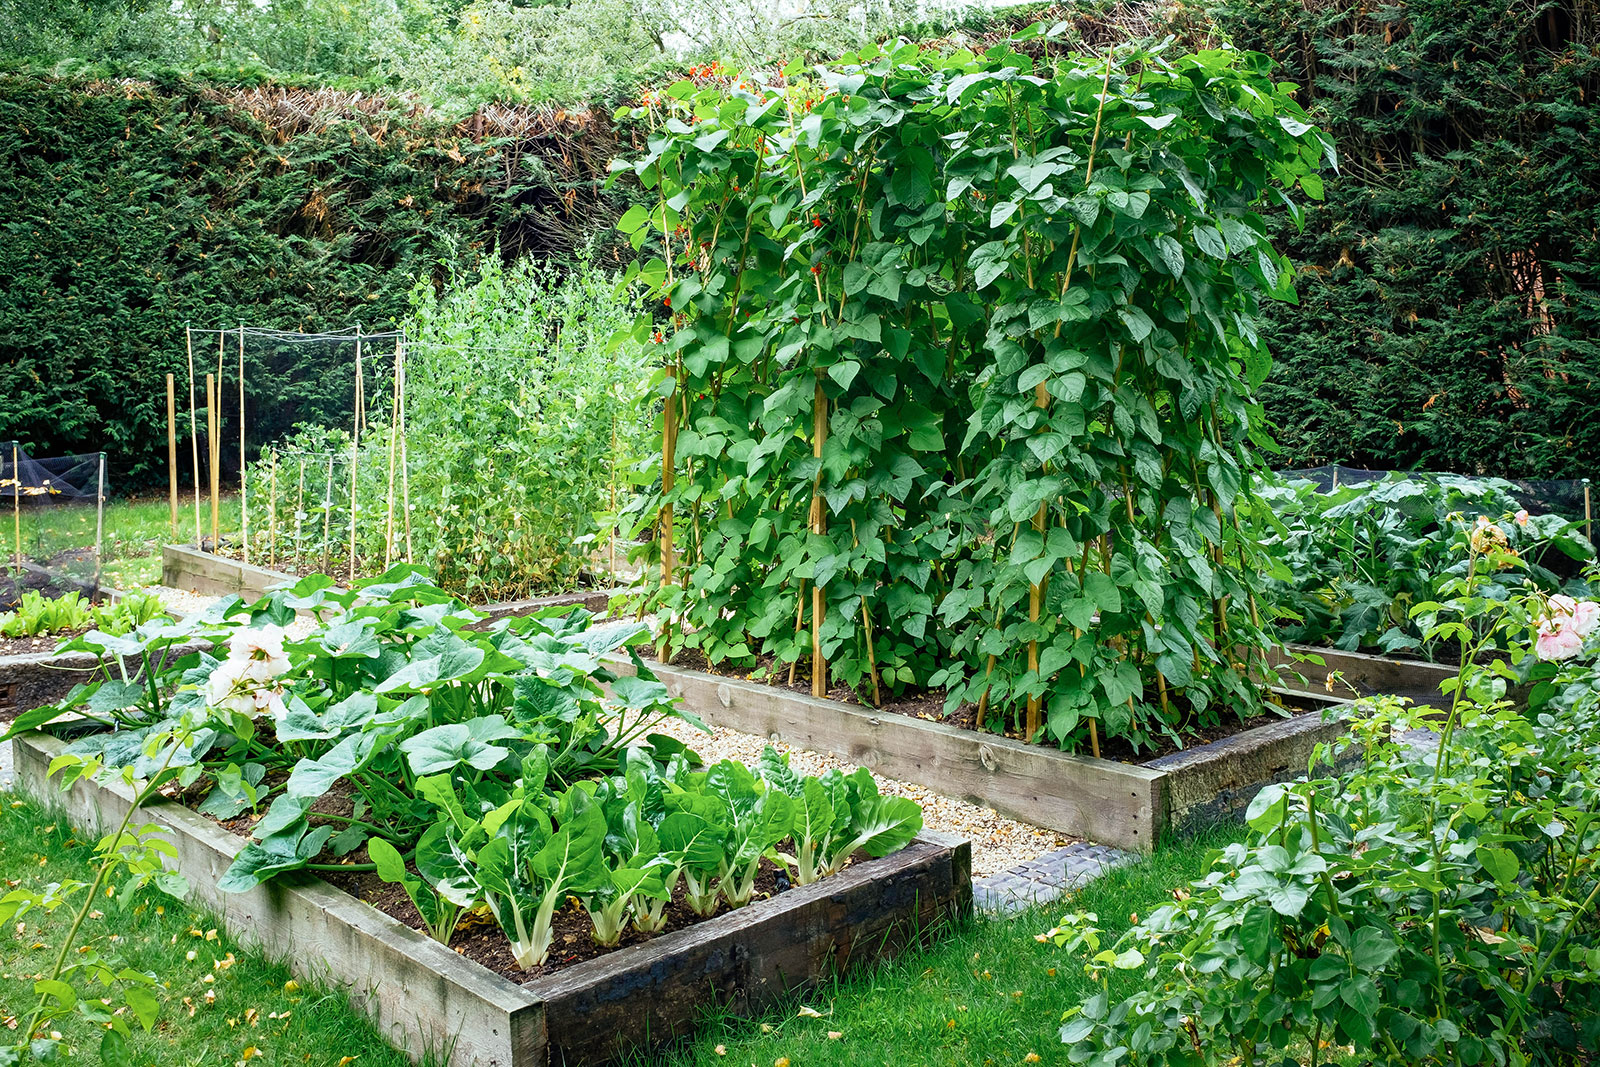
(These images show beautiful examples of mixed beds with lingering cool crops alongside emerging warm-season growth — notice how nothing is completely cleared! 🌿)
Step 2: Harvest and Prep Existing Beds
Once you’ve decided what stays, harvest remaining cool crops gently to avoid compacting soil.
- Cut greens at soil level (leave roots to decompose).
- Pull roots carefully with a garden fork.
- Remove debris: Compost healthy tops/stems; discard diseased parts.
Next, refresh the soil — this is crucial for warm-season heavy feeders like tomatoes and peppers.
Amendments to add:
- 2–4 inches of high-quality compost or aged manure for nutrients and structure.
- Balanced organic fertilizer (e.g., 4-4-4 or fish emulsion) — warm crops love phosphorus for fruit set.
- Optional: Worm castings or mycorrhizal inoculants to boost root health.
Lightly fork or broadfork the top 6–8 inches to incorporate amendments without deep tillage (no-till preserves soil life).
Step 3: Master Interplanting & Succession for Zero Downtime
This is the secret sauce for maximum harvest success: overlap crops so new plants grow while old ones finish.
Interplanting examples:
- Plant tomato or pepper seedlings between rows of maturing cabbage or broccoli — the brassicas provide temporary shade and wind protection.
- Sow bush beans or cucumbers near finishing peas — peas fix nitrogen that benefits the legumes.
- Tuck basil or marigolds among tomatoes for pest repulsion and flavor enhancement.
Succession planting:
- Follow quick 30–45 day crops (radishes, lettuce) with beans or zucchini.
- Stagger sowings every 2–3 weeks for continuous supply.
Spacing guidelines (adjust for your varieties):
- Tomatoes: 18–24″ apart, interplant with lettuce or chard if space allows.
- Peppers: 12–18″ centers.
- Cucumbers: 12–18″ in hills or trellised.
Companion planting bonus: Marigolds deter nematodes; nasturtiums trap aphids.

(Companion and interplanted beds like these keep your garden full and thriving during the shift! 🌼)
Step 4: Transplant or Direct-Sow Warm-Season Stars
With beds prepped, it’s planting time.
- Hardening off: Gradually expose indoor-started seedlings to outdoor conditions over 7–10 days.
- Transplanting: Dig holes twice the root ball width, add compost, water deeply. Plant tomatoes deep (bury stems to encourage roots).
- Direct-sowing: Beans, cucumbers, squash, corn — sow when soil is warm enough; thin seedlings later.
Immediate care:
- Water in thoroughly (1–2 inches).
- Apply 2–3 inches of organic mulch (straw, shredded leaves, or grass clippings) around plants to retain moisture and suppress weeds.
Step 5: Protect New Plants During the Shift
The transition window can bring temperature swings or pests.
- Use shade cloth (30–50% shade) over tender transplants for the first 1–2 weeks in hot sun.
- Row covers or cloches if a late cool snap threatens.
- Monitor daily for wilting — consistent moisture is key.
Advanced Tips for Maximum Yields & Garden Health 🌟
Once the basic transition is complete, these pro-level strategies help you push your garden to the next level of productivity, resilience, and sustainability.
Soil Health Strategies During Transition
Living roots are your garden’s best friend year-round. During the shift:
- Avoid leaving large areas bare for more than a week — bare soil loses moisture, invites weeds, and lets nutrients leach.
- If you do have temporary gaps, broadcast a fast-growing cover crop like buckwheat, cowpeas, or sunn hemp (warm-season nitrogen-fixers) that you can chop and drop in 4–6 weeks.
- Practice no-till or minimal-till: Use a broadfork to aerate without flipping soil layers, preserving fungal networks and earthworms.
- Rotate crop families: Don’t follow brassicas with more brassicas; move nightshades (tomatoes/peppers) to where legumes or greens were growing to break pest and disease cycles.
Watering, Mulching, and Pest Management
Summer heat changes everything:
- Watering: Shift to deep, infrequent watering (1–1.5 inches per week) early in the morning to reduce evaporation and fungal issues. Drip irrigation or soaker hoses are ideal.
- Mulching: Maintain 2–4 inches of organic mulch at all times. Straw, shredded leaves, composted wood chips, or grass clippings (weed-free) suppress weeds, moderate soil temperature, and feed soil biology as they break down.
- Pest & disease watch during transition:
- Aphids explode on stressed transitioning plants → Blast with strong water stream, introduce ladybugs, or spray neem oil.
- Flea beetles love young brassica transplants and new eggplant → Use row covers until plants are established.
- Powdery mildew on cucurbits → Improve airflow, avoid overhead watering, apply diluted milk spray (1:9 milk:water) preventatively.
Regional Variations & Adaptations
Your climate dictates tweaks:
- Humid Southeast (e.g., zones 7–9): Focus on disease-resistant varieties (e.g., ‘Celebrity’ tomato, ‘Clemson Spineless’ okra). Use trellises for better airflow.
- Dry Southwest (zones 8–10): Prioritize drought-tolerant varieties (e.g., ‘Black Krim’ tomato, Armenian cucumber). Heavy mulching and shade cloth are non-negotiable.
- Short-season North (zones 4–6): Start warm crops indoors 6–8 weeks early, use black plastic to warm soil, choose fast-maturing varieties (e.g., ‘Early Girl’ tomato, ‘Bush Pickle’ cucumber).
- Container/urban gardeners: Use at least 5–7 gallon pots with excellent drainage. Transition by moving pots of cool crops to shadier spots while placing warm-crop containers in full sun.
(Mulched, thriving summer beds like these show what consistent care during transition can achieve! 🌿🍅)
Common Mistakes to Avoid (And How to Fix Them) ❌
Even experienced gardeners slip up — here are the top pitfalls and quick remedies:
- Pulling everything out too early → Leaves bare soil and lost production. Fix: Use the “assess what can stay” checklist and interplant aggressively.
- Planting warm crops before soil is warm enough → Stunted growth or death. Fix: Always check soil temperature — don’t trust the calendar alone.
- Skipping soil amendments → Nutrient-deficient plants, poor fruit set. Fix: Always add compost + balanced fertilizer before planting heavy feeders.
- Overcrowding during interplanting → Competition for light/water/nutrients. Fix: Follow spacing guidelines and thin ruthlessly.
- Forgetting to harden off transplants → Sunburn or shock. Fix: 7–10 day gradual exposure schedule.
Avoid these, and your transition will feel effortless.
Real-Life Examples & Case Studies 📸
Example 1: Standard Raised Bed Transformation
Spring layout: 4×8 ft bed with lettuce, spinach, radishes, and broccoli. Mid-May: Harvested bolting greens/radishes, left two rows of kale and chard. Planted: 4 tomato plants (deep-planted), 6 peppers, and basil in between. Result: Continuous greens through June, tomatoes ripening by July, no bare soil.
Example 2: Small-Space Urban/Balcony Garden
Two 20-gallon grow bags + window boxes. Spring: Peas climbing trellis + mixed greens. Transition: Peas finished → replaced with bush beans and cucumbers trained vertically. Greens interplanted with dwarf cherry tomatoes. Result: Fresh salads through June, beans and tomatoes all summer in under 10 sq ft.
(These real setups prove the method works at any scale!)
Frequently Asked Questions (FAQ) ❓
When exactly should I start warm-season crops? Start transplants indoors 6–8 weeks before your last frost date. Transplant outdoors when soil reaches 60–70°F (check with thermometer), usually 1–2 weeks after last frost.
Can I save bolting cool crops? Sometimes — harvest outer leaves continuously, provide afternoon shade, or let them flower to attract pollinators (then pull). Most taste bitter once bolted.
What if I miss the transition window? Plant fast-maturing warm crops (bush beans, zucchini, radishes as a bridge) or use shade cloth to extend cool crops a bit longer.
Best warm-season crops for beginners? Bush beans, zucchini, cherry tomatoes (‘Sungold’ or ‘Sweet 100’), and basil — forgiving, productive, and fast.
How do I handle overlapping harvests? Harvest cool crops regularly to reduce shading/competition. Pick warm-crop fruits young to encourage more production.
Conclusion & Call to Action 🌈
A successful transition from cool-weather crops to warm-weather crops is one of the most rewarding parts of home gardening. When done right, you eliminate the dreaded “June gap,” keep your soil alive and active, reduce weed pressure, and enjoy fresher, more abundant harvests from spring straight through fall.
You now have a complete, expert-backed roadmap — more thorough and practical than most guides out there. Grab your soil thermometer, sketch your beds, and start planning today. Your summer (and fall!) garden is about to level up.
Have you tried interplanting or succession during your own transition? Drop your favorite tip, biggest lesson learned, or a photo of your garden shift in the comments below — I’d love to hear from you! 💚
Subscribe for more seasonal plant care guides, and happy gardening — you’ve got this! 🌿🍅🌶️


