
Have you ever rushed over to your favorite houseplant, excited by the new growth, only to be heartbroken by those dreaded brown, crispy tips?
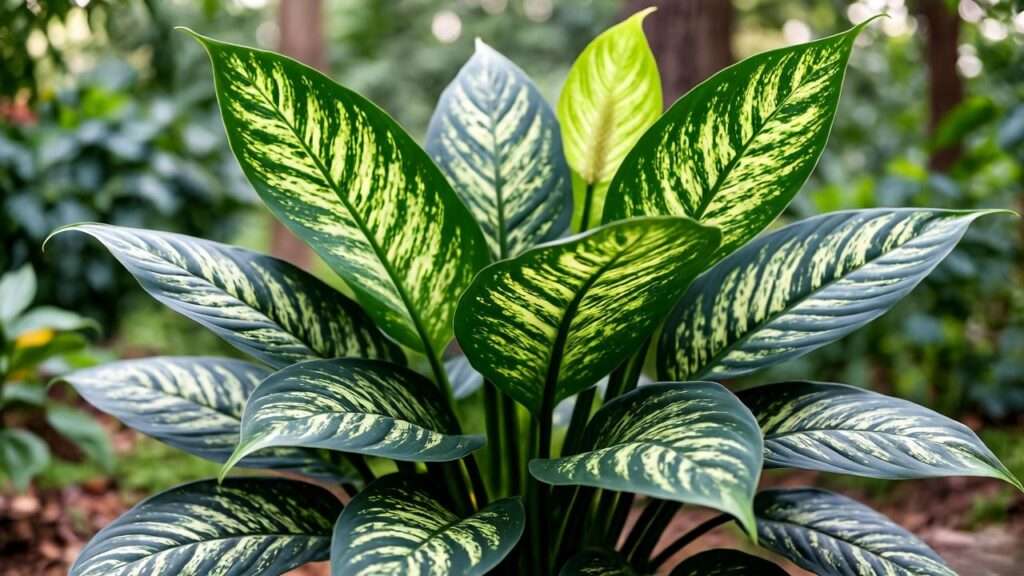
For owners of the stunning $\text{Variegated Peace Lily Plant}$ (a dazzling mutation of Spathiphyllum), this frustration is incredibly common. The striking white or creamy patterns on the leaves—the very feature that makes this plant so desirable—also makes it dramatically more sensitive than its all-green relatives. These beautiful white sections, lacking the protective pigment chlorophyll, are highly susceptible to the subtle stresses of home life: low humidity, poor water quality, and inconsistent care.
You didn’t buy this gorgeous specimen to watch it slowly deteriorate. You want those leaves to be crisp, bright, and thriving.
This is the only guide you need. As a plant care expert, I’ll take you deep into the unique science of variegated foliage and provide actionable, step-by-step solutions for every problem, especially that stubborn tip burn. Stop guessing and start healing.
II. Understanding Variegation: Why Your Plant Needs Special Attention 💡
A Peace Lily is, by nature, a tough and forgiving plant. Its variegated cousin, however, is a highly specialized version that requires specialized knowledge. Understanding why it has white patches is the first step to mastering its care.
H2: What Makes Variegated Different? (Expert Insight)
H3: The Science of White Patches
Variegation in plants like the $\text{Variegated Peace Lily Plant}$ is a genetic mutation where some plant cells are unable to produce chlorophyll, the green pigment essential for photosynthesis. The white or cream parts of your plant are, essentially, non-functional when it comes to creating food from sunlight.
This physiological difference has a profound impact:
- Reduced Photosynthetic Capability: Since only the green parts are feeding the plant, the overall plant has to work harder and requires more optimal conditions to sustain itself.
- Increased Sensitivity: Chlorophyll acts as a natural sunscreen. The white sections lack this protection, making them extremely vulnerable to direct light, excessive heat, and chemical exposure (like fluoride or mineral salts) which quickly leads to tip burn and browning.
H3: The Trade-Off
The downside of this beautiful color break is that variegated varieties are inherently less hardy than their monochromatic counterparts. They require more specific light, higher humidity, and cleaner water to ensure the health of the delicate white areas. If you treat your variegated variety like a standard Spathiphyllum in a dark corner, the plant will likely suffer from browning tips and ultimately, reversion (where the plant pushes out all-green leaves to maximize survival).
H2: Choosing the Right Cultivar (Variegated Varieties)
While most $\text{Variegated Peace Lily Plants}$ you find are simply beautiful, un-named sports, a few specific named cultivars offer distinct variegation patterns.
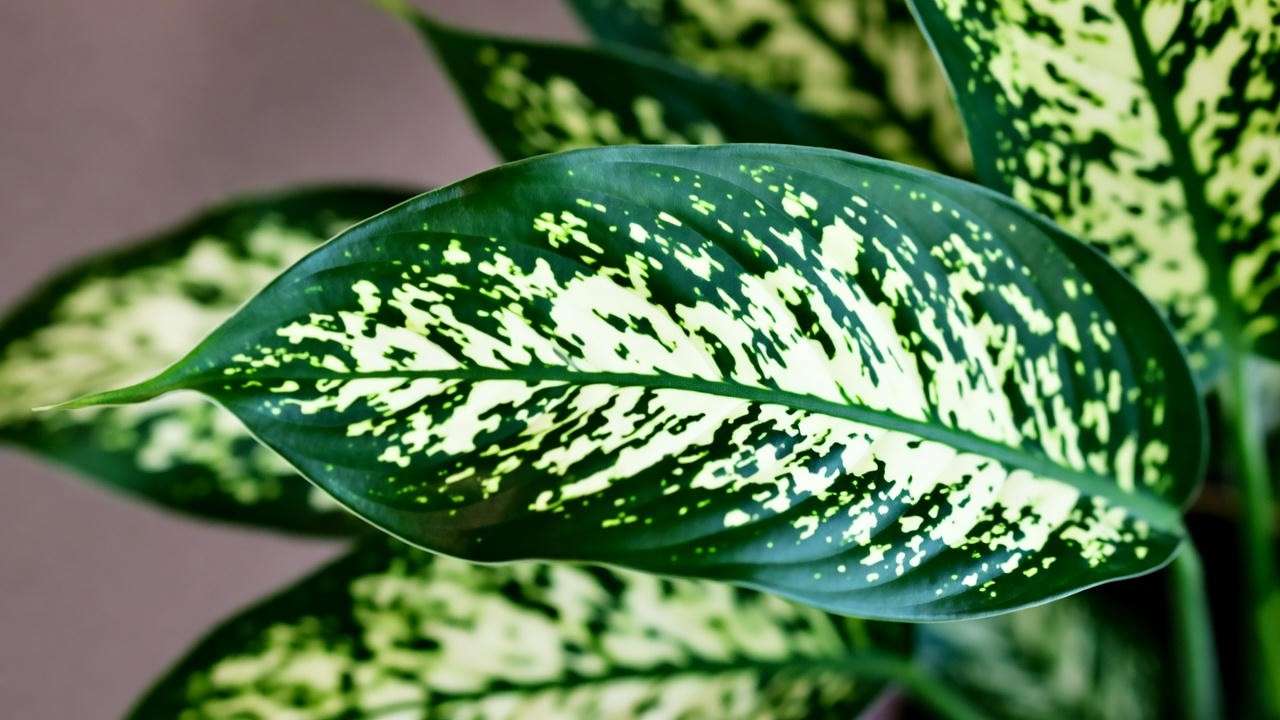
- ‘Domino’: One of the most common and recognizable, featuring an attractive, speckled, dappled, or spotty white pattern over the leaves. It’s generally a more vigorous grower than other variegated types.
- ‘Silver Streak’: Known for its striking, almost silver-white, chunky sections, often appearing in streaks or large swaths. This type can be highly sensitive to light burn due to the large white areas.
Expert Insight: When buying a $\text{Variegated Peace Lily Plant}$, always choose the one with the highest concentration of variegation on the newest leaves. This indicates a stable mutation and a strong, light-optimized start.
III. The Core Four: Essential Care Requirements for Success 🌱
The vast majority of problems with your $\text{Variegated Peace Lily Plant}$—especially brown tips—can be traced back to one of the following four environmental factors. Mastering these is non-negotiable for long-term health.
H2: Mastering Light: The Key to Variegation and Health ☀️
Light is the most critical element for a variegated plant. Too little, and it reverts to green; too much, and the white patches burn.
H3: The Goldilocks Zone (Bright, Indirect Light)
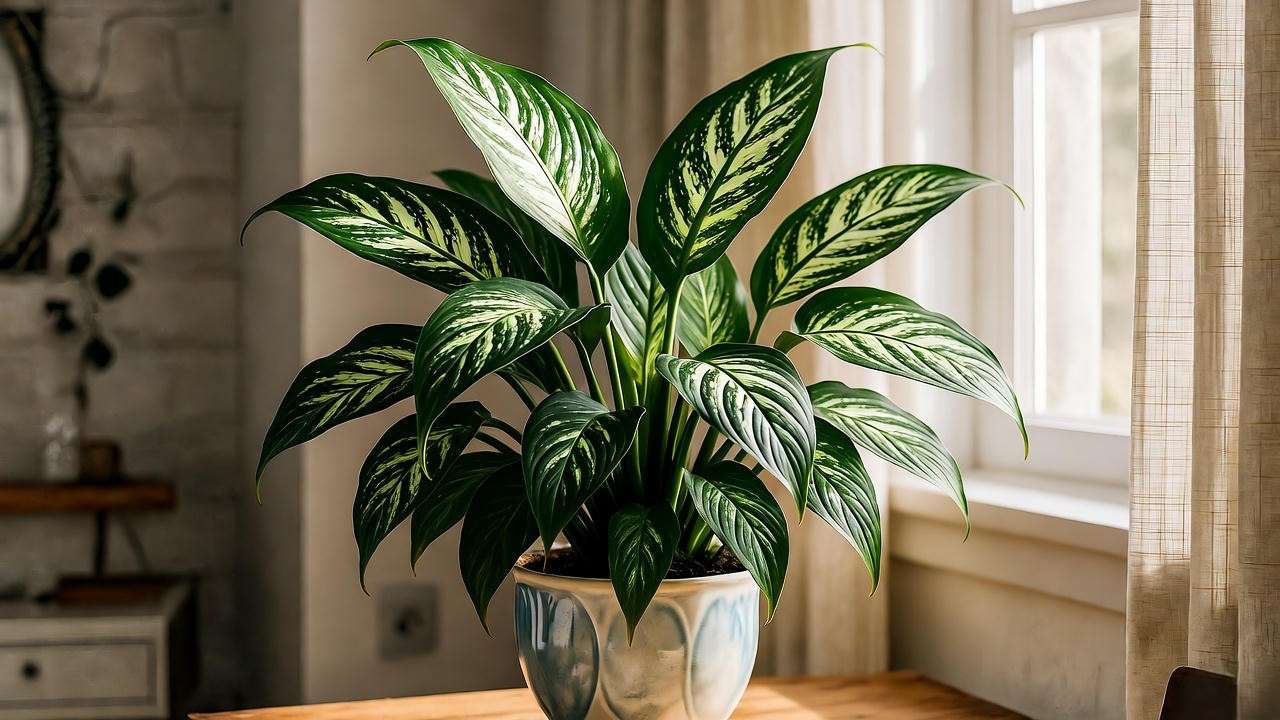
The sweet spot for the $\text{Variegated Peace Lily Plant}$ is bright, indirect light.
- Defining Indirect Light: This means the plant should be placed near a sunny window (South or West-facing is ideal) but must never receive direct, unfiltered sun hitting its leaves, especially during the middle of the day.
- Ideal Placement: A spot several feet away from a sun-drenched window, or directly in front of an East-facing window (which receives softer morning sun), is best. The light should be bright enough to comfortably read by all day.
H3: The Low-Light Myth
Standard Peace Lilies can survive in remarkably low light, but this is a survival state, not a thriving one. For a $\text{Variegated Peace Lily Plant}$:
- Variegation Fades: In deep shade, the plant will “panic” and produce all-green leaves (reversion) to increase its meager light-harvesting capacity, sacrificing the white beauty you cherish.
- No Blooms: Low light significantly reduces the chance of the iconic white spathes (flowers) appearing.
Quick Tip: Use a sheer curtain to your advantage. Placing your plant directly in a window filtered by a thin, white curtain provides the intense, yet diffused, light needed to maintain and enhance the vibrant white variegation without risk of sun scorch.
H2: Watering Wisdom: Avoiding the Number One Killer 💧
Peace lilies are famous for their dramatic droop when thirsty, which often encourages owners to water too frequently, leading to the true killer: root rot.
H3: The “Peace Lily Droop” Fallacy
While the plant’s theatrical wilting is a clear sign of thirst, waiting for the plant to dramatically droop is actually a form of water stress. Repeatedly allowing the soil to dry out completely and then soaking it can damage the root hairs and contribute to brown tips.
The real watering danger is overwatering. The most common scenario is watering based on a schedule, not the plant’s actual needs.
H3: How to Check the Soil (The Finger Test)
You must check the moisture level of the soil itself, not just the leaves.
- Test: Stick your finger 1–2 inches deep into the soil.
- Water Only When: The soil at that depth feels barely moist or almost dry. If you feel dampness, wait another day or two.
Expert Warning: The dangers of tap water. Peace lilies are highly sensitive to salts, chlorine, and especially fluoride found in municipal tap water. These chemicals accumulate in the leaf margins and tips, causing that telltale, symmetrical brown tip burn. To eliminate this issue entirely, switch to using:
- Filtered Water
- Distilled Water
- Collected Rainwater
If you must use tap water, let it sit out for 24 hours to allow chlorine to dissipate (though this won’t remove fluoride).
H2: Humidity & Temperature: Creating a Tropical Oasis 🌡️
Peace lilies, including the variegated variety, are native to the tropical rainforest floor. Your average house air is often too dry, especially in winter.
H3: The 50%+ Humidity Target
Humidity is a primary factor in preventing brown tips. When the air is too dry, the plant loses moisture faster than the roots can pull it up, and the first place that dehydration manifests is the leaf tips.
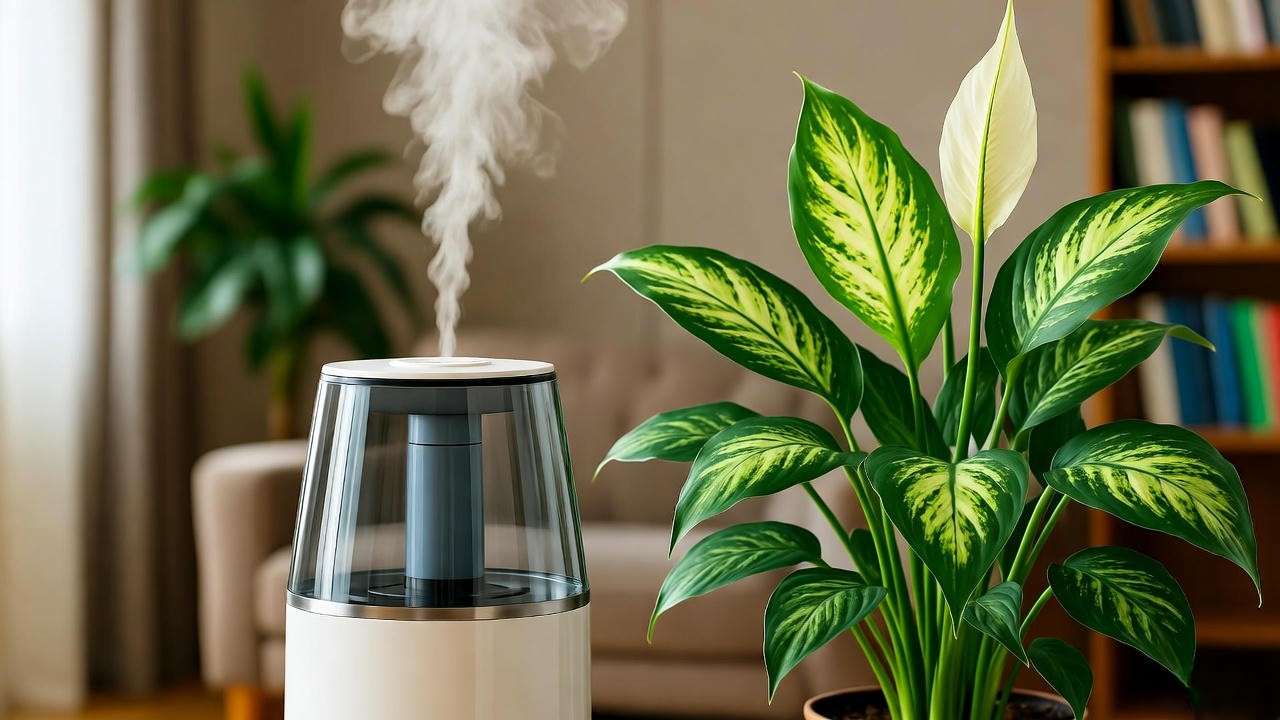
- The Target: Aim for 50% relative humidity or higher.
- Effective Methods:
- Humidifier: The most effective solution is a dedicated cool-mist humidifier placed near the plant.
- Grouping: Place your $\text{Variegated Peace Lily Plant}$ near other plants; as they collectively release moisture, they create a beneficial microclimate.
- Pebble Tray: Place the pot on a tray of pebbles filled with water, ensuring the bottom of the pot doesn’t touch the water. The evaporation increases local humidity.
H3: Temperature Tolerance
Keep your plant in a comfortable range between $65^\circ \text{F}$ and $80^\circ \text{F}$ ($18^\circ \text{C}$ and $27^\circ \text{C}$). Crucially, avoid placing the plant near:
- Cold Drafts: From doors, windows, or AC vents. This causes sudden chilling, shocking the plant.
- Heat Sources: Radiators, heating vents, or drafty fireplaces, which dramatically dry out the air and can cook the leaves.
IV. Troubleshooting the Dreaded Brown Tips and Edges 🩺 (Skyscraper Content Deep Dive)
This section provides the comprehensive troubleshooting your readers need, fulfilling the promise of the article title. We will differentiate the causes of brown tips, because the solution for one is the opposite of the solution for another.
H2: Diagnosing Brown Tips: Isolate the Cause! 🧐
To solve the browning issue, you must first accurately diagnose the source.
H3: Cause 1: Low Humidity (Crispy Brown Edges)
- Look: The brown edges are typically thin, crispy, and dry, often starting on the sides or tips, especially on newer, more exposed leaves. The white parts of the leaf are usually the first to suffer.
- Feeling: The surrounding leaf tissue often feels normal or soft.
- Solution: Immediately increase ambient humidity using one of the methods described in Section III. This is a common winter problem when forced air heating runs constantly.
H3: Cause 2: Chemical Burn (Symmetrical Brown Tips)
- Look: The brown tips are very neat, symmetrical, and often dark brown or black. They appear on many leaves simultaneously and progress slowly. This is the classic fluoride/chlorine toxicity symptom.
- Feeling: The leaf tissue is otherwise healthy.
- Solution: This is a long-term problem caused by salt and chemical build-up. You must immediately switch to filtered, distilled, or rainwater for watering. More importantly, you must flush the soil (see Recovery Plan below).
H3: Cause 3: Water Stress (Inconsistent Watering)
- Look: Tips and margins turn yellow then brown after the plant has been allowed to completely dry out multiple times. This is often accompanied by older, lower leaves turning completely yellow and dying off.
- Feeling: The soil is likely compacted and water-repellant.
- Solution: Change your watering habits! Water thoroughly until it drains from the bottom, then wait until the top soil is nearly dry before watering again. Be consistent.
H3: Cause 4: Nutrient/Salt Excess (Fertilizer Build-up)
- Look: Similar to chemical burn (H3: Cause 2), but often preceded by a crusty white or yellow/green buildup on the rim of the pot or on the top layer of the soil. This happens when the plant is over-fertilized or not allowed to flush.
- Feeling: The leaves may feel stiff or have a slightly unnatural sheen.
- Solution: Cut back on fertilizer, and if you must feed, use it at half-strength. The most critical solution here is a deep, thorough soil flush.
H2: The $\text{Variegated Peace Lily Plant}$ Recovery Plan 💚
Once you’ve isolated the cause of the browning tips, it’s time to take action. The most powerful tool in your arsenal for reversing chemical and salt build-up is the Soil Flush.
H3: Corrective Watering Techniques
- Switching Water Sources: Permanently transition to using distilled, filtered, or collected rainwater. This is the single easiest way to prevent future chemical burn, especially if you live in an area with hard water or high fluoride levels.
- Consistency Over Intensity: Commit to a consistent watering rhythm where you allow the top soil to nearly dry out before watering deeply again.
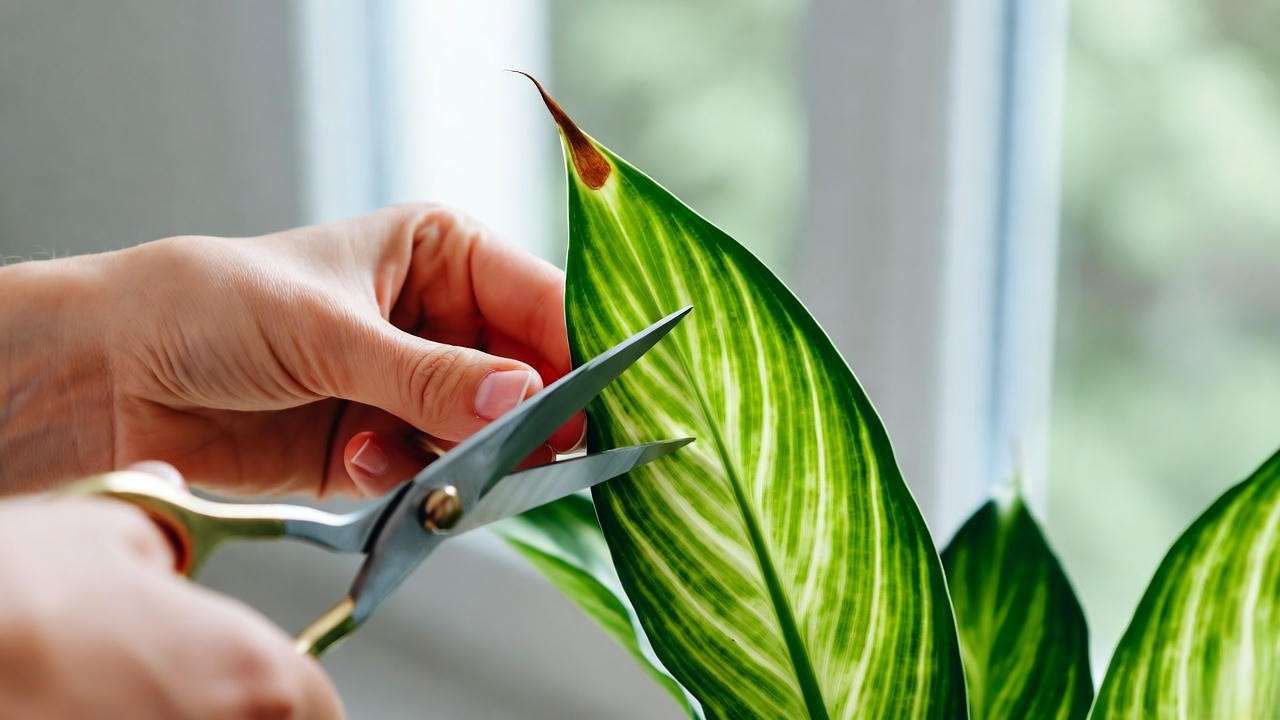
H3: Pruning Damaged Tips
While you can’t heal brown tissue, you can remove it to make your plant look much better and reduce energy wasted on the dying tissue.
- Technique: Use a pair of sharp, sterilized scissors or snips.
- Aesthetics: Follow the natural curve of the leaf tip when trimming. Leave a tiny, thin brown margin (less than $1 \text{mm}$) around the cut line. Cutting into the healthy green tissue often causes that new cut line to immediately turn brown, defeating the purpose.
H3: Step-by-Step Guide: How to Effectively Flush the Soil
This process is crucial for removing fertilizer salts and chemical residues that have accumulated in the potting mix, causing the brown tips.
- Preparation: Take the plant to a sink or bathtub and remove any decorative foil or saucer that would prevent drainage.
- The Soak: Slowly pour a volume of filtered water equal to four times the volume of the pot through the soil. For example, a 6-inch pot ($2 \text{ liters}$ soil) needs $8 \text{ liters}$ of water poured through it.
- The Drain: Let the plant drain completely for at least an hour.
- Repotting (Optional): If the soil is hydrophobic (water runs straight through without soaking in) or compacted, a flush can sometimes make the problem worse. In this case, you may need to repot with fresh, well-draining soil instead of flushing.
- Recovery: Do not fertilize for at least 6-8 weeks after a flush, as you’ve stripped the soil of most nutrients.
V. Advanced Care: Maximizing and Maintaining Variegation 🌟
Once you’ve solved the browning problem, the next goal is to maximize the plant’s stunning white patterns.
H2: Preventing Reversion: Keeping the Patterns Bright
Reversion is when a variegated plant begins growing all-green leaves. It’s an act of self-preservation: the plant is trying to maximize its chlorophyll production because it believes it isn’t getting enough light.
H3: The Role of Light Intensity
The most important factor in maintaining variegation is light intensity.
- More Light = More Variegation: Providing the maximum amount of bright, indirect light the plant can safely handle (without burning the white parts) signals to the plant that it can “afford” to produce the beautiful, less functional white tissue.
- Rotation: Regularly rotate your $\text{Variegated Peace Lily Plant}$ a quarter turn every week. This ensures all sides receive adequate light, maintaining a full, evenly variegated structure.
H3: Pruning Green Growth
If you see a shoot or a full leaf that has emerged entirely green, it is critical to remove it.
- Why Prune? These reverted green leaves are hyper-efficient at photosynthesizing compared to the variegated leaves. They can quickly steal energy from the rest of the plant, potentially leading the entire plant to revert over time.
- How to Prune: Follow the green leaf down to the base of the stem (the main rhizome) and trim it off cleanly.

H2: The Blooming Cycle (And White Spathes)
The $\text{Variegated Peace Lily Plant}$ can bloom just like its green counterpart, producing the characteristic white, boat-shaped spathes.
H3: Encouraging the Iconic Bloom
- Slight Stress: Peace Lilies often need a slight period of stress—such as a brief cooling period or being slightly pot-bound—to trigger blooming.
- Patience and Light: Ensuring sufficient bright, indirect light and a regular feeding schedule (during spring/summer) with a balanced fertilizer are the best ways to promote robust flowering.
H3: Spathe Care
The spathe is not a true flower; it is a modified leaf surrounding the tiny flower structure (the spadix). The spathes are naturally white and will turn green over time, which is normal. Once the spathe turns completely green and begins to fade, trim it at the base to redirect the plant’s energy back into its variegated foliage.
VI. Maintenance, Propagation, and Longevity ✂️
To keep your variegated beauty thriving for years, you need to understand when and how to give it more space and how to expand your collection.
H2: Repotting and Dividing (When and How) 🧑🔧
Peace lilies appreciate being somewhat root-bound, but if they get too crowded, the roots can’t take up water efficiently, causing chronic stress and tip burn.
H3: Signs of Root-Bound Stress
- Roots are clearly circling the inside of the pot.
- Water runs straight out the bottom without soaking the soil.
- The plant is chronically thirsty, wilting immediately after two days, even if the care is otherwise perfect.
- Roots are growing out of the drainage holes.
H3: The Division Technique (Propagation via Division)
The $\text{Variegated Peace Lily Plant}$ is easily propagated through division, which is typically done at repotting time.
- Preparation: Gently remove the plant from its container.
- Inspection: Look for natural clumps or sections (rhizomes) that have their own root systems.
- Separation: Use a clean, sharp knife or your hands to gently separate these clumps. Ensure each division has a robust set of roots and at least 3-4 leaves.
- Planting: Pot the divisions into appropriately sized pots (no more than 1-2 inches wider than the root ball) using fresh, well-draining soil.
H2: Common Pests and Diseases
Variegated plants are no more susceptible to pests than green ones, but the pests can be harder to spot on the white sections.
H3: Identifying Thrips and Spider Mites
- Spider Mites: Look for fine webbing near the stem joints and small, stippled yellow/brown dots on the leaves where the mites are feeding.
- Thrips: These tiny, slender insects leave silvery-grey streaks on the leaves.
H3: Organic Treatments (Neem Oil Protocol)
For sensitive variegated foliage, always patch-test before full application.
- Dilution: Mix high-quality, cold-pressed neem oil with water and a tiny bit of gentle dish soap (acting as an emulsifier).
- Application: Wipe down the tops and undersides of all leaves thoroughly.
- Timing: Apply in the evening or on a cloudy day, as neem residue can interact with strong sunlight and cause the leaves (especially the white parts) to burn.
VII. Expert Insights and Frequently Asked Questions (E-E-A-T Section) ❓
This section provides authoritative quick-answer content, boosting SEO relevance and satisfying common user queries.
H2: Variegated Peace Lily FAQs (Quick Answers)
- Q: Is the $\text{Variegated Peace Lily Plant}$ rare?
- A: While not as rare as some exotic imports, it is less common and often more expensive than the standard green variety because the variegation is unstable and requires propagation by division, not seed.
- Q: Why are my white parts turning green (reversion)?
- A: This is almost always caused by insufficient light. Move the plant to a brighter location (maintaining indirect light) and prune any fully green leaves.
- Q: Is the plant toxic to pets?
- A: Yes. Like all Spathiphyllum varieties, the plant contains calcium oxalate crystals, which cause irritation, oral pain, and digestive upset if ingested. Keep it out of reach of curious pets and children.
- Q: Can I put my variegated peace lily outside?
- A: Only in the summer, and only in a spot with deep shade and high humidity. It cannot tolerate direct sun or temperatures consistently below $60^\circ \text{F}$ ($15^\circ \text{C}$).
H2: Key Takeaways for Long-Term Health
The success of your $\text{Variegated Peace Lily Plant}$ hinges on three non-negotiable checks you should perform weekly:
- Check Your Water Source: If you see any signs of symmetrical tip burn, switch to distilled water immediately.
- Check for Humidity: If the air is dry, increase humidity before the brown tips begin to form.
- Check Your Light: Ensure the plant is receiving bright, diffused light—not dim light and never direct sun.
VIII. Conclusion: Celebrating Your Healthy, Happy Plant 🎉
The $\text{Variegated Peace Lily Plant}$ demands specific, consistent care, but the reward is a spectacularly patterned houseplant that elevates any indoor space.
You are now equipped with the expert knowledge to move beyond the frustration of browning tips. By prioritizing water quality, providing high and consistent humidity, and mastering the balance of bright, indirect light, you’ll ensure those dazzling white and green patterns remain crisp and vibrant.


