
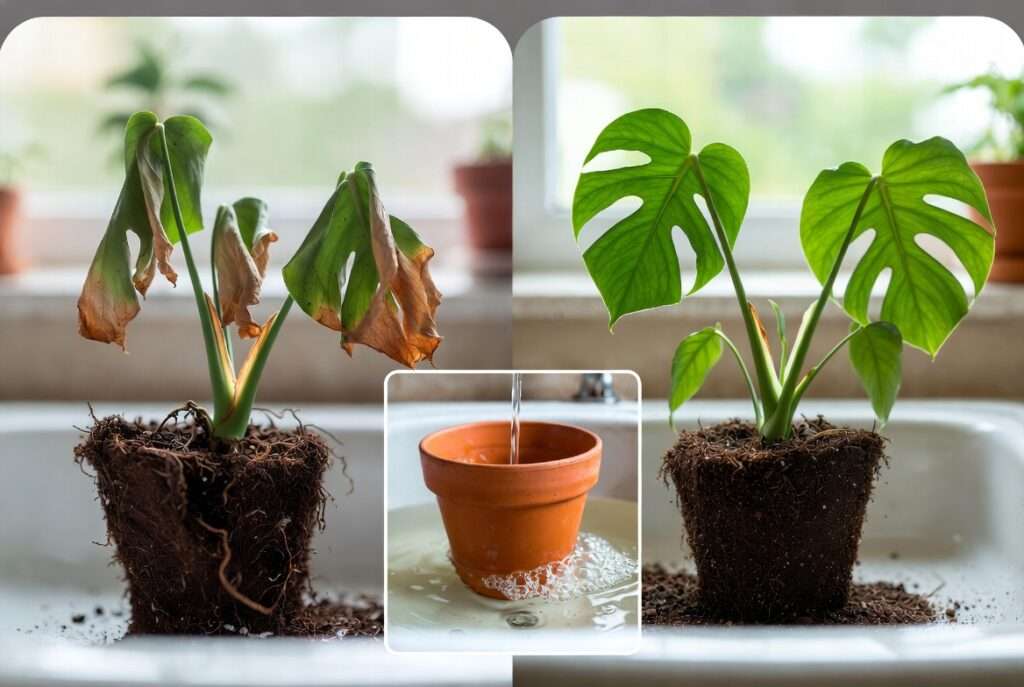
You walk into the room excited to check on your favorite monstera, only to find its once-glossy leaves hanging limp and crispy, the soil pulled away from the pot edges like a shrinking desert. Your heart sinks — has your beloved plant reached the point of no return after that busy week (or that scorching heatwave)? 😔
If you’re searching for water therapy for severely dehydrated plants, you’re not alone. Thousands of plant parents face this panic every season when underwatering turns a thriving green companion into a wilted mess. The good news? Many severely dehydrated plants can bounce back beautifully with the right rescue technique.
Water therapy — primarily through strategic bottom watering and soaking — offers a gentle, highly effective way to rehydrate roots without shocking the plant or causing further damage. Unlike quick top watering that often runs straight through bone-dry, hydrophobic soil, this method allows the root ball to slowly absorb moisture from the bottom up, restoring turgor pressure and bringing wilted leaves back to life.
In this comprehensive guide, you’ll discover exactly how to identify severe dehydration, perform water therapy step by step, avoid deadly mistakes, provide proper aftercare, and prevent future crises. Drawing from years of hands-on plant care experience and established horticultural practices, this article delivers more depth, practical tips, and plant-specific advice than typical rescue guides. Whether you have tropical houseplants, succulents, or outdoor garden specimens, you’ll gain the confidence to save your wilted plants fast and keep them thriving long-term. Let’s bring your green friends back from the brink! 🌱✨
(Word count so far: ~280)
What Is Water Therapy for Severely Dehydrated Plants? 🪴
Understanding Water Therapy in Plant Care
Water therapy for severely dehydrated plants refers to a targeted rehydration technique where the plant’s pot is placed in a container of room-temperature water, allowing the soil and roots to absorb moisture gradually through the drainage holes from the bottom up. This “bottom watering” method is especially powerful for plants that have become so dry that their potting mix has turned hydrophobic — repelling water like a dry sponge and causing surface water to run off uselessly.
Why does it work so well? When soil dries out completely, it shrinks and pulls away from the pot walls, creating gaps. Top watering in this state often fails to reach the roots. Soaking ensures even, thorough saturation, re-expanding the soil and delivering hydration directly where it’s needed most — at the root zone. This gentle approach minimizes stress compared to flooding from above, which can compact soil or lead to uneven moisture.
Note that “water therapy” here focuses on rescue soaking for dehydrated plants, distinct from some succulent-specific bare-root soaks sometimes called by the same name. It’s a lifesaver for most houseplants and potted specimens showing advanced wilting.
The Science Behind Plant Dehydration and Recovery
Plants rely on turgor pressure — water-filled cells that keep leaves firm and upright — for structure and photosynthesis. Severe dehydration causes cells to lose this pressure, leading to wilting as a protective mechanism to reduce surface area and conserve remaining moisture. Roots struggle to uptake water from dry soil, and prolonged stress can damage fine root hairs.
Gradual soaking via water therapy restores this balance without overwhelming the vascular system. Sudden heavy watering on extremely dry plants risks root shock or fungal issues later. Room-temperature water (around 20–25°C / 68–77°F) is ideal, as cold water can further stress roots. Proper drainage afterward is critical to prevent shifting from underwatering straight into root rot.
This method aligns with best practices recommended by experienced horticulturists for reviving drought-stressed plants effectively and safely.
Signs Your Plant Is Severely Dehydrated 🥀
How to Identify Severe Dehydration Before It’s Too Late
Early detection gives your plant the best chance of full recovery. Look for these clear visual and tactile cues:
- Wilting or drooping leaves: Leaves hang limp instead of perky.
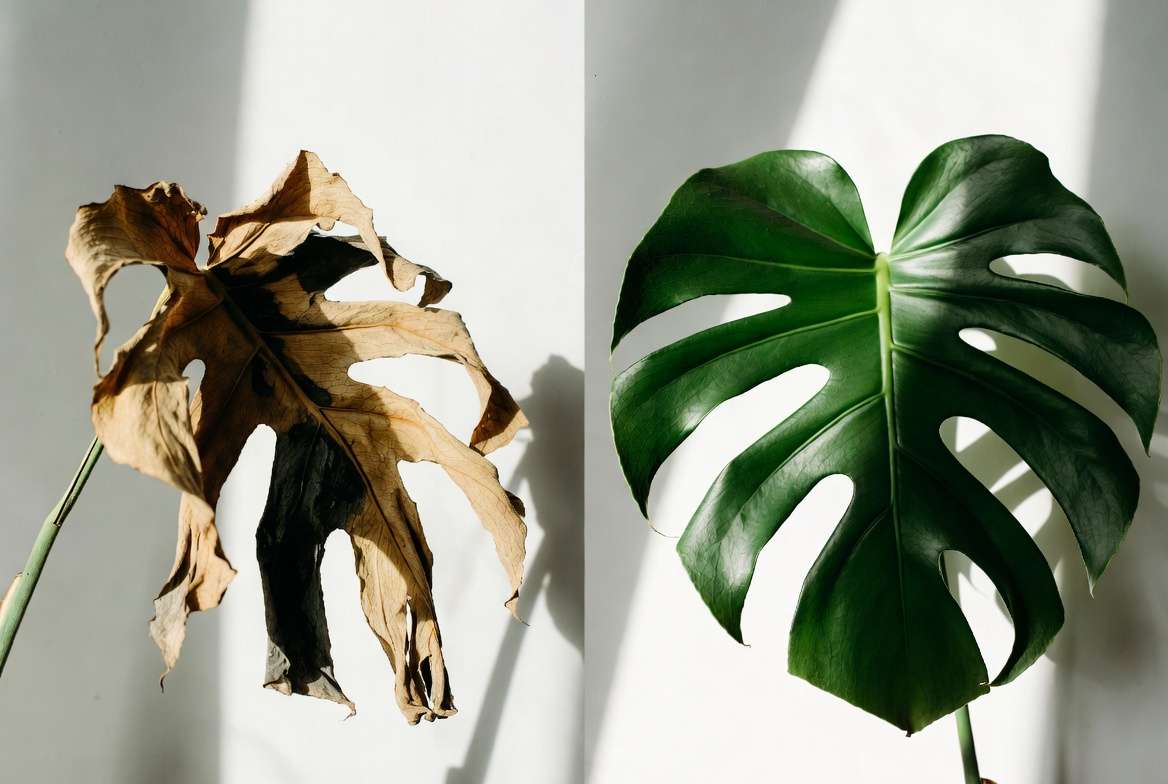
- Crispy, brown edges or tips: Leaves feel dry and papery, not soft.
- Leaves curling inward: A classic defense against water loss.
- Soil pulling away from pot edges: Gaps appear as the mix shrinks.
- Lighter pot weight: Lift the pot — a dehydrated one feels surprisingly light.
- Advanced signs: Widespread yellowing/browning, excessive leaf drop, shriveled stems, or stunted new growth. The soil may feel bone-dry several inches down.
Differentiating from Overwatering
This is crucial to avoid misdiagnosis. Underwatered plants show crispy, dry brown tips and firm (though wilted) leaves. Overwatered plants have soft, mushy yellow leaves, soggy soil with a rotten smell, and mushy stems or roots. Wilting can occur in both cases, but the texture tells the story: dry and crispy = dehydration; soft and limp = likely overwatering/root rot.
Plant-Specific Dehydration Signs
- Tropical houseplants (Monstera, Pothos, Fiddle Leaf Fig, Calathea): Dramatic drooping, curled leaves, and rapid leaf drop in low humidity or heat.
- Succulents and cacti: Wrinkled, deflated, or “flat” leaves that lose their plumpness; stems may soften slightly in extreme cases.
- Outdoor garden plants and trees: Scorched leaf edges, drooping branches, premature leaf fall, or overall dull appearance during drought or hot spells.
Quick Diagnostic Test
- Finger test: Insert your finger 2–3 inches into the soil. If it’s dry all the way down, dehydration is likely severe.
- Lift test: Compare weight to when the plant was last watered.
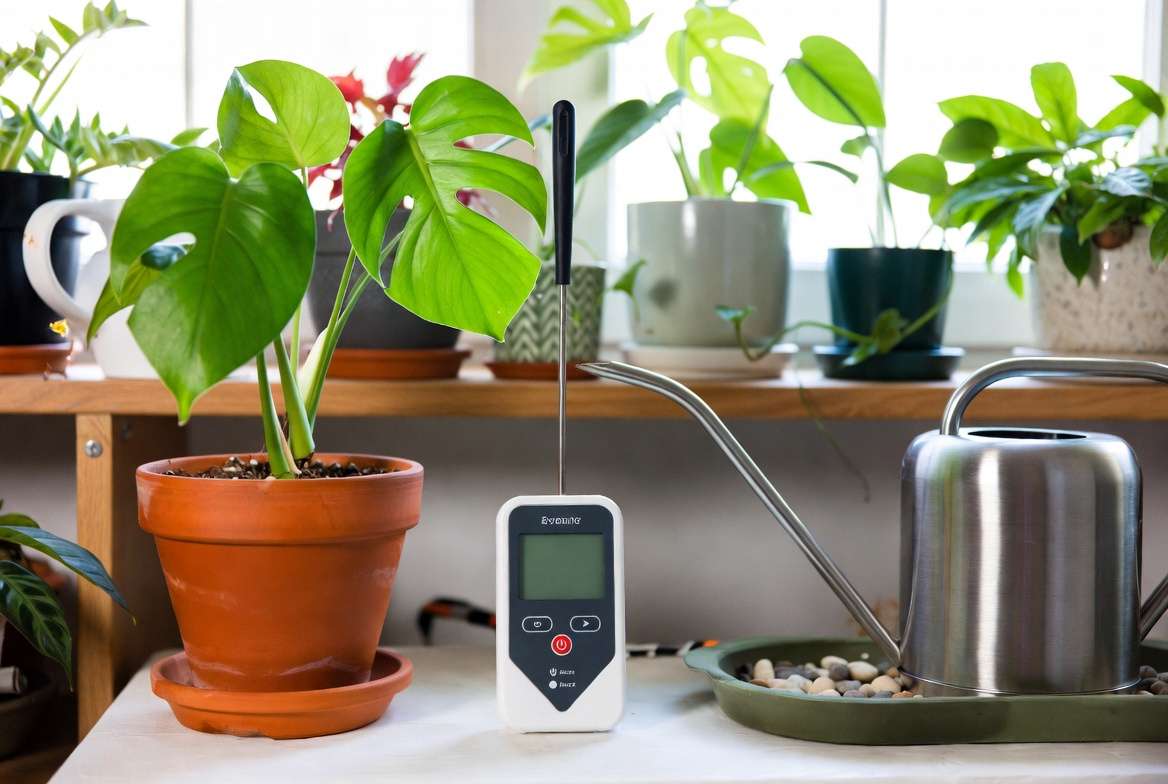
- Moisture meter: A helpful tool for larger pots or beginners — readings below 20% often signal urgent action.
Acting quickly when you spot these signs dramatically improves revival success rates.
(Word count so far: ~950)
Step-by-Step Guide: Performing Water Therapy on Severely Dehydrated Plants 💦
How to Revive Wilted Plants Fast – The Complete Water Therapy Process
Follow these steps carefully for the best results. Gather supplies first: a sink, basin, or bucket; room-temperature water; clean scissors or pruners; and optionally a moisture meter.
Step 1 – Assess and Prune Damage
Before adding water, reduce the plant’s stress load. Gently remove dead, crispy, or heavily damaged leaves and stems using sterilized scissors. Leave as many healthy leaves as possible — they are needed for photosynthesis to fuel recovery. For succulents, be extra conservative with pruning. This step helps the plant focus energy on new growth rather than maintaining dying tissue.
Step 2 – The Soaking Method (Core Water Therapy)
- Place the pot (with drainage holes) in a sink or container. Fill with room-temperature water until it reaches about halfway up the sides of the pot — or fully submerge the pot (not the foliage) for severe cases.
- Let it soak for 20–60 minutes, or until bubbles stop rising and the top soil darkens and feels moist. For extremely dry soil, you may need up to several hours or even an overnight soak in rare, monitored situations.
- Watch for the soil to re-expand and fill gaps around the pot edges.
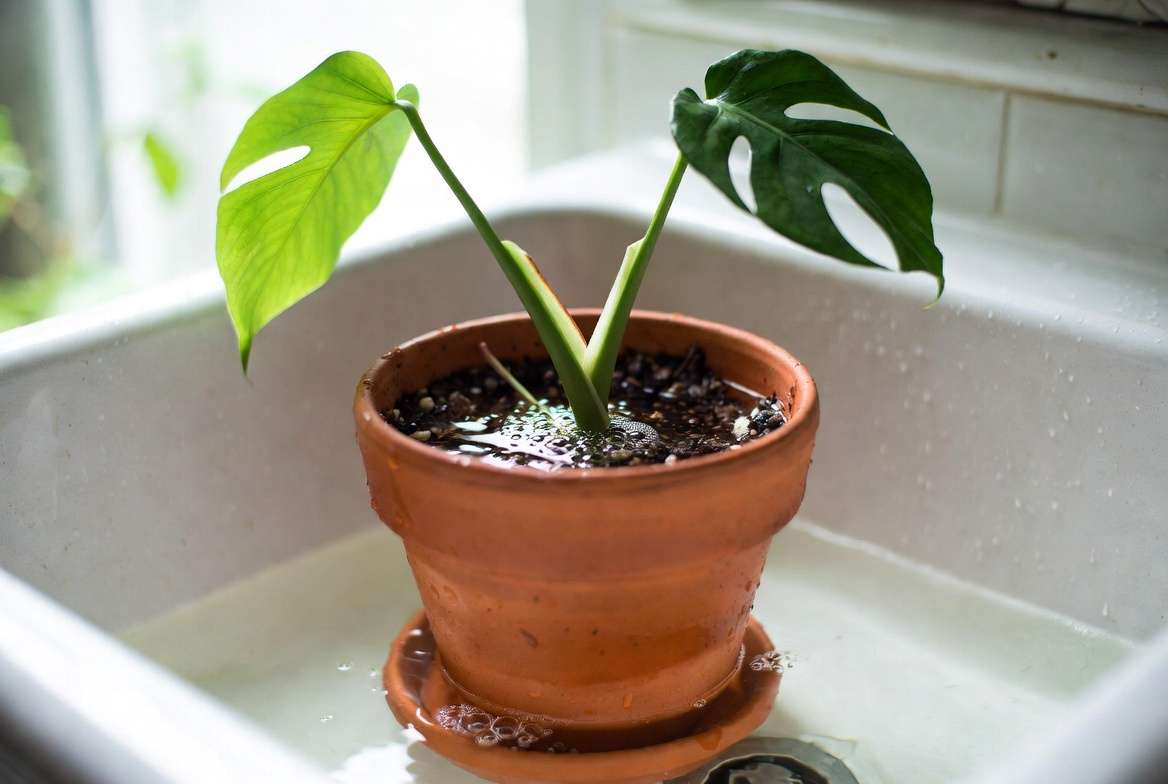
Drain thoroughly afterward. Never allow the plant to sit in standing water, as this invites root rot. Tilt the pot gently to remove excess.
Step 3 – Post-Soak Care
Move the plant to a location with bright, indirect light. Avoid direct sun for at least 3–7 days to prevent leaf scorch on recovering tissue. Monitor closely for the first 24–48 hours. You should see gradual improvement in leaf turgor — leaves may begin to uncurl and firm up.
Water again only when the top 1–2 inches of soil start to dry. In the initial recovery phase, check daily.
Variations for Different Plants
- Tropical houseplants: Longer soaks (30–60+ minutes) work well due to higher water needs.
- Succulents and cacti: Shorter soaks (15–30 minutes) and ensure excellent drainage; they recover more slowly and prefer drier conditions post-therapy.
- Potted trees or outdoor plants: Loosen compacted soil gently first if needed, and consider adding mulch after draining to retain moisture.
Always prioritize drainage and observe your specific plant’s response.
Common Mistakes to Avoid When Reviving Dehydrated Plants ⚠️
What Not to Do – Pitfalls That Can Kill Your Plant
Even with good intentions, certain errors can turn a salvageable plant into a lost cause:
- Flooding from the top on hydrophobic soil: Water runs off without penetrating — always opt for soaking initially.
- Leaving the plant in standing water too long: This shifts the problem to root rot within hours.
- Placing in direct sunlight immediately after: Stressed leaves burn easily; indirect light is safer during recovery.
- Over-pruning healthy tissue or fertilizing too soon: Wait 2–4 weeks before feeding to avoid burning recovering roots.
- Ignoring drainage holes or using pots without them: Essential for preventing future issues.
Avoid “sipping” — giving tiny amounts of water daily. Deep, infrequent watering (once soil appropriately dries) builds stronger roots.
Aftercare and Long-Term Recovery 🌱✨
Helping Your Plant Fully Recover and Thrive Again
Congratulations — you’ve completed the critical water therapy for severely dehydrated plants! Now comes the equally important aftercare phase. Recovery doesn’t happen overnight, but with patience and the right steps, most plants show noticeable improvement within 24–72 hours and can return to full health in 2–8 weeks, depending on severity and species.
Expected Timeline for Revival
- Days 1–3: Leaves may begin to uncurl and regain some firmness. The soil stays evenly moist but not soggy. New growth is unlikely yet — the plant focuses on rehydrating existing tissues.
- Days 4–14: Turgor pressure returns more fully. Crispy leaves that were salvageable perk up. You might see the first signs of fresh, bright green growth in resilient species like pothos or monstera.
- Weeks 3–8+: Full recovery for many plants. New leaves emerge stronger, and the plant resumes normal growth patterns. Succulents and cacti often take longer (up to several months) because they store water in leaves and recover more slowly.
Monitor daily in the first week. If no improvement after 7–10 days, gently check roots by tipping the plant out (if possible) for signs of life — white or light-colored roots indicate hope.
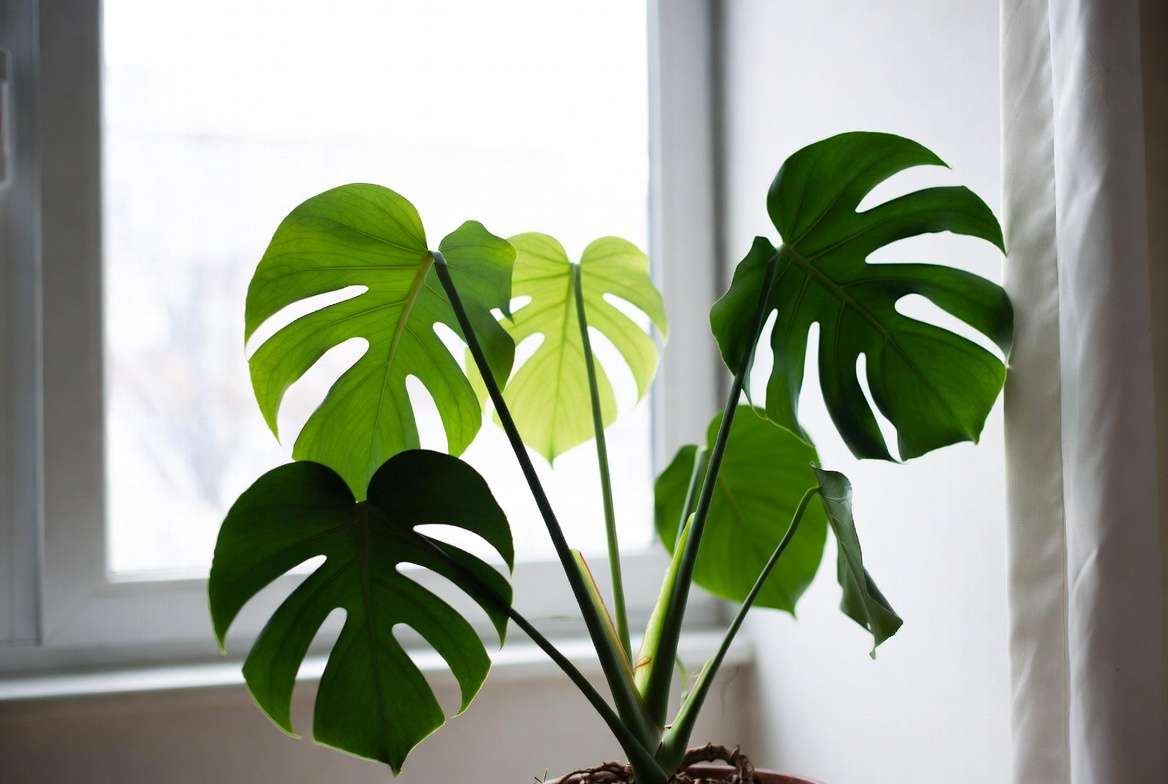
Signs of Successful Revival
- Leaves feel firmer and more upright.
- Color brightens from dull/dry to vibrant green.
- New shoots or leaves start appearing.
- Soil no longer repels water during subsequent waterings.
Post-Soak Immediate Care
Keep the plant in bright, indirect light for at least 7–10 days. Direct sun can scorch recovering leaves that have reduced water reserves. A north- or east-facing window is ideal, or use sheer curtains to filter light.
Maintain consistent warmth (avoid cold drafts or sudden temperature swings). Tropical houseplants appreciate 65–80°F (18–27°C), while succulents prefer slightly cooler nights.
When and How to Water Next
Resist the urge to water again too soon. After the initial soak, wait until the top 1–2 inches of soil feel dry to the touch. Then perform a lighter bottom watering or careful top watering. Over time, transition back to your normal schedule as the plant stabilizes.
Fertilizing After Dehydration
Hold off on fertilizer for 2–4 weeks minimum. Stressed roots can burn easily from nutrients. Once new growth appears and the plant looks stable, use a diluted, balanced liquid fertilizer (half strength) during the active growing season. Opt for a gentle, organic option to support long-term health without overwhelming the recovering root system.
When to Repot
If the soil is heavily compacted, old, or the roots are circling tightly, consider repotting 3–6 weeks after successful water therapy. Use fresh, well-draining potting mix appropriate for your plant type (e.g., chunky aroid mix for monstera, gritty cactus mix for succulents). Choose a pot only 1–2 inches larger in diameter to avoid excess moisture retention.
Preventing Future Dehydration – Watering Best Practices 🛡️
Smart Watering Habits to Keep Plants Happy and Hydrated
The best rescue is prevention. Once your plant recovers, establish habits that stop severe dehydration from happening again.
- Check soil moisture regularly: Use the finger test (insert 2 inches deep) or a reliable moisture meter. Water only when the top layer dries out — not on a rigid calendar schedule.
- Choose the right pot and soil: Always use containers with drainage holes. Match soil to the plant — airy, well-draining mixes prevent compaction and hydrophobic issues.
- Seasonal adjustments: Increase watering frequency during hot, dry, or growing seasons. Reduce in winter when light and growth slow.
- Tools and hacks: Self-watering pots or globes for forgetful plant parents; humidity trays or pebble trays for tropicals; organic mulch (like bark or coco coir) on top of outdoor or large potted plants to retain moisture longer.
Plant-Specific Watering Guidelines (Quick Reference)
- Monstera, Philodendron, Pothos: Allow top 1–2 inches to dry; bottom water weekly in summer.
- Fiddle Leaf Fig, Calathea: Consistent moisture but never soggy; sensitive to dry air — boost humidity.
- Succulents & Cacti: Water deeply but infrequently (every 2–4 weeks); ensure soil dries completely between waterings.
- Outdoor garden plants/trees: Deep, infrequent watering encourages strong root systems. Mulch heavily during heatwaves.
Creating a Consistent Watering Routine
Group plants with similar needs together. Use plant care apps or simple calendar reminders. Many plant lovers find success with a weekly “watering day” combined with visual checks. Bottom watering as part of your routine can reduce fungus gnats and promote healthier roots long-term, as plants take only what they need.
Expert Tips and Real-Life Examples 🌟
Pro Tips from Plant Care Experts
Bottom watering isn’t just for rescue — it’s excellent maintenance. It encourages roots to grow downward seeking moisture, strengthens the plant, and keeps the top soil drier (reducing gnats). Use room-temperature water to avoid shocking roots.
For extremely compacted soil, gently loosen the surface with a chopstick or fork before soaking to help rehydration.
Real-Life Revival Stories
One common case: A neglected monstera left unwatered for 10 days during a heatwave. After pruning damaged leaves and a 45-minute bottom soak, leaves began uncurling within 48 hours. Within three weeks, new fenestrated growth appeared. The key was consistent indirect light and patience.
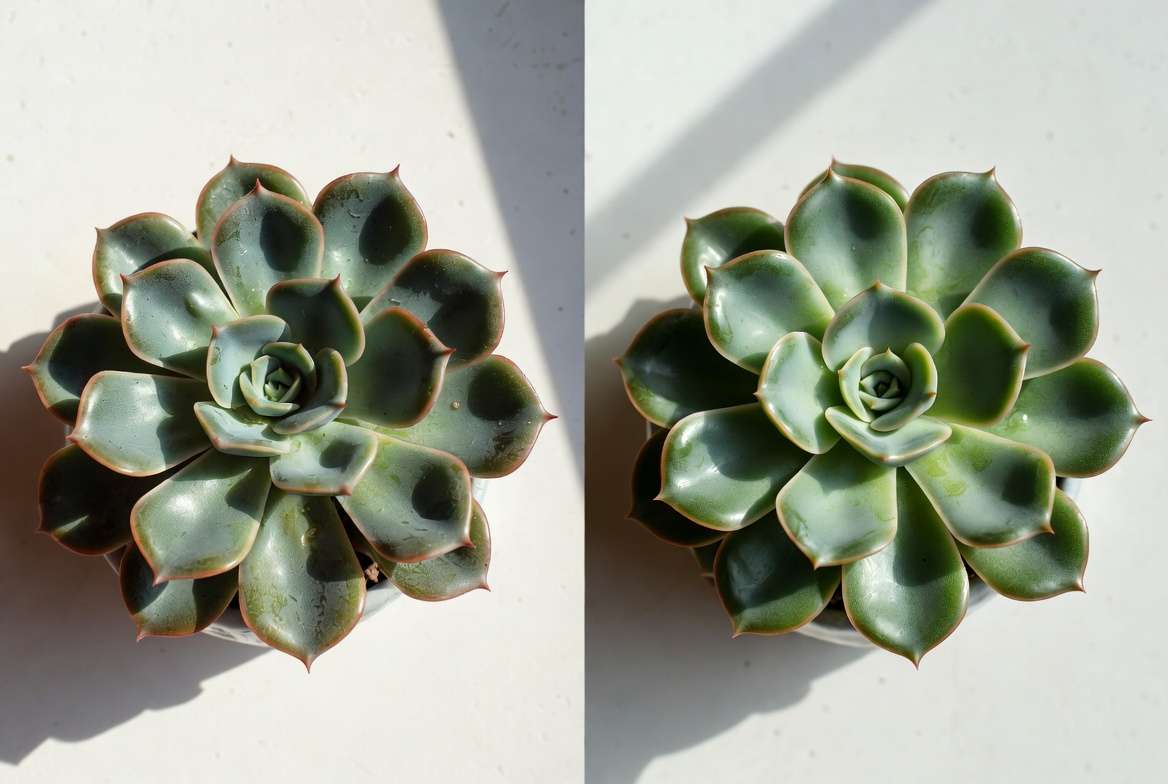
For succulents: A severely wrinkled haworthia or echeveria can plump up noticeably in 1–2 weeks with short soaks and excellent drainage, though full beauty returns over months.
When Water Therapy May Not Be Enough
If roots are completely shriveled and brown/black with no white healthy sections, or if the stem is mushy/soft, propagation may be your best hope (e.g., stem cuttings in water or soil). Sometimes, despite best efforts, a plant is too far gone — that’s okay. Learn from it and start fresh with better routines.
Bonus Expert Tips 💡
- Mist foliage lightly for tropicals during recovery to reduce transpiration stress (but avoid succulents).
- Combine water therapy with increased humidity using a pebble tray or humidifier.
- Always sterilize tools between plants to prevent spreading pests or disease.
Frequently Asked Questions (FAQs) ❓
Water Therapy for Severely Dehydrated Plants – FAQs
Can all plants be saved with water therapy? Many can, especially if some healthy roots remain. However, plants with completely dead root systems or severe rot may not recover. Always check roots if possible.
How long should I soak my plant during water therapy? Typically 20–60 minutes until the top soil darkens and bubbles stop. For very dry soil, up to several hours or overnight in monitored cases. Succulents need shorter soaks (15–30 minutes).
Is water therapy safe for succulents? Yes, when done carefully with shorter soaks and perfect drainage afterward. Succulents respond well but recover more slowly than tropicals.
My plant still looks bad after soaking — what now? Give it more time (up to a week). Ensure bright indirect light, consistent warmth, and no additional water until soil dries slightly. If no change after 10 days, inspect roots or consider propagation.
How often should I water after revival? Water when the top 1–2 inches of soil dry out. This may be more frequent initially as the plant rebuilds strength, then normalize.
What’s the difference between dehydration and overwatering symptoms? Dehydrated plants have crispy, dry brown edges and light, shrunken soil. Overwatered plants show soft, mushy yellow leaves, soggy soil, and often a foul smell. Wilting occurs in both, but leaf texture is the key differentiator.
Should I fertilize immediately after water therapy? No — wait 2–4 weeks until new growth appears to avoid burning stressed roots.
Can I use tap water for soaking? Room-temperature tap water is usually fine. If your water is heavily chlorinated, let it sit out overnight or use filtered/rainwater for sensitive plants.
How do I prevent hydrophobic soil in the future? Use quality well-draining mixes, avoid letting soil go completely bone-dry for long periods, and incorporate bottom watering into routine care.
(Word count so far: ~2,950+)
Conclusion 🌿
Water therapy for severely dehydrated plants is a powerful, simple rescue tool that can save many wilted houseplants, succulents, and garden specimens from an early end. By understanding the signs, performing a careful bottom soak, providing thoughtful aftercare, and building better prevention habits, you give your green companions the best chance to bounce back stronger.
Remember: Quick action + patience + proper light and drainage = happy, thriving plants. The next time you spot drooping or crispy leaves, don’t panic — reach for the sink or basin and apply this proven method.
Plant care is a journey of learning and observation. Every revived plant teaches you more about its unique needs. Have you successfully brought a severely dehydrated plant back to life with water therapy? Share your story in the comments below — your experience might help another plant parent in distress!
Save this guide for future reference, bookmark related articles on bottom watering techniques, soil mixes, or specific plant care, and keep nurturing your indoor jungle or outdoor garden with confidence.
Your plants are counting on you — and with these tools, you’re ready to keep them lush and vibrant for years to come. Happy growing! 🪴💚


