

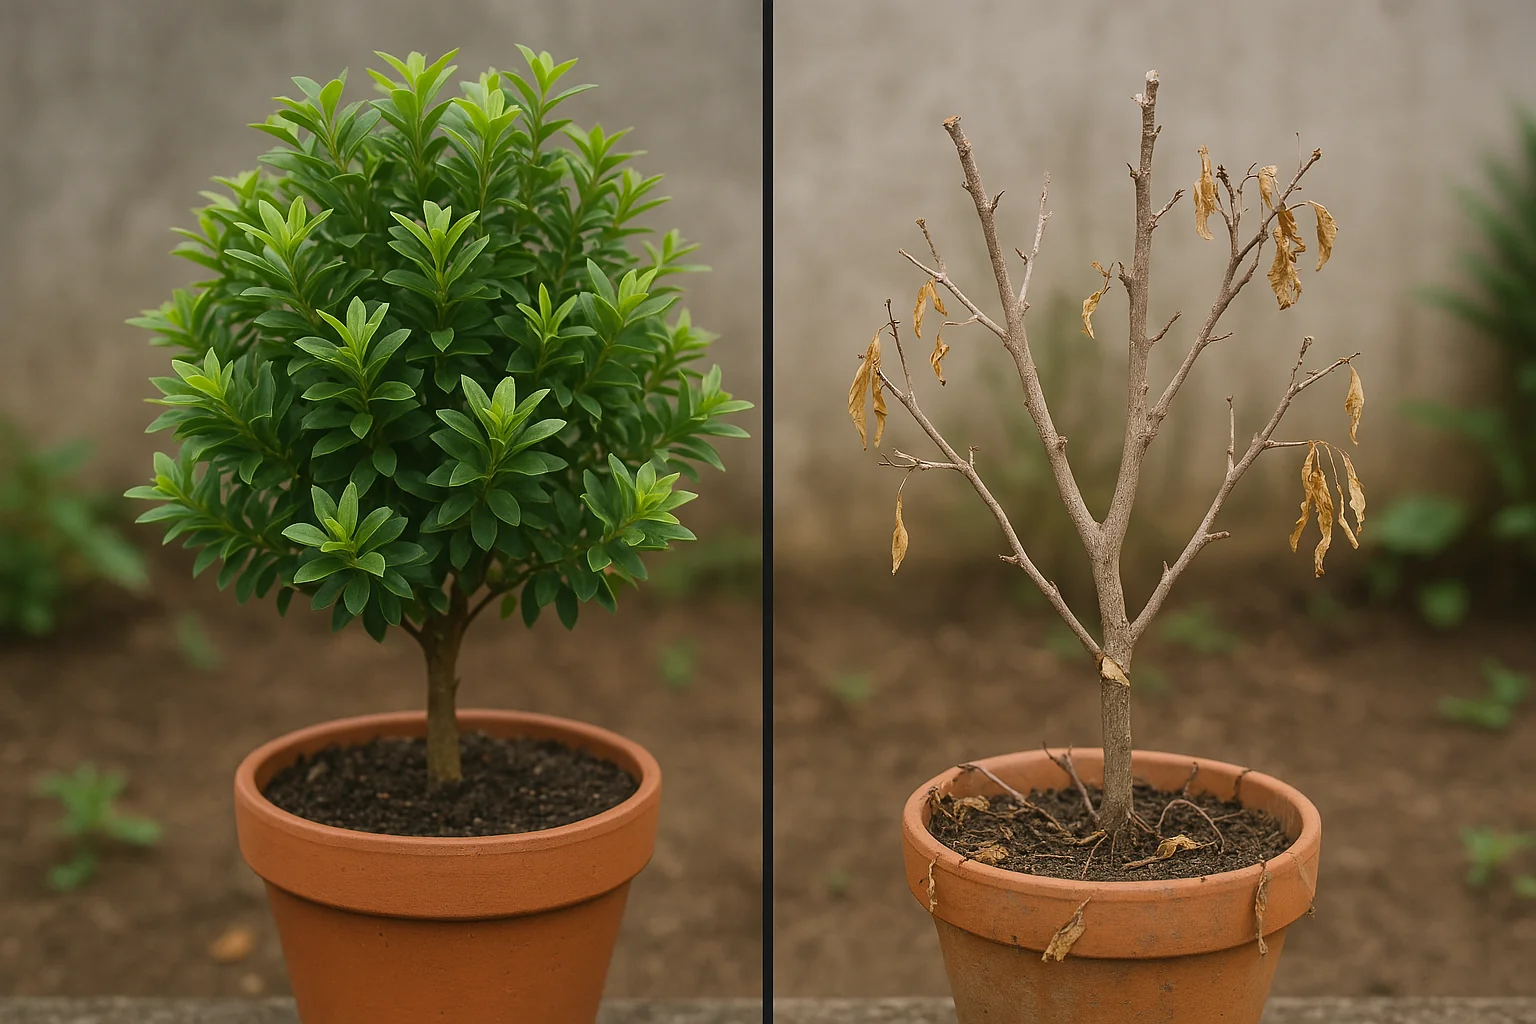
Are you looking for a way to enhance the beauty and health of your ornamental plants? Approach grafting for ornamental plants might be the perfect solution. This fascinating technique allows you to combine the best features of two plants, creating stronger, more resilient specimens. Whether you’re seeking to repair a damaged plant, preserve a rare variety, or create a stunning hybrid, approach grafting offers a simple and effective method. In this guide, we’ll walk you through everything you need to know—from the basics to advanced techniques—so you can master this valuable skill and build a deeper connection with your plants.
What is Approach Grafting? 🌱
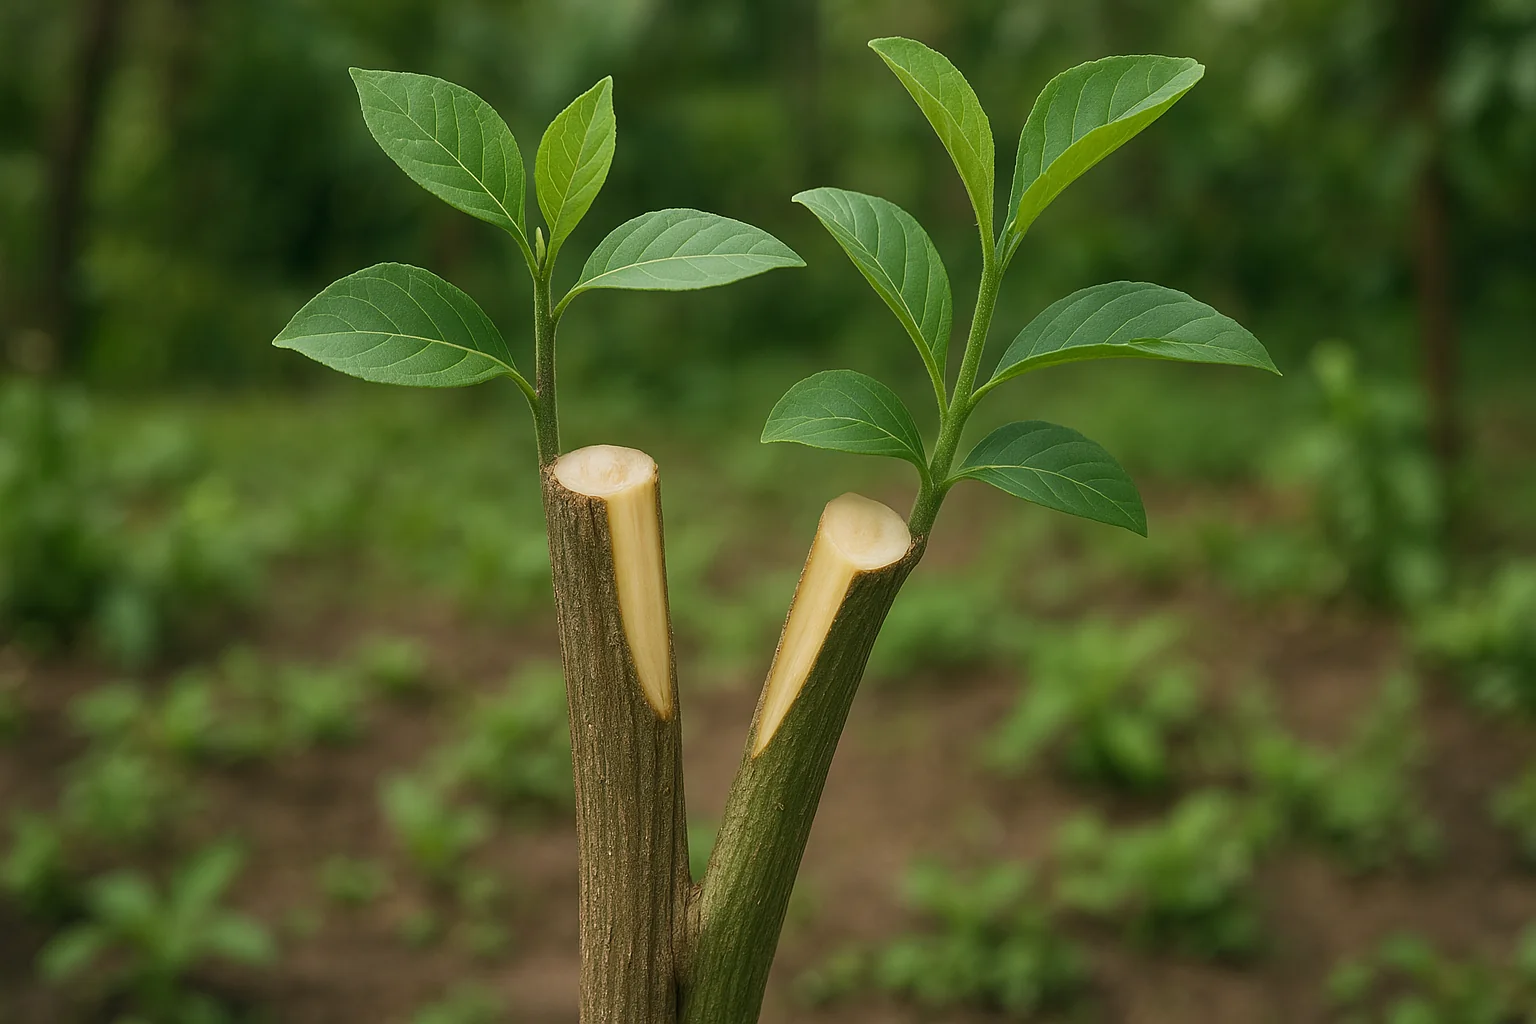
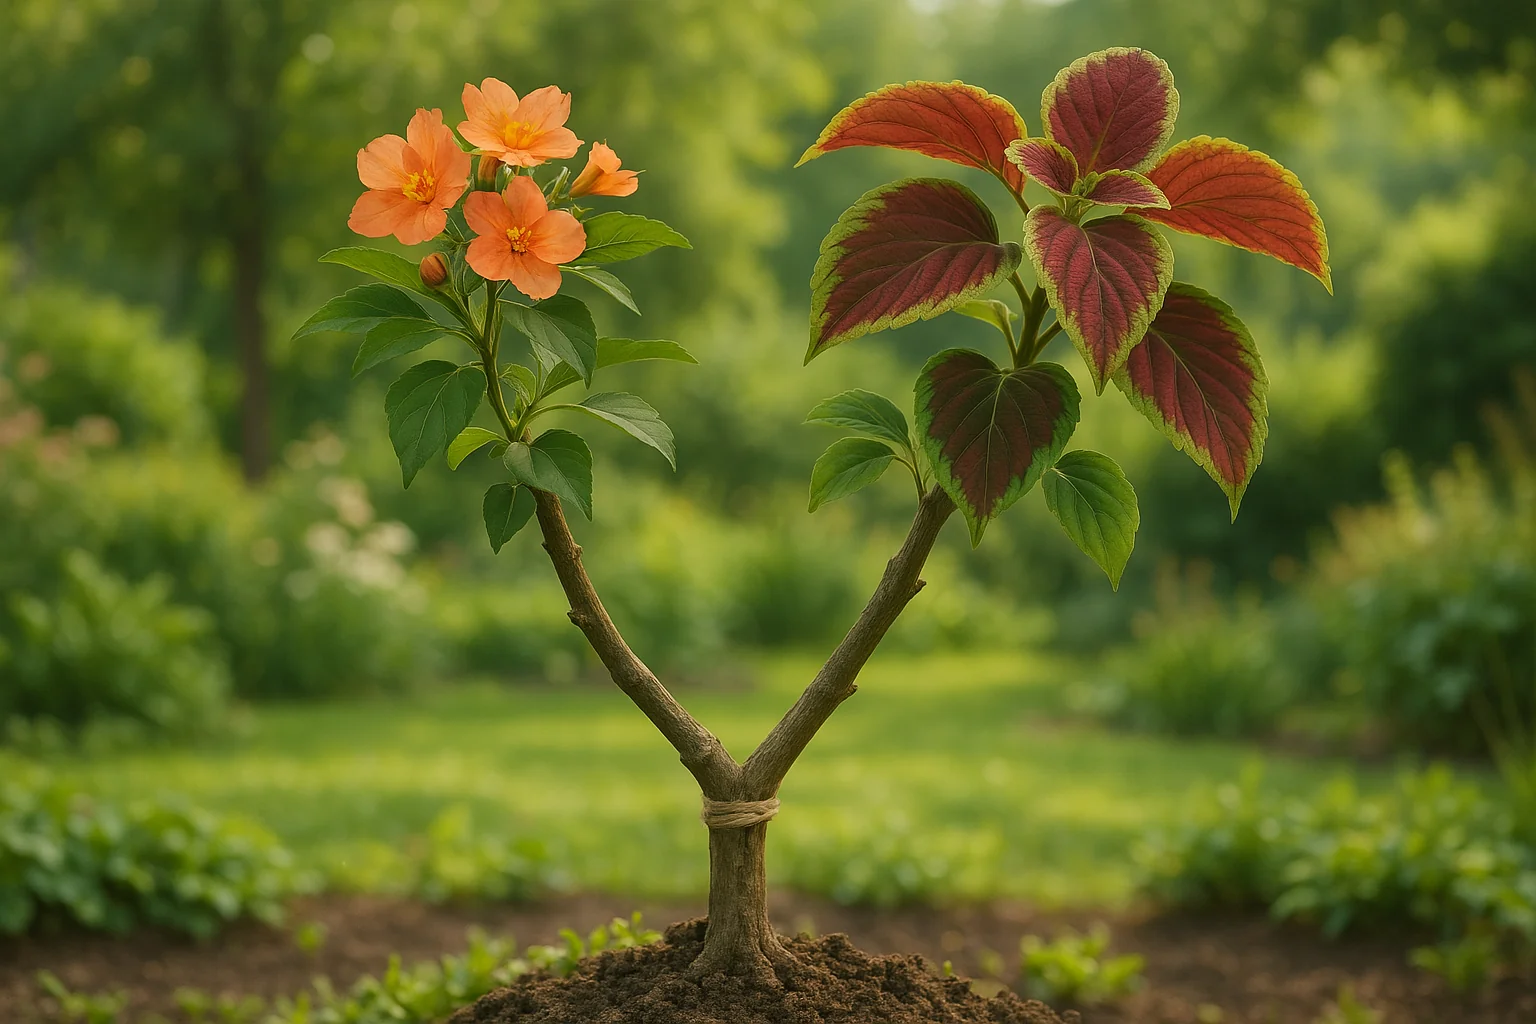
Approach grafting for ornamental plants is a plant propagation technique where two living plants are joined together to grow as one. In this method, both the rootstock (the plant that provides the roots) and the scion (the plant that provides the desired traits, like flowers or foliage) remain alive and are grafted at the same time.
Unlike other grafting methods, where the scion is cut off and attached to a rootstock, approach grafting involves making cuts on both plants and placing them close together until they naturally fuse. 🌿✨
The result? A stronger, more resilient plant that combines the best features of both parent plants. It’s a fantastic way to repair damaged plants, preserve unique varieties, or even create new hybrids. 💚
This technique is easy to do, requires minimal stress on the plants, and is ideal for ornamental plants, especially those with flexible stems. 🌸🌿
Why Choose Approach Grafting for Ornamental Plants? 🌸
Approach grafting for ornamental plants offers several benefits that make it an attractive option for plant lovers. Here’s why you should consider this method:
- Stronger Plants 💪: By combining two plants with desirable traits, you can create a stronger, more resilient plant. The rootstock provides stability and disease resistance, while the scion contributes beauty and unique characteristics.
- Minimal Stress 🌿: Unlike other grafting methods that can shock or damage plants, approach grafting is less invasive. Both plants remain alive during the process, making the graft more likely to succeed.
- Preserve Rare Varieties 🌱: Approach grafting allows you to preserve special ornamental plants that may be hard to find or propagate through seeds. It’s a great way to keep your garden full of unique varieties.
- Versatile and Creative 🌟: You can experiment with different plant combinations, creating hybrids or simply improving a plant’s appearance and health. Whether it’s roses, wisteria, or camellias, approach grafting can work wonders.
- Cost-Effective 💵: Instead of purchasing new plants, you can use approach grafting to propagate and improve your existing ornamental plants, saving money while expanding your garden collection.
Approach grafting is a simple, effective way to elevate your ornamental plants, combining beauty, strength, and creativity in one powerful technique! 🌷🌿
When to Use Approach Grafting 🌱
Knowing the right time to use approach grafting for ornamental plants is key to its success. Here are some ideal scenarios for when to try this technique:
- When Plants Are Actively Growing 🌿: The best time for grafting is during the growing season, typically in spring or early summer, when both the rootstock and scion are actively producing new growth. This makes the grafting process easier and increases the chances of success.
- Repairing Damaged Plants 🌻: If your favorite ornamental plant has suffered damage (e.g., broken branches or roots), approach grafting can help save it. By grafting a healthy scion onto the damaged plant, you can restore its vitality and shape.
- Preserving Rare or Hard-to-Find Plants 🌺: For ornamental plants that are difficult to propagate by other means (like seeds or cuttings), approach grafting is a great way to ensure these plants continue to thrive.
- Creating Plant Hybrids 🌼: Want to combine the best traits of two plants? Approach grafting allows you to experiment with hybridizing ornamental plants, giving you the opportunity to blend colors, shapes, and growth habits.
- When You Want a Stronger, More Resilient Plant 💪: If you have a delicate or struggling plant, approach grafting onto a more robust rootstock can enhance its resistance to pests, diseases, and environmental stress, creating a more durable specimen.
By choosing the right time for grafting, you can set yourself up for a successful graft and enjoy healthier, more beautiful plants! 🌷
Materials and Tools Needed 🌱🛠️
Before you begin approach grafting for ornamental plants, make sure you have the right materials and tools for a smooth process. Here’s a list of what you’ll need:
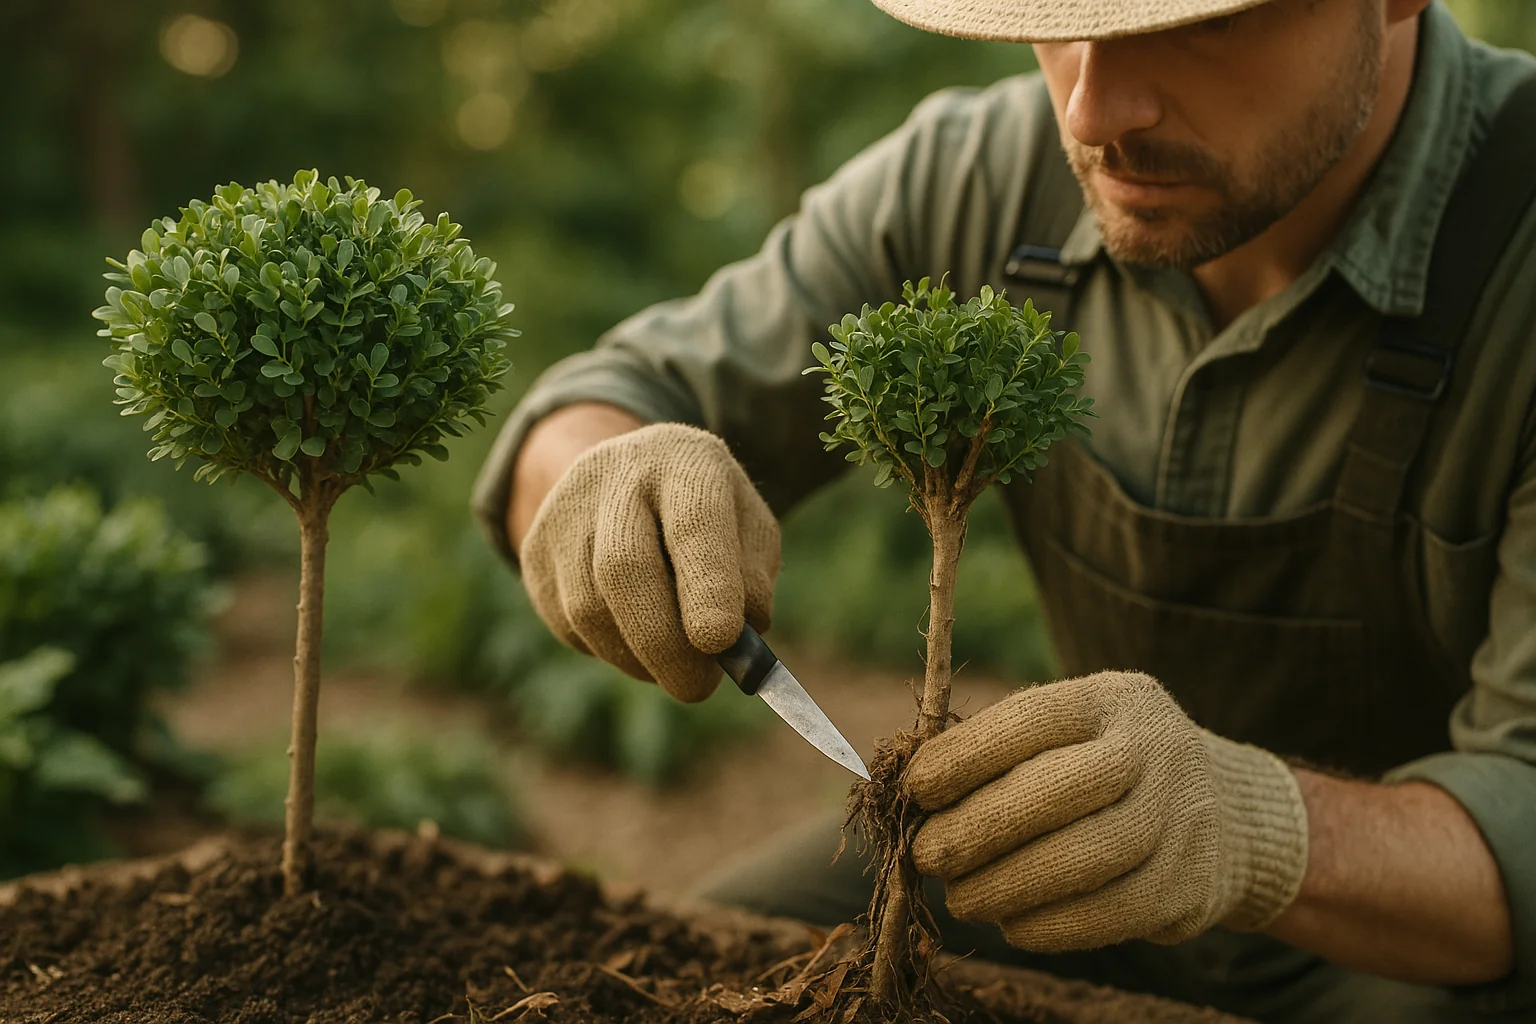
- Rootstock and Scion Plants 🌿: Choose two healthy plants—one as the rootstock (for the roots) and one as the scion (for the desired traits). Make sure they are compatible in terms of size and species.
- Sharp Grafting Knife or Scissors 🔪: A clean, sharp knife is essential for making precise cuts on both plants without causing damage. You want smooth, clean cuts for the best grafting success.
- Grafting Tape or Rubber Bands 🎀: Use grafting tape (or soft rubber bands) to secure the scion and rootstock together. This helps keep the graft in place while the plants heal and bond.
- Sterilizing Solution 🧼: Clean your tools with a disinfecting solution (e.g., rubbing alcohol) to prevent the spread of disease or pests between plants. Clean tools also help ensure a more successful graft.
- Grafting Wax or Sealant ✨: Apply grafting wax or sealant around the graft site to protect it from moisture loss, infection, and pests.
- Small Stakes or Support 🏷️: If the plants need extra support, especially in the early stages, a small stake can help keep the scion and rootstock aligned properly while they fuse.
- Pruning Shears ✂️: If needed, pruning shears are helpful for trimming excess growth or removing any unwanted branches to create the ideal grafting area.
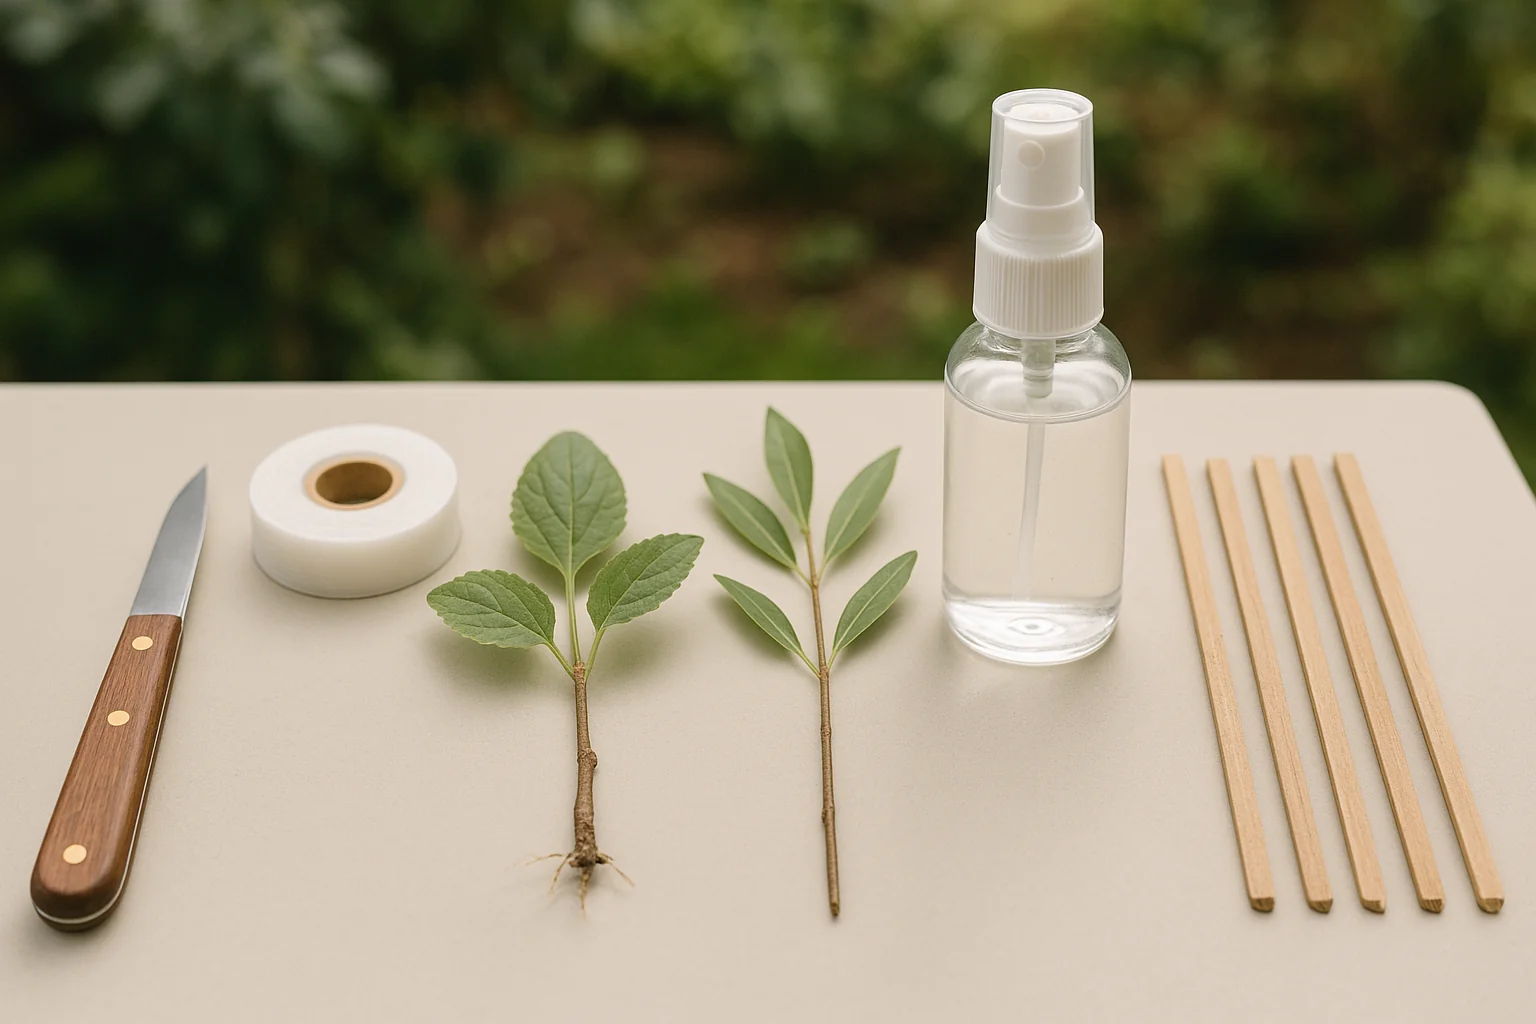
By gathering these materials and tools, you’ll be all set to get started with approach grafting and ensure your ornamental plants thrive! 🌷🌿
Step-by-Step Guide to Approach Grafting 🌱
Now that you’re equipped with the right tools and materials, let’s dive into the step-by-step process of approach grafting for ornamental plants. Follow these simple steps to successfully graft your plants!
Prepare the Plants 🌿
- Choose a healthy rootstock and scion that are compatible.
- Make sure both plants are actively growing, ideally in spring or early summer.
- Clean the areas around the plants where you’ll be making the cuts, removing any dead leaves or debris.
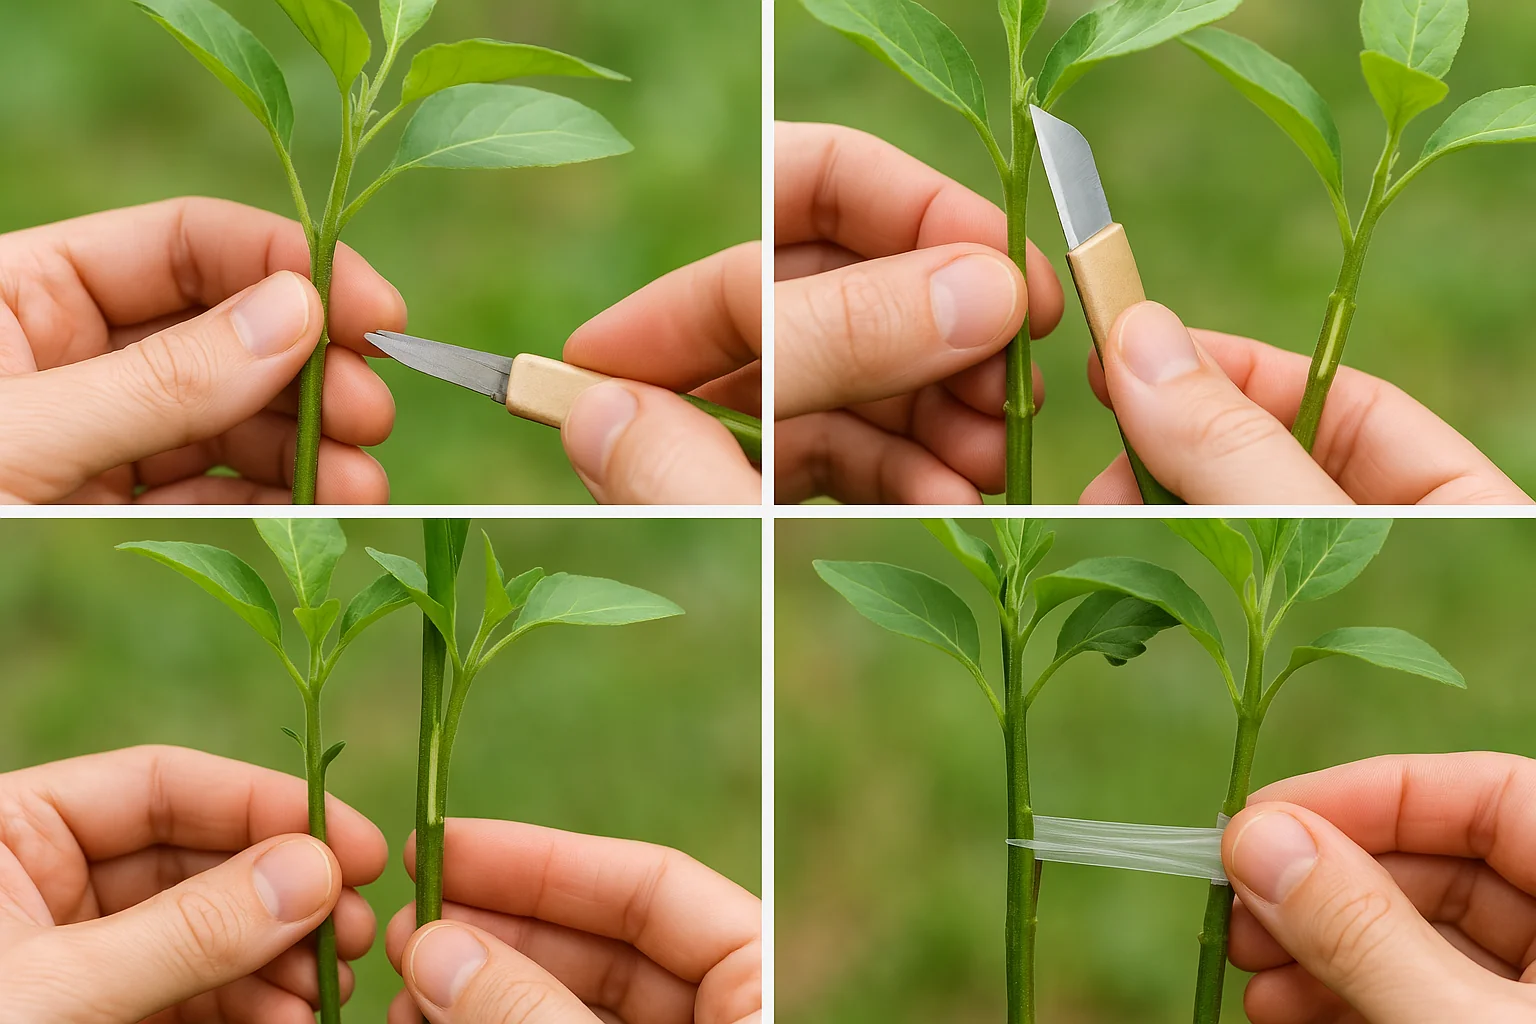
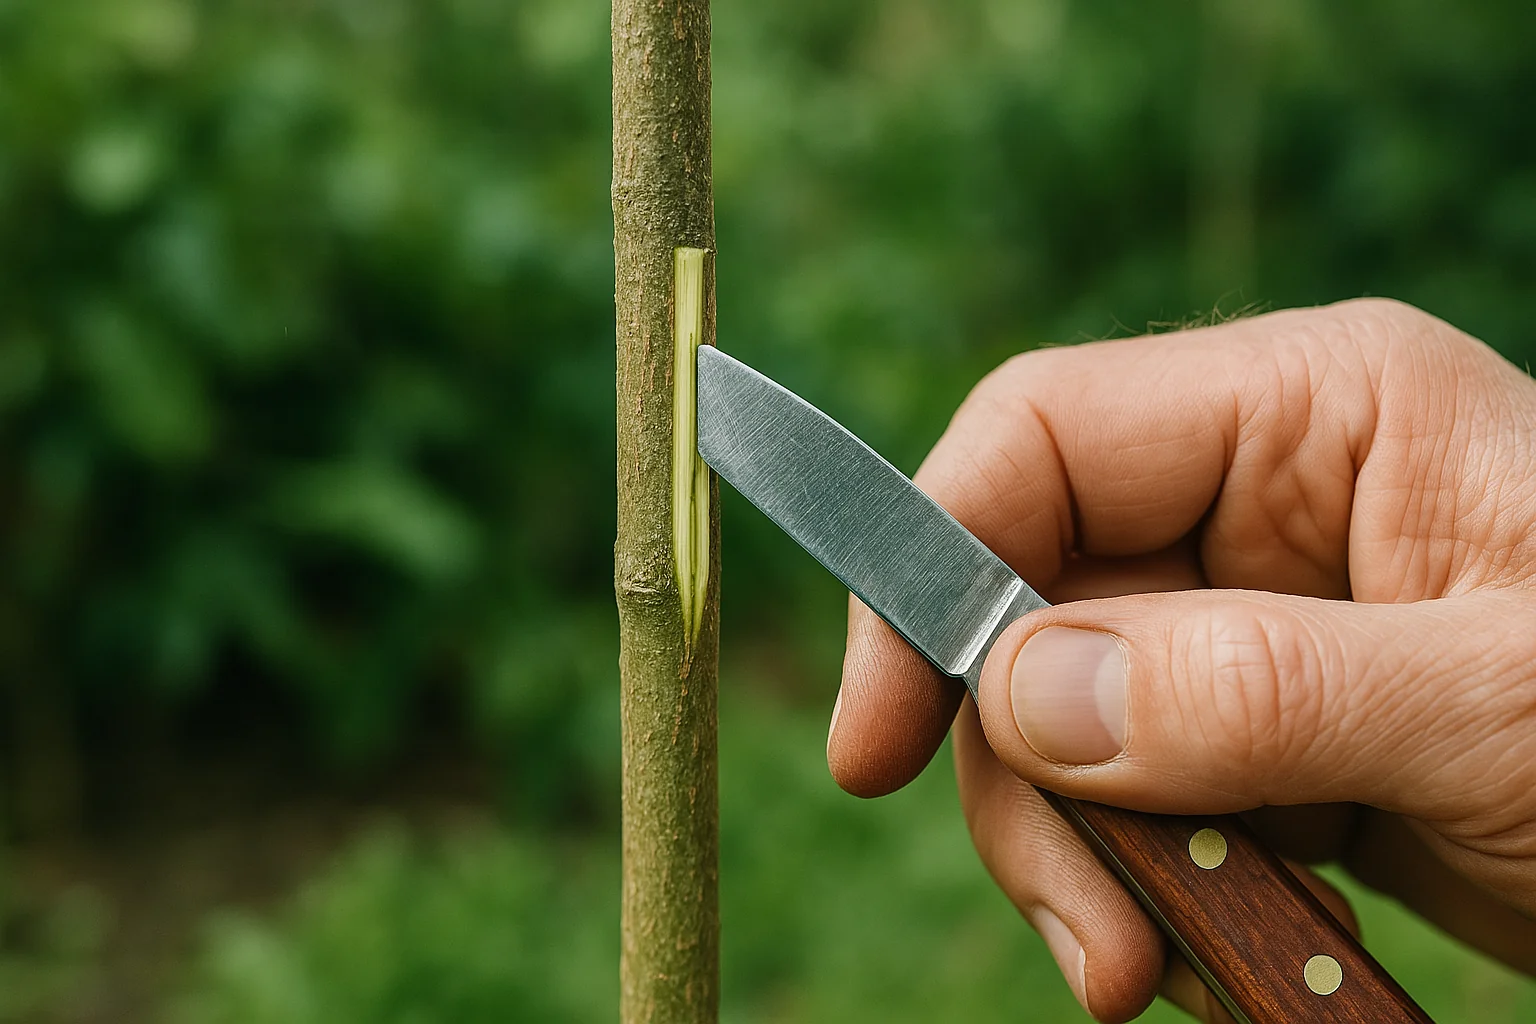
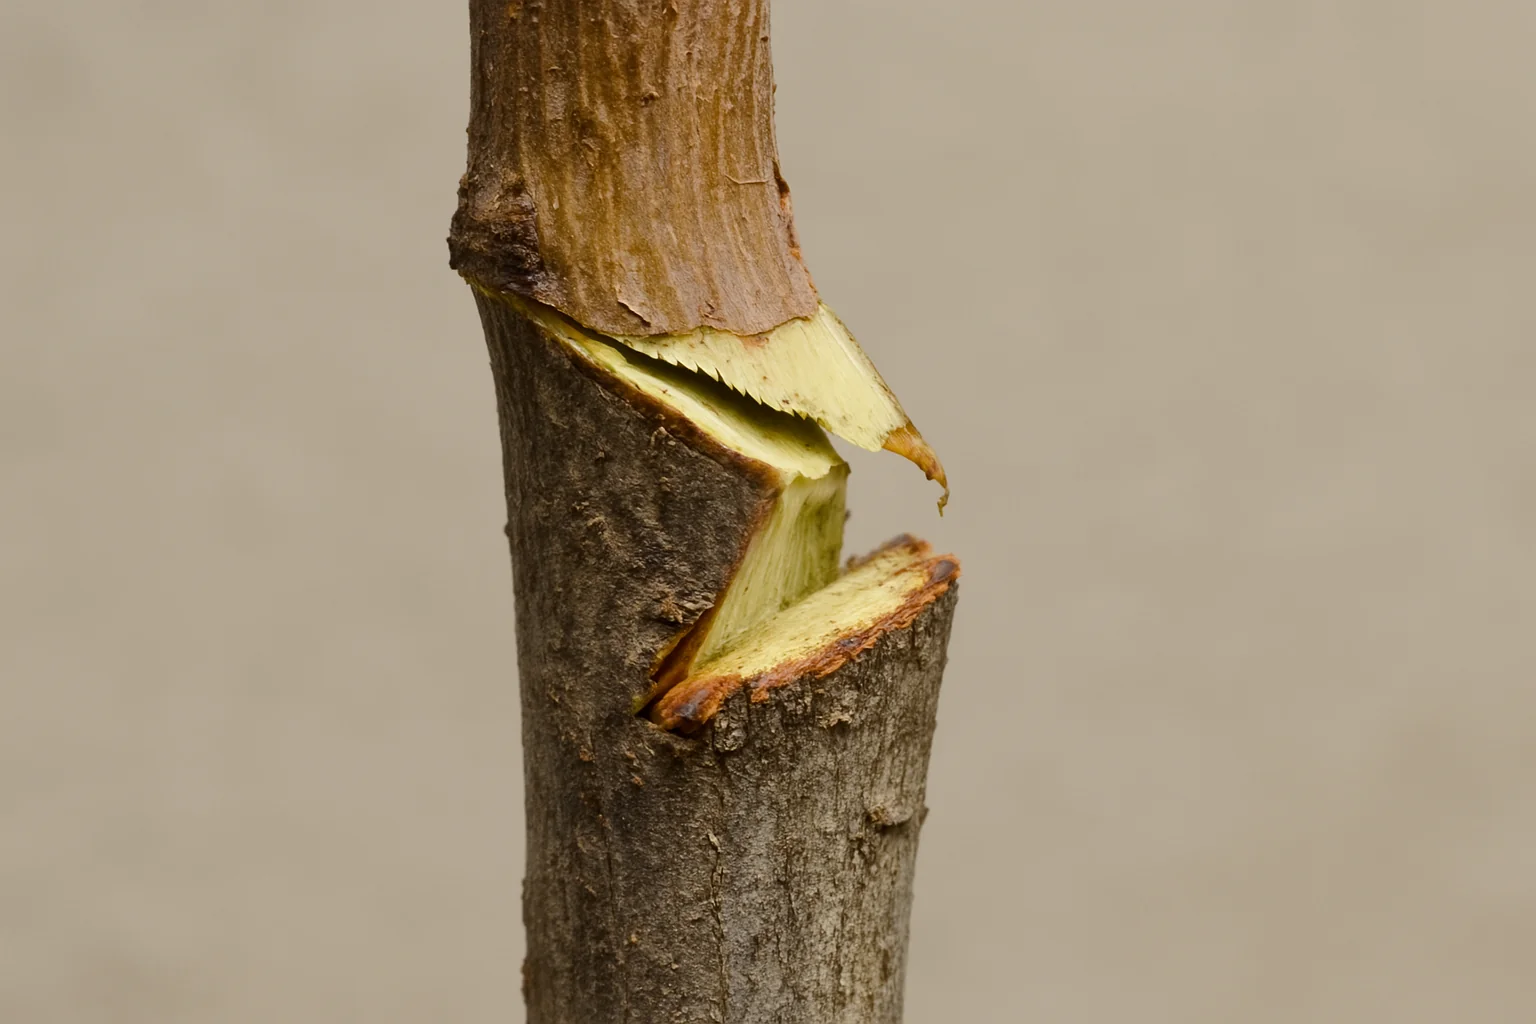
Make the Cuts 🔪
- Rootstock: Make a vertical cut on the stem of the rootstock. The cut should be about 2-3 inches long.
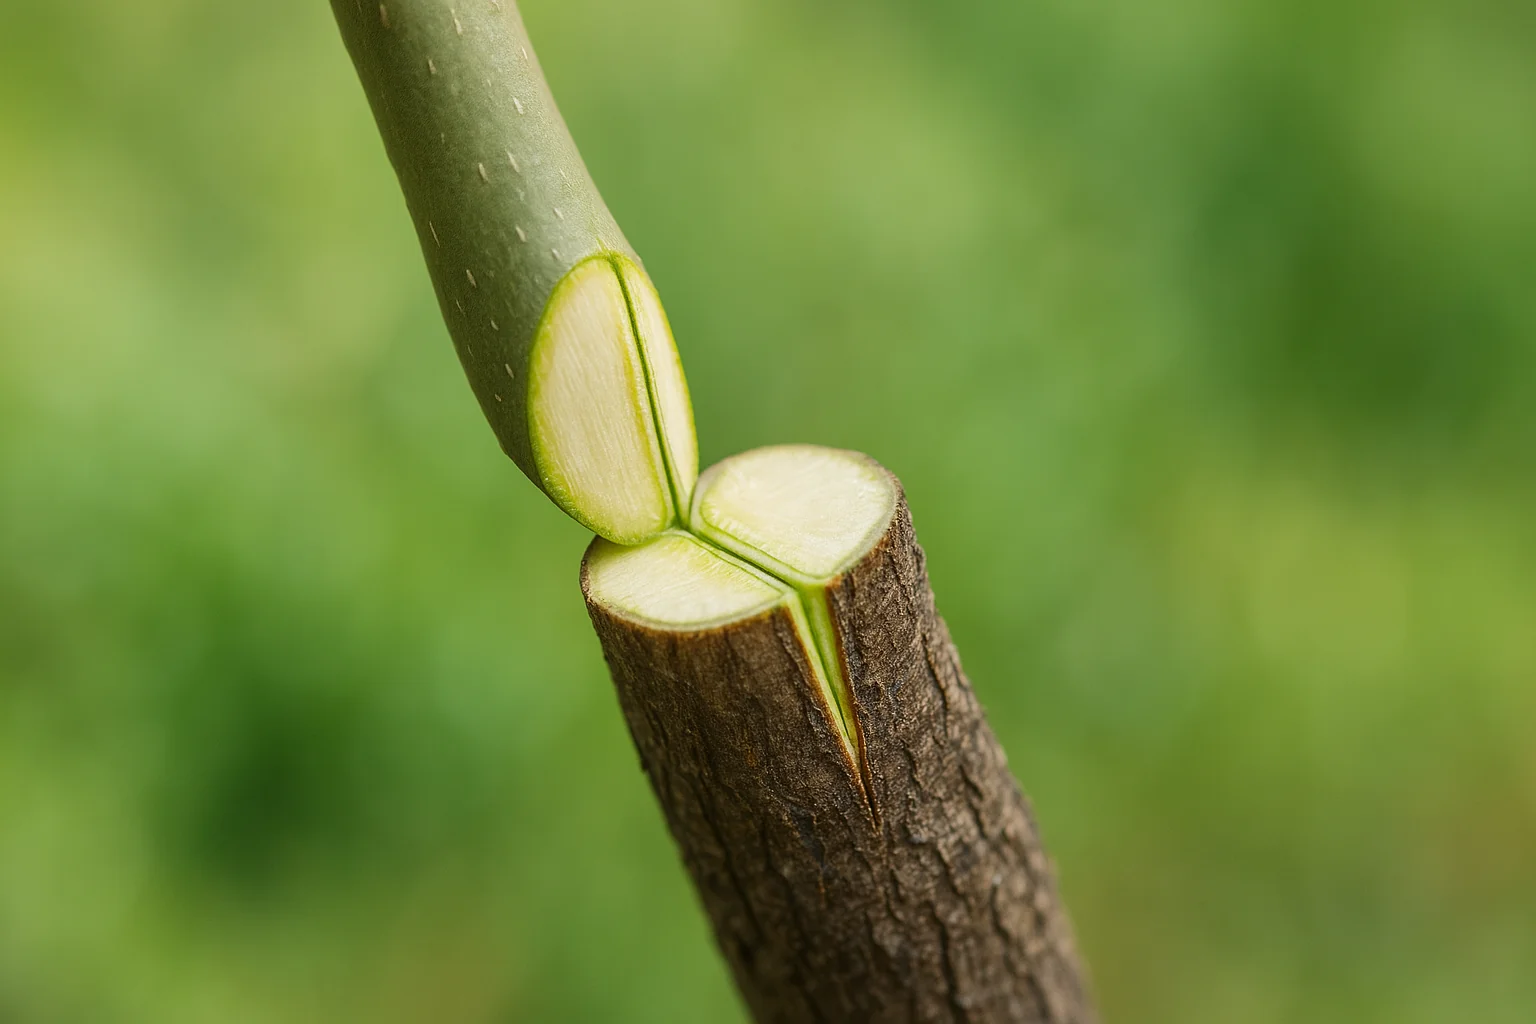
- Scion: Similarly, make a matching vertical cut on the scion. The cuts should align so that the tissues of both plants can connect and fuse.
- Tip: Ensure both cuts are smooth and clean to increase the chance of a successful graft.
Join the Plants Together 🌱
- Carefully bring the scion and rootstock together so the cut surfaces touch. The cambium layers (the green layer just under the bark) should be aligned to allow proper fusion.
- The two plants should be close enough that they are in direct contact, but not too tight to cause damage.
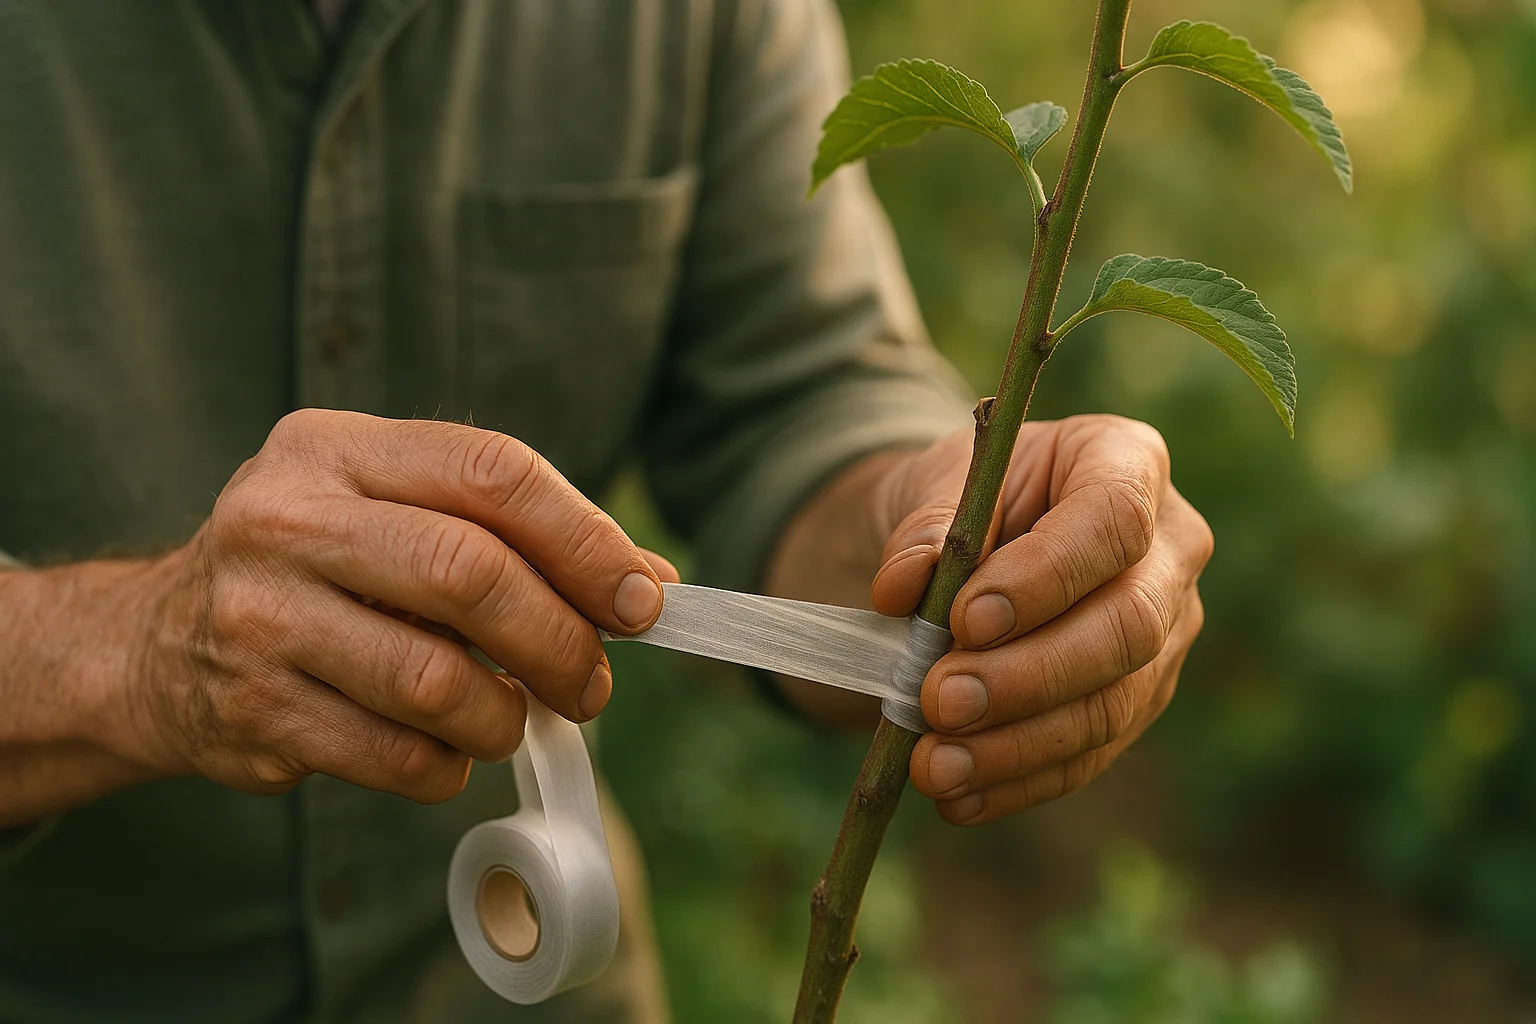
Secure the Graft 🎀
- Use grafting tape or rubber bands to gently hold the two plants together. Don’t wrap too tightly, as you want the graft to be secure but not constricted.
- If needed, use small stakes to prop the plants in place until they’re properly fused.
Seal the Graft ✨
- Apply a thin layer of grafting wax or sealant around the graft site to protect it from moisture loss and potential infections. This also helps keep pests away from the delicate area.
Post-Grafting Care 💧
- Keep the graft site moist but not soaked. Water the plants regularly, but avoid letting water sit around the graft.
- Place the grafted plants in a sheltered spot with indirect light, avoiding harsh sunlight until the graft heals.
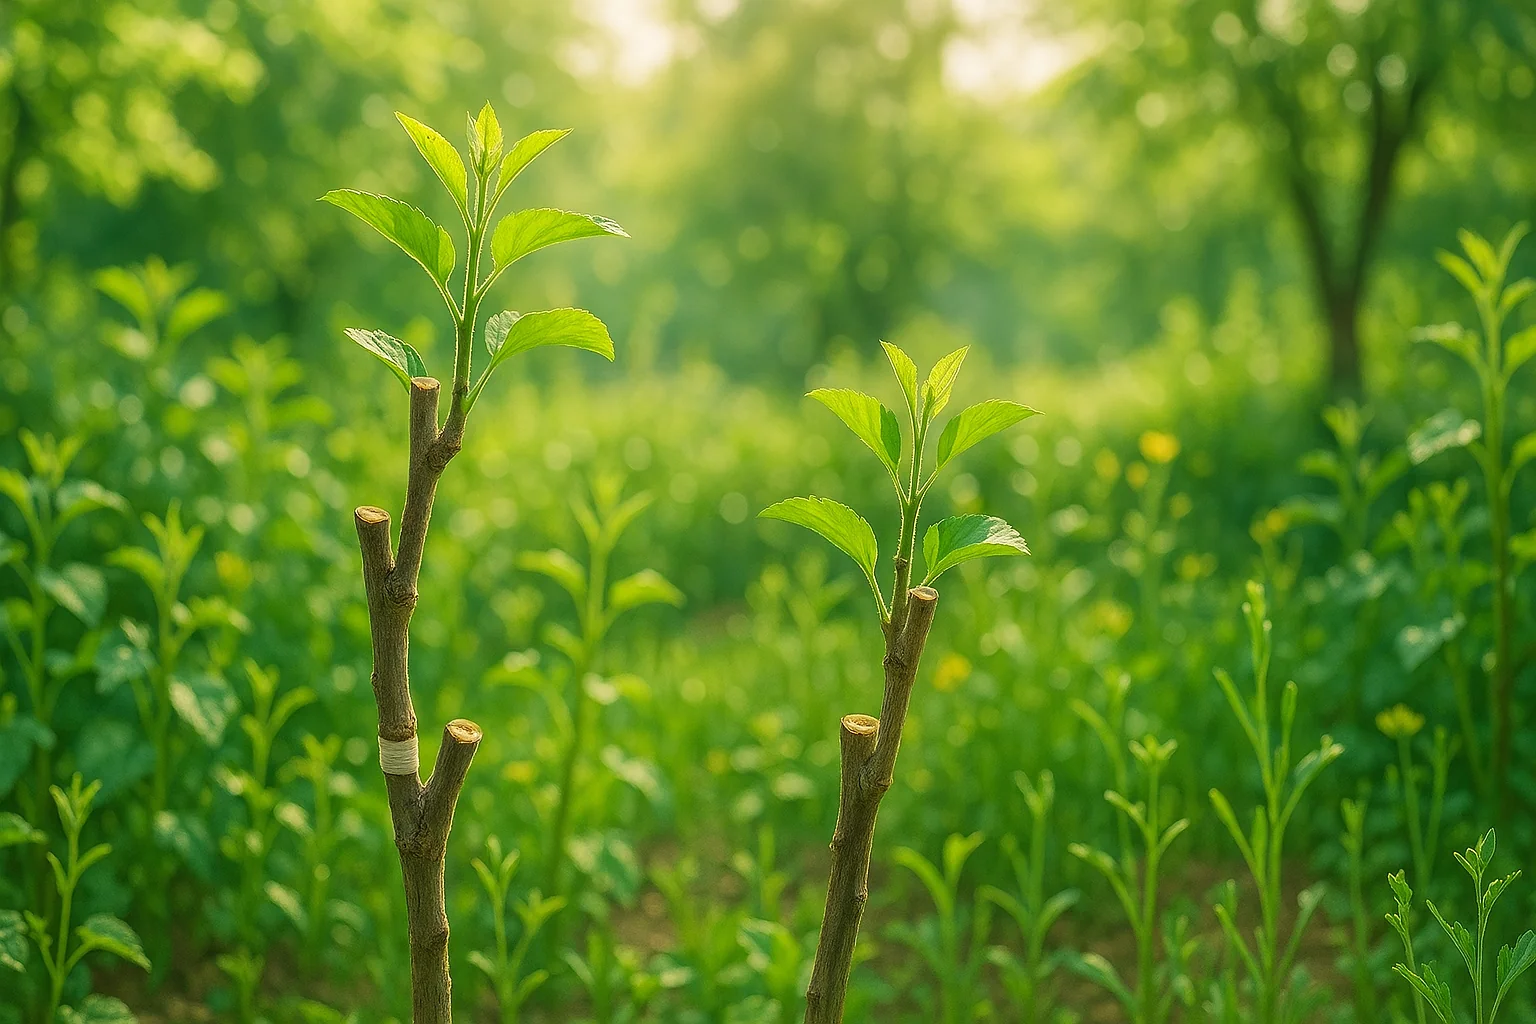
- Monitor the graft site over the next few weeks. If the graft successfully heals, you’ll begin to see new growth!
Remove the Grafting Tape 🎉
- After 4-6 weeks, once the graft has successfully fused and new growth appears, gently remove the grafting tape or rubber bands.
- Continue to care for your grafted plant as it matures, ensuring it receives proper nutrients, light, and water.
By following these easy steps, you’ll be on your way to successfully grafting ornamental plants and enjoying stronger, more beautiful specimens! 🌸
Common Mistakes to Avoid ⚠️🌿
While approach grafting for ornamental plants is a simple technique, a few common mistakes can prevent success. Avoid these pitfalls to ensure your grafting process is as smooth as possible:
Poor Alignment of Cuts 🔪❌
- Mistake: If the cut surfaces of the scion and rootstock don’t align properly, the graft won’t fuse correctly.
- Solution: Make sure the cambium layers (the green tissue under the bark) of both plants meet. Take your time to ensure the cuts are aligned perfectly.
Too Tight or Too Loose Wrapping 🎀
- Mistake: Wrapping the graft too tightly can restrict growth, while wrapping too loosely may cause the graft to separate.
- Solution: Use just enough tape or rubber bands to hold the plants together gently without constricting them. The graft needs room to grow and heal.
Not Using Sterilized Tools 🧼🔪
- Mistake: Using dirty or unsterilized tools can introduce bacteria or fungi, leading to infections or graft failure.
- Solution: Always clean and sterilize your tools (like your grafting knife and scissors) with rubbing alcohol before use.
Grafting Incompatible Plants 🌿❌🌱
- Mistake: Some plants don’t graft well together, and attempting to combine incompatible species can lead to graft failure.
- Solution: Do your research to ensure the rootstock and scion are compatible. Generally, plants from the same family or genus have the best success rate.
Grafting During the Wrong Season 🕒
- Mistake: Grafting during the plant’s dormant season (usually fall or winter) can hinder the healing process since the plants aren’t actively growing.
- Solution: Perform grafting during the active growing season, ideally in late spring or early summer when the plants are in their growth phase.
Neglecting Post-Graft Care 💧
- Mistake: Not giving proper care after grafting can result in the graft not healing correctly, or the plants becoming stressed.
- Solution: Keep the graft site moist (but not waterlogged), avoid direct sunlight, and be patient while the graft heals. Check regularly for signs of success or failure.
Removing the Grafting Tape Too Soon 🎀⏳
- Mistake: Removing the tape before the graft is fully healed can cause the scion to detach from the rootstock.
- Solution: Wait at least 4-6 weeks before removing the grafting tape. Only remove it once you see new growth, indicating the graft has successfully bonded.
By being aware of these common mistakes and following the solutions, you’ll increase your chances of successful approach grafting and enjoy healthier, more vibrant ornamental plants! 🌸🌿
Aftercare and Maintenance 🌿💧
Once you’ve successfully completed approach grafting for ornamental plants, proper aftercare is essential to ensure the graft heals well and the plants thrive. Here’s how to care for your grafted plants post-operation:
Keep the Graft Moist 💦
- Why: The graft site needs consistent moisture to heal and fuse effectively.
- How: Water the plants regularly, but avoid over-watering. Make sure the graft area stays moist, but not waterlogged. If the weather is dry, mist the grafted area lightly to maintain humidity.
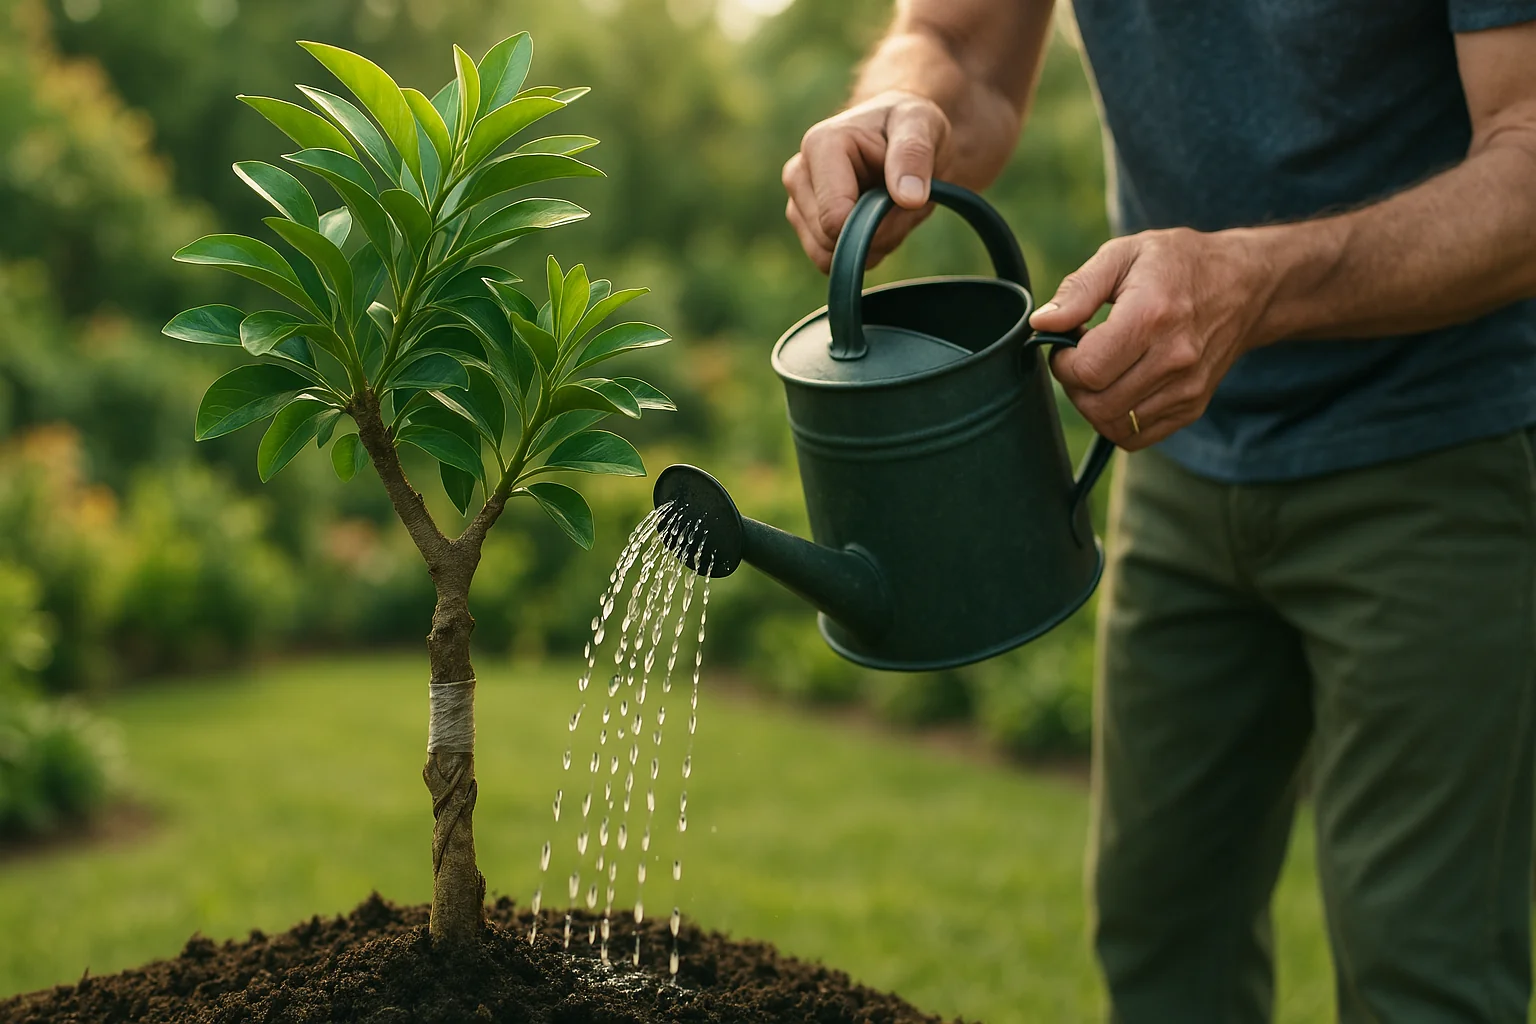
Avoid Direct Sunlight 🌞❌
- Why: Direct sunlight can stress the grafted plants, especially while they’re still healing.
- How: Place the grafted plants in a shaded or partially shaded spot for a few weeks. Once the graft is securely bonded and new growth appears, you can slowly acclimate the plant to more sunlight.
Monitor for Pests and Diseases 🐛🚫
- Why: Grafted plants are vulnerable to pests and infections, which could harm the graft site.
- How: Keep an eye out for any signs of pests or diseases around the graft area. Use organic pesticides or fungicides if necessary, but avoid spraying directly on the graft.
Be Patient ⏳
- Why: Grafting takes time, and the healing process can be slow.
- How: Be patient and give your plant the time it needs to heal. Don’t rush the process by removing support or tape too early. Expect to wait 4-6 weeks for successful graft bonding.
Remove Grafting Tape Gradually 🎀
- Why: The tape or rubber bands you used to secure the graft may start to constrict growth if left on too long.
- How: Once you see new growth from the grafted area, gently remove the tape. Do this carefully to avoid damaging the plant, and ensure the graft has fully healed before removal.
Prune as Needed ✂️
- Why: Pruning helps direct energy into the new graft and encourages healthy growth.
- How: After the graft has healed, prune any dead or unnecessary growth from the rootstock or scion to allow the plant to focus on developing the grafted area. This also helps the plant maintain a balanced shape.
Fertilize Lightly 🌱
- Why: Fertilization encourages strong growth, but too much can stress the graft.
- How: Apply a gentle, balanced fertilizer once you see new growth from the graft. Avoid over-fertilizing, as this can hinder the plant’s natural healing process.
By following these aftercare steps, you’ll set your grafted plants up for long-term success, ensuring they grow strong, healthy, and beautiful! 🌷🌿
Troubleshooting and Problem Solving ⚠️🌿
Even with the best care, problems can arise after approach grafting for ornamental plants. Here are some common issues you might encounter and how to fix them:
Graft Fails to Fuse ❌
- Problem: Sometimes, the scion and rootstock don’t join properly, and the graft doesn’t heal.
- Solution: Check the alignment of the cambium layers. If they weren’t properly aligned, the graft won’t take. Try again with new cuts and ensure both plants are compatible. If needed, make a fresh cut and ensure the plants are in good health.
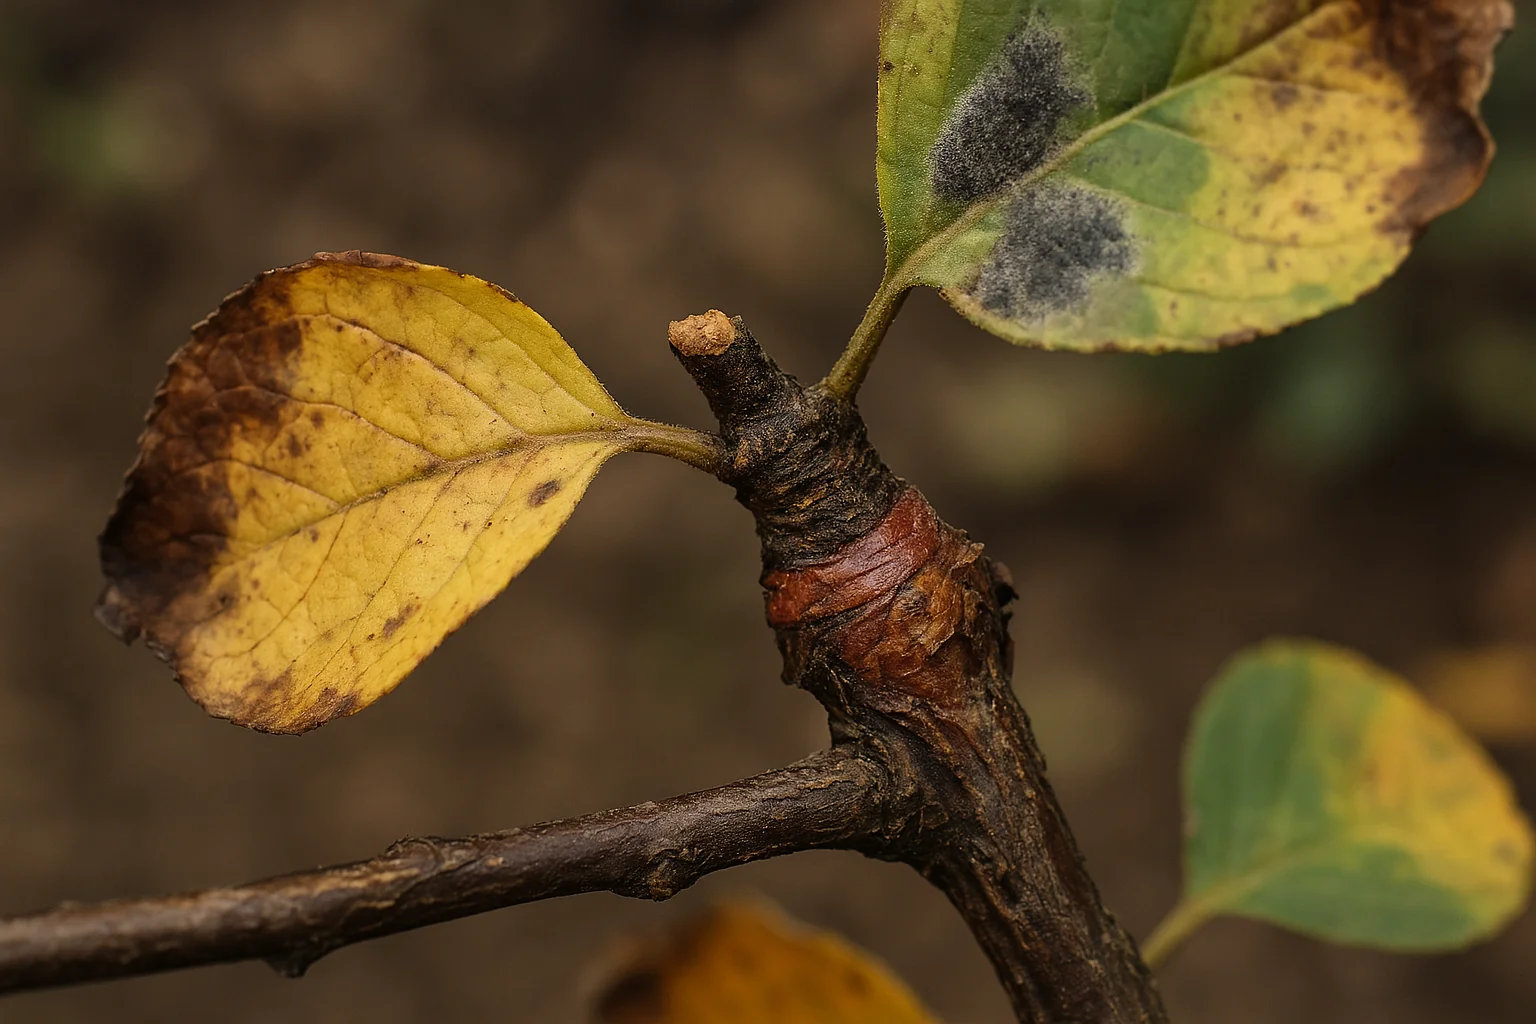
Graft Site Becomes Moldy or Fungal 🦠
- Problem: If the graft site remains too moist or isn’t protected, mold or fungal growth can develop.
- Solution: Remove any infected material carefully and treat with an antifungal solution. Ensure the graft site isn’t too wet and has proper air circulation. Consider using grafting wax or sealant to protect the graft site from moisture buildup.
Graft Turns Yellow or Wilts 🌿😟
- Problem: If the scion or rootstock turns yellow or wilts, it could indicate stress or poor grafting.
- Solution: Check for pests, disease, or improper watering. If the grafted plants are too stressed, remove any damaged sections and ensure the plant isn’t exposed to extreme temperatures or sunlight. Graft in the right season for better results.
New Growth Is Weak or Stunted 🌱
- Problem: The new growth after grafting may be weak or slow, indicating the graft isn’t fully established.
- Solution: Be patient! Sometimes, it takes a little longer for grafts to fully bond and establish. Continue regular care, but avoid fertilizing too early, as this can cause stress. If the growth continues to be weak, consider giving the plant more light or adjusting the watering routine.
Grafting Tape Is Too Tight or Loose 🎀
- Problem: If the grafting tape is applied incorrectly, it can either restrict growth or fail to hold the graft securely.
- Solution: Reapply the tape or rubber bands if needed. It should hold the plants together without cutting off circulation. Check periodically to ensure it’s not too tight or too loose, and adjust as necessary.
Graft Becomes Detached 🛑
- Problem: If the scion becomes completely detached from the rootstock, the graft has failed.
- Solution: Remove any damaged or detached parts and start fresh. Double-check that the cuts are clean, and try again with proper alignment and secure wrapping. Make sure to be gentle and patient as the graft heals.
Pests or Insects Attacking the Graft 🐞
- Problem: Pests can be attracted to the graft area, leading to damage or infection.
- Solution: Inspect the graft regularly for any signs of pest activity, such as holes or discolored areas. Use an organic insecticide or neem oil to gently treat the plant, but avoid spraying the graft directly. Keep the area clean to discourage pest activity.
By staying aware of these potential issues and knowing how to address them, you’ll be well-prepared to solve problems and ensure the success of your grafted ornamental plants! 🌷💪
Final Thought
Approach grafting for ornamental plants is a rewarding technique that allows you to create stronger, more resilient plants while preserving unique traits or repairing damaged specimens. By following the steps, using the right tools, and giving your plants the proper care, you can successfully graft ornamental plants and watch them thrive!
Remember, patience and attention to detail are key throughout the process. From the initial cuts to post-grafting care, every step plays a role in ensuring your graft takes hold and grows beautifully. And, with a little troubleshooting know-how, you’ll be able to solve any challenges that come your way.
Whether you’re looking to repair a damaged plant, create new hybrids, or simply improve your plant’s health, approach grafting offers endless possibilities for plant lovers. Happy grafting, and may your ornamental plants flourish! 🌸🌱