
Plant propagation is an exciting way to expand your garden, but even seasoned gardeners can run into pitfalls along the way. Whether you’re growing new plants from seeds, cuttings, or divisions, avoiding common mistakes in plant propagation is key to success. From improper watering to choosing the wrong soil, small errors can lead to weak or failing plants. But don’t worry—this guide will help you identify the top propagation mistakes and show you how to correct them. Keep reading to ensure your plants thrive from the very start!
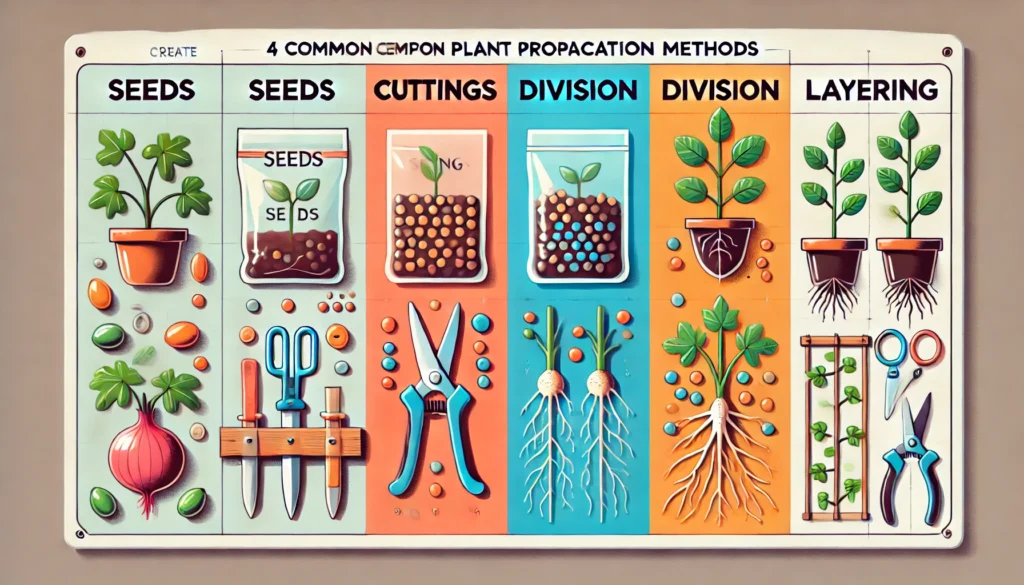
Choosing the Wrong Propagation Method
Plant propagation isn’t a one-size-fits-all process—different plants require different techniques. Using the wrong method can lead to failed cuttings, poor germination, or weak plants.
Understanding Propagation Methods
The most common ways to propagate plants include:

- Seeds – Best for annuals, vegetables, and some perennials.
- Cuttings – Ideal for herbs, succulents, and many houseplants.
- Division – Works well for perennials like hostas and ornamental grasses.
- Layering – Perfect for vines and shrubs like jasmine or raspberries.
Common Mistakes to Avoid
- Using seeds when cuttings would work better – Some plants, like succulents, root faster from cuttings than seeds.
- Trying to propagate woody plants with soft cuttings – Hardwood cuttings need a different approach than softwood or herbaceous ones.
- Dividing plants at the wrong time – Some species require division in spring, while others do better in fall.
How to Avoid This Mistake
- Research the best propagation method for each plant.
- Experiment with different techniques to see what works best.
- Observe successful plants in your area and learn from experienced gardeners.
Choosing the right propagation method increases success rates, helping your new plants grow strong and healthy from the start.
Using Poor-Quality or Unsuitable Cuttings
Selecting the right cuttings is crucial for successful plant propagation. Poor-quality or unsuitable cuttings often lead to weak growth, disease, or complete failure. To ensure the best results, follow these key guidelines:
Choose Healthy Parent Plants
Always take cuttings from strong, disease-free plants. Weak or stressed plants may pass on issues like pests, fungal infections, or poor genetic traits, reducing the chances of successful rooting.
Use the Right Type of Cutting
Different plants require different types of cuttings:
- Softwood Cuttings – Best for fast-growing plants like herbs and shrubs. Take them in spring or early summer.
- Semi-Hardwood Cuttings – Suitable for woody plants like roses and lavender, usually taken in late summer.
- Hardwood Cuttings – Ideal for deciduous trees and shrubs, collected in late fall or winter.
Using the wrong type of cutting can lead to slow or no root development.
Select the Right Cutting Size
A good cutting is usually 4–6 inches long with at least 2–3 leaf nodes. Cut just below a node using clean, sharp scissors. Remove excess leaves to reduce water loss and encourage root growth.
Avoid Old or Weak Stems
Older, woody stems often struggle to root, while very young, tender shoots may rot easily. Choose semi-mature growth for the best balance of strength and flexibility.
Take Cuttings at the Right Time
The best time to take cuttings is early in the morning when plants are fully hydrated. Avoid harvesting in extreme heat, as cuttings may dry out quickly.
By selecting high-quality, suitable cuttings, you increase the likelihood of successful propagation, leading to healthy, thriving plants.
Incorrect Soil or Growing Medium
The soil or growing medium plays a crucial role in plant health. Using the wrong type can lead to poor growth, weak roots, and even plant failure. Here’s what you need to know:
Poor Drainage Causes Root Rot
Plants need well-draining soil to prevent waterlogging. When excess moisture stays trapped, roots suffocate and rot. Signs include yellowing leaves, mushy roots, and slow growth.

Solution:
- Use a well-aerated, loose-growing medium.
- Add perlite, sand, or compost to improve drainage.
- Choose pots with drainage holes if growing in containers.
Wrong Soil pH Stunts Growth
Soil pH affects nutrient absorption. If it’s too acidic or too alkaline, plants struggle to take in essential minerals, leading to deficiencies.
Solution:
- Test the soil pH with a kit.
- Adjust acidity with lime (to raise pH) or sulfur (to lower pH).
- Choose soil that matches your plant’s natural habitat.
Lack of Nutrients Weakens Plants
Soil depleted of nutrients leads to weak, slow-growing plants. Without key elements like nitrogen, phosphorus, and potassium, leaves turn pale, growth slows, and flowering reduces.
Solution:
- Use organic compost or balanced fertilizers.
- Rotate crops and avoid overusing the same soil.
- Replenish nutrients with mulch, compost tea, or slow-release fertilizers.
Using Heavy or Compact Soil Limits Root Growth
Clay-heavy or compacted soil restricts root expansion, reducing oxygen flow. This leads to weak plants and stunted growth.
Solution:
- Loosen soil with organic matter like peat moss or coco coir.
- Avoid stepping on or compressing garden soil.
- Consider raised beds or aerated potting mixes for better structure.
By choosing the right soil or growing medium, you create the best conditions for healthy, thriving plants.
Overwatering or Underwatering
Watering mistakes are one of the most common reasons plants struggle. Both overwatering and underwatering can cause stress, leading to yellowing leaves, root rot, or stunted growth. Here’s how to identify and fix these issues:
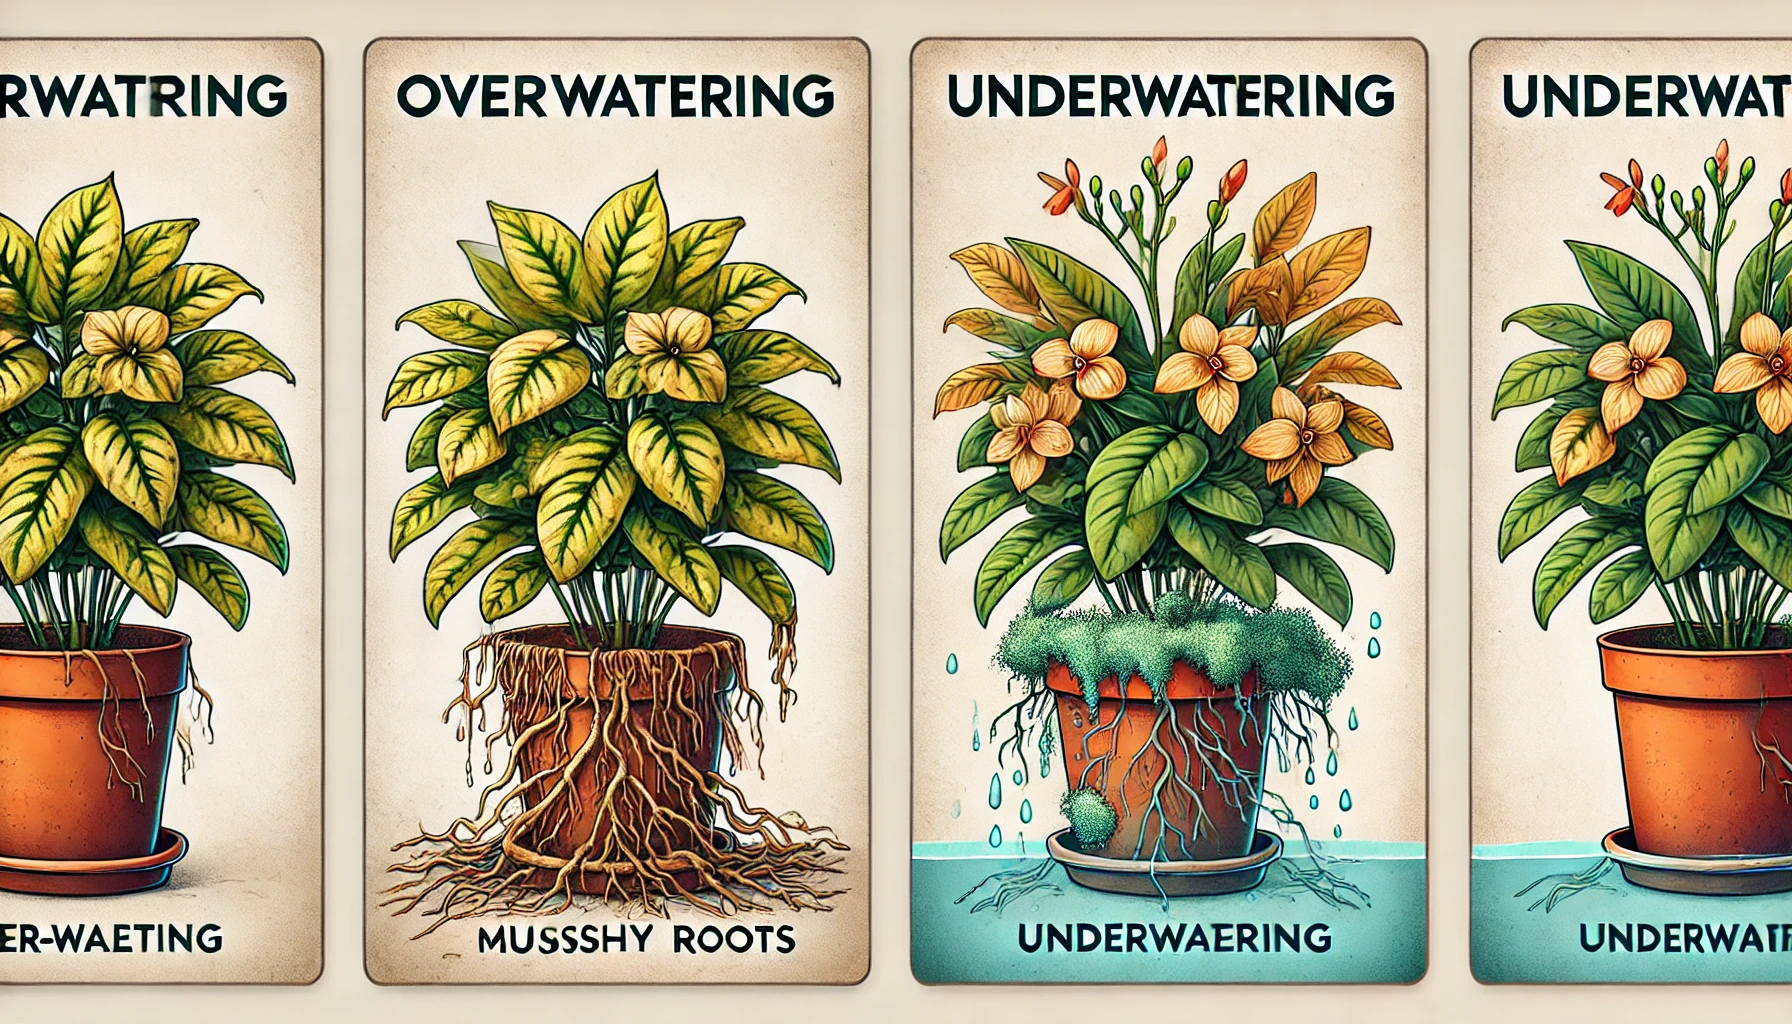
Signs of Overwatering
- Yellow or wilting leaves despite moist soil
- Mushy or rotten roots (bad smell from soil)
- Mold or fungus growth on the soil surface
- Edema (water blisters) on leaves
Fix:
- Reduce watering frequency and let the topsoil dry out.
- Improve drainage by using well-draining soil and pots with holes.
- Remove affected roots and repot if necessary.
Signs of Underwatering
- Dry, crispy leaves and slow growth
- Soil pulling away from the pot edges
- Drooping or curling leaves
- Lightweight pot (dry soil weighs less)
Fix:
- Water deeply but less frequently to encourage deep roots.
- Use mulch to retain soil moisture.
- Stick to a consistent watering schedule based on plant needs.
Best Watering Practices
- Water early in the morning to reduce evaporation.
- Check soil moisture by sticking a finger 1-2 inches deep before watering.
- Use room-temperature water to avoid shocking the roots.
Balancing moisture is key to plant health. Watch your plant’s signals and adjust watering habits accordingly.
Neglecting Proper Temperature and Humidity
Maintaining the right temperature and humidity is crucial for healthy plant growth. Many gardeners overlook this, leading to weak, stressed, or diseased plants.
Ideal Temperature Ranges
Plants thrive within specific temperature ranges. Extreme heat can cause wilting, while cold temperatures may stunt growth or kill sensitive plants. Here’s what to keep in mind:
- Warm-season plants (e.g., tomatoes, peppers) grow best between 70–85°F (21–29°C).
- Cool-season plants (e.g., lettuce, broccoli) prefer 50–70°F (10–21°C).
- Sudden temperature drops can cause shock, leading to leaf drop or slow growth.
Humidity’s Role in Plant Health
Humidity levels impact a plant’s ability to absorb water and nutrients. Dry air can cause leaf curling, browning edges, and dehydration, while excessive humidity increases mold and fungal growth.
Tips to Maintain Proper Humidity:
- Use a humidifier or misting for tropical plants that need high humidity.
- Improve air circulation with a fan to prevent excess moisture buildup.
- For dry indoor air, place water trays near plants to boost humidity naturally.
Signs Your Plant Is Struggling
If your plant is not thriving, look for these warning signs:
 Wilting or curling leaves – Too much heat or dry air.
Yellowing leaves – Humidity imbalance or temperature shock.
Mold or fungus – Excess moisture and poor airflow.
Final Tip: Monitor temperature and humidity using a digital thermometer and hygrometer. Adjust conditions accordingly to create the perfect environment for your plants.
Skipping Rooting Hormones
Many gardeners rely on rooting hormones to speed up plant propagation, but they aren’t always necessary. Some plants root naturally without added stimulants, making propagation easier and more organic.
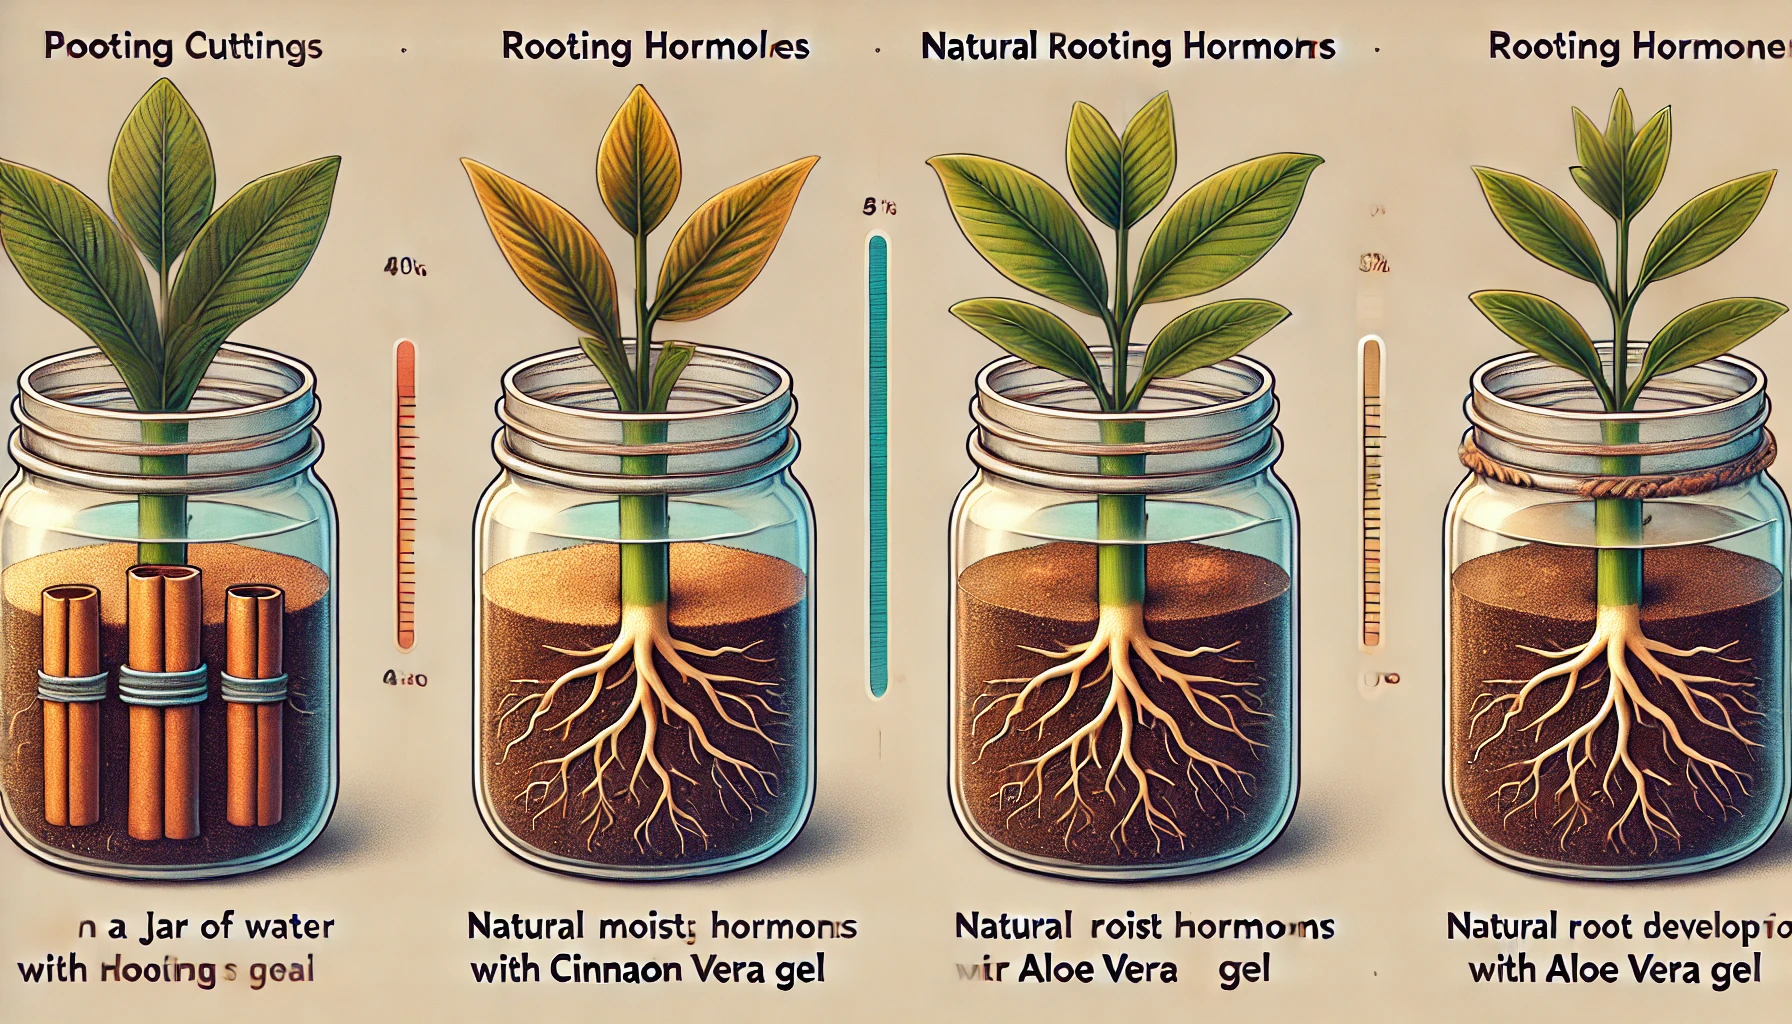
Why Skip Rooting Hormones?
- Certain Plants Root Easily – Softwood cuttings from plants like mint, rosemary, pothos, and succulents often develop roots without extra help.
- Natural Growth Process – Plants produce their own auxins (natural rooting hormones), especially when cuttings are taken at the right time.
- Avoid Chemicals – If you prefer organic gardening, skipping synthetic hormones aligns with a natural approach.
Best Practices for Rooting Without Hormones
Choose Healthy Cuttings – Select fresh, disease-free stems with at least 2-3 leaf nodes.
Use Water or Soil Propagation
- Water Method: Place cuttings in a clean jar of water, changing it every few days.
- Soil Method: Insert cuttings into moist, well-draining soil and keep humidity high.
Encourage Root Growth Naturally
- Aloe Vera Gel: Acts as a natural rooting agent.
- Cinnamon Powder: Prevents fungal infections and boosts root development.
- Honey: Contains antibacterial properties that protect cuttings.
Provide Optimal Conditions
- Keep cuttings in bright, indirect light.
- Maintain warmth (65–75°F) and humidity by covering with a plastic bag or dome.
- Water lightly to keep the medium moist but not soggy.
When Rooting Hormones Might Still Help
For slow-rooting plants like hardwood cuttings (e.g., roses, hydrangeas), using a rooting hormone may increase success rates. However, many plants will thrive without it when given the right care.
Skipping rooting hormones is a simple, cost-effective, and natural way to propagate plants successfully. With proper techniques, your cuttings can develop strong roots and grow into healthy plants without synthetic additives.
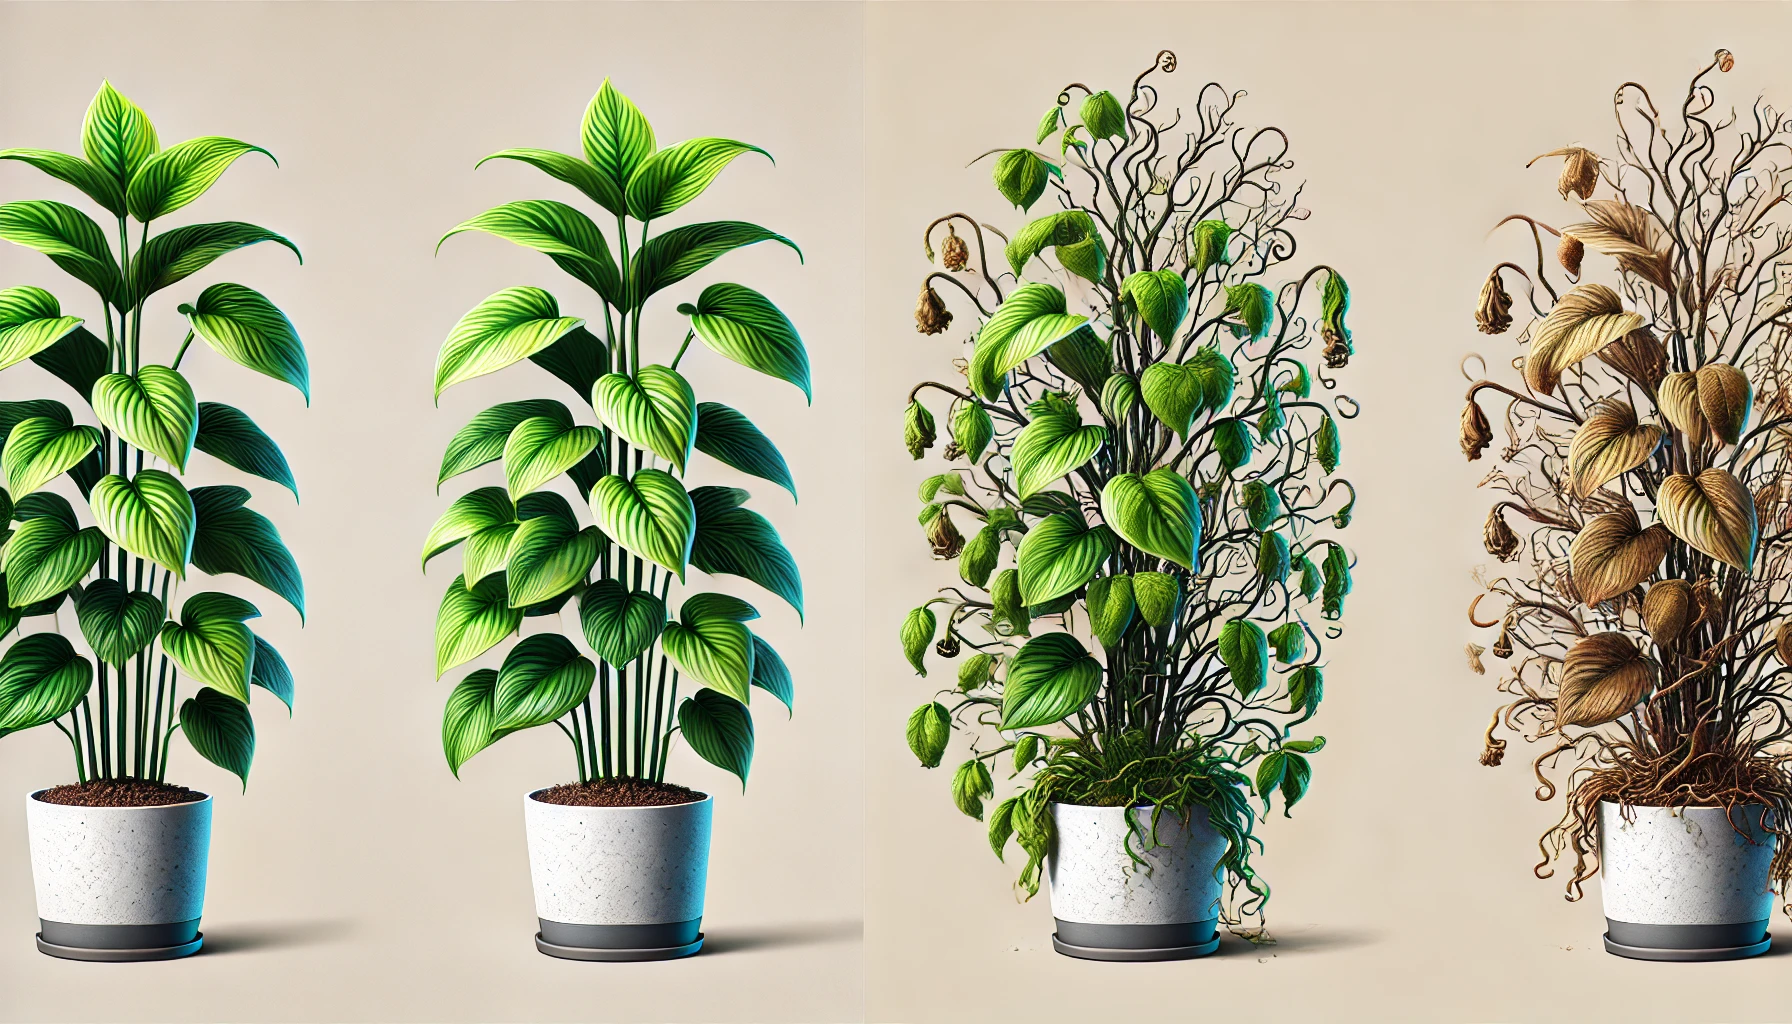
Not Providing Enough Light
One of the biggest mistakes in plant care is not providing enough light. Light is essential for photosynthesis, the process that keeps plants alive and thriving. Without sufficient light, plants grow weak, leggy, and may develop yellowing leaves.

Signs Your Plant Lacks Light
- Slow or stunted growth
- Pale, yellow, or dropping leaves
- Leaning or stretching towards a light source
- Reduced flowering or no blooms
How to Fix It
- Identify the Right Light Needs – Check your plant’s specific light requirements. Some plants need bright, direct sunlight, while others thrive in partial shade.
- Move the Plant Closer to a Light Source – Place your plant near a sunny window or use artificial grow lights for low-light areas.
- Rotate the Plant Regularly – Turn your plant every few days to ensure even light distribution and prevent uneven growth.
- Clean the Leaves – Dust on leaves can block light absorption. Wipe them with a damp cloth to maximize light intake.
- Use Reflective Surfaces – Mirrors or white walls can help bounce light around a room and brighten dim areas.
Providing the right amount of light is key to keeping your plants healthy. Observe their growth patterns and adjust their light exposure accordingly for best results.
Ignoring Air Circulation and Ventilation
When it comes to plant care, proper air circulation and ventilation are often overlooked, but they play a critical role in maintaining plant health. Plants, especially indoor varieties, need fresh air to thrive. Without adequate airflow, plants are more prone to fungal diseases, mold growth, and pests like aphids and spider mites.
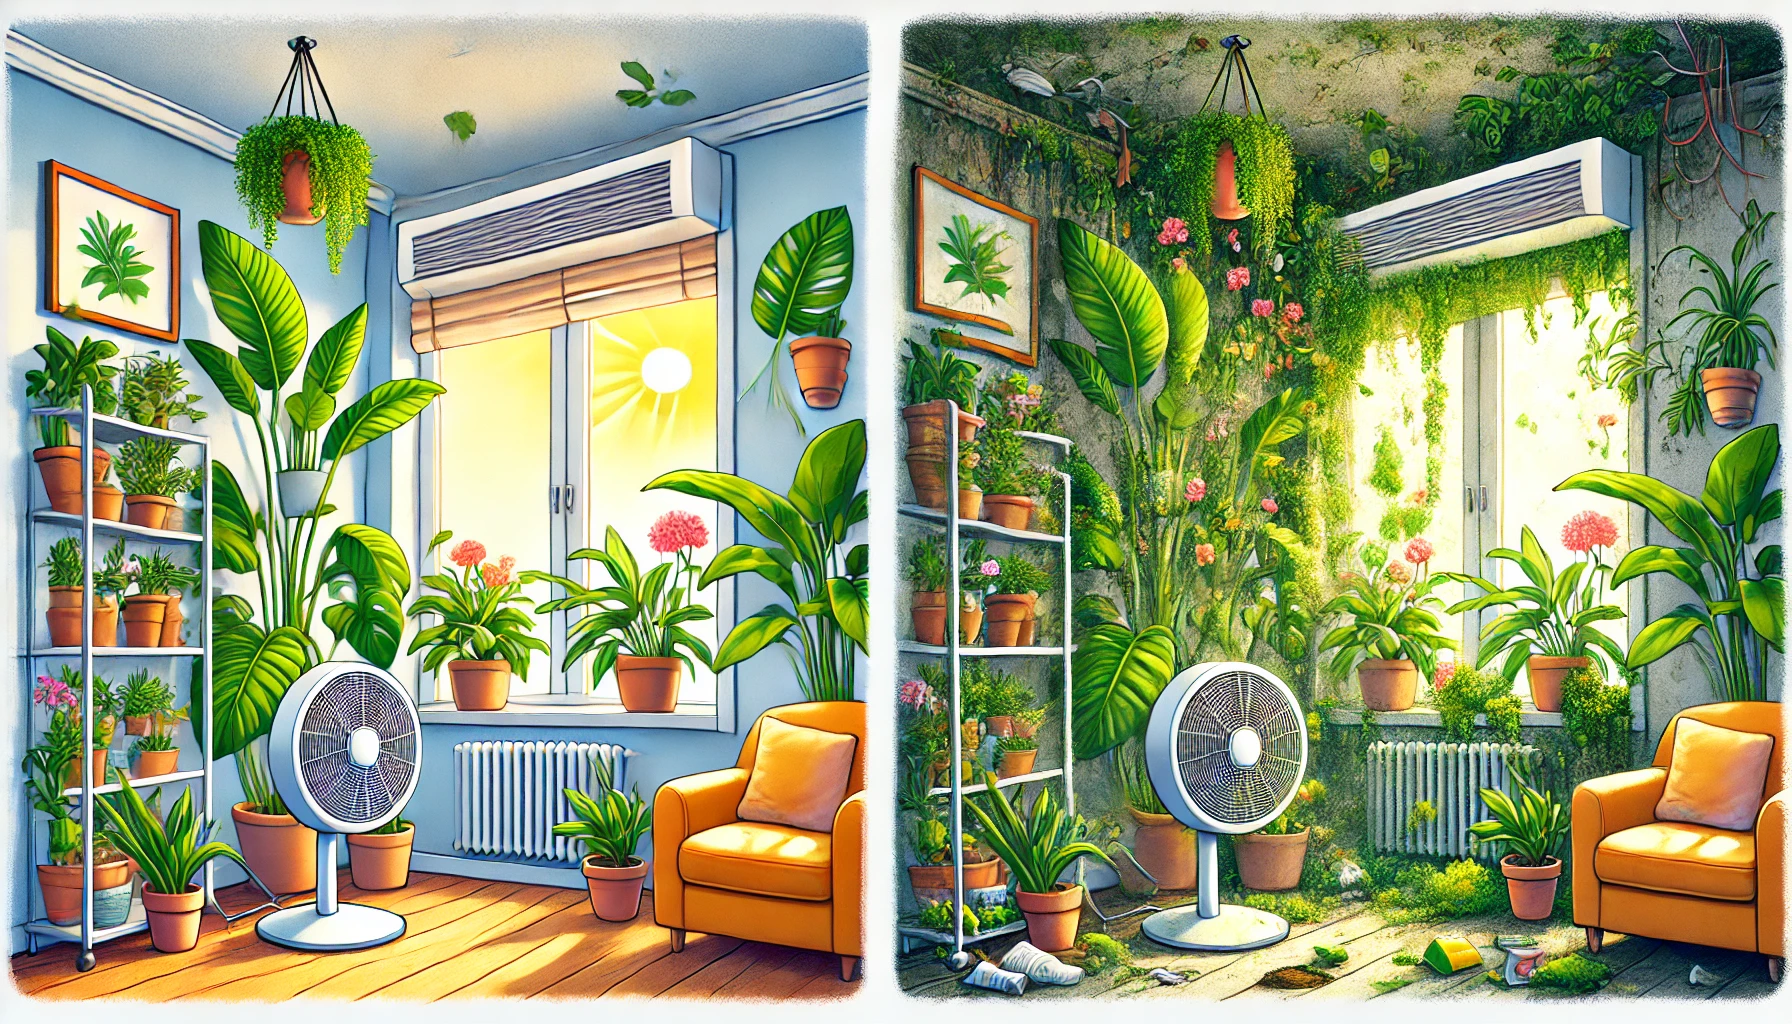
To ensure your plants get the airflow they need:
- Position Plants Wisely: Avoid placing them in closed-off corners where air can stagnate. A well-ventilated room or space with some airflow helps plants grow stronger and resist disease.
- Use Fans if Necessary: If you’re growing plants indoors, consider using a fan to circulate air, especially in a room with little natural ventilation. A small oscillating fan can do wonders in maintaining airflow.
- Avoid Overcrowding: When plants are too close together, they restrict airflow around each other. This can cause humidity to build up, creating an ideal environment for harmful mold and mildew.
- Open Windows: On warm days, open windows to allow fresh air into the room. Just make sure the temperature stays within the plant’s comfort zone to avoid stress.
By maintaining proper air circulation, you’ll create a healthier environment for your plants, leading to better growth, stronger resistance to diseases, and overall vitality.
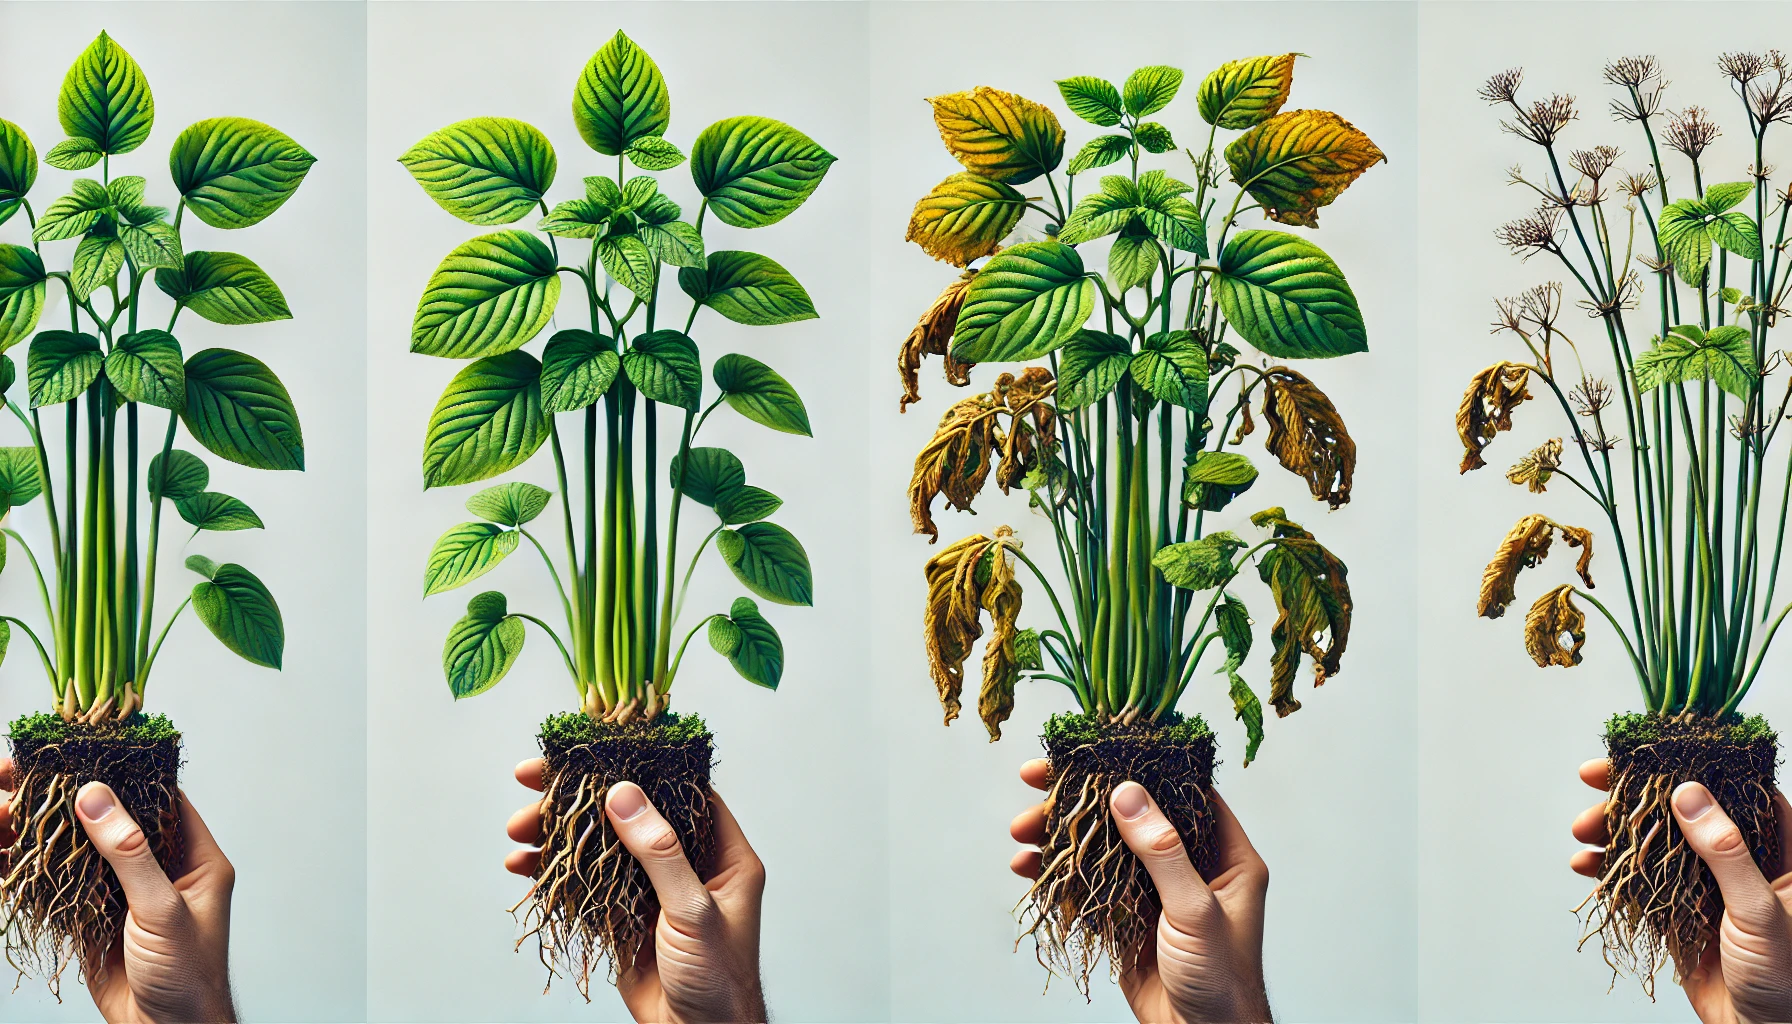
Being Impatient and Disturbing Roots Too Soon
One of the most common mistakes gardeners make is being impatient and disturbing the roots of their plants too soon. While it’s natural to want to check on the progress of a plant, especially when it’s growing quickly, disturbing the roots prematurely can cause more harm than good.
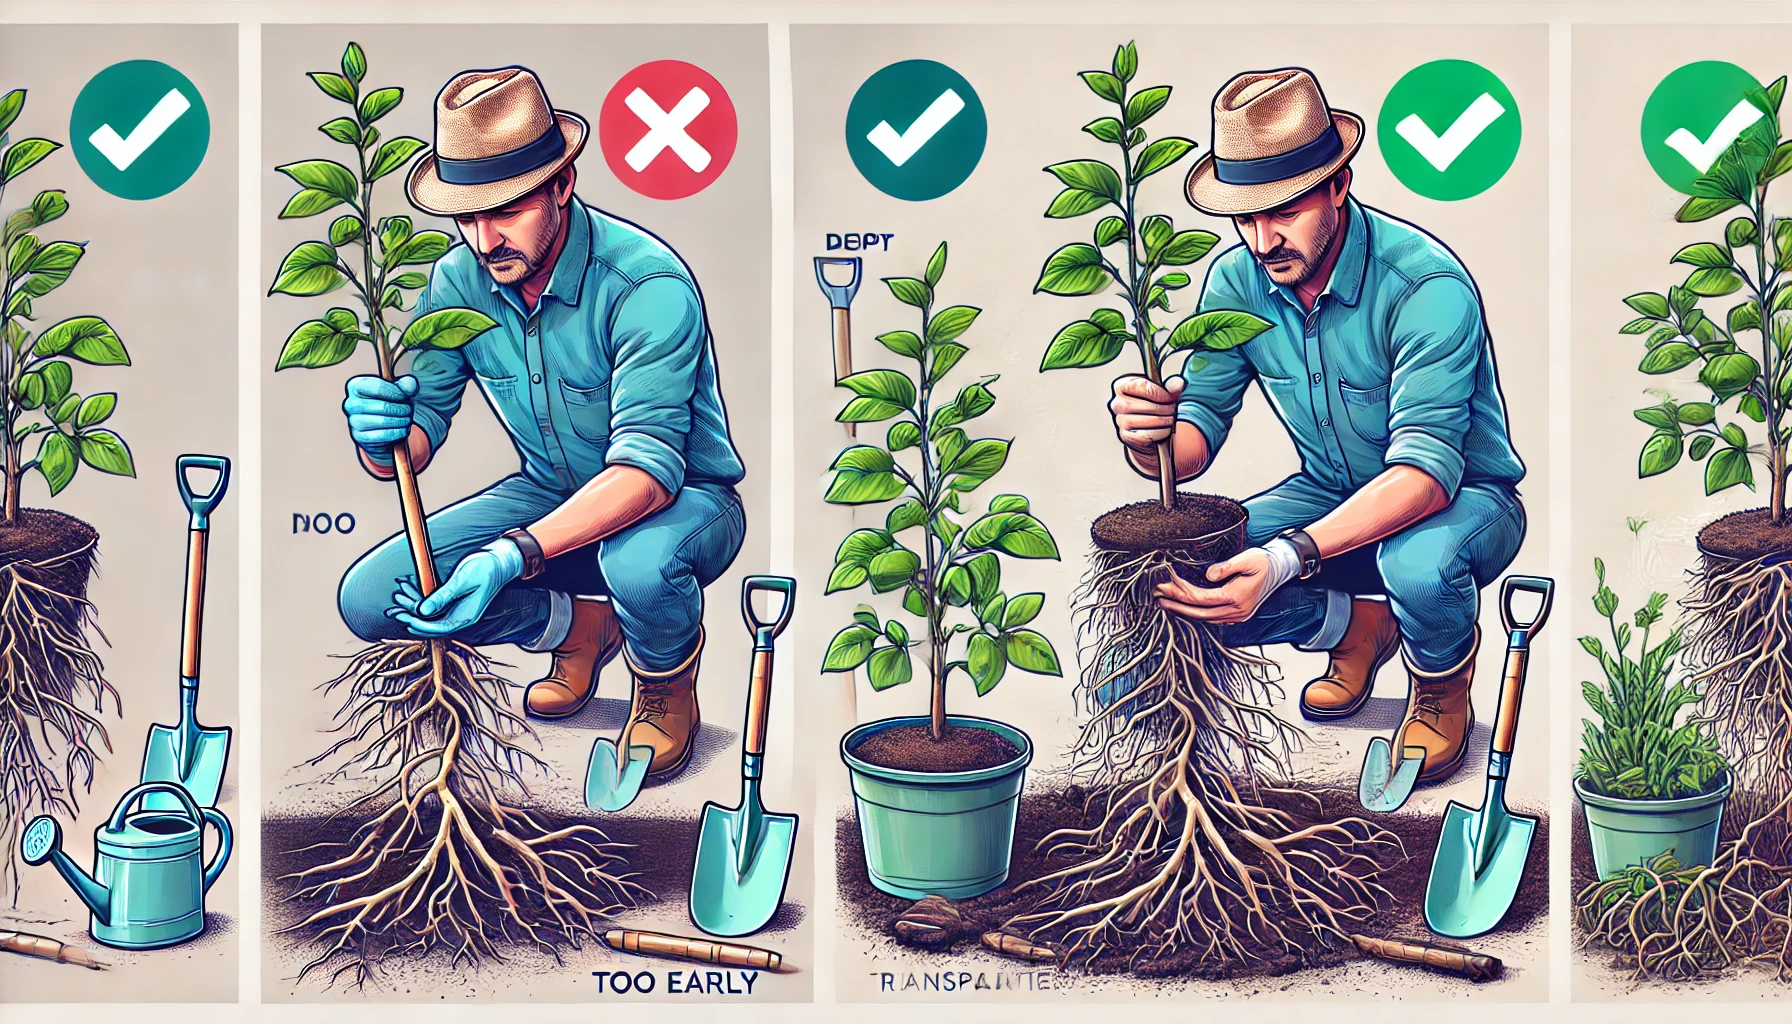
Why It’s Harmful
When you dig up or disturb a plant’s roots before they are well-established, you risk damaging the delicate root system. The roots are responsible for absorbing water and nutrients, and any disruption can lead to transplant shock or even plant death.
How to Avoid This Mistake
- Wait for Strong Roots: Make sure the plant has developed a strong root system before transplanting or moving it. You can check this by gently tugging on the plant to see if it resists or checking the root ball for visible growth.
- Be Patient with Growth: Plants need time to establish their roots. If you rush this process, your plant may struggle to survive, even if it looks healthy above ground.
- Use Root Pruning: For plants that need repotting or moving, consider root pruning at the right time to encourage healthy root growth, but avoid disturbing the entire system at once.
Transplanting Too Early or Incorrectly
Transplanting your plants too early or incorrectly can cause long-term damage, affecting their growth and development. Here’s what you need to know to avoid common mistakes and ensure your plants thrive:
Timing Is Key
Transplanting too early, especially in cold weather, can shock your plants. Wait until the soil has warmed up, and nighttime temperatures are consistently above 50°F (10°C). This ensures your plants are ready for the transition to their new environment.
Check Root Development
Before transplanting, make sure your plant’s roots have developed well in its current pot. If roots are still sparse or tangled, it may not be strong enough to handle the move. A healthy root system ensures better survival and quicker adaptation.
Don’t Disturb the Roots
When transplanting, avoid disturbing the root ball as much as possible. Gently remove the plant from its container, keeping the roots intact. Transplanting with minimal root disturbance helps reduce stress on the plant.
Correct Hole Size
Dig a hole that’s slightly larger than the root ball to allow for growth. If the hole is too small, the roots may become restricted, stunting the plant’s development.
Proper Watering
Water the plant thoroughly after transplanting to help settle the soil around the roots. Be careful not to overwater, as soggy soil can lead to root rot.
Give It Time to Adjust
After transplanting, give your plant time to adjust to its new location. Provide some shade during the first few days, especially if you’re transplanting in hot weather, to prevent sunburn and stress.
By paying attention to timing, root health, and transplanting methods, you can ensure a smooth transition for your plants, setting them up for healthy growth.
Avoiding the common mistakes in plant propagation can make a huge difference in your success as a gardener. By selecting the right propagation method, using healthy cuttings, and providing the proper environment, you can significantly increase your chances of growing thriving plants. Remember, gardening is all about learning and improving with each new attempt. So, don’t be discouraged by mistakes—use them as stepping stones to better plant care.
With these insights, you’re now ready to tackle plant propagation with confidence and watch your garden flourish! Happy propagating!