
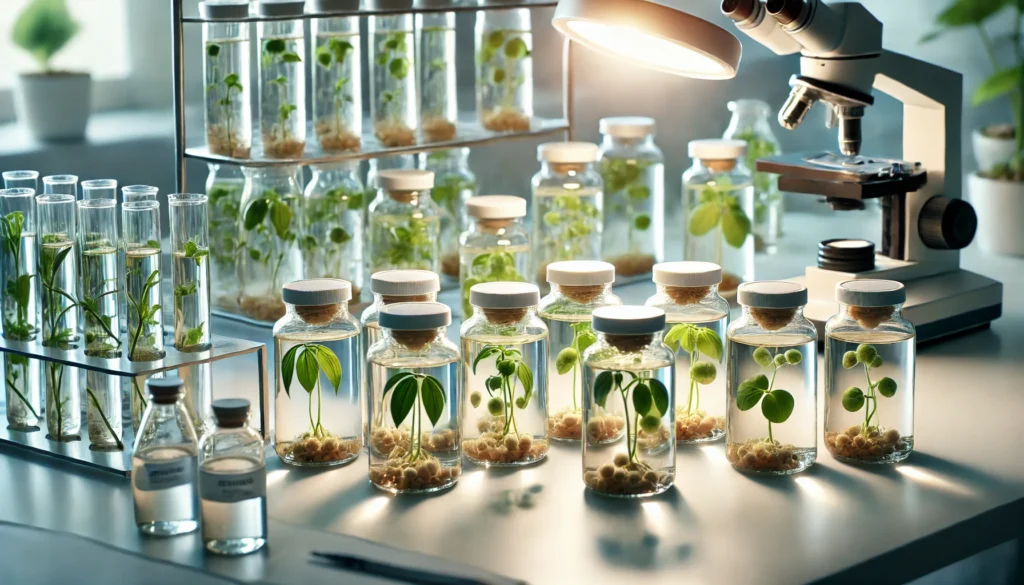
Have you ever wanted to grow multiple plants from your favorite specimen without worrying about diseases or pests? Tissue culture propagation at home might just be the answer you’ve been looking for! This innovative method allows you to produce healthy, genetically identical plants in a controlled environment, right from the comfort of your own home. Whether you’re a seasoned plant enthusiast or a beginner, mastering tissue culture propagation at home opens up endless possibilities for multiplying your plants quickly and efficiently. In this step-by-step guide, we’ll walk you through the essentials, making this fascinating process easy to understand and fun to implement. 🌿
🌱 Understanding Tissue Culture Propagation 🌱
Tissue culture propagation is a fascinating method that allows you to grow new plants from tiny pieces of existing ones—known as explants—using a controlled environment. 🌱 It’s like cloning your favorite plants, ensuring they are identical and free from diseases!
🌼 What is Tissue Culture Propagation? 🌼
In simple terms, it’s the process of taking a small piece of a plant (like a leaf, stem, or shoot tip) and growing it in a nutrient-rich gel or medium. This method encourages the plant cells to divide and develop into new, healthy plants. 🧬
🌸 Why Use Tissue Culture for Propagation? 🌸
There are a few great reasons to choose tissue culture:
- Disease-Free Plants: Tissue culture helps eliminate viruses and bacteria that might affect your plant’s health. 🌿
- Faster Growth: You can multiply plants in a fraction of the time compared to traditional methods. ⏳
- Cloning: Your new plants will be exact replicas of the original, maintaining their best characteristics! 🌸
🌿 Basic Requirements and Tools 🌿
To get started with tissue culture at home, you’ll need:
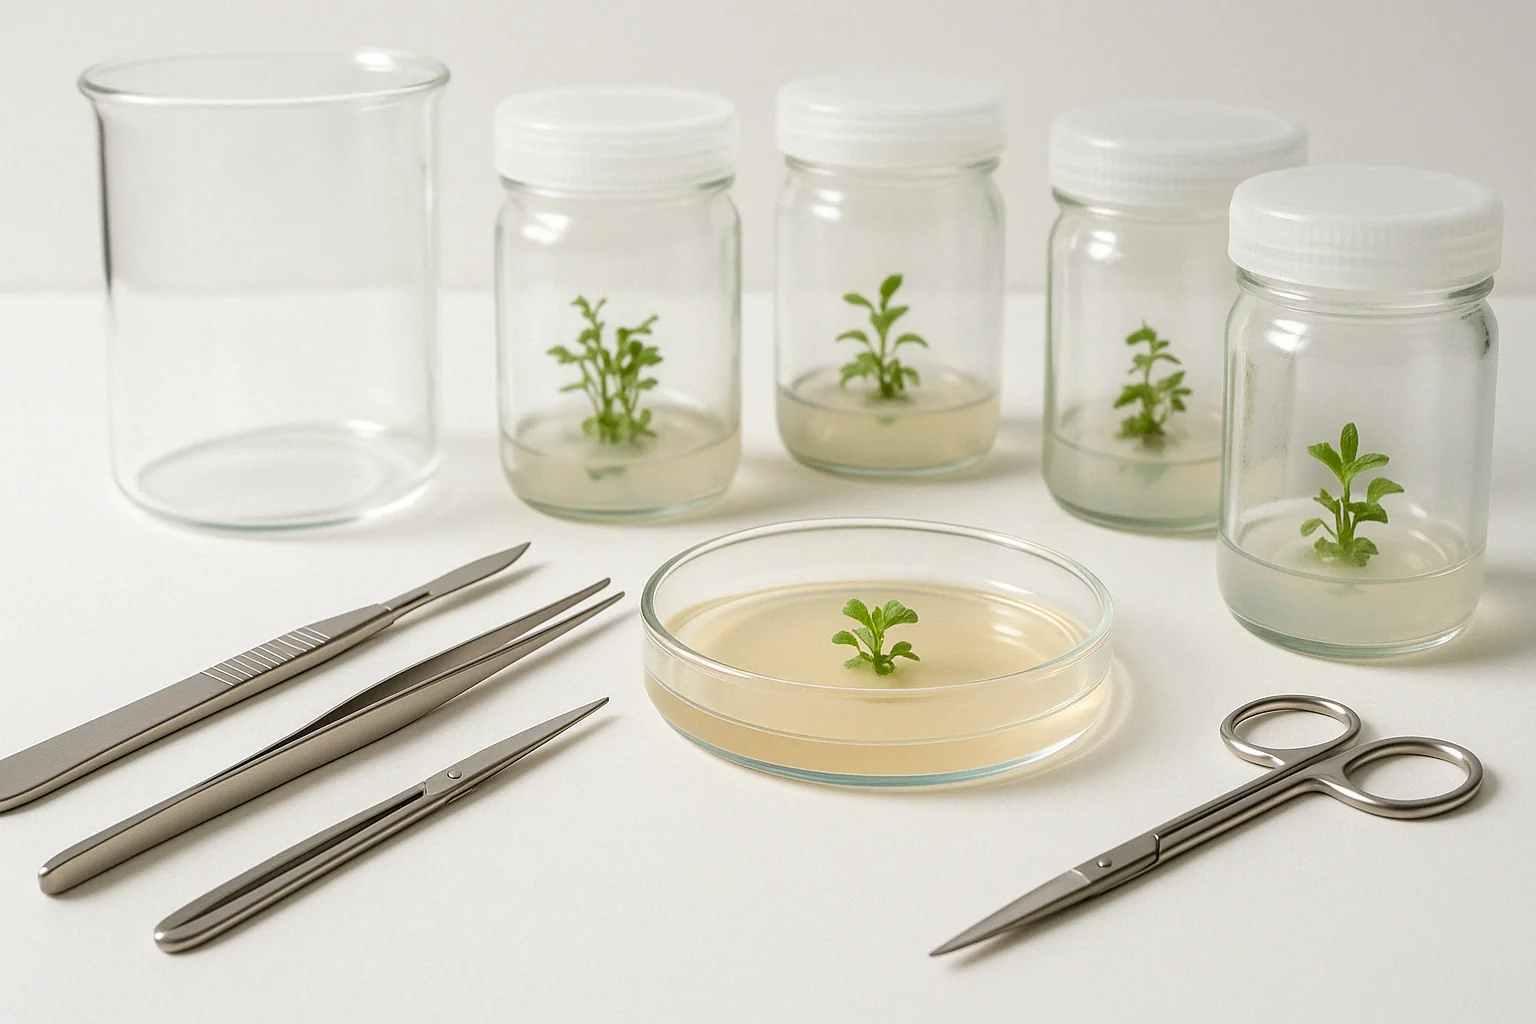
- Sterile Containers: Clean glass jars or containers to house your plants. 🧴
- Nutrient Medium: A gel-like substance (usually agar) mixed with essential nutrients. 🧫
- Plant Hormones: These help stimulate root and shoot growth. 🌿
- Sterilization Equipment: Alcohol, bleach, or a flame to ensure everything stays germ-free! 🔬
By understanding tissue culture, you’re opening the door to an exciting way of growing plants that’s both efficient and rewarding! Stay tuned as we break down the process in the next sections. ✨
🌱 Preparing for Tissue Culture Propagation 🌱
Before diving into tissue culture propagation at home, it’s important to be well-prepared. This step sets the foundation for success, ensuring your plant tissue has the best chance to thrive! 🌱 Let’s walk through the key preparation steps.
🌸 Choose the Right Plant 🌸
Start with a healthy, vigorous plant. It’s best to select species that propagate well through tissue culture, such as pothos, spider plants, or ferns. These plants have fast-growing tissue and are forgiving for beginners. Make sure the plant you choose is free of pests or diseases, as these can easily spread during the propagation process.
🧴 Sterilizing Your Tools and Workspace 🧴
Sterility is key in tissue culture, as any contamination can ruin your work. Follow these steps:
- Clean all tools (scalpel, scissors, tweezers) with rubbing alcohol or bleach.
- Sterilize your workspace by wiping down surfaces with disinfectant wipes.
- Use gloves to handle your plant and tools to avoid transferring bacteria from your hands. 🧤
🌿 Preparing the Plant Tissue 🌿
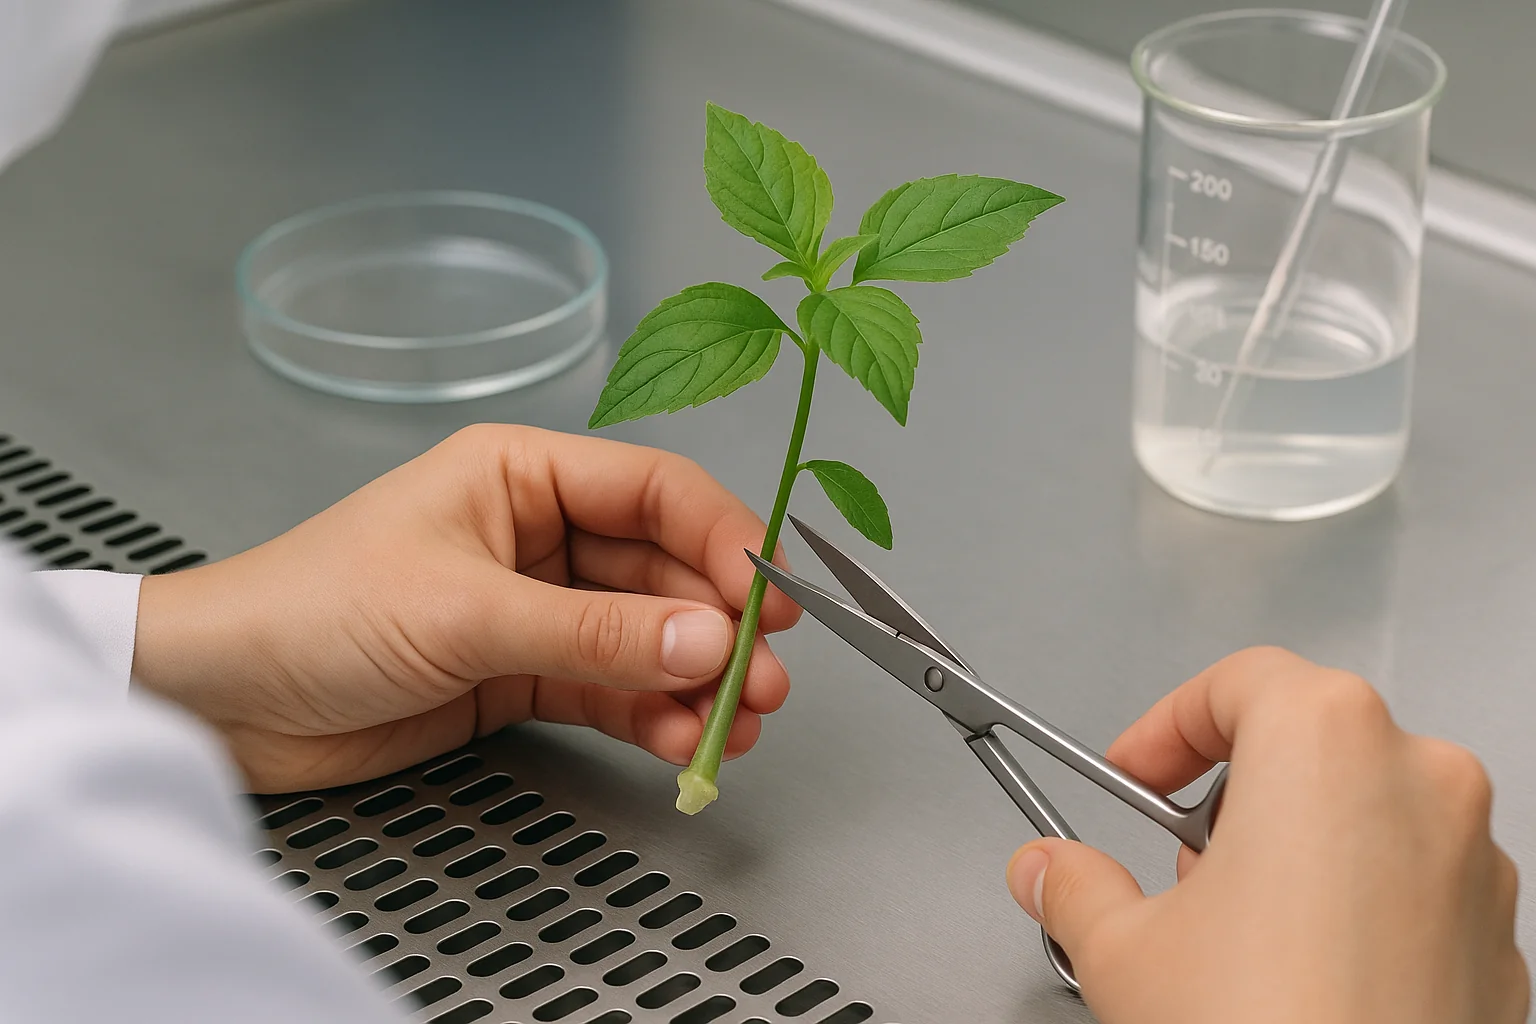
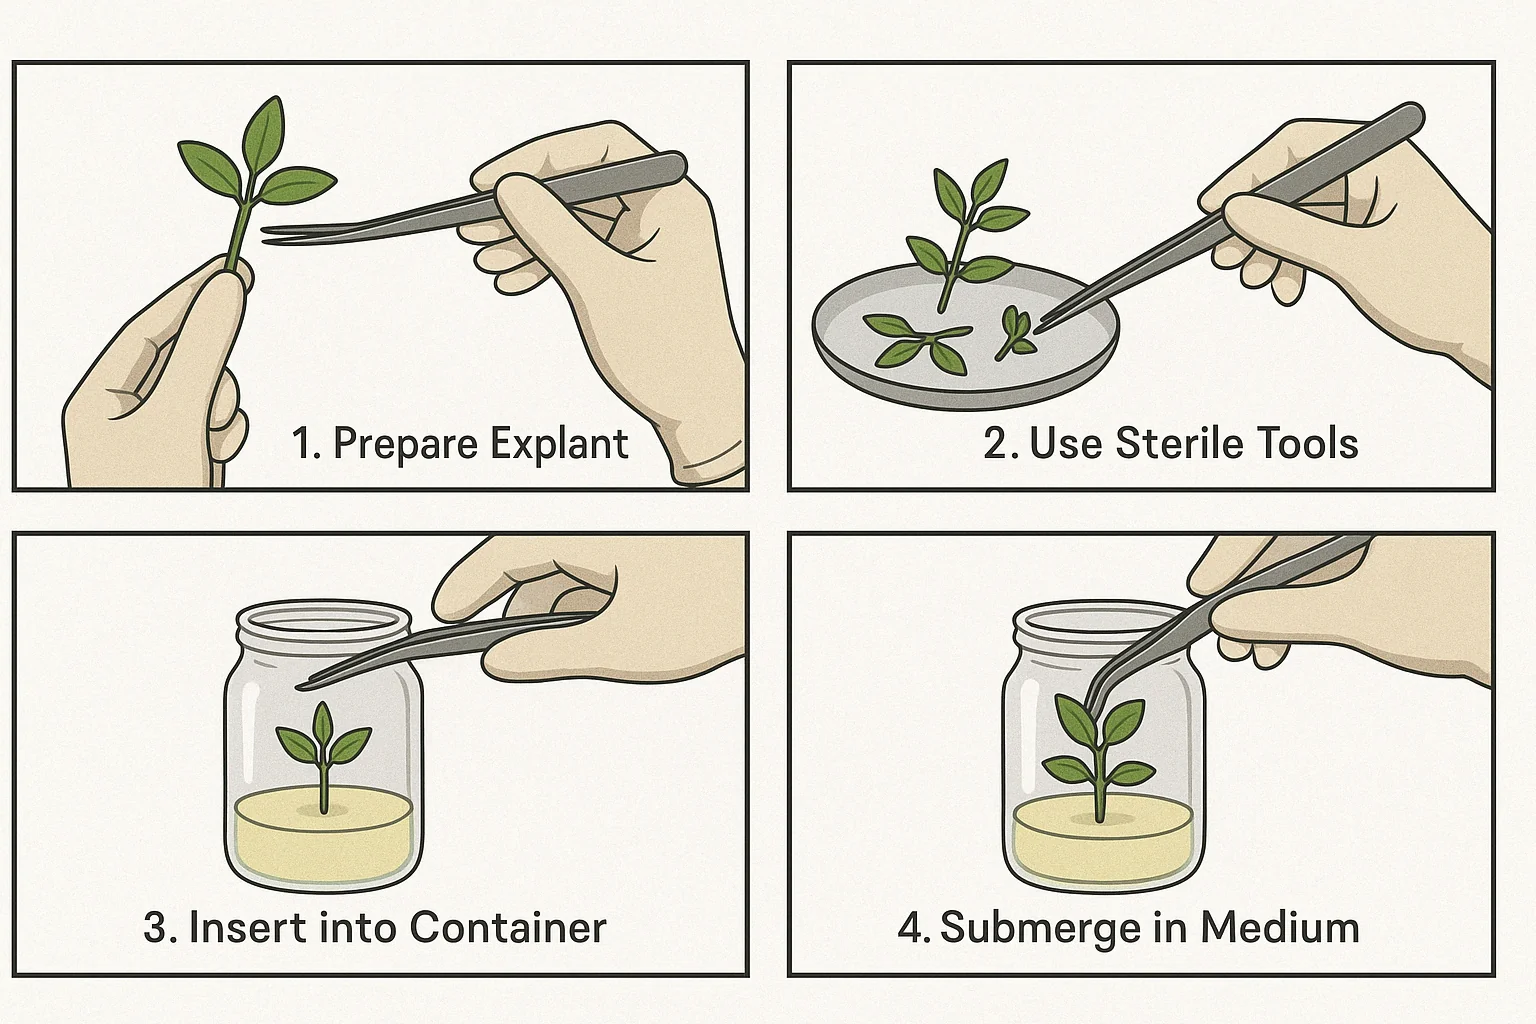
Now it’s time to cut the explant (the small piece of the plant you’ll be propagating). Here’s how to do it:
- Choose a healthy part of the plant, like a fresh shoot or leaf, avoiding older or damaged sections.
- Use a clean, sharp tool to make a small cut, ensuring the piece is about 1-2 inches long. Make sure your cut doesn’t have any visible rot or damage.
With everything prepared, you’re now ready to move on to the tissue culture process! 🚀 Proper preparation increases your chances of success and keeps the environment optimal for plant growth.
🌿 The Process of Tissue Culture Propagation 🌿
Now that you’re prepped and ready, let’s dive into the actual tissue culture process! This is where the magic happens, and with careful attention to detail, you’ll soon see new plants sprouting from your explants. 🌱✨
🧫 Step 1: Preparing the Growth Medium 🧫
The growth medium is essential for nurturing your plant tissue. It’s a gel-like substance that provides the nutrients your plant needs to grow.
- Mix the Medium: Combine agar (a jelly-like substance) with plant nutrients. You can buy pre-made mediums or create your own using agar, sugar, and plant nutrients.
- Add Plant Hormones: Plant hormones like cytokinins (for shoot development) and auxins (for root development) are key. These hormones help stimulate the growth of roots and shoots in your tissue.
- Sterilize the Medium: To prevent contamination, sterilize your growth medium by boiling it or microwaving it in the container until it’s clear and bubble-free. 🧪
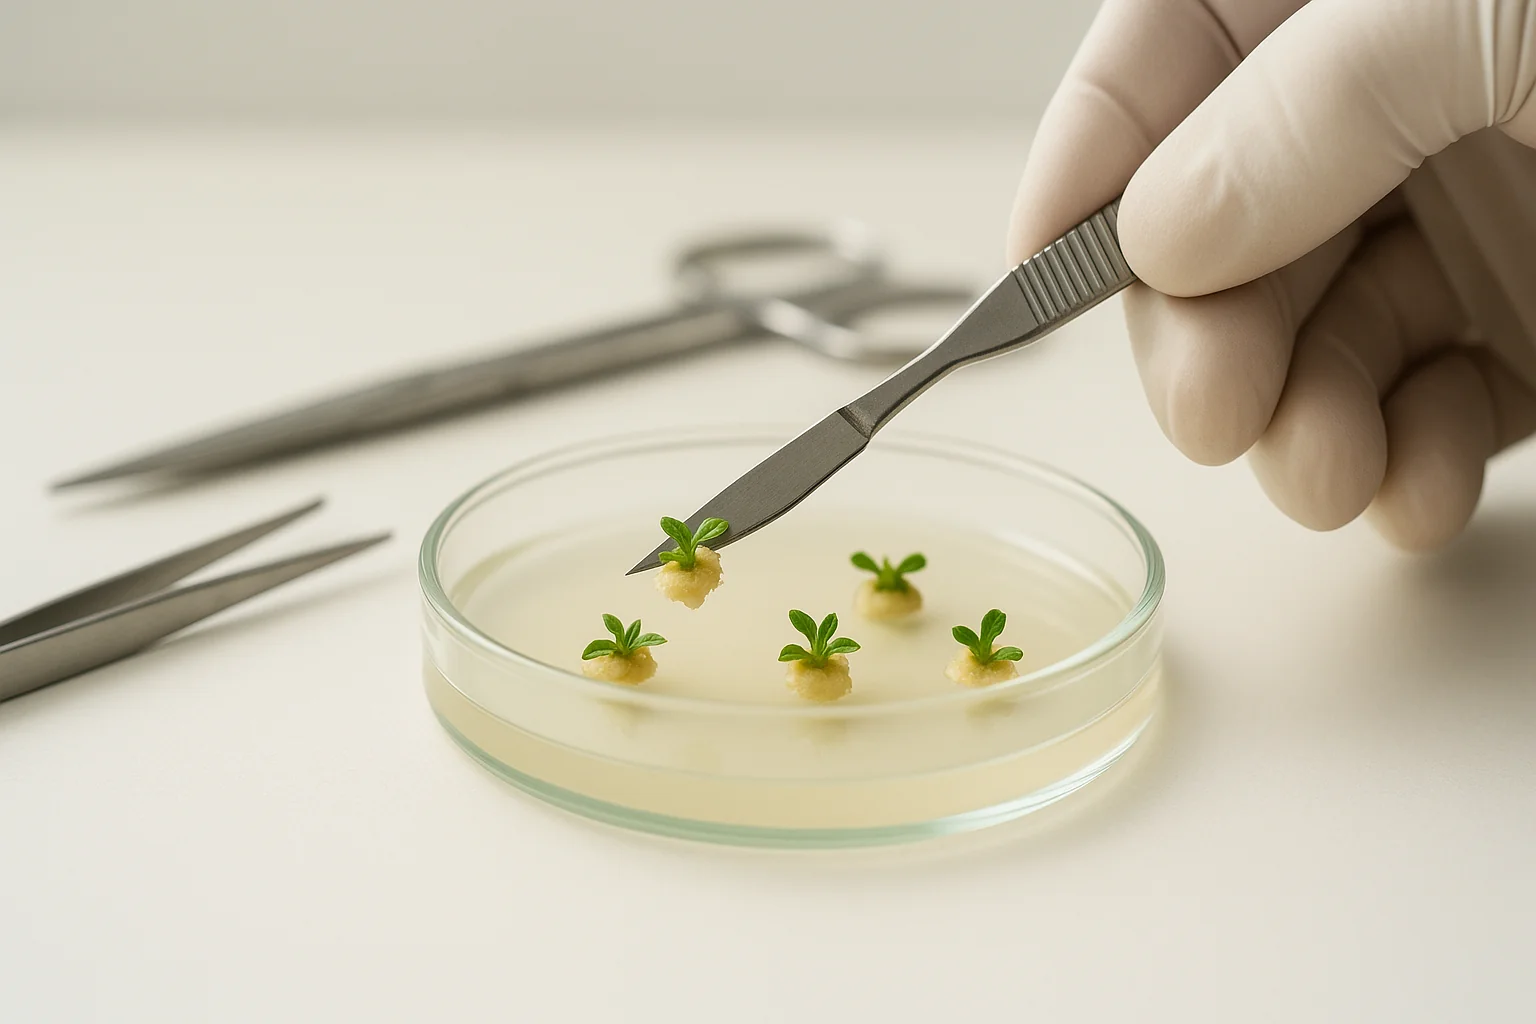
🌿 Step 2: Inoculating the Explant 🌿
This step is all about placing your prepared plant tissue into the growth medium.
- Transfer the Explant: Using sterile tweezers or a scalpel, carefully place your explant into the sterilized container filled with growth medium. Gently press the explant so it’s fully submerged in the medium.
- Seal and Label: Once the explant is in place, seal the container with a lid or plastic wrap. Don’t forget to label it with the plant’s name and date—it’s easy to forget later! ✍️
🌡️ Step 3: Creating the Right Environment 🌡️
Your plant tissue needs the perfect environment to thrive:
- Temperature: Keep the container in a warm, consistent temperature (70–75°F or 21–24°C) for optimal growth.
- Light: Provide bright, indirect light, as direct sunlight can be too harsh for the tissue culture.
- Humidity: To maintain humidity, use a mini greenhouse, humidity dome, or cover the container with plastic wrap. You can also mist the plants gently if they look too dry. 💧
👀 Step 4: Monitoring Growth 👀
After setting everything up, it’s time to monitor your plant’s progress:
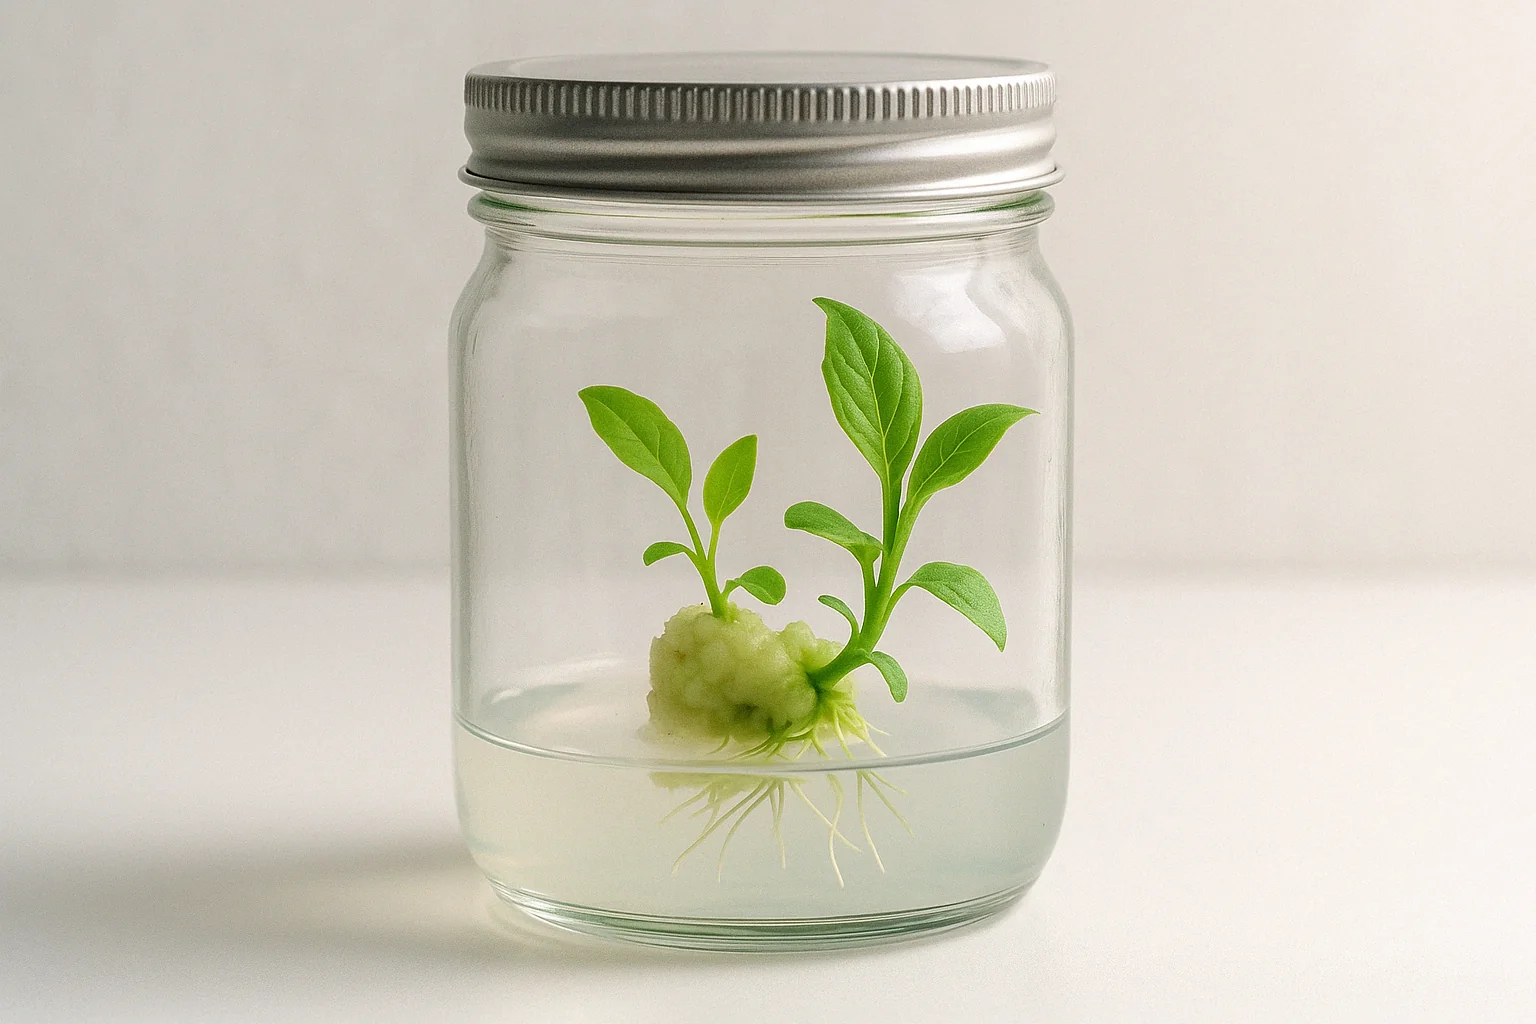
- Check for Growth: Over the next few weeks, you should start seeing new growth. Watch for tiny roots and shoots beginning to form.
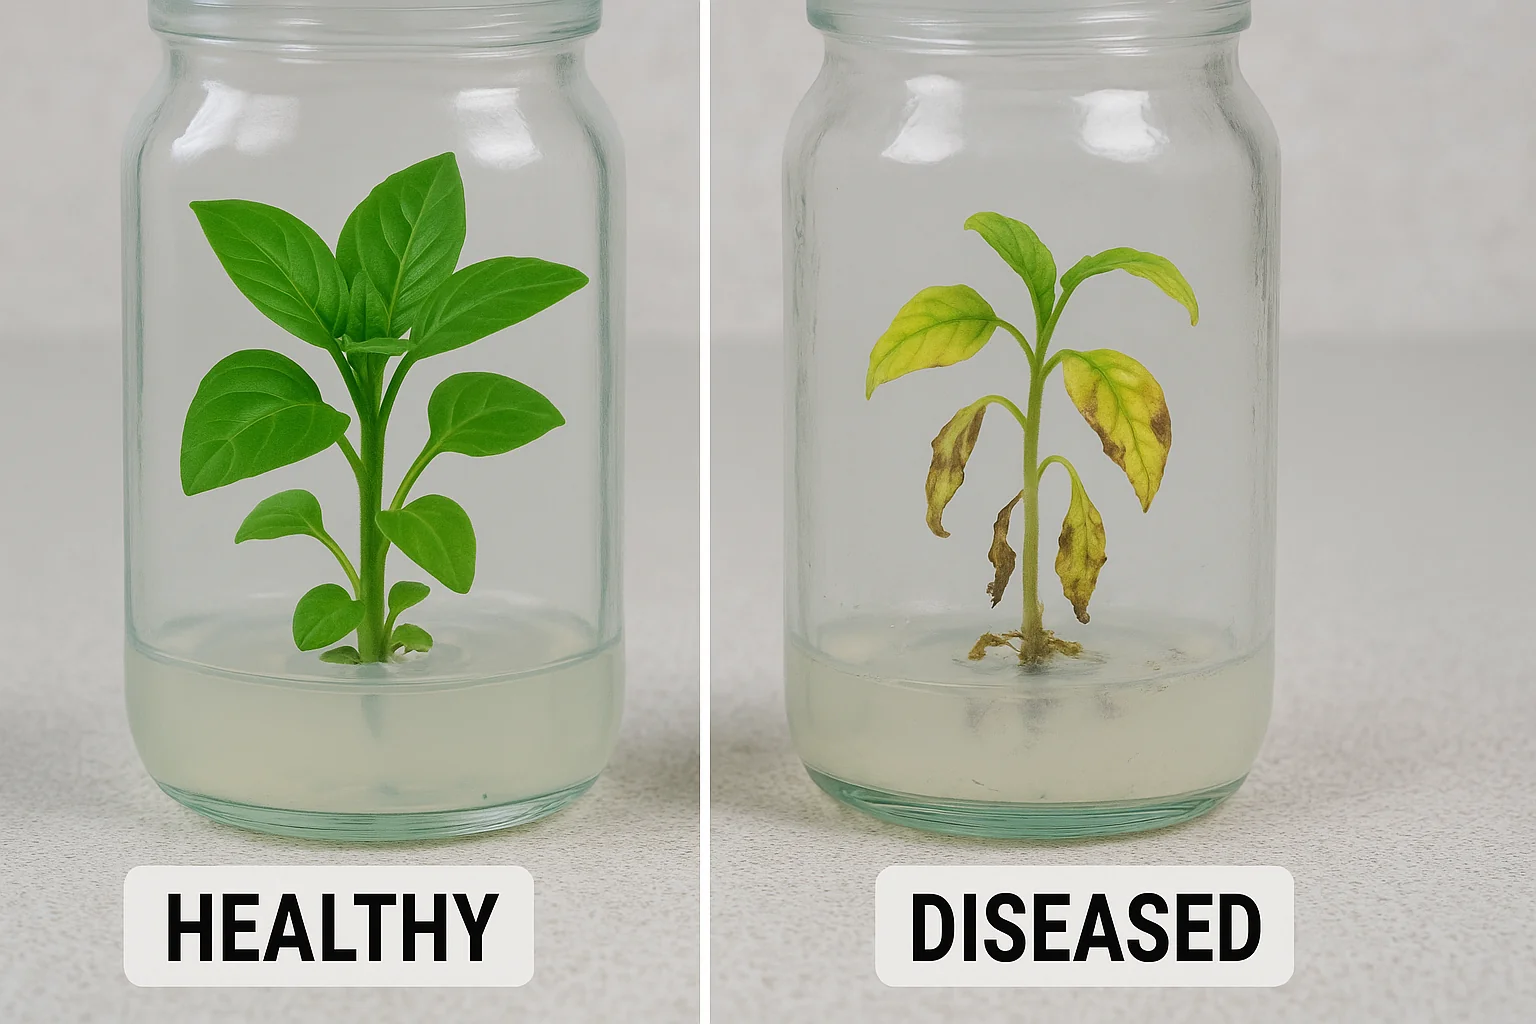
- Contamination Watch: Keep an eye out for mold or bacteria—if you see any, remove the contaminated explant immediately to avoid spreading it.
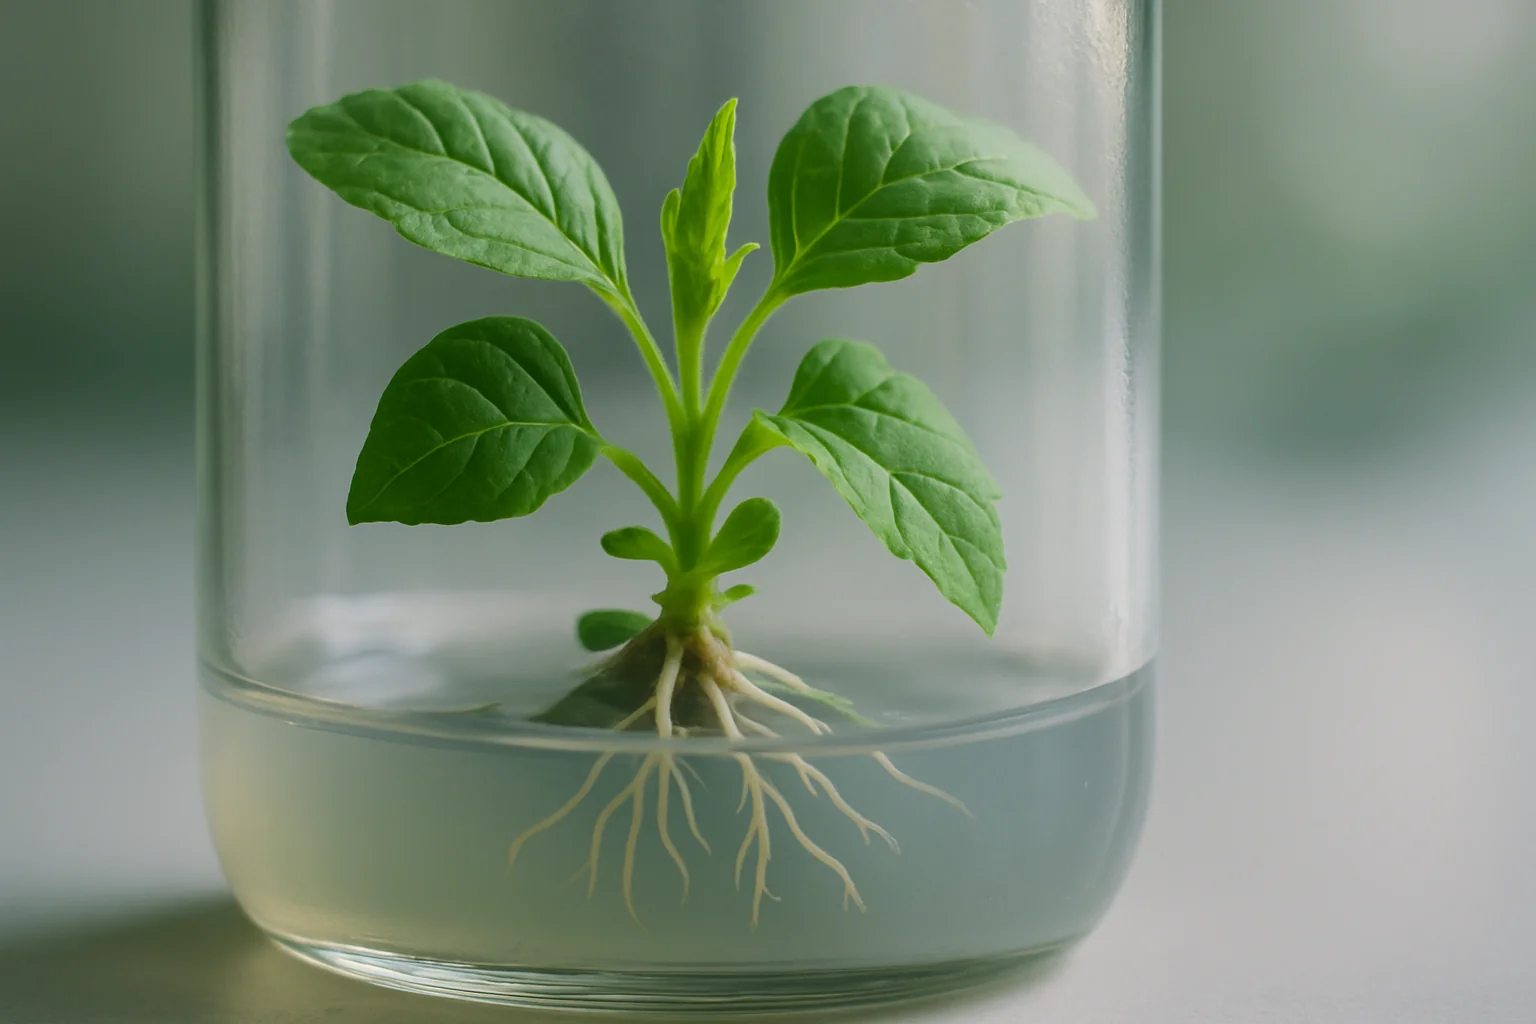
The tissue culture process can take anywhere from a few weeks to several months, depending on the plant species and environmental conditions. Patience is key, but with care and attention, your plant tissue will thrive and multiply! 🌿
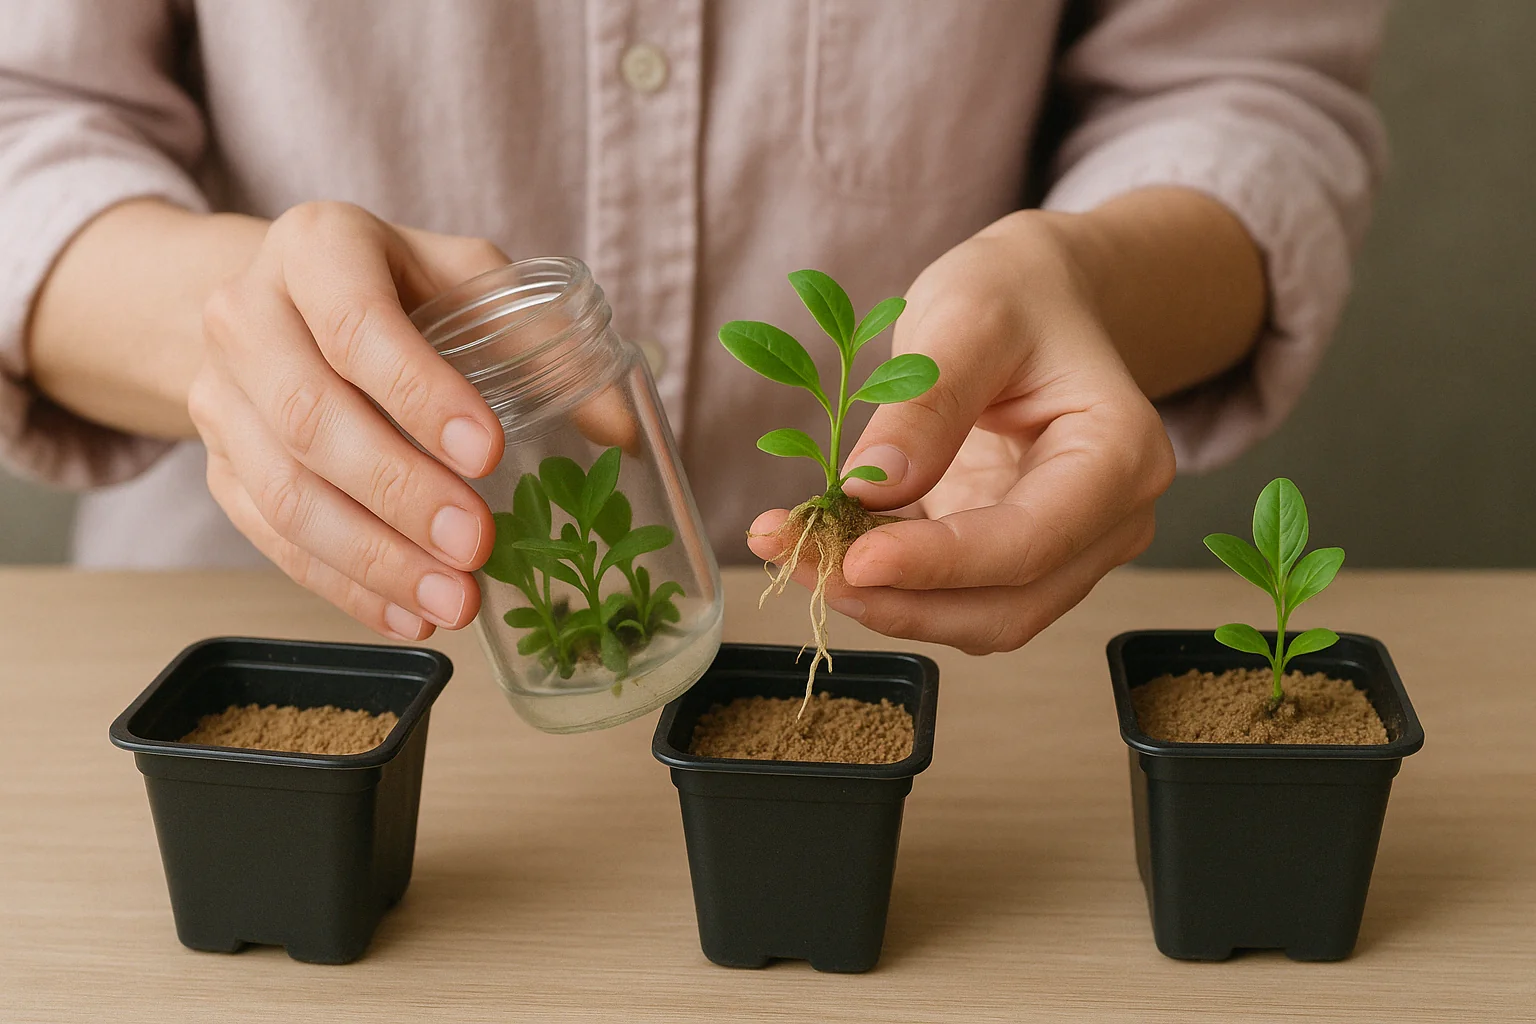
🌱 Transplanting the New Plants 🌱
Once your tissue culture plants have successfully developed roots and shoots, it’s time to move them into the real world—your garden or pots! Transplanting is a delicate process, so let’s go through it step-by-step to ensure the smoothest transition for your new plants. 🌿🌱
🏡 Step 1: Preparing for Transplanting 🏡
Before you move your tissue culture plants, it’s essential to harden them off, which means gradually adjusting them to normal growing conditions. This helps reduce transplant shock.
- Gradual Acclimatization: Over the course of 1-2 weeks, expose the plants to more light and slightly less humidity. Start by removing the cover or lid for a few hours each day and slowly increase the exposure.
- Check the Roots: Make sure the roots have grown enough to anchor the plant into the soil. Healthy roots should be white and firm, not mushy or discolored.
🌍 Step 2: Moving to Soil 🌍
Now that your tissue culture plants are ready, it’s time for them to meet soil!
- Choose the Right Potting Mix: Opt for a light, well-draining soil mix. If you’re transplanting into pots, use one with drainage holes to prevent waterlogging.
- Planting the Explant: Gently remove the plant from the culture container, being careful not to damage the delicate roots. Place the plant into the pot, ensuring the roots are spread out and not cramped. Fill in with soil and lightly press down to secure it.
- Watering: Water the plant thoroughly, making sure the soil is evenly moist but not soggy. 🌊 Keep the plant in a sheltered spot for the first few days, away from direct sunlight, to reduce stress.
🌿 Step 3: Post-Transplant Care 🌿
After transplanting, your tissue culture plants will need a little extra care to settle into their new environment:
- Monitor for Stress: Watch for any signs of transplant shock, like wilting or yellowing leaves. This is normal in the first few days, but if it persists, check if the plant needs more water or better lighting.
- Fertilization: Wait a few weeks before fertilizing to avoid overfeeding. Once the plant has settled, you can begin using a diluted, balanced fertilizer to encourage new growth.
- Gradual Exposure to Sunlight: Over time, slowly increase the amount of direct sunlight the plant receives, ensuring it’s not too harsh.
By following these transplanting steps, you’ll help your tissue culture plants transition from their sterile environment into thriving, healthy plants in your garden or home! 🌸This is an essential part of successful Tissue Culture Propagation at Home, ensuring strong growth after lab conditions. 🌳
🌱 Troubleshooting Common Issues 🌱
While tissue culture propagation is a rewarding process, it’s not without its challenges. Don’t worry, though! With a bit of patience and problem-solving, you can overcome any hurdles. Here are some common issues you may face and how to fix them. 🌱
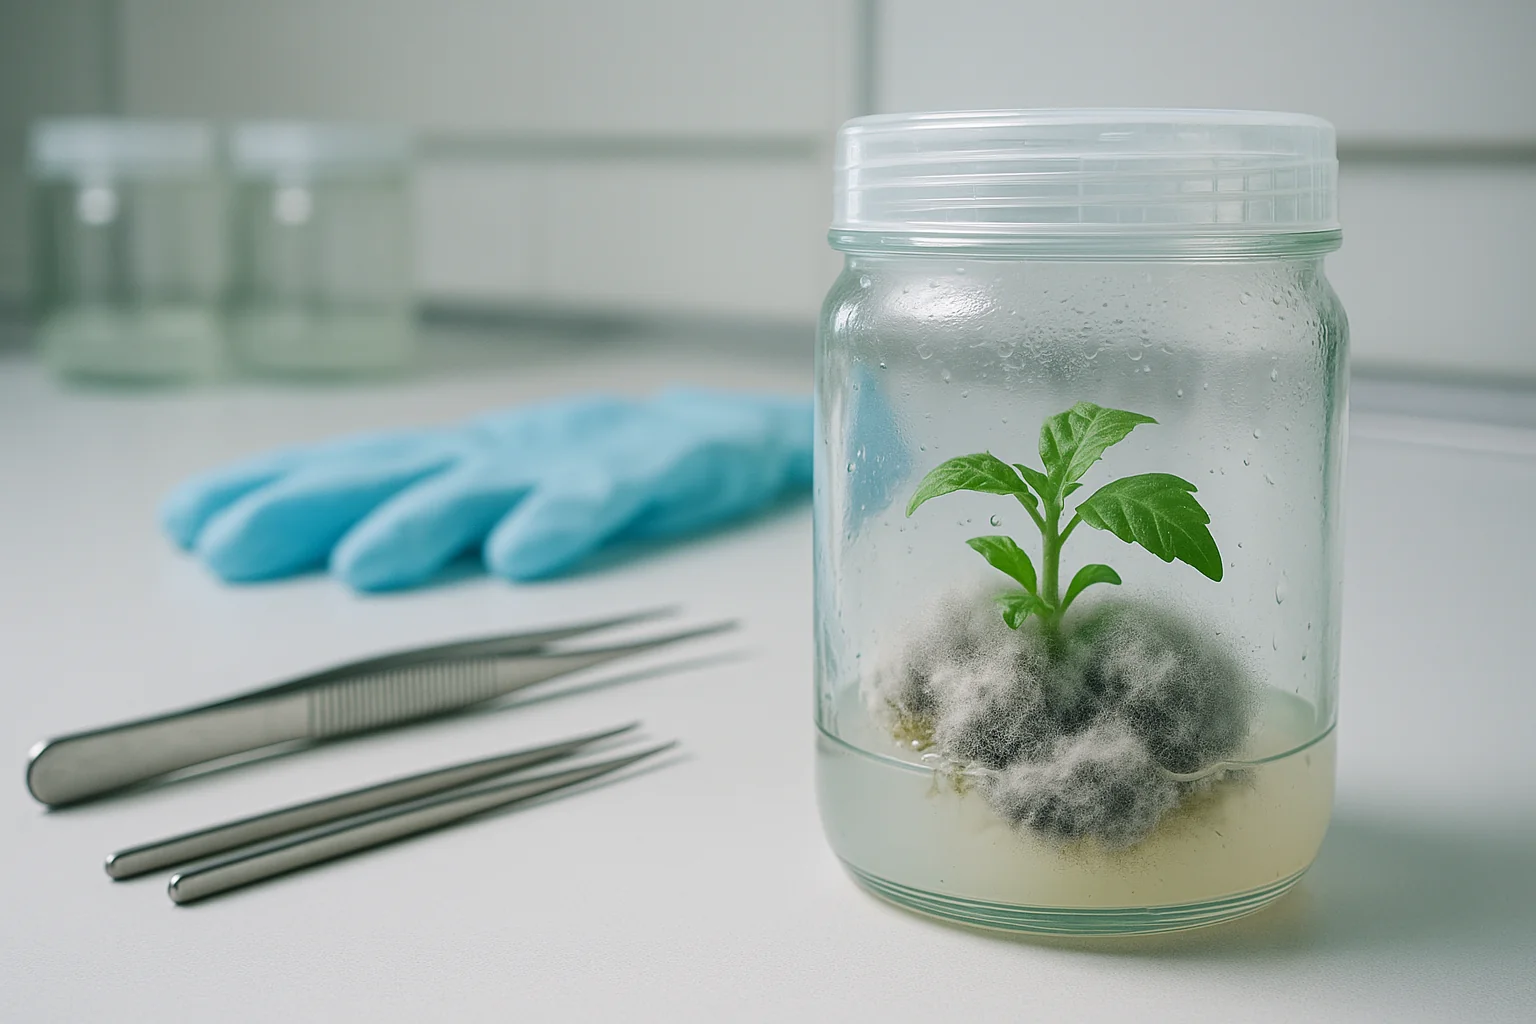
🦠 1. Contamination Problems 🦠
Contamination is one of the biggest concerns in tissue culture. It can ruin your hard work, but don’t panic! Here’s how to spot and deal with it:
- Signs of Contamination: Look for any fuzzy growth (like mold), discoloration, or an unpleasant smell. These indicate the presence of bacteria or fungi.
- Solution: If you spot contamination early, carefully remove the affected explant and replace the growth medium. Always make sure to sterilize tools and containers between uses to prevent it from happening again. 🧴
🐢 2. Failed Growth or Slow Development 🐢
Sometimes, your tissue culture explants might not grow as expected. Don’t lose hope—this can be caused by several factors.
- Causes:
- Improper Light: Too much or too little light can hinder growth. Make sure your plant gets bright, indirect light.
- Temperature Issues: Too cold or too hot can slow down the process. Keep the environment at a steady 70–75°F (21–24°C).
- Nutrient Imbalance: If the growth medium isn’t correctly mixed, the explant might struggle to grow. Ensure you’re using the right hormones and nutrients.
- Solution: Double-check the light, temperature, and nutrients. Try adjusting these factors gradually and keep the plant in a more controlled environment. 📊
🌱 3. Root and Shoot Problems 🌱
If the plant grows roots or shoots but they seem weak or unhealthy, there could be an issue with the environment or hormones.
- Weak Roots or No Roots: If the roots are not developing well, it could be due to low auxin (root hormone) levels in the medium.
- Weak Shoots: If the shoots are sparse or stunted, it might be because of low cytokinin (shoot hormone) levels.
- Solution: Make sure you’re using the correct balance of hormones and try adjusting the concentration slightly if needed. Also, ensure the growth medium is fresh and free from contamination. 🌿
🧫 4. Overcrowding in the Culture Vessel 🧫
As your tissue cultures grow, they may become crowded in the container, leading to competition for nutrients and space.
- Solution: Thin out the explants to allow each plant enough room to grow. If needed, transfer some into new containers to give them more space.
🌡️ 5. Temperature and Humidity Stress 🌡️
Temperature and humidity fluctuations can cause stress to your tissue cultures, affecting their growth.
- Signs of Stress: If the plant is wilting, yellowing, or showing slow growth, it could be due to environmental stress.
- Solution: Maintain a stable temperature of 70–75°F (21–24°C) and keep the humidity level high, especially during the early stages. Using a humidity dome or mini greenhouse can help.
By staying vigilant and troubleshooting these common issues, you’ll be well on your way to mastering tissue culture propagation at home. With a bit of practice, you’ll learn how to tweak the conditions to get the best results for your plants! 🌸
🌱 Tips for Success 🌱
To ensure that your tissue culture propagation at home goes smoothly, here are some expert tips to help you succeed! These simple yet effective strategies will improve your chances of producing healthy, thriving plants. 🌱✨
🌿 1. Start with Healthy Plants 🌿
The health of your starting plant is crucial for success. Choose a healthy, pest-free specimen with vigorous growth. This will ensure that the tissue you take for propagation has the best chance to grow into a strong, healthy plant.
🧼 2. Work in a Clean Environment 🧼
Sterility is key! Always sterilize your tools, containers, and workspace to prevent contamination. A clean environment helps minimize the risk of mold, bacteria, and fungi from interfering with your plant growth. Regularly disinfect your workspace and change your gloves when handling different plants.
⏳ 3. Be Patient ⏳
Tissue culture is a slow process, and results may take weeks or even months. Don’t be discouraged if you don’t see immediate results! Keep monitoring your cultures and maintaining the right conditions, and soon enough, you’ll begin to see new roots and shoots forming.
🌸 4. Experiment with Plant Varieties 🌸
While some plants are better suited for tissue culture than others, don’t hesitate to experiment! Try different species or cultivars to see how they respond. Over time, you’ll learn which plants thrive best in your environment and under your care.
💡 5. Use Proper Lighting 💡
Light plays a vital role in the growth of tissue cultures. While you want to avoid direct sunlight (which can burn the young plants), bright, indirect light is ideal. Consider using grow lights if you don’t have access to sufficient natural light.
💧 6. Keep the Right Humidity Levels 💧
Tissue cultures thrive in a humid environment, especially when they are in their early stages of development. Using a humidity dome, plastic wrap, or mini greenhouse can help maintain the moisture levels and prevent the explants from drying out.
🌡️ 7. Maintain a Stable Temperature 🌡️
Consistency is key! Keep the temperature within the ideal range of 70–75°F (21–24°C). Avoid placing your cultures in areas with temperature fluctuations, like near air conditioning units, heaters, or windows, as these can stress the plants.
🦠 8. Monitor for Contamination 🦠
Regularly check your cultures for signs of contamination, such as mold or a foul smell. If you spot contamination, remove the affected explant immediately to prevent it from spreading to the others.
🌞 9. Gradually Acclimate Plants to Normal Conditions 🌞
Once your plants have rooted and grown strong, slowly transition them to normal, non-sterile conditions. Gradually expose them to more light and reduce humidity to help them adapt to life outside the culture vessel.
📓 10. Keep a Record 📓
Keep track of your tissue culture propagation process, including dates, plant species, hormone concentrations, and environmental conditions. This will help you identify patterns and make improvements in future propagations.
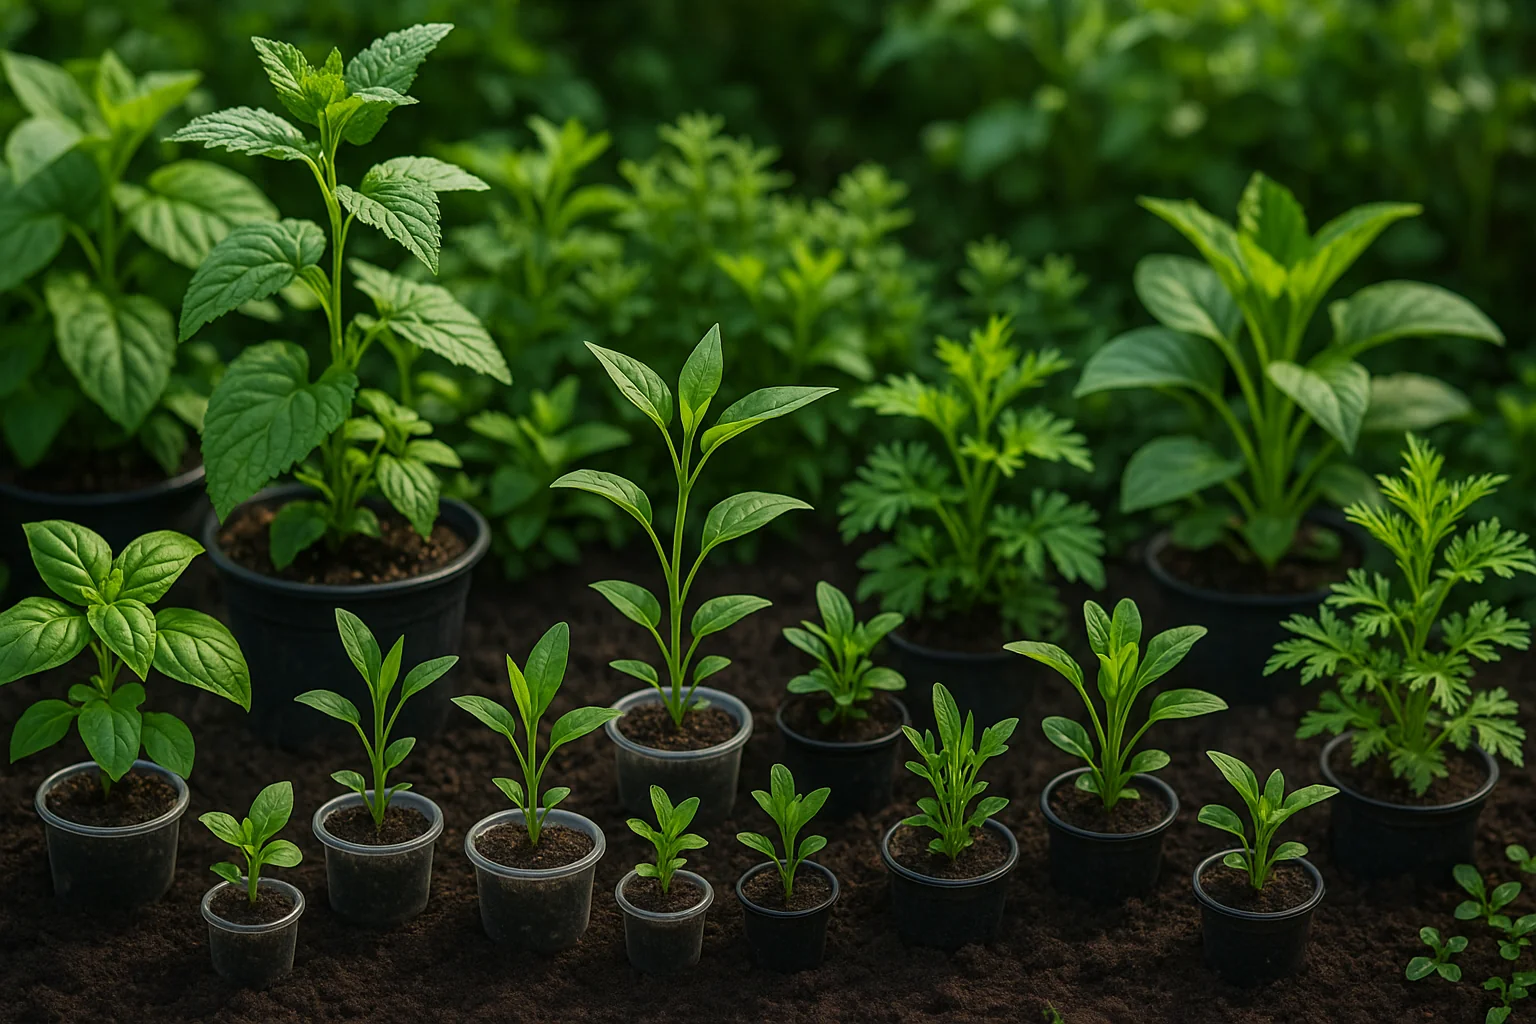
By following these tips, you’ll have a higher chance of success in your tissue culture propagation journey! With a bit of practice, you’ll be able to master this technique and produce a flourishing collection of healthy, genetically identical plants. 🌿🌸
🌱 Final Thoughts 🌱
Tissue culture propagation at home is a rewarding and innovative way to expand your plant collection while ensuring you grow healthy, disease-free plants. 🌱 By following the step-by-step process, preparing properly, and troubleshooting along the way, you’ll soon gain confidence in this unique propagation method.

Whether you’re a seasoned plant lover or just starting out, mastering tissue culture allows you to multiply your plants quickly and efficiently, with a little patience and attention to detail. 🌿💚 Remember, the key to success lies in a clean environment, proper care, and consistent monitoring. With practice, you’ll soon be cloning your favorite plants and watching them thrive in your garden or home.
So, are you ready to take your plant propagation to the next level? Start experimenting with tissue culture today, and enjoy the process of watching your plants grow from tiny pieces into vibrant, flourishing beauties! 🌸✨