
Imagine this: You’re tossing yet another handful of vegetable peels into the trash, while your favorite monstera or rose plant sits in nutrient-poor soil, looking a little lackluster. What if those scraps could become black gold — rich, organic fertilizer that transforms your houseplants and garden trees into thriving, vibrant beauties? That’s the magic of vermicomposting, and setting up a worm bin at home is easier (and more rewarding) than you think! 🪱
As someone who’s maintained indoor worm bins for years to supercharge my own collection of houseplants, balcony herbs, and backyard fruit trees in our warm Bangladeshi climate, I can tell you this: worm castings are one of the best-kept secrets for natural plant care. They’re packed with slow-release nutrients, beneficial microbes, and enzymes that chemical fertilizers simply can’t match. Plus, you’ll slash kitchen waste and feel great about going green. 🌿
In this complete beginner’s guide, you’ll get a detailed, step-by-step plan to set up your first worm bin successfully — no fancy gear required, no bad smells, and results you can see in your plants within months. Let’s turn your scraps into plant superfood! Ready? Let’s dive in. 🚀
What Is Vermicomposting and Why It’s Perfect for Plant & Tree Care Lovers 🪱
Vermicomposting (or worm composting) is the process of using special composting worms — primarily red wigglers (Eisenia fetida) — to break down kitchen scraps and organic matter into nutrient-dense worm castings (also called vermicast or worm poop). Unlike regular hot composting, vermicomposting happens at room temperature, making it ideal for indoor or apartment setups.
The Magic of Worm Castings – Nature’s Super Fertilizer 🌟
Worm castings are often called “black gold” for good reason. They contain a balanced, plant-available form of nutrients (typically around 1-0.5-0.5 NPK, but with much higher microbial activity than numbers suggest). Key perks include:
- Microbial boost: Castings are loaded with beneficial bacteria, fungi, and enzymes that improve soil life and help plants absorb nutrients better.
- Soil structure improvement: They create aggregates that enhance aeration, drainage, and water retention — perfect for potted plants that often suffer from compaction.
- No burn risk: Unlike synthetic fertilizers, castings won’t scorch roots even if over-applied.
Here’s a quick comparison table:
| Feature | Worm Castings | Regular Compost | Chemical Fertilizer |
|---|---|---|---|
| Nutrient Release | Slow & steady | Moderate | Fast (risk of burn) |
| Microbial Life | Extremely high | High | None |
| Soil Structure Benefit | Excellent | Good | Poor |
| pH Balancing | Near neutral | Varies | Can acidify/alkalize |
| Cost (long-term) | Very low (DIY) | Low | Higher recurring |
How Worms Help Your Plants & Trees Thrive ❤️
Adding worm castings to potting mix (10-30% ratio) or as top dressing leads to stronger roots, better disease resistance, and lusher growth. Houseplants like pothos, monstera, peace lilies, and succulents respond dramatically — leaves get glossier, new growth explodes. For trees (mango, guava, or citrus in pots or ground), castings improve root establishment and fruit quality by enriching soil biology. In our humid tropical climate, they also help combat nutrient lockout from heavy rains.
Ideal for Indoor / Apartment Living (No Smell, No Mess!) 🏠
Red wigglers thrive indoors at 18–25°C — common in Bangladeshi homes. With proper setup, bins stay odor-free and contained, fitting under a sink, on a balcony, or in a corner.
Choosing the Right Worm Bin for Your Space & Needs 🗑️
Don’t overcomplicate it — start simple!
Best Beginner Bin Types in 2025–2026
- DIY plastic tote (cheapest & customizable): A 40–60 liter opaque bin with lid. Drill ventilation and drainage holes.
- Stacked commercial wormeries (flow-through): Like Worm Factory or similar — worms migrate upward as you add food, making harvest easy.
- Continuous flow-through vs. single tray: Flow-through wins for beginners avoiding mess.
Size Guide – How Many Worms & Liters Do You Actually Need?
Start small: 1–2 kg of worms (about 1000–2000 worms) for a household of 2–4 people.
| Household Size | Bin Volume | Starter Worms | Weekly Food Capacity |
|---|---|---|---|
| 1–2 people | 40–50 L | 0.5–1 kg | 1–2 kg scraps |
| 3–5 people | 60–100 L | 1–2 kg | 2–4 kg scraps |
| Larger | 100+ L | 2+ kg | 4+ kg |
Where to Place Your Worm Bin Indoors (Temperature & Light Tips)
Choose a spot with stable temps (avoid direct sun, heaters, or AC vents). Under the kitchen sink, laundry area, or shaded balcony corner works great. Dark is best — worms dislike light.
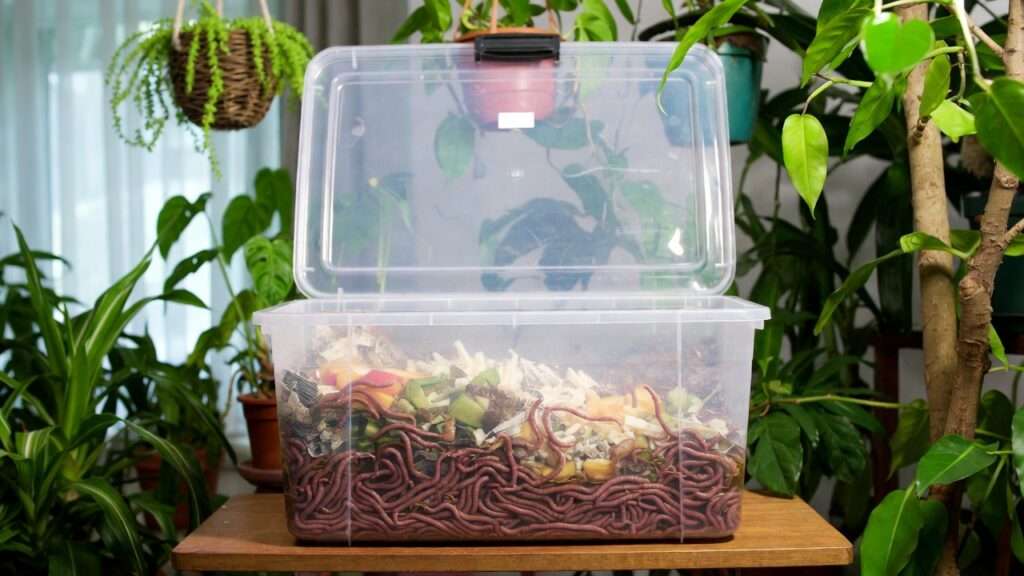
Step-by-Step: Setting Up Your Worm Bin (Day 1 Checklist) 📋
Now comes the fun part — actually building your worm home! Follow these steps exactly, and you’ll have a thriving system in no time. 🛠️
Step 1 – Gather Your Supplies (Budget Breakdown) 💰
You can start for under ৳1000–2000 in Bangladesh.
- Bin: 40–60 liter opaque plastic storage tote with lid (available at local markets or online ~৳300–600)
- Drill + 3–6 mm bit (for ventilation & drainage holes)
- Bedding materials: Shredded newspaper/cardboard (free), coconut coir (পাটের খোল ~৳100–200 per brick), handful of garden soil or aged manure
- Worms: 0.5–1 kg red wigglers (order from local vermicompost sellers in Dhaka/Barisal area, Facebook groups, or nurseries ~৳500–1000/kg)
- Optional extras: Small spray bottle for moisture, kitchen scraps bucket, mesh screen for later harvesting
Pro tip: Reuse old buckets or buy second-hand — sustainability starts at home!
(Healthy red wigglers like these are ready to work their magic in your bin!)
Step 2 – Prepare Perfect Bedding (The Worms’ Cozy Home) 🛏️
Bedding is the worms’ initial habitat and main carbon source.
- Shred newspaper/cardboard into 2–5 cm strips (avoid glossy pages).
- Soak coconut coir brick in water until fluffy (breaks apart easily).
- Mix roughly 70% shredded paper/cardboard + 30% coir.
- Add a handful of garden soil (for grit & microbes).
- Moisten until it feels like a wrung-out sponge — water should not drip when squeezed hard.
- Fill bin about 15–20 cm deep (fluff it up for air pockets).
This creates a dark, moist, aerated environment worms love.
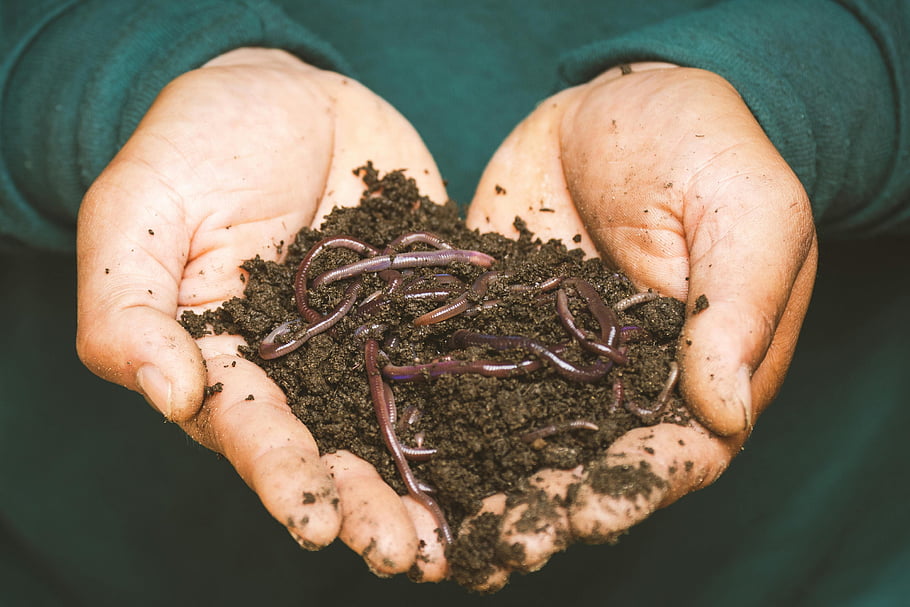
Step 3 – Add Your Red Wigglers (Where to Buy Healthy Worms) 🪱
Red wigglers (Eisenia fetida) are the gold standard — they eat fast, breed readily, and tolerate indoor conditions.
- Avoid earthworms from soil; they won’t thrive in bins.
- Buy from reputable sources: Search “red wiggler worms Bangladesh” on Facebook Marketplace, join “Vermicomposting Bangladesh” groups, or check nurseries in Barisal/Dhaka.
- Look for active, reddish worms clustered together — avoid lethargic or smelly batches.
Gently place worms on top of bedding. They’ll burrow in within hours. Don’t feed yet — let them settle 2–7 days.

(Close-up of vibrant red wigglers in rich organic matter — exactly what you want!)
Step 4 – First Feeding & Initial Setup 🍲
After 3–7 days:
- Bury a small handful (100–200g) of chopped veggie scraps in one corner.
- Cover with bedding to prevent flies.
- Lightly mist if surface dries.
- Keep lid on loosely for airflow.
- Wait 1–2 weeks before adding more food — let population adjust.
Your bin is now live! 🌟
(For visual learners: Imagine a simple sequence — drill holes → add fluffy bedding → introduce worms → bury first scraps. Many beginners succeed on their first try with this method.)
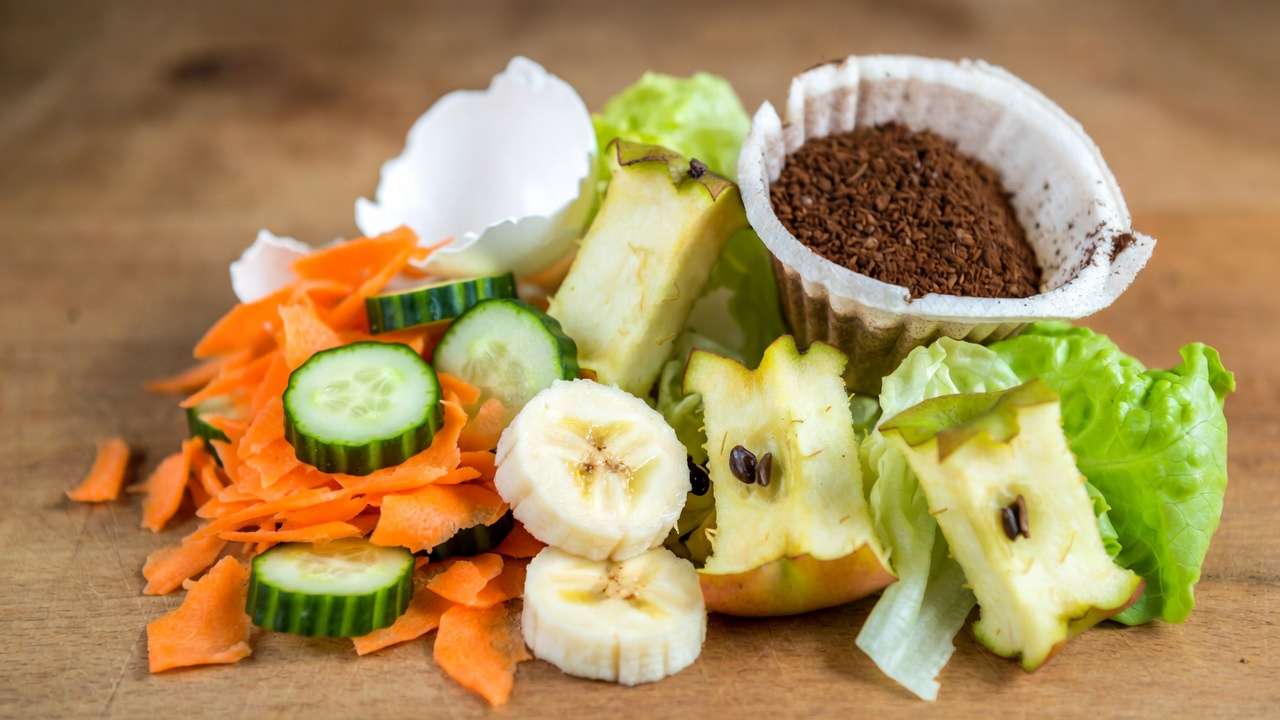
What to Feed Your Worms – The Ultimate Safe Foods List 🍎
Worms are not picky eaters, but the right diet keeps them healthy and productive.
Green Light Foods (Weekly Favorites) ✅
- Vegetable peels & scraps (carrot tops, potato skins, cucumber ends)
- Fruit scraps (banana peels, apple cores — limit citrus to small amounts)
- Coffee grounds & paper filters (great nitrogen source)
- Tea bags (remove staples)
- Crushed eggshells (for grit & calcium — rinse first)
- Small amounts of cooked rice/pasta (no oil)
- Wilted lettuce, spinach, or herbs
Chop larger pieces small for faster breakdown.
Foods to Avoid (Common Beginner Mistakes) ❌
- Meat, fish, dairy, oils — cause smells & pests
- Excessive citrus, onion, garlic — too acidic
- Salty/spicy foods
- Pet waste, diseased plants
- Glossy paper, stickers, plastic-coated items
Stick to plant-based kitchen waste — your plants will love the resulting castings.
Feeding Schedule & Amount – Keep It Simple ⏰
Rule of thumb: Feed half the worms’ body weight daily once established (e.g., 1 kg worms → ~0.5 kg food/day).
- Start slow: 200–500g per week for first month.
- Bury food in different spots each time.
- If food vanishes in 3–5 days → increase slightly.
- If leftovers pile up → reduce or wait.
Monitor: Happy worms = fast eaters and no bad odors.
Daily & Weekly Care – Keep Your Worms Happy & Productive ❤️
Once your bin is running, maintenance is surprisingly low-effort — think 5–10 minutes a week. Happy worms = fast castings production = happier plants!
Temperature & Humidity Sweet Spot (18–25°C Ideal) 🌡️
Red wigglers are most active and reproductive between 18–25°C, which matches most indoor spaces in Bangladesh year-round (especially in Barisal’s mild climate).
- Summer tip: If it climbs above 30°C (common May–August), move bin to the coolest room, place it on a tile floor, or add a frozen water bottle wrapped in cloth on top (never directly on worms).
- Winter tip: Below 15°C activity slows dramatically. Keep near (but not touching) a warm spot or wrap bin in an old blanket.
Humidity: Aim for bedding that stays consistently moist (like a wrung-out sponge). Mist lightly with dechlorinated water (let tap water sit 24 hours) every 3–7 days if surface looks dry.
Moisture & Aeration Troubleshooting 💧
- Too wet → Worms drown or bin smells rotten. Fix: Add dry shredded newspaper/cardboard, leave lid off for a day, mix gently.
- Too dry → Worms migrate to corners or die. Fix: Mist evenly, bury moist food scraps deeper. Pro trick: Bury food under 5–7 cm of bedding — it retains moisture and discourages flies.
Odor Control – When It Smells, What It Means 👃
A healthy worm bin smells earthy, like forest soil — never foul.
- Sour/ammonia smell = too much nitrogen (overfeeding) → Stop feeding 5–7 days, add dry bedding.
- Rotten smell = anaerobic conditions (too wet, not enough air) → Fluff bedding, add holes if needed, reduce food. Good airflow + balanced feeding = zero odor indoors.
Worm Population Monitoring & Expansion 📈
Every 2–3 months gently lift top layer:
- Seeing clusters of tiny white cocoons? Great — babies coming!
- Population doubling every 60–90 days is normal. When bin is crowded (worms covering surface), harvest castings or start a second bin.
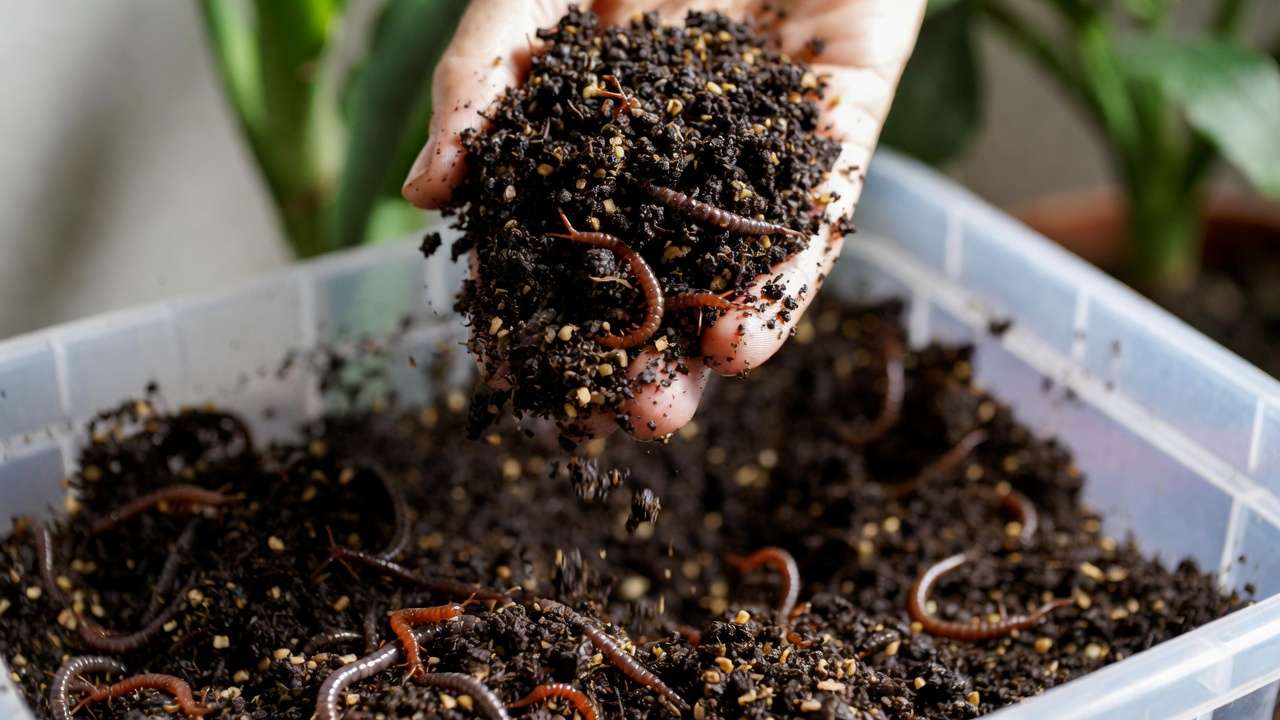
Harvesting Worm Castings & Tea – Your Plant Superfood Ready! ☕
After 3–6 months (faster in warm climates), you’ll have dark, crumbly, coffee-ground-like castings at the bottom.
When & How to Harvest (3 Main Methods) 🕒
- Light separation (easiest for beginners): Shine bright light over bin — worms burrow down. Scoop top castings gently.
- Screen/tray method: Dump contents onto plastic sheet or large mesh screen outdoors. Worms move downward — collect castings from top.
- Stacked bin migration (best long-term): Add fresh bedding + food only to top tray. Worms migrate up over 2–4 weeks → remove bottom tray of finished castings.
Expect 50–70% volume reduction — 10 kg scraps → ~3–5 kg beautiful castings.
Making Worm Tea (Liquid Gold for Foliar Feed & Watering) 🫖
Worm tea = castings steeped in water = instant liquid fertilizer. Recipe:
- 1 cup finished castings
- 4–5 liters dechlorinated water
- Optional: 1 tsp molasses (feeds microbes)
- Aerate 24–48 hours with aquarium pump (or stir vigorously 2–3× daily)
- Dilute 1:10 for watering, 1:20 for foliar spray
Use monthly on houseplants, vegetables, or young trees — dramatic leaf shine and growth boost!
How to Use Castings in Potting Mix, Top Dressing & Tree Planting 🌳
- Potting mix: Mix 10–30% castings with coco coir + perlite/vermiculite for perfect houseplant soil.
- Top dressing: Sprinkle 1–2 cm layer on soil surface, water in — great for established plants.
- Trees & garden beds: Work 1–2 kg per square meter into top 10–15 cm of soil during planting or rainy season top-up.
My personal favorite: 20% castings in monstera or fiddle-leaf fig mix = noticeably bigger, glossier leaves in 6–8 weeks.
Common Problems & Fixes – Beginner Troubleshooting Guide ⚠️
Most issues are easy to spot and fix when you know what to look for. Here’s the most common worm bin problems I’ve seen (and solved) over the years.
Worms Escaping? 🏃♂️
- Why it happens: Too wet, too dry, too hot, overfeeding, or not enough air/food.
- Quick fixes:
- Check moisture first (wrung-out sponge test).
- Ensure good ventilation (more small holes if needed).
- Bright light on surface makes them burrow back down.
- Place a brick or heavy object on the lid temporarily.
- If persistent, harvest castings early and restart with fresh bedding.
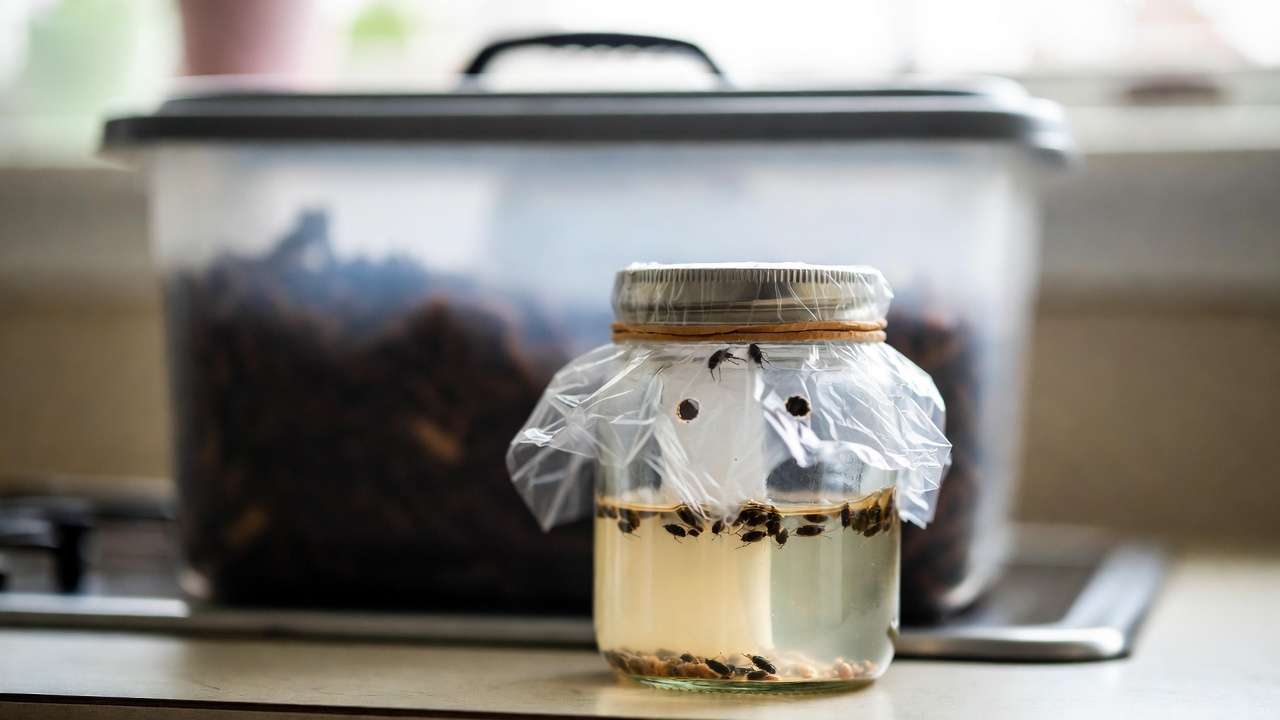
Fruit Flies or Gnats Invasion? 🪰
- Cause: Exposed food scraps attract them (very common in warm, humid Bangladesh).
- Solutions:
- Always bury food 7–10 cm deep under fresh bedding.
- Cover surface with a layer of moist newspaper or cardboard.
- Add a DIY trap: Small jar with apple cider vinegar + drop of dish soap + plastic wrap with holes.
- Reduce feeding until population stabilizes.
- Prevention tip: Freeze scraps for 24 hours before adding — kills fly eggs.
Too Wet / Too Dry? 💦❄️
- Too wet signs: Water pooling at bottom, bad smell, worms clumping on surface. → Add handfuls of dry shredded paper/cardboard, mix gently, improve drainage (more bottom holes + tray underneath).
- Too dry signs: Bedding dusty, worms lethargic or trying to escape upward. → Mist evenly with dechlorinated water, add moist food scraps, cover lid more tightly for a few days.
Worms Dying or Slow Activity? 😔
- Symptoms: Fewer worms visible, little casting production, bad odor.
- Diagnostic table:
| Symptom | Likely Cause | Immediate Action |
|---|---|---|
| Worms on surface/lid | Too wet, too hot, low oxygen | Add dry bedding, move to cooler spot, fluff |
| Worms skinny & slow | Starvation, too acidic | Reduce feeding, add eggshells, bury fresh food |
| Many cocoons but no babies | Temperature swings | Stabilize 20–25°C, be patient (60–90 days) |
| Sudden mass die-off | Toxic food (onion/garlic excess, chemicals) | Remove bad food, replace 50% bedding, monitor |
If you lose most worms, don’t panic — order a small new batch and restart. Most bins recover with patience.
Advanced Tips to Level Up Your Worm Bin 🌟
Once your first bin is humming along, try these upgrades to get even more value for your plants and trees.
Boosting Castings Quality for Prize-Winning Plants
- Add crushed eggshells weekly (calcium boost → stronger cell walls, prevents blossom-end rot in tomatoes/peppers).
- Mix in a little aged manure or leaf mold for extra microbial diversity.
- Feed “superfoods” occasionally: pumpkin, melon rinds, avocado peels (in moderation) — worms process them into exceptionally rich castings.
Scaling Up – Multiple Bins or Outdoor Transition
- Start a second bin when the first is full (use migration method).
- In Barisal’s warm climate, you can transition a mature bin outdoors under shade during cooler months for faster processing.
- Create a “worm hotel” stack: 3–4 trays for continuous harvest without disturbing the worms.
Seasonal Adjustments (Hot summers / cooler winters in tropical climates)
- Monsoon season (June–October): Watch for excess moisture — add more dry bedding.
- Winter (December–February): Activity slows → feed less, insulate bin sides with old sacks.
- Summer heat spikes: Add frozen plastic bottles on top (refresh every 2 days) or place bin in lowest, shadiest indoor spot.
Integrating with Bokashi or Regular Composting
- Use worm bin for kitchen scraps that break down quickly (veggies, fruits, coffee).
- Combine with bokashi bucket for meat/dairy/oily scraps → ferment first, then finish in worm bin.
- Use worm castings to “seed” regular compost piles — speeds decomposition dramatically.
Frequently Asked Questions (FAQs) ❓
How long until I get usable castings? Typically 3–6 months for the first full harvest. In warm indoor conditions like Barisal, you can often start harvesting small amounts after 8–12 weeks.
Can I use worm castings for all plants (including succulents & carnivorous)? Yes — but adjust ratios. Succulents/cacti: 5–10% max to avoid over-retention of water. Carnivorous plants (Venus flytraps, pitcher plants): Use very sparingly (5% or less) or as very diluted worm tea — they prefer low-nutrient soil.
Are worms noisy or smelly indoors? Completely silent and odorless when managed properly. A healthy bin smells like fresh garden soil.
Best worm source in Bangladesh or online shipping? Local options: Facebook groups (“Vermicomposting Bangladesh”, “Organic Farming BD”), nurseries in Barisal/Dhaka, or sellers in Patuakhali/Barisal region. Online: Daraz or local eco-shops sometimes stock red wigglers. Start with 0.5–1 kg — they multiply fast!
How much money can I save on fertilizer? A single 1 kg worm starter colony can produce 50–100+ kg of castings yearly — easily replacing ৳2000–5000 worth of commercial organic fertilizer for a serious indoor/outdoor plant collection.
Conclusion: Start Small, Grow Big – Your Plants Will Thank You! 🌳
Setting up a worm bin at home is one of the most rewarding steps you can take as a plant and tree lover. You’ll turn everyday kitchen waste into the richest, most alive fertilizer nature offers — and watch your pothos explode with new leaves, your mango saplings grow stronger roots, and your entire green family thrive like never before.
Start today: Grab a simple tote, order some red wigglers, and follow the steps above. Within weeks you’ll see activity, and in a few months you’ll be harvesting your own black gold. 🌱
I’d love to hear from you — drop a comment below with your setup progress, any questions, or even a photo of your first worm bin! Happy vermicomposting, Shuvo — your plants are about to level up big time. 🪱💚


