
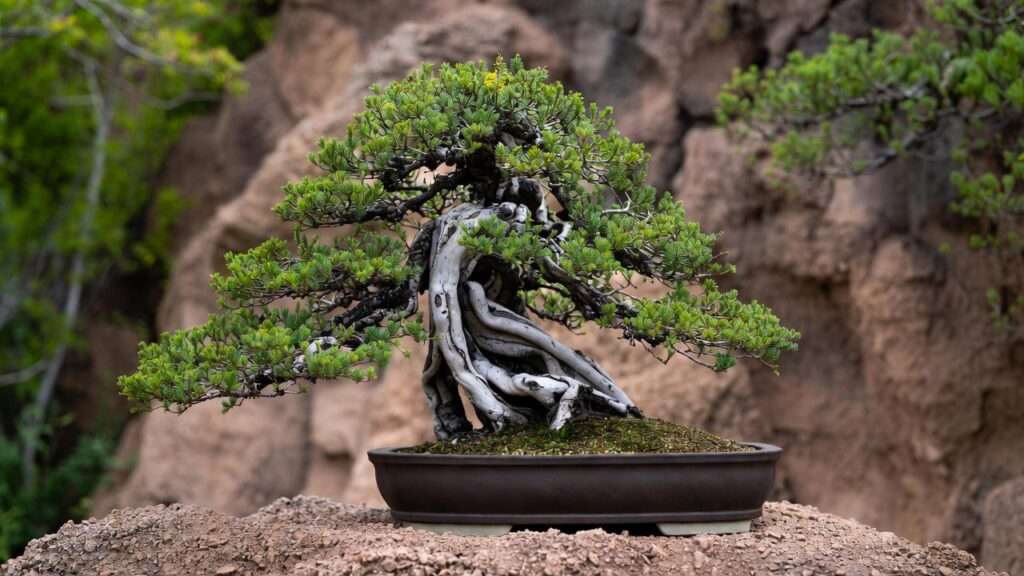
Picture this: a miniature tree gracefully tumbling over the edge of its pot like a living waterfall frozen in time, branches flowing downward with elegant defiance against gravity. This is the captivating magic of cascading bonsai — styles that evoke ancient cliffs, windswept mountainsides, and resilient trees clinging to life in dramatic landscapes. ⛰️🍃
If you’ve ever admired a kengai (full cascade) or han-kengai (semi-cascade) bonsai and thought, “I want that dramatic flow in my collection,” but ended up with weak branches, unnatural bends, or dieback, you’re not alone. Many enthusiasts struggle with these challenging yet rewarding styles. The good news? With the right cascading bonsai design tips, proper branch selection, patient wiring, strategic pruning, and balanced energy management, you can create breathtaking, healthy specimens that become the centerpiece of your bonsai display.
In this in-depth guide, I’ll share proven expert techniques drawn from traditional Japanese bonsai principles (think masters like John Naka and modern refinements), common pitfalls to avoid, species recommendations, seasonal timing, and step-by-step processes. Whether you’re a beginner dipping into cascade styling or an intermediate grower refining your skills, these cascading bonsai design tips will help you achieve natural-looking, flowing artistry that stands the test of time. Let’s dive in! 🌳
What Are Kengai and Han-Kengai? Understanding the Styles 📚
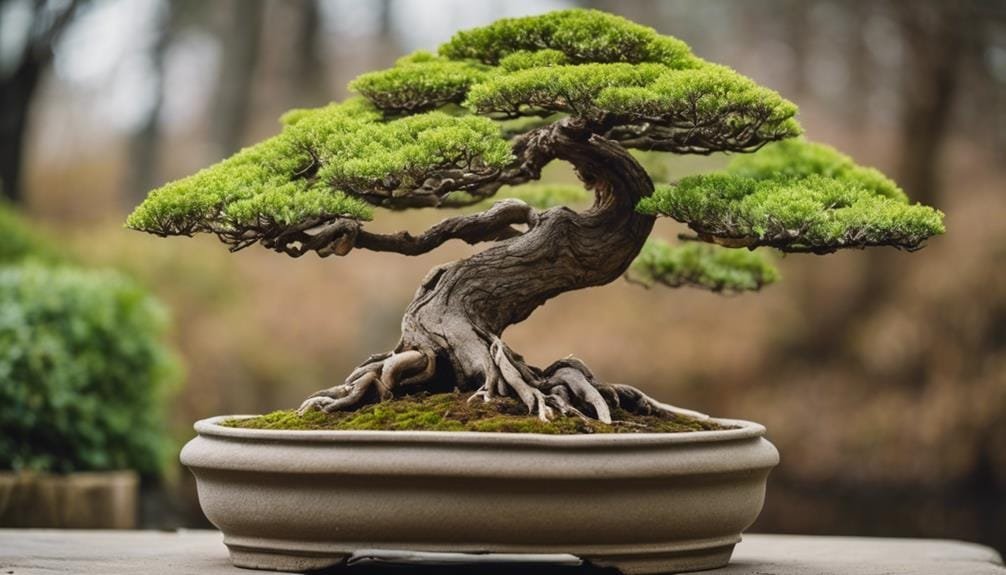
Kengai (full cascade) is the most dramatic bonsai style. The trunk plunges sharply downward — often at a 45° angle or steeper — with the apex (tip) dropping well below the pot’s base. The foliage cascades in elegant sweeps, sometimes swinging left or right for added movement, mimicking a tree growing on a sheer cliff face exposed to harsh elements.
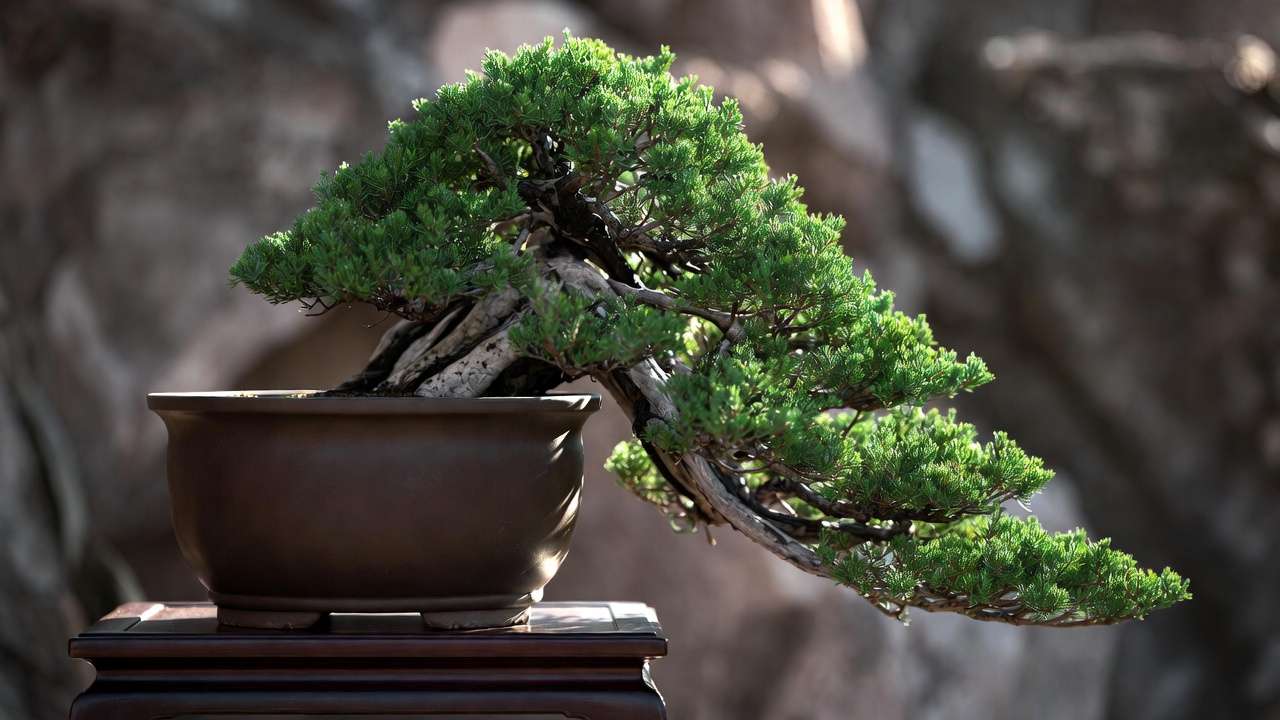
Han-kengai (semi-cascade), by contrast, is more forgiving. The trunk bends downward gracefully, but the tip of the foliage reaches only to or slightly below the pot rim. This creates a gentler, waterfall-like flow while remaining easier to balance and maintain.
Key differences include:
- Angle & drop — Kengai demands extreme downward movement; han-kengai stays more contained.
- Pot requirements — Deep, tall cascade pots for kengai; medium-deep or standard for han-kengai.
- Balance challenges — Full cascades need strong counterbalance branches to prevent tipping visually or physically.
These styles shine when you want maximum visual drama in limited space — perfect for tabletops, shelves, or as focal points in bonsai collections. They emphasize asymmetry, depth, and the illusion of age and struggle. 🌊
Choosing the Right Tree Material for Cascading Success 🌱
Not every bonsai candidate suits cascading styles. The best material has flexible lower branches or a naturally leaning trunk, good nebari (root flare) potential, and healthy vigor to support heavy bending.
Top species recommendations:
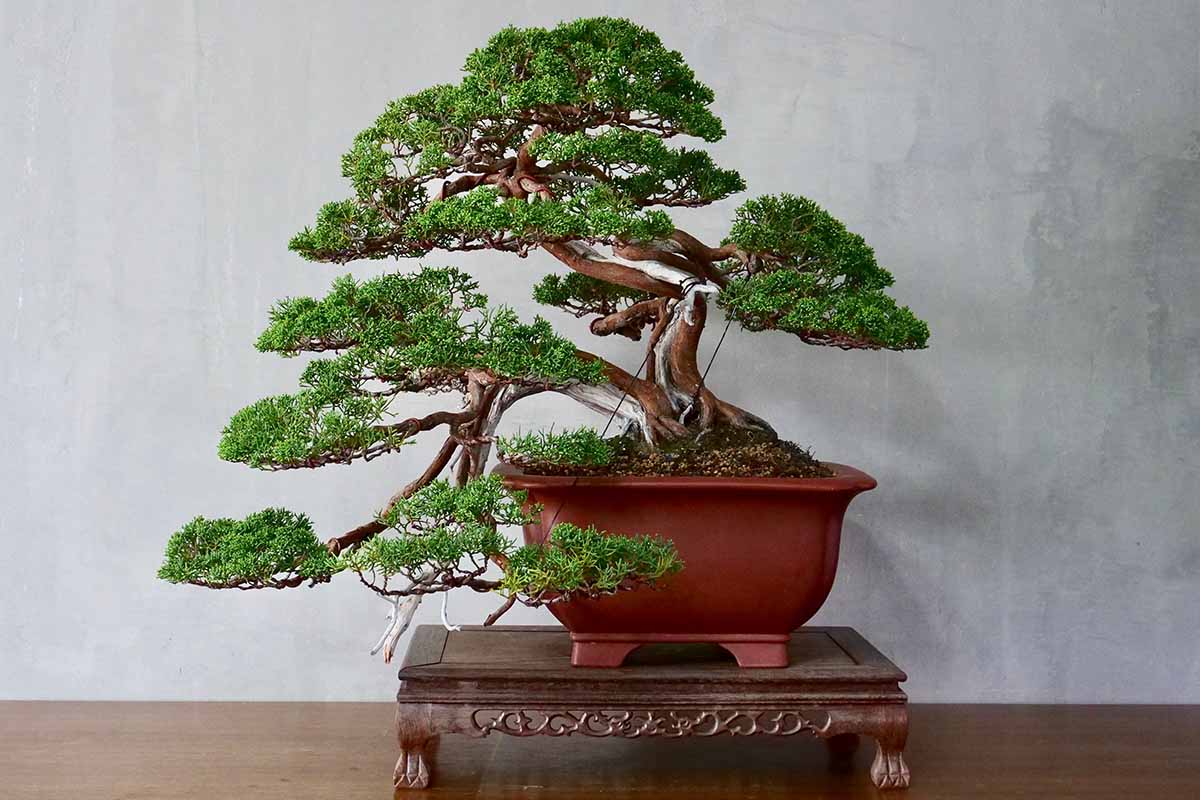
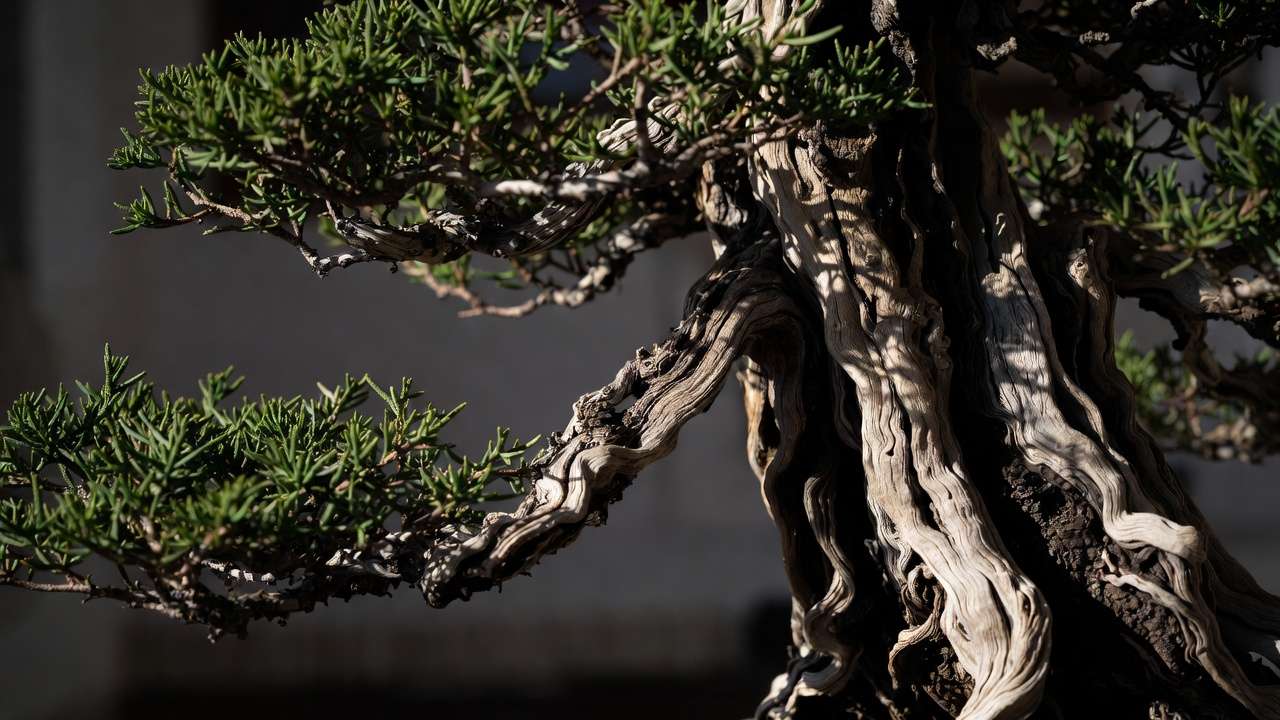
- Juniper (Juniperus procumbens ‘nana’, J. chinensis, J. rigida) — The cascade king! Flexible young branches, excellent deadwood (jin/shari) opportunities, and resilient foliage. 🌲
- Pine (especially cascade-friendly Black Pine or Scots Pine varieties) — Strong structure but slower to bend dramatically.
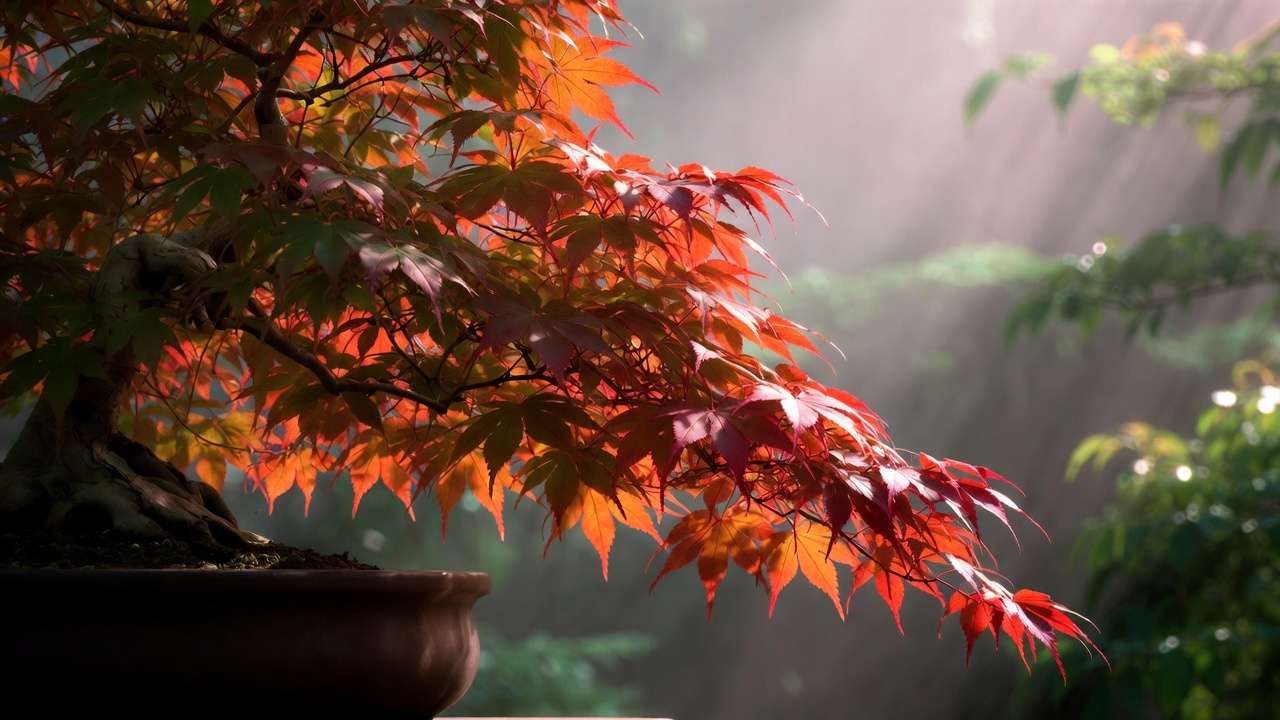
- Maple (Japanese Maple) — Beautiful fall color; works wonderfully for semi-cascade with soft, flowing pads.
- Cotoneaster, Ficus, Serissa — Forgiving for beginners in han-kengai; good ramification.
Avoid initially stiff or brittle species like certain azaleas or older pines until you gain experience. Look for pre-bonsai stock with a long, whippy lower branch or trunk section — this becomes your primary cascade line.
Sourcing tips: Start with nursery stock showing promise, collect yamadori (wild collected) with natural leans, or propagate from cuttings for ultimate control. Patience here pays off massively in the final design. 🌿
Step-by-Step Guide to Designing & Styling a Cascading Bonsai 🛠️
Step 1: Analyze & Plan Your Tree (The Most Important Step!) 🔍
Before any cut or wire, spend time studying your tree. Rotate it 360° multiple times under good light. Ask:
- Which direction gives the strongest downward potential?
- Where is the natural “front” for viewing?
- Which branch or trunk section can serve as the primary cascade apex?
Visualize the final silhouette: triangular pads decreasing in size downward, negative space for “see-through” depth, and counterbalance on the opposite side. Sketch quick front/side views if helpful. This planning prevents irreversible mistakes.
Step 2: Pruning & Structural Cleanup ✂️
Begin with structural pruning:
- Remove thick upright leaders or sacrifice branches competing with your cascade (but taper gradually over seasons to avoid shocking the tree).
- Redirect energy: Heavy pruning on upper/vertical parts strengthens the lower cascade.
- Build layers: Prune for horizontal pads with intentional gaps — this creates airy, three-dimensional depth.
Always prune back to a bud facing the desired direction. Use concave cutters for clean cuts that heal smoothly.
Step 3: Wiring Techniques for Safe, Dramatic Bends ⚡
Wiring is the heart of cascade styling — but done wrong, it scars or breaks branches.
- Wire choice: Annealed copper for conifers (holds shape longer); aluminum for deciduous trees (gentler on bark).
- Strategy: Apply heavy-gauge wire to the trunk first, then branch primaries. Use raffia or wet paper wrapping on sharp bends to protect bark.
- Bending: Start gradual — bend 10–20° at a time over months. Use guy wires, weights, or branch spreaders for extreme drops without cracking.
- Pro tip: Incorporate subtle S-curves or gentle twists for organic flow; pure straight-down lines look artificial.
Remove wire before it bites in (usually 3–12 months depending on species and season).
Step 4: Creating Movement, Asymmetry & Depth 🌬️
The true artistry of a cascading bonsai lies in its sense of motion and three-dimensional presence. A flat, one-dimensional cascade looks artificial and lifeless — instead, aim for flowing energy that draws the eye downward and around the tree.
- Branch placement rules: Position the first major branch (usually the lowest on the cascade side) to sweep outward and down. Place a strong secondary branch on the opposite side (back or slightly higher) to act as a visual counterweight — this prevents the design from feeling lopsided or ready to tip over.
- Foliage pad layering: Build triangular or cloud-like pads that decrease in size as they descend. Each pad should have clear separation (negative space) so light filters through, creating airy depth rather than a solid green mass.
- Incorporating jin & shari: For rugged, cliff-like realism, carefully create deadwood features on the trunk or branches. On junipers especially, strip bark selectively and carve subtle twists to mimic wind and weather erosion. Always seal fresh deadwood with cut paste to prevent rot.
Pro tip from decades of observation: Slightly twist branches as you wire them — even 10–15° rotation adds natural irregularity that straight wiring can never achieve.
Step 5: Pot Selection & Final Positioning 🪴
Choosing the correct pot is non-negotiable for cascading styles — the wrong vessel ruins the drama.
- For full kengai: Use deep cascade pots (often called “kengai pots” or “tall rectangular/tall round” styles) that allow the apex to hang well below the rim. The pot should be tall enough to give the illusion of a cliff dropping into space.
- For han-kengai: Medium-deep oval, rectangular, or round pots work beautifully — they provide stability without overwhelming the gentler flow.
- Color & texture: Earthy browns, unglazed reds, or subtle blues complement natural cascades. Avoid overly bright or shiny glazes that distract from the tree.
- Potting technique: Tilt the rootball slightly forward during repotting so the trunk naturally leans over the edge. Use a well-draining bonsai soil mix (akadama + pumice + lava rock in roughly 2:1:1 ratio) to prevent waterlogging in deeper containers.
Position the tree on a stand or shelf that allows viewers to see the full downward sweep — never place it so low that the cascade disappears against a table edge.
Seasonal Timing & Aftercare: Keep Your Cascade Thriving Through the Year ⏰
Timing is everything in bonsai styling — especially for dramatic bends.
- Best windows: Late winter to very early spring (February–April in most temperate zones) before buds swell, or early fall after summer growth hardens but before cold sets in. Conifers tolerate late fall wiring better than deciduous trees.
- Immediately after styling:
- Place in 50–70% shade for 4–8 weeks to reduce stress.
- Mist foliage daily and keep soil evenly moist (but never soggy — deep pots dry unevenly).
- Avoid fertilizing for 4–6 weeks post-styling.
- Long-term maintenance:
- Pinch new growth regularly to keep pads tight.
- Rewire every 1–2 years as branches thicken.
- Protect from extreme winter cold and summer scorch — cascades are more exposed due to their open structure.
Monitor for pests (spider mites love dry, cascading foliage) and treat promptly with horticultural oil or neem.
Common Mistakes & How Experts Avoid Them ❌➡️✅
Even experienced growers make errors — here are the most frequent cascade killers and their fixes:
- Mistake #1: Over-pruning the upright portion too aggressively → The cascade branch starves and dies back. Fix: Reduce upright growth gradually over 2–3 seasons while feeding heavily to build root energy.
- Mistake #2: Sharp, 90°+ bends without support → Cracks, dieback, or ugly scars. Fix: Use raffia wrapping + guy wires for controlled, incremental bending. Never force branches in one session.
- Mistake #3: Ignoring energy balance → Upright parts dominate, cascade weakens. Fix: Consistently pinch upright candles/pads harder than the cascade side to redirect sap flow.
- Mistake #4: Poor drainage in deep pots → Root rot kills from the bottom up. Fix: Add extra pumice/lava at the base, use mesh screens, and water only when the top 2 cm dries.
- Mistake #5: Leaving wire on too long → Deep bite marks that never heal cleanly. Fix: Check monthly — remove copper wire after 3–6 months on conifers, aluminum sooner on maples.
Inspiring Examples & Case Studies 📸
Imagine a classic Juniper procumbens nana cascade: The trunk drops almost vertically for 30 cm below the pot rim, then sweeps gently left in a smooth S-curve. Small, tight pads descend like green clouds, with subtle jin twists along the upper trunk adding rugged character. Before styling it was an upright mame; after 4 years of patient wiring and pruning, it became a National Bonsai Exhibition contender.
Another favorite: A semi-cascade Japanese Maple in vibrant autumn red. The main branch flows downward to just kiss the pot edge, with delicate secondary branches creating layered depth. The contrast between fiery foliage and dark pot makes it unforgettable.
Study photos of award-winning cascades from Kokufu-ten, U.S. National Bonsai Museum, or European shows — notice how masters leave intentional negative space and never overcrowd pads.
Advanced Tips from Bonsai Masters ✨
Once you’ve mastered the basics of cascading design, these refined techniques — drawn from decades of practice by Japanese, American, and European bonsai artists — elevate your trees from good to show-quality.
- Strategic sacrifice branches: Keep one or two strong upright shoots during early development to feed the entire tree and thicken the trunk base. Once the cascade is established (usually year 2–3), gradually remove or shorten them. This “feed and starve” method builds impressive taper without weakening the flowing branches.
- Deadwood mastery in cascades: On junipers and some pines, extend jin (deadwood on branches) or shari (deadwood strips on trunk) downward along the cascade path. This reinforces the “windswept cliff survivor” story. Use a sharp carving tool to create subtle texture — never overdo it; 20–30% deadwood maximum keeps the tree looking alive.
- Refining older cascades: For trees already in semi-cascade that you want to push into full kengai, use a combination of heavy trunk wiring + branch splitters over multiple seasons. Protect major bends with thick raffia and wooden splints. Many award-winning cascades were “upgraded” this way over 5–10 years.
- Micro-climate tricks for cascading foliage: Because lower branches hang lower and receive less light, rotate the tree every 2–4 weeks during the growing season. Supplement with weak grow lights (6500K LED) in winter if natural light is limited — this prevents thin, etiolated pads at the bottom.
- Creating illusion of great age: Introduce subtle reverse taper near the apex (thicker at the tip than midway down) using careful carving and jin creation. Pair with tight ramification and small leaf reduction to make even young trees appear ancient.
These advanced touches separate hobbyist cascades from competition-level pieces. Patience and observation remain the real secrets.
Frequently Asked Questions (FAQs) ❓
Can complete beginners start with a cascading bonsai style? It’s possible with a forgiving species like cotoneaster or ficus in han-kengai form, but most experts recommend mastering informal upright or slanting styles first. The wiring and energy management in cascades are more demanding. Start small and simple — success builds confidence faster than frustration.
How long does it take to develop a beautiful cascading bonsai? Realistically: 3–7 years from nursery stock to a refined, presentable cascade; 10–20+ years for a truly mature, show-quality kengai. Semi-cascades can look impressive in 2–4 years with good material and technique.
What should I do if my main cascade branch starts dying back? First, check for over-pruning of the rest of the tree (energy starvation), underwatering, or wire bite scars blocking sap flow. Cut back to live tissue, heavily shade the tree, fertilize lightly, and mist daily. In many cases the branch recovers if caught early. If not, select the next strongest lower branch and re-design around it.
Which fertilizer and watering routine works best for cascading bonsai? Use a balanced organic fertilizer (e.g., 5-5-5 or bonsai-specific liquid) every 2 weeks in spring/summer, reduced to monthly in fall. Deep pots dry unevenly — check the top 2–3 cm of soil daily in summer; water thoroughly when it feels dry. Bottom-watering once a month helps reach lower roots.
Is full kengai harder than semi-cascade? Which should I try first? Yes — full kengai requires deeper pots, more extreme wiring, stronger material, and precise balance. Start with han-kengai; the skills transfer directly when you’re ready to go full cascade.
Conclusion: Bring Dramatic Beauty to Your Bonsai Collection 🌟
Creating a stunning cascading bonsai is one of the most rewarding challenges in the art. It teaches patience, observation, respect for the tree’s natural tendencies, and the delicate balance between control and letting nature speak.
By following these cascading bonsai design tips — careful material selection, thoughtful planning, gradual structural pruning, protective wiring techniques, energy redirection, proper potting, seasonal timing, and vigilant aftercare — you’ll avoid the most common frustrations and instead craft living sculptures full of movement, depth, and emotional power.
Your cascade doesn’t need to be perfect on day one. Every bend, every pruned shoot, every season of growth adds to its story. Start with one promising tree, apply these expert techniques step by step, and watch it transform into a miniature masterpiece that tells tales of resilience and grace.
Now it’s your turn — grab your favorite pre-bonsai candidate, study its lines, and begin the journey. Share your progress, before-and-after photos, or questions in the comments below. I’d love to see the dramatic flowing beauty you create! 🌳❤️


