
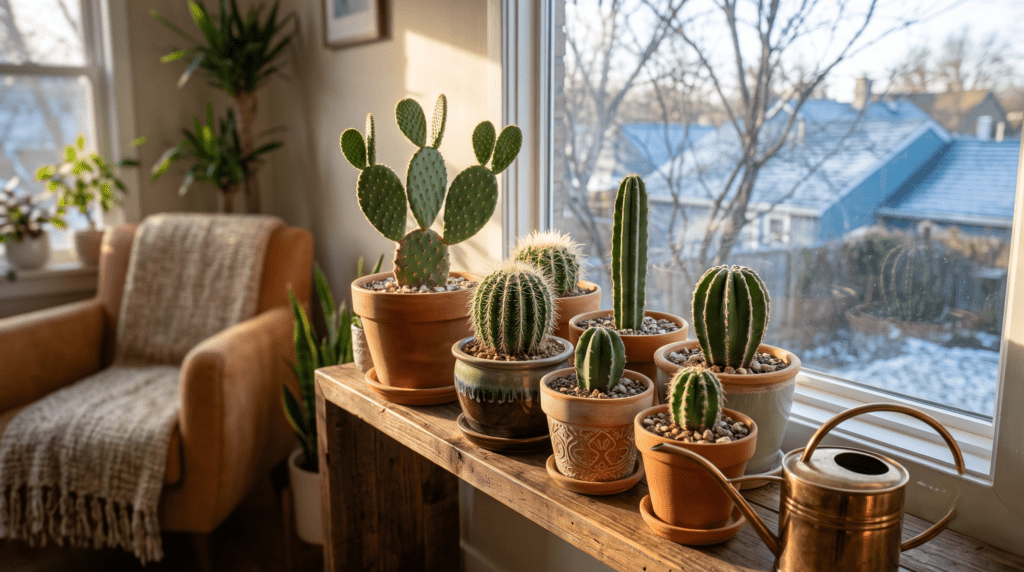
The transition from late autumn to early winter is a notoriously stressful time for succulent and desert plant enthusiasts. You spend all summer watching your prickly companions thrive, soak up the sun, and push out beautiful new growth, only to watch them turn into a mushy, yellow mess by January. Why does this happen? The process of moving outdoor cacti indoors for winter is fraught with invisible dangers, primarily because our cozy, centrally heated homes are the exact opposite of what these plants need to survive the colder months.
If you are tired of losing your favorite plants to root rot, etiolation (stretching), or surprise pest infestations, you are in the right place. This comprehensive guide will walk you through the exact, foolproof process of overwintering your collection safely. By following these 5 crucial steps, you will learn how to mimic their natural winter dormancy, prevent rot, and set them up for a massive burst of spring growth. Let’s dive in! 🪴
Understanding the Cactus Winter Dormancy Phase 🩺
Before you pick up a single pot, it is vital to understand what your plants are biologically experiencing as the seasons change.
In their natural habitats, most cacti experience a distinct period of winter dormancy. As daylight hours shorten and temperatures drop, these plants slow their metabolic processes. They stop utilizing water and nutrients for active growth and enter a state of suspended animation designed purely for survival.
When we bring them inside, we often disrupt this natural cycle. The artificial heat from our furnaces and the drastically reduced light from our windows create a confusing environment. The warmth tricks the cactus into thinking it is growing season, but the lack of intense sunlight prevents healthy photosynthesis. The result? Weak, pale, stretched-out growth and a root system highly susceptible to fungal infections.
Expert Insight: Winter cactus care is about survival and rest, not growth. Your goal is not to encourage new pads or spines during December; your goal is to keep the plant dormant, dry, and healthy until spring. ❄️
Step 1: Timing the Great Migration 🗓️
Timing is everything. Bring them in too early, and you rob them of the crucial autumn temperature drops that trigger healthy dormancy. Bring them in too late, and a surprise frost could cause irreversible cell damage, turning your plant to black mush overnight.
The Temperature Threshold
As a general rule, you should begin preparing to move your plants when nighttime temperatures consistently drop to 50°F (10°C). While many desert species can survive temperatures dipping into the 40s or even upper 30s, sustained cold combined with autumn rains is a death sentence.
The Moisture Rule (Crucial) 💧
Never, under any circumstances, bring a wet cactus indoors for the winter. The combination of cold, wet soil and stagnant indoor air is the fastest route to severe root rot. Check the weather forecast weeks in advance. Stop watering your outdoor collection completely at least two weeks before your target move-in date to ensure the soil is bone dry.
Step 2: The Deep Clean and Pest Inspection 🐛
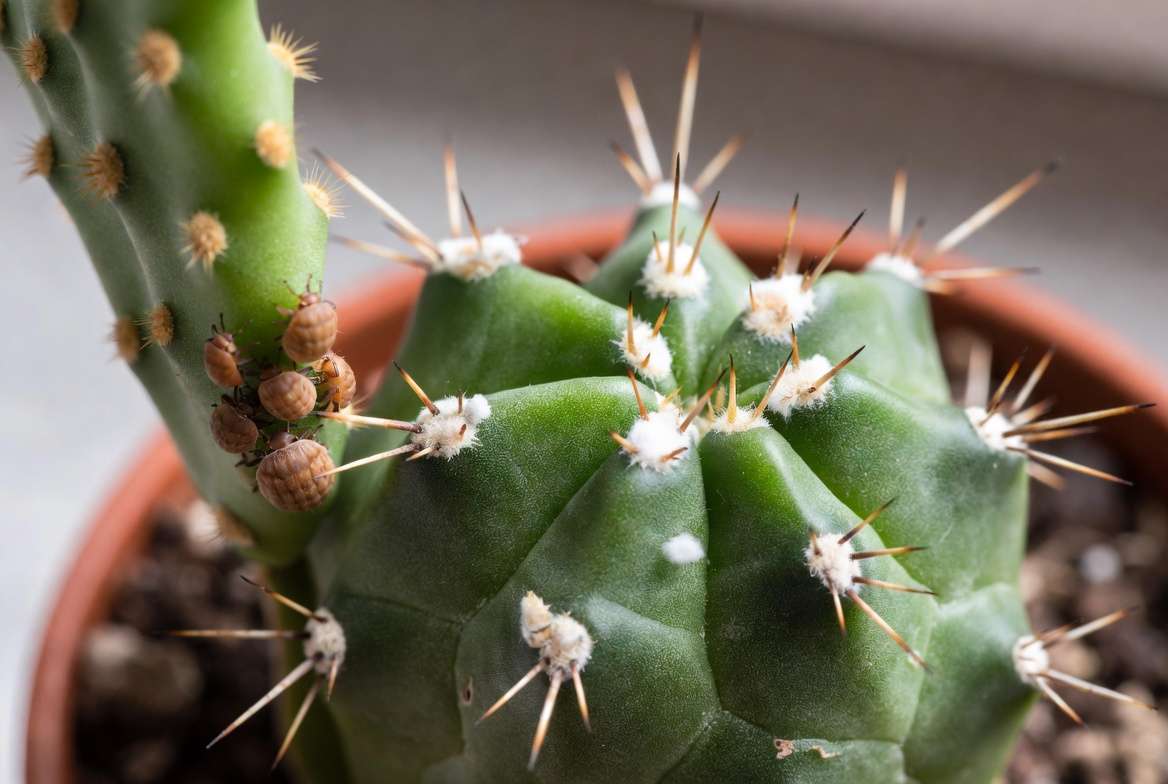
The great outdoors is filled with natural predators that keep pest populations in check. Inside your home, it is a pest paradise: warm, dry, and completely free of ladybugs or predatory wasps. A single mealybug brought indoors can decimate an entire indoor plant collection within weeks.
The Inspection Checklist
Take a magnifying glass and inspect every inch of your plants before they cross the threshold of your home.
| Pest Type | Where to Look | Visual Signs |
| Mealybugs | Areoles (where spines grow), crevices, root crown | White, cottony masses; sticky honeydew residue |
| Scale | Stems, base of the plant, underside of pads | Hard, brown, or tan armored bumps that can be scraped off |
| Spider Mites | New growth, between ribs, near the apex | Fine webbing, rusty or silvery discoloration on the skin |
Treatment Protocol
If you spot pests, isolate the plant immediately.
-
The Hose Down: Use a sharp stream of water from your garden hose to blast off visible pests (ensure you have enough warm days left for the plant to dry completely).
-
Topical Treatment: Spray the plant thoroughly with a high-quality insecticidal soap, neem oil solution, or 70% isopropyl alcohol mixed with water.
-
The Root Check: If a plant looks withered despite adequate summer watering, unpot it and check for root mealybugs. If found, prune the affected roots, treat with a systemic insecticide, and repot in fresh, sterile soil.
Step 3: Soil Health and Drainage Optimization 🪴
The potting soil that worked perfectly during hot, breezy summer days might be your plant’s worst enemy indoors. Standard nursery soil is often heavily peat-based. Peat moss retains water like a sponge and compresses over time, choking the roots of oxygen.
The Root Rot Connection
When a cactus is dormant, it does not drink. If it sits in moisture-retaining organic soil indoors, the stagnant water breeds Phytophthora and Pythium water molds—the pathogens responsible for root rot.
The Ideal Winter Soil Recipe
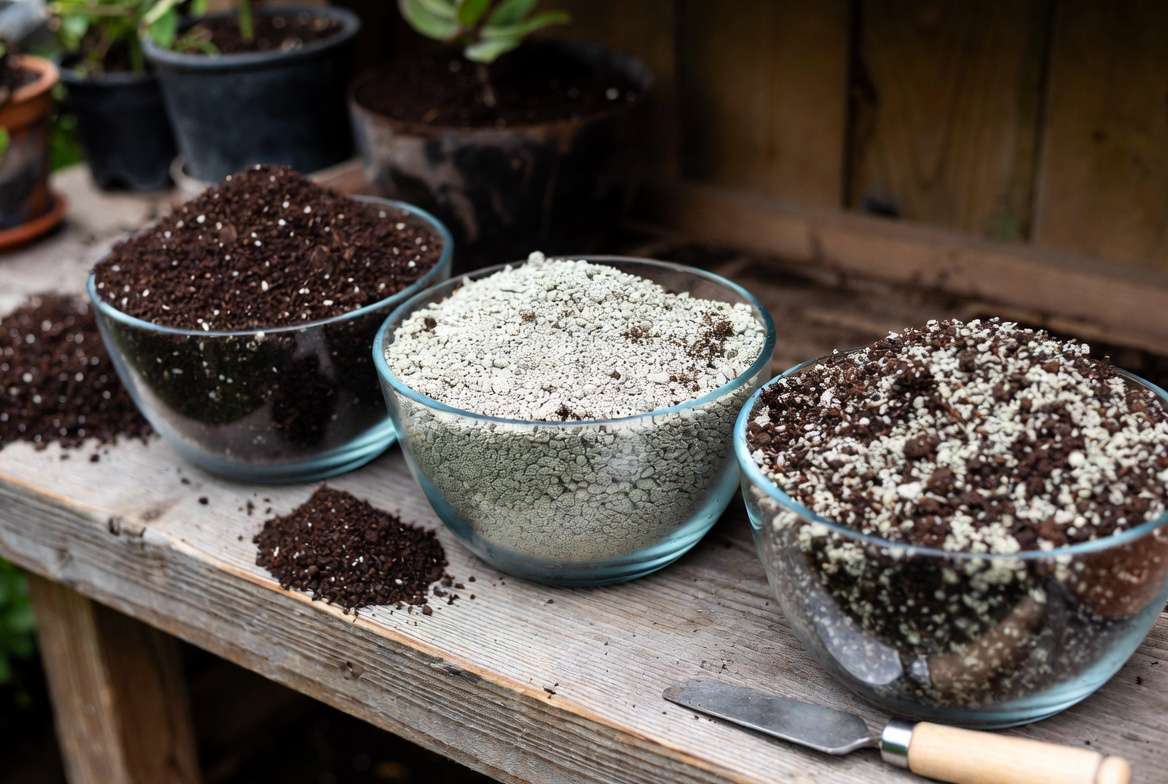
If you suspect your soil is too dense, do an emergency repotting a few weeks before moving them indoors. You want a high-grit, inorganic mix that drains almost instantly.
(Pro-Tip: If you create visual content for your website, this is the perfect spot to embed a customized, highly shareable Pinterest graphic showing your ideal soil mixing ratios!) 📌
The Foolproof Cactus Mix:
-
30% Organic Matter: High-quality potting soil (sifted to remove large bark).
-
70% Inorganic Grit: A mix of pumice, coarse horticultural sand, calcined clay, or perlite.
Test your drainage: Water should pour out of the bottom drainage holes within seconds of being applied to the top. If the water pools on the surface, your soil is too heavy for safe overwintering.
Step 4: Light Management and Acclimation ☀️
Plants get sunburned just like humans, but they also suffer from “shade shock.” Moving a plant from 100,000 lux of direct outdoor sunlight to 2,000 lux of indoor living room light is incredibly stressful.
Step-Down Acclimation
A week before the final move, shift your outdoor pots from full sun to a heavily shaded porch or under a tree. This gradual reduction helps the plant adjust its chlorophyll production and prevents it from dropping pads or going into shock once brought inside.
Finding the Right Indoor Spot
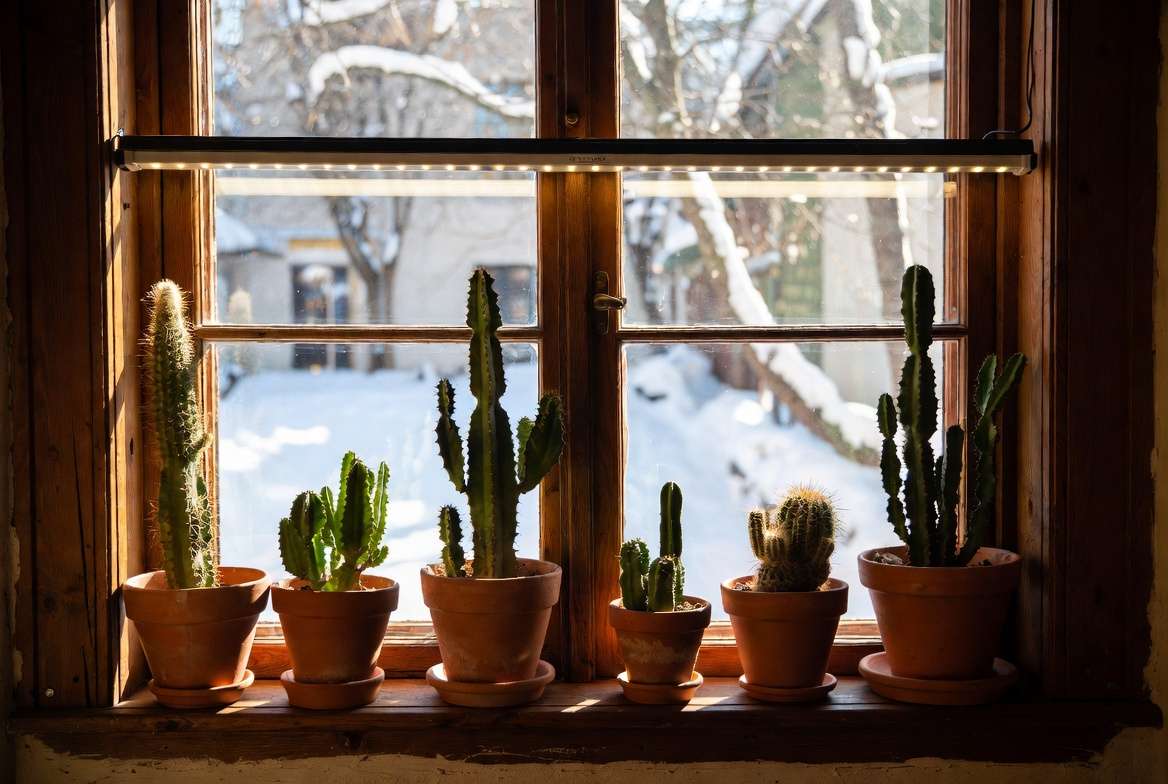
Place your cacti in the absolute brightest, sunniest window available—typically a South-facing or West-facing window in the Northern Hemisphere. Ensure the window is draft-free; freezing air leaking through windowpanes can cause localized frost damage.
Artificial Assistance (Grow Lights) 💡
Unless you have a sunroom or a massive south-facing bay window, natural winter light is rarely enough. To prevent etiolation, invest in full-spectrum LED grow lights.
-
Placement: Position the lights 6 to 12 inches away from the top of the plants.
-
Duration: Run them on a timer for 10 to 12 hours a day.
-
Spectrum: Choose full-spectrum white lights (often labeled daylight or 6500K) to support maintenance without forcing unnatural stretching.
Step 5: The Winter Watering Protocol (The Golden Rule) 💧
If you only remember one piece of advice from this entire article, let it be this: Overwatering during dormancy kills 99% of indoor cacti.
The “When in Doubt, Drought” Rule
Your watering schedule must change drastically. A cactus that needed water twice a week outdoors in July might only need water once a month—or not at all—indoors in January.
-
Desert Cacti (e.g., Opuntia, Trichocereus, Ferocactus): These can often go from November to March without a single drop of water.
-
Tropical/Jungle Cacti (e.g., Christmas Cactus, Epiphyllum): These are exceptions. They do not tolerate bone-dry soil for months. Water them lightly when the top two inches of soil feel dry.
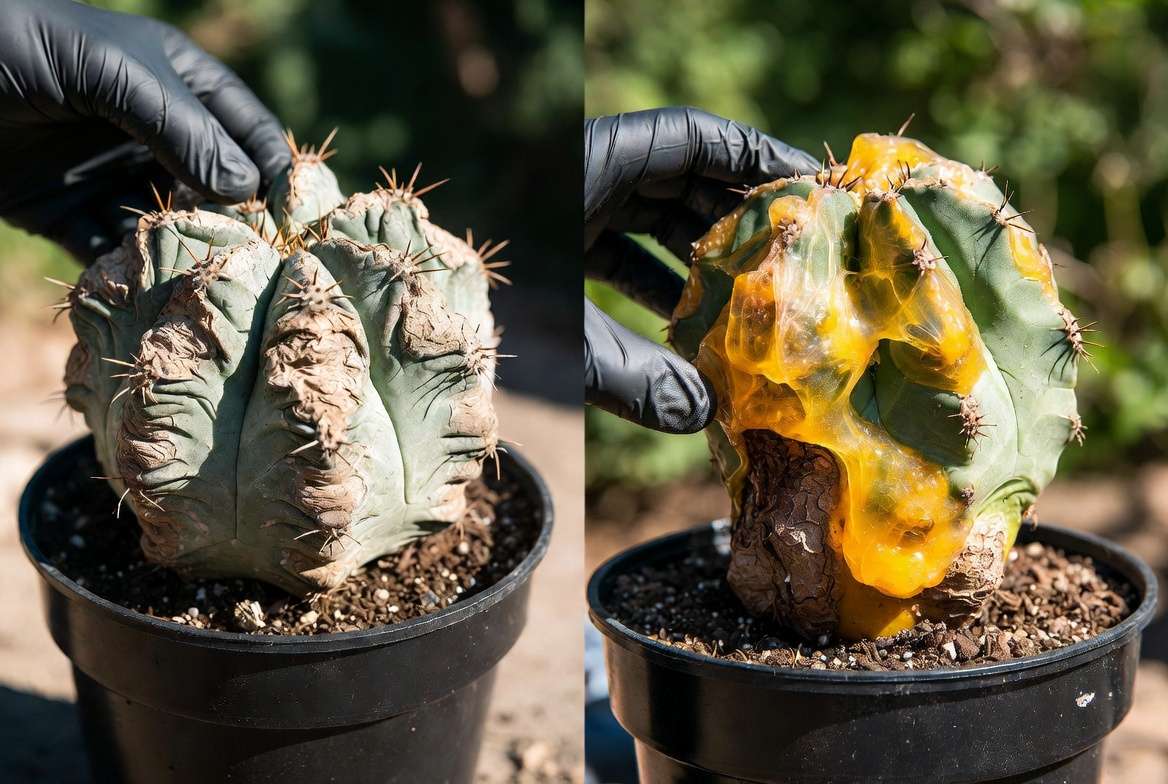
Signs of Thirst vs. Rot
Many growers panic when they see their cactus shriveling or wrinkling in December and immediately reach for the watering can. Stop! Shriveling is a natural, healthy defense mechanism. The plant is slightly dehydrating its cells to prevent freezing.
-
Normal Thirst: Uniform wrinkling, a slightly duller color, firm to the touch.
-
Root Rot: Squishy, blackened, or translucent yellowing at the absolute base of the plant near the soil line. It may also smell foul. If it is squishy, water is the last thing it needs.
Troubleshooting Common Winter Issues 🚑
Even with the best preparation, issues can arise. Here is how to diagnose and treat the most common winter ailments:
Etiolation (Stretching)
-
The Symptom: The top of your cactus starts growing rapidly, but the new growth is pale green, skinny, and stretched out.
-
The Cause: Insufficient light paired with too much warmth or water, tricking the plant into reaching desperately for the sun.
-
The Fix: Immediately stop watering and move the plant to a brighter location or add a grow light. You cannot reverse etiolation (the skinny part will never fatten up), so prevention is key. You may need to cleanly chop the top off in spring to allow it to branch out normally.
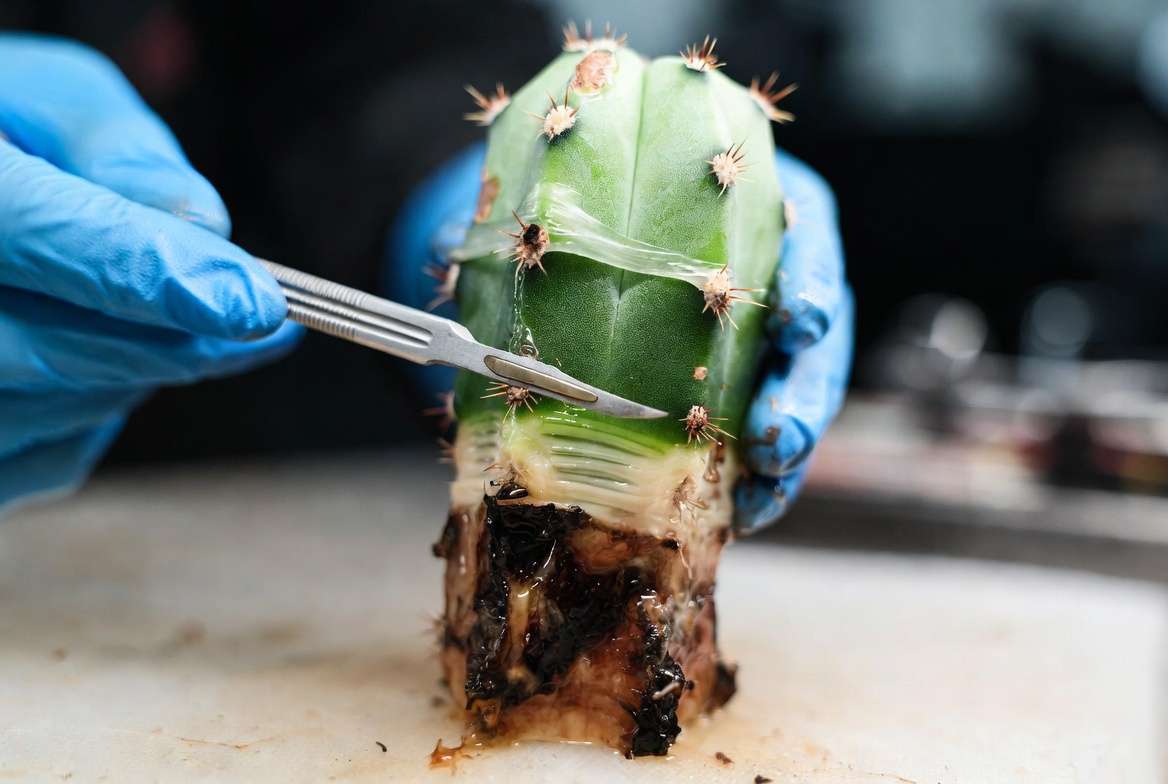
Base Yellowing and Softening (Rot)
-
The Symptom: The base of the stem turns yellow, black, or brown and feels mushy when poked gently with a chopstick.
-
The Fix: This is an emergency. Unpot the plant immediately. If the roots are black and slimy, they are rotting. You must surgically cut away all rot using a sterilized knife until only clean, green/white tissue remains. Let the healthy cutting callus over for a week in a dry place before repotting it in dry grit to re-root in the spring.
Corking
-
The Symptom: A hard, woody, brown crust forming at the very base of an older cactus.
-
The Fix: Do nothing! This is a natural aging process called corking, where the base hardens to support the weight of the growing plant above. As long as it is hard and firm (not mushy), your plant is perfectly healthy.
Frequently Asked Questions (FAQs) 💬
Can I leave my cacti in an unheated garage for the winter?
Yes, under the right conditions! Many growers successfully overwinter desert cacti in dark, unheated garages. The key is that temperatures must remain consistently between 35°F and 45°F (2°C – 7°C) to keep them fully dormant. If they are completely dormant and cold, they do not need light. However, they must stay 100% dry.
Do I need to fertilize my indoor cactus during winter?
Absolutely not. Because the plant is dormant and not actively growing, it cannot process the nutrients. Applying fertilizer during winter can burn the roots and cause a toxic buildup of salts in the soil. Wait until you see the first signs of active new growth in the spring.
Should I mist my cactus to combat dry indoor heater air?
No. Desert cacti thrive in low humidity. Misting them provides no benefit and actually encourages fungal diseases and rot on the surface of the plant’s skin. Keep the air around them as dry as possible.
How do I know when it’s time to move them back outside?
Wait until all danger of spring frost has passed and nighttime temperatures are consistently staying above 50°F (10°C). Just as you acclimated them to come indoors, you must reverse the process. Start them in full shade outdoors for a week, gradually moving them into direct sunlight to prevent severe sunburn.
Conclusion: Setting Up for Spring Success 🌸
Moving outdoor cacti indoors for winter does not have to be a stressful gamble. By timing your move correctly, rigorously checking for pests, optimizing your soil for drainage, maximizing light, and—most importantly—withholding water, you are guaranteeing your plants a safe and restful dormancy.
Remember, when it comes to overwintering succulents and desert plants, a healthy dose of “benign neglect” is your greatest tool. Let them sleep peacefully through the dark months, and they will reward you with vibrant health, stunning blooms, and vigorous new growth the moment spring arrives!











