
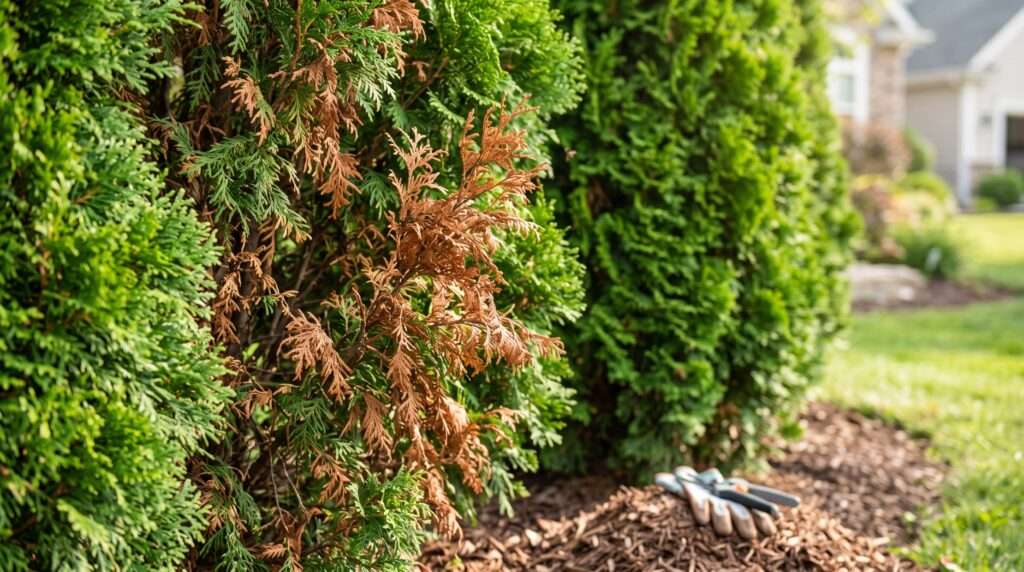
Walking out into your yard and discovering that your prized, expensive privacy hedge is fading from a vibrant emerald green to a sickly, crispy rust color is a uniquely stressful experience. You likely planted arborvitae trees because nurseries heavily promote them as low-maintenance, hardy evergreens. So, why are they suddenly struggling to survive?
As a plant care specialist who has diagnosed and rescued countless Thuja hedges from the brink of death, I can assure you that panic is the wrong first reaction. A browning evergreen is certainly a cry for help, but it is rarely an immediate death sentence if you know exactly what to look for. In this comprehensive diagnostic guide, we will break down exactly why your foliage is discoloring and provide a targeted, step-by-step rescue plan to bring your landscape back to life. 🧑🌾
🍂 First, A Deep Breath: Is Your Arborvitae Actually Dying?
Before we start applying fertilizers or adjusting watering schedules, we need to rule out a completely normal biological process. Just because you see brown needles does not automatically mean your tree is diseased or dying.
Understanding Natural Seasonal Shedding
Arborvitae are evergreens, which means they hold onto their foliage year-round. However, “evergreen” does not mean “forever green.” Just like deciduous trees drop their leaves in the fall, arborvitae go through a process called fall needle drop or seasonal shedding.
As the tree grows and expands its outer canopy, the inner branches receive significantly less sunlight. In late autumn, it is perfectly natural for the tree to abandon these shaded inner needles to conserve energy for the winter. These older needles will turn yellow, then brown, and eventually drop to the ground.
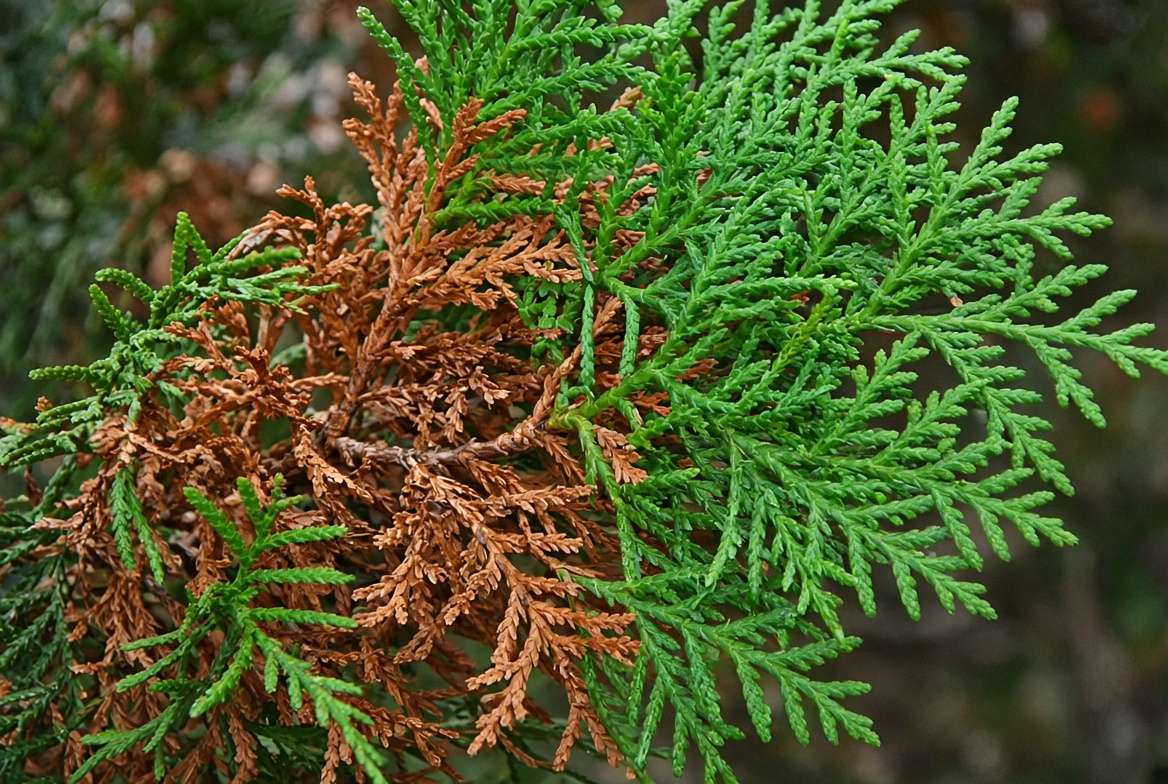
🧑🌾 Arborist’s Note: The Golden Rule of Browning. If the brown needles are localized entirely on the inside of the tree near the trunk, and the outer tips are soft, flexible, and bright green, your tree is perfectly healthy. Simply brush the dead needles away. However, if the browning is occurring on the outer tips, at the very top of the tree, or spreading rapidly in the spring or summer, you have an active problem that requires immediate intervention. 💡
🕵️ The 6 Most Common Reasons Arborvitae Trees Turn Brown (Diagnostic Guide)
If you have ruled out natural seasonal shedding, it is time to play tree detective. Arborvitae are generally resilient, but they are highly sensitive to sudden environmental changes and specific pests. Here are the six primary culprits behind browning foliage.
1. Water Stress: The #1 Culprit (Drought vs. Drowning) 💧
When an arborvitae is struggling, improper watering is the root cause in about 80% of cases. Unfortunately, the symptoms of underwatering and overwatering look incredibly similar above ground, making this a tricky diagnosis for beginners.
-
Drought (Underwatering): Arborvitae have shallow, fibrous root systems. During prolonged dry spells or intense summer heat, they cannot tap into deep groundwater.
-
Symptoms: The browning usually starts at the very top of the tree and works its way down. The foliage will feel crispy, dry, and brittle to the touch, easily crumbling between your fingers. The tips will look scorched.
-
-
Root Rot (Overwatering): Planting in heavy clay soil or running irrigation systems too frequently deprives the roots of oxygen. The roots literally suffocate, rot, and lose the ability to transport water to the canopy—ironically causing the tree to die of dehydration while sitting in a puddle.
-
Symptoms: The foliage turns a dull, muddy brown or dark grey-green. Instead of being crispy, the branches may feel limp, droopy, or heavy. If you dig near the base, the soil will smell swampy or sour.
-
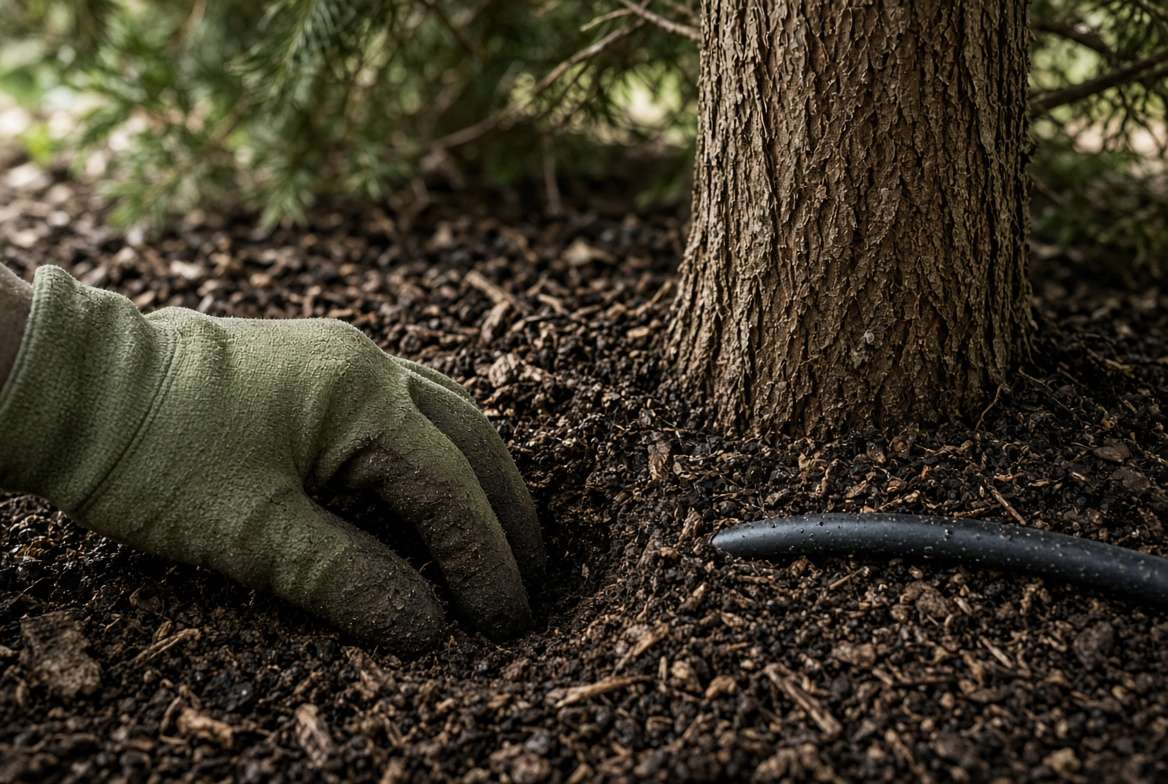
The Finger Test: To diagnose water stress, do not just look at the surface of the mulch. Push your finger 2 to 3 inches deep into the soil at the base of the trunk. If it is bone dry and dusty, your tree needs a deep soaking. If it feels like a wrung-out sponge, it is perfect. If it is muddy and saturated, stop watering immediately.
2. Winter Burn (Desiccation) ❄️
If you live in a colder climate and notice your trees turning brown in early spring just as the snow melts, you are likely dealing with winter burn.
During the winter, harsh, freezing winds constantly whip against the evergreen foliage, stripping moisture from the needles. Under normal conditions, the tree would pull water up from the roots to replenish those needles. However, because the ground is frozen solid, the roots cannot access any water. The needles essentially freeze-dry and die.
-
Symptoms: The browning is almost always highly directional. The side of the tree facing the prevailing winter winds (or facing a highly reflective white fence) will be brown and scorched, while the sheltered side facing the house remains perfectly green.
3. Pesky Invaders: Spider Mites and Bagworms 🐛
While arborvitae are generally pest-resistant, there are two specific invaders that can decimate a hedge in a matter of weeks if left unchecked.
-
Spruce Spider Mites: These are microscopic arachnids that thrive in cool, dry weather (typically spring and fall). They suck the sap directly out of the individual needles.
-
Symptoms: The foliage will not turn a solid brown; instead, it will look “stippled” with tiny yellow and brown dots, giving the whole tree a dull, dirty, or bronze appearance. You may also notice very fine, dusty webbing between the inner branches.
-
The Paper Test: Hold a sheet of white paper under a suspect branch and tap the branch sharply. If tiny specks fall onto the paper and begin crawling around (some red, some dark green or black), you have an active mite infestation.
-
-
Bagworms: These caterpillars are silent killers. They construct camouflage cocoons using the tree’s own dead brown needles, making them incredibly difficult to spot until the tree is severely defoliated.
-
Symptoms: Look closely at the branches. If you see what looks like 1-to-2-inch brown pinecones hanging vertically from the foliage, those are bagworm cocoons. A severe infestation can strip an arborvitae bare in a single summer, leading to rapid death.
-

4. Fungal Diseases (Tip Blight) 🍄
While environmental stressors are more common, fungal infections can quickly ruin the aesthetic of your hedge. The two most frequent offenders in arborvitae are Phomopsis and Kabatina twig blight. Fungal pathogens thrive in damp, humid conditions with poor air circulation, often striking when hedges are planted too closely together or watered via overhead sprinklers.
-
Symptoms: Unlike drought, which affects the whole tree, or winter burn, which affects one side, fungal blight is typically localized. Individual branch tips will turn a sickly yellow, then transition to brown or ash-gray. If you look very closely at the dead foliage with a magnifying glass, you might spot tiny black pimples—these are the fungal fruiting bodies releasing spores.
5. Transplant Shock (For Newly Planted Trees) 🌱
If you planted your arborvitae within the last 12 to 18 months and they are already turning brown, you are almost certainly dealing with transplant shock. Moving a tree from a nursery pot to your yard is highly traumatic for its root system.
Transplant shock is usually triggered by planting the root ball too deep (the root flare should be visible just above the soil line) or failing to untangle circling roots before planting. When the roots cannot establish themselves in the surrounding native soil, the tree cannot absorb water, leading to rapid, widespread browning.
6. Environmental Damage (Dog Urine & Salt) 🐕
Sometimes the culprit is entirely external. Arborvitae foliage is highly sensitive to chemical burns.
-
Dog Urine: If you notice black or dark brown patches exclusively isolated to the bottom 18 to 24 inches of the tree, neighborhood dogs are likely using your hedge as a fire hydrant. The high concentration of nitrogen and salts in dog urine severely burns the needles.
-
De-icing Salt: If the browning is localized to trees planted directly adjacent to a roadway, driveway, or sidewalk, road salt is the likely cause. The salty splash-back from winter plows damages the foliage, and the salt accumulation in the soil dehydrates the roots.
🚑 The Rescue Plan: Exactly How to Save a Browning Arborvitae
Once you have identified the probable cause of the browning, it is time to take targeted action. Do not simply throw fertilizer at the problem—fertilizing a stressed tree forces it to expend energy on new growth rather than healing, which can actually kill it faster. Follow this step-by-step triage protocol instead.
Step 1: The “Scratch Test” (Is it worth saving?) 🔪
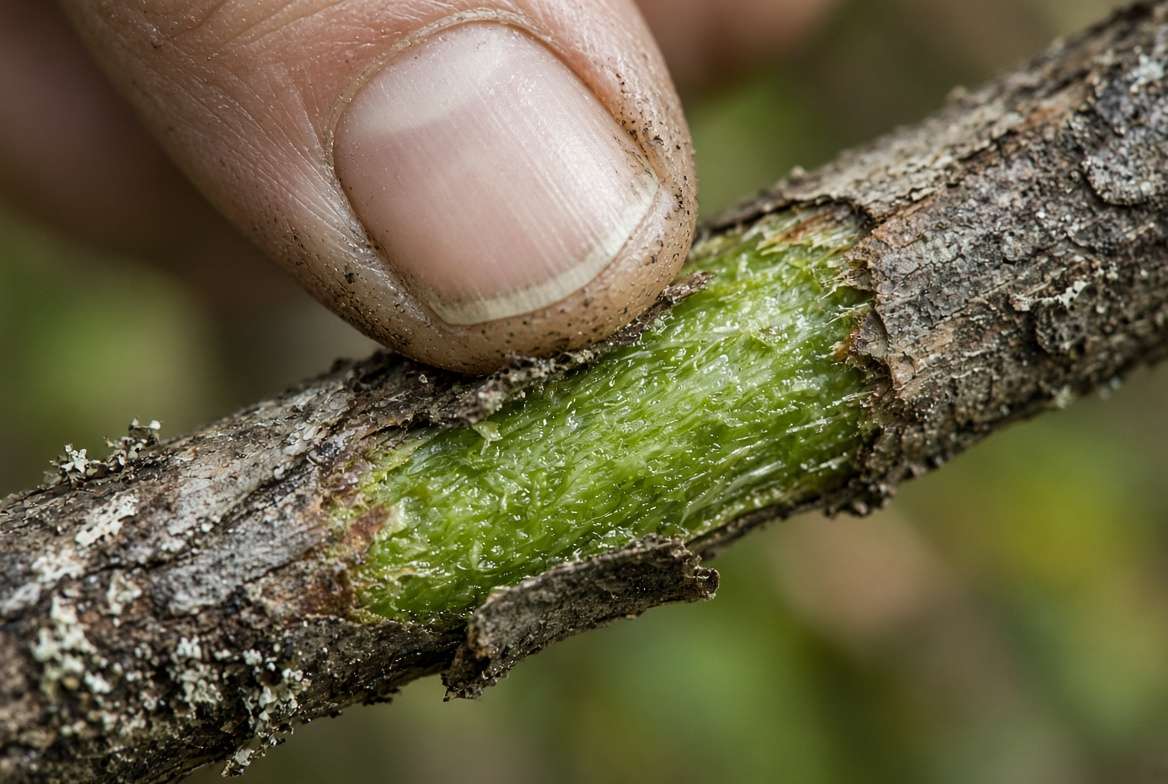
Before investing time and money, you need to know if the brown branches are entirely dead. Take a small pocket knife or simply use your fingernail to gently scratch away a tiny patch of the outer bark on a brown branch.
-
If the tissue underneath (the cambium layer) is moist and green, the branch is still alive and has a chance to recover.
-
If the tissue is dry, brown, or brittle, and the twig snaps in half when you bend it, that branch is completely dead.
Step 2: Correcting Your Watering Routine 🚿
If water stress is the issue, you must recalibrate your irrigation strategy. Arborvitae prefer deep, infrequent watering rather than light, daily sprinkles.
-
For Underwatering: Set up a soaker hose or drip irrigation line at the base of the trees. Let it run on a slow trickle for 1 to 2 hours, allowing the water to penetrate 8 to 10 inches down into the root zone. Do this once or twice a week during dry spells.
-
For Overwatering/Root Rot: Stop watering immediately. Pull back the mulch away from the trunk to let the soil dry out. If the soil is heavy clay, you may need to carefully aerate around the root zone to improve drainage.
Step 3: Targeted Pest and Fungal Treatments 🛡️
If your diagnostic check revealed pests or fungus, you need to treat the specific problem:
-
For Spider Mites: Spray the foliage with a hard stream of water to knock the mites off. Follow up with an application of horticultural oil, neem oil, or insecticidal soap, ensuring you coat the inner branches where mites hide. For severe cases, a systemic miticide may be necessary.
-
For Bagworms: If you only have a few trees, the most effective method is hand-picking the cocoons off the branches and dropping them into a bucket of soapy water. If the infestation is massive, spray an organic biological control like Bacillus thuringiensis (Bt) in late spring when the larvae are young and feeding.
-
For Fungal Blight: Prune out the infected branches immediately (cleaning your shears between cuts). Apply a copper-based fungicide to the remaining foliage to prevent the spores from spreading to healthy tissue.
Step 4: Pruning Out the Damage ✂️
Dead brown needles will not magically turn green again. Once you have addressed the underlying cause and the tree is stable, you need to prune away the dead wood.
🧑🌾 Arborist’s Note: The Dead Zone Danger. Arborvitae will not produce new growth from old, bare wood. If you cut a branch back past the green foliage into the bare, brown interior stems, that branch will remain a permanent, ugly stump. Always make your pruning cuts just above a healthy green shoot.
🛡️ Pro-Level Prevention: Keeping Your Arborvitae Lush and Green Year-Round
The best way to fix a brown arborvitae is to prevent it from getting stressed in the first place. Incorporate these three landscape maintenance habits into your yearly routine.
The Magic of Proper Mulching 🪵
Mulch regulates soil temperature and retains moisture, making it your tree’s best friend. Apply a 2- to 3-inch layer of organic hardwood mulch around the base of your trees out to the drip line (the edge of the canopy).
Crucial rule: Use the “donut” method, not the “volcano” method. Keep the mulch pulled a few inches away from the actual trunk to prevent bark rot and deter rodents.

Winterizing Your Hedge 🧣
To prevent winter burn, give your evergreens a long, deep soaking in late fall right before the ground freezes. This ensures the roots are fully hydrated going into winter. For highly exposed trees, consider wrapping them loosely in burlap or erecting a burlap windbreak screen on the windward side to protect the foliage from freezing gusts.
Soil Testing and Fertilization 🧪
Do not guess what nutrients your soil is missing. Conduct a soil test to check your pH (arborvitae prefer slightly acidic to neutral soil, around 6.0 to 7.2) and nutrient levels. Apply a slow-release, granular evergreen fertilizer in early spring just before the new growth pushes out. Never fertilize in late summer or fall, as this encourages tender new growth that will be instantly killed by the first winter freeze.
🙋 Frequently Asked Questions (FAQs)
Will brown arborvitae branches ever turn green again? No. Once arborvitae needles turn completely brown and dry out, they are dead and will not revert to green. However, if the inner branch is still alive, nearby green growth can eventually fill in the gaps over a few seasons if the dead tips are pruned away.
Can I cut the brown top off my arborvitae? Yes, you can top a dead leader (the main vertical stem), but understand the consequences. Cutting the top off will permanently halt the tree’s vertical growth. It will continue to grow wider, but it will never regain its natural, pointed pyramidal shape.
How long does it take an arborvitae to recover from transplant shock? A newly planted arborvitae can take 1 to 2 full years to establish a healthy root system and fully recover from transplant shock. Consistent, deep watering during this establishment period is critical.
Is Epsom salt good for arborvitae trees? Epsom salt provides magnesium, which aids in chlorophyll production. If your soil test indicates a magnesium deficiency, a diluted Epsom salt drench can help green up yellowing foliage. However, it is not a cure-all and will do nothing to fix water stress, pests, or disease.
Trees operate on a much slower timeline than we do, and healing from severe stress takes time. By accurately diagnosing the root cause—whether it is an irrigation issue, pesky spider mites, or winter desiccation—you can take the precise steps needed to halt the damage. Stay consistent with your deep watering routines, apply a proper mulch ring, and monitor the foliage regularly. With prompt attention and a little patience, you can successfully pull your arborvitae hedge back from the brink and enjoy a lush, green privacy screen for decades to come. If you are noticing strange symptoms not covered here, drop a comment below detailing what your tree looks like, and we can troubleshoot it together!











