
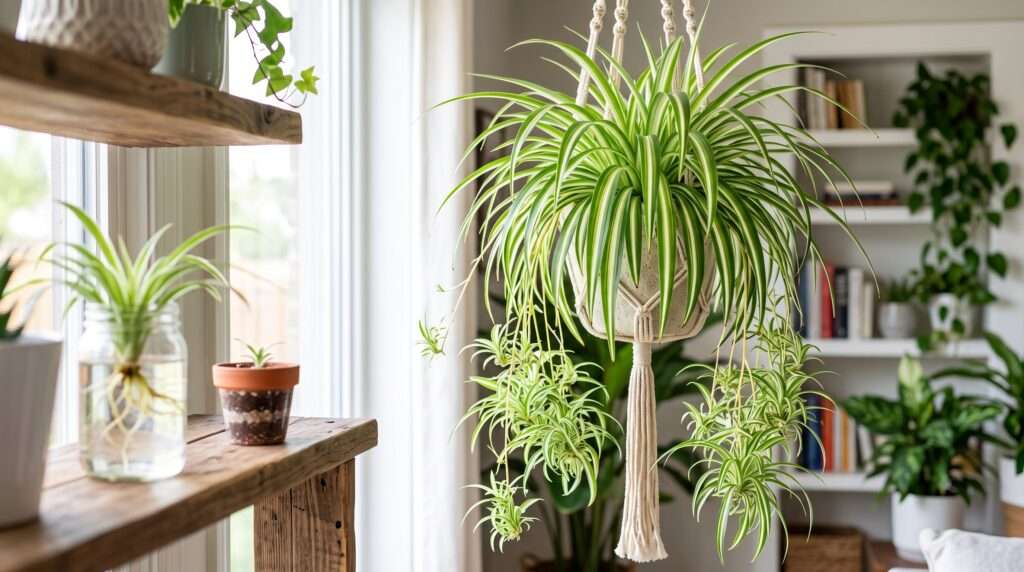
You bring home a lush, vibrant houseplant, promised by the nursery to be “impossible to kill.” Fast forward three months, and you are staring at a sad, crispy fringe of brown foliage. If this sounds familiar, you are not alone. The spider plant (Chlorophytum comosum) is universally praised for its resilience, but it is also highly communicative about the quality of its water and soil.
As a botanist and lifelong houseplant collector, I have diagnosed hundreds of struggling spider plants. The good news? Those brown tips are rarely a death sentence. In this comprehensive guide, we will dive into the exact botanical reasons behind leaf burn, master the baseline care required to reverse it, and unlock the horticultural secrets to triggering those cascading “spiderettes” or pups. Let’s get your plant thriving again. ✨
🍂 Why Are My Spider Plant’s Tips Turning Brown? (The #1 Culprit)
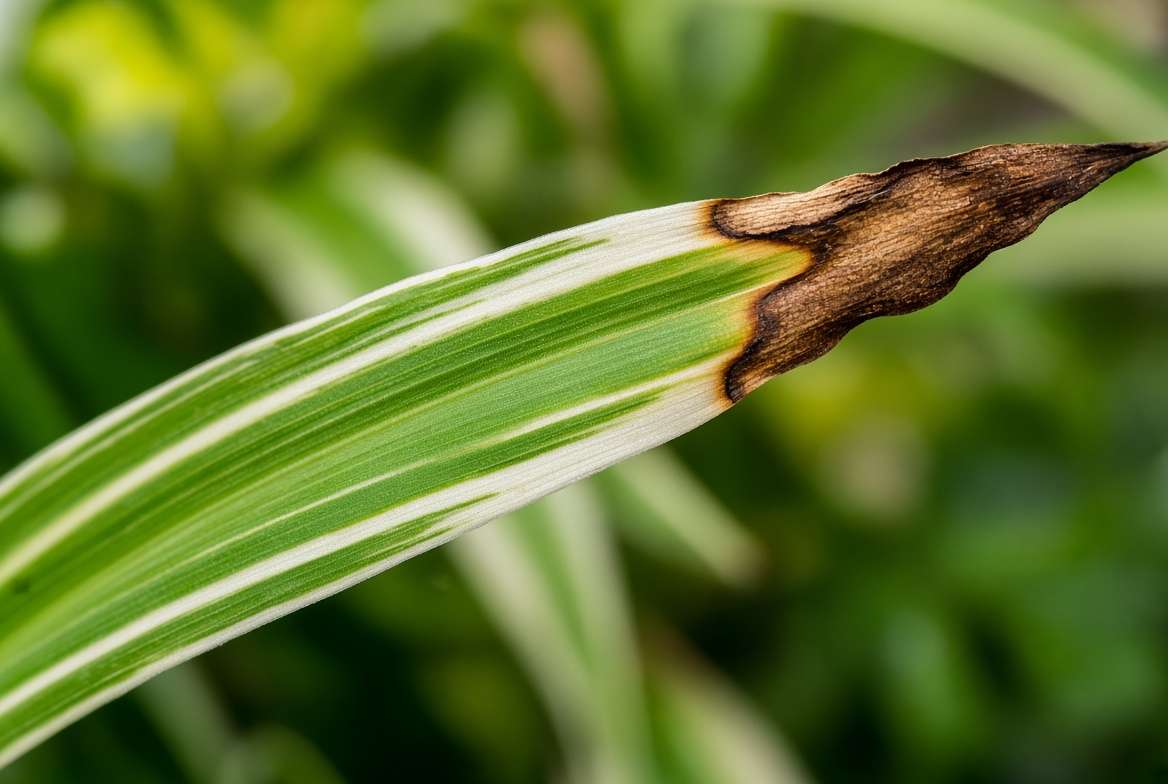
Let’s address the most common spider plant problem right away. When the tips of your Chlorophytum comosum turn brown, dry, and brittle, the plant is usually suffering from a physiological issue rather than a pest or disease. Here is a deep dive into the four primary culprits and exactly how to fix them.
🚰 Tap Water Toxicity (Fluoride and Chlorine)
This is, unequivocally, the number one reason spider plants develop brown tips. Spider plants are highly sensitive to the chemicals commonly used to treat municipal tap water—specifically fluoride and chlorine. When you water your plant, its root system absorbs these elements along with the moisture. As the plant transpires (releases moisture) through its leaves, these heavy chemicals are left behind, accumulating at the very ends of the foliage. Over time, this chemical buildup reaches toxic levels, causing the tissue to burn and die off, resulting in that classic crispy brown tip.
The Actionable Fix: Stop using water straight from the tap. To immediately halt the chemical burn, switch to watering your spider plant with distilled water, reverse osmosis (RO) water, or collected rainwater. If you must use tap water, let it sit in an open container for at least 24 to 48 hours before watering. While this allows chlorine to off-gas and evaporate, please note that it will not remove fluoride or chloramine. For a permanent solution, a basic water filter that removes heavy minerals is your best investment for healthy, green foliage. 🌧️
🏜️ Inconsistent Watering (The Feast or Famine Cycle)
Spider plants have thick, tuberous root systems designed to store water for periods of drought in their native South African habitats. However, forcing them into a “feast or famine” cycle—letting the potting soil become bone-dry and dusty, followed by drowning the roots—severely stresses the plant. When the soil gets too dry, the delicate root hairs shrink and die. When you finally flood the pot, the compromised roots cannot uptake the water efficiently, leading to dehydration at the furthest points of the plant: the leaf tips.
The Actionable Fix: Consistency is key. Implement the “top two inches” rule. Instead of watering on a strict weekly schedule, insert your finger into the soil up to your second knuckle. If it feels dry, it is time to water. If it is still moist, wait a few more days. When you do water, ensure you are thoroughly saturating the soil until water runs out the drainage holes, which encourages a deep, robust root system rather than shallow, weak roots. 💧
💨 Extremely Low Humidity
While spider plants adapt reasonably well to average household conditions, they are inherently tropical plants that thrive in moderate to high humidity. During the winter months, central heating systems completely strip the moisture from indoor air. When the ambient humidity drops below 40%, the thin, delicate leaves of the spider plant lose moisture to the air faster than the roots can pull it up from the soil. The result is dry, crispy edges and tips.
The Actionable Fix: You do not need to turn your living room into a greenhouse, but slightly elevating the ambient moisture will do wonders. The most effective method is utilizing a small indoor humidifier near your plant collection. Alternatively, you can create a localized microclimate by placing the plant pot on a pebble tray filled with water (ensuring the bottom of the pot sits above the water line, not in it) or by grouping several houseplants together so they can benefit from each other’s transpiration. 🌫️
🧂 Fertilizer Burn and Salt Buildup
We all want our indoor jungles to grow faster, but over-fertilizing is incredibly detrimental to the spider plant. Synthetic houseplant fertilizers contain high levels of mineral salts. If applied too heavily or too frequently, these salts accumulate in the potting mix. This salt buildup creates osmotic stress, essentially drawing water out of the roots and causing severe chemical burns that manifest as rapid browning on the leaf tips.
The Actionable Fix: Spider plants are relatively light feeders. First, treat your current salt buildup by “leaching” the soil: run room-temperature distilled water through the pot for five straight minutes to flush out excess minerals. Going forward, only fertilize during the active growing season (spring and summer) using a balanced, water-soluble houseplant fertilizer diluted to half the recommended strength on the label. Never fertilize a dry plant; always water it slightly first to protect the root system. 🌿
🌱 The Fundamentals of Spider Plant Care
While preventing brown tips is half the battle, establishing a perfect baseline environment is what transforms a surviving spider plant into a thriving, vibrant centerpiece. Spider plant care is generally forgiving, but dialing in these three environmental factors will ensure vigorous growth and thick, arched foliage.
☀️ Lighting: The Sweet Spot for Bright Foliage
Spider plants are highly adaptable, but they are very particular about direct sunlight. In their natural habitat, they grow as ground cover beneath the canopy of larger trees, meaning they receive dappled, filtered light.
Placing your spider plant in direct, harsh sunlight (like an unobstructed south-facing window) will bleach the leaves and cause severe sunburn, which manifests as large, pale, crispy patches. Conversely, if placed in a dark corner, the plant will survive but its growth will stunt, the leaves will become limp, and variegated varieties (those with beautiful white or yellow stripes) will revert to solid green to maximize photosynthesis.
The Ideal Setup: Aim for bright, indirect light. An east-facing window that receives gentle morning sun is absolutely perfect. If you only have south or west-facing windows, simply pull the plant back a few feet into the room, or filter the intense light using a sheer curtain. 🌤️
🪴 Soil Needs & The Perfect Potting Mix
The root system of a spider plant is composed of thick, fleshy tubers designed to hold water. Because of this, they are highly susceptible to root rot if left sitting in dense, waterlogged soil. A standard, heavy bag of commercial potting soil straight from the garden center is often too dense.
To provide the exceptional drainage and aeration this species demands, you need a customized, chunky potting mix. Here is my expert-approved recipe for the ultimate spider plant substrate:
-
2 Parts High-Quality Indoor Potting Soil: Provides the organic base and essential nutrients.
-
1 Part Coarse Perlite or Pumice: Creates air pockets to ensure the roots can breathe.
-
1 Part Orchid Bark: Prevents compaction and allows excess water to flush out rapidly.
Pro-Tip: Always use a pot with drainage holes. Whether you prefer the breathability of terracotta or the lightweight nature of nursery plastics, without a drainage hole, water will pool at the bottom and suffocate the roots. 🪨
✂️ Grooming: How to Safely Trim Brown Tips
Even with perfect care, older leaves may occasionally develop minor imperfections. Grooming your plant keeps it looking pristine and redirects the plant’s energy toward new, healthy growth. However, chopping blindly at the leaves can cause more harm than good.
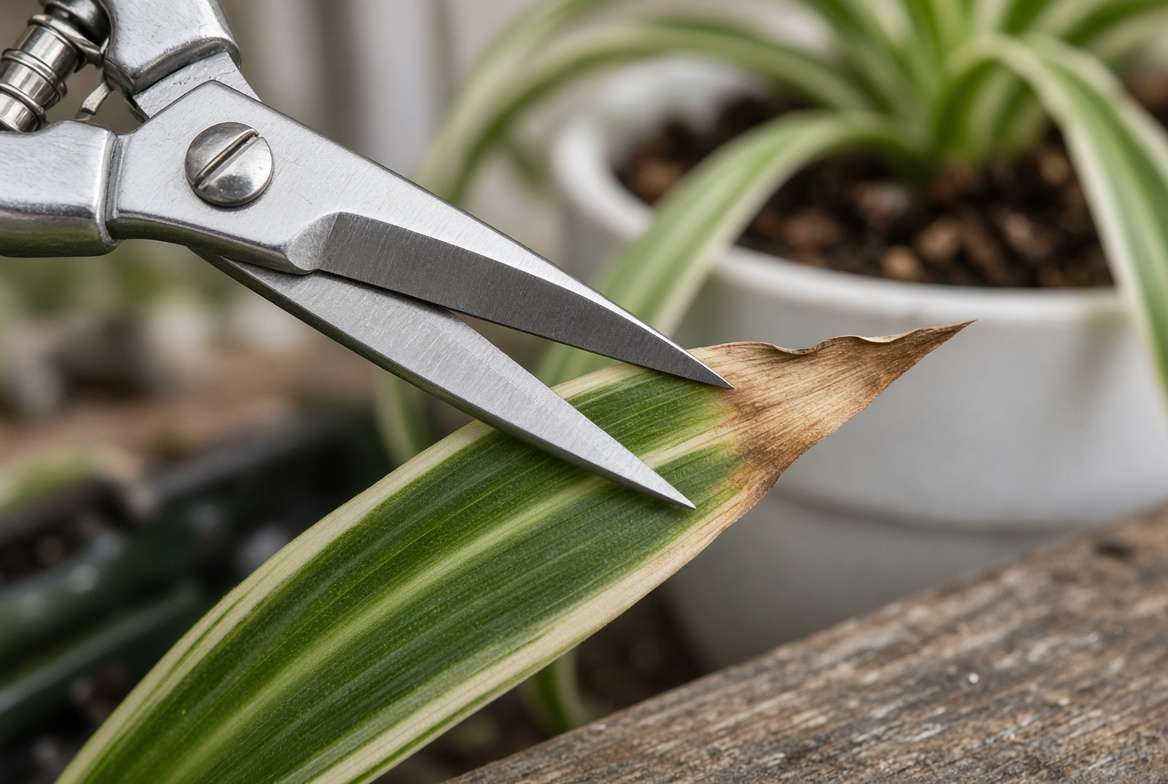
When removing brown tips, never cut into the healthy green tissue. Doing so creates a fresh, open wound that stresses the plant and often leads to a brand-new brown edge forming right where you just cut!
The Step-by-Step Method:
-
Sterilize a sharp pair of pruning shears or scissors with rubbing alcohol to prevent the spread of bacteria.
-
Carefully snip off the brown tip, leaving a minuscule millimeter (a tiny sliver) of the brown, dead tissue attached.
-
Cut at a sharp, diagonal angle on both sides to mimic the natural, pointed shape of the leaf. This keeps the plant looking aesthetically natural and beautiful. ✂️
🕷️ How to Trigger Your Spider Plant to Grow Endless Pups
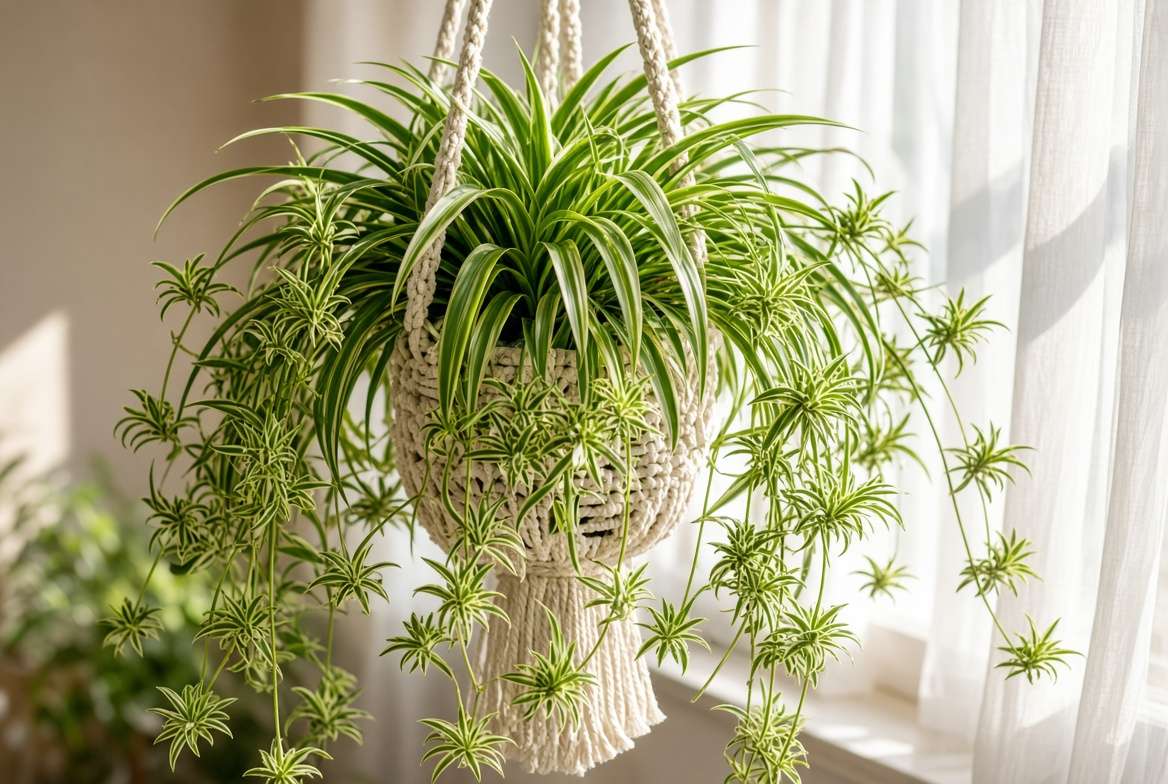
For most plant parents, the ultimate goal is coaxing their spider plant to produce those iconic, cascading runners (botanically known as stolons) dripping with baby spiderettes (pups). It is a spectacular display that makes them perfect for hanging baskets. But why do some plants produce dozens of pups while others remain bare? The secret lies in a fascinating mix of maturity, light cycles, and controlled stress.
🪴 The “Slightly Root-Bound” Secret
Here is a counter-intuitive truth that often surprises beginners: spider plants will rarely produce pups if they have too much room in their pot.
When a spider plant is placed in a large container, its biological imperative is to expand its root system to fill the available space. All of its energy goes underground. However, once the fleshy tuberous roots hit the walls of the pot and become slightly “root-bound” or snug, the plant receives a biological signal. Sensing that it can no longer expand its territory locally, it shifts its energy entirely toward reproduction—sending out long runners to establish offspring in new territory.
The Takeaway: Resist the urge to repot your spider plant annually. Wait until the roots are visibly pushing out of the drainage holes or lifting the plant slightly out of the pot before upgrading to a container only 1-2 inches larger. 🪴
🌓 Mature Age and Seasonal Light Changes
Patience is a virtue in houseplant care. A juvenile spider plant simply does not have the maturity or stored energy required to produce offspring. Typically, a plant needs to be at least one to two years old before it will begin shooting out stolons.
Furthermore, spider plants are highly responsive to photoperiodism—the physiological reaction to the length of day or night. In nature, the shortening days of autumn trigger the plant to reproduce before winter. You can simulate this indoors! If your mature, root-bound plant is stubbornly refusing to pup, ensure it is experiencing natural day-night cycles. Keeping it in an office or living room where artificial lights are on until midnight can disrupt this natural trigger. Let it experience the natural darkness of autumn and winter evenings, and you will likely see runners emerge within weeks. 🌙
💧 The Right Balance of Plant Stress vs. Plant Health
In the botanical world, reproduction is often triggered by a mild form of stress—a survival mechanism to ensure the continuation of the species. Being pot-bound is a form of “healthy stress.”
However, it is crucial to differentiate this from “dying stress.” If your spider plant is suffering from severe root rot, pest infestations (like spider mites or fungus gnats), or prolonged dehydration, it will focus entirely on basic survival. Even if a sick plant attempts to push out a runner, it will often abort the pup, dropping it prematurely to conserve energy. Maintain excellent basic care, allow it to become snug in its pot, and let nature take its course. 🌿
🍼 Propagating Spiderettes: A Step-by-Step Guide
Once your plant blesses you with pups, you essentially have an endless supply of free houseplants to expand your indoor jungle or gift to friends. Propagating Chlorophytum comosum is incredibly rewarding and famously easy. Once the pups have developed tiny starter roots (called root nodes) on their undersides, they are ready for propagation.
💧 Method 1: Water Propagation (The Classic Way)
This is the most visually satisfying method, allowing you to watch the roots develop in real-time.
-
Snip: Using sterilized shears, cut the pup away from the mother plant’s runner.
-
Soak: Place the base of the pup in a small, shallow glass or jar of room-temperature water. Ensure only the tiny root nodes are submerged; if the leaves sit in water, they will quickly rot.
-
Wait: Place the glass in bright, indirect light and change the water every 5-7 days to prevent bacterial growth and provide fresh oxygen.
-
Plant: Within 2-4 weeks, you will see thick white roots growing. Once the roots are about two inches long, transfer the pup into your chunky potting mix. Keep the soil slightly more moist than usual for the first week to ease the transition from water to soil. 🚰
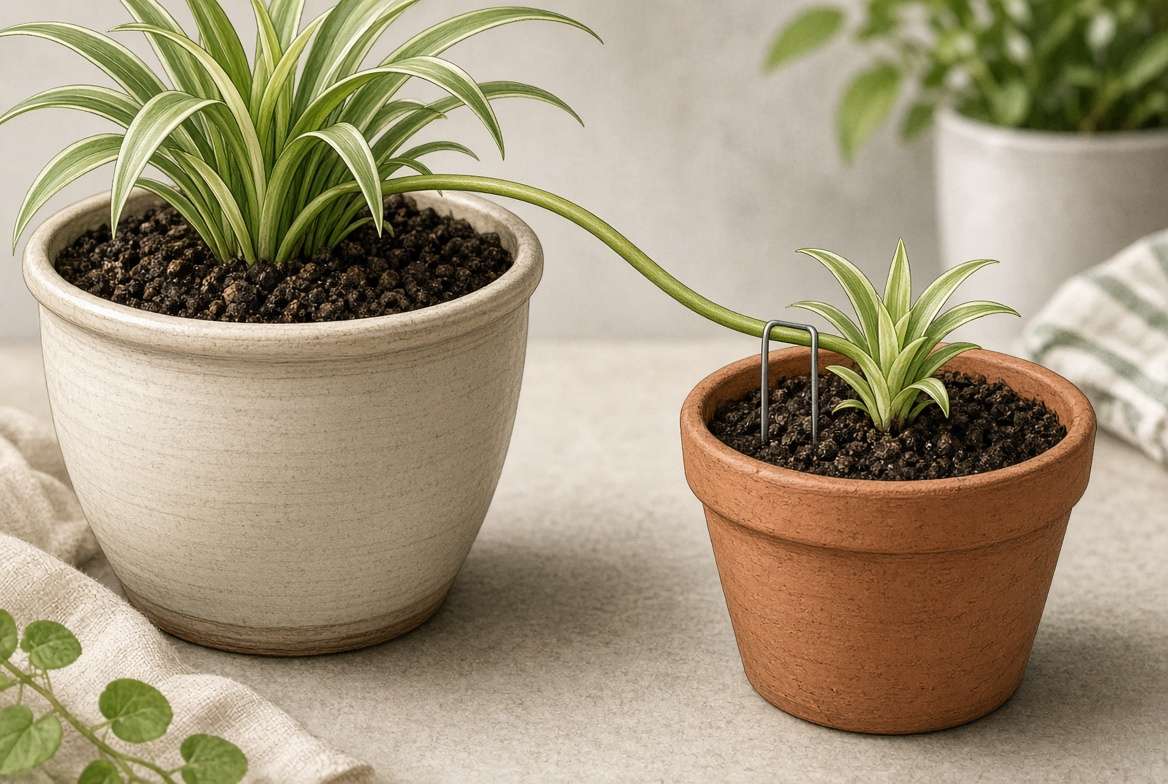
🌍 Method 2: Soil Layering (The Pro’s Choice for 100% Success)
While water propagation is fun, soil layering is the most foolproof, authoritative method utilized by professional nurseries. Why? Because you don’t sever the pup from the mother plant until it is already established, meaning the pup experiences zero transplant shock.
-
Prepare a Nursery Pot: Fill a small (2 or 3-inch) pot with moist potting soil and place it right next to the mother plant.
-
Pin the Pup: Without cutting the runner, gently lay the pup on top of the soil in the new nursery pot. Use a bent paperclip or a floral pin to gently anchor the base of the pup into the dirt.
-
Let the Mother Do the Work: The mother plant will continue to feed the pup through the “umbilical cord” (stolon) while the pup roots directly into the soil.
-
Snip and Separate: After 3 to 4 weeks, give the pup a very gentle tug. If you feel resistance, it has successfully rooted! You can now snip the runner, separating the new independent plant from its mother. 🌱
❓ Spider Plant Care FAQs
To ensure you are fully equipped for your plant parenthood journey, let’s address some of the most common questions and concerns that arise when caring for these botanical beauties.
Q: Are spider plants toxic to cats and dogs? A: Great news for pet owners! The ASPCA lists spider plants as completely non-toxic to both cats and dogs. However, be warned: spider plants contain mild chemical compounds related to opium that are mildly hallucinogenic to cats. You may find your feline friends aggressively chewing on the leaves to get a mild “buzz.” While not lethal, eating too much roughage can cause an upset stomach, so keeping them out of reach (like in a macrame hanging planter) is still a good idea. 🐾🐈
Q: Why is my variegated spider plant turning solid green? A: This is a classic symptom of inadequate lighting. The white or yellow stripes in variegated leaves lack chlorophyll. If the plant is in a low-light environment, it will start producing more green chlorophyll to maximize its ability to photosynthesize and survive, eventually overpowering the variegation. Move it to a brighter spot with indirect light, and the new growth should emerge with those beautiful stripes again. 🌗
Q: How often should I fertilize my spider plant? A: Less is more! During the active growing season (Spring and Summer), feed your plant once a month using a balanced liquid fertilizer diluted to half-strength to avoid the dreaded salt buildup and leaf burn. During the Fall and Winter, halt fertilizing entirely, as the plant’s metabolism slows down and it rests. 🧪
💚 Conclusion
Mastering spider plant care is an incredibly rewarding journey. While those pesky brown tips can be frustrating, they are simply your plant’s way of communicating its needs. By swapping out chemical-heavy tap water for filtered water, maintaining consistent moisture, and providing adequate humidity, you will banish crispy edges for good.
And remember, patience is your best tool for generating those gorgeous, cascading pups. Keep your plant cozy in its pot, provide plenty of bright, indirect light, and soon you’ll have an absolute abundance of spiderettes to propagate and share.
Now, I want to hear from you! What is your favorite way to propagate spider plant pups? Have you tried the soil layering method, or are you a loyal fan of water propagation? Drop a comment below, or share a photo of your thriving spider plant. Happy planting! 🪴✨











