
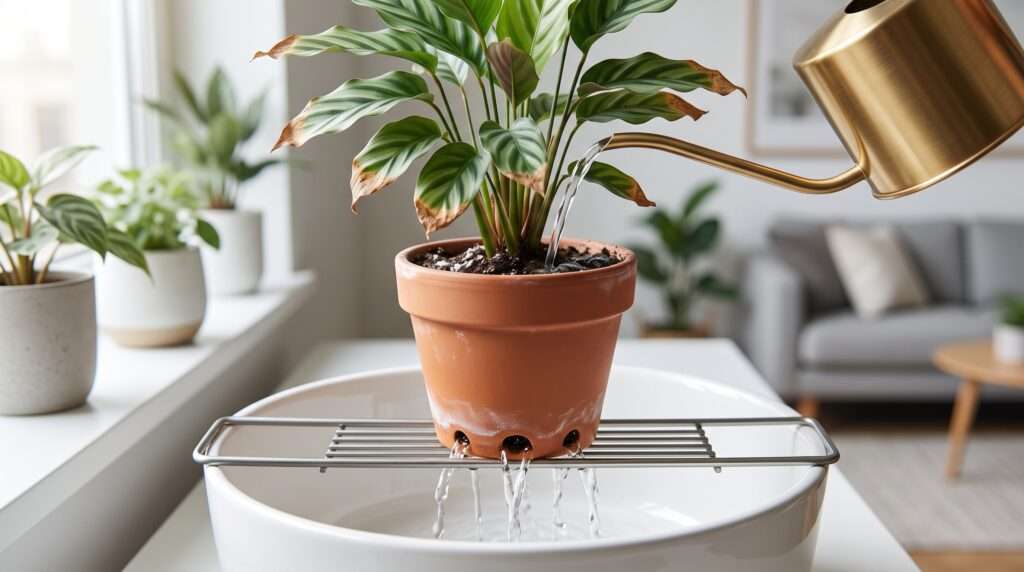
You are watering on a strict schedule, the lighting is perfect, and you have even set up a humidifier nearby. Yet, despite your absolute best efforts, your prized houseplant is developing frustratingly crispy, brown leaf tips. It is a heartbreaking scenario for any plant parent. Before you reach for the watering can again or try a new brand of plant food, you need to investigate the potting mix itself. The hidden culprit is almost always a toxic accumulation of minerals and unabsorbed nutrients. The most effective, immediate solution is flushing salts from container soil, an essential maintenance technique that can save your dying houseplants.
In my years of hands-on plant care and troubleshooting indoor gardens, I have found that container environments are uniquely vulnerable to this issue. Unlike outdoor gardens where heavy rainfall naturally washes away excess minerals deep into the earth, a potted plant exists in a closed, isolated ecosystem. Whatever goes into that pot stays in that pot—unless you deliberately remove it.
In this comprehensive, step-by-step guide, we are going to dive deep into why this buildup happens, how to identify it before it kills your plant, the fascinating biology of root dehydration, and exactly how to execute a professional-grade soil flush to restore your plant’s health. 🌿✨
2. What Causes Salt Buildup in Potted Plants? 🧂
To prevent brown leaf tips and soil toxicity, we first have to understand the sources of the contamination. Soil salts do not just appear out of nowhere; they are introduced over time through our routine care habits.
Tap Water Mineral Deposits (Hard Water) 🚰
For most indoor gardeners, the primary source of soluble salts is standard municipal tap water. Depending on where you live, your tap water may be “hard,” meaning it is packed with dissolved minerals like calcium, magnesium, sodium, and bicarbonates. Furthermore, water treatment facilities often add chlorine, chloramine, and fluoride to keep the water supply safe for human consumption.
While humans process these minerals easily, sensitive tropical houseplants—such as Calatheas, Marantas, Dracaenas, and Spider Plants—cannot tolerate them. Over months of regular watering, the water evaporates or is absorbed by the plant, but these heavy minerals are left behind in the potting mix, slowly accumulating into a toxic concentration.
Over-Fertilization and Synthetic Nutrient Salts 🧪
The word “salt” in botany does not just mean table salt (sodium chloride). In agricultural terms, fertilizers are composed of mineral salts. Synthetic liquid and granular fertilizers deliver primary macronutrients (Nitrogen, Phosphorus, Potassium, or N-P-K) in the form of soluble salts so the plant can absorb them instantly.
If you apply fertilizer too frequently, use too high of a concentration, or feed your plant during its winter dormancy period when it is not actively growing, the plant simply cannot uptake all those nutrients. The leftover fertilizer remains trapped in the soil matrix. Over time, these residual synthetic salts crystallize and aggressively alter the soil chemistry, leading to severe fertilizer burn.
Poor Drainage and Lack of Runoff 🛑
Perhaps the most dangerous catalyst for salt accumulation is improper drainage. Many aesthetically pleasing ceramic pots sold in stores do not have drainage holes. Alternatively, plant owners often use a “cachepot” system (a plastic nursery pot sitting inside a decorative outer pot) but fail to empty the outer pot after watering.
When you water a plant and allow it to sit in its own runoff, the water evaporates, but the salts are wicked right back up into the soil. Without a clear exit path for excess water, flushing out these impurities becomes impossible, and the root zone becomes a highly concentrated mineral trap.
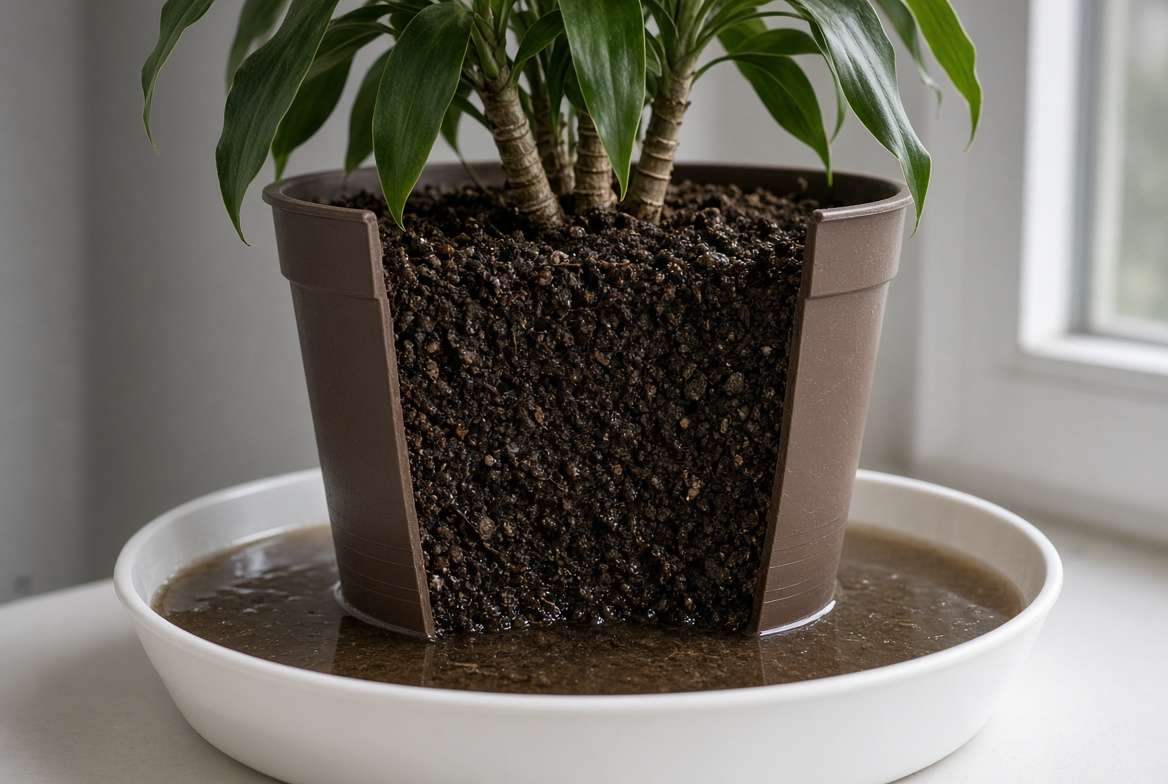
3. Signs Your Plant Needs a Soil Flush 🥀
Plants cannot speak, but they will give you very clear, visual distress signals when the soil environment becomes toxic. If you notice a combination of the following symptoms, it is time to perform a soil flush immediately.
Crispy, Brown Leaf Tips and Margins 🍂
This is the hallmark symptom of salt toxicity and fertilizer burn. When roots absorb excess minerals, those minerals travel up the vascular system of the plant. Because the plant cannot utilize them, it pushes them to the furthest extremities—the tips and edges of the leaves. Once the concentration becomes too high, it chemically burns and kills the plant tissue, resulting in dry, crispy, brown margins that will never turn green again.

The White Crust on Top (Efflorescence) ❄️
Sometimes, the evidence is clearly visible on the surface. Take a close look at the top layer of your potting soil. Do you see a hard, crusty, white or yellowish substance forming on top of the dirt? This is called efflorescence. It occurs when water containing dissolved salts rises to the surface via capillary action and evaporates, leaving the crystallized salts behind. You might also notice this white, chalky residue building up on the outside rims of porous terracotta pots.
Stunted Growth and Yellowing Leaves (Chlorosis) 📉
Excessive salts alter the pH of the potting mix, leading to a phenomenon known as “nutrient lockout.” Even if you are feeding your plant regularly, the high concentration of salts prevents the roots from absorbing vital micronutrients like iron or magnesium. This results in stunted, weak new growth, and older leaves turning a pale, sickly yellow while the veins remain green (chlorosis).
The “Wilting Despite Wet Soil” Paradox 💧
Have you ever noticed your plant drooping miserably, yet when you touch the soil, it is soaking wet? This is one of the most confusing symptoms for beginners and often leads to fatal overwatering. The plant is wilting because it is entirely dehydrated, but the cause is not a lack of water—it is osmotic stress caused by salt.

4. The Science of Osmotic Stress (Why Salts Harm Roots) 🔬
To truly master houseplant care, it helps to understand the underlying biology. Why exactly do salts stop a plant from drinking? The answer lies in a biological process called osmosis.
Osmosis is the natural movement of water across a semi-permeable membrane (like a plant root) from an area of low solute concentration to an area of high solute concentration. In a healthy plant, the interior of the root cells contains a higher concentration of natural sugars and salts than the surrounding moist soil. Because of this, water naturally flows into the roots to balance things out.
However, when you allow soluble salts from tap water and fertilizer to build up excessively in the potting mix, the environment flips. The soil becomes saltier than the inside of the plant. Following the laws of physics, water will flow toward the highest concentration of salt. The toxic soil literally begins to pull water out of the plant’s roots.
Expert Insight: This is why applying more fertilizer to a sick, wilting plant is often a death sentence. The plant is experiencing chemical drought. It is completely surrounded by water, but it is dying of thirst because the osmotic pressure is forcing the moisture out of its root system.
5. How to Properly Begin Flushing Salts From Container Soil (Step-by-Step) 🚿
Now that you understand the mechanics of fertilizer burn and osmotic stress, it is time to take action. Flushing (also known as leaching) is the process of washing away excess soluble salts by passing a large volume of clean water through the root zone.
Here is the professional, step-by-step method to safely execute a soil flush without shocking your houseplant.
Step 1: Prepare the Right Water 🌧️
The most common mistake plant parents make is trying to flush their soil with the same hard tap water that caused the problem in the first place. To effectively pull minerals out of the potting mix, you must use water that is completely free of minerals.
Gather enough distilled water, reverse osmosis (RO) water, or collected rainwater to equal at least three times the volume of your plant’s pot. Because this pure water lacks minerals, it acts like a magnet, easily dissolving and absorbing the excess salts trapped in the soil matrix. Ensure the water is room temperature to avoid shocking the sensitive root system.
Step 2: Relocate to a Safe Drainage Zone 🛁
Flushing requires a lot of water, which means a lot of runoff. Move your potted plant to a deep sink, a bathtub, or an outdoor shaded area if the weather is mild.
Crucial Step: You absolutely must remove the plant from its decorative cachepot or drainage saucer. The water needs to flow freely out of the bottom drainage holes and immediately away from the plant. If the pot does not have drainage holes, flushing is impossible, and you must repot the plant into a proper nursery container immediately.
Step 3: The First Drench (Dissolving the Salts) 🌊
Slowly pour your purified water evenly over the entire surface of the potting media. Apply an amount of water roughly equal to the volume of the pot itself (e.g., if you have a one-gallon pot, slowly pour one gallon of water).
Pour gently to avoid displacing the soil or exposing the upper roots. You should see water streaming out of the bottom. This initial drench serves a specific purpose: it saturates the dry pockets of soil and begins dissolving the hardened, crystallized salts clinging to the roots and perlite.
Step 4: The 15-Minute Rest Period ⏱️
Do not rush the process. After the first drench, step away and let the plant sit undisturbed for 15 to 30 minutes.
This is an expert technique that many beginners skip. Hardened mineral deposits (efflorescence) do not dissolve instantly. Giving the pure water time to sit in the soil allows it to chemically break down stubborn salt crusts, ensuring they are loose and ready to be washed away during the final step.
Step 5: The Final Flush (Washing it Away) 🌪️
Return to the plant and begin the heavy flush. Slowly pour an amount of water equal to twice the volume of the pot through the soil.
Watch the color of the runoff water exiting the drainage holes. Initially, it will likely look dark brown, cloudy, or yellowish—this is the toxic buildup being carried away. Continue pouring until the water running out of the bottom is completely clear. Congratulations, you have successfully leached the soil!
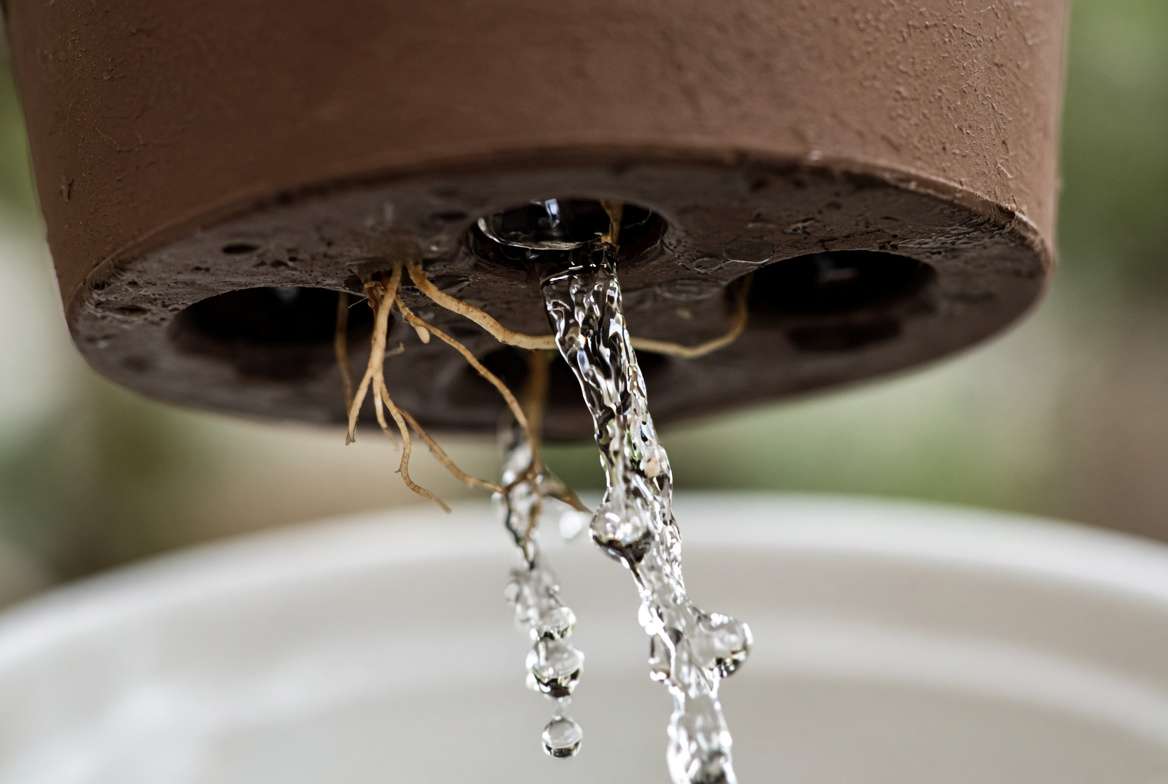
6. Post-Flush Care: What to Do Next 🌱
Your soil is now clean, but it is also completely saturated. The immediate danger shifts from salt toxicity to the risk of root rot. Proper post-flush care is essential to safely reboot your plant’s ecosystem.
Maximizing Airflow and Drying Time 🌬️
To prevent the root zone from suffocating, you need to help the soil dry out efficiently.
-
The Tilt Trick: Tilt the pot at a 45-degree angle in the sink for 10 minutes. This breaks the surface tension of the perched water table at the bottom of the pot, forcing excess water to drain out rapidly.
-
Towel Wicking: Place the pot on top of a folded, dry microfiber towel or a stack of paper towels. The fabric will wick excess moisture directly out of the drainage holes.
-
Air Circulation: Move the plant back to its spot, but place a small oscillating fan nearby to ensure good air circulation around the foliage and soil surface.
When to Resume Fertilizing (The Reboot) 🔄
Do not apply any fertilizer immediately after flushing. The roots are recovering from chemical burns and osmotic stress, and adding food now will severely damage them. Wait at least 2 to 4 weeks before you resume feeding. When you do, use a high-quality, organic liquid fertilizer (like fish emulsion or worm tea) diluted to half or quarter strength. Organic fertilizers rely on soil microbes to break them down, making them far less likely to cause salt buildup than synthetic chemical options.
Trimming the Damage ✂️
Unfortunately, brown, crispy leaf tips are dead tissue and will not turn green again. To improve the plant’s aesthetic, you can trim the damage. Use sterilized scissors or pruning shears (wiped with rubbing alcohol) to trim away the dead edges.
Pro-Tip: Follow the natural shape of the leaf, and always leave a tiny millimeter of the brown edge behind. If you cut into the healthy green tissue, the plant will simply form a new brown scab to heal the fresh wound.
7. Pro-Tips to Prevent Future Salt Accumulation 🛡️
Prevention is always better than a cure. By adjusting a few simple habits in your houseplant care routine, you can ensure you never have to perform an emergency soil flush again.
The “Weakly, Weekly” Fertilizer Method 💧
Instead of hitting your plants with a massive dose of full-strength synthetic fertilizer once a month, adopt the “weakly, weekly” approach. Dilute your liquid fertilizer to 1/4 or 1/8 of the recommended strength on the label, and apply it with every standard watering during the active growing season (Spring and Summer). This provides a steady, gentle stream of nutrients that the plant can fully consume, leaving zero residual salts behind.

Why You Should Water Until It Drains 🪴
Never “sip water” your plants by giving them small splashes of water. This guarantees that minerals will accumulate in the bottom half of the pot. Instead, practice deep watering. Every time you water your houseplants, pour enough water so that at least 20% of the total volume drains out of the bottom. Empty the catch saucer 30 minutes later. This mini-flush routine constantly washes away minor mineral deposits before they become a toxic threat.
Repotting: When Flushing Isn’t Enough 🪴
Over time, organic components in potting media (like peat moss and bark) physically break down and compact, turning into a dense sludge. If your soil takes more than two weeks to dry out, or if you have flushed the soil but the plant is still declining, the soil structure has likely collapsed. In this case, flushing will not save it. You need to completely unpot the plant, gently rinse the old dirt away from the root ball, and repot it in a fresh, chunky, well-aerated potting mix.
8. Frequently Asked Questions (FAQs) ❓
Q: Can I use tap water to flush salts if I let it sit out for 24 hours? No. Letting tap water sit out for 24 hours allows chlorine to evaporate, but it does absolutely nothing to remove heavy minerals like calcium, magnesium, or fluoride. Those minerals will remain in the water and continue to pollute your soil. You must use filtered, RO, or distilled water.
Q: How often should I flush my container plants as a preventative measure? For most indoor plants fertilized with synthetic nutrients, doing a preventative soil flush every 4 to 6 months is an excellent horticultural practice. If you use strictly organic fertilizers and pure water, you may only need to flush once a year.
Q: Will flushing salts cause root rot? Flushing requires a lot of water, but overwatering is about frequency, not volume. A plant does not get root rot from a single heavy drenching; it gets root rot when the soil stays soggy for weeks on end. As long as your pot has drainage holes and you follow the post-flush drying tips, your plant will be perfectly safe.
Q: Do organic fertilizers cause salt buildup? They are much less likely to. Synthetic fertilizers are essentially pure chemical salts. Organic fertilizers (like kelp, bone meal, or worm castings) require natural microbial action to break down into nutrients. They release slowly, meaning the plant absorbs them at a natural pace, dramatically reducing the risk of toxic buildup.
9. Conclusion & Next Steps 🌟
Discovering crispy, brown leaf tips on your favorite houseplant can be alarming, but it is a rite of passage for every dedicated indoor gardener. Understanding the hidden threat of soluble salts and mastering the technique of flushing salts from container soil elevates your plant care from basic watering to true horticulture. By utilizing pure water, ensuring proper drainage, and adopting the “weakly, weekly” fertilizing method, you can maintain a pristine, healthy root zone for years to come.
If you found this comprehensive guide helpful, don’t let these tips go to waste! Save this article to your Plant Care Pinterest Board for easy reference next time you spot a brown tip, and share it with your fellow plant-loving friends.











