
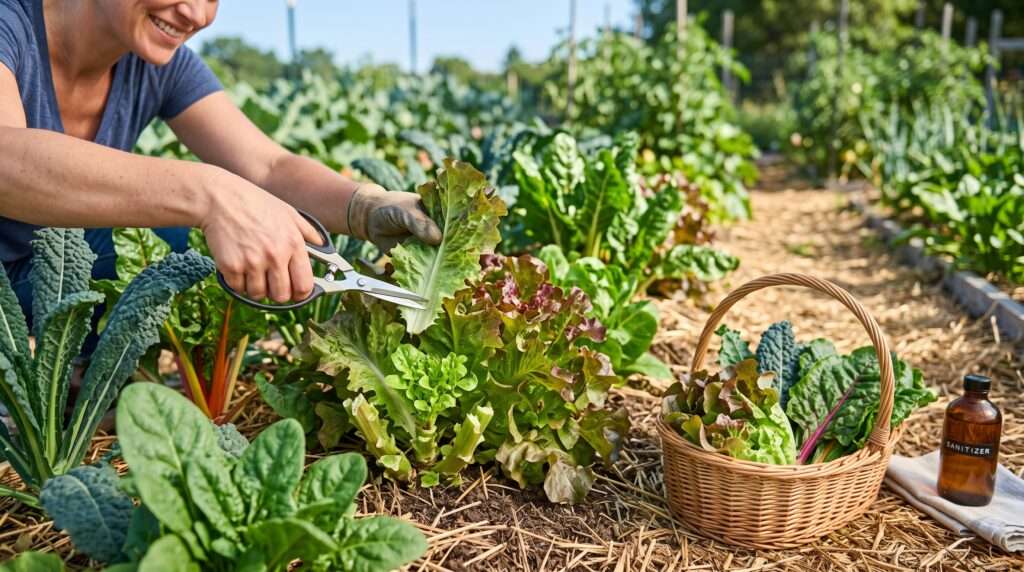
If you are tired of waiting weeks for your lettuce to mature, only to pull it up for a single meal and stare at an empty patch of dirt, you are not alone. The frustration of the “one-and-done” garden is a common hurdle for many backyard growers. But there is a much better way. By mastering the art of harvesting leafy greens repeatedly, you can transform a single seed packet into a season-long salad factory.
Traditional single-harvest gardening wastes precious time, requires you to constantly buy new seeds, and leaves valuable garden space bare while you wait for successive plantings to sprout. The solution is the “cut-and-come-again” method. This simple yet highly effective approach relies on the natural regenerative properties of specific leafy vegetables. By the end of this comprehensive guide, you will understand the underlying plant botany, the precise cutting techniques, and the critical post-harvest care routines needed to ensure your greens bounce back flush after flush. 🥗
II. What is the “Cut-and-Come-Again” Method? ✂️🪴
At its core, the cut-and-come-again method is a harvesting technique that allows you to take leaves from a plant while keeping its root system and central growing point entirely intact. Instead of uprooting the whole vegetable, you selectively prune it, triggering the plant to push its energy into growing new foliage.
Demystifying the Botany To succeed with this method, you need a basic understanding of how these plants grow. The secret lies in the basal growing point (often called the crown) and the apical meristems. In plants that form a basal rosette—like loose-leaf lettuce, kale, and spinach—new leaves continuously emerge from the absolute center of the plant. As long as you protect this central node and do not sever the crown from the root system, the plant’s biological imperative will drive it to replace the lost outer leaves.
The Yield Multiplier Contrast a traditional harvest with a continuous harvest. If you grow a head of iceberg lettuce, you wait 70 days, harvest one head, and you are done. If you plant a loose-leaf variety and harvest it repeatedly, you can begin taking your first leaves at day 30, and continue taking smaller harvests every 10 to 14 days for the next two to three months. This compounds your total yield from the same square footage of soil.
Time & Money Saved Financially, this method is a massive win. You spend less money on seeds and seed-starting supplies. More importantly, you save the heavy labor of repeatedly tilling, amending, and prepping garden beds for new sowings. Your soil structure remains undisturbed, which promotes a healthier soil microbiome. 💰
III. The Top 7 Leafy Greens Perfect for Repeated Harvesting 🏆🥗
Not all vegetables are suited for continuous harvesting. Heading varieties (like standard cabbage or iceberg lettuce) form tight, terminal heads and will not regrow if cut down. To succeed, you must plant non-heading, loose-leaf, or “picking” varieties. Here are the absolute best performers.
1. Loose-Leaf Lettuce (The Beginner’s Best Friend) 🥬
Loose-leaf lettuce is the undisputed champion of the cut-and-come-again garden. Because it never forms a tight core, its center is always exposed to sunlight, promoting rapid regrowth.
-
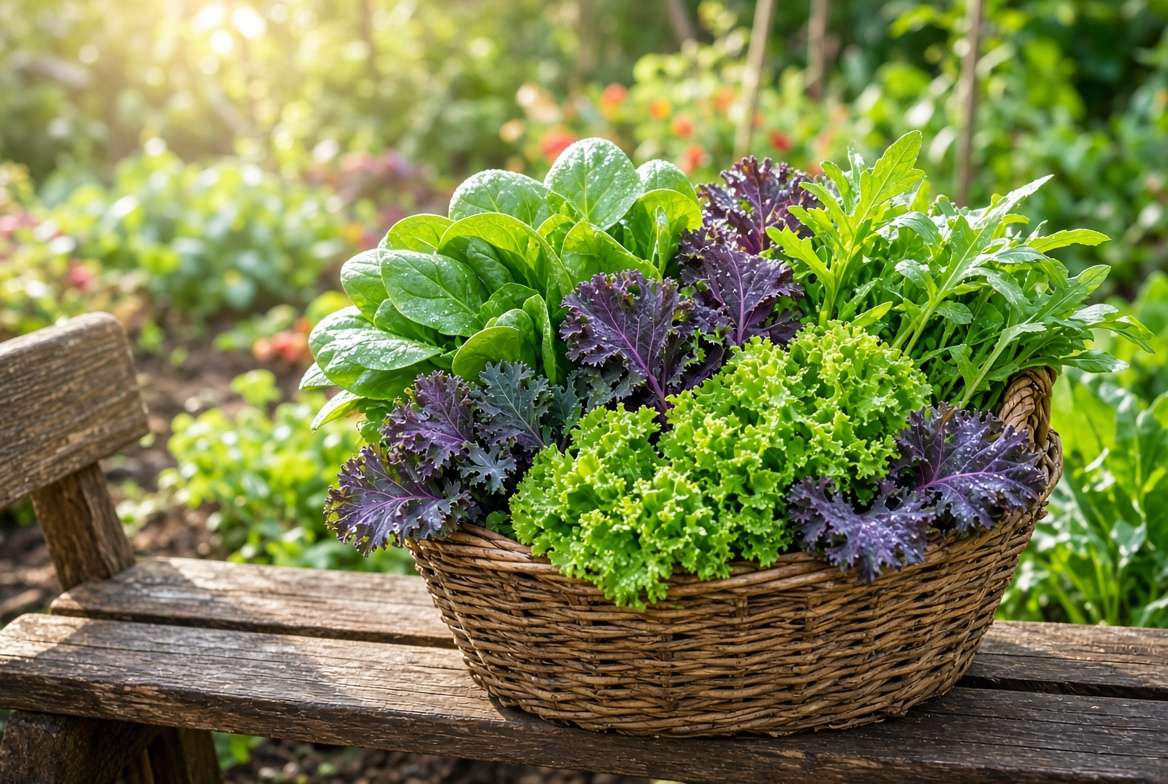
Best Varieties: Oakleaf (tender and heat-tolerant), Lollo Rosso (frilly, deep red, and nutrient-dense), and Salad Bowl (a vigorous green variety that produces massive rosettes).
-
Pro Tip: Plant a mix of red and green varieties for a visually stunning garden bed and a nutrient-diverse salad bowl.
2. Kale (The Cold-Hardy Champion) 🦖
Kale is virtually indestructible. It thrives in cool weather, and its flavor actually sweetens after a light frost. Unlike lettuce, kale grows upright on a central stalk, making it incredibly easy to harvest from the bottom up.
-
Best Varieties: Lacinato (also known as Dinosaur or Tuscan kale, prized for its tender, bumpy leaves) and Red Russian (excellent cold tolerance and tender stems).
-
Pro Tip: As you harvest the lower leaves, the plant will begin to look like a miniature palm tree. This is completely normal and allows for excellent airflow, reducing fungal diseases.
3. Swiss Chard (Vibrant & Vigorous) 🌈
Swiss chard is a powerhouse of production. It boasts a deep, extensive root system that allows it to pull up nutrients and moisture to fuel rapid regrowth, even during the warmer days of early summer.
-
Best Varieties: Bright Lights (for stunning neon stems) and Fordhook Giant (for massive, heavily crinkled green leaves).
-
Pro Tip: Chard leaves can grow exceptionally large. Harvesting them when they are medium-sized (about 6–8 inches) ensures the most tender texture for fresh eating.
4. Spinach (The Fast Grower) 🍃
Spinach is incredibly fast to germinate and grow, but it requires a slightly more delicate touch. It is highly responsive to daylight hours and temperatures, making it a strict cool-season crop.
-
Best Varieties: Bloomsdale Long Standing (a classic, crinkled variety that resists bolting slightly better than others) and Space (a smooth-leaf hybrid known for vigor).
-
Warning: Spinach will bolt (go to seed) rapidly once temperatures consistently exceed 24°C. Harvest aggressively before the heat sets in.
5. Arugula (For the Spice Lovers) 🌶️
If you love a peppery kick in your salads, arugula is essential. It grows extremely fast, often ready for its first harvest in just 21 to 28 days from sowing.
-
Best Varieties: Roquette (the standard, robustly flavored heirloom) and Astro (a slightly milder, faster-growing option).
-
Pro Tip: The more frequently you harvest arugula, the longer you delay the plant’s instinct to produce flowers, which drastically increases the bitterness of the leaves.
6. Mustard Greens (Quick and Zesty) 🌿
Often overlooked in Western gardens, mustard greens are spectacular for continuous harvests. They add a sharp, horseradish-like bite to culinary dishes and regrow with surprising speed.
-
Best Varieties: Red Giant (beautiful burgundy leaves) and Southern Giant Curled (frilly edges with a classic mustard bite).
7. Asian Greens (Bok Choy & Mizuna) 🥢
While heading Bok Choy is harvested once, many Asian greens are perfect for the cut-and-come-again approach if you choose the right types.
-
Best Varieties: Mizuna (feathery, jagged leaves that tolerate both heat and cold) and Baby Bok Choy (harvest the outer leaves while the inner stalks continue to thicken).
-
Pro Tip: These greens are highly susceptible to flea beetles. Keep row covers handy during the early spring to protect your continuous harvest.
IV. The Masterclass: How to Harvest Without Killing Your Plants 🎓🔪
Knowing what to plant is only half the battle. The physical act of harvesting requires precision. If you cut too low, you destroy the basal growing point and kill the plant. If you cut too high, you leave ragged stems that invite disease. Here is the expert methodology for harvesting leafy greens repeatedly.
Step 1: Timing is Everything ⏱️
Patience in the early stages pays off later. Do not make your first cut until the plant has established a robust root system.
-
When to start: Wait until the leaves are at least 4 to 6 inches long. The plant should have at least 6 to 8 mature leaves before you take anything.
-
Time of day: Always harvest in the early morning. Before the sun hits the garden, plants are fully turgid (filled with water) from the cool night. Leaves cut in the morning will be crisp, sweet, and store significantly longer in your refrigerator.
Step 2: Choose and Prep the Right Tools ✂️
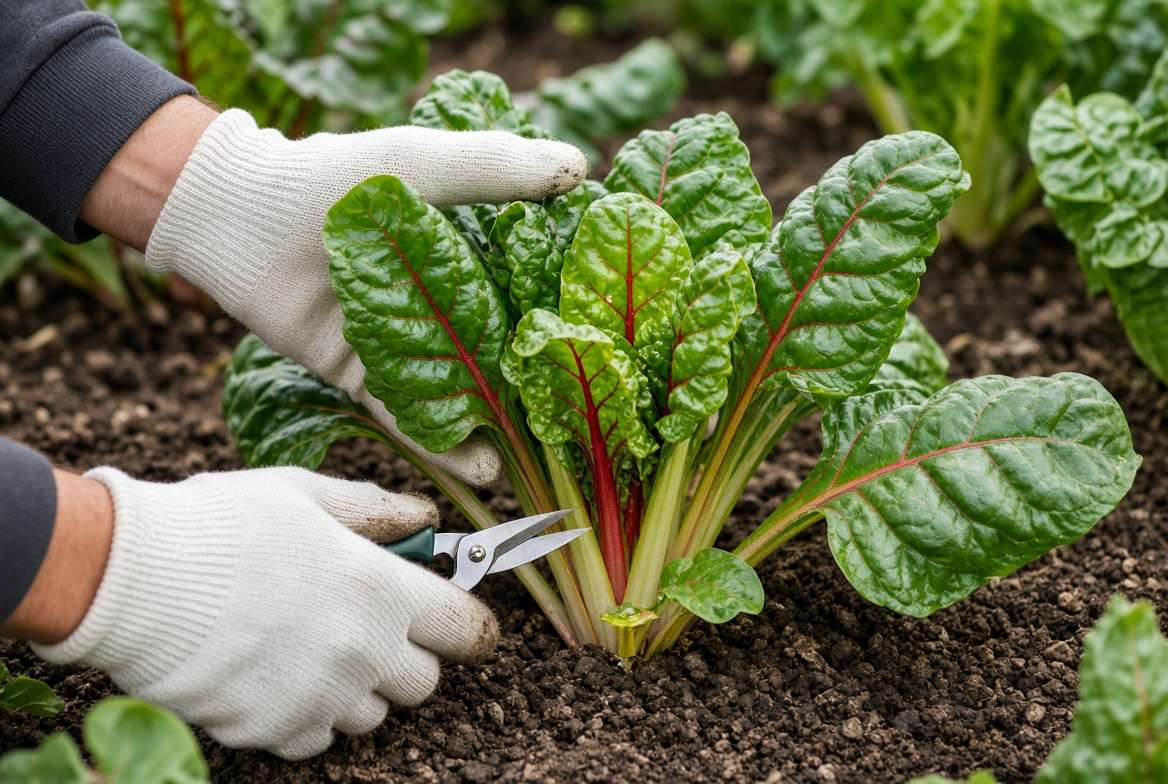
Do not tear leaves off by hand unless you are very experienced; pulling can uproot the entire plant or damage the delicate crown.
-
The Tools: Use micro-tip pruning snips, bonsai scissors, or sharp kitchen shears.
-
E-E-A-T Safety Tip: Plant pathogens spread easily through infected sap. Before moving from one bed to another, wipe your scissor blades with a cotton pad soaked in rubbing alcohol or a 10% bleach solution. This prevents the spread of mosaic viruses and fungal spores.
Step 3: The “Outer-Leaf” Strategy 🛡️
This is the golden rule of continuous harvesting: Always harvest from the outside in. The outermost leaves are the oldest and most mature. By snipping these off at the base, you allow sunlight to penetrate the center of the plant, which stimulates the tiny, newly formed leaves in the basal rosette to grow rapidly. Never touch the innermost cluster of leaves.
Step 4: The Perfect Cutting Height 📏
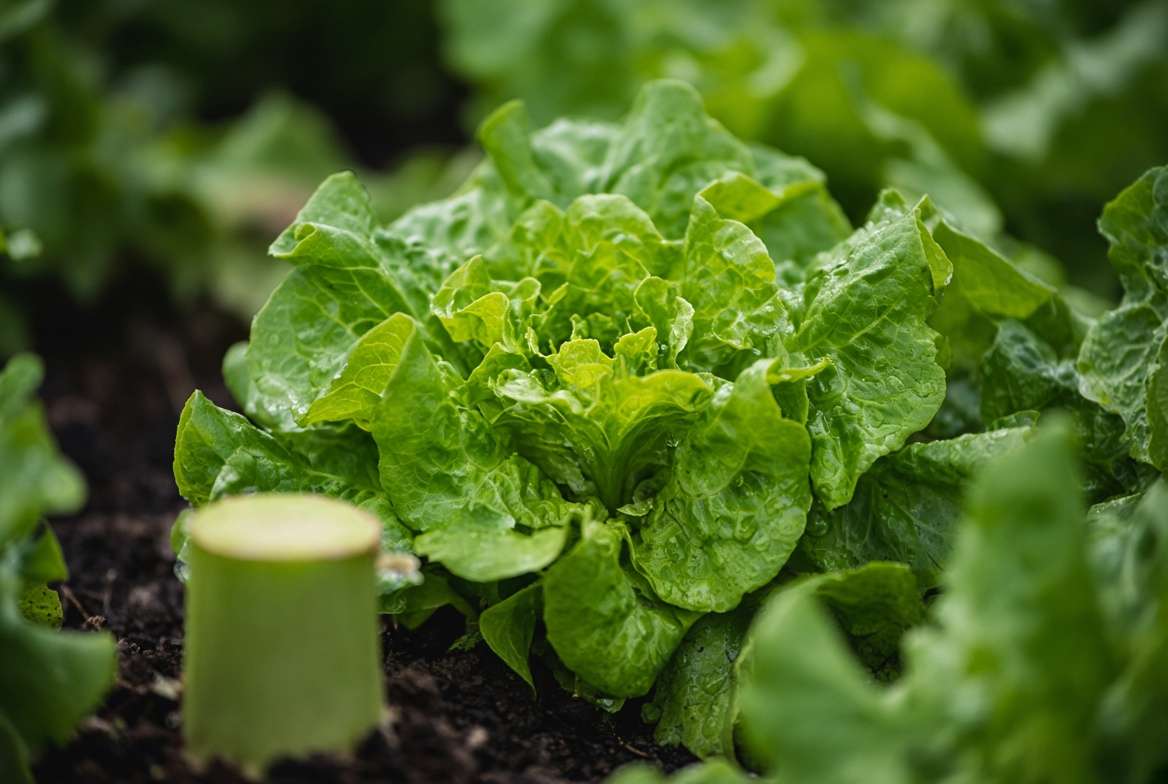
When dealing with mixed beds of loose-leaf lettuce, some gardeners prefer the “haircut” method—grabbing a handful of leaves and cutting them all at once. If you use this method, you must follow the 1-to-2-inch rule. Always leave at least 1 to 2 inches of plant material above the soil line. If you cut the plant flush with the dirt, you will sever the apical meristem (the central growing node), and the plant will permanently stop growing and die. Leaving an inch of stem ensures the crown remains intact to fuel the next flush of growth.
V. Post-Harvest Care: Fueling the Next Flush of Growth 💧🔋
Harvesting leafy greens repeatedly is an inherently stressful event for the plant. You are actively removing its primary method of photosynthesis (the leaves). To ensure the plant has the energy and resources to push out a brand-new flush of foliage within 10 to 14 days, you must step in with immediate post-harvest care.
Watering Protocols for Regrowth 🚿
The moment you clip away foliage, the plant’s transpiration rate changes, but its need for water remains critical. Consistent soil moisture is the engine that drives cell expansion in new leaves.
-
The Goldilocks Rule: The soil should feel like a wrung-out sponge—damp but not waterlogged. If the roots dry out completely after a harvest, the plant will panic and prematurely bolt (go to seed).
-
Overwatering Dangers: Conversely, drowning the roots deprives them of oxygen. Because the plant has fewer leaves to transpire water after a severe cut, it is easier to accidentally overwater. Check the soil moisture at a depth of two inches before irrigating.
Fertilizing: Feeding the Foliage Engine 🧪
Leafy greens are heavy feeders of nitrogen, the macronutrient responsible for vigorous, green vegetative growth. When you harvest repeatedly, you rapidly deplete the nitrogen reserves in the surrounding soil.
-
Immediate Feeding: Within 24 hours of a heavy cut-and-come-again harvest, apply a fast-acting, liquid organic fertilizer. Liquid feeds are absorbed much faster by the root system than granular top-dressings.
-
Expert Recommendations: Diluted fish emulsion, liquid kelp extract, or compost tea are perfect choices. Mix at half-strength to avoid burning the delicate new growth. This immediate nutrient boost provides the exact chemical building blocks the plant needs to replace its lost canopy.
Mulching and Soil Protection 🪱
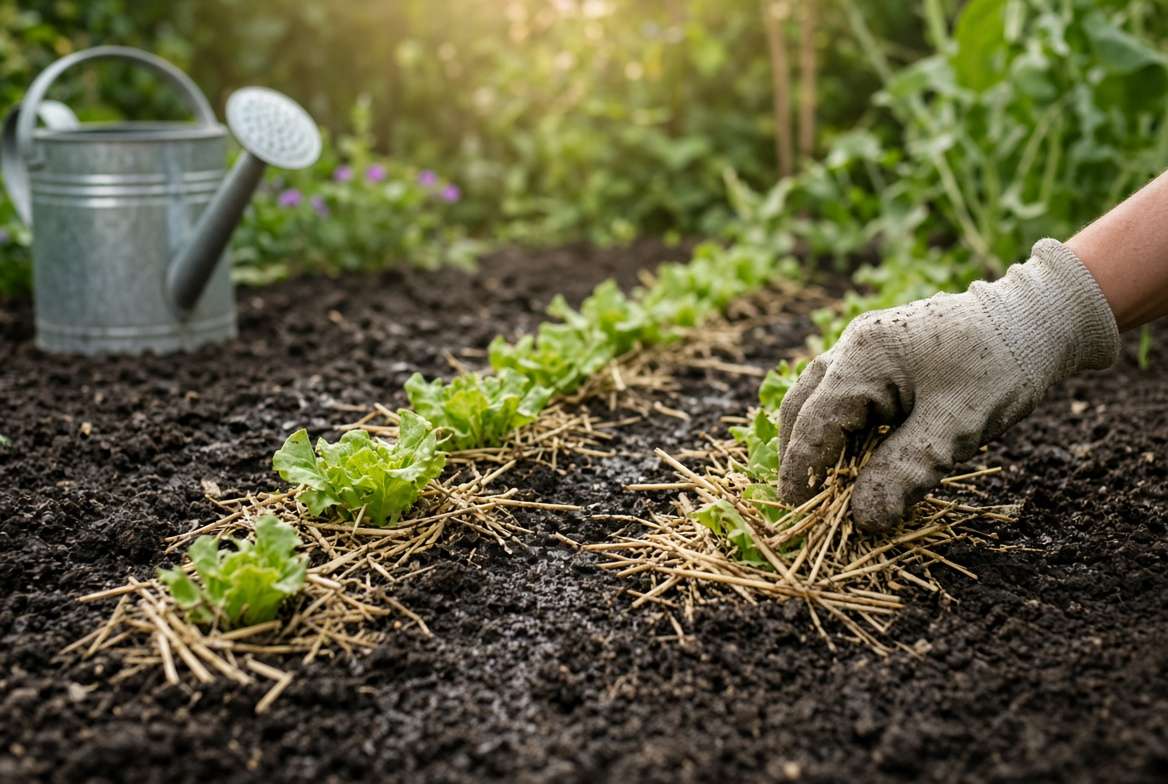
Exposed soil is the enemy of cool-weather crops. When you remove the lower leaves of your greens, you expose the bare soil beneath the plant to direct sunlight, which raises the soil temperature.
-
Apply a 1-to-2-inch layer of organic mulch (like finely shredded straw, chemical-free grass clippings, or leaf mold) around the base of the plants.
-
Mulch keeps the root zone cool, locks in moisture, and suppresses weed competition, ensuring all available soil energy goes directly into your next harvest.
VI. Troubleshooting: Common Pitfalls & How to Avoid Them 🚫🐛
Even with perfect harvesting techniques, environmental factors can throw a wrench into your continuous harvest plans. Here is how to navigate the most common roadblocks.
Preventing “Bolting” (Going to Seed) ☀️
Bolting is the natural life-cycle conclusion for leafy greens. Triggered by heat and lengthening daylight hours, the plant stops producing edible leaves and shoots up a thick, central stalk to produce flowers and seeds.
-
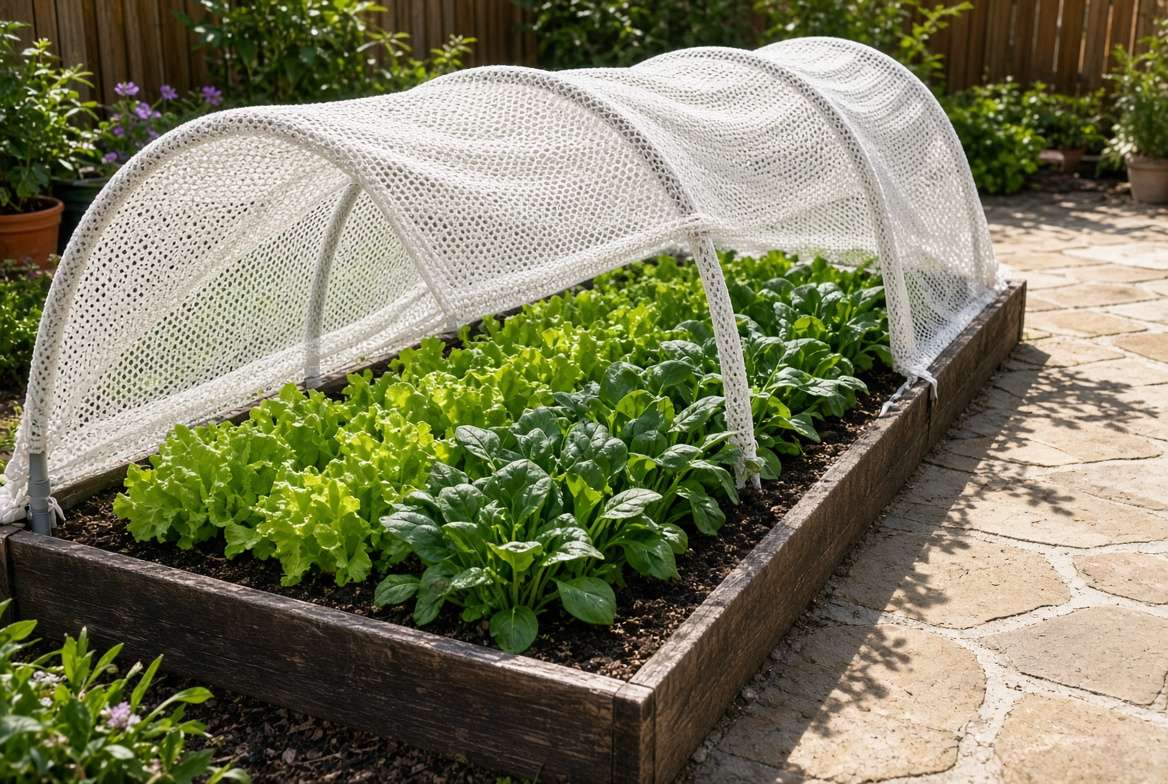
The Fix: You cannot stop bolting entirely, but you can delay it. As spring turns to summer, erect a 30% to 50% shade cloth over your greens. This simple physical barrier can lower the ambient temperature around the plants by up to 10 degrees, buying you an extra 3 to 4 weeks of high-quality harvests.
Dealing with Bitter Leaves 👅
Nothing ruins a salad faster than a mouthful of intensely bitter lettuce or arugula. Bitterness is a defense mechanism caused by the buildup of sesquiterpene lactones, which spike when the plant is stressed by heat, lack of water, or old age.
-
The Fix: Always taste a small piece of a mature leaf before harvesting the whole batch. If the outer leaves have turned bitter, it is time to perform a “hard reset.” Cut the plant down to 2 inches above the soil line and heavily water it. The fresh, new growth that emerges will often be sweet and tender again. If the new growth is also bitter, the plant has reached the end of its lifespan and should be pulled and composted.
Pest Management for Vulnerable Cuts 🐌
A freshly cut plant oozes sap, which acts like a dinner bell for garden pests. Slugs, snails, and aphids are particularly drawn to stressed plants.
-
The Fix: Dust the soil surface around your freshly cut greens with food-grade diatomaceous earth (DE) to deter soft-bodied pests. For aphids, a gentle spray of organic neem oil applied in the evening (to prevent leaf burn from the sun) will keep populations in check without resorting to harsh synthetic chemicals.
VII. Expert Pro-Tips for an Infinite Salad Bowl 🧑🌾💡
To elevate your gardening game from a basic hobbyist to a backyard expert, combine the cut-and-come-again technique with advanced growing strategies.
Succession Planting + Cut-and-Come-Again Even the most vigorous lettuce plant will eventually exhaust itself after 4 or 5 harvests. To ensure you literally never run out of greens, practice succession planting. Sow a new 3-foot row of seeds every 21 days. By the time your first row becomes bitter or bolts, your second row will be at peak production, and your third row will be just sprouting. This staggered approach guarantees a seamless, unbroken supply of food.
Indoor vs. Outdoor Harvesting You are not limited to the outdoor growing season. Leafy greens thrive in indoor hydroponic setups or under standard LED grow lights. Because indoor environments are perfectly climate-controlled (averaging 20°C with no intense summer sun), you can often harvest a single indoor kale or Swiss chard plant continuously for 6 to 8 months. Ensure you provide 12 to 14 hours of artificial light daily to keep the vegetative growth robust. 💡
VIII. Frequently Asked Questions (FAQs) ❓
How many times can you harvest leafy greens repeatedly? With proper care, watering, and fertilization, you can safely harvest most loose-leaf greens 3 to 5 times per season. Extremely vigorous plants like Swiss chard and kale can be harvested weekly for several months before production slows down.
Will the cut-and-come-again method work for head lettuce like Iceberg or Romaine? No, it will not work for tight-heading varieties like Iceberg. These plants have a terminal growing point that forms the head. Once you cut the head off, the plant cannot regenerate. However, you can harvest the loose, outer leaves of young Romaine before it forms a tight heart.
How long does it take for greens to grow back after cutting? In optimal conditions (cool weather, adequate moisture, and fertile soil), you will see new growth begin to push from the center within 3 to 5 days. A full flush of harvestable leaves will generally be ready in 10 to 14 days.
IX. Your Never-Ending Harvest Awaits 🌅🥗
Mastering the cut-and-come-again method completely shifts the paradigm of backyard gardening. By choosing the right non-heading varieties, utilizing the outer-leaf harvesting strategy, and protecting the delicate basal crown with the 1-to-2-inch rule, you maximize the potential of every single seed sown. Add in a consistent routine of liquid organic fertilizer and proper hydration, and your garden will reward you with an abundance of fresh, crisp foliage week after week.











