
If you’re looking to expand your garden with new shrubs without the cost of buying more, learning effective layering techniques for shrubs is the perfect solution. This natural and easy-to-master propagation method allows you to clone your favorite shrubs right from the comfort of your garden. Whether you’re a seasoned gardener or just starting out, layering can offer an efficient way to propagate healthy, robust plants. In this guide, we’ll walk you through step-by-step techniques to ensure you achieve successful results every time. Let’s dive into how you can harness the power of layering for thriving shrubs in your landscape.
What is Layering and Why Is It Useful?
Layering is a simple yet effective propagation technique where a stem or branch of a plant is encouraged to grow roots while still attached to the parent plant. This method is ideal for vining and woody plants, allowing new growth to form without needing to cut the stem entirely.
The process involves bending a healthy stem to the ground, burying a section of it in soil, and keeping it in contact with the parent plant. Over time, the buried section will develop roots, creating a new plant that can be separated from the original.
Why is Layering Useful?
- No Need for Rooting Hormones: Unlike cuttings, layering doesn’t require rooting hormones, making it a natural, low-effort method.
- Higher Success Rate: Since the stem stays connected to the parent plant, it receives continuous nutrients and water, leading to a higher success rate.
- Ideal for Hard-to-Root Plants: Some plants are difficult to propagate from cuttings, but layering works well for them.
- Cost-Effective: It’s a great way to expand your garden without buying new plants.
Layering is perfect for gardeners looking to propagate their plants with minimal hassle and maximum success. Whether you’re growing vining plants or shrubs, it’s an easy, reliable technique to multiply your plants and strengthen your garden.
Different Layering Techniques
Layering is one of the most effective ways to propagate vining plants, allowing you to grow new plants without cutting them from the main vine. By using different layering techniques, you can ensure healthy growth and quick propagation. Below are the most popular layering methods you can try:
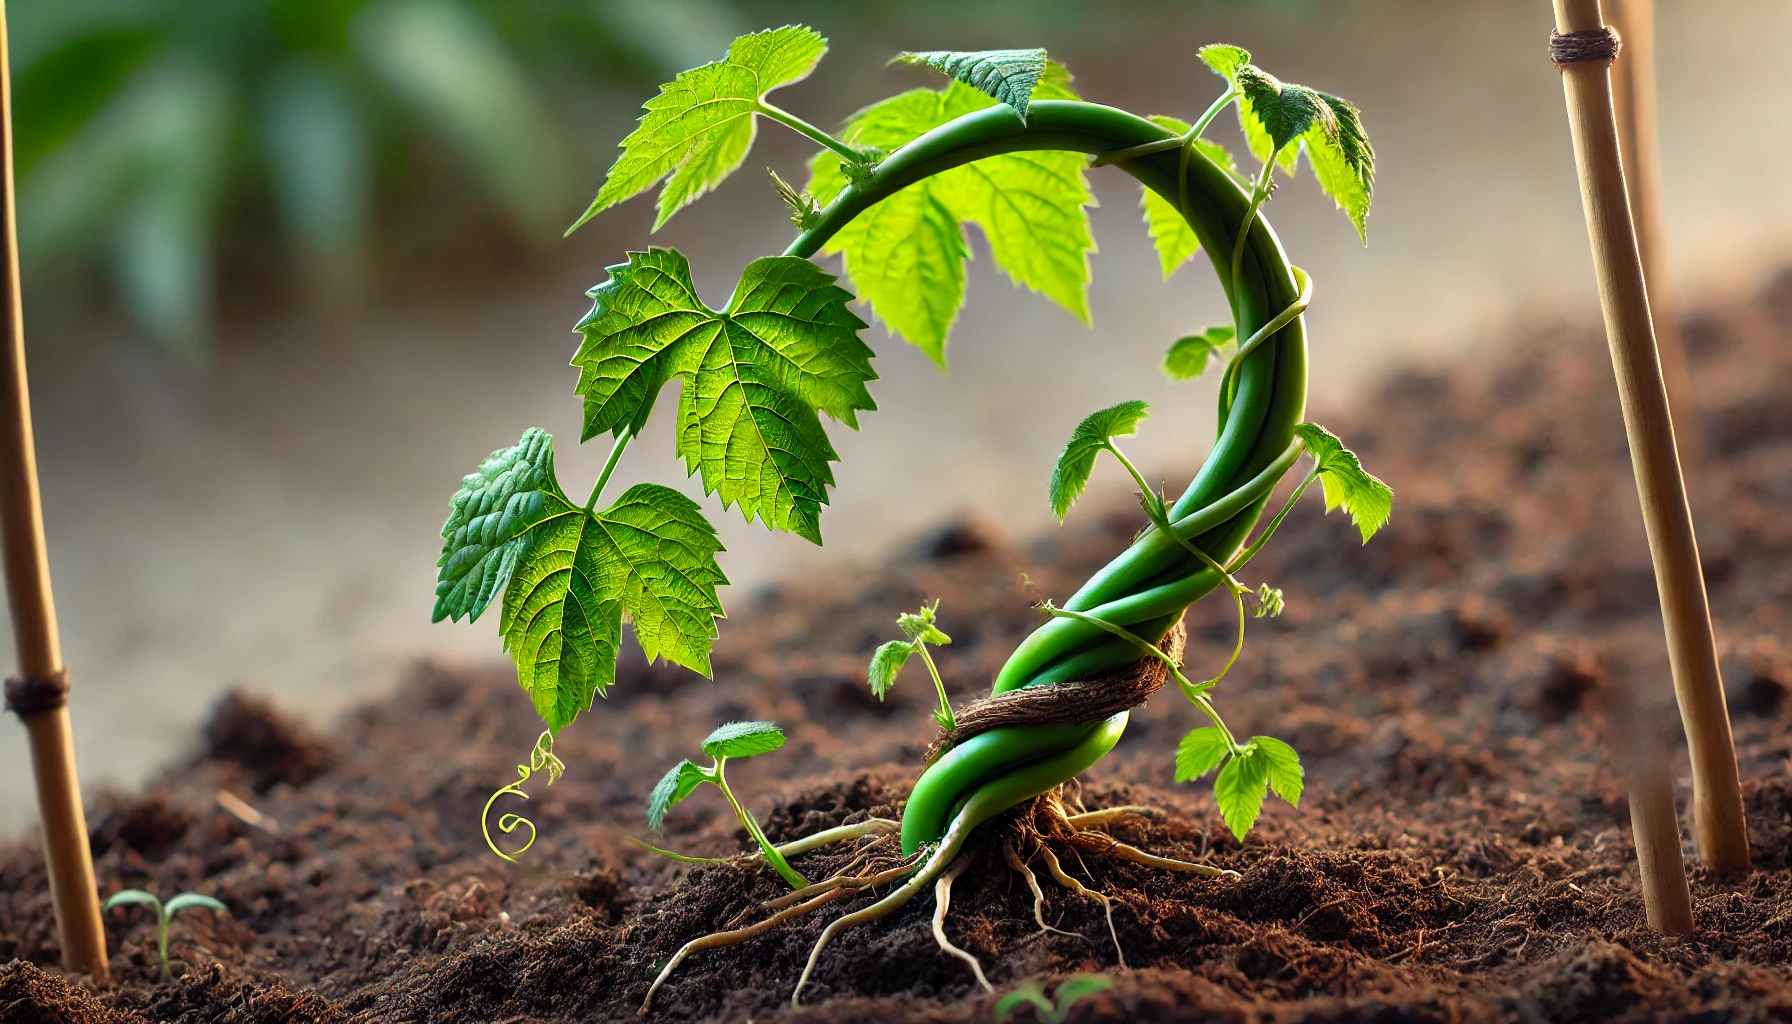
1. Simple Layering
In simple layering, a healthy vine is bent down to the soil and partially buried. The section of the vine that is in contact with the soil will develop roots over time. Here’s how to do it:
- Choose a long, healthy vine and locate a section with several nodes.
- Gently bend the vine toward the soil and bury a part of it, leaving the tip exposed above the soil.
- Pin the buried section in place using a small rock or a plant stake.
- Keep the soil moist and wait for roots to form, which usually takes a few weeks.
2. Tip Layering
Tip layering is ideal for plants with long, flexible vines. This technique involves burying only the tip of the vine to encourage rooting.
- Select a healthy vine and position the tip so that it touches the soil.
- Pin the tip down into the soil using a small stake or a bent wire.
- Keep the soil moist and wait for roots to develop at the tip. Once roots form, you can cut the new plant from the main vine.
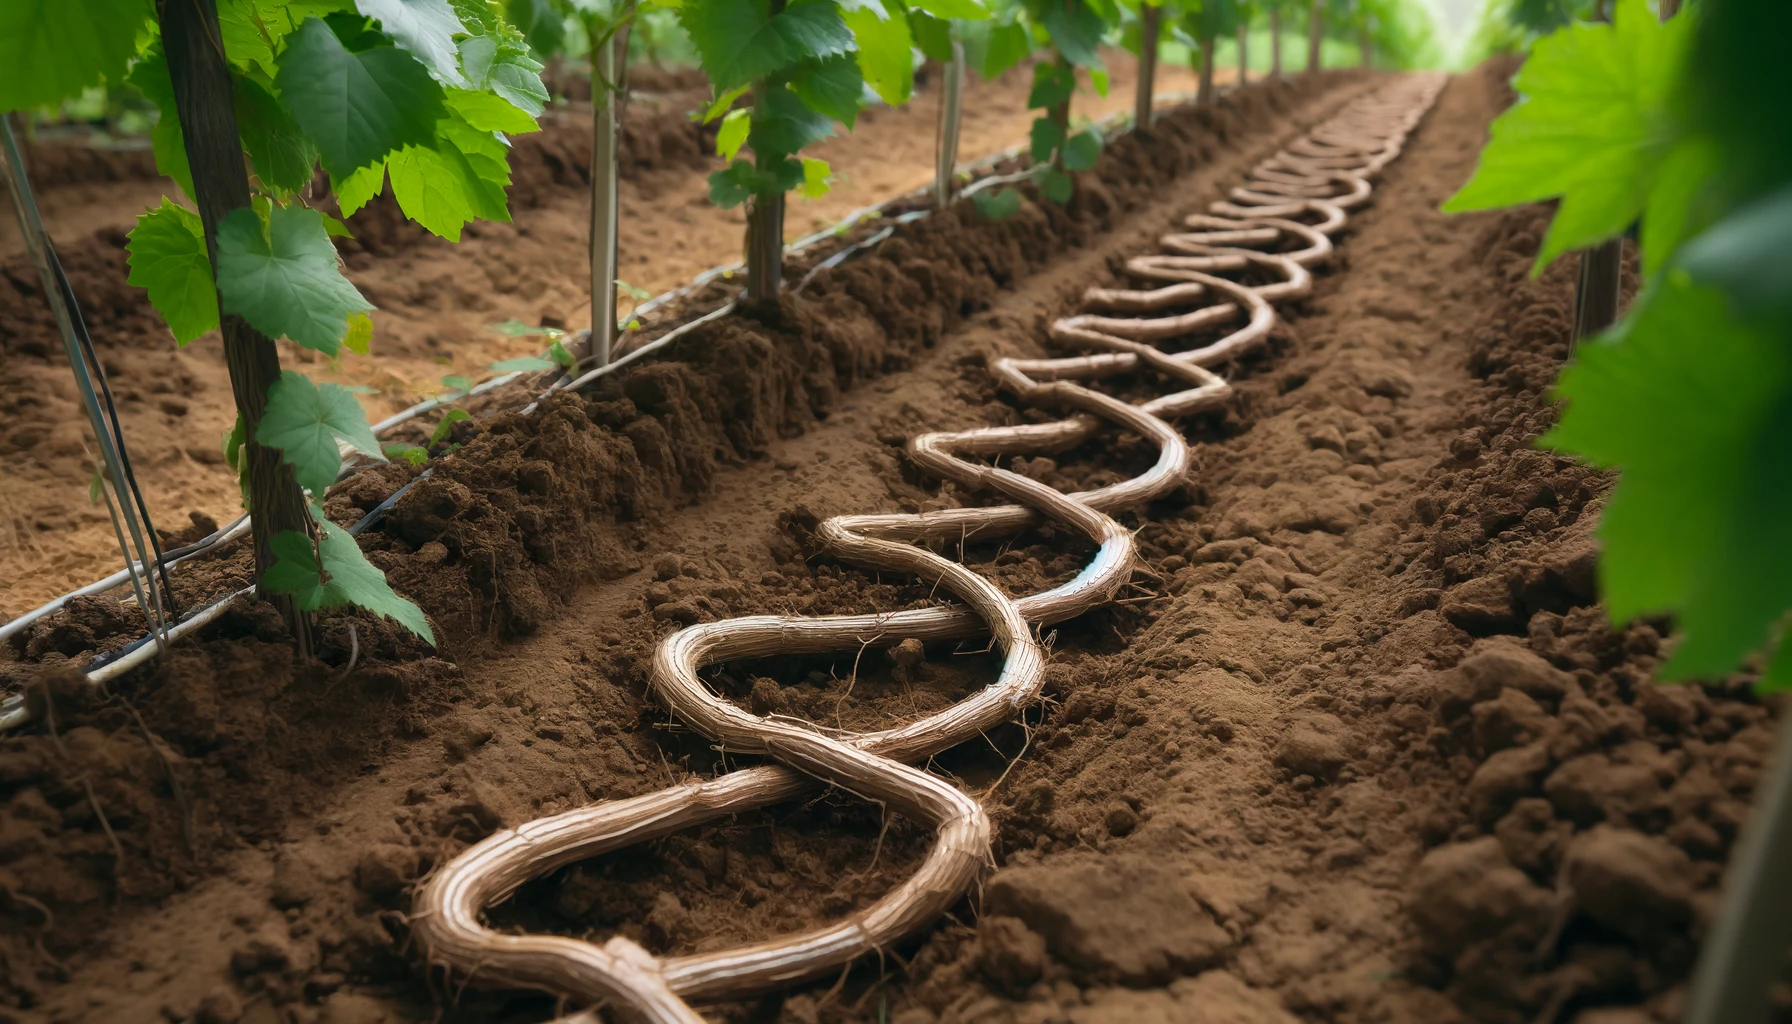
3. Serpentine Layering
Serpentine layering is useful for plants with long, flexible stems and can produce several new plants from one vine. It’s a great method if you want multiple cuttings from one plant.
- Stretch the vine along the soil in a zigzag or serpentine shape.
- Pin each segment of the vine into the soil, leaving some sections exposed above the surface.
- As the vine grows, roots will form at each buried section. Afterward, you can separate the rooted sections and plant them individually.
4. Mound Layering
Mound layering is often used for plants with thicker stems or those that do not readily root when bent. This method encourages roots to form from a larger section of the vine.
- Select a healthy, mature plant with a thick stem.
- Dig a small trench around the base of the plant and mound soil around the lower part of the stem.
- Leave the top portion of the plant above the soil to continue growing.
- Over time, roots will form from the buried section. Once well-rooted, the new plant can be separated from the parent.

When Is the Best Time to Start Layering?
The best time to start layering vining plants is during the growing season, typically in spring or early summer. This is when the plant is actively growing, which increases the chances of successful root development. Warmer temperatures and longer daylight hours promote faster rooting and overall plant health.
Here are a few key factors to consider:

Optimal Temperature: The ideal temperature for layering is between 65°F to 75°F (18°C to 24°C). These temperatures support strong root development without stressing the plant.
Active Growth Phase: Choose a time when the plant is producing new growth. This ensures that the stems are flexible and healthy enough to root effectively.
Avoid Late Fall or Winter: During the cooler months, many plants enter dormancy, making it harder for them to root. Avoid starting layering in late fall or winter when the plant is less active.
By timing your layering efforts to the plant’s growing season, you can ensure the best results and watch your vining plants thrive.
Preparing the Plant for Layering
Layering is a fantastic method for propagating vining plants, allowing you to grow new plants from existing stems while keeping them attached to the parent plant. To ensure success, proper preparation is key.
Select a Healthy Stem
Choose a healthy, flexible stem from your plant that is free from disease or damage. The ideal stem should be long enough to reach the ground or a container where roots can form.
Choose the Right Spot
Pick a section of the stem that’s close to the ground or in contact with soil. This will make it easier for the stem to root. Look for a spot where the stem can bend gently without breaking.
Trim the Leave
Remove leaves from the area of the stem that will be in contact with the soil. This helps prevent rot and encourages the stem to focus on producing roots.
Make a Small Cut or Scrape
Gently scrape or make a small slit in the stem where it will touch the soil. This encourages the stem to start forming roots at the damaged area. Be careful not to cut through the stem completely.
Prepare the Ground or Container
If you’re layering directly into the ground, ensure the soil is loose and well-draining. If using a pot, fill it with sterile soil for rooting cuttings to create the best environment for the roots to grow.
By following these simple steps, your vining plant is ready for layering. With patience and care, you’ll soon see new roots developing, leading to a thriving new plant!
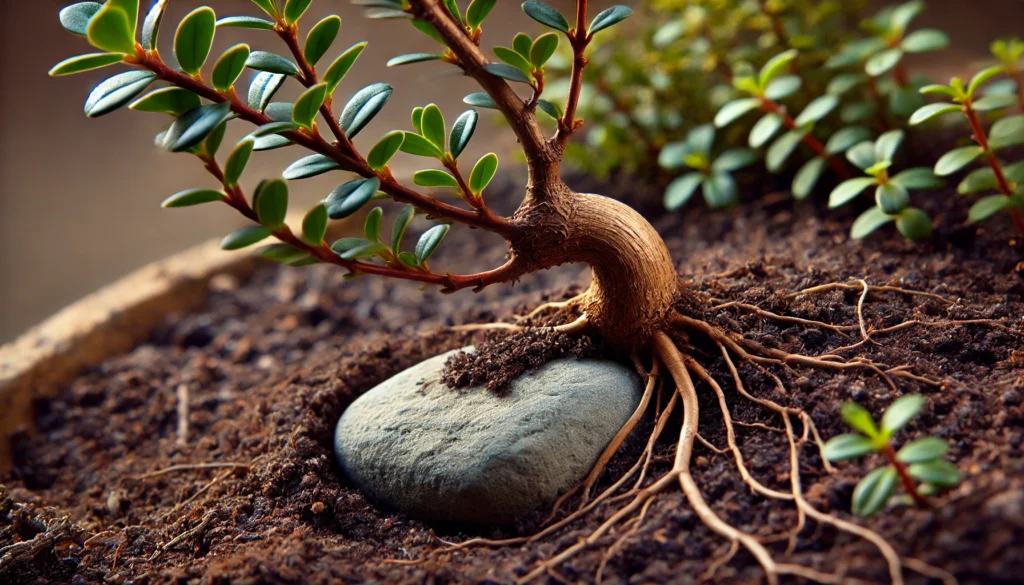
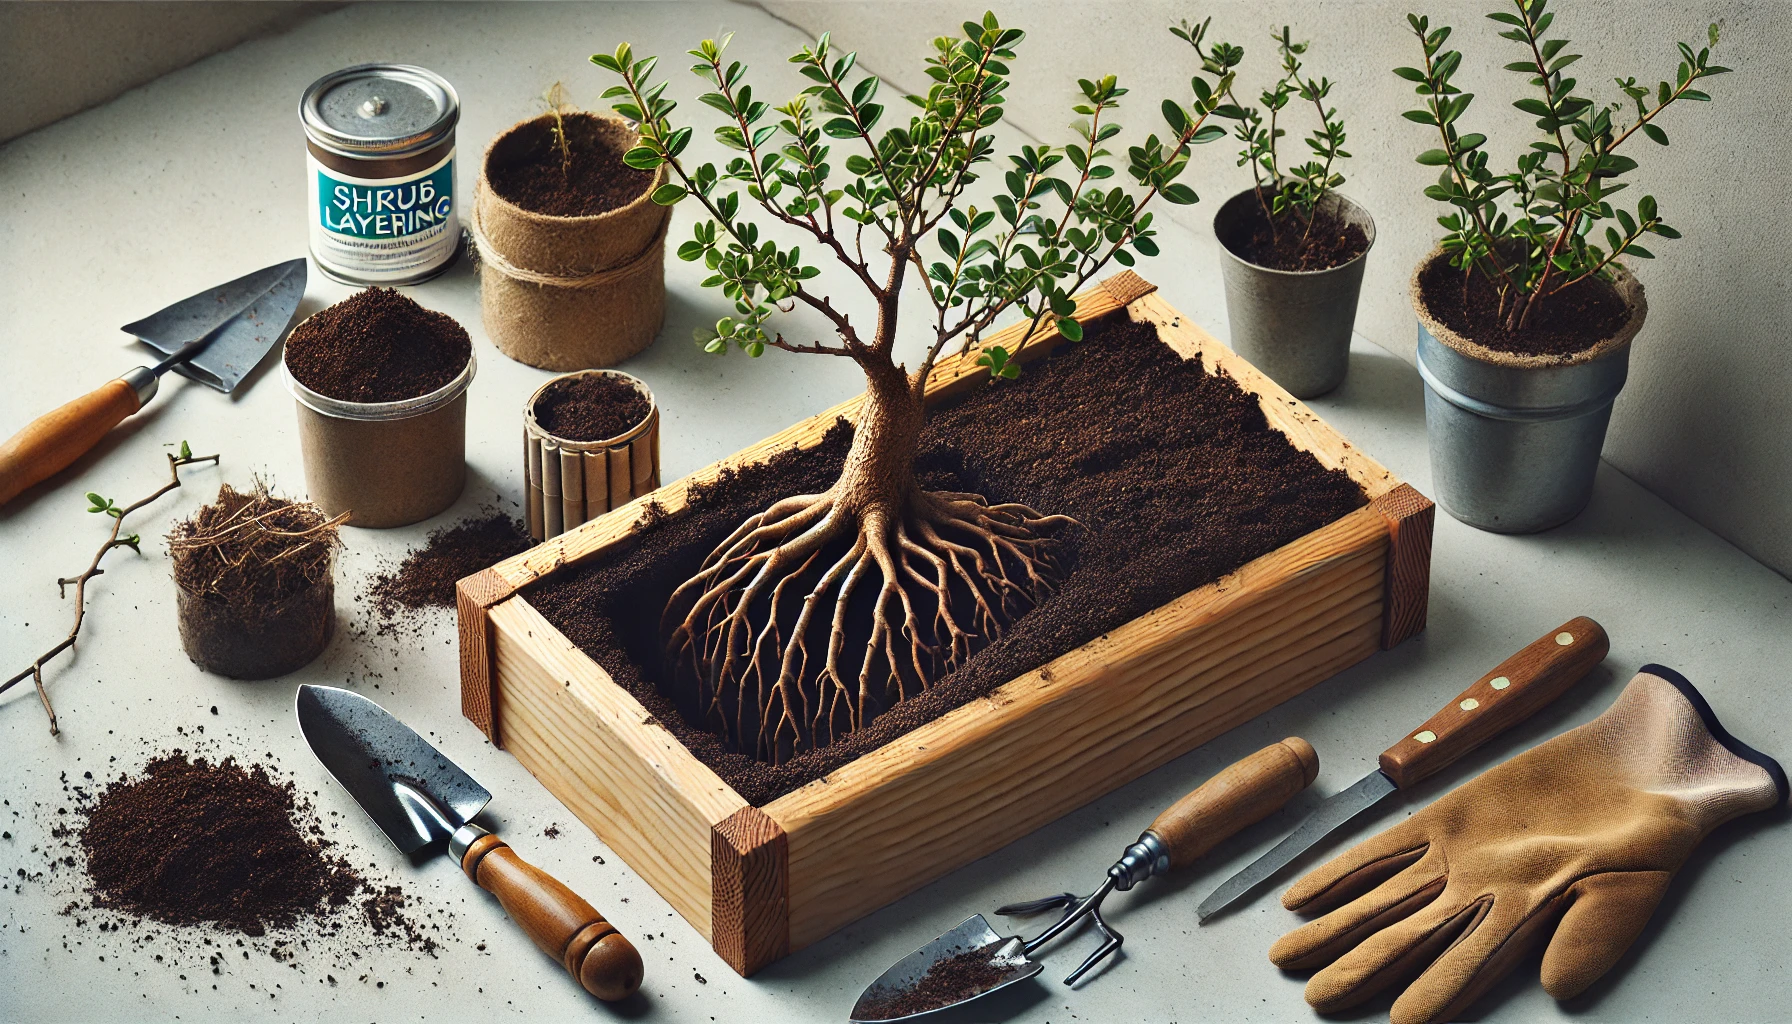
Step-by-Step Guide to Layering Shrubs
Layering is one of the simplest and most effective methods for propagating shrubs. This technique involves bending a low-growing branch of a shrub to the ground and encouraging it to root. Here’s how to do it step by step:
Choose the Right Shrub
- Select a healthy shrub with flexible branches. Popular shrubs for layering include Azaleas, Rhododendrons, and Forsythia.

Prepare the Branch
- Find a low-growing branch that can be bent to the ground without snapping. The branch should be long enough to reach the soil but still attached to the parent plant.
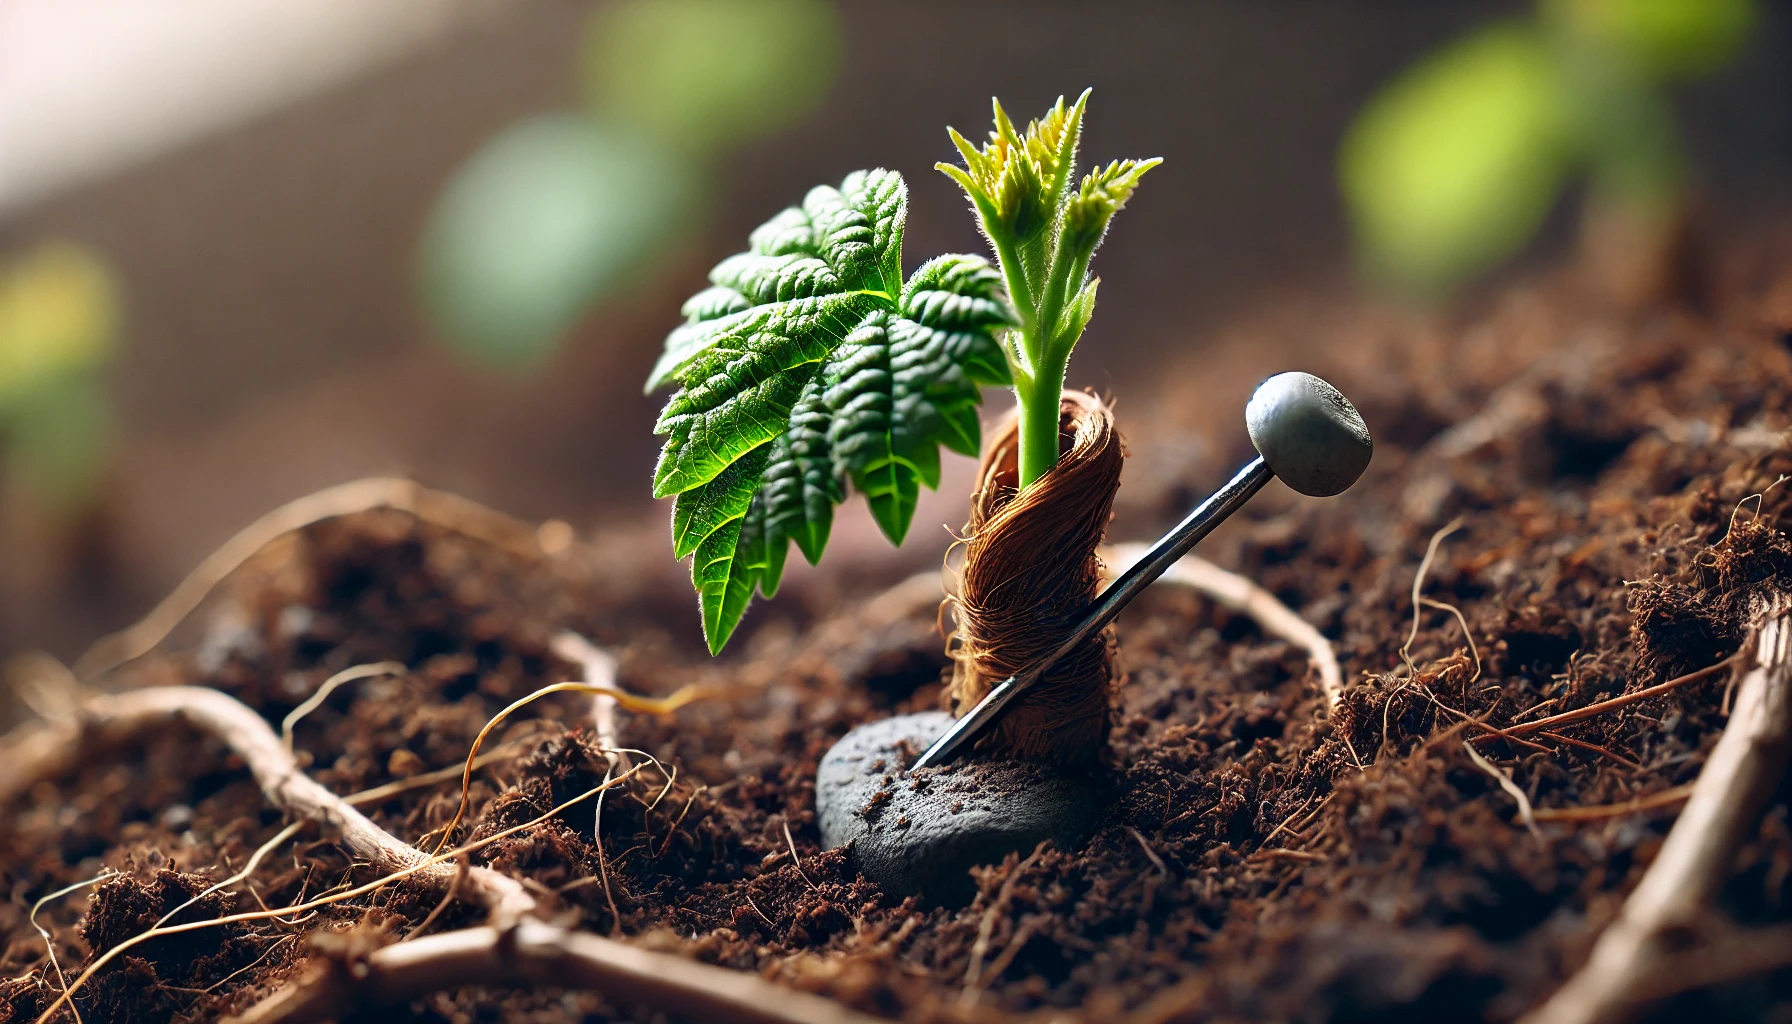
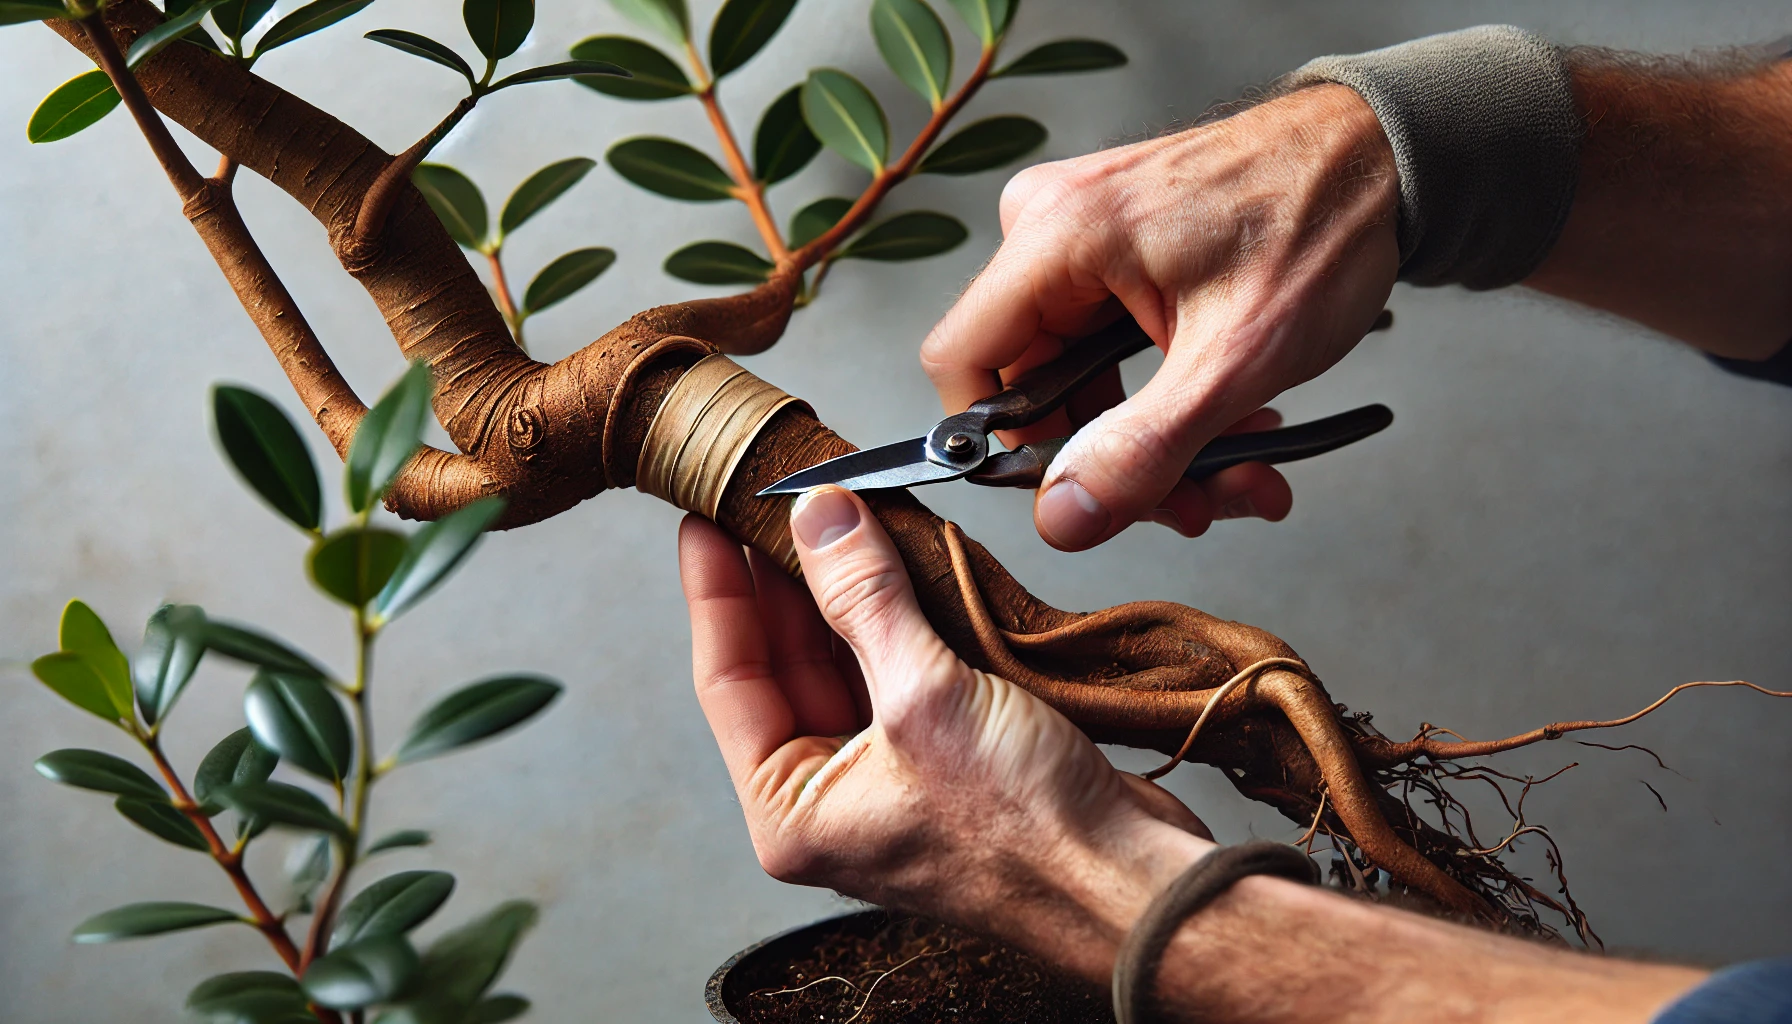
Wound the Stem (Optional)
- Lightly scrape the bark on the underside of the branch where it will touch the soil. This helps encourage rooting. You can also use rooting hormone to speed up the process, but it’s optional.
Bend the Branch to the Soil
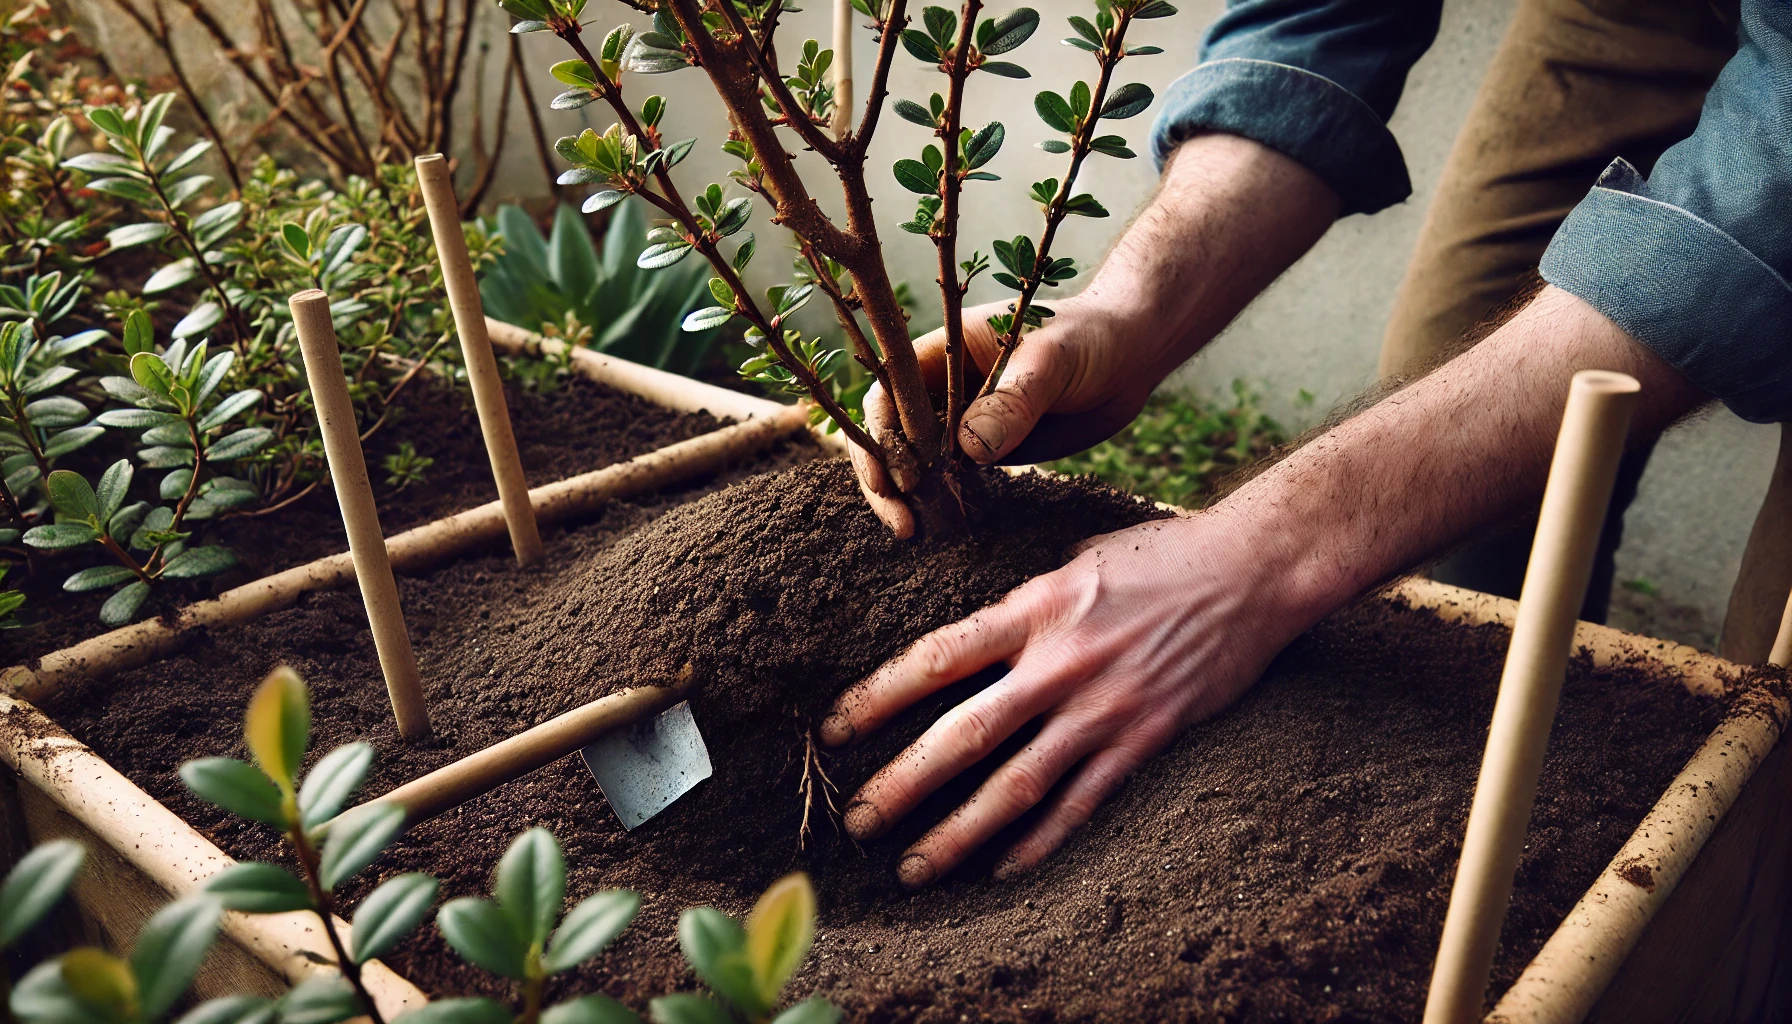
- Carefully bend the branch towards the ground. Dig a small hole or trench in the soil where the branch will touch. Lay the branch in the hole, ensuring the wounded part of the stem is in contact with the soil.

Secure the Branch in Place
- Use a garden staple, a rock, or a small peg to hold the branch in place. Make sure it’s firmly pressed into the soil, so it doesn’t move.
Cover with Soil
- Cover the section of the branch that’s in contact with the soil with a layer of soil or mulch. Leave the tip of the branch exposed.
Water Regularly
- Keep the soil moist, but not soggy. Water the area regularly to keep the soil around the stem hydrated.
Wait for Root Development
- After a few months (typically 6-12 weeks), gently tug on the branch. If you feel resistance, it means roots are forming. You can also check by carefully uncovering the buried part of the branch.
Sever the New Plant
- Once the new roots are well-established, use pruning shears to cut the newly rooted branch from the parent plant.
Transplant the New Shrub
- Dig up the new plant and transplant it into a pot or directly into your garden, ensuring it gets the proper care for continued growth.
By following these simple steps, you can propagate shrubs quickly and efficiently using the layering method. This technique is perfect for expanding your garden or sharing plants with others. Plus, it’s a great way to preserve the parent plant while growing new ones!
Tips for Successful Shrub Layering
Shrub layering is a fantastic technique for propagating shrubs quickly and efficiently, allowing you to grow new plants with minimal effort. Here are some expert tips to ensure your shrub layering process is a success:
Choose the Right Shrub
Some shrubs are more suited for layering than others. Ideal candidates include Forsythia, Hydrangeas, and Lilacs. Choose a healthy, flexible branch that is easy to bend and will easily root.
Select a Low, Healthy Branch
Look for a low-growing branch that is close to the ground. It should be healthy, free from disease, and flexible enough to bend without breaking.
Prepare the Ground
Clear a small area of soil where the branch will make contact with the ground. Loosen the soil to ensure good contact for root formation.
Wound the Branch
Gently scrape the bark on the part of the branch that will be buried in the soil. This helps stimulate root growth. You can also make a small cut or notch in the branch to encourage rooting.
Bury the Branch
Bend the branch toward the ground and bury the wounded section in the prepared soil. Secure it with a U-shaped pin or a stone to keep it in place.
Maintain Moisture
Keep the soil around the buried section moist but not waterlogged. Consistent moisture is key to encouraging the development of roots.
Wait for Root Development
Be patient. Depending on the shrub, it may take several months for roots to form. Check the buried section occasionally by gently pulling on the branch.
Sever the New Plant
Once the new roots have developed, cut the branch from the parent shrub and transplant it into its own pot or location.
Pruning and Care
After transplanting, prune the new shrub to help it grow strong and bushy. Continue to care for it as you would any other mature shrub.
By following these simple but effective tips, you’ll be able to propagate shrubs with success, creating new plants for your garden or landscape with minimal effort. Whether you’re expanding your garden or sharing plants with friends, shrub layering is a reliable and rewarding method.
Common Challenges and How to Overcome Them
While propagating vining plants can be a rewarding experience, there are a few common challenges that gardeners often face. Here’s how to troubleshoot and solve them:
1. Slow or No Rooting
If your cuttings aren’t developing roots, there are a few things to check:
- Solution: Ensure you’re using sterile soil for rooting cuttings. Contaminated soil can inhibit root growth. Also, make sure the cuttings are placed in a warm, humid environment with indirect light.
- Tip: If rooting is slow, try dipping the cut end in rooting hormone to speed up the process.

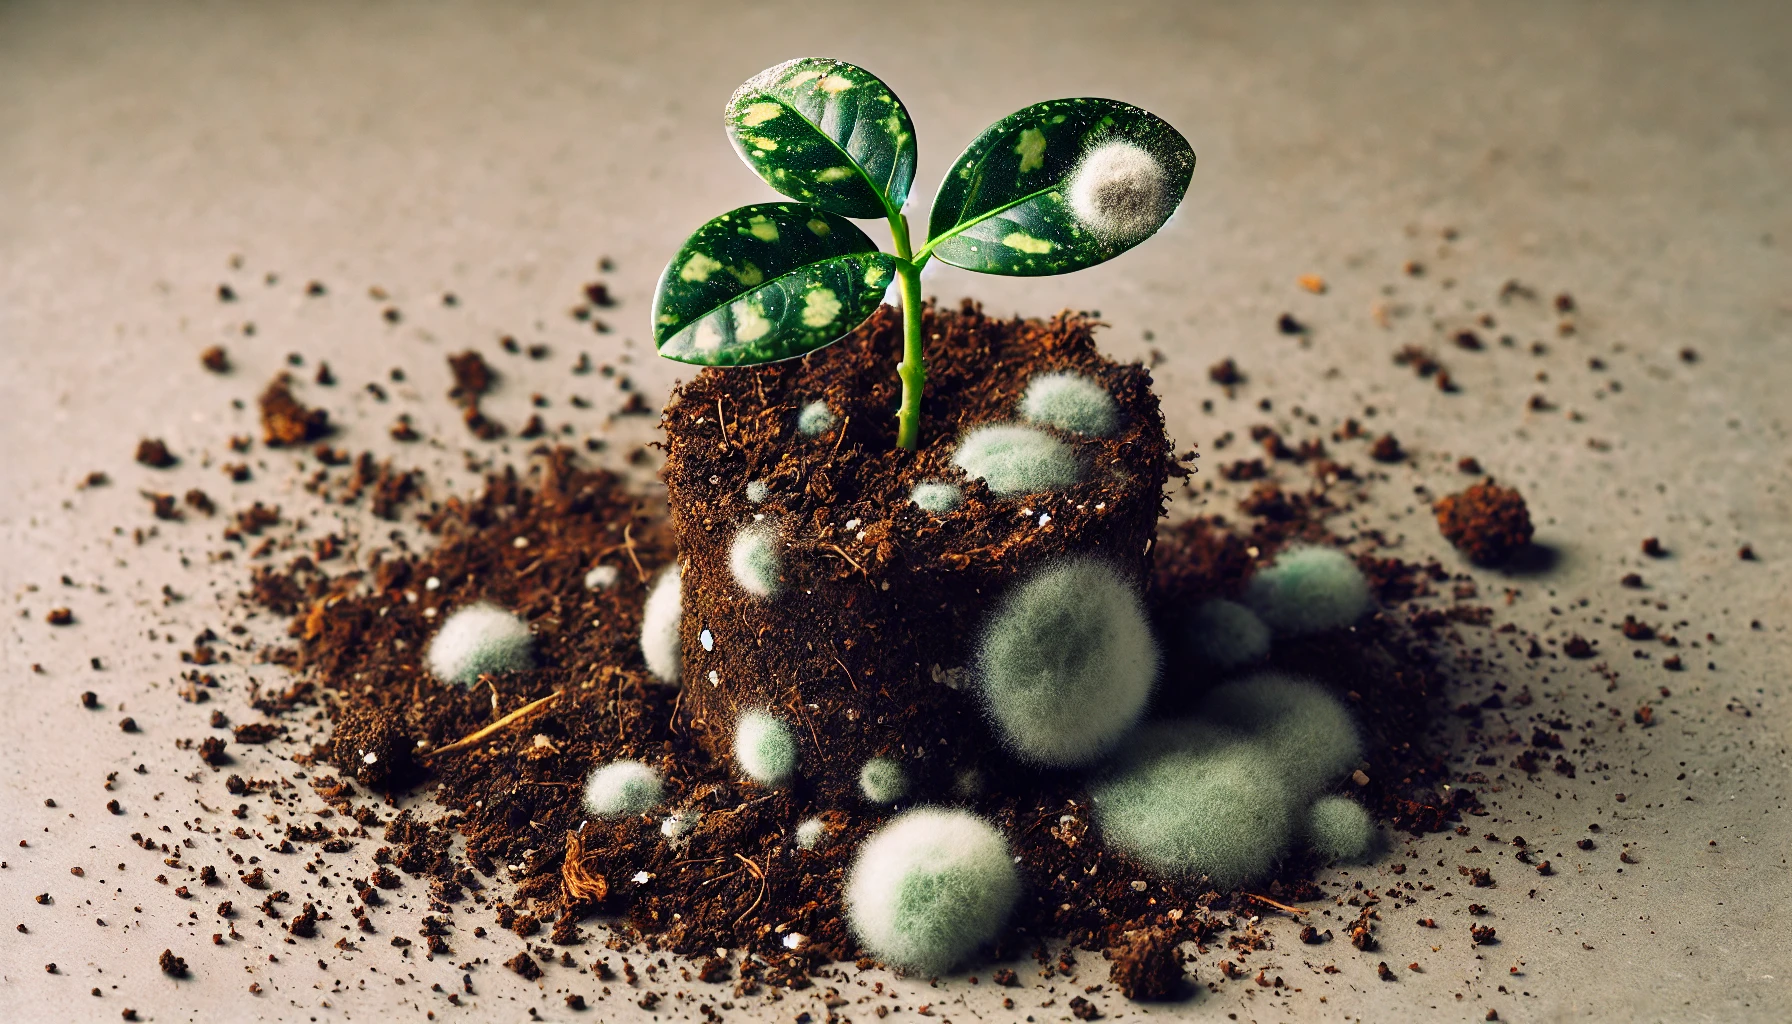
2. Mold or Fungal Growth
Mold or mildew can sometimes develop on cuttings, especially in overly humid conditions.
- Solution: Reduce humidity levels slightly and ensure the cuttings aren’t sitting in water. Also, make sure the soil is well-draining. If mold appears, gently remove it and allow the cuttings to dry out slightly before continuing.
- Tip: Use a fan to improve air circulation around the cuttings.
3. Yellowing or Wilting Leaves
Yellowing or wilting leaves indicate that something’s wrong, possibly with watering or environmental stress.
- Solution: Overwatering is a common cause, so make sure the soil is moist but not soggy. Also, check that the cuttings are not exposed to too much direct sunlight, which can cause stress.
- Tip: Trim away any yellow or damaged leaves to help the plant focus its energy on new growth.
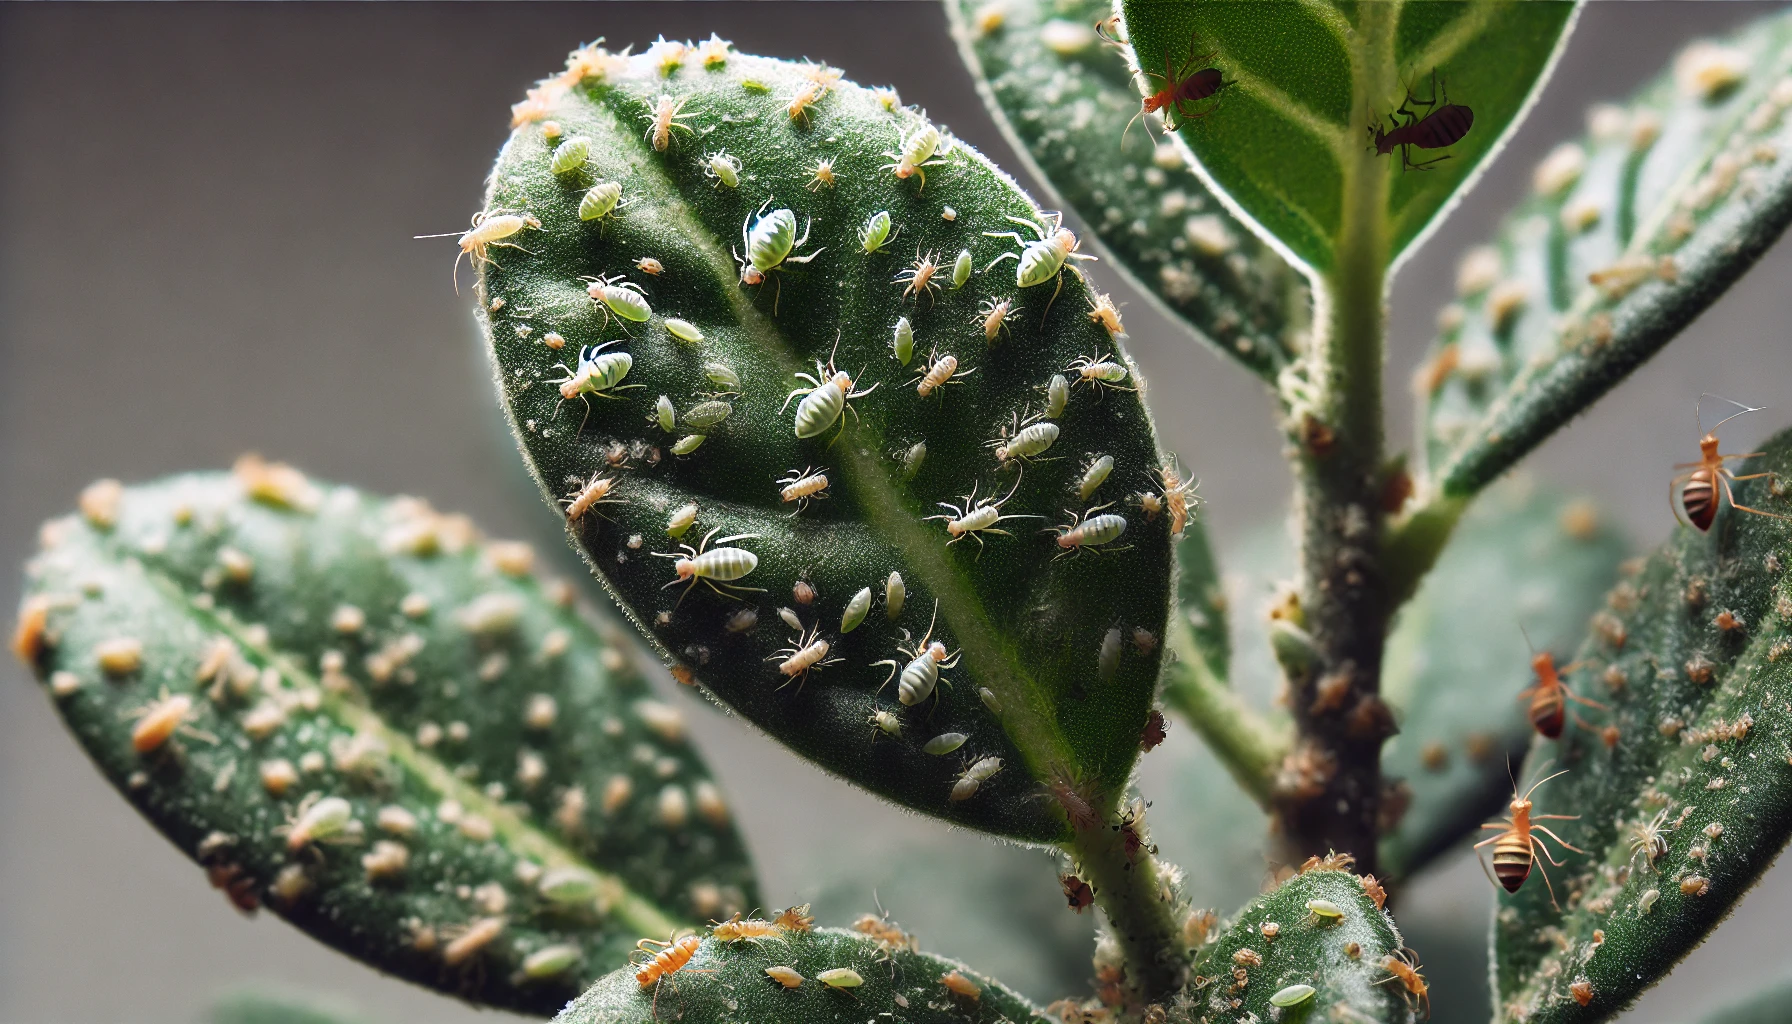
4. Pests
Pests like aphids or mealybugs can affect the growth of young cuttings.
- Solution: Regularly inspect your plants for pests. If you spot any, use an organic insecticidal soap or a gentle spray of water to remove them.
- Tip: Isolate infected plants from others to prevent the spread of pests.
By identifying and addressing these common challenges early on, you’ll help your vining plants thrive and grow quickly. Keep a close eye on your cuttings and be proactive about making adjustments as needed!
Propagating vining plants quickly is not only an enjoyable and fulfilling process, but it’s also a great way to expand your plant collection without breaking the bank. By following the expert tips shared in this guide—from selecting the right plants to using sterile soil for rooting cuttings and maintaining optimal care—you’re well on your way to achieving fast, healthy growth.
Remember, patience is key! While some challenges may arise along the way, with the right knowledge and a little attention, you can overcome them and watch your plants thrive. So, grab your scissors, gather your cuttings, and start propagating. Soon enough, you’ll be rewarded with vibrant, lush vining plants that bring beauty and life to your home or garden. Happy planting!