
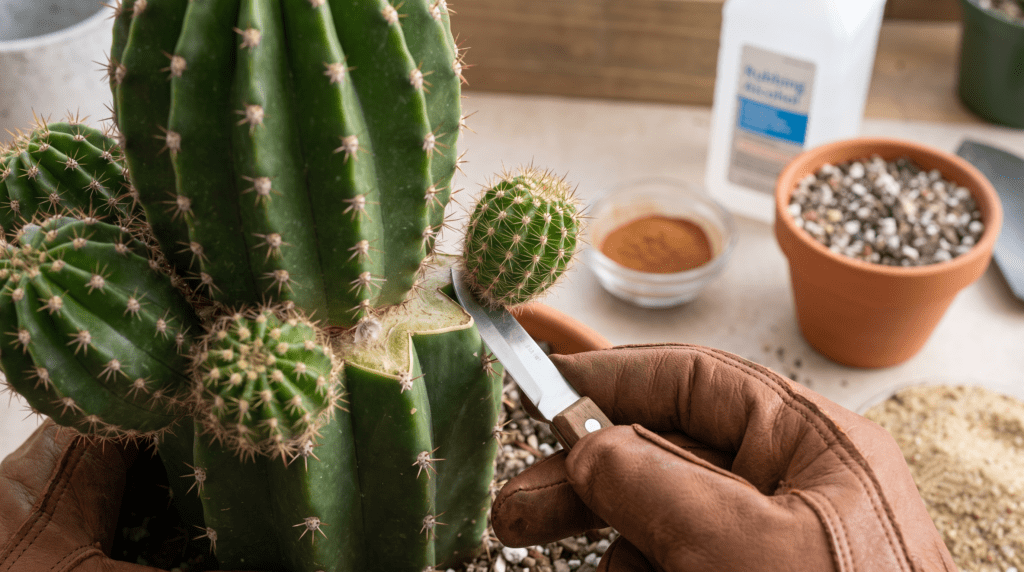
Seeing a new baby cactus (often called a pup) emerge from the base of your favorite plant is a thrilling moment for any indoor gardener. It is the ultimate sign that your plant is thriving! But for many plant parents, that initial excitement quickly morphs into propagation anxiety. The thought of slicing off that fragile new growth and accidentally causing irreversible rot to the parent plant is genuinely terrifying. If you have been nervously staring at your sprouting succulent, you are in the right place. This comprehensive guide is dedicated entirely to safe offset removal for cactus pups, providing you with the exact, foolproof techniques used by expert botanists.
By the end of this guide, you will know precisely when to cut, where to cut, and how to nurture your new plant so that both the parent and the baby flourish. Let’s dive into the fascinating world of cactus cloning! ✨
🌱 What Exactly Are Cactus Pups (Offsets)?
Before we start wielding the pruning shears, it is crucial to understand exactly what we are dealing with. A deeper understanding of plant biology makes propagation significantly less intimidating.
The Botany Behind the Babies 🧬
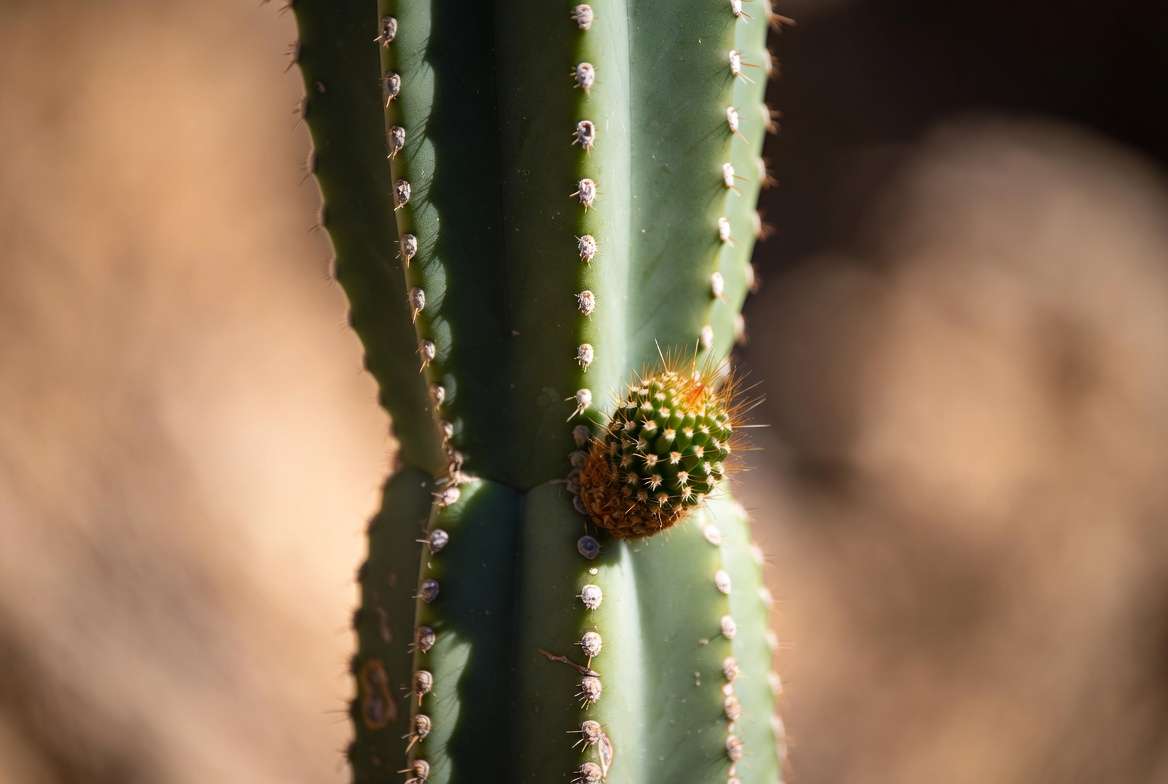
In the botanical world, cactus pups are technically known as “offsets.” These are complete, genetically identical clones of the parent plant produced through asexual reproduction (vegetative propagation).
Unlike growing a cactus from a seed, which requires pollination and a combination of genetics, a pup is an exact replica of its mother. These offsets typically emerge from an areole—the small, fuzzy, cushion-like bumps on a cactus from which spines, flowers, and branches grow. When a cactus decides it is time to reproduce vegetatively, it directs energy to an areole near the base of the plant (creating basal pups) or sometimes higher up on the stem, prompting a miniature version of itself to burst forth.
Why Do Cacti Produce Them? 🏜️
Cacti produce offsets for two primary reasons:
-
Natural Growth Habit: For many species, such as Echinopsis, Mammillaria, and Aloe (a succulent cousin), clumping and producing pups is simply their natural way of spreading across the desert floor.
-
Stress Response: Sometimes, a cactus will throw out pups if it feels its survival is threatened. If the mother plant is damaged, severely root-bound, or experiencing environmental stress, it may produce offsets as a last-ditch effort to ensure its genetic lineage survives.
Visual Asset Opportunity: [Insert a highly pinnable, custom graphic highlighting the anatomy of a cactus, with an arrow pointing directly to a basal pup attached to a fuzzy areole. Include the text: “Anatomy of a Cactus Pup: Where to Look!”] 📌
🕒 Timing is Everything: When to Separate Cactus Pups
One of the biggest mistakes eager beginners make is rushing the process. Removing a pup too early is a guaranteed way to lose the baby plant, as it simply won’t have the internal resources to survive on its own. Patience is your greatest tool. 🕰️
The “One-Third” Golden Rule 📏
How do you know when a pup is ready to leave the nest? Follow the One-Third Rule. A cactus offset should be allowed to grow until it is at least one-third the size of the mother plant.
Why? Because until a pup develops its own independent root system, it acts like a parasite, siphoning water, nutrients, and energy directly from the mother. If you sever that connection too early, the tiny pup will not have enough stored water in its tissues to survive the rooting phase. A larger pup has the mass and energy reserves required to push out new roots once separated.
Rooted vs. Unrooted Pups 🪴
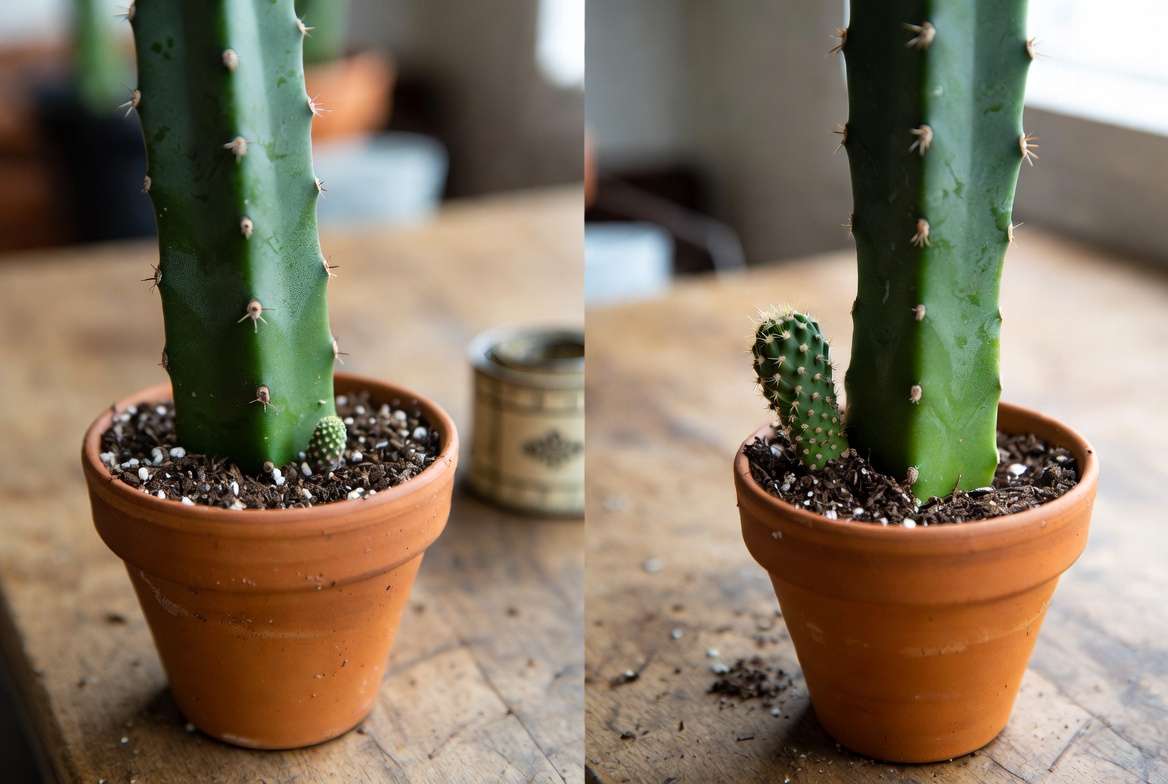
Sometimes, older pups will start growing their own adventitious roots while still attached to the mother. You can test this by giving the pup a very gentle, tentative wiggle. If you feel resistance beneath the soil line, congratulations! The pup has already started rooting, making the separation process incredibly low-risk. If it wiggles freely without soil resistance, it is unrooted. Both can be removed safely, but rooted pups have a significant head start.
Seasonal Considerations ☀️❄️
Never propagate during the winter dormancy period! Cacti drastically slow down their metabolism in the winter to conserve energy. If you wound a cactus during this time, it lacks the active cellular growth needed to heal the cut, making it highly susceptible to fungal infections and rot.
The absolute best time for offset removal is late spring or early summer. The warm temperatures and extended daylight trigger active growth, ensuring rapid healing for the mother plant and explosive root development for the baby.
🛠️ The Ultimate Prep: Essential Tools for Safe Removal
A successful surgery requires a sterile operating room, and plant propagation is no different. The vascular tissue inside a cactus is incredibly sensitive to airborne fungal spores and bacteria. 🦠
Sterilization is Non-Negotiable 🧼
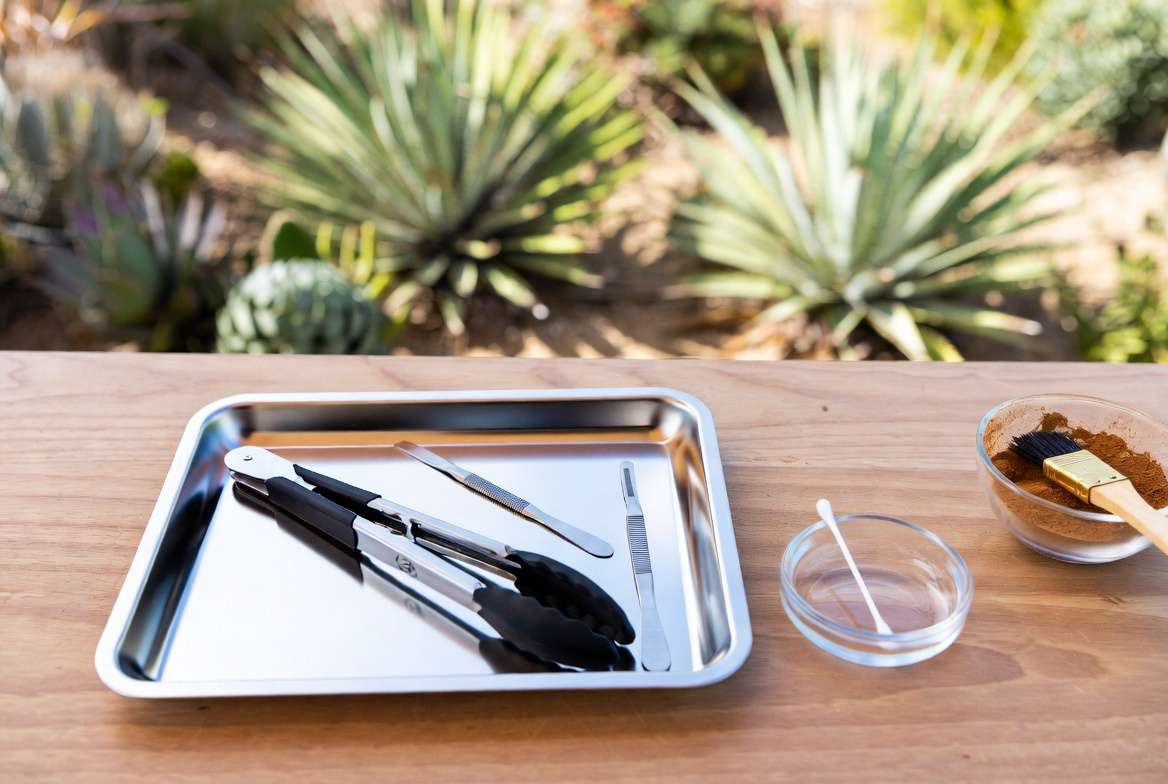
Skipping sterilization is the number one reason propagation fails. Before you begin, thoroughly wipe down your cutting blades with 70% isopropyl (rubbing) alcohol. Allow the blade to air-dry completely for a few seconds. Do this between every single cut if you are removing multiple pups.
The Toolkit Checklist 📋
Gather these essentials before you begin:
-
A Sharp Cutting Tool: A sterilized grafting knife, a fresh scalpel, or a thin, non-serrated pairing knife. Avoid thick shears or dull scissors, as they will crush the plant tissue rather than slice it.
-
Hand Protection: Heavy-duty leather gardening gloves. For particularly spiky varieties (like Opuntia or Echinocactus), use long silicone kitchen tongs to securely grip the pup without crushing its spines. 🧤
-
Rooting Hormone (Optional): A high-quality rooting hormone powder can speed up root development, though many cacti root perfectly well without it.
-
Natural Fungicide: Powdered horticultural sulfur or everyday household cinnamon. Both possess excellent, natural anti-fungal properties used to dust open plant wounds and accelerate healing. 🤎
🔪 Step-by-Step: Performing Offset Removal for Cactus Pups
Now that we understand the biology and have our sterile tools ready, it is time for the main event. Take a deep breath! If you follow these precise steps, both your plants will be perfectly fine.
Step 1: Unpotting vs. In-Pot Removal 🪴
Assess the situation. Is the pup growing high up on the stem, or is it a basal pup hiding just beneath the soil line?
-
Stem Pups: You can easily remove these while the mother plant remains potted.
-
Basal Pups: It is often much safer to gently unpot the entire mother plant. Brushing the soil away from the root ball gives you a clear, unobstructed view of exactly where the pup connects to the parent’s taproot or base. Trying to blindly cut a basal pup beneath the soil often results in a jagged, damaging slice.
Step 2: Locating the Joint 🔍
Gently push the pup slightly away from the mother plant (using your tongs or gloved hands). You are looking for the exact point of connection—the “umbilical cord” of the plant. This joint is naturally narrower than the rest of the pup. Your goal is to sever the connection exactly at this narrowest point to create the smallest possible wound.
Step 3: The Clean Cut Method ✂️
Position your sterilized blade at the joint. With a smooth, confident, and swift motion, slice downward.
-
Do not saw.
-
Do not twist.
-
Do not pull. Tearing the pup away will rip the vascular tissue of the mother plant, leaving a massive, jagged, and heavily bruised wound that is practically a neon welcome sign for rot-causing pathogens. A clean, surgical slice heals incredibly fast.
Step 4: Tending to the Mother Plant 🩹
Immediately after the cut is made, the mother plant will have a bright green, exposed wound. Dip a clean, dry cotton swab into your powdered sulfur or ground cinnamon and lightly dust the open wound. This acts as an immediate protective barrier against bacteria.
If you unpotted the mother plant, repot her in fresh, dry soil. Do not water the mother plant for at least a week. Watering immediately after cutting risks introducing waterborne pathogens directly into her fresh wound. Let her rest and heal! 🛌
⏳ The Callusing Phase: The Secret to Preventing Rot
If there is one cardinal rule in succulent and cacti propagation that separates the experts from the beginners, it is this: Never plant a fresh cutting directly into soil. Understanding the callusing phase is your ultimate secret weapon against plant rot. 🛡️
What is Callusing? 🤎
When you sever a pup from the mother plant, you expose its internal, water-filled tissues. If you were to place this open, wet wound directly into potting soil (which contains moisture, microbes, and organic matter), bacteria and fungi would immediately enter the plant’s vascular system, turning your prized pup into black mush within days.
Callusing is the natural biological process where the plant forms a thick, protective “scab” over the cut area. The tissue dries out, hardens, and seals the internal moisture in while locking external pathogens out.
How Long Should You Wait? ⏱️
The time it takes for a proper callus to form depends entirely on the size of the wound and your ambient humidity.
-
Small Pups (Thumbnail size): Usually callus in 3 to 5 days.
-
Medium to Large Pups (Golf ball to baseball size): May take 7 to 14 days.
Expert Tip: While your cactus pup is callusing, place it on a dry paper towel in a warm, well-ventilated area that receives bright, indirect light. Never put an unrooted, callusing pup in direct sunlight! Without a root system to replenish its water supply, direct sun will quickly bake and dehydrate the small offset. ☀️
🪨 Replanting and Formulating the Perfect Soil Mix
Once the base of your cactus pup is completely dry, hardened, and perhaps even slightly puckered, it is finally time to give it a new home. But beware: your choice of soil can make or break the rooting process.
Why Standard Potting Soil is a Death Sentence ☠️
Most commercial potting soils found at garden centers are heavily amended with peat moss and compost. These ingredients are designed to act like sponges, holding onto moisture for extended periods to support thirsty houseplants. For a vulnerable, unrooted desert cactus pup, this environment is suffocating. Prolonged moisture around a newly callused stem will quickly break down the scab and invite fungal rot.

Building a Well-Draining Soil Recipe 🥣
To encourage your pup to push out healthy, vigorous roots, you need a gritty, highly aerated soil mix that drains almost instantly. Roots need oxygen just as much as they need water to grow!
The Expert Cactus Propagation Formula:
-
50% Inorganic Gritty Material: Pumice or coarse perlite. This prevents soil compaction and creates essential air pockets.
-
25% Coarse Horticultural Sand: Do not use fine play sand, which can clump and suffocate roots. Use coarse builder’s sand or poultry grit for drainage.
-
25% Organic Cactus Soil: A high-quality, bark-based commercial succulent mix to provide a touch of organic nutrients.
Mix these ingredients thoroughly. The resulting substrate should feel rocky and crumble easily in your hands, even when slightly damp.
Visual Asset Opportunity: [Insert an engaging, brightly colored Pinterest-style graphic or YouTube thumbnail showing a “Perfect Cactus Soil Recipe Formula” with clear visual fractions and ingredients.] 🎥
💧 Post-Removal Care: Watering and Light Requirements
Your pup is callused, and your gritty soil mix is ready. Now comes the final phase of offset removal for cactus pups: encouraging root growth through strategic neglect.
The “Dry Potting” Technique 🏜️
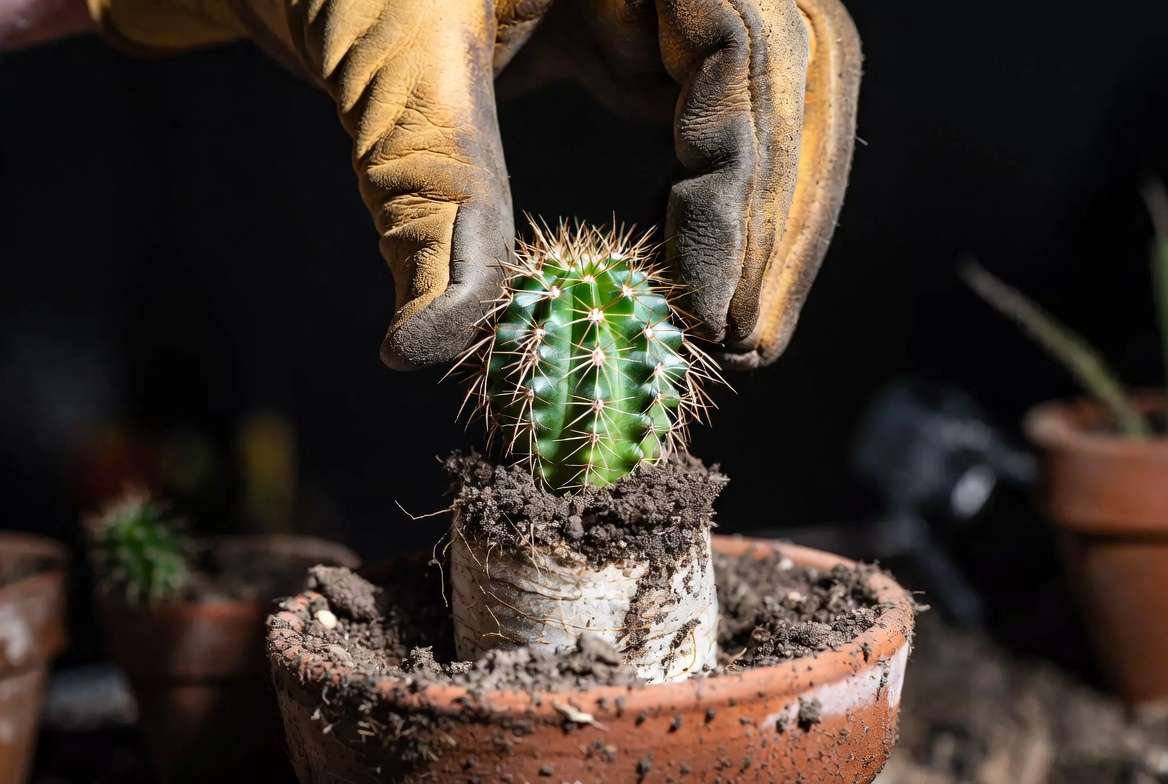
Fill a small, well-draining nursery pot (terracotta is excellent as it wicks away excess moisture) with your custom soil mix. Nestle the callused base of the pup just slightly into the surface of the soil—only deep enough to keep it standing upright. You can top-dress with a thin layer of small gravel to help support the plant.
Crucial Step: Do not water it. This is known as “dry potting.” Because the pup has absolutely no roots, it physically cannot absorb water from the soil. Watering now only increases the risk of rot.
The First Drink 🚰
How do you know when to finally water? Wait at least two to three weeks, then perform the gentle tug test. Lightly pinch the top of the pup and give it the slightest upward pull.
-
If it lifts right out of the soil effortlessly, it has not rooted yet. Place it back and wait another week.
-
If you feel resistance and the soil lifts slightly with the plant, success! It has grown roots into the substrate.
Once roots are established, give the pot a deep, thorough watering until water flows out the drainage holes, then let the soil dry out completely before watering again.
Transitioning to Bright Light 🌤️
Unrooted pups need bright but indirect light to prevent sunburn while they lack a water supply. Once your pup has rooted and received its first deep watering, you can begin slowly acclimating it to its permanent location. Over the course of two weeks, gradually introduce it to more direct morning sunlight for a few hours a day to prevent shock.
🚨 Troubleshooting Common Offset Removal Fails
Even with the best preparation, plant propagation can sometimes throw you a curveball. Here is how to diagnose and fix common issues:
The Pup is Shriveling (Is it dying?) 🥀
It is incredibly common for an unrooted cactus pup to look slightly deflated, wrinkled, or shriveled after a few weeks. Do not panic, and do not overwater it! Because the pup is using its internal water storage to manufacture new roots, it naturally loses volume. Once it roots and gets a good drink, it will plump right back up.
Mushy Stems at the Base 🤢
If the base of the pup turns black, yellow, translucent, or feels squishy to the touch, rot has set in. This usually happens from cutting with unsterilized tools, failing to callus properly, or planting in wet soil.
-
The Fix: Pull the pup out immediately. Using a sterilized blade, cut away all the mushy tissue until you see only healthy, bright green flesh. Dust with cinnamon, let it callus for an extra-long time, and try dry potting again.
Stubborn Pups (No Roots After Months) 🐢
Some species are notoriously slow rooters. If your pup is callused, sitting in dry soil, not rotting, but simply refuses to root after several months, it likely needs a temperature boost. Cacti need warmth to stimulate root cell division.
-
The Fix: Place the pot on a seedling heat mat set to around 75°F–80°F (24°C–27°C). The bottom heat will often trigger stubborn pups to push out a root system within a few weeks!
🙋♀️ Frequently Asked Questions (FAQs)
Can I remove a cactus pup if it doesn’t have roots yet? Yes, absolutely! While pups that have already developed adventitious roots are easier to establish, unrooted pups can be safely removed and propagated as long as you follow the One-Third Rule (waiting until the pup is at least 1/3 the size of the mother plant) and allow the cut to callus fully before dry-potting.
Will the mother plant grow another offset in the exact same spot? It is highly likely. The areole where the pup was attached remains an active growth point. Once you remove an offset, the mother plant will often direct energy back to that same node, or nearby nodes, to produce a flush of new baby cacti in the following growing seasons.
Do I absolutely need to use rooting hormone for cactus pups? No, rooting hormone is entirely optional for cacti. Because they are biologically adapted to survive harsh desert environments, they are naturally aggressive rooters when given the right combination of warmth and well-draining soil. However, rooting powder can speed up the process and often contains anti-fungal properties, making it a helpful safety net for beginners.
What do I do if the pup breaks off accidentally without a clean cut? Accidents happen! If a pup is knocked off and leaves a jagged, torn wound on either the baby or the mother plant, immediately use a sterilized scalpel or knife to clean up the wound. Make a smooth, straight slice above the jagged tear. Dust heavily with sulfur or cinnamon to prevent infection and proceed with the normal callusing steps.
✨ Conclusion & Next Steps
Mastering offset removal for cactus pups without damaging the mother plant doesn’t require a degree in botany—it just requires patience, sterile tools, and an understanding of how desert plants heal. By adhering to the golden rules of the trade (cutting cleanly, allowing ample time for callusing, and utilizing a highly aerated soil mix), you can confidently multiply your cactus collection for free!
Propagation is one of the most rewarding skills you can learn as a plant parent, turning a single beautiful specimen into a thriving, spiky family. 🌵💚
We want to see your success stories! 💬 Have you successfully separated a tricky cactus pup? Do you have a favorite gritty soil recipe? Drop your experiences, questions, and propagation photos in the comments below. Don’t forget to save our Pinterest graphics for quick reference during your next propagation session, and subscribe to our newsletter for more expert, deep-dive plant care guides! Happy planting!











