
Whether you’re a seasoned gardener or just starting out, growing your own okra can be a rewarding and enjoyable experience. In this ultimate guide, we’ll walk you through the step-by-step process of planting and growing okra seeds, from choosing the right location to harvesting your bountiful crop. With our comprehensive instructions and helpful tips, you’ll be well on your way to cultivating healthy and productive okra plants in no time. So, let’s dive in and get started on your okra-growing adventure!
Understanding Okra Seeds
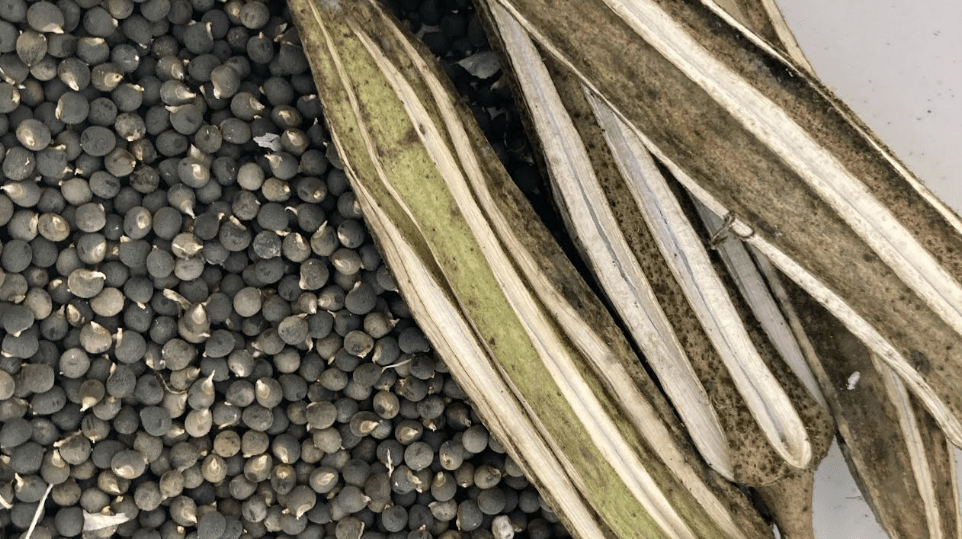
1.Types of Okra Seeds
There are several different types of okra seeds to choose from, including traditional green okra, red okra, and even heirloom varieties. Each type has its own unique flavor, texture, and growing requirements, so it’s important to consider which variety best suits your preferences and gardening conditions before you begin planting.
A.Heirloom vs. hybrid varieties
Heirloom okra seeds are open-pollinated and have been passed down through generations, maintaining their original traits and flavors. Hybrid okra seeds, on the other hand, are created by cross-breeding different varieties to produce specific traits, such as disease resistance or higher yields. When choosing between heirloom and hybrid varieties, consider your gardening goals and preferences to determine which type is best for you.
B.Popular okra seed varieties (e.g., Clemson Spineless, Burgundy, Emerald)
Clemson Spineless, Burgundy, and Emerald are popular okra seed varieties that are known for their high yields and great taste. Clemson Spineless is a classic green okra variety that is easy to grow and produces tender, spineless pods. Burgundy okra, as the name suggests, has beautiful burgundy-colored pods and adds a unique visual appeal to your garden. Emerald okra is known for its vibrant green pods and is a favorite among gardeners for its productivity. Whether you’re a novice gardener or an experienced one, these popular okra seed varieties are sure to provide you with a bountiful crop of delicious okra. Happy gardening!
2.Selecting Quality Okra Seeds
When selecting okra seeds, it’s important to choose high-quality seeds that will produce healthy and productive plants. Look for seeds that are fresh, plump, and free from any signs of damage or disease. It’s also a good idea to purchase seeds from a reputable source, such as a trusted seed company or garden center, to ensure their quality and viability. Additionally, consider the specific traits and characteristics you are looking for in your okra plants, such as disease resistance, pod size, and flavor, and choose varieties that best meet your needs. Taking the time to select quality okra seeds will set you up for success in your garden and ensure a successful harvest.
Preparing for Planting
1.Climate and Soil Requirements
Okra plants thrive in warm, sunny climates and require well-drained, fertile soil to grow successfully. When preparing to plant okra seeds, it’s important to choose a location in your garden that receives full sunlight and has soil with a pH level of 6.5 to 7.0. If you’re planting in a cooler climate, consider starting your okra seeds indoors and transplanting them outside once the weather warms up. It’s also a good idea to amend the soil with organic matter, such as compost or aged manure, to improve its fertility and drainage. By providing the right climate and soil conditions, you can ensure that your okra plants have the best chance of thriving and producing a bountiful harvest. Happy gardening!
A.Soil preparation: pH levels, soil type, and amendments
When preparing the soil for planting okra seeds, it’s important to test the pH levels of the soil to ensure it falls within the optimal range of 6.5 to 7.0. This can be done using a simple soil testing kit available at most gardening stores. Additionally, consider the type of soil you have and whether it requires any amendments to improve its fertility and drainage. Adding organic matter such as compost or aged manure can help improve the soil structure and provide essential nutrients for the growing okra plants. It’s important to thoroughly mix in any amendments to ensure they are evenly distributed throughout the soil. By taking the time to properly prepare the soil, you can create an ideal growing environment for your okra plants. Happy gardening!
2.Site Selection
When selecting a site for planting okra, it’s important to consider a few key factors. First, okra plants require full sun, so choose a location that receives at least 6-8 hours of sunlight per day. Additionally, make sure the site has well-drained soil to prevent waterlogging, as okra plants don’t tolerate standing water. It’s also beneficial to choose a spot with good air circulation to help reduce the risk of disease.
If you’re planting okra in a garden, consider rotating the location from previous years to help prevent the buildup of pests and diseases. Raised beds can also be a good option for growing okra, especially if you have heavy or poorly draining soil. By selecting a suitable site for your okra plants, you can set them up for success and enjoy a bountiful harvest. Happy gardening!
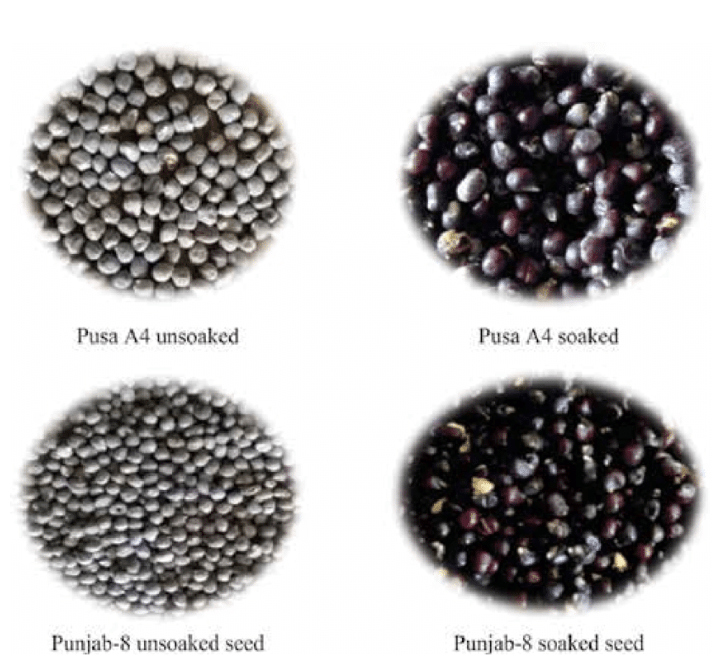
3.Seed Treatment
When it comes to planting okra seeds, there are a few treatment options that can help improve germination and overall plant health. One common method is to soak the seeds in water for 12-24 hours before planting. This can help soften the seed coat and speed up the germination process. Another option is to treat the seeds with a powdered inoculant, which contains beneficial rhizobacteria that can improve the plant’s ability to fix nitrogen from the soil. This can be especially beneficial in soils with low fertility. Additionally, some gardeners choose to pre-sprout their okra seeds by laying them on a damp paper towel in a warm, dark location until they begin to germinate. This can help ensure a higher germination rate and give the plants a head start once they’re planted in the garden. By treating your okra seeds before planting, you can give them a better chance at a healthy start and a successful growing season. Happy gardening!
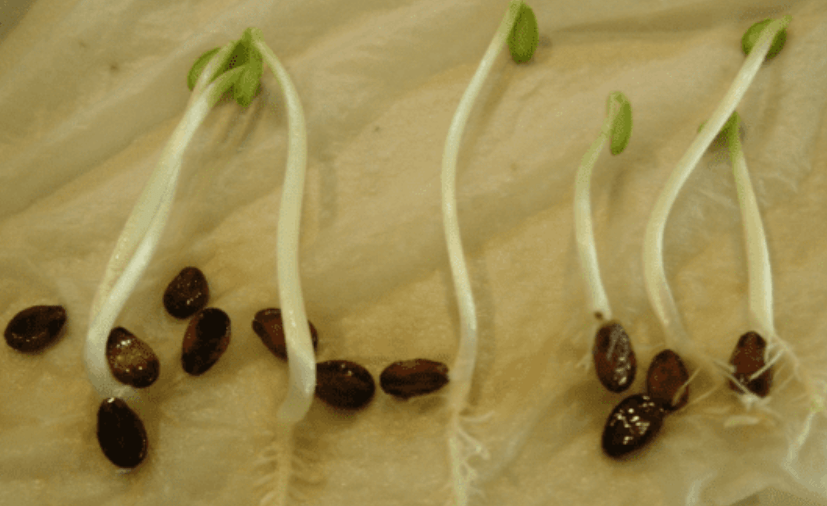
A.Pre-planting seed treatments (e.g., soaking, scarification)
Pre-planting seed treatments (e.g., soaking, scarification) can help soften the seed coat and speed up the germination process. Another option is to treat the seeds with a powdered inoculant, which contains beneficial rhizobacteria that can improve the plant’s ability to fix nitrogen from the soil. This can be especially beneficial in soils with low fertility. Additionally, some gardeners choose to pre-sprout their okra seeds by laying them on a damp paper towel in a warm, dark location until they begin to germinate. This can help ensure a higher germination rate and give the plants a head start once they’re planted in the garden. By treating your okra seeds before planting, you can give them a better chance at a healthy start and a successful growing season. Happy gardening!
Planting Okra Seeds
1.When to Plant
Okra seeds should be planted outdoors in late spring or early summer, once the soil has warmed to at least 70°F (21°C). This typically occurs 2-3 weeks after the last frost date in your area. Okra plants require warm temperatures to thrive, so planting them too early in cool soil can result in poor germination and slow growth. Be sure to check the average last frost date for your region and wait until the soil has warmed before planting your okra seeds. Happy gardening!
2.Planting Methods
There are a few different methods for planting okra seeds. You can either sow the seeds directly into the garden soil or start them indoors and transplant them later. If sowing directly into the soil, make sure to space the seeds about 12-18 inches apart in rows that are 3-4 feet apart. Plant the seeds about 1 inch deep and water them well. If starting indoors, plant the seeds in biodegradable pots about 3-4 weeks before the last frost date. Once the seedlings have reached about 3-4 inches in height, they can be transplanted into the garden. Whichever method you choose, be sure to provide the seeds with plenty of sunlight and water to promote healthy growth. Happy gardening!
Caring for Okra Plants
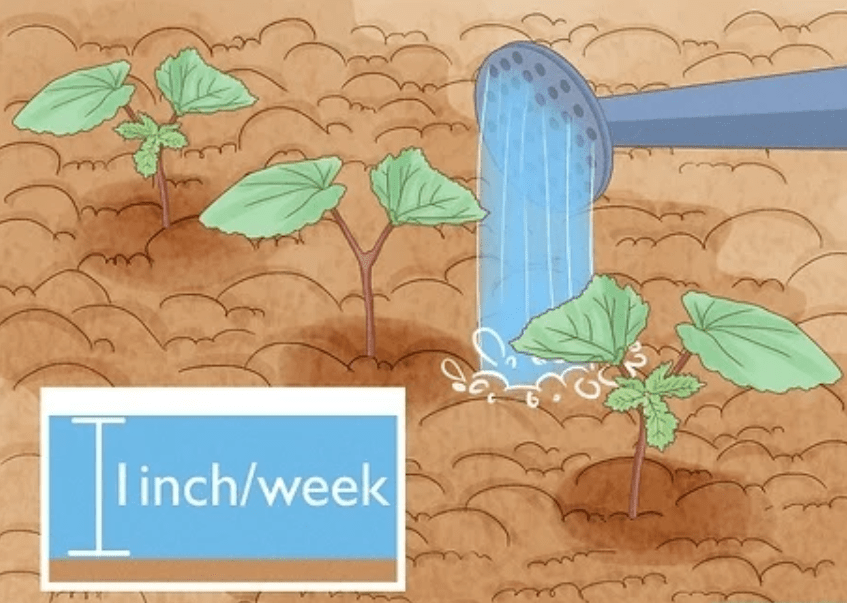
1.Watering and Irrigation
Watering and Irrigation are essential for the successful growth of okra plants. Okra plants require consistent moisture to thrive, especially during the hot summer months. It is important to water the plants deeply, ensuring that the soil is evenly moist but not waterlogged. Watering the plants in the morning or early evening will help prevent evaporation and ensure that they have enough water to sustain their growth. Be sure to water the plants at the base and avoid wetting the foliage, as this can lead to disease. Additionally, using a soaker hose or drip irrigation system can help deliver water directly to the roots, promoting healthy and efficient growth. By providing proper watering and irrigation, you can ensure that your okra plants have the moisture they need to produce a bountiful harvest.
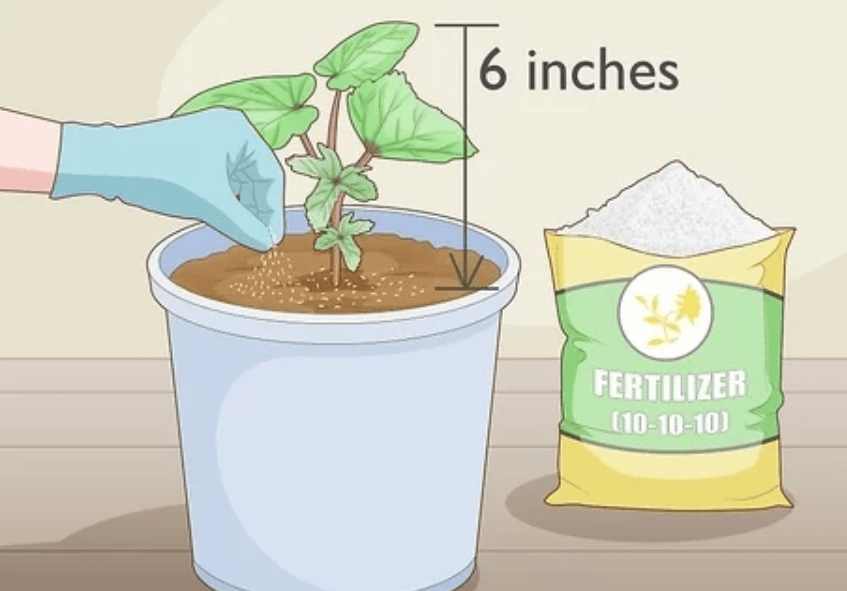
2.Fertilizing
Fertilizing is an important aspect of caring for okra plants. It is essential to provide the plants with the necessary nutrients to support their growth and development. When planting okra seeds, it is recommended to incorporate a balanced fertilizer into the soil, such as a 10-10-10 fertilizer, to provide essential nutrients for the plants. Additionally, it is beneficial to apply a side-dressing of fertilizer around the base of the plants once they have reached a height of 12-18 inches. This will help promote healthy growth and improve the yield of the okra plants. It is important to follow the instructions on the fertilizer label and avoid over-fertilizing, as this can lead to negative effects on the plants. By providing the appropriate fertilization, you can ensure that your okra plants have the nutrients they need to thrive and produce a successful harvest.
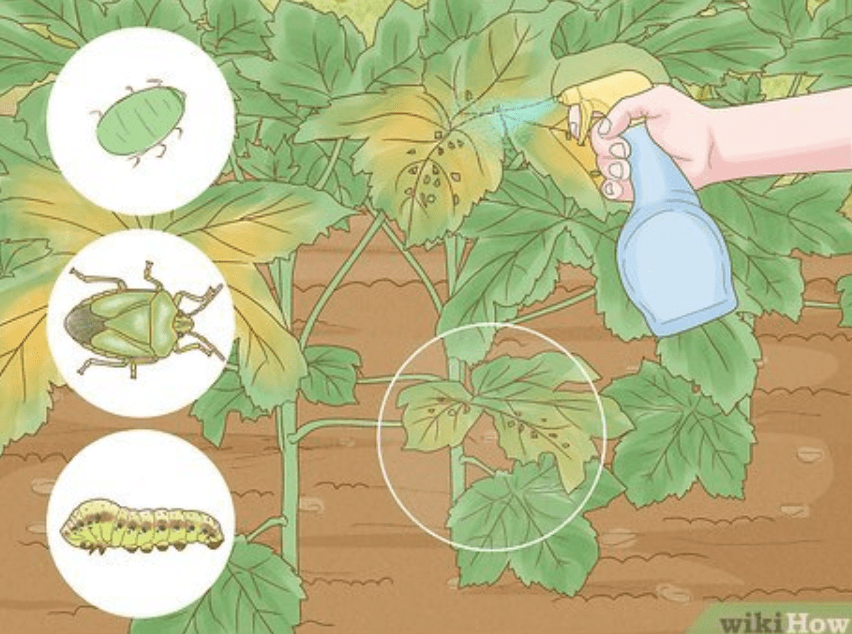
3.Weed and Pest Control
Weed and Pest Control are important aspects of growing okra plants. It is essential to remove weeds from the garden beds to prevent competition for nutrients and water. Mulching around the okra plants can also help suppress weeds and retain soil moisture. Additionally, pest control is crucial for protecting the plants from destructive insects. You can use organic pesticides or insecticidal soaps to control pests such as aphids, caterpillars, and leafhoppers. It is important to monitor the plants regularly for any signs of pest infestations and take appropriate action to protect the plants. By practicing effective weed and pest control, you can ensure the health and productivity of your okra plants.
Harvesting and Storage
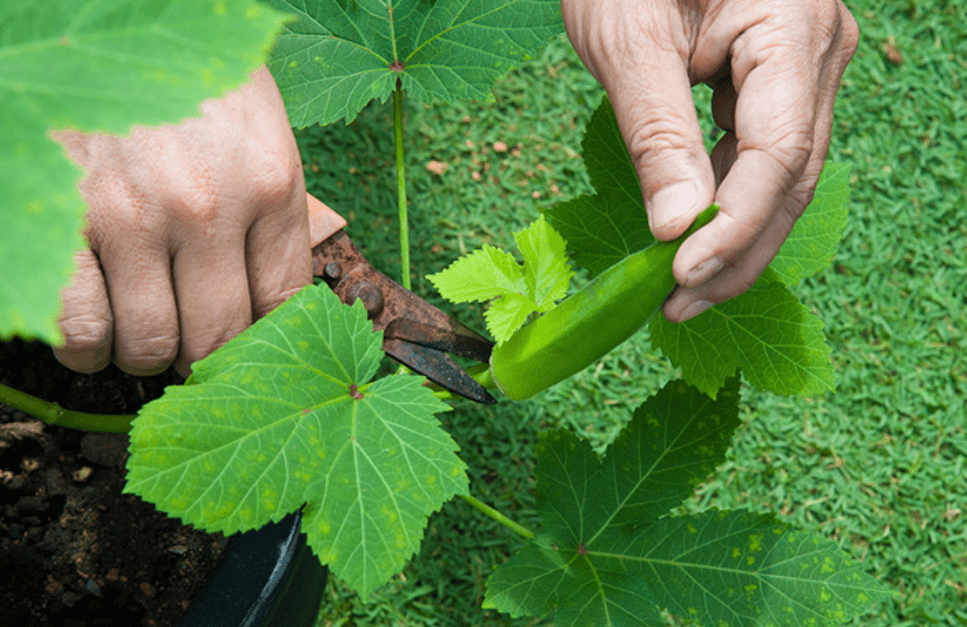
1.When and How to Harvest
Okra plants are typically ready for harvesting about 2 months after planting. You can tell it’s ready to harvest when the pods are about 2-4 inches long and are still tender. To harvest, simply use a sharp knife or pruners to cut the pods from the plant. It’s best to harvest the pods regularly, as this will encourage the plant to produce more. Once harvested, okra should be stored in the refrigerator and used within a few days for best freshness. Overall, growing and harvesting okra can be a rewarding experience for both novice and experienced gardeners. With the proper care and attention, you can enjoy a bountiful harvest of delicious okra from your own garden.
2.Post-Harvest Handling
Post-Harvest Handling is an important aspect of growing and harvesting okra. After harvesting the pods, it’s important to handle them carefully to ensure their freshness and quality. Make sure to handle the pods gently to avoid bruising or damaging them. Once harvested, okra should be stored in the refrigerator and used within a few days for best freshness. If you have a large harvest, you can also consider freezing the pods for later use. To do this, simply blanch the pods in boiling water for a few minutes, then transfer them to an ice bath to stop the cooking process. Once they are cooled, drain off any excess water and pack the pods into airtight containers or freezer bags for long-term storage. Overall, effective post-harvest handling is essential for preserving the quality of your okra harvest and ensuring that you can enjoy fresh, delicious okra for weeks to come.
3.Saving Okra Seeds
Saving Okra Seeds is an important part of the okra growing process. To save okra seeds, start by allowing some of the pods to stay on the plant and mature fully. Once the pods have turned brown and dried out, carefully remove them from the plant. Then, open the pods and remove the seeds. Allow the seeds to air dry for a few days before storing them in a cool, dry place. Properly saved okra seeds can be used for planting in the next growing season. By saving and storing your own okra seeds, you can continue to grow a bountiful okra crop year after year.
Troubleshooting Common Issues
1.Germination Problems
Germination Problems are a common issue when planting okra seeds. To improve germination rates, it’s important to ensure that the soil temperature is warm enough, ideally between 75-90°F. You can use a soil thermometer to monitor the temperature and adjust as needed. Additionally, soaking the okra seeds in water for 12-24 hours before planting can help to soften the seed coat and improve germination.
2.Growth and Development Issues
Growth and development issues with okra plants can occur due to a variety of factors. To promote healthy growth, it’s important to provide the plants with ample sunlight, at least 6-8 hours per day. Additionally, okra plants require well-drained soil, so be sure to avoid overwatering to prevent root rot. Consider using a balanced fertilizer to provide essential nutrients for healthy development. Finally, be mindful of pests and diseases that can hinder growth, and take proactive measures to protect your okra plants.
3.Pest and Disease Management
Pest and disease management is essential for maintaining the health of okra plants. Common pests that can affect okra include aphids, spider mites, and caterpillars. To manage these pests, you can use insecticidal soaps or neem oil, and regularly inspect the plants for any signs of infestation.
In terms of diseases, okra plants are susceptible to fungal diseases such as powdery mildew and root rot. To prevent these diseases, it’s important to maintain good air circulation around the plants and avoid overwatering. If you notice any signs of disease, such as white powdery patches on the leaves, consider using a fungicide to treat the issue.
Regular monitoring and proactive measures can help to effectively manage pests and diseases to ensure the overall health and productivity of okra plants.
In conclusion, growing okra seeds successfully requires proper soil preparation, regular watering, and adequate sunlight. It’s important to also be mindful of pests and diseases that can affect okra plants. By following the steps outlined in this guide, you can ensure a successful okra harvest and enjoy the benefits of homegrown produce. Happy gardening!