
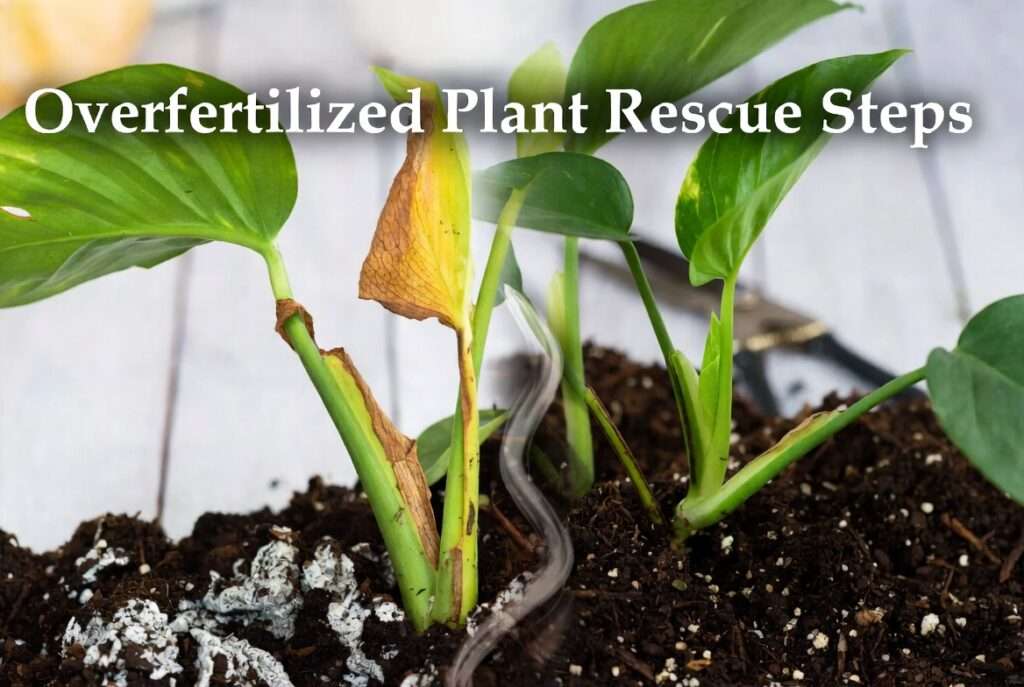
You excitedly fed your favorite monstera, pothos, or tomato plant a “boost” of fertilizer, dreaming of lush new growth. But the next morning, you’re greeted by crispy brown leaf tips, yellowing edges, wilting despite wet soil, and maybe even a suspicious white crust on the soil surface. 😱 Your heart sinks — have you accidentally burned your beloved green baby?
Don’t panic. Overfertilized plant rescue steps can save most plants if you act quickly and correctly. Fertilizer burn (also called nutrient burn or salt burn) is a common but fixable issue caused by excess fertilizer salts that draw moisture out of roots, damaging them and stressing the entire plant.
With the right immediate actions — flushing the soil, pruning damaged parts, and providing gentle recovery care — many overfertilized plants bounce back stronger within weeks. In my years of hands-on experience rescuing houseplants, garden vegetables, and even young trees from fertilizer mishaps, I’ve seen dramatic recoveries when these steps are followed properly. This comprehensive guide delivers proven overfertilized plant rescue steps that go beyond basic advice, helping you understand why it happens, how to fix it fast, and how to prevent it forever. 🌿
Whether you’re a beginner plant parent or an experienced gardener, these detailed, science-backed instructions will give you the confidence to save your burnt plants and keep them thriving. Let’s get started — your plant’s recovery begins now! 💧
Understanding Overfertilization – Why It Happens and How It Damages Plants
Overfertilization occurs when plants receive more nutrients (especially nitrogen, phosphorus, potassium, and salts) than they can absorb. Excess soluble salts build up in the soil, creating high osmotic pressure. Instead of roots pulling in water and nutrients, water is drawn out of the roots — essentially dehydrating the plant from the inside. This is what causes the classic “burn” symptoms.
Common causes include:
- Applying too much fertilizer or too frequently
- Using full-strength liquid fertilizer on dry soil
- Combining different fertilizers without checking totals
- Ignoring product labels or plant-specific needs
- Fertilizing during dormant seasons or extreme heat
- Poor drainage in pots, trapping salts
Synthetic fertilizers are often more risky than slow-release or organic options because they dissolve quickly and create rapid salt spikes. Container plants (houseplants, potted veggies) are especially vulnerable since salts can’t easily leach away naturally like in garden beds.
The damage starts at the roots: burned or blackened root tips lose their ability to uptake water efficiently. Leaves then show stress because the plant can’t transport nutrients or maintain turgor pressure. In severe cases, this can lead to root rot if opportunistic fungi move in, or total plant collapse if not addressed promptly.
Understanding this mechanism helps you act with confidence — you’re not just treating symptoms; you’re reversing the root cause.
Clear Signs Your Plant Is Overfertilized (Don’t Confuse With Other Issues)
Spotting fertilizer burn early dramatically improves rescue success. Here are the most reliable signs of overfertilized plants:
Visual symptoms above ground:
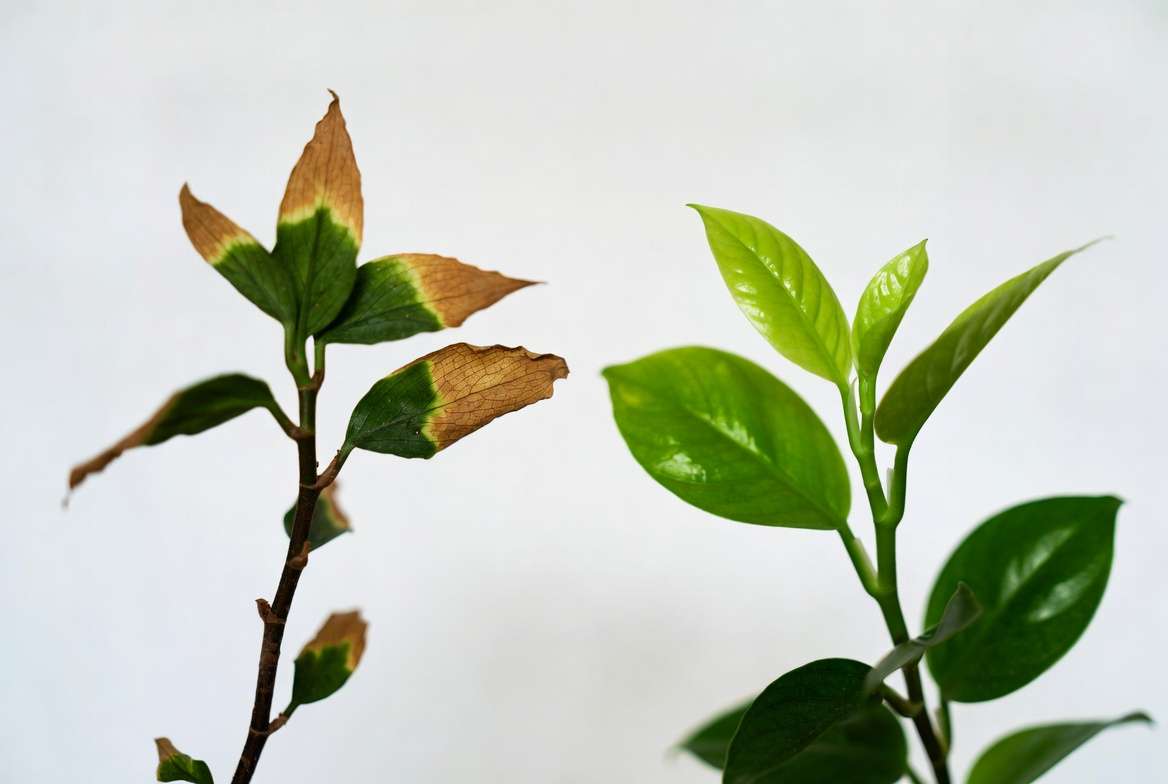
- Brown, crispy leaf tips and margins (the classic “burned” look) 🌿
- Yellowing or scorched edges, sometimes with a thin yellow halo
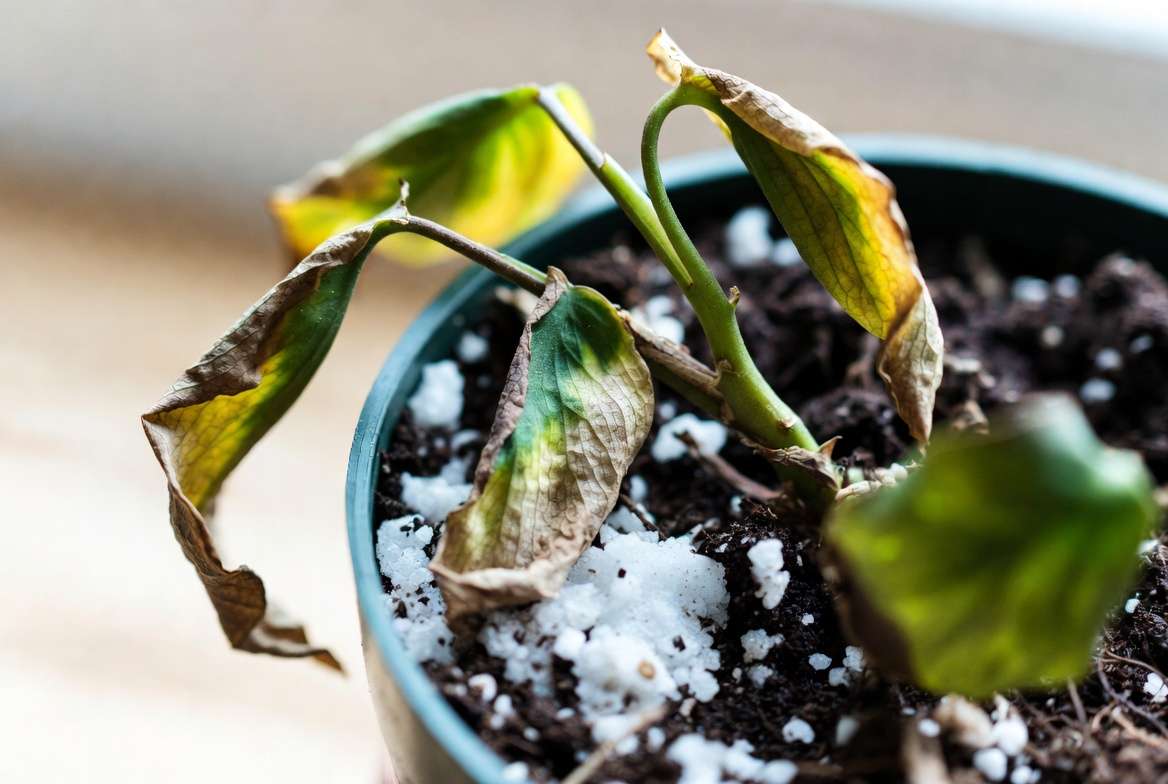
- Wilting leaves even when soil feels moist
- Stunted or no new growth
- Sudden leaf drop or curling
- White or yellowish crusty buildup on soil surface (fertilizer salts)
- Dark green, overly lush leaves that later crisp up
Root-level signs (check during repotting):
- Brown, black, or mushy roots
- Foul smell from the root ball
- Roots that feel brittle or slimy
Helpful comparison table to differentiate issues:
| Symptom | Fertilizer Burn | Overwatering | Underwatering | Nutrient Deficiency |
|---|---|---|---|---|
| Leaf tips/margins | Brown & crispy | Yellow, soft | Brown & dry, crispy | Yellow between veins or uniform |
| Wilting | Yes, despite wet soil | Yes, with soggy soil | Yes, with dry soil | Sometimes |
| Soil surface | White crust possible | Algae or mold possible | Very dry, pulling from sides | Normal |
| New growth | Stunted or distorted | Soft, leggy | Small or none | Distorted or pale |
| Root appearance | Burned, brown tips | Mushy, black (root rot) | Dry, shriveled | Normal or pale |
Real example: A friend’s fiddle leaf fig developed brown tips after a double dose of liquid fertilizer. After flushing, the new leaves emerged healthy and glossy — proving quick action works wonders.
If you’re unsure, take clear photos of leaves, soil, and (if possible) roots to compare or consult local extension services for tailored advice.
Overfertilized Plant Rescue Steps – Immediate Action Plan 🛠️💧
This is the heart of the guide — follow these overfertilized plant rescue steps in order for the best results. Speed matters: the sooner you start, the higher the survival rate.
Step 1: Stop Fertilizing Immediately and Assess the Damage
Cease all fertilizer applications — including compost tea, worm castings, or any “natural” boosters — for at least 4–6 weeks (or longer in severe cases). Remove any visible granules or powder from the soil surface with a spoon or gloved hand. Gently scrape away any white salty crust without disturbing roots too much.
Assess severity: Count damaged leaves and check root health if possible. Mild cases often recover with flushing alone; severe ones may need repotting.
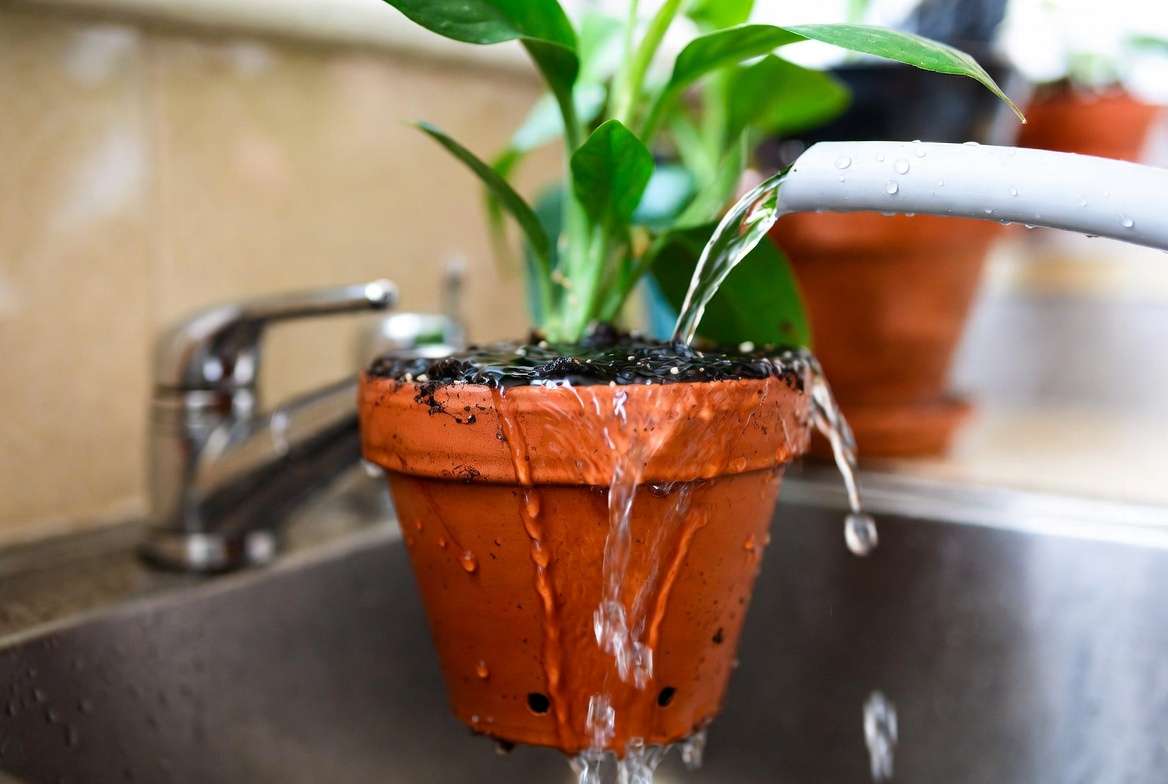
Step 2: Flush the Soil Thoroughly (The Most Critical Rescue Step) 💦
Flushing (leaching) washes excess salts out of the root zone. This is the single most effective overfertilized plant rescue step.
For potted plants (houseplants, containers):
- Move the pot to a sink, bathtub, or outdoors.
- Use room-temperature distilled, rainwater, or filtered water (low in minerals) — tap water can sometimes add more salts.
- Slowly pour water equal to 3–4 times the volume of the pot. For a 6-inch pot (about 1–2 liters of soil), use 3–8 liters of water.
- Let it drain completely each time. Repeat 2–3 times over 1–2 days.
- Pro tip: Water slowly to avoid channeling (water running down the sides without soaking the center). Empty saucers immediately so salts don’t re-absorb.
For garden beds or in-ground plants:
- Deeply irrigate the area with a slow hose or soaker — aim for 6–12 inches of water penetration to push salts below the root zone. Repeat every few days for a week if damage is heavy.
Advanced monitoring (optional but expert-level): If you have an EC (electrical conductivity) or TDS meter, test the runoff water. Continue flushing until readings drop below 0.4–0.8 mS/cm or 200–400 ppm, depending on the plant.
After flushing, allow the top inch of soil to dry slightly before normal watering resumes. This prevents compounding issues like root rot.
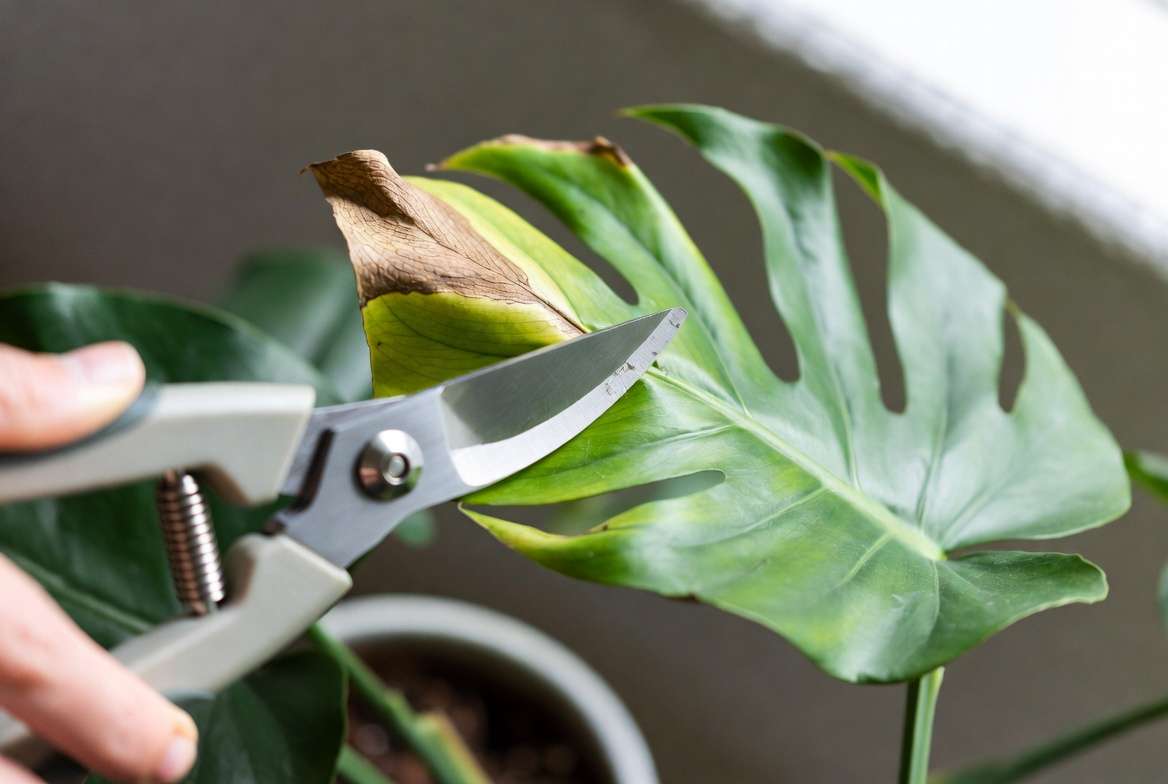
Step 3: Prune Damaged Parts Wisely ✂️
Remove dead or severely burned leaves and tips to redirect the plant’s energy toward new healthy growth. Use clean, sterilized scissors or pruners.
- Cut brown tips at an angle to mimic natural leaf shape.
- Remove entirely dead or yellow leaves at the base.
- Rule of thumb: Never remove more than 25–33% of the foliage at once to avoid shocking the plant further.
Pruning also improves airflow and reduces disease risk during recovery.
Step 4: Repot in Fresh Soil (When Flushing Isn’t Enough) 🪴
If damage is severe (mushy roots, strong odor, or no improvement after flushing), repotting gives the best chance.
How to repot safely:
- Gently remove the plant and rinse roots under lukewarm water to wash away old soil and salts.
- Trim any dark, mushy, or burned roots with sterilized tools.
- Choose a fresh, well-draining, low-nutrient potting mix (avoid pre-fertilized mixes).
- Select a pot only 1–2 inches larger if needed — oversized pots can lead to overwatering issues.
- Plant at the same depth, water lightly, and place in indirect light.
For trees or large shrubs, soil drenching or partial soil replacement around the drip line may be more practical.
Step 5: Provide Optimal Recovery Conditions
- Light: Move to bright, indirect light. Avoid direct sun while the plant is stressed.
- Temperature: Keep in a stable 65–75°F (18–24°C) range; avoid cold drafts or heat vents.
- Humidity: Increase slightly for tropical houseplants using a pebble tray or humidifier.
- Watering: Water only when the top 1–2 inches of soil are dry. Use the same clean water as for flushing.
Monitor daily for the first week. New growth is the best sign of successful rescue!
Special Considerations for Different Plants
Not all plants respond the same way to overfertilization, so tailor your overfertilized plant rescue steps accordingly.
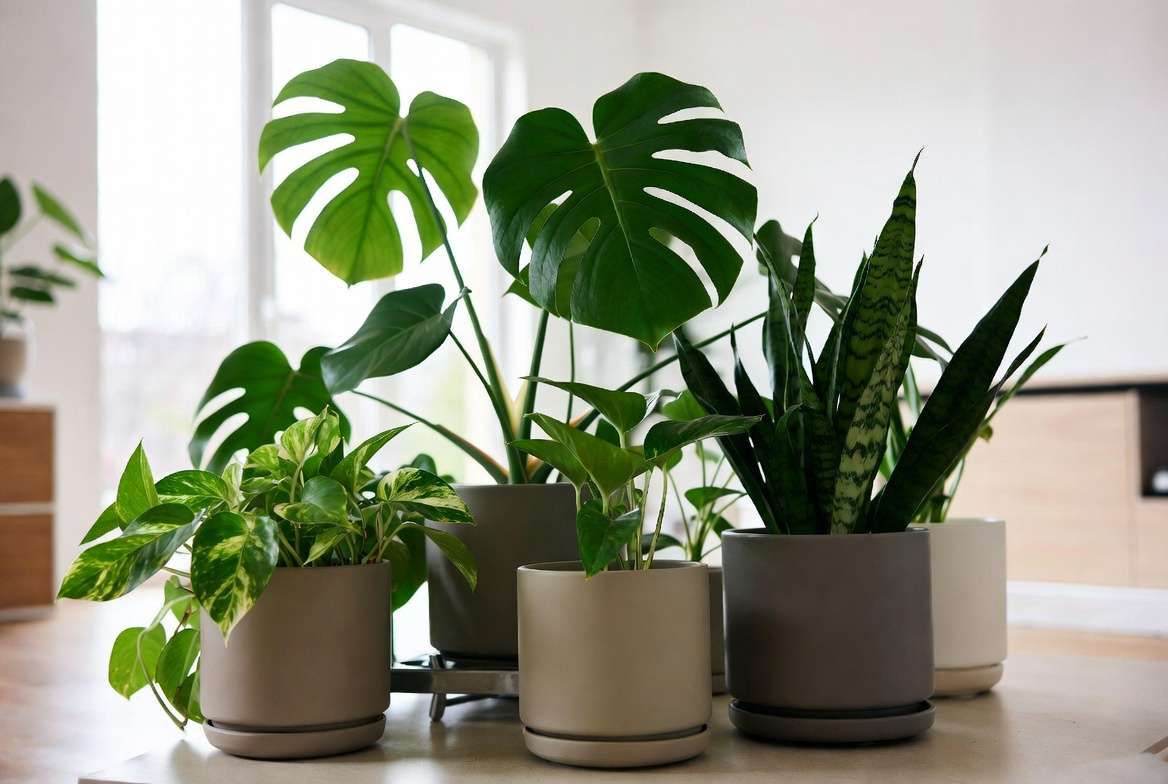
Houseplants (Pothos, Monstera, Snake Plant, Fiddle Leaf Fig): These popular indoor plants are highly sensitive to salt buildup because they live in limited soil volumes. Flush thoroughly and be extra gentle with root pruning. Snake plants and ZZ plants are more forgiving and often recover faster due to their tough nature. For variegated varieties (like variegated monstera), be careful not to remove too many leaves, as they rely heavily on photosynthesis from remaining green tissue.
Garden Vegetables and Flowering Plants: Tomatoes, peppers, roses, and petunias show fertilizer burn quickly through leaf scorch and blossom end rot (in tomatoes). Flush beds deeply and follow up with a light mulch of compost (not fresh manure) once salts are leached. Vegetables often bounce back with new growth once nitrogen levels normalize, but fruit production may pause for 2–3 weeks.
Trees and Shrubs: Young trees and container-grown shrubs require larger-scale intervention. Use a garden hose on a slow trickle to deeply water the root zone (aim for a 2–3 foot radius around the trunk). For potted trees, follow the same flushing method but with much higher water volumes — sometimes 10–20 gallons per session. Mature landscape trees are more resilient but can still suffer if lawn fertilizers were applied too close to the trunk. In extreme cases, professional arborist soil aeration or gypsum application can help break down sodium buildup.
Lawn Grass: If your lawn shows yellow or brown patches after heavy fertilizer application, deeply water the area multiple times over several days. Avoid walking on the grass during recovery to prevent further soil compaction.
How Long Does Recovery Take? What to Expect Timeline 📅
Recovery from fertilizer burn is rarely instant, but patience pays off. Here’s a realistic timeline based on hundreds of rescue cases I’ve observed:
- Days 1–3: Immediate stabilization after flushing. Wilting may temporarily worsen as the plant adjusts, but crispy tips stop spreading.
- Days 4–10: Leaves that were only partially damaged begin to look less scorched. The plant stops dropping leaves.
- Weeks 2–4: First signs of new growth! Tiny green shoots or unfurling leaves appear. This is the most rewarding moment. 🌱
- Weeks 4–8: Noticeable improvement in overall vigor. Previously stunted plants resume normal growth patterns.
- 2–3 months: Full recovery for mild to moderate cases. The plant may look even healthier than before as it grows fresh foliage.
Severe cases with heavy root damage can take 3–6 months or longer. If no new growth appears after 6 weeks despite proper care, the plant may have sustained irreversible root loss.
Track progress with weekly photos — it’s motivating and helps you spot subtle improvements early.
Common Mistakes to Avoid During Rescue ❌
Even well-meaning plant owners can accidentally worsen the situation. Here are the top pitfalls to avoid:
- Overwatering right after flushing: The soil is already saturated — wait until the top 1–2 inches dry out before watering again to prevent root rot.
- Fertilizing too soon: Wait at least 6–8 weeks (or until strong new growth appears) before introducing any nutrients, and always at half strength.
- Removing too many leaves at once: Cutting more than one-third of the foliage shocks the plant and reduces its ability to photosynthesize and recover.
- Using hard tap water or softened water: High mineral content or sodium in softened water adds more salts. Stick to distilled, rainwater, or filtered water during rescue.
- Placing the plant in direct harsh sunlight: Stressed plants burn easily — bright indirect light is safest.
- Ignoring drainage: Always ensure pots have holes and saucers are emptied promptly.
Preventing Overfertilization in the Future 🛡️
The best rescue is prevention. Once your plant recovers, adopt these expert habits to keep it thriving long-term:
- Always read and follow labels — “A little goes a long way” is plant care wisdom.
- Use the “half-strength” or “weakly weekly” method during growing season for liquid fertilizers.
- Fertilize only during active growth (spring and summer for most houseplants and outdoor plants). Skip winter entirely for indoor plants.
- Test your soil annually for garden beds using affordable soil test kits to understand existing nutrient levels.
- Choose slow-release or organic fertilizers whenever possible — they release nutrients gradually and reduce burn risk.
- Water thoroughly before fertilizing so roots are hydrated and less likely to absorb concentrated salts.
- Maintain a plant care journal noting dates, products used, and plant responses — this simple habit prevents repeat mistakes.
Pro tip: For beginners, start with organic options like diluted compost tea or worm castings. They are much gentler on roots while still providing balanced nutrition.
When to Give Up and Start Over (Honest Advice)
Sometimes, despite your best overfertilized plant rescue steps, a plant may not recover. Signs it’s time to let go include:
- Completely black, mushy roots with a strong rotten smell
- No new growth after 8–10 weeks of proper care
- The plant continues declining even after multiple flushes and repotting
- Stem base becomes soft and collapses
In these cases, it’s kinder (and better for your gardening confidence) to compost the plant responsibly and learn from the experience. Many gardeners turn failures into future successes — your next plant will benefit from this hard-won knowledge.
Conclusion
Overfertilization can feel devastating, but with prompt action using these overfertilized plant rescue steps, most burnt plants can be saved and returned to vibrant health. The key actions — stopping fertilizer, thorough soil flushing, wise pruning, repotting when needed, and providing gentle recovery conditions — give your plant the best fighting chance.
Remember: Plants are remarkably resilient. Many that looked doomed after fertilizer burn go on to produce their best growth yet once the excess salts are removed. Your quick thinking and careful care can turn a potential loss into a success story. 🌱✨
Now that you know exactly how to handle fertilizer burn, you can fertilize with confidence moving forward — or better yet, prevent the problem entirely. Share your own overfertilized plant rescue experience in the comments below! Did flushing work wonders for your monstera or tomato plants? What tips would you add for fellow plant lovers?
For more expert plant care guidance, explore these related articles:
- How to Choose the Right Fertilizer for Your Houseplants
- Common Houseplant Problems and How to Fix Them
- The Ultimate Guide to Watering Indoor Plants Correctly
Thank you for reading. Happy planting — and may your leaves stay green and happy! 🪴💚
Frequently Asked Questions (FAQs)
Can an overfertilized plant recover completely? Yes, in most mild to moderate cases, plants can make a full recovery with prompt flushing and proper aftercare. Severe root damage may result in slower or partial recovery.
How much water do I need to flush an overfertilized plant? Generally, use 3–4 times the volume of the pot. For example, a 2-liter pot may need 6–8 liters of water per flush, repeated 2–3 times.
Is fertilizer burn reversible on leaves? The burned brown tips and edges will not turn green again, but you can trim them. New healthy leaves will replace the damaged ones as the plant recovers.
What’s the difference between fertilizer burn and root rot? Fertilizer burn usually shows crispy brown tips with dry soil crust, while root rot causes soft, black roots and wilting in soggy soil. Overfertilization can sometimes lead to root rot if not addressed.
Can I use fertilizer again after rescuing my plant? Wait at least 6–8 weeks or until strong new growth appears. Start with half-strength fertilizer and always water the plant first.
What’s the best water type for flushing overfertilized plants? Distilled, rainwater, or filtered water is ideal because it contains fewer minerals that could add to salt buildup. Avoid softened water.
How do I save an overfertilized tree versus a small houseplant? Trees require deep, heavy watering over a larger root zone, while houseplants need thorough pot flushing and possible repotting. The core principle — leaching salts — remains the same.


