
Growing potatoes in a grow bag is a convenient and efficient way to produce a bountiful harvest, regardless of your gardening experience. In this post, we’ll cover the best practices for planting, watering, and harvesting your potatoes to ensure a successful and plentiful yield. Whether you’re a novice or seasoned gardener, these tips will help you maximize your potato growing efforts. So, let’s dig in and get started!
Understanding Grow Bags
A. What Are Grow Bags?
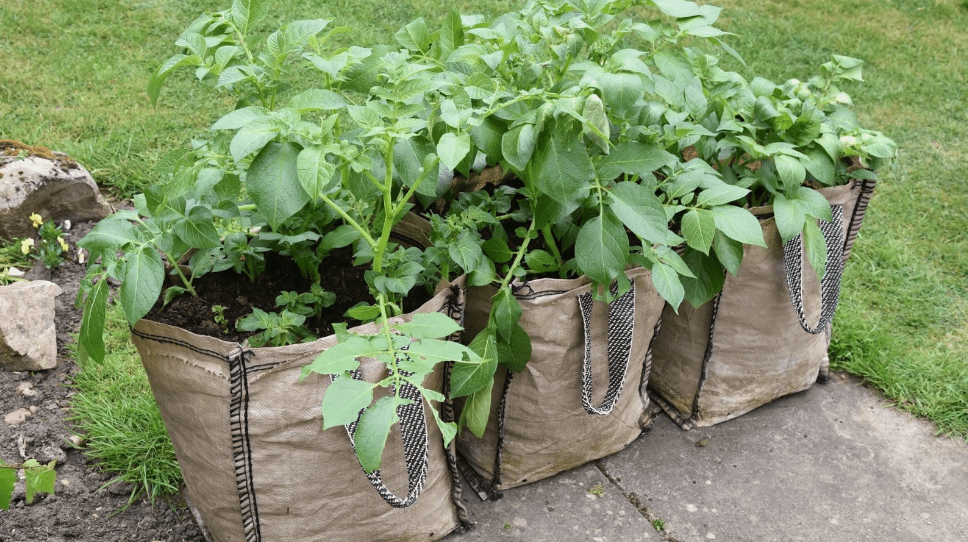
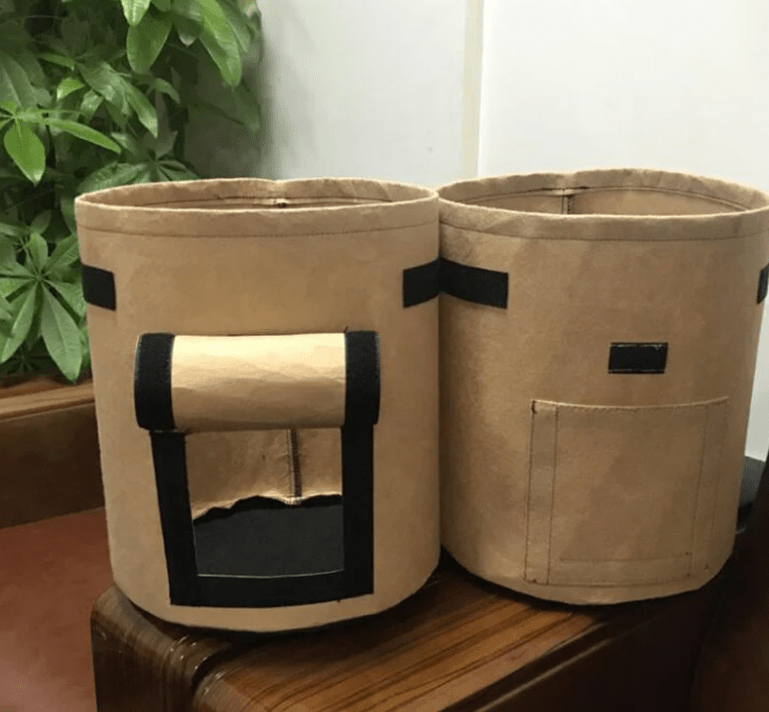
Grow bags are a popular and versatile option for growing potatoes and other crops. They are essentially fabric containers that provide excellent drainage and aeration for the plants’ roots. The breathable fabric allows for air pruning, which encourages the development of a robust root system. Grow bags come in various sizes and are lightweight, making them easy to move around and stack for vertical gardening. They are also reusable and foldable for easy storage.
B. Benefits of Using Grow Bags for Potatoes
Grow bags offer several benefits for growing potatoes. They provide excellent drainage and aeration for the plants’ roots, which helps prevent issues such as root rot. The breathable fabric also allows for air pruning, which encourages the development of a strong and healthy root system. Additionally, grow bags come in various sizes and are lightweight, making them easy to move around and stack for vertical gardening. They are also reusable and foldable for easy storage, making them a convenient option for gardening. Overall, grow bags are a popular and versatile choice for growing potatoes and other crops.
C. Choosing the Right Grow Bag
When choosing the right grow bag for potatoes, it’s important to consider factors such as size, material, and drainage. Look for a grow bag that is large enough to accommodate the potato plant’s growth, typically at least 10 gallons in size. The material should be breathable and durable, such as a thick fabric or plastic. It’s also important to ensure that the grow bag has proper drainage holes to prevent water from pooling at the bottom. Additionally, consider the portability and storage options of the grow bag. By taking these factors into account, you can choose the right grow bag to support healthy potato growth.
Preparing for Planting
A. Selecting the Right Potato Variety
When preparing to plant potatoes, it’s important to select the right potato variety based on your climate and growing conditions. Different varieties thrive in different climates, so it’s important to choose one that is well-suited to your specific location. Consider factors such as the amount of sunlight, temperature, and soil type in your area. Additionally, consider whether you want to grow early, mid-season, or late-season potatoes based on your desired harvest time. By selecting the right potato variety, you can ensure a successful and bountiful potato harvest.
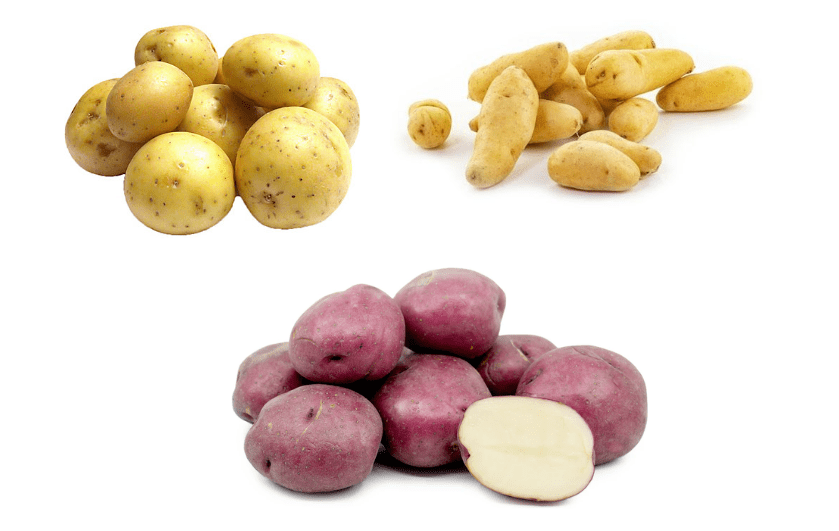
1. Best potato varieties for grow bags
When choosing the best potato varieties for grow bags, it’s important to consider ones that are well-suited for container gardening. Some popular options include Yukon Gold, Red Norland, and Fingerling potatoes. These varieties are known for their compact growth and high yield, making them ideal for growing in limited space. Additionally, look for varieties that are disease-resistant and have a shorter growing season, as they will be better suited for the confined environment of a grow bag. By selecting the right potato variety for your grow bag, you can set yourself up for a successful and rewarding potato harvest.
B. Preparing the Grow Bag
When preparing your grow bag for planting potatoes, it’s important to start with a high-quality, well-draining soil mix. You’ll want to fill the grow bag about one-third to one-half full with your soil mix before planting your potatoes. It’s also helpful to add in some organic compost or fertilizer to provide the potatoes with essential nutrients throughout the growing season. Once your soil is prepared, you can plant your seed potatoes about 2-4 inches deep and space them 8-12 inches apart. As the potatoes begin to grow, continue to add more soil to the grow bag to cover the emerging stems, leaving about 3-4 inches of growth exposed. This process, known as “hilling,” encourages the development of more potatoes. With proper preparation, your grow bag can provide an ideal environment for a successful potato harvest.
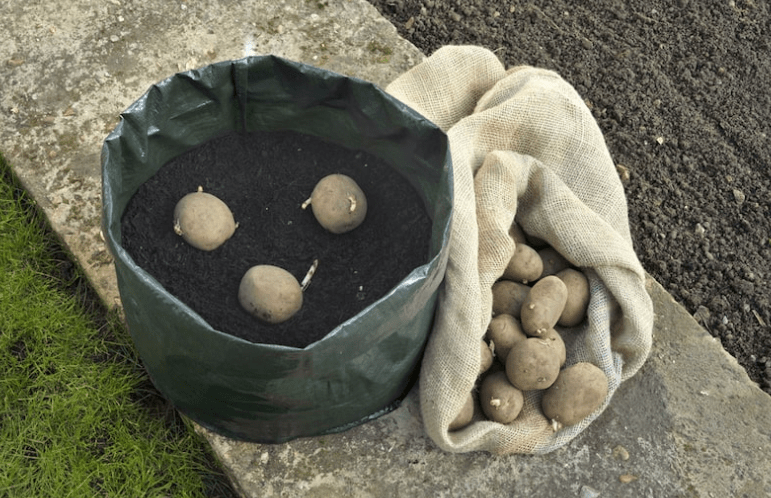
C. Chitting Potatoes
Chitting potatoes is a process of sprouting the seed potatoes before planting them. This can be done by placing the seed potatoes in a cool, light place for a few weeks before planting. The sprouts that develop will give the potatoes a head start once they are planted in the soil, leading to faster and more uniform growth. This can result in a higher yield at harvest time.
Planting Potatoes in Grow Bags
A. Planting Process
When planting potatoes in grow bags, it’s important to choose a location with full sun and good drainage. Fill the grow bag with a few inches of soil and place the chitted seed potatoes on top, spacing them out evenly. Cover the potatoes with more soil, leaving a few inches of space at the top of the bag for watering. As the potatoes grow, continue to add more soil to cover the stems, leaving a small amount of the plant exposed. This will encourage more tubers to form along the stem, increasing your harvest. Water the potatoes regularly, and once they start to flower, you can begin to harvest small, new potatoes or wait until the plants die back for a larger harvest. With proper care and attention, your grow bag can provide an excellent growing environment for a successful potato harvest.
B. Watering and Fertilizing
To ensure a successful potato harvest in your grow bag, it’s important to water and fertilize your plants regularly. Keep an eye on the moisture level of the soil, making sure it doesn’t dry out completely or become waterlogged. Water the potatoes consistently, making sure the soil remains moist but not waterlogged.
Additionally, it’s important to fertilize your potato plants to provide them with the nutrients they need to thrive. You can use a balanced fertilizer or a specialty potato fertilizer, following the instructions on the packaging for the correct application method and frequency.
By providing regular water and the right nutrients, you can help your potato plants grow healthy and strong, leading to a successful harvest in your grow bag.
C. Positioning and Light Requirements
When growing potatoes in a grow bag, it’s important to consider their positioning and light requirements. Potatoes thrive in well-drained soil and prefer full sun, so it’s best to place your grow bag in a location that receives at least 6-8 hours of sunlight per day. Ensure that the grow bag is positioned in a spot where it can receive ample sunlight.
If you’re growing potatoes indoors, consider placing them near a sunny window or using grow lights to provide the necessary light. Proper positioning and meeting the light requirements will help your potato plants grow and develop healthy tubers. By ensuring they have access to the right amount of sunlight, you can help your potato plants reach their full potential and ultimately lead to a successful harvest.
Caring for Potato Plants
A. Hilling and Mulching
When caring for potato plants, hilling and mulching are important practices to consider. Hilling involves adding soil or mulch around the base of the plant as it grows to protect the developing tubers from sunlight, which can cause them to turn green and become toxic. Mulching helps to retain moisture in the soil, suppress weeds, and regulate soil temperature. Both practices contribute to healthier and more productive potato plants. It’s recommended to hill your potato plants as they grow and to mulch around them to maintain optimal growing conditions. By incorporating these care practices into your potato growing routine, you can help ensure a successful and bountiful harvest.
B. Pest and Disease Management
When it comes to pest and disease management for potato plants, there are several key strategies to consider. First, it’s important to regularly monitor your plants for any signs of pests or disease, such as yellowing leaves, holes in the foliage, or wilting. If you notice any issues, it’s important to take action promptly.
One effective method of pest and disease management is to practice crop rotation, planting potatoes in different areas of your garden each year to reduce the build-up of pests and diseases in the soil. Additionally, using resistant potato varieties can help minimize the risk of certain diseases.
In terms of pest control, you can use organic methods such as hand-picking pests, using insecticidal soaps, or introducing beneficial insects to your garden. It’s also important to remove any diseased plant material and properly dispose of it to prevent the spread of disease.
Overall, staying vigilant, practicing good hygiene in the garden, and using a combination of preventive and control measures can help minimize the impact of pests and diseases on your potato plants. By incorporating these strategies into your pest and disease management routine, you can help promote the health and productivity of your potato crop.
C. Monitoring Growth and Health
Monitoring the growth and health of your potato plants is essential for effective pest and disease management. Keep an eye out for any signs of pest infestations or disease symptoms, such as wilting, yellowing leaves, or unusual spots or markings. Regularly inspecting your plants allows you to catch any issues early and take appropriate action to address them. Additionally, maintaining optimal growing conditions, such as proper watering and fertilization, can help promote the overall health and resilience of your potato plants, making them less susceptible to pests and diseases. By monitoring the growth and health of your potato plants, you can proactively address any issues and ensure the success of your crop.
Harvesting Potatoes
A. When to Harvest
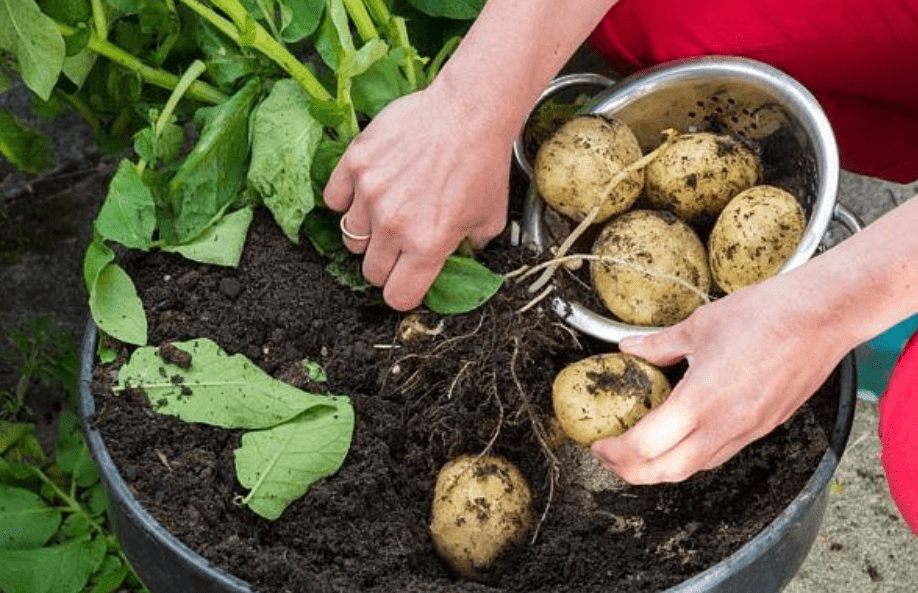
Potatoes are typically ready to harvest when the plants have reached full maturity and the foliage begins to die back. This usually occurs around 2-3 weeks after the plants have finished flowering. To check if your potatoes are ready for harvesting, gently dig around the base of the plant and feel for the size and firmness of the potatoes. If they are mature, the skin should be firm and the potatoes should be a decent size. Avoid harvesting too early, as the potatoes may not have reached their full size and may not store well. Once you have determined that your potatoes are ready to harvest, gently dig them up, being careful not to damage the tubers. After harvesting, allow the potatoes to cure in a cool, dark, and well-ventilated area for a week before storing them for long-term use. This will help toughen the skins and heal any minor cuts or bruises, extending their shelf life.
B. Storing Potatoes
To store your potatoes after harvesting, it’s important to cure them in a cool, dark, and well-ventilated area for about a week. This will help toughen the skins and heal any minor cuts or bruises, which will extend their shelf life. Once they have been properly cured, you can store them in a cool, dark place such as a cellar or pantry. Be sure to keep them away from light, as exposure to light can cause them to turn green and develop a bitter taste. Additionally, it’s important to store potatoes away from onions, as the gases they emit can cause potatoes to spoil more quickly. By following these steps, you can ensure that your harvested potatoes stay fresh and tasty for longer periods of time.
Troubleshooting Common Issues
A. Dealing with Poor Yields
If you’re experiencing poor yields when harvesting potatoes, there are a few things you can do to troubleshoot the issue. First, check the quality of your seed potatoes. If they are old or diseased, it can result in poor yields. Make sure to use certified seed potatoes from a reputable source. Secondly, ensure that you are planting your potatoes in well-draining soil and providing them with adequate moisture and nutrients. Consider conducting a soil test to determine if there are any deficiencies that need to be addressed. Finally, check for any pests or diseases that may be affecting your potato plants and take appropriate measures to control them. By addressing these potential issues, you may be able to improve your potato yields in the future.
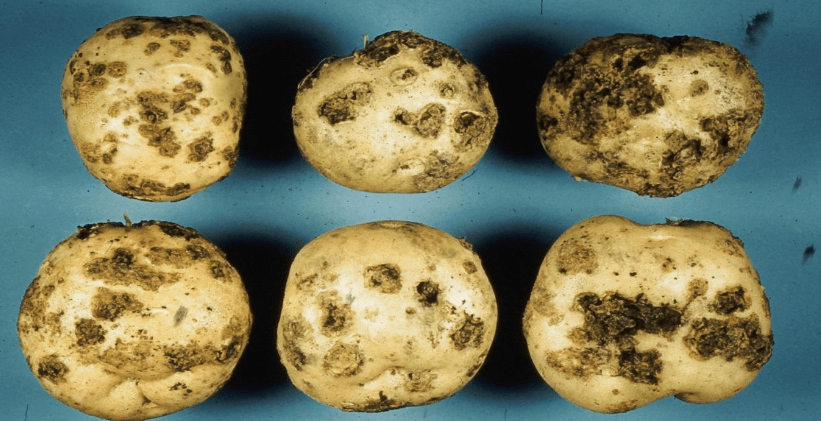
B. Addressing Pest and Disease Outbreaks
When addressing pest and disease outbreaks in your potato plants, it’s important to first identify the specific pest or disease affecting your crop. This will allow you to choose the most effective control measures. Common pests and diseases that affect potatoes include potato beetles, aphids, late blight, and early blight.
For pests, you can implement physical removal methods, such as hand-picking pests off the plants, or use insecticidal soaps or neem oil to control them. For diseases, consider using fungicides or other disease control methods recommended for the specific disease affecting your plants.
It’s also important to practice good crop rotation and sanitation practices to prevent the spread of pests and diseases. Remove and destroy any infected plants and debris, and avoid planting potatoes in the same area for consecutive seasons.
By addressing pest and disease outbreaks promptly and effectively, you can help protect your potato crop and improve your overall yields.
C. Maintaining Healthy Soil
Maintaining Healthy Soil is also important in preventing pest and disease problems. Healthy, well-drained soil with good fertility will help potatoes grow strong and resist pests and diseases. Consider adding organic matter, such as compost, to improve soil structure and provide nutrients for the plants. Additionally, make sure to properly space and plant your potatoes to allow for good air circulation, which can help prevent the spread of diseases. By taking proactive measures to maintain healthy soil and implementing effective pest and disease control strategies, you can help ensure a successful potato harvest.
In conclusion, growing potatoes in a grow bag can be a rewarding and bountiful experience if you follow the best practices outlined in this article. From proper planting and watering techniques to harvesting tips, you can ensure a successful potato harvest. Whether you’re a beginner or experienced gardener, these tips will help you achieve a bountiful harvest of delicious homegrown potatoes. Happy gardening!