
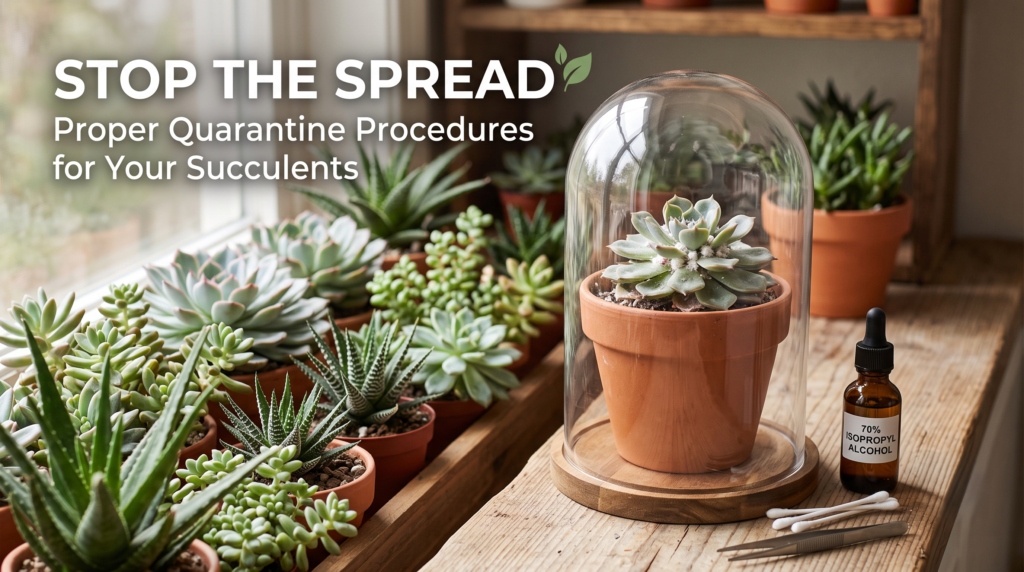
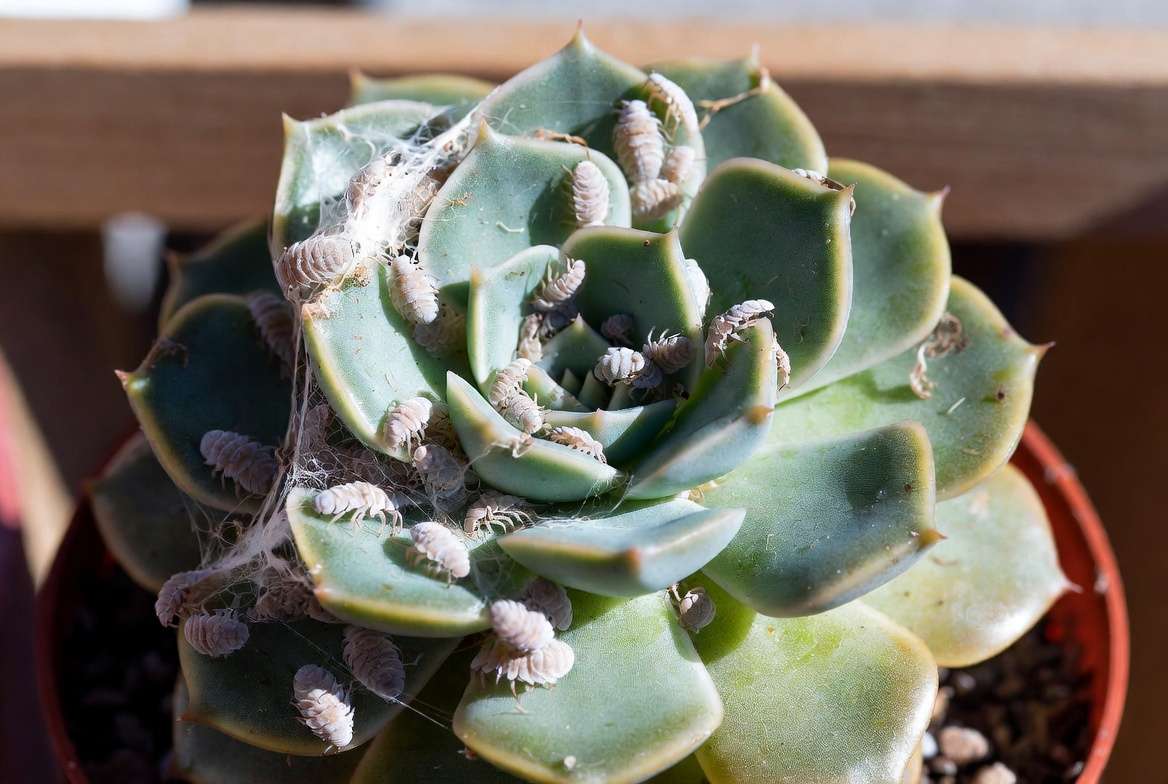
You are doing your routine plant inspection when suddenly, your heart drops. There, nestled deep within the perfect rosette of your prized Echeveria, is a cluster of sticky, white webbing. Or perhaps it is a mushy, black stem on your favorite Aloe. Panic sets in. Whether it is a full-blown pest infestation or a silent fungal infection, a sick plant is every indoor gardener’s nightmare. But before you throw the entire pot away in despair, take a deep breath. To protect the rest of your collection, you must immediately implement proper quarantine procedures for diseased succulents.
When one plant falls ill, the clock starts ticking. Swift, decisive isolation is the absolute most critical step in succulent care and pest management. In this comprehensive guide, we will break down the exact, foolproof methods to contain the threat, treat your ailing plant, and ensure your indoor garden remains a safe, thriving environment.
🧑🌾 Expert Insight: As a horticulturist who has managed and rehabilitated hundreds of rare succulent collections, I have seen firsthand how a single missed mealybug can wipe out an entire display shelf in a matter of weeks. The protocol outlined in this guide is the exact, step-by-step isolation method I use in professional greenhouses to stop outbreaks in their tracks.
Why a Strict Quarantine is Your Collection’s Only Lifeline 🚨
When you discover a sick plant, your first instinct might be to grab a bottle of neem oil and start spraying it right where it sits. Do not do this. Treating a plant while it is still surrounded by healthy neighbors is one of the most common—and devastating—mistakes a succulent owner can make.
The “Succulent Contagion” Effect 🦠
In the wild, succulents grow with plenty of airflow and space between them. In our homes, they are often clustered beautifully on windowsills or crowded under grow lights. This proximity is a dream for pests and pathogens.
Consider how these threats travel:
-
Crawlers: Pests like mealybugs and scale insects do not just stay on one leaf. They actively crawl across the soil surface, down the sides of pots, and onto adjacent foliage.
-
Fliers and Jumpers: Fungus gnats and thrips can fly or leap from pot to pot, laying microscopic eggs in the soil of your healthy plants long before you notice the adults.
-
Airborne Pathogens: Fungal spores, such as those responsible for powdery mildew, are incredibly light. A gentle breeze from an indoor fan, an open window, or even your own breath can carry these spores to neighboring succulents.
-
Water Splashing: When you water a succulent suffering from root rot or bacterial leaf spot, a single droplet splashing onto a nearby plant can transmit the disease.
What Exactly Are You Quarantining Against? 🐛
To defeat the enemy, you must know what you are looking for. Here is a quick-reference guide to the most common succulent ailments that demand immediate isolation:
Step 1: Immediate Action—How to Safely Extract the Sick Plant 🧤
The moment you spot trouble, the extraction must happen. However, simply picking up the infected succulent and carrying it across the house can actually spread the problem. Think of it like carrying a leaky bag of flour—you will leave a trail behind you.
The Hands-Off Approach to Moving the Plant 🪴
To prevent cross-contamination during the removal process, you need to create a temporary barrier.
-
Stop the Airflow: Turn off any nearby oscillating fans, air conditioners, or heaters to prevent blowing spores or bugs around.
-
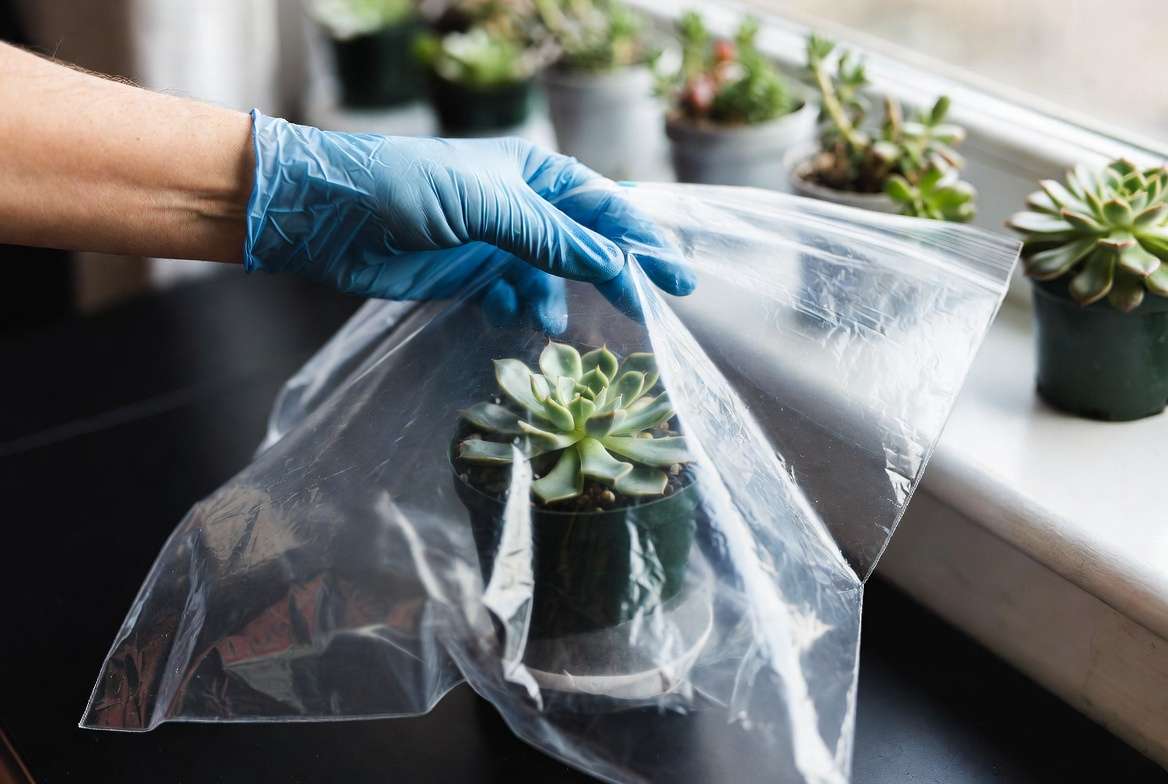
The “Bag Method”: Gently place a clear plastic grocery bag or a large ziplock bag entirely over the sick plant and its pot before you lift it. 🛍️
-
Secure and Transport: Cinch the bottom of the bag closed around the pot. Now, you can safely carry the succulent through your home to the designated quarantine zone without dropping pests or spores onto your floors or other plants.
The 360-Degree Neighbor Inspection 🔍
Once the sick plant is removed, the space it left behind is a potential crime scene. Do not assume the surrounding plants are safe just because they look fine at first glance.
-
Check the Immediate Neighbors: Take the plants that were touching or sitting closest to the infected plant and examine them thoroughly under a bright flashlight. Look deep into the central rosettes, under the lower leaves, and at the base of the stem where it meets the soil.
-
Wipe Down the Area: Pests often hide in the cracks of wooden shelves or on plastic plant trays. Thoroughly clean the shelf, windowsill, and any shared drainage trays using a solution of 70% isopropyl alcohol or a gentle household disinfectant. 🧽
-
Put Neighbors on “Watchlist”: Even if the neighboring plants look clean, consider them on probation. Keep a close eye on them for the next 14 days, as pest eggs can take a week or two to hatch.
Step 2: Setting Up the Ultimate Succulent Quarantine Zone 🏥
A proper quarantine zone is a completely separate micro-environment where your plant can safely undergo treatment without risking the rest of your urban jungle.
Location, Location, Location 🗺️
The ideal hospital ward for your succulent must meet specific criteria. Simply moving the plant to the other side of the same table is not enough.
-
Physical Distance: Ideally, the quarantine zone should be in a completely different room. If that is impossible (due to apartment living or limited space), the plant must be at least 10 to 15 feet away from any other plants.
-
No Shared Airflow: Ensure the sick plant is not sitting directly under an air vent that blows toward your healthy collection.
-
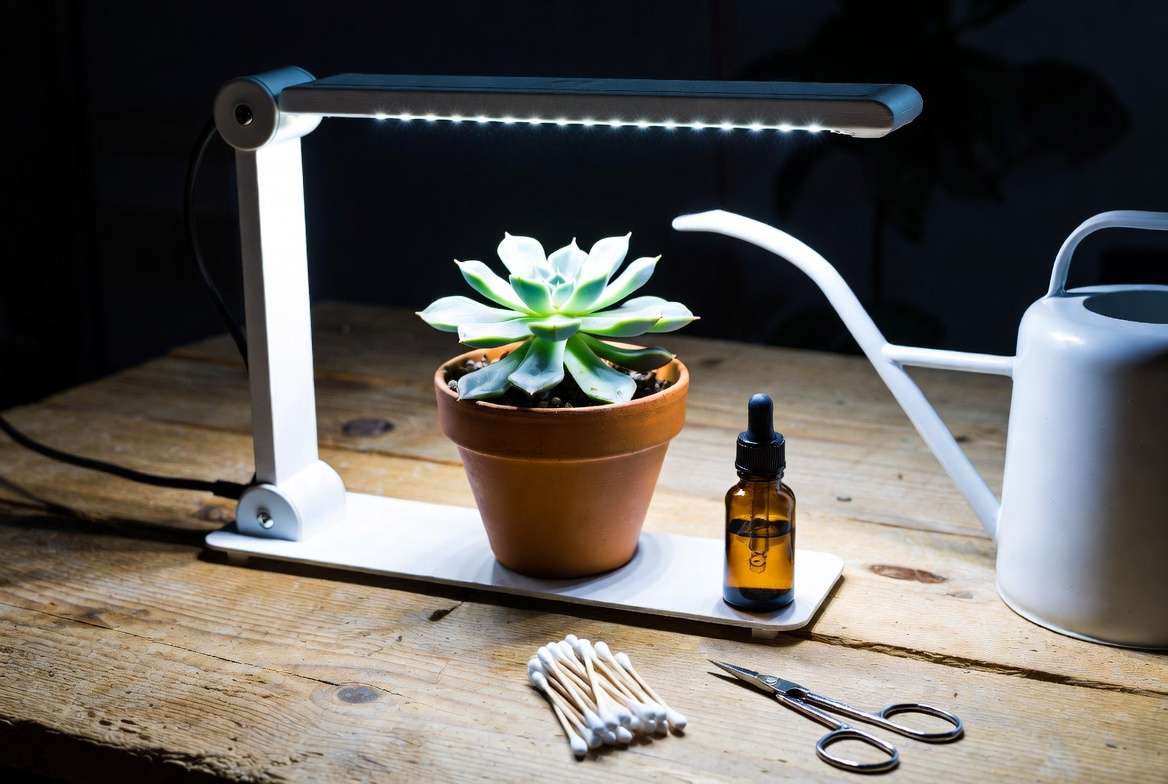
Lighting Considerations: Succulents still require ample light to fuel their immune systems and heal. However, a plant suffering from pest damage or chemical treatments (like neem oil) will be highly sensitive to sunburn. Place the plant in bright, indirect light. If a natural sunny window isn’t available in your quarantine room, set up a small, dedicated LED grow light for the patient. ☀️
Your Quarantine Supply Kit 🧰
Cross-contamination often happens because of shared tools. To be a responsible plant parent, you must treat your quarantine zone like a sterile hospital wing. Keep a dedicated supply kit in this room, and never use these items on your healthy plants.
Your kit should include:
-
Separate Watering Can: Or a simple plastic water bottle used only for the sick plants.
-
70% Isopropyl Alcohol: The holy grail for instantly killing mealybugs and sterilizing surfaces.
-
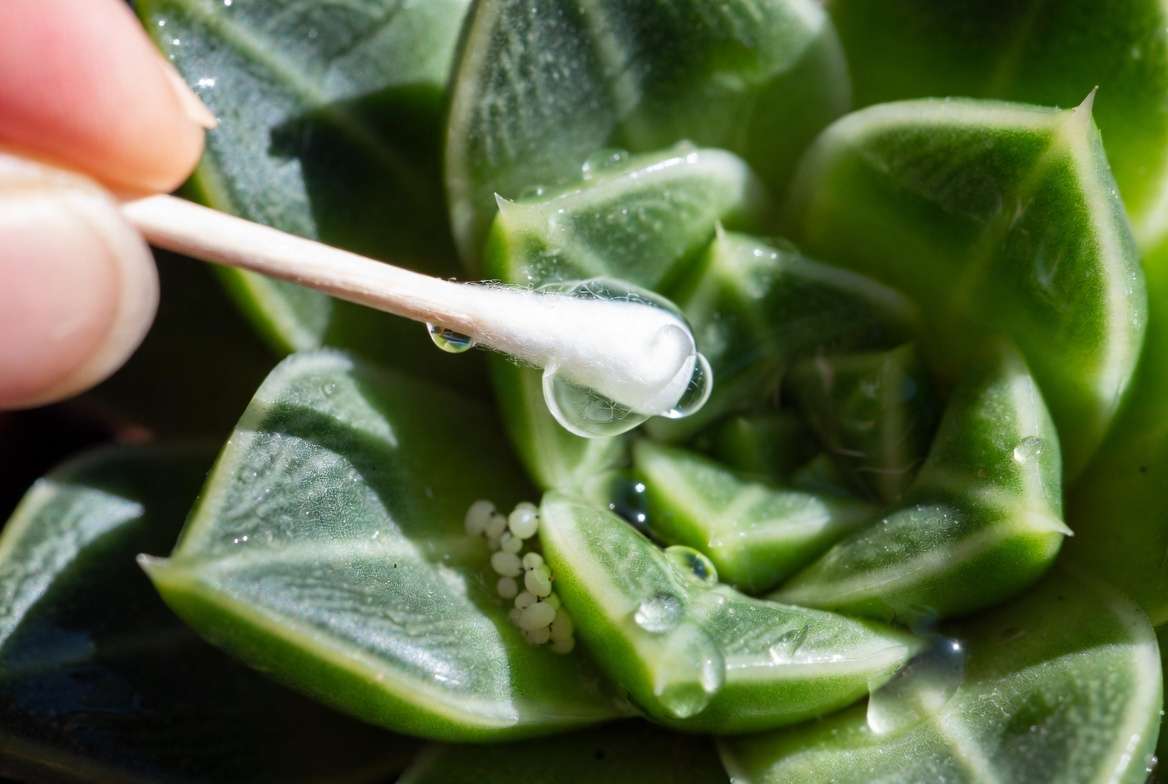
Cotton Swabs (Q-tips): For precision pest removal in tight rosettes.
-
Treatment Sprays: Neem oil, insecticidal soap, or liquid copper fungicide (depending on the ailment).
-
Systemic Granules: (For indoor use only) to mix into the soil for long-term pest control.
-
Dedicated Pruning Shears: Small scissors specifically for snipping away dead or rotting leaves in the isolation zone. ✂️
Proper Quarantine Procedures for Diseased Succulents 📋
Now that your sick plant is safely isolated in its dedicated hospital zone, the real work begins. Executing proper quarantine procedures for diseased succulents requires discipline and consistency. This is not a “spray it once and forget it” scenario.
The “No-Share” Rule (Water, Tools, and Hands) 🚫💦
The most common vector for disease transmission in an indoor garden is you. To prevent becoming Patient Zero for your own collection, you must strictly adhere to the “No-Share” rule.
-
Hand Hygiene: Always wash your hands thoroughly with soap and warm water immediately after handling the quarantined succulent. If you accidentally touch a mealybug and then touch a healthy Haworthia, you have just transferred the infestation. 🧼
-
Sterilize Between Snips: If you must prune away rotting leaves or dead stems, sterilize your pruning shears with rubbing alcohol before and after every single cut.
-
Never Share Drainage Water: If your quarantined succulent sits in a saucer, never pour that excess water into another plant’s pot. Fungal spores and root mealybugs thrive in runoff water.
Tailoring the Treatment Plan 💊
Different ailments require different treatment protocols while in isolation. Diagnosing your plant accurately dictates the next steps in your quarantine procedure.
For Pest Infestations (Mealybugs, Spider Mites, Thrips, Scale): 🕷️
-
The Spot Treatment: Dip a cotton swab into 70% isopropyl alcohol and physically dab every visible bug. The alcohol breaks down their waxy outer coating, killing them instantly.
-
The Spray Down: For severe infestations, spray the entire plant with a targeted insecticidal soap or a diluted neem oil solution. Crucial Tip: Do this in the evening to prevent the oil from magnifying sunlight and burning the leaves. 🌙
-
Soil Assessment: Many pests lay eggs in the top inch of soil. If the infestation is recurring, unpot the succulent, discard all the old soil, rinse the bare roots, and repot in fresh, sterile, well-draining cactus mix.
For Fungal Issues and Root Rot: 🍂
-
Emergency Surgery: Remove the succulent from its wet, contaminated soil immediately. Discard the soil (do not compost it).
-
Pruning the Rot: Using sterilized shears, cut away any black, mushy, or translucent roots and lower leaves. Cut until you only see healthy, green or white tissue.
-
The Callous Period: Do not repot the plant immediately! Lay the bare-root succulent on a dry paper towel in your quarantine zone for 3 to 5 days. This allows the cut wounds to “callous” (scab over), which prevents pathogens from re-entering. 🩹
-
Fungicide Application: Treat the roots and stem with a specialized copper fungicide or sulfur powder before repotting in dry, gritty soil. Wait at least a week before watering.
Monitoring the Environment 🌡️
Succulents are arid plants; they despise high humidity, damp foliage, and stagnant air. Unfortunately, so do pests and fungi. While your plant is in isolation, keep the humidity low. If you are treating the plant with foliar sprays, ensure the quarantine room has gentle airflow (a small fan on a low setting, pointed away from the plant) so the leaves can dry quickly before nightfall. 🌬️
The Waiting Game: How Long Should a Succulent Stay in Quarantine? ⏳
One of the most frequent questions plant owners ask is, “When is it safe to put my plant back?” The answer requires patience. Rushing the process is the fastest way to trigger a secondary outbreak.
The 40-Day Rule 🗓️
As a golden rule of horticulture, a sick succulent should remain in quarantine for a minimum of 40 days from the start of treatment.
🧑🌾 Expert Insight: Why 40 days? It all comes down to pest life cycles. Spider mites and thrips go through multiple developmental stages (instars), and their eggs can remain dormant in the soil or hidden in microscopic leaf crevices for weeks. Treating the plant once only kills the adults. A 40-day window ensures that any late-hatching eggs mature, emerge, and are subsequently eliminated by your follow-up treatments. 🐣
Signs Your Succulent is Ready to Be Discharged 🌟
Do not rely on the calendar alone. Before ending the quarantine, ensure your succulent meets these three health markers:
-
Two Weeks of Zero Pests: You have closely inspected the plant every few days for at least 14 days and have not spotted a single crawler, webbing, or spore.
-
Vigorous New Growth: The center of the rosette or the tips of the stems are producing firm, vibrantly colored new leaves. Healthy new growth is the ultimate indicator that the root system has recovered. 🌱
-
Firm Texture: Gently squeeze the lower leaves. They should feel plump and firm, not mushy, wrinkled, or translucent (which indicates ongoing rot or extreme dehydration).
Step 3: The Safe Reintegration Process 🏡
Congratulations! Your succulent has survived the hospital and is ready to rejoin its friends. However, the transition back to the main display shelf must be done carefully to avoid stressing the newly recovered plant.
The Final Health Checklist ✅
Before carrying the pot back to the living room, give it one final, rigorous inspection. Use a magnifying glass if you have one. Check the drainage holes underneath the pot—pests love to hide there! If everything is clean, wipe down the outside of the pot with alcohol to ensure it is pristine.
Avoiding Acclimation Shock 🌤️
While in quarantine, your succulent likely adapted to lower light levels (especially if it was kept out of direct sun to avoid chemical burns). If you suddenly thrust it back onto a scorching south-facing windowsill, it will suffer severe sunburn.
Reintroduce the plant to its original lighting conditions gradually. Place it in bright, indirect light for a few days, then slowly inch it closer to its permanent, sunny home over the course of a week.
The Golden Rule: Quarantining New Arrivals 🌱
Once you have experienced the nightmare of treating an established collection for pests, you will realize that proactive prevention is vastly superior to reactive treatment. The most crucial quarantine procedure you can adopt has nothing to do with sick plants—it is about managing new ones.
Why Every New Plant is a Suspect 🕵️♀️
Commercial greenhouses and big-box store garden centers are incredible breeding grounds for pests. A plant might look perfectly healthy on the shelf, but it could be harboring microscopic thrip larvae or root mealybugs deep within the nursery soil.
The 14-Day New Plant Protocol 🪴
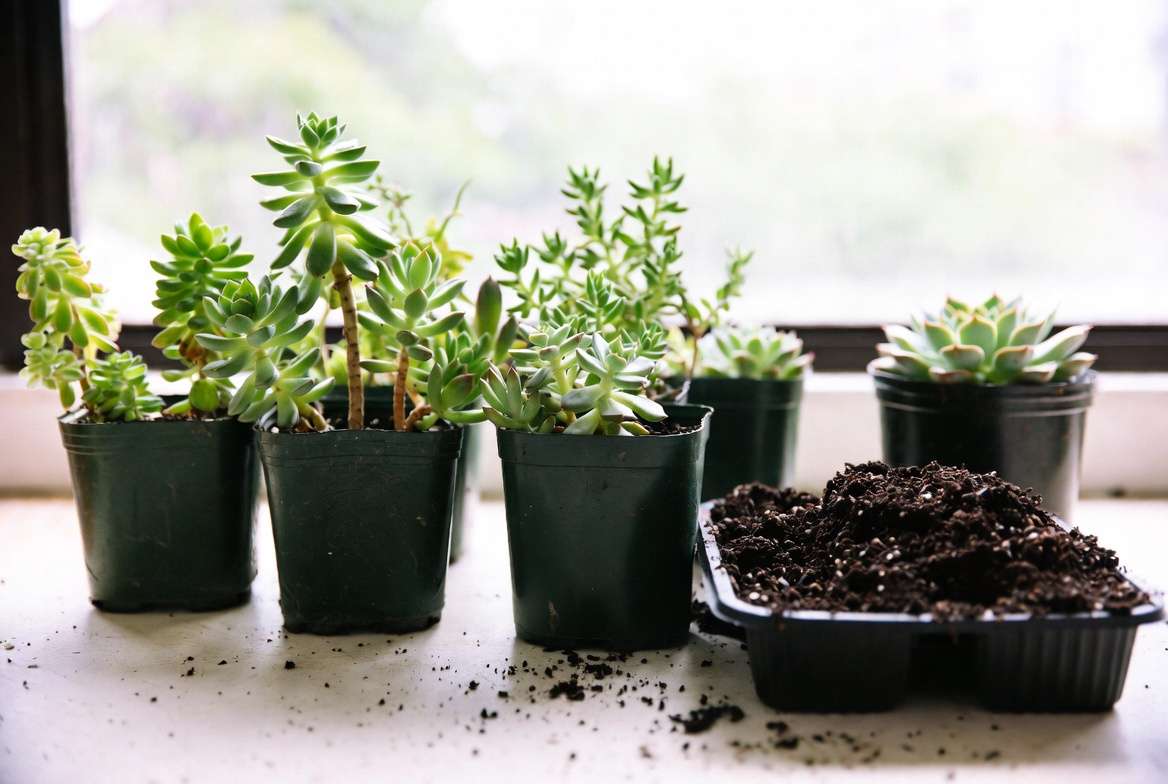
Treat every single new succulent you purchase as if it is already infected.
-
Immediate Isolation: Place the new arrival in your quarantine zone for at least 14 days.
-
The Nursery Soil Purge: Nursery soil is often heavily peat-based and retains too much moisture for long-term home growing, inviting fungus gnats and rot. Unpot the new plant, throw away the nursery soil, and repot it in your own sterile, gritty succulent mix. 🪨
-
Preventative Treatment: Even if you see no bugs, give the plant a gentle preventative wipe-down with insecticidal soap or rubbing alcohol before letting it join your permanent collection.
🛑 Common Quarantine Mistakes to Avoid
Even well-meaning plant parents can make errors during isolation. Avoid these common pitfalls to ensure your succulent’s speedy recovery:
-
Mistake 1: The Dark Closet Quarantine. 🥀 Never put a sick succulent in a dark bathroom or a windowless room. Without light, a succulent will rapidly etiolate (stretch out), weakening its immune system and making it highly susceptible to rot.
-
Mistake 2: Stopping Treatment Prematurely. Pests have a way of disappearing for a week and returning with a vengeance. Always complete a full 3 to 4 weeks of regular treatment cycles, even if the plant looks clean after day two.
-
Mistake 3: Reusing Contaminated Soil or Pots. 🗑️ Never reuse soil from a diseased plant. If you want to reuse the physical pot, you must scrub it thoroughly and soak it in a 1:9 bleach-to-water solution for 20 minutes to kill lingering pathogens.
Frequently Asked Questions (FAQs) ❓
Can I quarantine my indoor succulents outdoors? While moving a sick plant outside isolates it from your indoor collection, it exposes the already-stressed succulent to harsh temperature fluctuations, rain, and outdoor pests. It is generally safer to maintain a controlled indoor quarantine zone. 🏡
Will my healthy succulents get mealybugs if they are in the same room? If the room is large and the plants are placed 10 to 15 feet apart with no shared airflow, the risk is minimal. Mealybugs crawl, but they are not marathon runners. However, different rooms are always the safest option.
Do I need to throw away a badly diseased succulent? If a plant is completely rotted from the roots up to the crown, or heavily encrusted in scale to the point of severe tissue death, tossing the plant (and sealing it in a plastic bag before throwing it in the outdoor trash) is the most responsible choice to protect your other plants. Sometimes, sacrificing one is necessary to save the many. 🚮
🏁 Conclusion
Dealing with pests, rot, and fungi is an inevitable rite of passage for every succulent enthusiast. Finding a sick plant doesn’t mean you are a bad plant parent; it simply means it is time to step up your horticultural game.
By acting swiftly, establishing a secure isolation zone, and following strict, proper quarantine procedures for diseased succulents, you can stop the spread in its tracks. Remember that patience is your greatest weapon. Take your time, monitor carefully, and your beloved plant will soon be healthy, resilient, and ready to take its rightful place back on your display shelf! 💪
Share your biggest plant pest horror story in the comments below, or check out our other comprehensive guides for more expert succulent care strategies!











