

Picture this: you step out onto your balcony, patio, or even just reach out to your windowsill, and snip a handful of crisp, vibrant leaves for tonight’s dinner. No plastic clamshells, no slimy grocery store spinach, and no confusing expiration dates—just pure, organic freshness. If you are short on backyard space but crave the deep satisfaction of a homegrown harvest, cultivating quick-growing salad greens for containers is the absolute ultimate gardening hack.
Within just 30 days (and sometimes even less!), you can transform an empty pot into a thriving, edible ecosystem.
🧑🌾 Expert Insight: As a plant care specialist and long-time container gardener, I’ve spent years testing dozens of seed varieties, soil mixtures, and lighting conditions to find the absolute best performers for small spaces. The truth is, you don’t need an acre of land to be a successful gardener. Leafy greens are incredibly forgiving, highly productive, and perfectly suited for pot cultivation. In this comprehensive guide, I am going to walk you through exactly which seeds to buy, how to set up your pots for explosive growth, and how to harvest them so they keep feeding you for months.
Let’s dive in and get your 30-day countdown started! ⏱️🌱
Why Grow Salad Greens in Containers? 🪴
You might be wondering if it’s truly worth the effort to set up a patio garden when the supermarket is just down the street. The answer is a resounding yes. Beyond the undeniable upgrade in flavor and nutritional value, growing leafy greens in containers offers several distinct advantages over traditional in-ground gardening.
1. Ultimate Climate and Soil Control 🧫
Tender salad greens require loose, well-aerated, and nutrient-rich soil to develop their shallow root systems quickly. When you plant in the ground, you are at the mercy of your native soil—which might be heavy clay, overly sandy, or packed with dormant weed seeds. Containers allow you to play Mother Nature. By filling your pots with a custom, high-quality potting mix, you create the absolute perfect, weed-free environment for seed germination and rapid root expansion.
2. Pest Management Made Easy 🐛
If you have ever tried to grow lettuce in a backyard bed, you know the heartbreak of waking up to find your precious crop decimated by ground-dwelling pests. Slugs, snails, pillbugs, and even rabbits view ground-level greens as an all-you-can-eat buffet. Elevating your crops in containers, window boxes, or on plant stands acts as a physical barrier. While you still need to keep an eye out for airborne pests, keeping your pots off the ground eliminates about 90% of the most common garden predators. 🛡️
3. Mobility for Maximizing Sun ☀️
Most cool-season crops prefer mild temperatures. In the early spring, your greens might need full sun to stay warm and grow vigorously. However, as late spring turns into scorching summer, that same full sun will cause your delicate greens to “bolt” (go to seed) and turn incredibly bitter. Containers offer the magic of mobility. You can easily drag a grow bag or pot into partial shade during a heatwave, effectively extending your harvest season by several weeks!
The 7 Best Quick-Growing Salad Greens for Containers ⏱️🥬
Not all vegetables are suited for the fast-paced life of a container garden. You need varieties with shallow roots, rapid germination rates, and a high tolerance for tight spacing. Here are the top 7 champions of the container garden world.
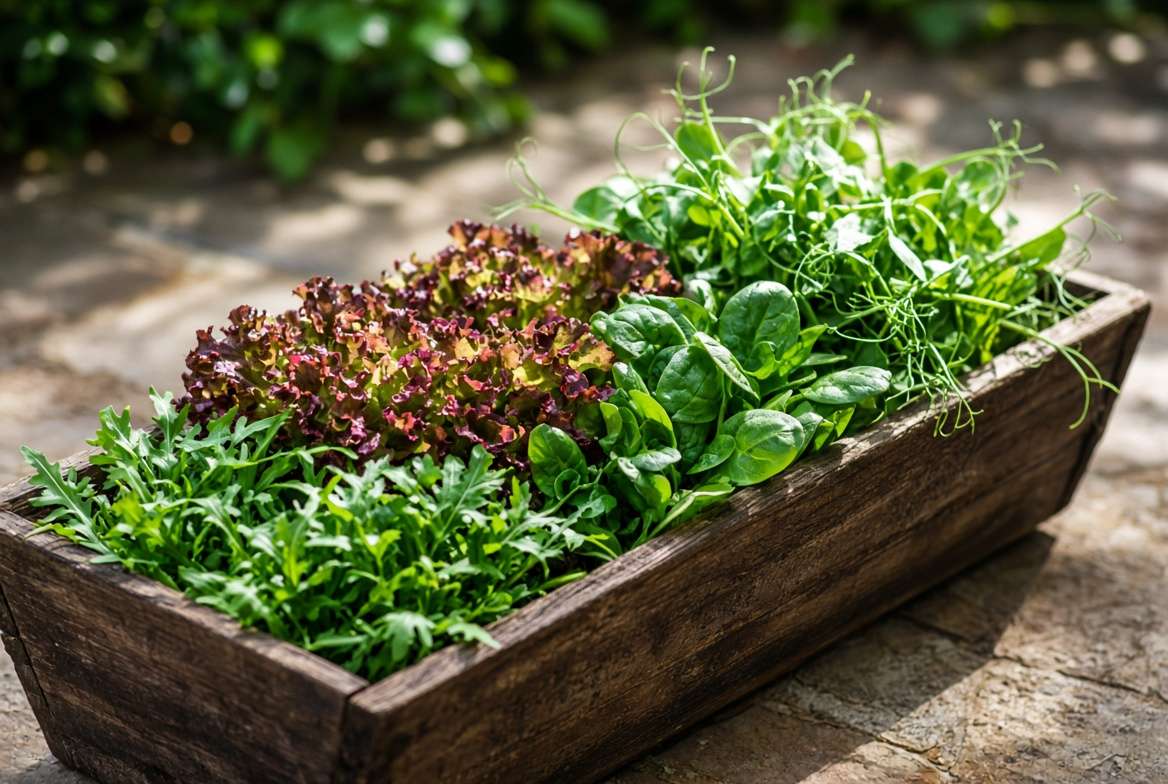
1. Arugula (Rocket): The Peppery Powerhouse 🌿
Arugula is often the very first seed to sprout in a container garden, sometimes poking through the soil in just 3 to 4 days! It produces deeply lobed leaves that pack a sophisticated, peppery, and slightly nutty punch, making it a favorite for gourmet salads and pizza toppings.
-
Days to Maturity: 21-30 days
-
Container Depth Needed: 4-6 inches (Very shallow!)
-
Why it works: Arugula actually prefers the slightly crowded conditions of a container. It thrives in cooler weather and handles partial shade beautifully, making it ideal for covered balconies.
-
🧑🌾 Expert Tip: Temperature dictates flavor. Harvest your arugula as “baby greens” at the 3-week mark for a mild, delicate taste. If you let it mature or expose it to hot weather, the spicy, peppery kick will intensify dramatically. 🌶️
2. Baby Spinach: Nutrient-Dense and Fast 🍃
Spinach is a nutritional powerhouse packed with iron, vitamins, and antioxidants. While traditional mature spinach can take up to two months to grow, harvesting it at the “baby” stage cuts that time in half and provides much tenderer, sweeter leaves.
-
Days to Maturity: 25-30 days
-
Container Depth Needed: 6 inches
-
Why it works: Spinach is notoriously cold-hardy. You can start sowing spinach seeds in your containers weeks before the last frost date in spring, or late into the autumn. It also tolerates shade better than almost any other green, requiring only 3 to 4 hours of direct sunlight.
-
🧑🌾 Expert Tip: Spinach seeds have a hard outer shell. To speed up seed germination, soak your seeds in a shallow bowl of room-temperature water for 12 to 24 hours before planting them in your potting soil. 💧
3. Mesclun Mix: The Gourmet Variety Pack 🥗
If you can’t decide which green to grow, grow them all! Mesclun (from the Provençal word mescla, meaning “to mix”) is a curated blend of seeds that usually includes diverse textures and colors—like frilly endive, red mustard greens, tender butterhead lettuce, and curly kale.
-
Days to Maturity: 25-35 days
-
Container Depth Needed: 6 inches
-
Why it works: Mesclun mixes are specifically bred for the “cut-and-come-again” harvesting method. Because you are broadcasting a mix of seeds heavily over the surface of the soil, it creates a dense, beautiful canopy of foliage that acts as a living mulch, retaining moisture in the pot.
-
🧑🌾 Expert Tip: When buying mesclun seeds, look for “mild” or “spicy” mixes depending on your palate. Spicy mixes usually contain a higher ratio of arugula and mustard, while mild blends lean heavily into sweet lettuces.
4. Loose-Leaf Lettuce: The Cut-and-Come-Again Classic 🥬
While iceberg and romaine are famous for their tight, crisp heads, head-forming lettuces take a long time to mature and are prone to rotting in containers. Loose-leaf lettuce varieties, such as Black-Seeded Simpson, Oakleaf, or Lollo Rosso, are the ultimate problem-solvers for impatient gardeners.
-
Days to Maturity: 30-40 days
-
Container Depth Needed: 6-8 inches
-
Why it works: Instead of forming a tight cabbage-like head, these varieties grow in a loose rosette shape. This open structure allows you to harvest the outer leaves continuously while the inner leaves keep growing, providing a steady yield for weeks.
-
🧑🌾 Expert Tip: Loose-leaf lettuces are incredibly sensitive to dry soil. If the potting mix dries out completely, the plant will panic and turn bitter. Consistent moisture is the secret to sweet, tender leaves. 💧
5. Mustard Greens: Fast, Fiery, and Frilly 🦖
If you want to add bold flavor and stunning visual appeal to your patio garden, mustard greens are unparalleled. With striking varieties like Red Giant or Mizuna, they offer frilly, deeply serrated leaves with stunning purple and green veins.
-
Days to Maturity: 20-30 days
-
Container Depth Needed: 6 inches
-
Why it works: Mustard greens are vigorous growers that can outcompete almost anything else in your container. Furthermore, their high concentration of glucosinolates (the compounds that make them spicy) acts as a natural pest deterrent, keeping bugs at bay organically.
-
🧑🌾 Expert Tip: Like arugula, heat amplifies the spice. Grow them in early spring or fall for a mild, pleasant zing, or grow them into the warmer months if you love a horseradish-like kick in your salads! 🔥
6. Radish Greens: The Secret Salad Green 🪄
When most people think of radishes, they think of the spicy, crunchy red root. But did you know that radish leaves are not only entirely edible, but they are also one of the fastest-growing greens on the planet?
-
Days to Maturity: 15-20 days
-
Container Depth Needed: 6 inches
-
Why it works: Radish seeds germinate with explosive speed—often within 48 hours. By day 15, the leafy tops are lush, tender, and ready to be snipped. They taste mildly earthy with a subtle peppery finish, perfect for bulking up a fresh salad.
-
🧑🌾 Expert Tip: You don’t have to choose between the root and the leaf! Snip just one or two outer leaves from each radish plant while they grow. The root will continue to swell beneath the soil, giving you a beautiful double harvest. 🌱
7. Pea Shoots (Microgreens): Sweet and Crunchy 🟢
Pea shoots are the young, tender vines and leaves of the pea plant. They are a staple in high-end restaurant dishes but cost a fortune at the grocery store. Luckily, they are incredibly easy and fast to grow in shallow containers.
-
Days to Maturity: 10-20 days
-
Container Depth Needed: 3-4 inches
-
Why it works: You don’t need deep pots for pea shoots; a simple cafeteria tray with drainage holes or a shallow window box works perfectly. They taste exactly like a fresh spring pea and add an unmatched crisp, juicy texture to salads and sandwiches.
-
🧑🌾 Expert Tip: Don’t buy expensive “pea shoot seeds.” Simply buy a bulk bag of whole, dried organic peas from the soup aisle of your grocery store. Soak them overnight, plant them densely in your container, and watch them explode with growth! 🍲
The Expert Setup: Soil, Pots, and Sun ☀️🪱
Having the right seeds is only half the battle. To achieve a 30-day harvest, your container environment must be optimized for rapid growth. Here is how to set up your patio garden like a pro.
Choosing the Right Container (Wider is Better Than Deeper) 🪴
When growing quick-growing salad greens for containers, surface area is far more important than depth. Leafy greens have shallow, fibrous root systems that rarely extend deeper than 6 inches.
-
Window Boxes and Troughs: Excellent for maximizing linear space along a balcony railing.
-
Fabric Grow Bags: My personal favorite. Fabric pots provide superior aeration, allowing roots to breathe and preventing root rot. They also drain perfectly.
-
The Golden Rule: Whatever container you choose, it must have drainage holes. Stagnant water at the bottom of a pot will suffocate roots and kill your greens in a matter of days. 🚫💧

The Ultimate Soil Mix for Fast Growth 🧫
Do not use garden soil or topsoil from your yard. It is too heavy, compacts easily in pots, and may harbor soil-borne diseases. You need a fluffy, well-draining potting mix.
🧑🌾 My Go-To Container Greens Recipe:
-
60% High-Quality Organic Potting Soil: (Look for a base of coco coir or peat moss).
-
20% Perlite or Pumice: To ensure excellent drainage and root aeration.
-
20% Organic Compost or Worm Castings: This provides the gentle, slow-release nitrogen that leafy greens desperately need to produce lush foliage quickly. 🪱
Watering Rules for Potted Greens 🚿
Containers dry out much faster than raised beds or in-ground gardens. The soil should feel like a well-wrung-out sponge—moist, but not dripping wet. Check your pots daily by sticking your finger an inch into the soil. If it feels dry, it’s time to water. Water gently at the base of the plants to avoid splashing dirt onto the leaves, which can spread fungal diseases.
How to Harvest: The “Cut-and-Come-Again” Method ✂️
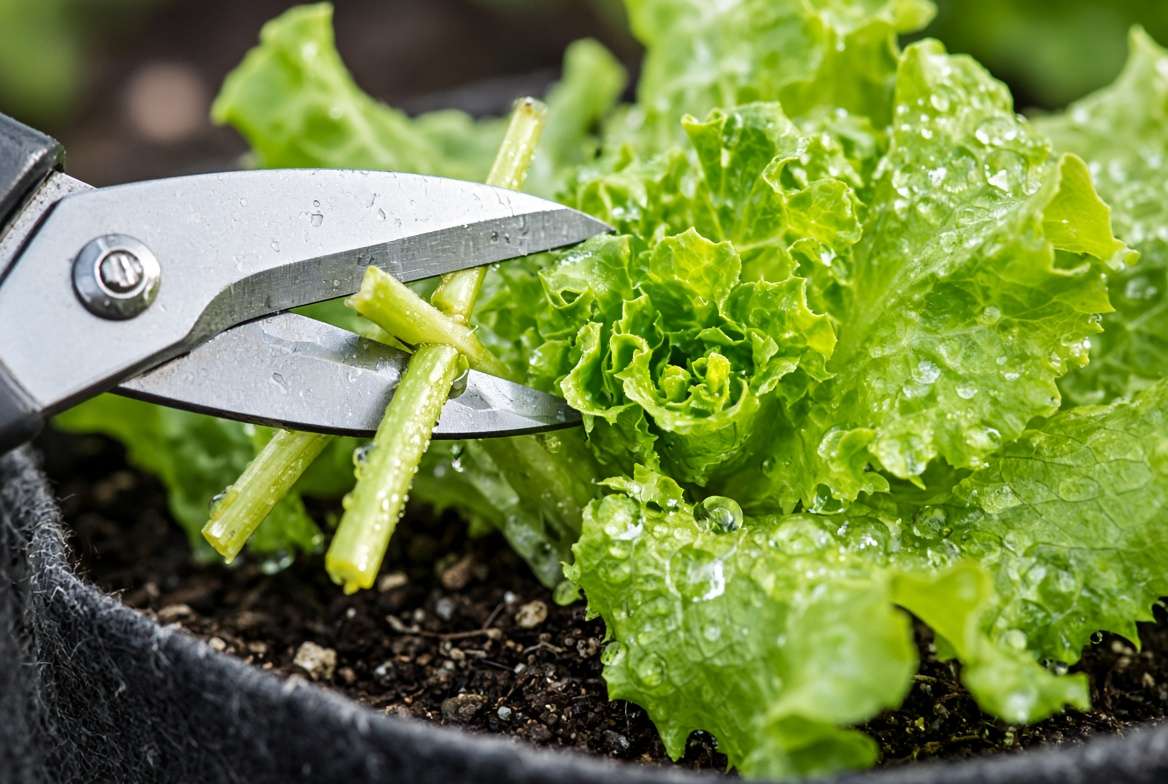
If you harvest your greens correctly, you can turn a single 30-day crop into a continuous food supply that lasts for months. This is known as the “cut-and-come-again” technique.
-
Wait for the Right Size: Let the leaves reach about 3 to 4 inches in length (usually around week 3 or 4).
-
Locate the Crown: Look closely at the center of the plant. You will see tiny, brand-new leaves forming. This central point is the growing tip (or crown).
-
Snip the Outer Leaves: Using sharp, clean scissors, snip only the oldest, outermost leaves about an inch above the soil line.
-
Leave the Center Intact: By leaving the central growing tip completely untouched, the plant will quickly push out a new flush of leaves. You can usually repeat this harvest every 5 to 7 days! 🥗
Troubleshooting Common Container Pests & Problems 🛡️
Even in the controlled environment of a container, you might run into a few hiccups. Here is how to handle them quickly and organically.
Why Are My Greens Turning Bitter? (Bolting) 🥵
If your greens suddenly shoot up a tall central stalk and the leaves turn incredibly bitter, your plant is “bolting.” This is a stress response—usually triggered by hot weather or dry soil—where the plant abandons leaf production to create flowers and seeds before it dies.
-
The Fix: Once a plant bolts, the flavor won’t return. Pull it up and replant. To prevent it in the future, move your containers into afternoon shade during hot weather and water more consistently.

Dealing with Aphids and Leaf Miners Naturally 🐞
Aphids are tiny green or black bugs that suck the sap from your leaves, while leaf miners leave distinct white, winding trails through the leaf tissue.
-
The Fix: For aphids, a strong blast of water from a spray bottle will often knock them right off. For persistent infestations, a light spray of organic insecticidal soap or cold-pressed Neem oil (applied in the evening) works wonders. For leaf miners, simply pinch off and discard the affected leaves to stop the larvae from spreading.
Frequently Asked Questions (FAQs) 🙋♀️
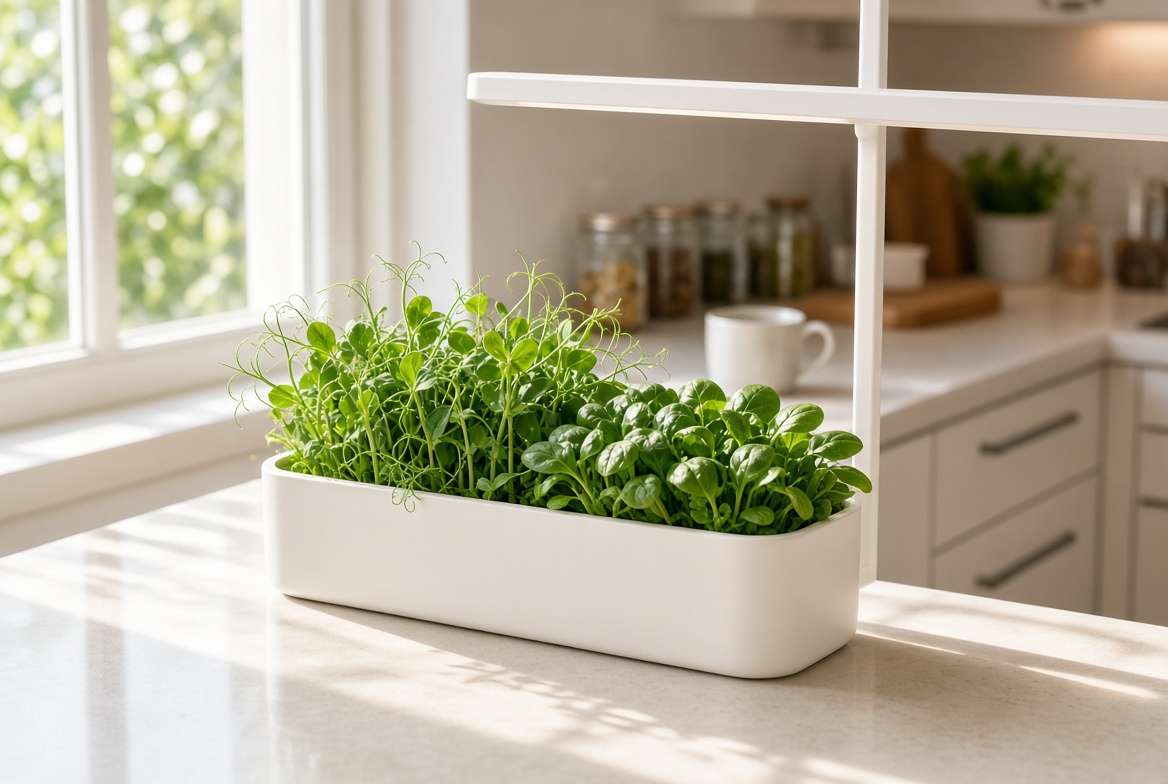
Can I grow these greens indoors on a windowsill? Yes! As long as you have a very bright, south-facing window. If your home lacks natural light, you can easily supplement with a basic, full-spectrum LED grow light placed a few inches above the containers. 💡
Do I need to fertilize quick-growing greens? Because they grow so fast, the worm castings or compost in your initial soil mix is often enough for the first 30 days. However, if you are using the cut-and-come-again method, feed them every two weeks with a diluted, organic liquid fertilizer (like fish emulsion or kelp extract) to replenish their nitrogen supply. 🐟
Can I reuse the potting soil after the greens are done? Absolutely. Once your greens have finished their life cycle, pull out the root balls. Revitalize the old soil by mixing in a fresh handful of compost or worm castings before planting your next batch of seeds. ♻️
Conclusion: Start Your 30-Day Countdown Today 🏁
Growing your own food doesn’t require a sprawling backyard, heavy farming equipment, or months of agonizing patience. By choosing the right varieties, optimizing your soil, and utilizing sunny corners of your patio or balcony, you can secure a steady, delicious harvest in mere weeks.
These quick-growing salad greens for containers offer an immediate reward that bridges the gap between novice experimentation and expert-level yield. From the fiery kick of mustard greens to the sweet crunch of pea shoots, your ultimate salad bowl is just a few handfuls of soil and some seeds away.
Are you ready to ditch the grocery store greens? Grab a pot, pick your favorite seed from this list, and start planting this weekend!
Let’s keep growing together: Which of these 7 greens are you going to plant first? Have a question about your balcony setup? Drop a comment below, or share photos of your first 30-day harvest on our social media pages. Happy planting! 👩🌾🪴✨











