
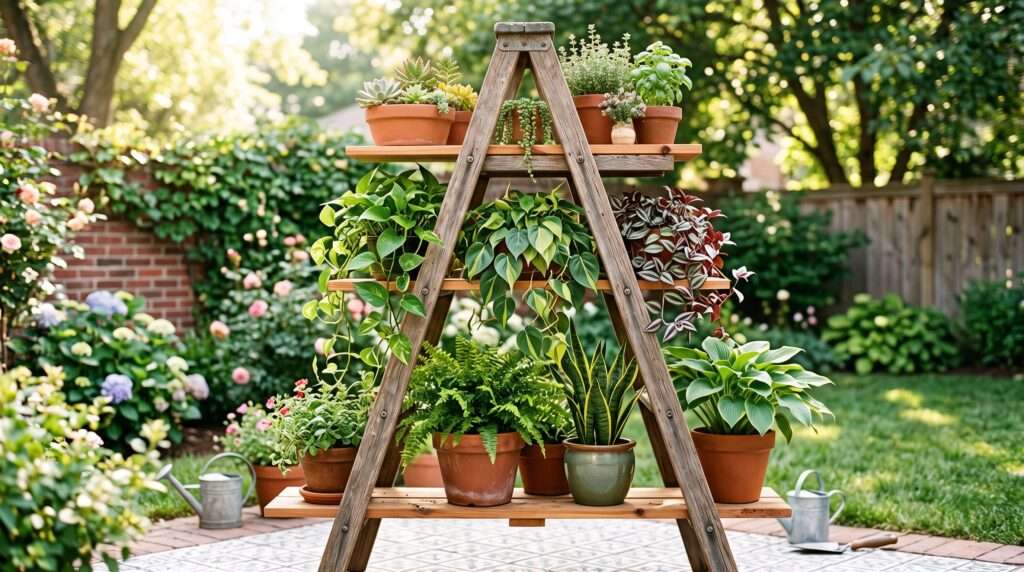
Are your window sills completely overflowing with terracotta pots? When horizontal surfaces vanish, looking upward is the ultimate game-changer. As a plant care specialist, I have found that repurposing old ladders for vertical gardens is a brilliant, space-saving solution for dense indoor jungles and compact patios. This sustainable, budget-friendly DIY project not only transforms your space aesthetically but also drastically improves air circulation for healthier foliage.
Prepping & Treating Your Vintage Ladder 🪜
Before loading up your new upcycled planter, establishing structural integrity is paramount. Heavy, wet soil requires a sturdy foundation.
-
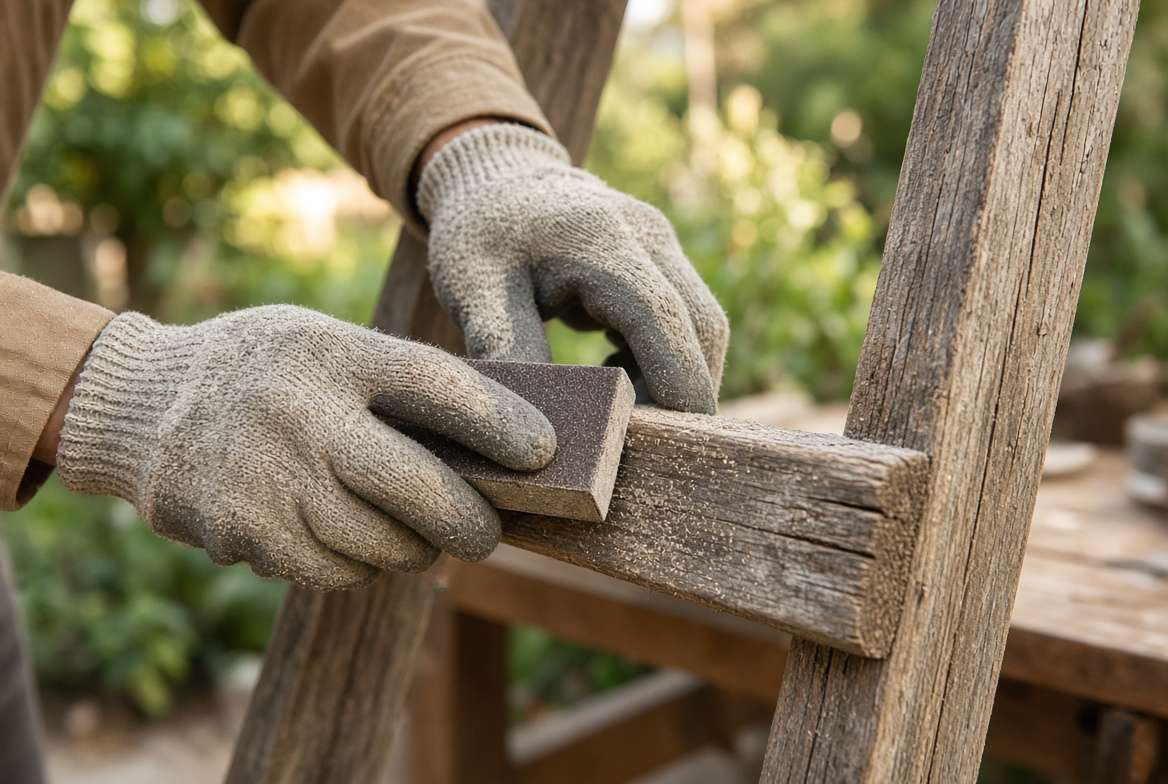
Inspect and Sand: Thoroughly check the wooden frame for rot, pests, or loose hinges. Lightly sand the surface to remove splinters and old, flaking paint.
-
Weatherproof: Apply an eco-friendly, non-toxic water sealant to the wood—a crucial step if your plant stand will face outdoor balcony humidity or rain.
-
Create Shelving: Secure custom-cut, durable cedar planks across the steps using rust-resistant hardware to build broad, level platforms for your heavier pots.
Strategic Plant Selection 🌿✨
A vertical planter inherently creates distinct microclimates. Organizing your greenery by light requirements and weight ensures both plant health and structural safety.
-
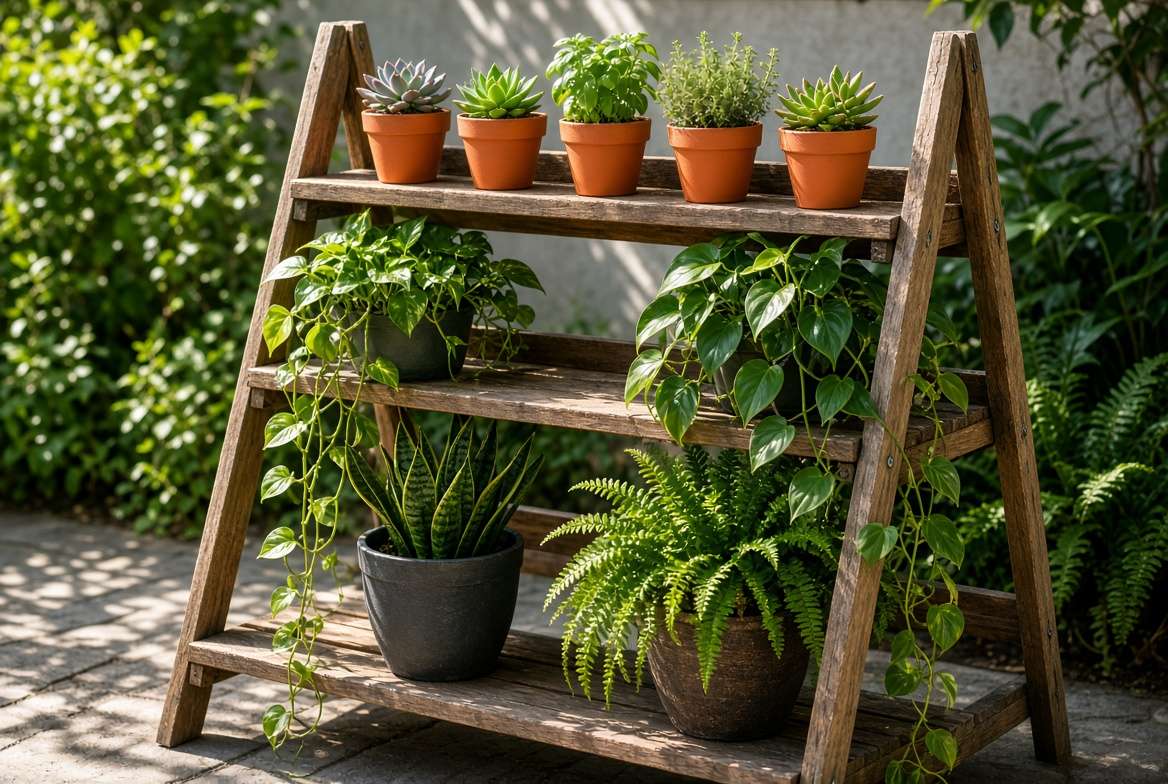
Top Tier (High Light): Place sun-loving succulents, blooming vines, and drought-tolerant herbs closest to your window or overhead sunlight.
-
Middle Tier (Moderate Light): Showcase bushy aroids, cascading pothos, and trailing philodendrons that will drape elegantly over the wooden rungs.
-
Bottom Tier (Low Light): Anchor the base with heavy, wide pots containing shade-tolerant ferns and calatheas to lower the center of gravity and prevent tipping.
Expert Maintenance & Stability 🌸
Maintaining a tiered garden setup requires logistical planning, primarily concerning watering logistics and long-term stability.
-
Soil Optimization: Use lightweight, well-draining soil mixes heavily amended with perlite to minimize the structural load on older wooden joints.
-
Water Management: Utilize deep drip trays or self-watering planters to gracefully manage runoff and protect your floors from water damage.
-
Safety Anchors: Always secure tall wooden ladders to the wall with discreet L-brackets to protect against strong winds, accidental bumps, or curious pets.
Do you plan to keep the original distressed paint of your ladder for a rustic look, or will you be staining it to match your modern decor?
Deep Dive: The Ultimate Masterclass in Ladder Restoration 🛠️
Now that we have covered the foundational concepts, let’s roll up our sleeves and get into the comprehensive, step-by-step mechanics of this project. As a horticulturist who has built countless indoor plant stands and balcony gardens, I can tell you that the success of repurposing old ladders for vertical gardens lies in the preparation. Skipping steps here can lead to wobbly shelves, water-damaged wood, or worse—a collapsed plant display.
1. Sourcing the Perfect Ladder 🕵️♀️
Not all ladders are created equal when it comes to upcycled furniture and container gardening. When scouring flea markets, garage sales, or antique stores, you will generally encounter two types:
-
The A-Frame Stepladder: This is the holy grail for a freestanding vertical garden. Because it supports its own weight, an A-frame ladder can be placed anywhere—in the center of a patio, tucked into a bright living room corner, or used as a room divider.
-
The Straight Leaning Ladder: Originally used for roofing or tall fruit trees, these single-sided ladders must lean against a wall. They are fantastic for tight spaces and narrow hallways, but they require strict anchoring to prevent sliding.
Expert Tip: Always prioritize wooden ladders over aluminum or fiberglass if you want a natural, rustic, or bohemian aesthetic. However, if your garden is exposed to harsh outdoor elements year-round, a vintage galvanized metal ladder might be your best defense against rust and rot.
2. Cleaning and Decontaminating 🧽
Vintage pieces carry history, but they also carry decades of grime, grease, and potentially harmful lead paint.
-
Wash thoroughly: Start by scrubbing the ladder with a mixture of warm water and a mild degreaser (or a TSP substitute).
-
Inspect for pests: Look for tiny holes in the wood that might indicate termites or wood-boring beetles. If you see signs of active pests, treat the wood immediately or discard the piece—you do not want to introduce wood-boring insects to your home!
-
Check for lead: If the ladder has peeling, chipped paint and looks like it was made before 1978, use a simple lead testing swab (available at any hardware store). If it tests positive, seal the paint with a clear encapsulating primer rather than sanding it off.
3. Sanding and Weatherproofing 🪵
To prepare your ladder for its new life as a DIY plant shelf, you need to create a smooth, water-resistant surface. Water spills are inevitable in plant care, and untreated wood will quickly warp or rot.
-
The Sanding Sequence: If lead paint isn’t an issue, start with an 80-grit sandpaper to remove rough splinters and old varnish. Follow up with a 120-grit, and finally a 220-grit for a buttery smooth finish.
-
Sealing the Wood: For an indoor space-saving garden, rubbing the wood down with raw linseed oil or beeswax brings out the natural grain while providing moderate water resistance. For an outdoor vertical display, apply two to three coats of exterior-grade spar urethane. This flexible sealant expands and contracts with temperature changes, shielding the wood from UV rays and rain.
4. Expanding Real Estate: Crafting the Shelves 📏
While you can balance small terracotta pots directly on the existing rungs, you will drastically increase your green real estate by adding custom shelving.
-
Choosing Your Wood: Cedar and redwood are the gold standards for outdoor container gardening because they naturally resist moisture and rot. For an indoor plant stand, more affordable pine or plywood works perfectly fine.
-
Measurements: Measure the depth of each rung. A-frame ladders naturally taper at the top, meaning your bottom shelf will be much wider and deeper than your top shelf.
-
Securing the Boards: Rest your cut planks across the rungs. While gravity will hold heavy pots down, it is much safer to secure the boards using L-brackets or wood screws from underneath. This prevents the shelves from tipping if an unevenly weighted pot is moved.
Advanced Plant Styling and Care Mechanics 🪴💧
Once your structure is built and cured, the truly fun part begins: curating your urban jungle. Designing a vertical plant display requires an understanding of micro-environments. Light, humidity, and temperature change depending on how high up a plant sits.
Mastering the Lighting Tiers ☀️
-
The Canopy (Top Shelf): Heat rises, and the top shelf usually receives the most unobstructed sunlight. This is prime real estate for sun-worshipping succulents, cacti, and flowering plants like Hoya or Bougainvillea. If your ladder is near a kitchen window, this is also the perfect spot for an indoor herb garden (basil, thyme, and rosemary).
-
The Understory (Middle Shelves): This zone enjoys bright, indirect light. It is ideal for trailing plants that need vertical drop space. Lush cascading pothos, heartleaf philodendrons, and wandering dudes (Tradescantia) will create a living, green waterfall effect, softening the harsh wooden lines of the ladder.
-
The Forest Floor (Bottom Shelf): The lowest rungs receive the least light and stay the coolest. Reserve this sturdy, shadowed space for heavy, low-light tolerant species like Snake Plants (Sansevieria), ZZ plants, or humidity-loving ferns.
Mastering Moisture: DIY Irrigation Systems 💦
Watering a multi-tiered wooden structure without damaging your floors or the reclaimed wood requires careful planning. As a tree care and indoor plant specialist, I highly recommend transitioning from traditional top-watering to a more controlled system for your ladder garden.
-
Capillary Mats: Place highly absorbent capillary matting inside custom drip trays beneath your pots. This allows plants to wick up exact moisture as needed, keeping the wooden rungs perfectly dry.
-
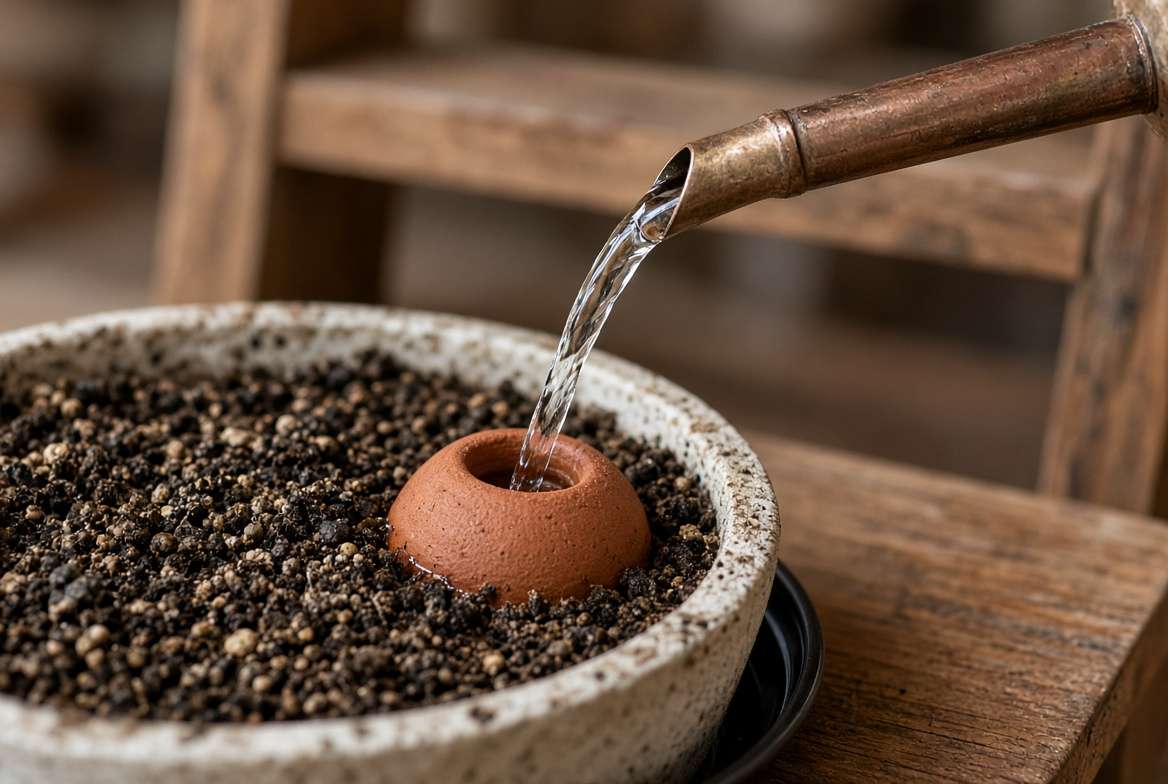
Olla Watering Spikes: Bury porous terracotta spikes in the soil of your larger plants. When filled with water, they slowly release moisture directly to the root zone, eliminating surface runoff completely.
-
Automated Drip Lines: For outdoor balcony setups, run a discreet 1/4-inch drip irrigation line up the back leg of the ladder, attaching micro-emitters to each pot for hands-free watering.
Advanced Root Rot Prevention Strategies 🛡️
When repurposing old ladders for vertical gardens, drainage is a double-edged sword. You need excellent drainage to prevent root rot, but you must capture that drainage to protect the wooden frame.
-
The Cachepot Method: Never plant directly into decorative pots. Keep your greenery in lightweight plastic nursery pots with heavy drainage holes, and slip them into a waterproof decorative cachepot.
-
Aerated Soil Mixes: Ditch dense potting soils. Blend your standard indoor soil with equal parts orchid bark and coarse perlite. This creates air pockets crucial for healthy root oxygenation.
-
Elevated Spacers: If using saucers, place small pebbles or pot feet under the nursery pot so it never sits directly in stagnant runoff water.
The Google Discover Optimization Checklist 🚀
To ensure your plant care blog reaches the widest possible audience, aligning with Google Discover’s visual and intent-driven algorithm is essential.
-
High-Resolution Hero Images: Discover thrives on striking visuals. Use bright, well-lit photos of the finished ladder garden, ideally formatted in a 16:9 aspect ratio.
-
Engaging Web Stories: Repurpose this guide into a visual Google Web Story highlighting the step-by-step DIY process.
-
Niche Authority: Consistently interlink this post with your other expert articles on specific tree care or pest management to build topical authority.
Are you ready for the final section detailing seasonal transition tips and aesthetic styling themes for this vertical garden, or would you like to conclude the article here?
Seasonal Transitions: Adapting Your Vertical Garden 🍂❄️
As a seasoned plant care specialist, I always emphasize that repurposing old ladders for vertical gardens is an evolving, dynamic project. Plants are living organisms, and your wooden structure must adapt to the changing seasons to maintain a healthy ecosystem.
-
Overwintering Procedures: When frost approaches, smoothly transition outdoor ladder setups indoors. Clean the wooden frame thoroughly to prevent bringing in outdoor fungal spores or debris.
-
Thorough Pest Inspections: Always quarantine your greenery and inspect the undersides of leaves for spider mites or aphids before introducing your patio plants to your indoor collection.
-
Supplemental Lighting Adjustments: Winter sun sits much lower in the sky, reducing natural light. Reposition your indoor ladder closer to south-facing windows, or attach discreet, full-spectrum LED grow lights directly onto the higher wooden rungs to keep your tropicals thriving.
Aesthetic Styling Themes 🎨🌻
The beauty of upcycled container gardening is complete customization. Your ladder plant stand should seamlessly complement your interior design or patio aesthetic while displaying your horticultural expertise.
-
Rustic Farmhouse: Leave the wood raw or lightly distressed. Pair this natural look with classic, aged terracotta pots and sprawling English ivy to create a cozy, vintage vibe.
-
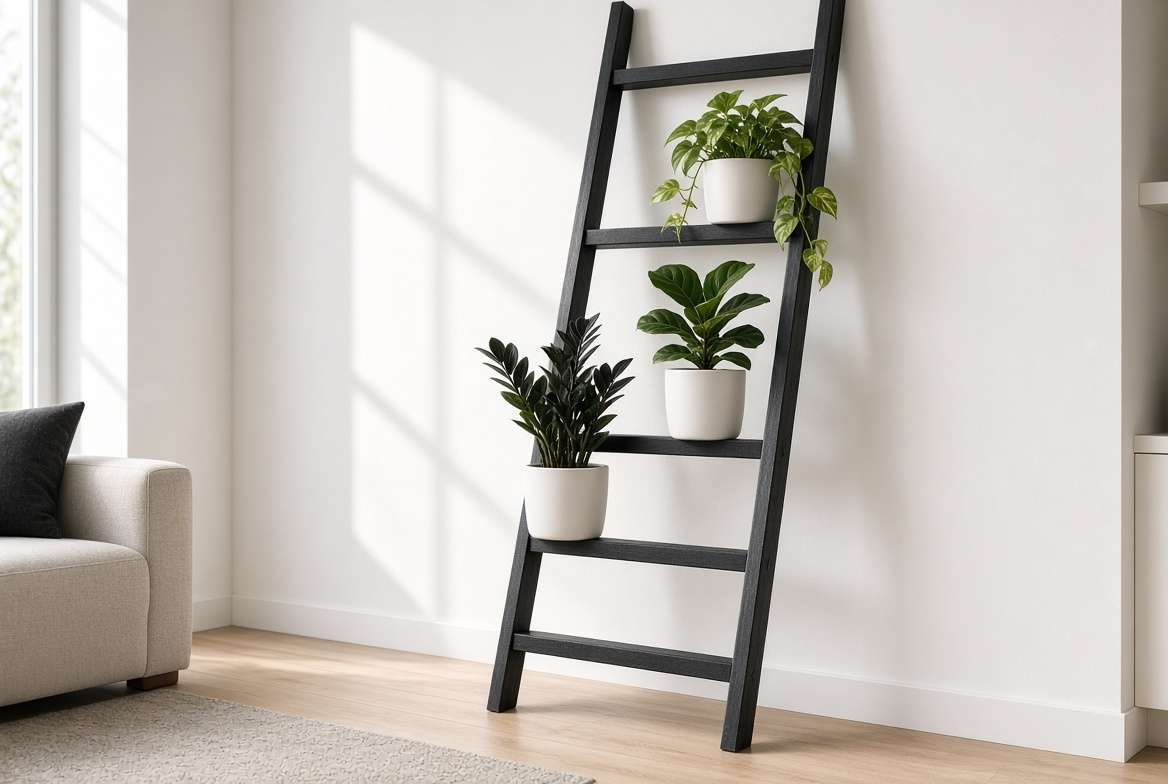
Modern Minimalist: Paint the ladder a sleek matte black or crisp white. Utilize uniform, geometric ceramic planters featuring sharp lines and architectural plants like the ZZ Raven or structural cacti.
-
Boho Jungle: Embrace organized botanical chaos. Mix and match colorful glazed pots, suspend small macrame hangers from the side rails, and let vigorous vining plants organically take over the structural framework.
Conclusion: Elevating Your Plant Care Journey 🪴🏆
Transforming a forgotten household item into a thriving vertical ecosystem is incredibly rewarding. It solves the perpetual problem of limited floor space, breathes new life into reclaimed materials, and provides a customizable canvas for your botanical collection. By following expert preparation steps, mastering moisture control, and strategically curating plants for each light tier, you guarantee a stunning, long-lasting display.











