

You check on your beautiful, symmetrical plant, only to find the bottom leaves are translucent, mushy, and falling off at the slightest touch. Even worse, the stem looks suspiciously dark and feels soft. If you are reading this, you are likely in panic mode. Take a deep breath! Dealing with rotting stems in echeveria rosettes is the number one emergency for succulent owners, but all hope is not lost.
As a succulent enthusiast who has rescued countless plants from the brink of death, I can assure you that swift action is your best friend right now. This is a critical situation, but with the right technique, you can save your plant. In this comprehensive guide, we will diagnose the exact cause of the rot, walk through the step-by-step emergency “surgery” required to save your Echeveria, and share expert care tips to ensure you never have to deal with this heartbreak again. Let’s get your plant back to perfect health! 💚
What Causes Rotting Stems in Echeveria Rosettes? 🌧️
To effectively treat the problem, we first need to understand the “why.” Echeverias are native to semi-desert regions of Central America, meaning they are biologically engineered to withstand prolonged droughts, not heavy rainfall or constant moisture. When rot sets in, it is almost always an environmental issue.
The Silent Killer: Overwatering and “Wet Feet” 💧
The absolute most common cause of stem and root rot is overwatering. Succulents store water in their fleshy leaves and thick stems. When they are forced to sit in damp soil (a condition often called “wet feet”), their roots suffocate due to a lack of oxygen. The plant takes up more water than its cells can hold, causing the cell walls to burst (edema). This dead, ruptured tissue becomes a buffet for rot-causing fungi and bacteria, which quickly travel from the roots up into the main stem of the rosette.
The Wrong Soil Mix 🪨
If you planted your Echeveria in standard indoor potting soil, you have inadvertently set a trap for it. Standard potting soils are heavy in peat moss and compost, which are designed to retain moisture for tropical plants. For an Echeveria, this soil acts like a wet sponge, clinging to the roots and suffocating them.
Expert Tip: Echeveria roots need oxygen just as much as they need water. Without a highly porous, gritty soil mix, the roots cannot breathe, leading inevitably to rot.
Poor Air Circulation and Humidity 🌬️
Echeverias thrive in dry, arid conditions with plenty of airflow. When kept indoors in stagnant air, or in a highly humid room (like a bathroom), excess moisture cannot evaporate from the soil surface or the plant’s leaves. This stagnant dampness creates the ultimate breeding ground for devastating fungal pathogens like Phytophthora and Rhizoctonia, which attack the stem directly at the soil line.
Oversized Pots 🏺
Pot size matters immensely in succulent care. If you place a small Echeveria rosette into a massive pot, there is an unbalanced “pot-to-root ratio.” The sheer volume of soil holds far more water than the small root system can drink. Consequently, the soil stays wet for weeks, inviting stem rot. Always choose a pot that is only 1 to 2 inches wider than the rosette itself.
How to Identify Stem Rot (Catch It Early!) 🔍
Stem rot can move incredibly fast. One day your Echeveria looks slightly tired; three days later, the entire rosette collapses into a pile of black mush. Identifying the exact stage of rot is critical for deciding your next steps.
Table: Diagnosing Echeveria Rot (Early vs. Advanced Stages)
| Stage | Leaf Symptoms 🍃 | Stem Symptoms 🌵 | Action Required 🚑 |
| Early Warning | Bottom leaves are yellowing, turning translucent, and falling off easily when bumped. | Stem is still green/firm above the soil, but roots may look brown or soil is soaking wet. | Unpot immediately, remove wet soil, let roots dry out, repot in gritty mix. |
| Advanced Rot | Leaves are mushy, blackening, and the center of the rosette is drooping or collapsing. | Stem is black, brown, squishy, and emits a slightly swampy or sour smell. | Emergency Surgery (Beheading) required immediately. |
If your plant falls into the “Advanced Rot” category, you cannot simply let the soil dry out. The rot is inside the vascular tissue of the plant, and like an infection, it must be amputated.
Step-by-Step Guide: How to Fix Rotting Stems in Echeveria Rosettes ✂️🏥
This is the emergency surgery phase. If the stem is rotting, the root system is already dead or dying, and the decay is traveling upwards. The only way to save the plant is to remove the healthy top portion of the rosette before the rot reaches the crown. This technique is often referred to as “beheading.”
Step 1: Unpot and Assess the Damage 🧤
Gently remove the Echeveria from its pot. Brush away the wet soil to inspect the stem and roots. Healthy roots should look firm, white, or light pink. If the roots are dark brown, stringy, slimy, and disintegrate when you touch them, root rot is confirmed. Look at the stem—note exactly how high the black/brown discoloration reaches.
Step 2: The “Beheading” Technique (Emergency Surgery) 🔪
You are now going to cut the healthy head of the rosette off the rotting stem.
-
Gather Your Tools: You will need a very sharp pair of pruning shears or a sterilized knife, rubbing alcohol, and optional rooting hormone or cinnamon powder.
-
Sterilize: Wipe your blade down completely with rubbing alcohol. Introducing dirty shears to an open plant wound will just cause secondary infections.
-
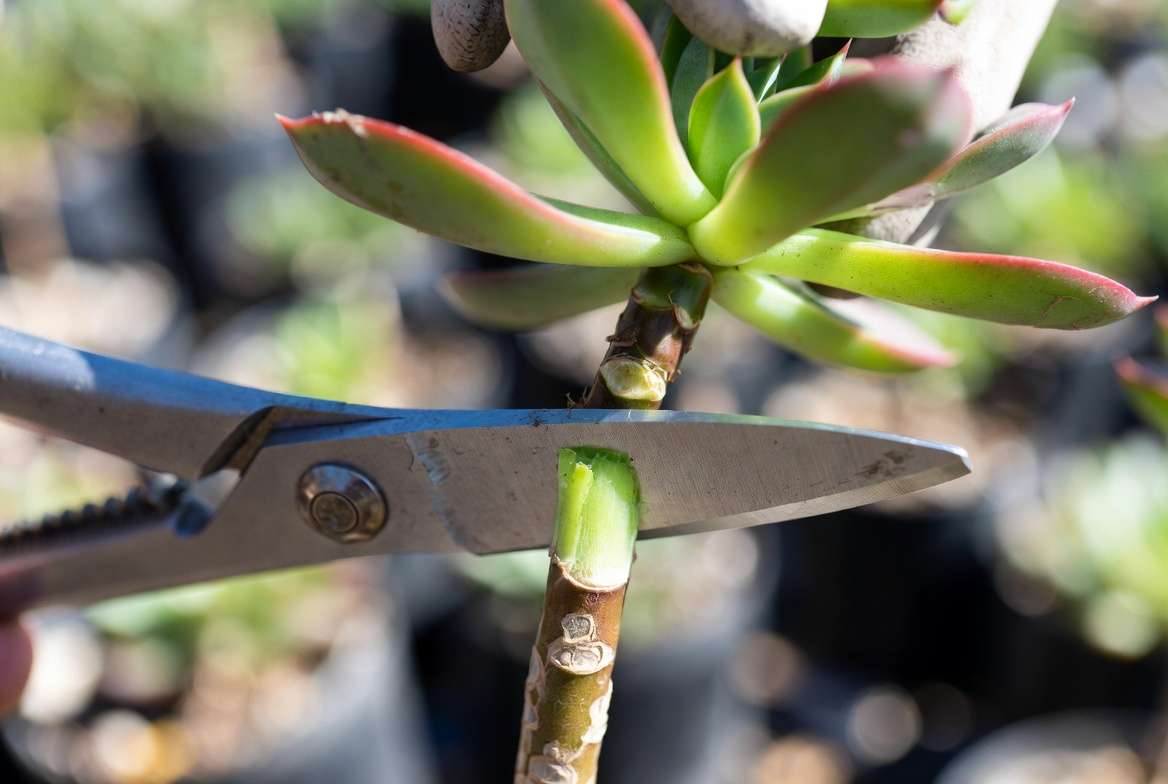
The Cut: Look at where the rot ends on the stem. You need to make a clean, horizontal cut at least 1 inch above the highest sign of rot. You may need to remove a few healthy bottom leaves to expose enough clear stem.
-
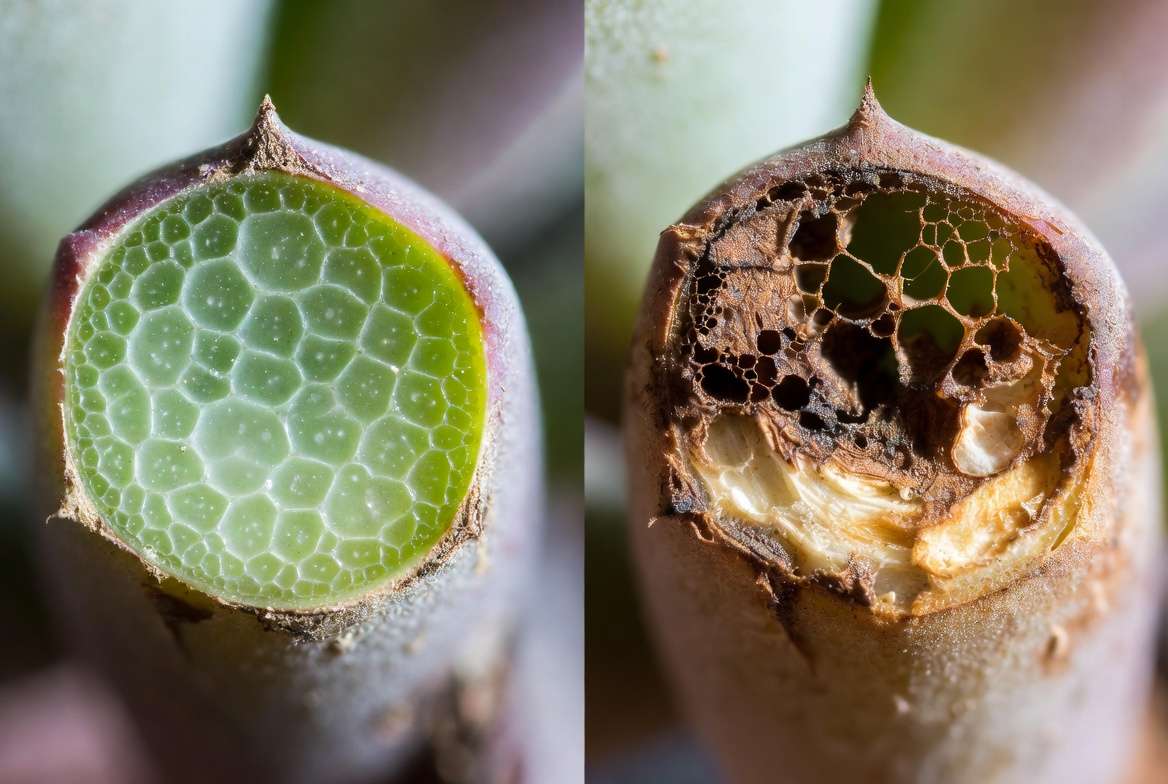
The Cross-Section Check (Crucial!): Look directly at the freshly cut stem on the healthy rosette. The tissue inside should be a crisp, uniform light green or white. If you see any brown spots, a dark ring, or black specks inside the stem, the rot pathogen is still there. You must sterilize your blade again and cut higher up the stem until the cross-section is 100% clean and green.
Step 3: Callusing the Healthy Rosette ⏳
Now that you have a clean, healthy rosette with a fresh cut, do not plant it. If you put an open plant wound into soil, it will immediately succumb to bacterial infection and rot again.
Instead, place the rosette in a bright, dry, well-ventilated area out of direct, harsh sunlight. You must wait for the cut end to dry out and form a hard scab, known as a “callus.”
Expert Tip: Depending on the humidity in your home, callusing can take anywhere from 3 to 7 days. To speed up the process and prevent fungal growth, lightly dab the fresh cut with powdered cinnamon (a natural fungicide) right after cutting.
Step 4: Re-rooting Your Saved Echeveria 🪴
Once the stem has formed a hard, dry callus, it is ready to grow new roots! You have two excellent options for rooting:
-
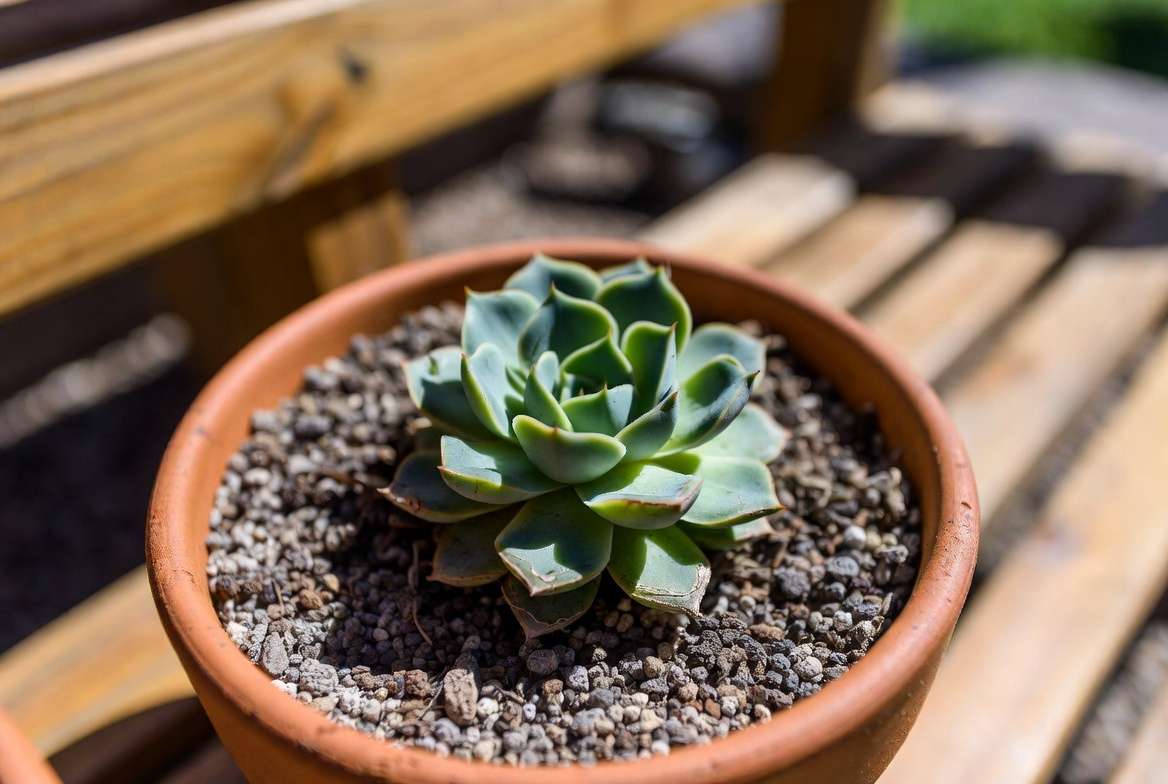
Method A: Dry Soil Rooting: Fill a small, terracotta pot with completely dry, gritty succulent soil. Simply place the callused rosette on top of the soil. Do not water it. The plant has no roots to absorb water, so watering now will only encourage rot. Wait 2 to 3 weeks. The Echeveria will sense the soil and push out bright pink aerial roots seeking moisture. Once a good root system is established, you can begin lightly watering.
-
Method B: Air Rooting: Suspend the rosette over an empty glass jar or cup, ensuring the stem is exposed to the air but not touching any water. Place it in a bright spot. Within a few weeks, you will see roots sprouting from the stem. Once they are an inch long, plant the rosette in gritty soil and resume normal watering.
Damage Control: Can You Save Individual Leaves? 🍂
Sometimes, you discover the problem too late. If the stem rot has reached all the way up to the very center of the rosette (the crown), beheading won’t work because there is no healthy stem left to cut.
In this tragic scenario, your best bet is to salvage any remaining firm, plump leaves and try to propagate them to create baby Echeverias (pups).
Leaf Propagation Best Practices 🌱
-
Harvesting: Carefully wiggle the healthiest-looking leaves side to side until they pop off the stem. You must get a clean break at the very base of the leaf. If the leaf tears, it will not root.
-
Callusing: Just like the stem, lay these leaves on a paper towel in a dry place for 3 to 5 days until the ends callus over.
-
Rooting: Lay the callused leaves flat on a tray of dry, well-draining succulent soil. Place them in bright, indirect light.
-
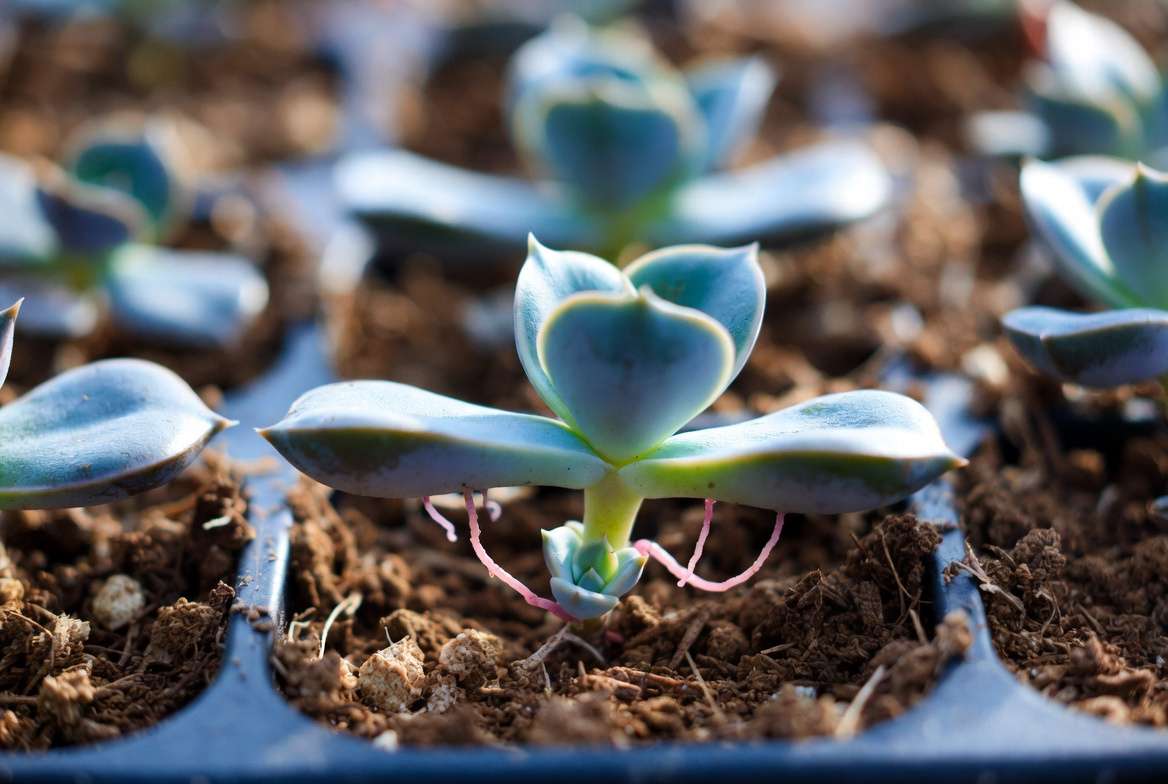
Waiting Game: Over the next few weeks to months, you should see tiny pink roots and a miniature Echeveria rosette form at the base of the leaf. Mist the roots very lightly only once they appear.
Note: Leaves taken from a plant suffering from rot have a higher failure rate than leaves from a healthy plant, as the fungal pathogen may already be microscopic within the leaf tissue. Expect a few to turn mushy and discard them immediately, but don’t give up on the rest!
Expert Tips for Preventing Echeveria Stem Rot 🛡️
The best cure for rotting stems in echeveria rosettes is prevention. By mimicking their natural, dry habitat, you can ensure your succulents live long, healthy lives.
Master the “Soak and Dry” Watering Method 🚰
Never water your succulents on a strict calendar schedule (e.g., “every Sunday”). Instead, let the plant and soil tell you when they are thirsty.
Wait until the soil is 100 percent bone dry all the way to the bottom of the pot. A good way to test this is by inserting a wooden skewer into the drainage hole; if it comes out completely dry, it’s time to water. When you do water, drench the soil thoroughly until water pours out of the drainage holes. Then, ignore the plant completely until the soil is bone dry again.
The Perfect Gritty Soil Recipe 🥣
Ditch the standard potting mix. Your Echeveria needs a substrate that drains water in seconds, not hours. If you want to mix your own professional-grade succulent soil, use this simple ratio:
-
1 Part Organic Matter: High-quality cactus/succulent soil (sifted to remove large bark).
-
1 Part Porous Rock: Pumice or perlite (this creates essential air pockets for roots to breathe).
-
1 Part Coarse Grit: Coarse horticultural sand, poultry grit, or crushed Turface.
Choose the Right Pot (Terracotta vs. Plastic) 🧱
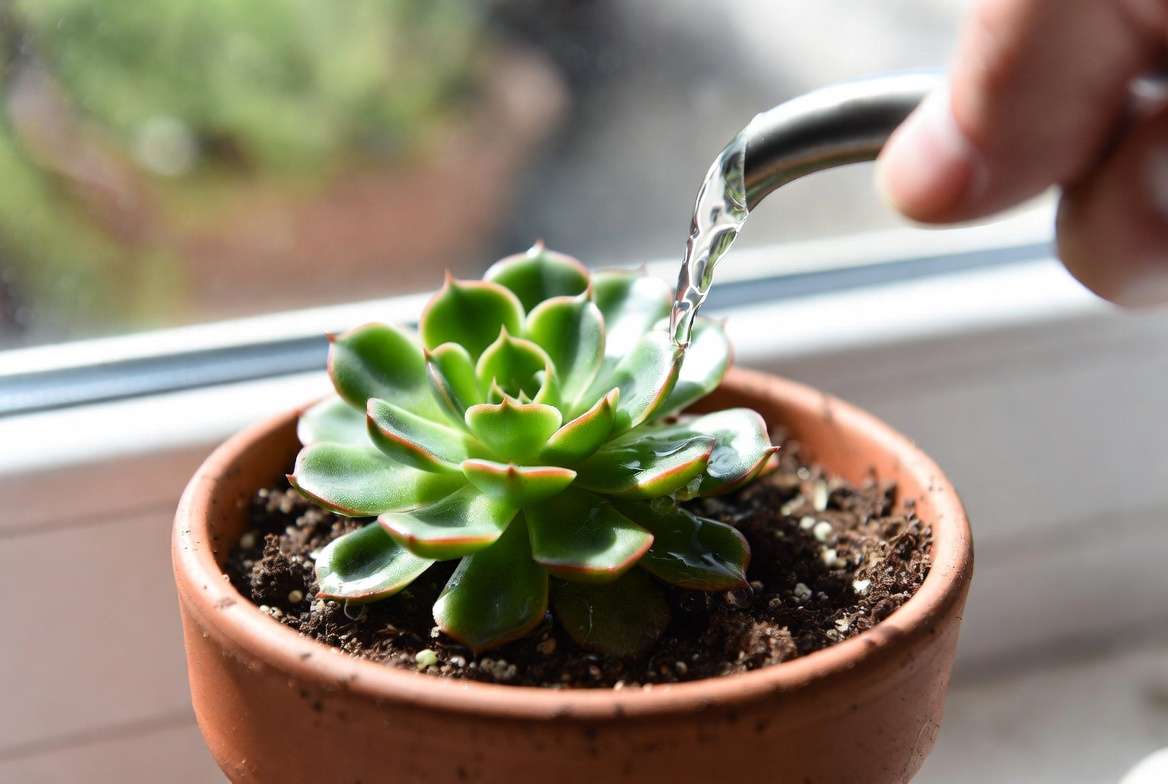
While decorative glazed ceramic and plastic pots are cute, they trap moisture inside. Unglazed terracotta is porous, meaning it breathes and wicks excess moisture away from the soil, allowing it to dry out much faster. This makes terracotta an Echeveria’s best friend. Furthermore, never use a pot without drainage holes. A pot without a drainage hole is a bucket, and planting a succulent in a bucket is a guaranteed death sentence.
Frequently Asked Questions (FAQs) 🙋♀️
Will stem rot spread to my other succulents?
If your Echeveria is in an arrangement with other succulents, the answer is yes. Fungal spores and bacteria that cause root and stem rot live in the moist soil and can easily spread to the roots of neighboring plants. You should immediately remove the rotting plant and be very cautious with your watering habits for the remaining plants.
Can a rotting Echeveria heal itself?
No. Once the stem tissue turns black and mushy, those plant cells are dead and decaying. The plant cannot heal or reverse this process. Physical intervention (cutting away the rot) is the absolute only way to save it.
Why is my Echeveria rotting even though I hardly ever water it?
If you are watering infrequently but still getting rot, the culprit is almost certainly your soil or your pot. If your soil is heavily peat-based, it can compact and stay wet at the very bottom of the pot for weeks, even if the top feels dry. Similarly, a pot with no drainage holes will allow a pool of stagnant water to sit at the base of the roots.
Should I water my Echeveria right after cutting off the rot?
Absolutely not! Water and an open, fresh plant cut are a lethal combination. Watering immediately will simply invite the bacteria right back in. The unrooted rosette has no mechanism to absorb water anyway. Wait until strong, visible roots have grown before introducing any moisture.
Conclusion: Don’t Give Up on Your Succulents! 🌟
Discovering rotting stems in echeveria rosettes can be a heartbreaking moment for any plant parent, but it is also a powerful learning experience. Almost every succulent enthusiast has lost a plant to rot at some point in their gardening journey—it is simply a rite of passage!
By acting swiftly, diagnosing the rot early, making clean, sterilized cuts, and ensuring proper callusing, you have a fantastic chance of saving your beloved plant. Going forward, remember the golden rules of succulent care: gritty soil, pots with drainage holes, and the strict “soak and dry” watering method. Your Echeverias will reward you with vibrant colors, tight rosettes, and years of healthy growth. 🌵✨











