
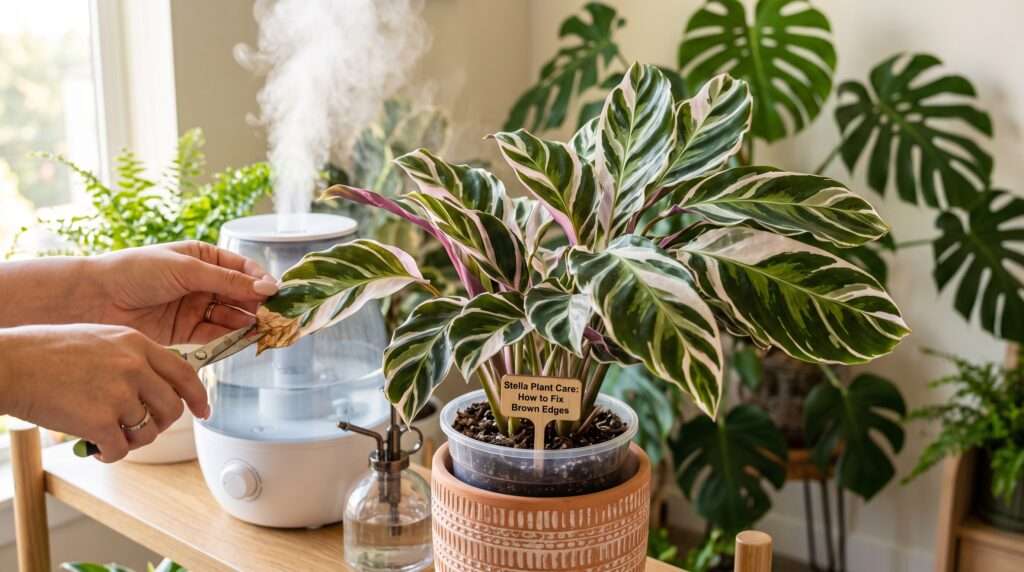
You bring home a vibrant, strikingly patterned stella plant, place it proudly in your living room, and for a few weeks, everything looks absolutely perfect. Then, the nightmare begins. The tips of those gorgeous, painted leaves start to crisp, turning a disheartening shade of brown. Soon, the edges follow. If this sounds familiar, take a deep breath—you are not alone, and you definitely aren’t a bad plant parent. 🪴
With years of hands-on experience diagnosing indoor plant stress factors and rescuing countless tropicals from the brink, I can tell you that this beautiful plant is notoriously dramatic when its specific needs aren’t met. But here is the good news: those crispy brown edges are completely preventable. In this comprehensive guide, we are going to dive deep into exactly why your plant is struggling and give you the actionable, proven steps to stop the browning, encourage lush new growth, and keep your indoor jungle thriving. ✨
🔍 What Exactly is a Stella Plant?
Before we can fix the problem, we need to understand the patient. The name “Stella plant” is often used in the nursery trade as a common name applied to a few different striking houseplants. Most frequently, it refers to specific, highly variegated cultivars in the Calathea (now officially reclassified as Goeppertia) or Maranta family, and occasionally a specific variety of Sansevieria (Snake Plant). However, when indoor gardeners are frantically searching for solutions to crispy, brown leaf margins, 99% of the time, we are dealing with a Calathea or prayer plant variety.
These tropical beauties originate from the dense, humid understories of South American rainforests. In their natural habitat, they are shielded from harsh, direct sunlight, bathed in constant 70-90% ambient humidity, and grow in rich, incredibly well-draining organic matter. When we bring them into our dry, climate-controlled modern homes, it’s a massive culture shock. Understanding these tropical origins is the secret to unlocking their care and realizing why standard houseplant routines just won’t cut it. 🌿
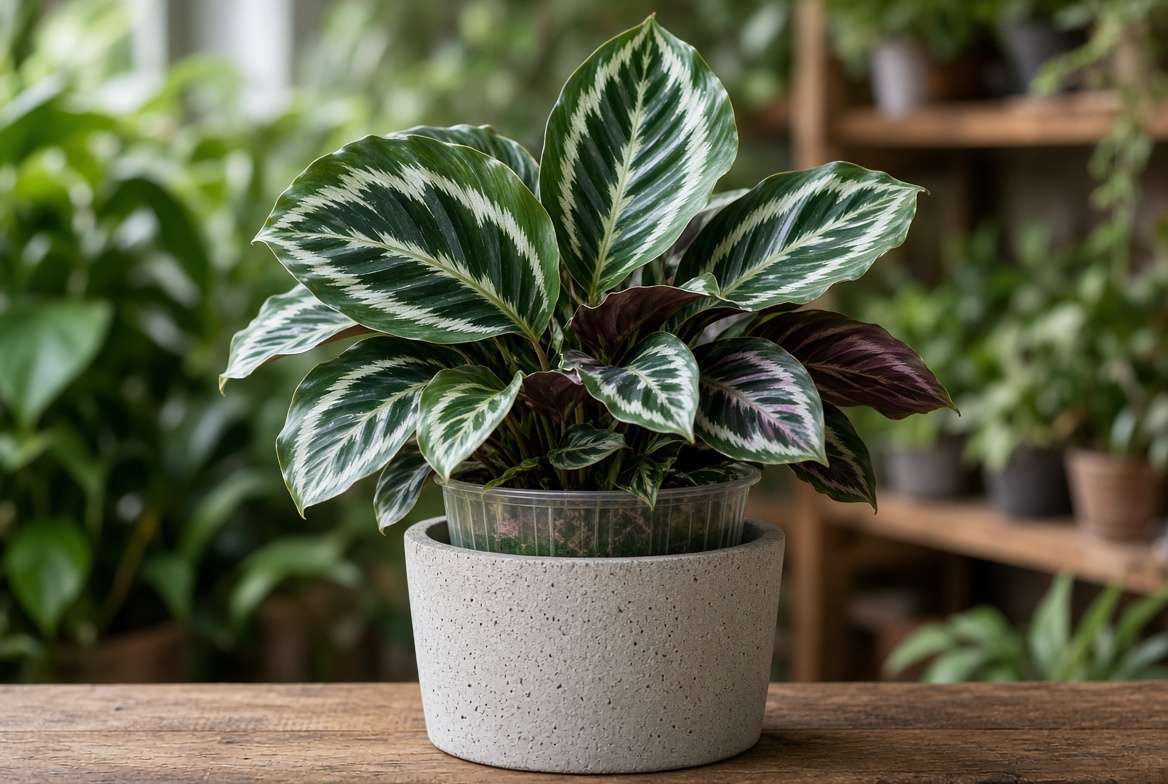
🍂 The #1 Problem: Why Are My Stella Plant Leaves Turning Brown?
Let’s tackle the most pressing issue immediately. If your gorgeous foliage is turning brown, crisping at the edges, or getting yellow halos around dead spots, your plant is crying out for help. This is rarely a fungal disease or pest issue right away; it is almost always an environmental stress response. Here are the top three culprits and how to fix them.
1. The Humidity Crisis 🏜️
The Science: Tropical plants transpire (release moisture from their leaves) throughout the day. In the jungle, the surrounding humid air slows this moisture loss. In the average home—especially during winter with central heating or summer with air conditioning—ambient indoor humidity often drops to a desert-like 30%. Because the air is so dry, moisture is sucked out of the plant’s leaves faster than the root system can absorb it from the soil. The first parts of the plant to suffer from this severe dehydration are the furthest points from the roots: the delicate leaf tips and edges.
The Fix: You cannot fix low humidity by simply watering the soil more frequently; that only leads to waterlogged roots. Instead, you must raise the localized relative humidity. Group your houseplants together to create a transpiration microclimate, place your plant on a pebble tray filled with water (ensuring the bottom of the pot sits on the pebbles, not submerged in the water), or best of all, invest in a dedicated cool-mist humidifier. Aim for at least 55-60% humidity for a truly happy plant. 🌧️
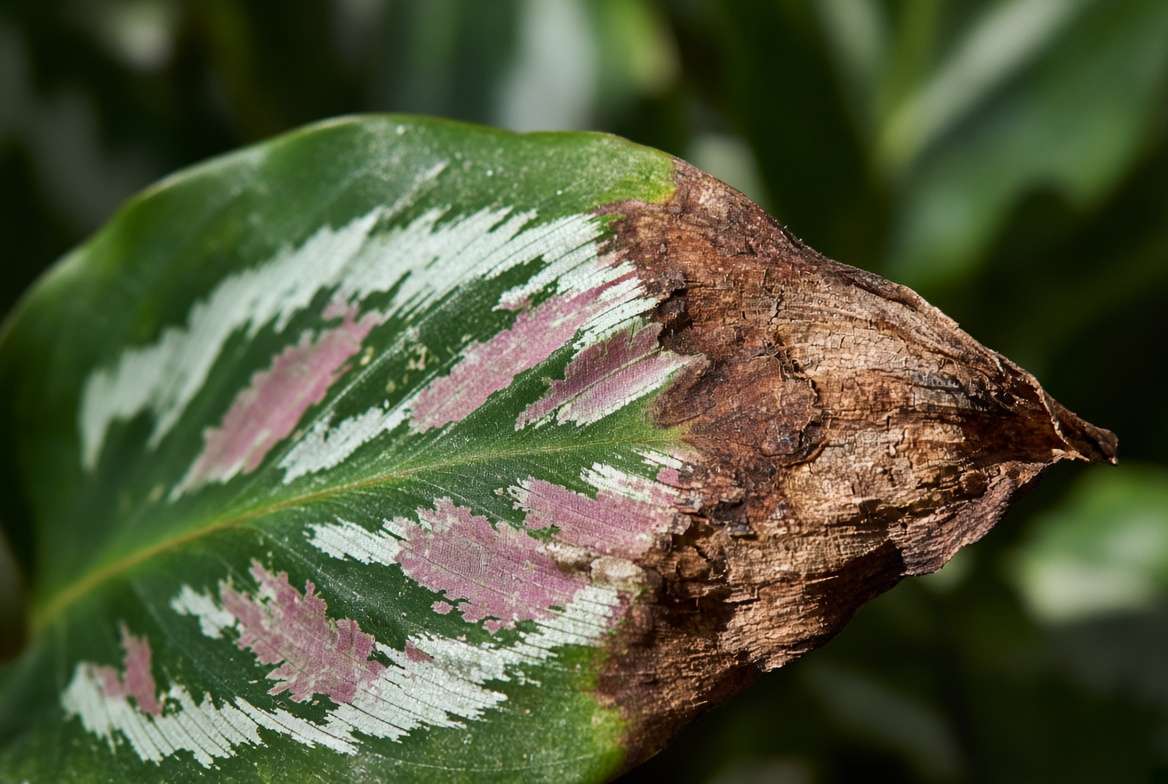
2. Tap Water Toxicity (The Chemical Burn) 🚰
Expert Insight: If there is one crucial secret you take away from this guide, let it be this: Stella plants are incredibly sensitive to the chemicals and dissolved solids found in municipal tap water. Chloramines, chlorine, fluoride, and heavy mineral salts cannot be processed or utilized by the plant. As the plant absorbs water, these toxic elements are pushed to the extremities of the leaves. They accumulate there and literally burn the plant tissue from the inside out, resulting in distinct brown, crispy margins.
The Fix: Stop using tap water immediately. Transition to watering your plant exclusively with distilled water, reverse osmosis (RO) water, or collected rainwater. Within just a few weeks of this switch, you will notice that all new foliage emerges pristine, colorful, and stays that way. 💧
3. Inconsistent Soil Moisture 📉
The See-Saw Effect: The “see-saw” watering habit is another major stressor. If you let the potting mix dry out completely until it shrinks away from the sides of the pot, the delicate, fine root hairs desiccate and die off. When you suddenly drench the plant in a panic, there are no healthy roots left to absorb the heavy influx of water. This leads to severe shock and, ironically, both crispy leaves and a massive risk of root rot. Consistency is your best friend here. ⚖️
🪴 Master the Soil: The Ultimate Stella Plant Potting Mix
Now that we’ve addressed the immediate causes of leaf browning, we need to look at the foundation of your plant’s long-term health: the soil mechanics.
Why Standard Potting Soil Fails 🛑
Most standard, commercially available indoor potting soils are heavily peat-based. While peat moss retains moisture well initially, it compacts severely over time. After a few months of top-watering, a dense peat soil turns into a solid brick that chokes out oxygen. The roots suffocate, water pools at the bottom of the container, and anaerobic bacteria take over, causing the dreaded, smelly root rot.
The Perfect Moisture-Retaining Recipe 🥣
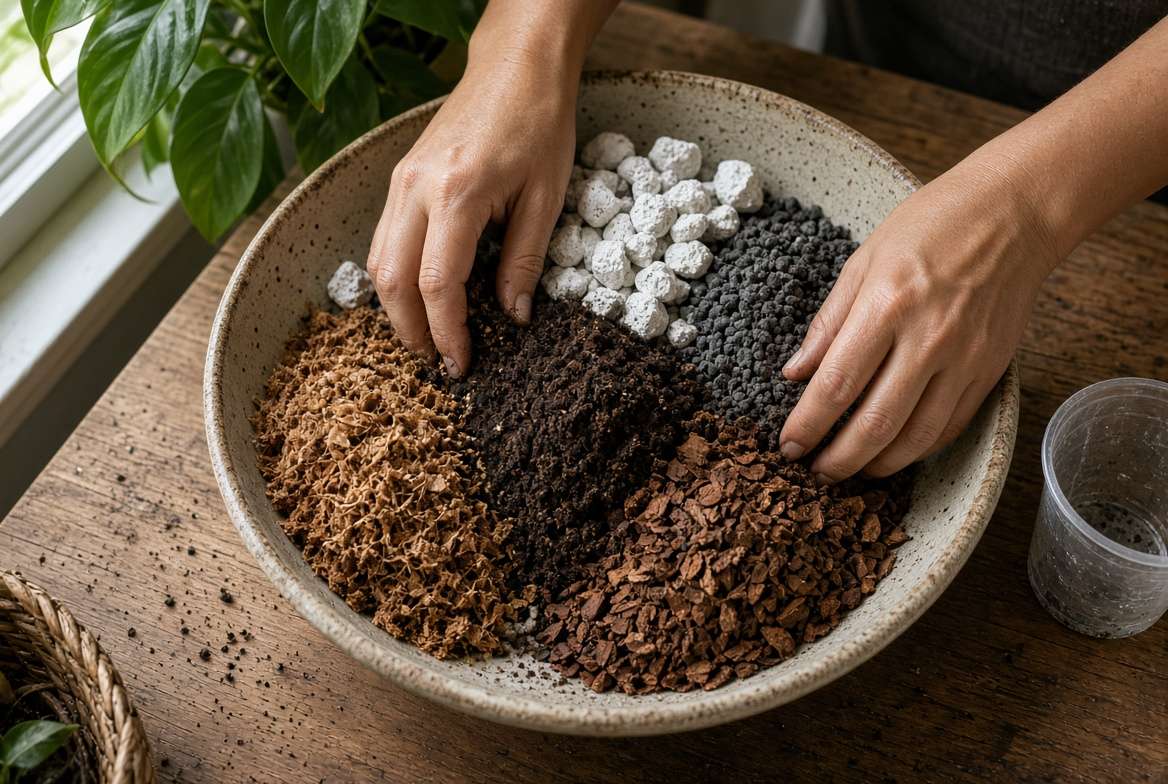
To mimic the airy, rich forest floor, you need an aroid-style chunky potting mix that holds onto just enough moisture but allows excess water to flow through rapidly. Mix the following for the ultimate Stella substrate:
-
40% Coco Coir: Excellent for moisture retention without turning into a solid, hydrophobic block when dry.
-
30% Chunky Orchid Bark: Creates massive air pockets in the soil matrix so the roots can breathe.
-
20% Perlite or Pumice: Ensures rapid drainage and prevents compaction.
-
10% Worm Castings: A gentle, organic, slow-release fertilizer that won’t burn delicate roots.
Pro Tip for Root Health: Ditch the heavy, opaque ceramic pots for direct planting. Instead, always use clear plastic nursery pots for your plants, and simply slip those inside your decorative cachepots. Clear plastic plant pots allow you to visually monitor root health, check for soil pests, and see exactly where the moisture level is at the bottom of the pot without guessing. It is the single easiest way to prevent root rot before it ever starts! 🪴🔍
💧 Watering Mastery: Hydration Without Root Rot
With your chunky, well-aerated soil mix prepared and securely housed in a clear plastic pot, mastering your watering routine becomes significantly easier. The goal is to keep the soil consistently barely moist—like a wrung-out sponge—but never soggy or waterlogged.
The “Soak and Drain” Method 🚿
When it is time to water, avoid giving the plant little “sips.” Shallow watering only encourages weak, shallow root systems that are highly susceptible to drought stress. Instead, utilize the “Soak and Drain” method:
-
Take your plant (still in its clear nursery pot) to the sink.
-
Using room-temperature distilled or rainwater, thoroughly drench the soil until water streams freely from the drainage holes.
-
Let it sit in the sink for at least 15 to 20 minutes to drain completely.
Crucial Warning: Never, under any circumstances, let your Stella plant sit in a decorative pot filled with standing water. If the roots are left submerged in stagnant water for even a few days, root rot will set in rapidly, suffocating the plant and causing widespread leaf collapse. 🛑
Spotting Overwatering vs. Underwatering ⚖️
Even experts sometimes misjudge a watering cycle. The key to maintaining your plant’s health is recognizing the early warning signs before irreversible damage occurs:
-
Signs of Overwatering: Leaves will often turn a sickly, uniform yellow starting near the base of the plant. The stems may feel mushy to the touch. If you check your clear pot, the soil will look dark, heavy, and wet, and the roots may appear brown or smell foul.
-
Signs of Underwatering: The plant will look visibly wilted, with leaves curling inward like a taco (a defense mechanism to reduce moisture loss). The soil will be pulled away from the sides of the pot, and the leaf edges will be dry and brittle.
☀️ Perfecting the Environment: Light and Temperature
Because these are understory tropicals, placing them in the wrong lighting is a fast track to bleached foliage and crispy brown edges. Replicating the dappled sunlight of a rainforest canopy is your primary objective.
Finding the “Goldilocks” Light Zone 🌤️
Your plant requires bright, indirect sunlight to maintain its striking variegation and push out robust new growth.
-
Too much light: Direct sun rays (especially harsh afternoon sun from a West-facing window) will scorch the delicate tissue, causing brown, faded patches and permanent burning.
-
Too little light: If placed in a dark corner, the plant’s growth will stagnate, the vibrant colors will fade, and the soil will take too long to dry out, dramatically increasing the risk of overwatering.
The Ideal Spot: Place your plant about 3 to 5 feet away from a bright East-facing or North-facing window. If you only have a South or West-facing window, filter the harsh light using sheer white curtains.
Temperature Shock and Drafts 🥶
Stella plants are notoriously sensitive to sudden temperature fluctuations. They thrive in a stable environment between 65°F and 80°F (18°C – 27°C). Dropping below 60°F will induce cold damage and stunt growth.
Be highly strategic about placement. Keep your plant far away from drafty winter windows, blasting air conditioning vents, and forced-air heating radiators. A blast of hot, dry air from a heater will crisp the leaves faster than almost any other environmental stressor.
✂ Aesthetic Care: How to Prune Brown Edges Safely
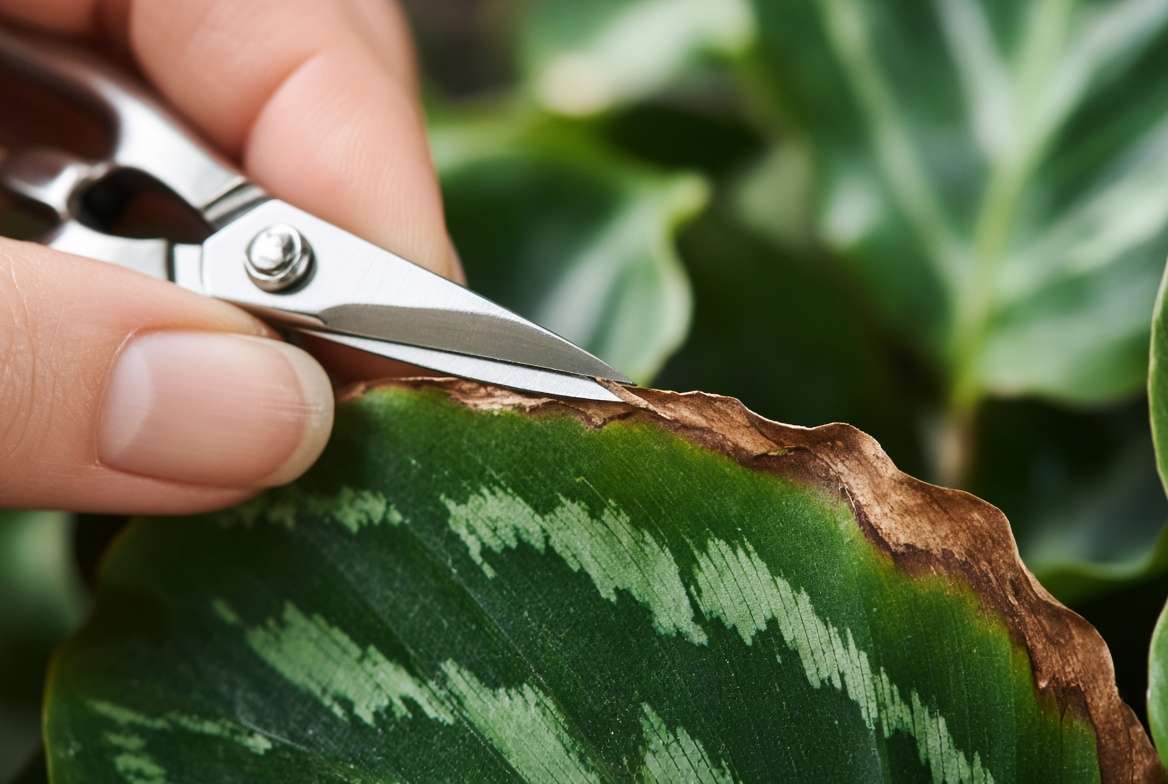
Once a leaf tip or margin turns brown and crispy, the plant tissue is dead. Unfortunately, no amount of water, humidity, or love will turn it green again. However, leaving dead tissue on the plant can invite pests or fungal spores.
You can safely improve the aesthetic appearance of your plant with a simple cosmetic trim:
-
Thoroughly sterilize a pair of sharp pruning shears or scissors with rubbing alcohol to prevent the spread of pathogens.
-
Carefully follow the natural curve of the leaf, trimming away the brown, crispy sections.
-
Expert Rule of Thumb: Always leave a tiny, millimeter-thin margin of brown tissue behind. If you cut into the healthy, green tissue, the plant will react by creating a new brown scab to heal the fresh wound, defeating the purpose of the trim! ✂️
🌱 Expanding Your Collection: Stella Plant Propagation
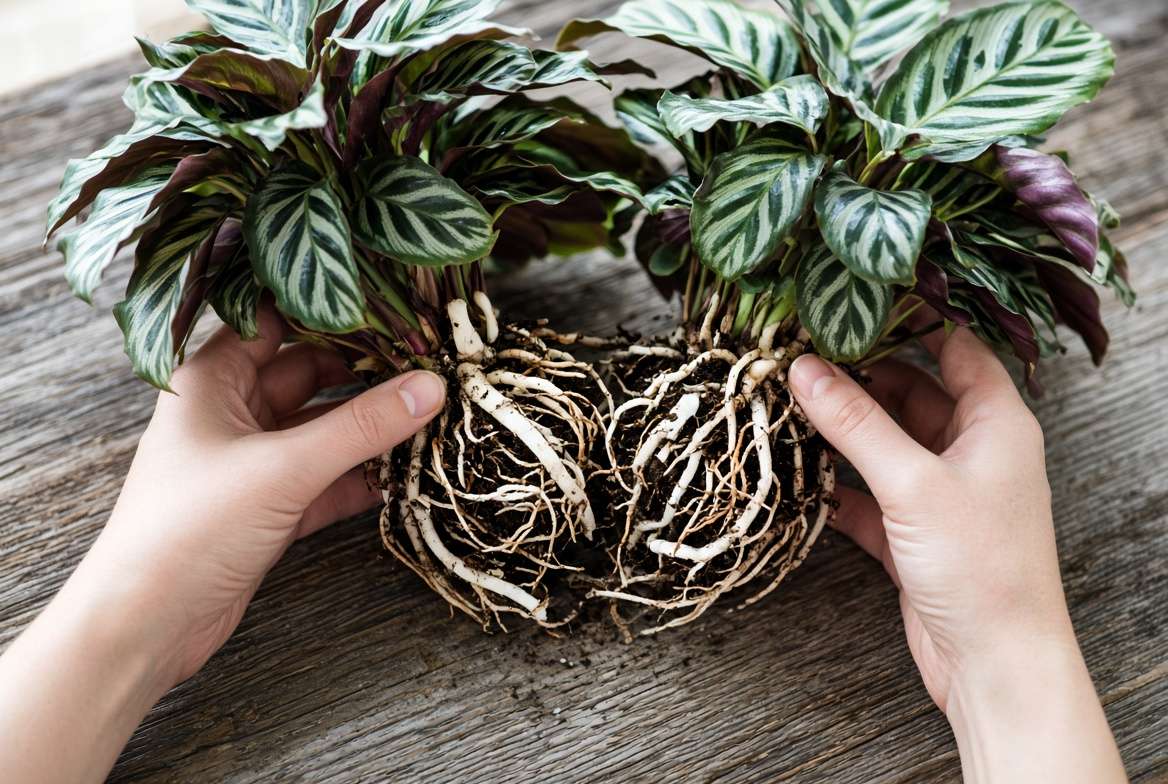
Once you have mastered the care routine and your plant is thriving and pushing out fresh foliage, you might want to propagate it. Unlike pothos or philodendrons, you cannot propagate a Stella plant (especially Calathea varieties) from a simple leaf or stem cutting. They must be propagated by rhizome division.
The Division Method 🔪
Spring or early summer, when the plant is actively growing, is the best time to divide.
-
Gently unpot the mature plant and massage the root ball to loosen the chunky potting mix.
-
Look for natural clusters or “pups” that have formed their own distinct root systems connecting to the main rhizome.
-
Using your hands or a sterilized knife, gently separate the root systems.
-
Pot each new division into its own small, clear plastic pot using your well-aerated soil recipe.
-
Aftercare: Divisions are highly susceptible to transplant shock. Keep the newly potted pups in a warm environment with exceptionally high humidity (a clear plastic bag loosely draped over the top works wonders as a makeshift greenhouse) until you see new growth. 🌱
🐛 Defending Against Pests and Diseases
Even the most well-cared-for indoor jungles occasionally face pests. Being proactive is the best defense.
Spotting Spider Mites 🕷️
Spider mites are the number one enemy of thin-leaved tropicals, and they absolutely thrive in dry indoor air.
-
The Threat: These microscopic arachnids suck the sap from the leaves, leaving behind tiny yellow dots (stippling) and fine, dusty webbing, particularly where the stem meets the leaf. If left unchecked, they will quickly decimate the foliage.
-
The Treatment: Wipe the leaves down regularly with a damp microfiber cloth. If you spot mites, treat the plant aggressively with a high-quality Neem oil solution or an insecticidal soap, applying it thoroughly to the tops and bottoms of the leaves every 5–7 days until the infestation is eradicated.
Preventing Fungal Leaf Spot 🦠
Dark brown or black spots with yellow halos typically indicate a fungal or bacterial infection. This usually occurs when water sits on the leaves overnight in a cool, poorly ventilated room.
-
The Fix: Always water the soil directly, avoiding the foliage. Ensure there is gentle air circulation in the room (a small oscillating fan works well), and prune away any severely infected leaves immediately.
🙋♀️️ Frequently Asked Questions (FAQs)
Should I mist my Stella plant? Misting is a common houseplant myth that does more harm than good. A quick spritz of water only raises the humidity for about 5 minutes and leaves the foliage wet, inviting fungal infections. Stick to a humidifier for sustained, safe humidity. 🚫💦
Why are my Stella plant’s leaves curling inward? Leaf curling is the plant’s mechanism for conserving water. It almost always indicates severe dehydration. Check the soil moisture immediately; if it is bone dry, give the plant a thorough soak. If the soil is wet but the leaves are curling, the roots may have rotted away, meaning the plant can no longer uptake water.
How fast does a Stella plant grow? During the active growing season (spring and summer), a healthy plant will push out new leaves continuously. During late fall and winter, growth will naturally slow down or completely stall. Hold back on fertilizer during this dormant period.
Is the Stella plant toxic to cats and dogs? If your Stella plant is a true Calathea or Maranta, it is entirely non-toxic and pet-safe! However, if it is a Sansevieria (Snake Plant) variety marketed under the Stella name, it is mildly toxic to pets. Always verify the botanical name to ensure your furry friends stay safe. 🐾
💚 Final Thoughts on Stella Plant Recovery
Rescuing a struggling indoor plant can feel overwhelming, but patience is your greatest tool. By shifting away from tap water, elevating the ambient humidity, and utilizing an airy, chunky potting mix inside a breathable clear nursery pot, you are eliminating the primary causes of brown edges.
Remember that the existing brown tips will not heal, but by implementing these expert care strategies, you are guaranteeing that all the new foliage your Stella plant pushes out will be stunning, vibrant, and perfectly pristine.
Have you successfully brought a crispy tropical plant back from the brink, or are you currently battling brown edges? Drop your experiences and questions in the comments below—let’s grow together! 🌿✨











