
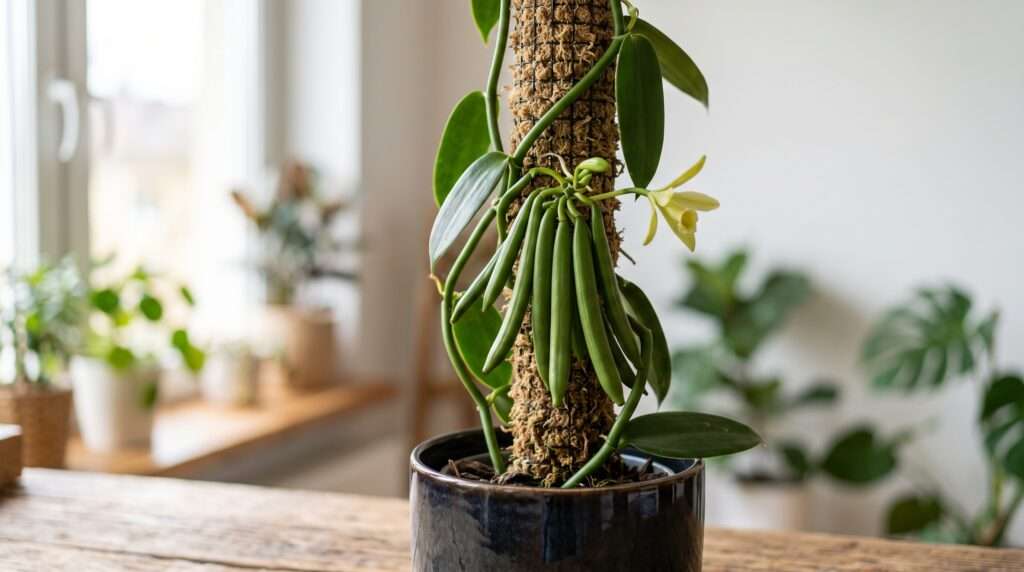
What if I told you that the world’s second most expensive spice could be grown right in your living room? For many indoor gardening enthusiasts, cultivating vanilla bean plants is the ultimate houseplant flex. It is one thing to keep a delicate tropical vine alive, but it is an entirely different level of mastery to coax it into blooming and eventually harvesting your very own fragrant, home-grown vanilla pods.
Most plant lovers buy a small, 4-inch vanilla cutting with dreams of infinite vanilla extract, only to treat it like a common pothos. The reality? Growing this magnificent plant requires specific environmental triggers, patience, and a little bit of botanical magic.
In this comprehensive, expert-led guide, we are going completely beyond basic care. I will walk you through the precise roadmap for raising your vanilla orchid from a juvenile cutting to a mature, pod-producing vine, backed by proven orchid-care science. Get your moss poles ready—we are about to turn your home into a tropical jungle! 🪴
## 1. Meet the Vanilla Orchid (Vanilla planifolia) 🌸
Before we dive into soil and water, we need to understand exactly what we are dealing with. The vanilla plant (Vanilla planifolia) belongs to the Orchidaceae family, making it part of the largest family of flowering plants on Earth. More impressively, out of over 28,000 orchid species, vanilla is the only one that produces an edible agricultural crop.
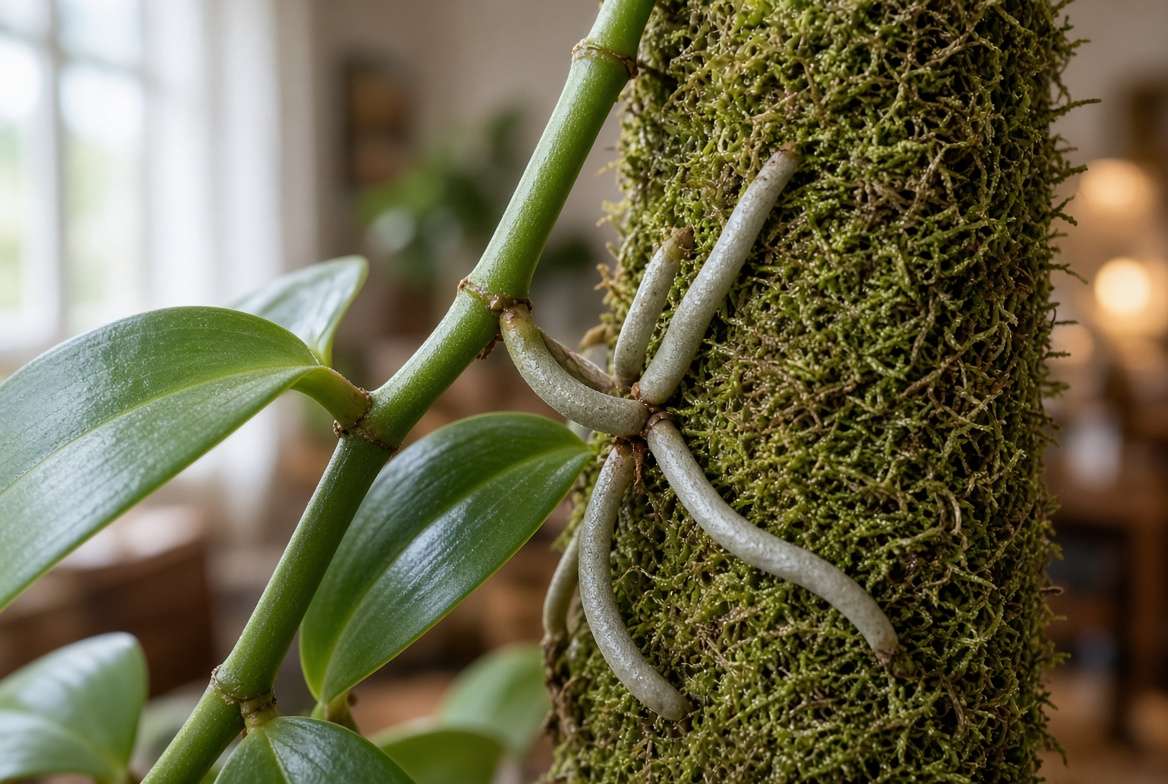
Growth Habit and Nature In its native habitat of the deep Central American rainforests, the vanilla plant is an epiphytic vining orchid. This means it doesn’t just grow in the dirt; it starts on the forest floor and aggressively climbs up towering trees, using its thick, fleshy aerial roots to anchor onto the bark and absorb moisture directly from the humid air. When growing vanilla indoors, understanding this climbing nature is the secret to unlocking its growth.
The Timeline: Patience is Key Setting realistic expectations is a crucial part of your success. If you are starting with a small cutting (as most home growers do), you should expect it to take 3 to 5 years of consistent growth before the vine reaches maturity and produces its first cluster of pale yellow-green flowers.
Expert Insight 💡: Why is vanilla so expensive, and why do we have to hand-pollinate? In Mexico, where the plant originates, it is naturally pollinated by a specific, tiny insect called the Melipona bee. When vanilla was introduced to other tropical regions like Madagascar and Tahiti by European explorers, the vines grew beautifully but never produced pods. It wasn’t until 1841, when a 12-year-old enslaved botanist named Edmond Albius invented a quick hand-pollination technique, that global cultivation became possible. Because the Melipona bee doesn’t live in your living room, you will have to step into Edmond’s shoes when your plant finally blooms!
## 2. Creating a Tropical Microclimate Indoors 🏡
To successfully grow a vanilla orchid indoors, we must replicate the warm, humid, and dappled environment of a Central American jungle canopy.
### Light: The Goldilocks Zone ☀️ In the wild, vanilla vines climb up trunks, shaded by the leafy canopy above. Therefore, they crave bright, indirect sunlight.
-
The Sweet Spot: An East-facing window where the plant receives gentle morning sun and bright ambient light for the rest of the day is ideal. South or West-facing windows can work, provided you filter the harsh afternoon rays with a sheer curtain.
-
The Danger Zone: Direct, intense afternoon sunlight will quickly scorch the thick leaves, leaving permanent black or bleached burn marks. Conversely, too little light will result in leggy vines with long internodes (the space between leaves) and absolutely zero chance of flowering.
-
Pro Tip: If your home lacks natural light, full-spectrum LED grow lights are incredibly effective. Aim for 12–14 hours of artificial light per day during the active growing season.
### Humidity & Temperature: Replicating the Jungle 🌴 Vanilla orchids despise the cold. The absolute ideal temperature range is between 70°F and 85°F (21°C–29°C). The plant will suffer if temperatures drop below 55°F (12°C), so keep it far away from drafty windows or air conditioning vents.
Humidity is arguably the most critical environmental factor. These plants breathe and drink through the aerial roots along their stems.
-
Target Humidity: Aim for 70% to 80% humidity. Standard household humidity usually hovers around 30-40%, which is too dry for optimal growth.
-
How to achieve it indoors: Place a dedicated plant humidifier near your vine. You can also group your vanilla plant with other moisture-loving tropicals (like Monsteras and ferns) to create a humid microclimate, or set the pot on a large pebble tray filled with water (ensuring the bottom of the pot never sits directly in the water).
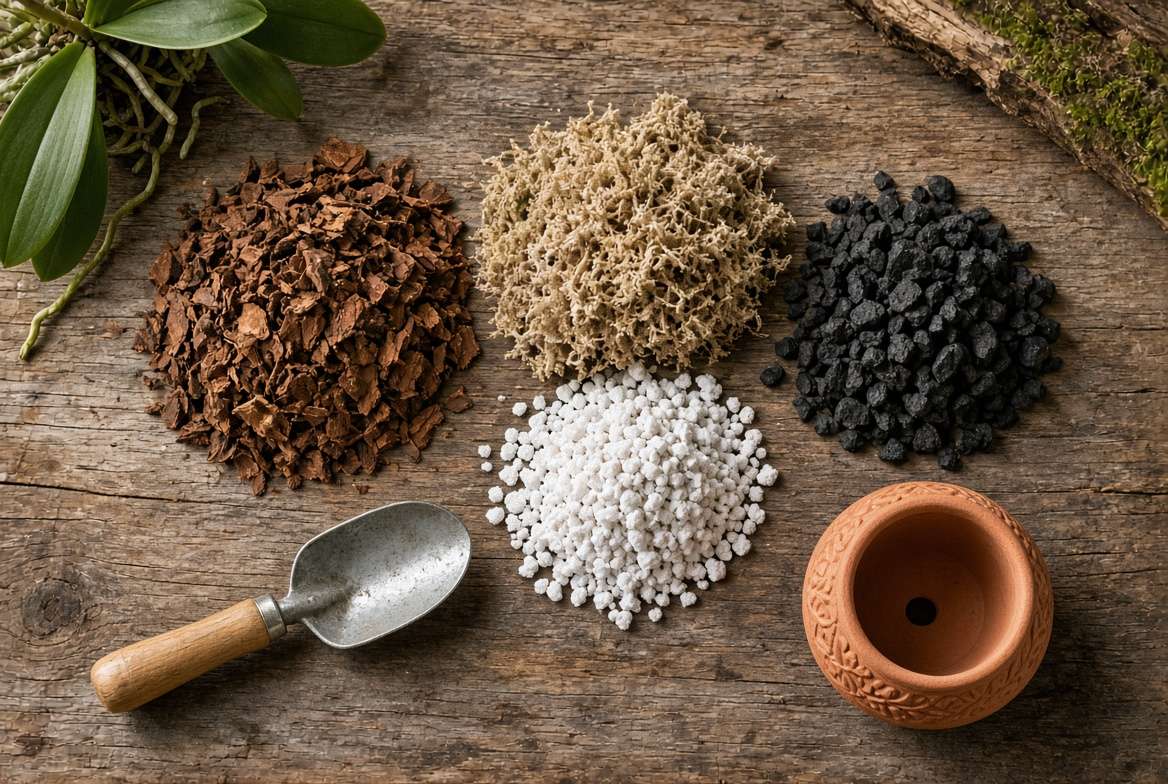
### The Perfect Potting Mix 🥥 Do not use standard indoor potting soil! Because vanilla is a semi-epiphyte, dense dirt will suffocate the roots and lead to immediate root rot. You need an incredibly chunky, well-aerated, and fast-draining medium.
The Ultimate Vanilla Orchid Recipe:
-
40% Medium-grade Orchid Bark (fir or pine)
-
30% Sphagnum Moss (retains essential moisture)
-
20% Chunky Perlite or Pumice (for drainage and aeration)
-
10% Horticultural Charcoal (keeps the mix “sweet” and prevents bacterial buildup)
### Trellising: Why Your Vanilla Needs to Climb 🧗♀️️ A vanilla bean plant must climb upwards to mature. If you let it hang from a basket like a string of hearts, the vines will remain thin, juvenile, and they will stubbornly refuse to flower. Provide a sturdy support system immediately upon planting. A tall sphagnum moss pole, a rough cedar plank, or a robust wooden trellis works perfectly. As the vine grows, gently tie the stem to the support using soft plant ties or orchid clips until the aerial roots naturally attach themselves to the surface.
## 3. Watering and Feeding Your Vanilla Bean Plant 💧
Proper hydration and nutrition will accelerate the 3-to-5-year waiting period for blooms. However, getting the watering rhythm right is where many beginners stumble.
### The “Soak and Dry” Watering Method 🚿 Vanilla plants want to be consistently moist, but never soggy.
-
Check the roots: Water only when the top two inches of your chunky potting mix feel dry to the touch.
-
The Drench: Take the plant to the sink or shower and drench the potting mix until water runs freely out of the drainage holes.
-
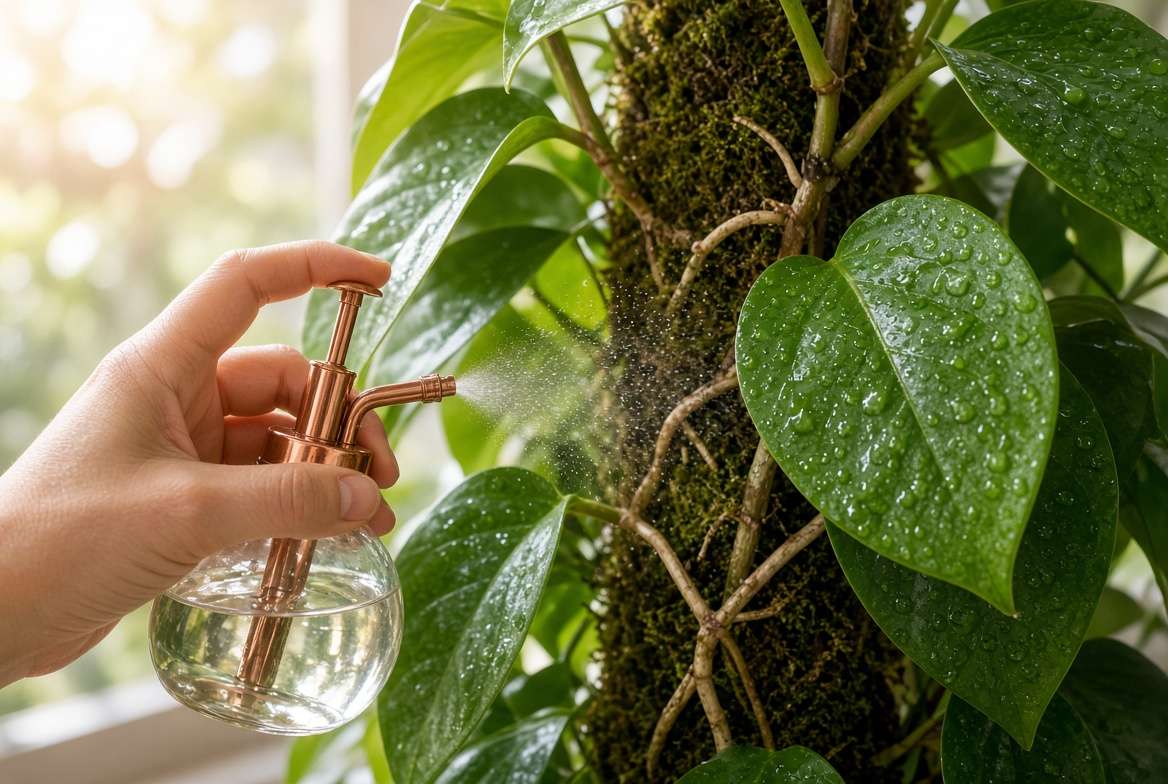
Don’t forget the vine! The roots in the pot are only half the equation. You must regularly mist or spray the aerial roots clinging to your moss pole or trellis. If your moss pole dries out completely, the plant will struggle to push out new foliage.
### Fertilizing for Growth vs. Blooming 🍽️ Vanilla orchids are heavy feeders during the spring and summer.
-
Vegetative Phase (Years 1-3): While the plant is focusing on leaf and vine growth, use a balanced, water-soluble orchid fertilizer (like a 20-20-20 NPK ratio). Dilute it to half-strength and apply it every two weeks after watering (never fertilize dry roots, as this can cause chemical burns). Foliar feeding—spraying a weak fertilizer solution directly onto the leaves and aerial roots—is also highly effective.
-
Bloom Phase (Mature Plants): Once your vine has reached a mature length (which we will cover in the next section), switch to a “bloom booster” fertilizer with a higher phosphorus content (e.g., 10-30-20) in the late winter and early spring to encourage bud formation.
## 4. The Holy Grail: Getting Your Vanilla Plant to Bloom ✨
For most indoor gardeners, keeping the vanilla plant green and growing is easily achievable. The true test of your orchid-care expertise is convincing the plant to produce its magnificent, pale-yellow flowers.
### The Size Requirement 📏 Vanilla orchids will absolutely not flower while they are juveniles. The vine must reach a critical mass to have the energy reserves required for blooming. Typically, a vanilla vine needs to be between 10 to 20 feet long with a stem diameter of at least half an inch before it is mature enough to flower.
If you are growing indoors, a 20-foot vine might sound impossible, but it is highly manageable if you train the plant properly. Instead of letting it grow straight up into your ceiling, carefully loop the vine up and down a sturdy, wide trellis or loop it continuously around a thick moss pole. This looping technique keeps the massive vine compact while still satisfying the plant’s need to climb.
### The Dry Spell (Triggering the Flowers) 🏜️ Once your plant is large enough, you have to mimic the environmental stress of its native dry season. In nature, the transition from a dry winter to a rainy spring triggers a hormonal shift in the plant, signaling it to reproduce (flower).
To recreate this indoors:
-
Reduce Watering: In late winter (around January or February), cut your watering frequency in half for roughly six to eight weeks. Allow the potting mix to dry out significantly more than usual.
-
Lower the Temperature: If possible, let the nighttime temperatures in the room drop slightly to around 60°F–65°F (15°C–18°C) during this dry period.
-
Resume Normal Care: After the two-month dry spell, resume your regular, heavy watering schedule and introduce a phosphorus-rich bloom booster fertilizer. If your plant is mature, this sudden influx of moisture and nutrients will trigger the nodes to produce flower spikes (inflorescences) instead of just new leaves.
## 5. Playing the Bee: Hand-Pollination 🐝
If you successfully trigger blooms, congratulations! However, your work is just beginning. Because the specific Melipona bee is absent from your home, your beautiful flowers will simply shrivel and drop off after a day if you do not step in.
The 12-Hour Window Vanilla blooms are notoriously fleeting. Each flower opens in the early morning and wilts by the late afternoon. You have a very narrow, 12-hour window to pollinate each flower on the precise day it opens. During blooming season, you must check your plant every single morning.
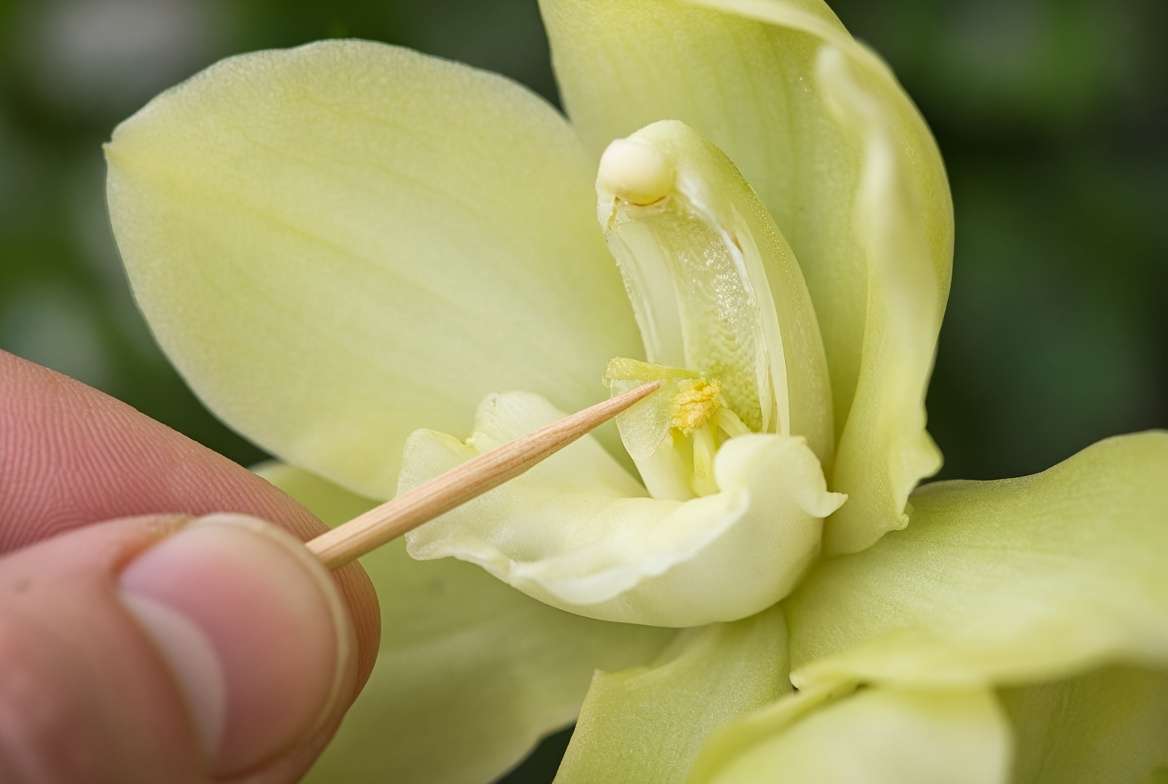
### Step-by-Step Hand-Pollination Guide 🤏 Do not be intimidated; while delicate, the anatomy of the flower is easy to navigate once you know what to look for. You only need one tool: a clean wooden toothpick.
-
Locate the Reproductive Organs: Gently hold the trumpet-shaped lip of the flower open. Inside, you will see a central column.
-
Find the Rostellum: On this column, there is a small flap of plant tissue called the rostellum. This flap physically separates the male part (the anther, which holds the pollen) from the female part (the stigma).
-
Lift the Flap: Using your toothpick, gently lift the rostellum flap upwards and push it back, out of the way.
-
Press and Squeeze: With the flap lifted, use your thumb and forefinger to gently pinch the top of the column. This pushes the pollen mass directly down onto the sticky stigma.
-
Success: If you executed this correctly, the flower will not drop off the vine the next day. Instead, it will wilt but remain attached, and the stem directly behind the flower will slowly begin to swell. That swelling stem is your future vanilla bean!
## 6. The Reward: Harvesting and Curing Vanilla Beans 🍂
Growing the pod is an exercise in extreme patience. Once pollinated, the vanilla pods (which are technically botanical berries) take 7 to 9 months to mature on the vine.
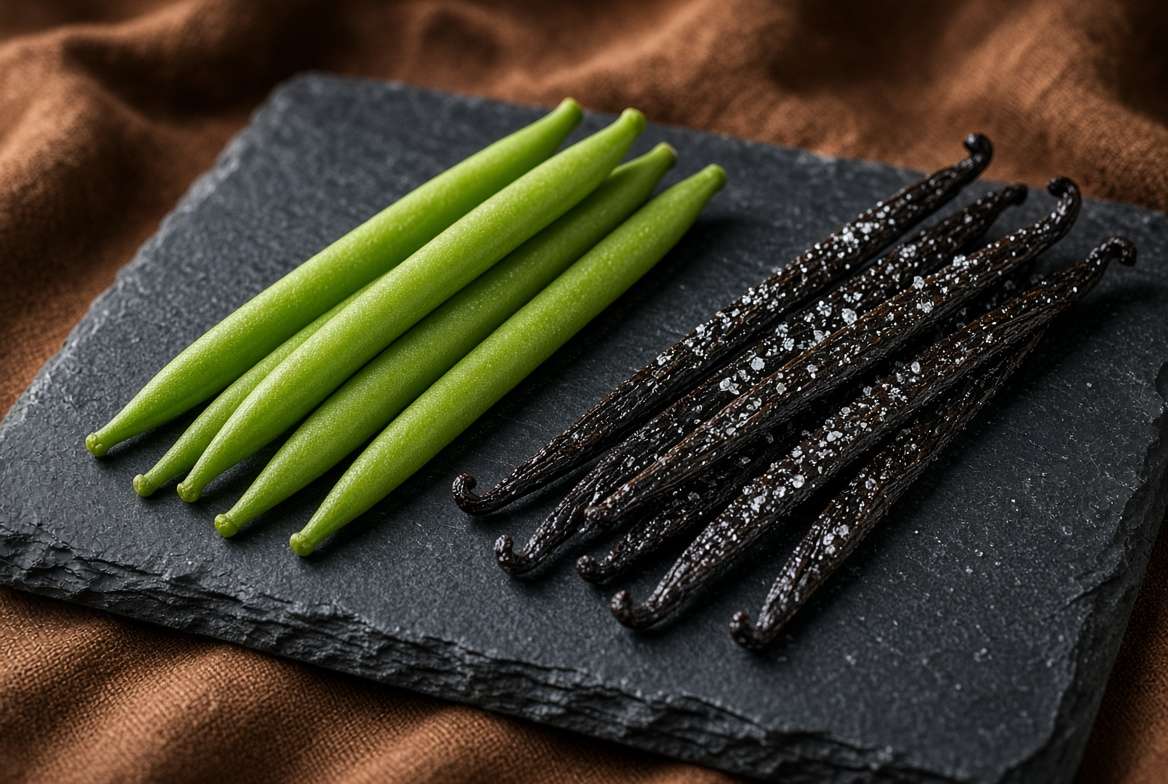
### When to Harvest (The Waiting Game) ⏱️ Do not pick green beans! A vanilla bean is ready to be harvested when the very tip of the green pod begins to turn a pale yellow. Use sterile pruning shears to carefully snip the pod from the cluster.
At this stage, the pod has absolutely no vanilla aroma or flavor. The iconic scent and taste are entirely developed during the post-harvest curing process.
### The Curing Process (Where the Magic Happens) 🪄 Commercial curing is a complex, months-long endeavor, but home growers can achieve incredible results by following these four fundamental steps:
-
Dipping (Stopping the Growth): Submerge your freshly harvested green pods in hot water (around 150°F or 65°C) for exactly 3 minutes. This blanched state stops the living tissue from growing and initiates the enzymatic reactions.
-
Sweating (Developing the Flavor): Immediately wrap the hot pods in dark wool blankets and place them in an insulated cooler or a closed box. Let them “sweat” for 48 hours. When you unwrap them, they should have turned from green to a light brown color. For the next two weeks, lay the pods in the sun for a few hours each day until they are hot, then re-wrap them in the blankets and put them back in the box every night.
-
Drying (Preserving the Pod): Once the pods are deeply brown and pliable, stop the sweating process. Let them air-dry on a rack in a warm, well-ventilated room for 3 to 4 weeks. You want the moisture content to drop significantly so they do not mold, but they should remain leathery and bendable, not brittle.
-
Conditioning (Aging): Place the dried beans in an airtight glass jar and store them in a dark cupboard for 2 to 3 months. Open the jar once a week to let the beans breathe and check for mold. During this conditioning phase, the complex flavor profile deepens, and that heavenly, unmistakable vanilla aroma will finally emerge.
## 7. Troubleshooting Common Problems 🚑
Even the most attentive indoor gardeners run into issues. Here is how to diagnose and fix common vanilla plant ailments:
-
Yellowing Leaves: If the lowest, oldest leaves are turning yellow and dropping, this is natural aging. However, if new growth is yellow and mushy, you are overwatering, and root rot has likely set in. Immediately let the potting mix dry out and inspect the roots. If the leaves are yellowing but feel dry and papery, your plant is likely undernourished and needs fertilizer.
-
Crispy, Shriveled Aerial Roots: Your ambient humidity is critically low. The plant is desperately reaching for moisture in the air and failing. Increase your misting frequency, add a humidifier, or switch to a high-quality sphagnum moss pole that holds water longer.
-
Pests: Vanilla plants are relatively pest-resistant, but they can fall victim to mealybugs (white, cottony masses) or spider mites (tiny webbing under the leaves) in dry indoor environments. Treat infestations immediately by wiping the leaves with a cotton swab dipped in rubbing alcohol, followed by a thorough spray of organic neem oil or insecticidal soap.
## 8. Frequently Asked Questions (FAQs) 🙋♀️
Can I grow a vanilla plant from a grocery store vanilla bean? Unfortunately, no. The vanilla beans you buy at the grocery store or spice market have been blanched in hot water and cured for months. The seeds inside are no longer viable. You must purchase a live plant cutting from a reputable nursery or orchid breeder.
Do I need multiple plants for cross-pollination? No! Vanilla planifolia is entirely self-fertile. You can use the pollen from one flower to pollinate that exact same flower, or transfer pollen between different flowers on the same vine. A single, healthy plant is all you need to produce a crop.
Is it safe to have vanilla bean plants around pets? Yes. Unlike many tropical houseplants (such as Monsteras or Philodendrons) that contain toxic calcium oxalate crystals, true orchids, including the vanilla orchid, are completely non-toxic to cats, dogs, and horses.
Embarking on the journey of growing a vanilla bean plant indoors is not for the faint of heart, but it is undeniably one of the most rewarding botanical projects you can undertake. It requires you to act as mother nature—providing the jungle canopy, simulating the dry season, and even stepping in as the pollinator. But when you finally open that glass jar months from now and are greeted by the rich, intoxicating aroma of a vanilla pod you cultivated entirely from scratch, every single moment of patience will be overwhelmingly worth it. Grab a healthy cutting, build a sturdy moss pole, and let the growing begin!











