
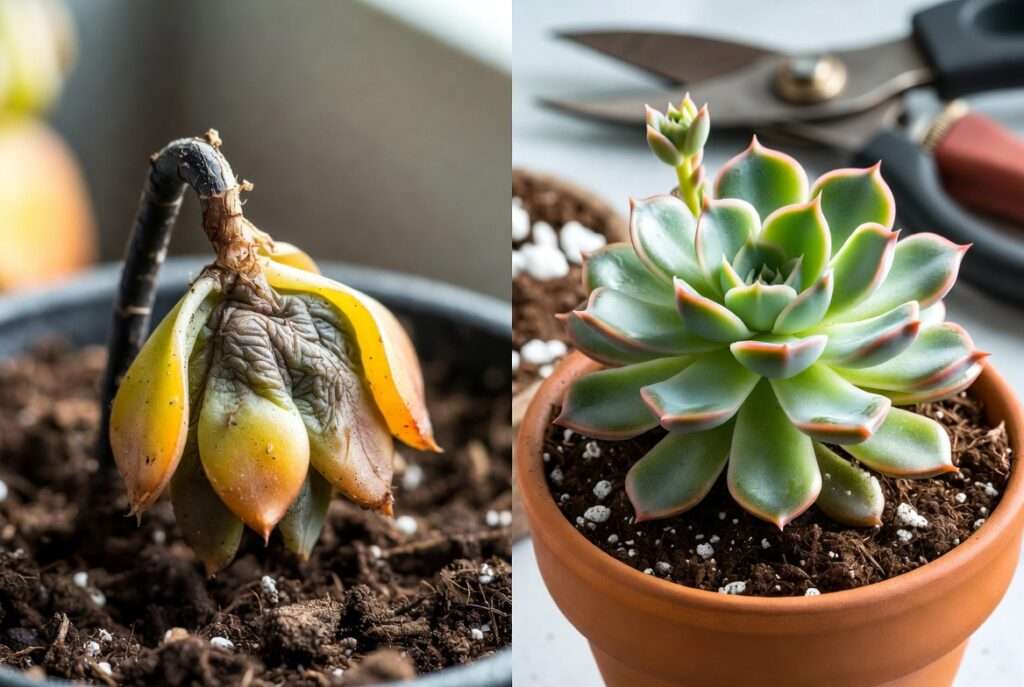
Have you ever walked into your plant corner only to find your once-plump, vibrant succulent looking sad, shriveled, or mushy? 😔 That heartbreaking moment when leaves turn yellow, black spots appear, or the whole rosette starts collapsing is all too common — especially for new and experienced plant parents alike.
In this step-by-step guide to rescue a dying succulent, I’ll walk you through exactly how to diagnose the problem, take immediate action, and bring your beloved plant back to life. Whether it’s suffering from overwatering (the #1 killer), underwatering, poor lighting, pests, or other issues, most “dying” succulents can be saved with quick intervention and the right techniques.
Over my years of hands-on succulent care — from rescuing countless Echeverias, Sedums, and Haworthias to helping plant lovers in humid tropical climates like Dhaka — I’ve learned that patience, proper diagnosis, and propagation magic turn potential losses into thriving collections. 🌱✨ By the end of this comprehensive guide, you’ll have the confidence and tools to not only save your current succulent but prevent future disasters. Let’s get your plant thriving again!
Understanding Why Your Succulent Is Dying: Common Causes 🌵😟
Succulents are famous for being “low-maintenance,” but that reputation often leads to heartbreak. These drought-tolerant beauties store water in their thick leaves, stems, and roots, making them extremely sensitive to excess moisture and improper conditions. Here are the most frequent culprits behind a dying succulent:
Overwatering – The #1 Killer of Succulents 💦
Overwatering tops the list of reasons succulents decline. When soil stays soggy for too long, roots can’t access oxygen, leading to root rot — a fungal or bacterial issue that turns roots black and mushy.
Common signs:
- Yellowing or translucent lower leaves
- Mushy, black stems or leaves that fall off easily
- Foul smell from the soil
- Soil that remains wet for days
In humid regions, even infrequent watering can cause problems if drainage is poor. Root rot spreads quickly, so early action is critical.
Underwatering and Dehydration 🏜️
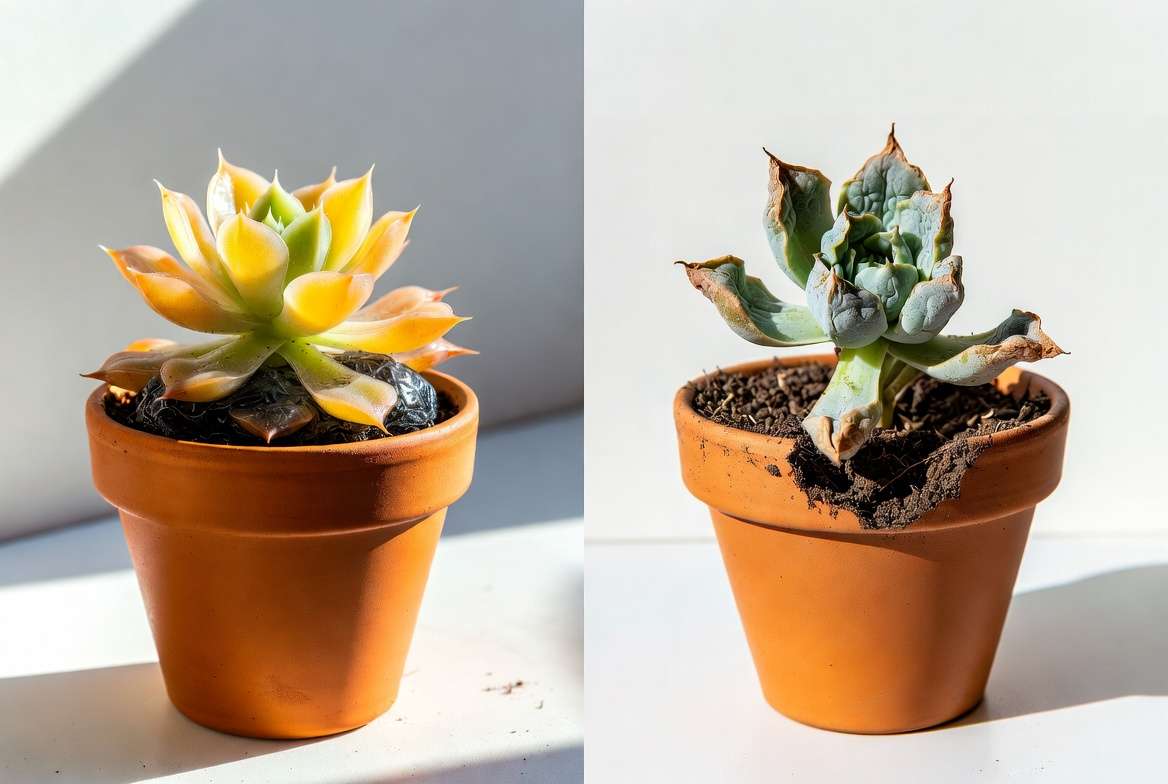
At the opposite end, underwatering causes leaves to wrinkle, shrivel, or become crispy and papery. The plant pulls water from older leaves to survive, causing bottom leaves to dry up first. While succulents are forgiving here, prolonged dehydration weakens the plant and invites pests.
Lighting Problems (Too Much or Too Little) ☀️🌑
- Insufficient light: Leads to etiolation — stretched, leggy growth with pale leaves as the plant reaches for sun.
- Too much direct sun (especially sudden exposure): Causes sunburn, appearing as brown or white scorched patches on leaves.
Succulents generally crave bright, indirect light or several hours of gentle morning sun.
Poor Soil, Drainage, and Pot Issues 🪴
Using regular garden or potting soil that retains too much water is a recipe for disaster. Pots without drainage holes trap moisture, and root-bound plants struggle to breathe. Always choose containers with multiple drainage holes and a gritty, fast-draining mix.
Pests and Diseases 🐛
Mealybugs (white, cottony clusters), scale insects, and fungus gnats are common attackers. They suck sap, weakening the plant and sometimes spreading diseases. Root rot pathogens often accompany overwatering.
Other Factors (Temperature, Fertilizer, Transplant Shock) ❄️🌡️
Extreme temperature swings, over-fertilizing, or recent repotting can stress succulents. In hot, humid climates, high moisture in the air slows drying time, increasing rot risk.
Quick Self-Check Tip: Gently wiggle the plant. If it feels loose or comes out easily, root issues are likely.
Step-by-Step Diagnosis: Assess Your Succulent’s Condition 🔍
Before any rescue, accurate diagnosis prevents further damage. Follow this checklist:
Visual Inspection Checklist ✅
- Leaves: Are they yellow/mushy (overwater), wrinkled/shriveled (underwater), stretched (low light), or spotted/scorched (sun/pests)?
- Stem/Base: Check for blackening or softness.
- Soil: Perform the finger test — insert a finger 2 inches deep. If wet, hold off watering. Weigh the pot: heavy = wet soil.
- Overall Plant: Note any pests, ants (they farm mealybugs), or unusual odors.
How to Safely Unpot and Examine Roots
- Water lightly the day before if soil is bone-dry to ease removal.
- Gently turn the pot upside down and tap/slide the plant out.
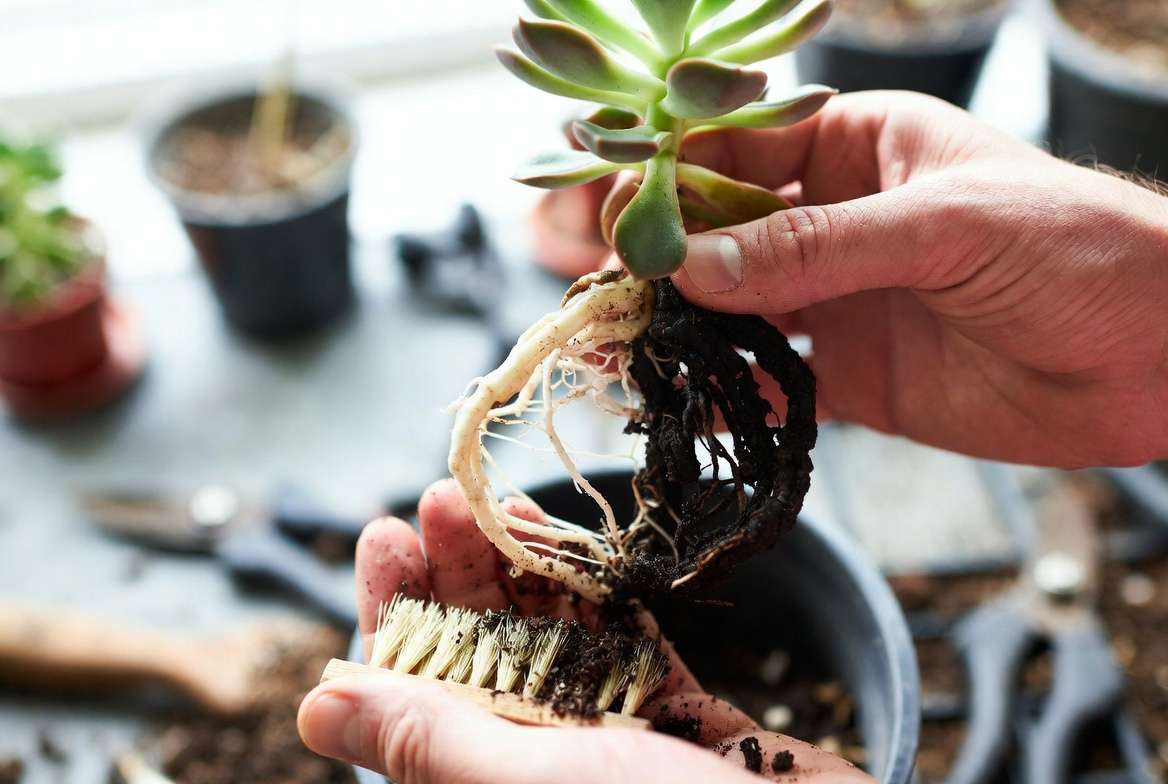
- Brush away old soil and inspect roots: Healthy roots are firm and white/tan; rotten ones are black, mushy, or stringy.
- Rinse roots under lukewarm water if soil is caked on, then lay the plant on a paper towel to dry.
Pro Tip: Sterilize tools with rubbing alcohol between plants to avoid spreading issues. This diagnostic step alone saves many succulents by catching problems early.
Emergency Rescue Steps for Overwatered Succulents 💧➡️🌵
Overwatering causes the majority of succulent deaths, but good news — you can often save them!
Immediate Action – Stop Watering and Remove from Wet Soil
- Cease all watering immediately.
- Carefully unpot the succulent and remove as much wet soil as possible.
- Rinse roots gently if needed and trim away all rotten (black/mushy) roots and leaves with clean, sharp scissors or a knife. Cut until you reach firm, healthy tissue.
Pruning Rotten Parts (Beheading and Leaf Removal) ✂️
- Remove damaged lower leaves by gently twisting them off.
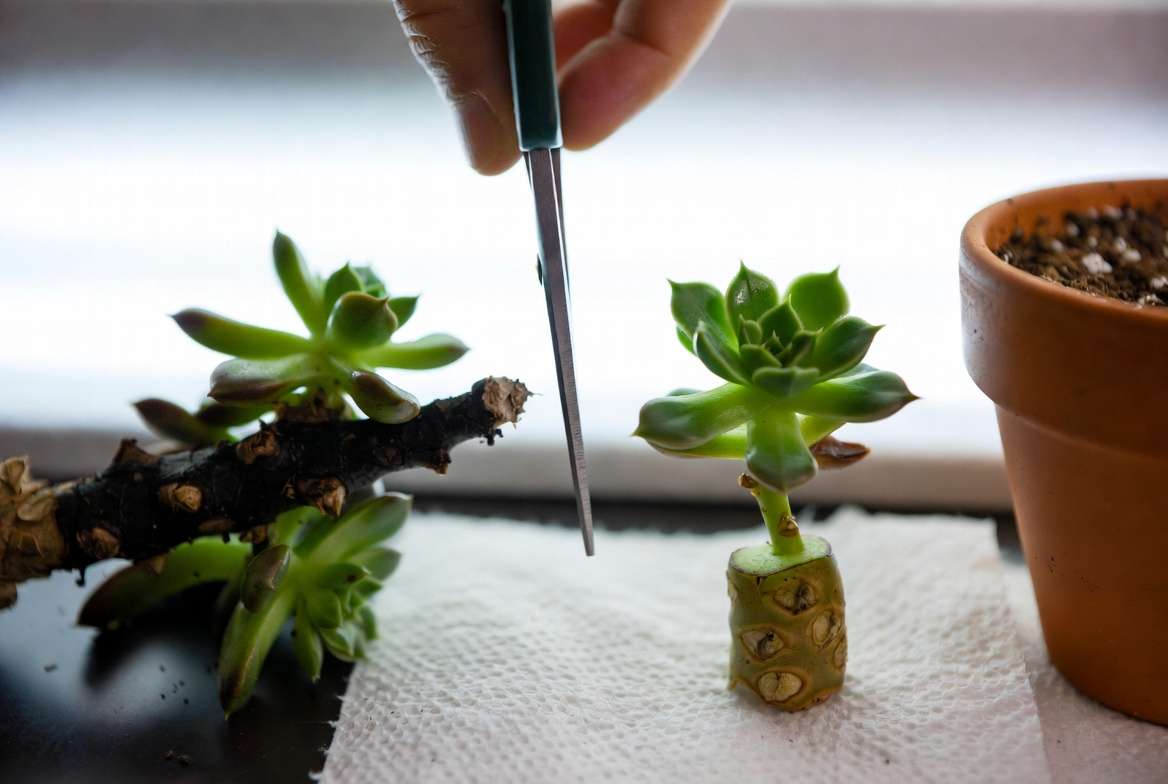
- If the stem or crown is rotting, behead the healthy top rosette: Cut cleanly 1–2 inches below the healthy leaves.
- Allow the cut end to callus (dry and form a scab) for 3–7 days in a bright, dry, shaded spot. This prevents new rot.
Drying Out and Callusing
Place the plant on a clean surface or dry paper towels in indirect light. In humid areas, use a fan for gentle airflow to speed drying without stressing the plant.
Repotting in Fresh, Well-Draining Soil
Prepare a gritty mix: 50–70% inorganic grit (perlite, pumice, coarse sand, or lava rock) + 30–50% cactus/succulent soil. Avoid regular potting mix.
Recommended simple recipe:
- 1 part cactus mix
- 1 part perlite or pumice
- 1 part coarse builder’s sand (not beach sand)
Choose a terracotta pot with drainage holes — it wicks away moisture better than plastic. Repot only when the cut has callused. Water sparingly after repotting — wait until soil is completely dry.
Aftercare for Overwatered Recovery
- Avoid direct sunlight for the first few weeks as the plant recovers.
- Mist the leaves very lightly only if the air is extremely dry — otherwise, skip misting entirely.
- Keep temperatures between 18–27°C (65–80°F). In Dhaka’s humid monsoon season, ensure excellent airflow around the plant.
Success rate is high when you act before the rot reaches the main stem. Many gardeners report their succulents looking healthier after rescue than before the crisis!
Reviving Underwatered or Dehydrated Succulents 🏜️💧
If your succulent looks wrinkled, deflated, or has crispy brown tips, it’s likely suffering from dehydration. Unlike overwatering, this problem is much easier and faster to fix.
Gentle Rehydration Techniques (Bottom Watering & Soaking)
- Place the pot in a shallow tray of lukewarm water for 15–30 minutes. This allows the roots to drink from the bottom without shocking the plant.
- Alternatively, water thoroughly from the top until water runs out the drainage holes, then let the soil drain completely.
- Repeat this every 7–10 days initially, adjusting based on your climate and pot size.
Important: Never water a severely dehydrated succulent with ice-cold water — room temperature is best to avoid root shock.
Recovery Timeline and Signs of Improvement
- Within 3–7 days: Wrinkled leaves usually start plumping up.
- 1–2 weeks: New growth appears at the center of the rosette.
- 3–4 weeks: The plant regains its firm, juicy appearance.
If lower leaves were severely shriveled, they may drop naturally as the plant redirects energy — this is normal and not a cause for worry.
Preventing Future Dehydration
- Check soil moisture weekly using the finger test or a moisture meter.
- Adjust watering frequency according to season: less in winter, more during hot, dry periods.
- Use pots that retain some moisture but still drain well (glazed ceramic can work better than terracotta in very arid indoor conditions).
Fixing Light-Related Problems ☀️
Light issues are sneaky but very common, especially for indoor succulents.
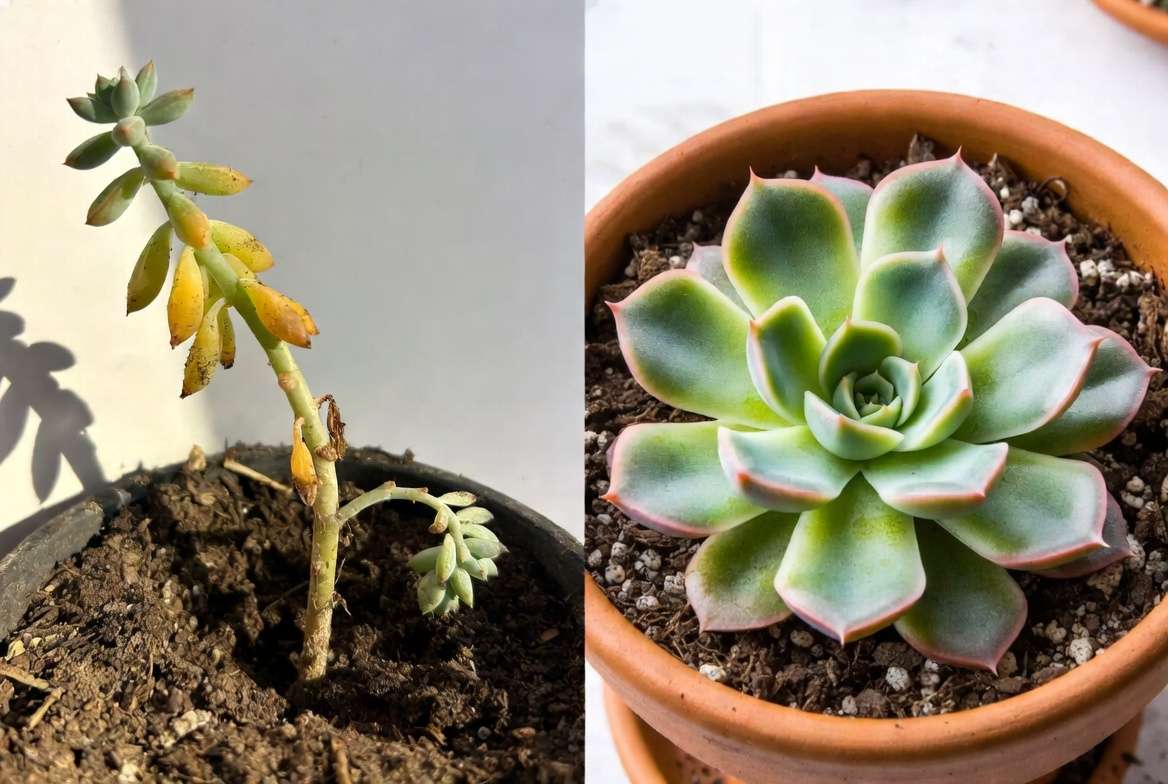
Helping Stretched (Etiolated) Succulents
Etiolated succulents grow tall and leggy with wide gaps between leaves. While you can’t “shrink” the stretched stem, you can save the plant through propagation:
- Behead the healthy top rosette, leaving 1–2 cm of stem.
- Let the cut callus for 4–7 days.
- Repot the top in fresh succulent soil. The old stem can often produce new pups at the base.
Gradually move the plant to brighter light (south or west-facing window) to prevent future stretching. In low-light homes, supplement with full-spectrum grow lights for 12–14 hours daily.
Treating Sunburned Succulents
Sunburn appears as pale, brown, or white crispy patches.
- Immediately move the plant to bright indirect light or filtered morning sun.
- Do not remove sunburned leaves unless they are completely dead — the plant uses them for protection while new healthy growth emerges.
- Recovery usually takes 2–4 weeks. New leaves will grow without scars.
Pro Tip: Acclimate succulents slowly when moving them outdoors. Start with 1–2 hours of morning sun and increase gradually over 10–14 days.
Dealing with Pests and Diseases 🐛🛡️
Pests can quickly turn a healthy succulent into a dying one if left unchecked.
Identifying and Treating Common Pests
- Mealybugs: Look like tiny white cotton balls in leaf crevices.
- Treatment: Dab individual bugs with a cotton swab dipped in 70% isopropyl alcohol. Repeat every 3–4 days for 2 weeks.
- For heavy infestations: Spray with neem oil solution (1 tsp neem oil + 1 tsp dish soap in 1 liter water) weekly.
- Scale Insects: Hard, brown or white bumps on stems/leaves. Scrape them off gently and treat with alcohol or neem oil.
- Fungus Gnats: Tiny flies around soil. Let soil dry completely between waterings and use yellow sticky traps.
Always isolate infested plants from your healthy collection to prevent spreading.
Managing Root Rot and Fungal Issues
If root rot is advanced, combine pruning of rotten roots with a fungicide dip (diluted hydrogen peroxide 1:4 with water works as a gentle natural option). Repot in fresh sterile soil mix after treatment.
Propagation: Turn Your Dying Succulent into New Plants 🌱🌱
One of the most rewarding parts of succulent rescue is propagation — turning one struggling plant into many healthy ones!
Leaf Propagation from Healthy Leaves
- Gently twist off plump, healthy leaves from the lower part of the plant.
- Lay them on dry succulent soil in bright indirect light.
- Mist lightly every few days. In 2–4 weeks, tiny roots and baby rosettes will appear at the base.
- Once the new plant has several leaves, gently detach it from the mother leaf and pot it up.
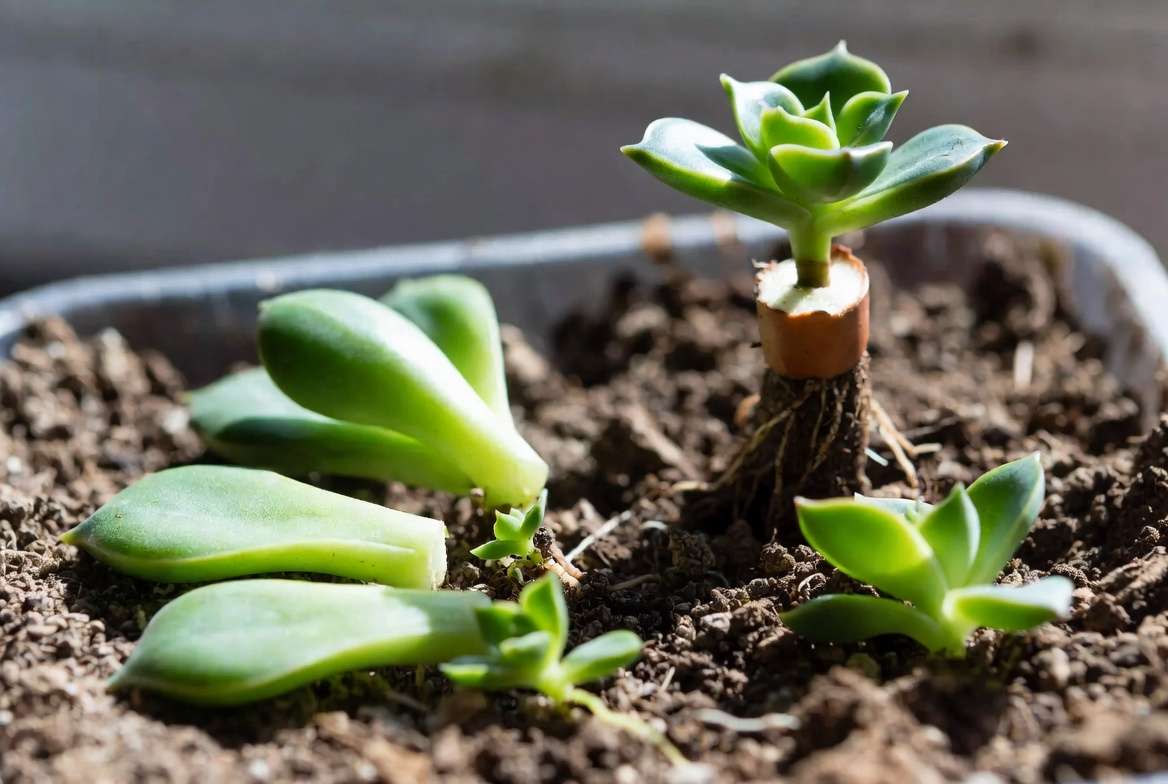
Stem/Beheading Propagation
Best for etiolated or beheaded plants. Follow the callusing process described earlier, then plant the healthy top in well-draining soil. Keep soil barely moist until roots form (usually 2–3 weeks).
Offsets and Pups
Many succulents naturally produce baby plants (pups) at the base. Wait until they are at least 1/3 the size of the mother plant, then carefully separate them with roots attached and repot individually.
Success Rate Boosters:
- Always use sharp, sterilized tools.
- Provide bright indirect light and warm temperatures (22–26°C ideal for rooting).
- Be patient — some varieties root faster than others.
Propagation not only saves your collection but gives you free plants to share with friends!
Creating the Perfect Long-Term Succulent Care Routine 🏡💚
Saving a dying succulent is only half the battle. The real victory comes from establishing a care routine that keeps your plants thriving for years. Here’s how to build a foolproof system tailored for both beginners and seasoned collectors.
Watering Best Practices (“Soak and Dry” Method)
The golden rule for succulents is simple: water deeply, then let the soil dry out completely before watering again.
- How to water properly: Pour water slowly around the base until it drains freely from the bottom holes. Never let the plant sit in standing water.
- Frequency guide:
- Summer/hot weather: Every 7–14 days
- Winter/cooler months: Every 3–4 weeks or longer
- Humid climates (like Dhaka during monsoon): Extend intervals significantly and always check soil moisture first.
Use the finger test or a chopstick inserted into the soil — if it comes out dry and clean after a week, it’s time to water.
Ideal Light, Temperature, and Humidity
Succulents love bright, indirect light or 4–6 hours of gentle direct morning sun. South or west-facing windows work best indoors. In low-light spaces, full-spectrum LED grow lights are a game-changer.
- Temperature: 18–27°C (65–80°F) during the day; not below 10°C (50°F) at night.
- Humidity: Keep it low (30–50%). In humid areas, use a small fan for air circulation and avoid crowding plants together.
Choosing the Right Soil and Pots
Invest in a high-quality, gritty succulent mix. A reliable homemade blend:
- 40% cactus/succulent potting mix
- 30% perlite or pumice
- 20% coarse sand
- 10% small orchid bark or lava rock
Always use pots with drainage holes. Terracotta is excellent because it breathes and dries faster; plastic or glazed ceramic works well for plants that need slightly more consistent moisture.
Fertilizing Sparingly
Succulents are light feeders. Use a balanced, diluted succulent fertilizer (half strength) only once in spring and once in early summer. Over-fertilizing causes weak, leggy growth and salt buildup in soil.
Seasonal Care Adjustments
- Monsoon/Rainy Season (Dhaka & similar climates): Reduce watering dramatically, move plants under cover, and ensure maximum airflow.
- Summer: Provide afternoon shade and increase watering slightly as soil dries faster.
- Winter: Cut watering to a minimum and move to brightest spot available.
Consistent routines prevent 90% of future “dying succulent” emergencies.
Tools and Supplies You’ll Need for Succulent Rescue 🛠️
Having the right tools makes rescue work clean, safe, and effective:
- Sharp, sterilized pruning shears or exacto knife
- 70% isopropyl alcohol (for disinfection and pest treatment)
- Well-draining succulent soil mix + perlite/pumice
- Terracotta pots with drainage holes (various sizes)
- Neem oil or insecticidal soap
- Soft paintbrush for cleaning soil off roots
- Moisture meter (optional but helpful for beginners)
- Grow lights (for low-light homes)
- Yellow sticky traps for fungus gnats
Budget-Friendly Starter Kit Tip: Begin with basic items you likely already have at home and upgrade as your collection grows.
Real-Life Rescue Stories and Examples 📖
Case 1: Overwatered Echeveria ‘Perle von Nürnberg’ A reader in Dhaka lost several lower leaves to rot after heavy monsoon rains. After unpotting, pruning rotten roots, and repotting in a gritty mix, the plant produced new roots within 18 days and is now producing beautiful offsets. The key? Acting within 48 hours of noticing mushy leaves.
Case 2: Stretched Sedum ‘Burrito’ This popular trailing succulent became extremely leggy indoors. Beheading the top rosette and propagating the healthy head resulted in a compact new plant, while the old stem sprouted multiple pups at the base. Within two months, one plant became four healthy ones.
Case 3: Mealybug-Infested Haworthia Tiny white pests were hiding deep in the leaves. Consistent alcohol swabbing and neem oil sprays over three weeks eliminated the infestation. The plant recovered fully and is now producing new tight growth.
These real recoveries prove that with the right steps, even severely stressed succulents can bounce back stronger.
Common Mistakes to Avoid When Saving Succulents ❌
Even well-meaning plant parents make these errors:
- Watering too soon after repotting — Wait until the plant shows signs of new growth.
- Using regular garden soil — It holds too much moisture and invites rot.
- Over-fussing — Constant checking and moving stresses the plant.
- Removing too many healthy leaves — Leave enough for photosynthesis during recovery.
- Placing in direct harsh sun right after rescue — This can cause further sunburn.
- Ignoring quarantine — New or rescued plants should stay separate for 2–3 weeks.
Avoiding these mistakes dramatically increases your success rate.
Frequently Asked Questions (FAQs) ❓
Can a succulent with no roots be saved? Yes! Many succulents can grow new roots from the stem or leaves. Behead above the rot, let it callus, and place on well-draining soil. Roots often appear within 2–4 weeks.
How long does it take for a dying succulent to recover? Mild cases show improvement in 1–2 weeks. Severe root rot or etiolation may take 1–3 months for full recovery. Patience is key.
Is it normal for leaves to fall off during recovery? Yes, especially lower leaves. The plant redirects energy to new growth. As long as the center looks healthy, don’t worry.
What if only the stem is left? Many succulents (like Echeveria and Graptopetalum) can regrow from a bare stem if placed in bright light on dry soil. New pups often emerge at the base.
Can I use regular potting soil for succulents? No. Regular potting soil retains too much water. Always amend heavily with perlite, pumice, or sand.
Should I fertilize a recovering succulent? Wait until the plant shows strong new growth (usually 6–8 weeks after rescue) before applying diluted fertilizer.
Conclusion 🌵✨
Watching a beloved succulent struggle is painful, but with this step-by-step guide to rescue a dying succulent, you now have the knowledge and tools to act confidently and effectively. From quick diagnosis and emergency pruning to propagation magic and long-term prevention, most succulents can be revived and even multiplied.
Remember: The best plant parents aren’t those who never lose a plant — they’re the ones who learn from each challenge and give their plants the specific care they need. Your rescued succulent may grow back even more beautiful than before.
Start today — unpot that struggling plant, assess the roots, and take the first rescue step. Share your before-and-after photos in the comments below. I’d love to hear your rescue success stories!
For more expert plant care advice, explore our other guides on creating the perfect succulent soil mix, choosing the best indoor lighting for plants, and caring for succulents during monsoon season.
Thank you for trusting this guide. Your plants are lucky to have you. Keep growing, keep learning, and enjoy the rewarding journey of succulent parenthood! 💚🌱


