
When it comes to plant propagation, cleanliness is more than just a best practice—it’s essential for ensuring healthy growth and preventing disease. One of the most overlooked steps in the process is properly sterilizing tools for clean propagation. Without proper sterilization, you risk introducing harmful pathogens and contaminants that can stunt growth or kill your cuttings. In this article, we’ll explore the best methods for sterilizing your tools and why this crucial step is the key to boosting your propagation success. Ready to give your plants the clean start they deserve? Let’s dive in! 

What Is Tool Sterilization and Why Is It Important? 
Tool sterilization refers to the process of cleaning and disinfecting gardening tools, such as pruners, shears, trowels, and shovels, to eliminate harmful bacteria, fungi, and viruses. This step is crucial for maintaining plant health and preventing the spread of diseases. Here’s why sterilizing your tools is essential:
1. Prevent Disease Spread
Dirty tools can carry pathogens from one plant to another. By sterilizing your tools, you reduce the risk of transmitting diseases like rust, blight, or mold that could harm your plants.
2. Protect Plant Health
Using sterilized tools helps keep your garden safe and healthy. It prevents cross-contamination between plants, especially when working with different species or cutting infected plants.
3. Prolong Tool Life 
Sterilization also helps preserve the longevity of your tools. Removing sap, soil, and plant matter prevents rust and keeps them functioning efficiently for longer.
4. Simple and Effective 
Sterilizing your tools is quick and easy. Common methods include soaking tools in a solution of bleach and water, wiping with rubbing alcohol, or using a specialized disinfectant. These methods effectively kill germs without causing harm to the tools or plants.
In short, sterilizing your gardening tools is a simple yet vital step to ensure a healthy garden. It protects your plants, prevents the spread of disease, and keeps your tools in top condition for years to come. 
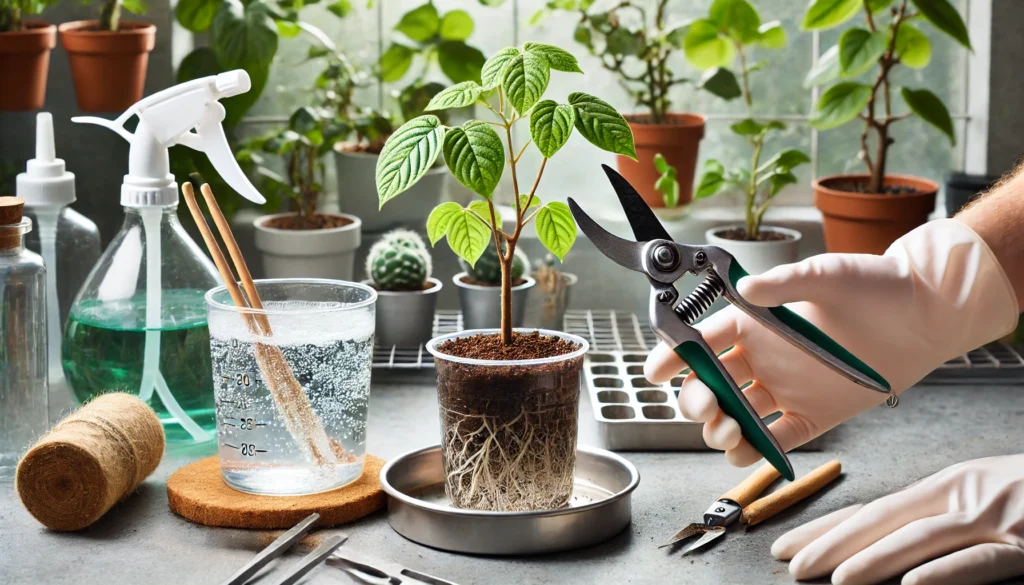
Common Tools Used in Propagation That Need Sterilization
Proper sterilization of tools is essential when propagating plants to prevent the spread of diseases and pests. Here’s a guide to the key tools you’ll use and how to keep them clean for successful propagation:
1. Pruning Shears or Scissors 
These are the go-to tools for cutting plant stems, leaves, or roots. Always sterilize them before each use to avoid transferring any pathogens from one plant to another. Wipe the blades with rubbing alcohol or dip them in a disinfectant solution.
2. Cutting Containers
Whether you use jars, pots, or trays for rooting cuttings, these containers can harbor mold or bacteria. Wash them thoroughly with soap and water, then sterilize them with a bleach solution (1 part bleach to 9 parts water) before reuse.
3. Rooting Trays or Pots
Rooting trays are often used for multiple cuttings. Sterilize them between uses by cleaning with hot, soapy water and then using a disinfecting agent like hydrogen peroxide. This ensures that harmful organisms don’t affect your new plants.
4. Watering Tools 
Spray bottles or watering cans should also be sterilized to prevent bacterial or fungal infections. Clean them regularly with hot water and mild soap, followed by a rinse in diluted bleach or vinegar.
5. Propagation Mediums 
While not a tool, propagation mediums like soil, perlite, or coco coir can carry pests. Sterilize these by baking them in the oven or soaking them in a disinfectant solution before using them for your new cuttings.
Why Sterilization Matters
Sterilizing tools and equipment ensures your propagation process is free from contamination. This gives your new plants the best start and helps avoid problems down the line. It’s a simple, yet effective way to promote healthy growth! 
Best Methods for Sterilizing Tools for Clean Propagation
Maintaining clean tools is essential for successful plant propagation. Sterilizing your equipment helps prevent the spread of diseases, mold, and pests, ensuring your new plants start healthy. Here’s how to properly sterilize your tools before each use:
1. Why Sterilize?
Sterilizing tools eliminates harmful bacteria, fungi, and viruses that could harm your propagated plants. Clean tools reduce the risk of infection, giving your new plants a better chance to thrive.
2. Alcohol Method 
Use rubbing alcohol (70% or higher) to disinfect your tools. Simply dip a cloth or cotton ball into the alcohol and wipe down scissors, pruners, or any cutting tools. Let them air dry before use. This is a quick and effective method!
3. Bleach Solution
Mix 1 part bleach with 9 parts water to create a sterilizing solution. Soak your tools for 10-15 minutes, then scrub away any residue. Rinse thoroughly with water afterward. This method is perfect for sterilizing larger tools like pots or trays.
4. Boiling Water Method
For tools that can handle heat, boiling water is an excellent choice. Immerse your tools in boiling water for 5 minutes. Be sure to dry them completely to avoid rusting. This method is great for quick disinfection without using chemicals.
5. Hydrogen Peroxide
A 3% hydrogen peroxide solution is another natural disinfectant. Spray it on tools or soak them for about 10 minutes. It’s effective and less harsh than bleach, making it a great option for delicate tools.
6. Drying and Storing
After sterilizing, make sure your tools are fully dry before storing them. Moisture can cause rust or mold growth. Store them in a dry, clean place to ensure they’re ready for your next propagation project.
By regularly sterilizing your tools, you’ll create a clean, safe environment for plant propagation, increasing the success rate of your new plants. Happy propagating!
How to Properly Sterilize Tools: Step-by-Step Guide
Keeping your gardening tools clean and sterilized is essential for preventing the spread of diseases and pests. Follow this simple, expert-approved guide to sterilize your tools effectively:
1. Gather Your Tools
Start by collecting all the tools you need to sterilize, such as pruning shears, knives, trowels, and any other equipment that will come into contact with your plants.
2. Clean Off Dirt and Debris
Before sterilizing, remove any soil, sap, or plant material from the tools. Use a wire brush, scraper, or soapy water to scrub off all the grime. This ensures the sterilizing solution works effectively.
3. Disinfect with Bleach Solution
Mix a disinfecting solution using 1 part bleach to 9 parts water. For a gentler alternative, you can use white vinegar or rubbing alcohol. Submerge the tools in the solution for 10-15 minutes, making sure all surfaces are covered.
4. Scrub for Extra Cleanliness
After soaking, scrub your tools with a brush to remove any stubborn dirt or debris. This helps ensure the disinfectant has reached every part of the tool.
5. Rinse and Dry Thoroughly
Rinse the tools under clean water to remove any bleach or vinegar residue. Dry them thoroughly with a clean towel or let them air dry completely to avoid rusting.
6. Store Tools Properly 
Once your tools are sterilized and dry, store them in a cool, dry place. This will help maintain their condition and prevent the growth of mold or rust.
By following these steps, you ensure that your tools remain safe, sharp, and ready for gardening. Sterilizing regularly helps protect your plants from harmful infections and keeps your gardening environment healthy!
When to Sterilize Your Tools: Frequency and Timing 

Sterilizing your gardening tools is an essential practice to maintain plant health and prevent the spread of diseases. Here’s when and how often you should do it:
1. After Each Use with Diseased Plants
If you’ve been working with plants showing signs of disease (e.g., spots, wilting, mold), clean your tools immediately afterward. This helps prevent the spread of harmful pathogens to healthy plants.
2. At the Start of Each Season 
Before you begin gardening each season, take the time to sterilize your tools. This ensures that any residual bacteria or fungi from the previous season are removed and won’t affect your new crops.
3. When Switching Between Different Plants 

If you’re moving between different plant types (especially if they’re susceptible to different diseases), sterilize your tools in between. This reduces the risk of cross-contamination between plants.
4. When Storing Tools for Long Periods 

If you won’t be using your tools for a while, like during the off-season, give them a thorough cleaning before storage. This keeps them in top condition and ready for use when you need them again.
5. How Often to Sterilize 
In general, sterilize your tools at least every few uses, especially if you’ve been cutting or pruning plants. Regular sterilization ensures that you’re minimizing any risk of spreading pests or diseases.
Tip: Always use a proper disinfectant (such as rubbing alcohol, bleach solution, or a commercial cleaner) to sanitize your tools effectively.
By maintaining a routine for tool sterilization, you’ll protect your plants and keep your gardening efforts on track.
Preventative Measures: Keeping Tools Clean Between Uses
Maintaining clean gardening tools is essential for both the health of your plants and the longevity of your tools. Here’s how to keep your equipment in top shape:
1. Why Clean Tools Matter
Dirty tools can spread pests, diseases, and pathogens between plants, causing harm to your garden. Keeping them clean helps prevent contamination and ensures you’re using the best equipment for the job.
2. How to Clean Your Tools
- Scrape Off Dirt: Use a putty knife or a brush to remove excess dirt and debris from your tools after each use.
- Wash with Soapy Water: For a deeper clean, wash your tools with warm, soapy water. A mild dish soap works well. Scrub all parts of the tool, including handles and blades.
- Rinse & Dry Thoroughly: After washing, rinse your tools with clean water and dry them completely to prevent rust.
3. Disinfecting Tools
For added protection, especially after using tools on diseased plants, disinfect them with a solution of 10% bleach or rubbing alcohol. Soak the tool for a few minutes and allow it to dry fully before using it again.
4. Lubricate Moving Parts 
To ensure your tools stay in good working condition, apply a light coat of oil (vegetable or motor oil) to moving parts like hinges or blades. This helps prevent rust and ensures smooth operation.
5. Storage Tips 
Store tools in a dry, cool place to avoid rusting. Hang them up or keep them off the ground to prevent dirt from building up.
By keeping your gardening tools clean and well-maintained, you’ll extend their lifespan and keep your plants healthy and happy.
In conclusion, sterilizing tools for clean propagation is a simple yet powerful step in ensuring your plants thrive. By adopting the best sterilization methods, you prevent the spread of diseases and pests, ultimately boosting your chances of successful propagation. Clean tools not only protect your plants but also contribute to their long-term health and growth, setting the foundation for a flourishing garden. Remember, consistency is key. Whether you’re using boiling water, rubbing alcohol, or natural alternatives, keeping your tools disinfected is essential for every stage of propagation. By incorporating these practices into your gardening routine, you’ll be well on your way to healthier plants and a more successful propagation process. Happy gardening! 