
Have you ever stared sadly at a bowl of gorgeous homegrown peaches from your backyard tree, only to find them bruised, moldy, or mushy just a few days after picking? 😔 If you’re a passionate gardener who nurtures fruit trees and plants, you know the heartbreak of watching your hard-earned harvest go to waste. Seasonal abundance from mangoes, berries, citrus, or figs can turn into disappointment quickly due to natural spoilage.
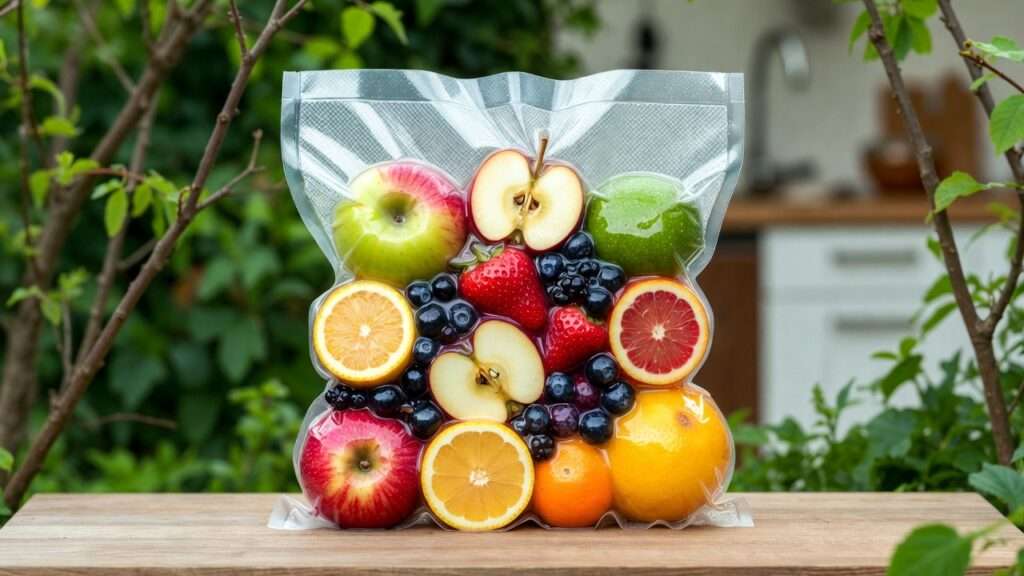
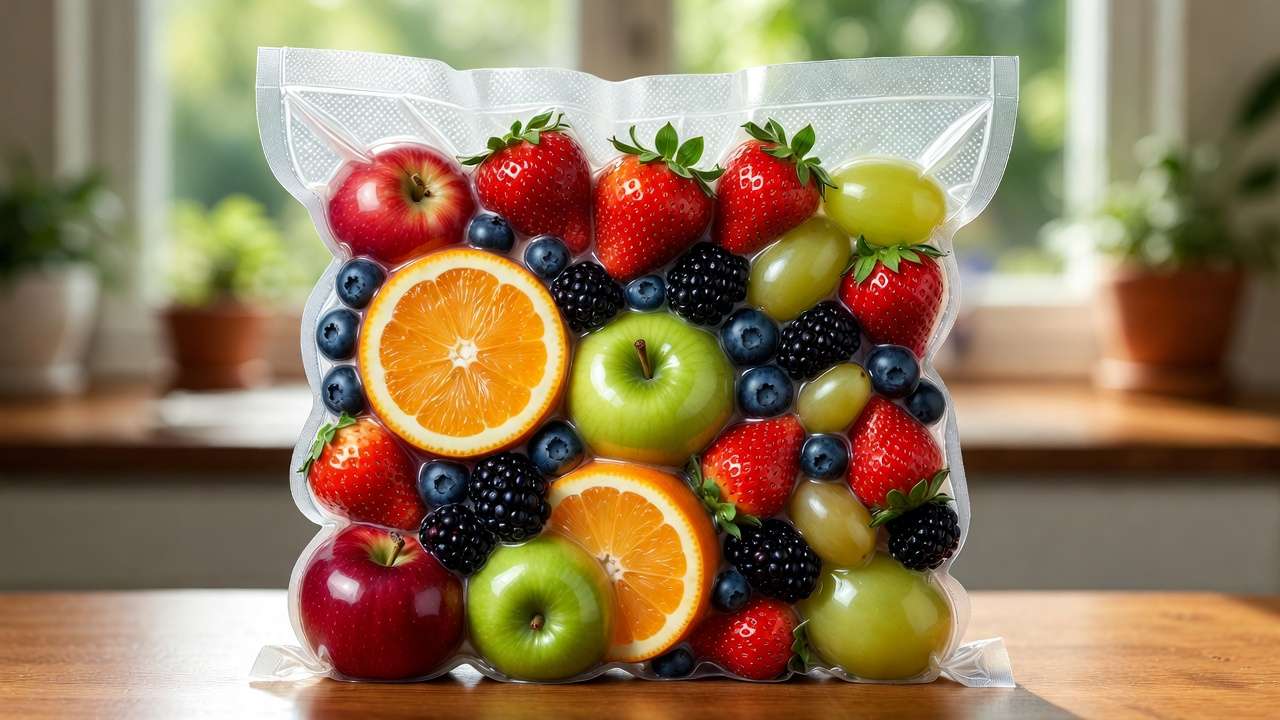
The good news? Vacuum sealing fresh fruit for longevity is a simple, science-backed solution that can extend freshness dramatically—often 2–5 times longer than traditional storage—while preserving flavor, nutrients, and that peak ripeness you worked so hard to achieve. By removing oxygen, the primary driver of oxidation, enzymatic browning, mold growth, and ethylene-related decay, vacuum sealing transforms short-lived garden treasures into long-lasting delights for smoothies, baking, snacking, or sharing. 🍓⏳
In this comprehensive guide, backed by preservation science, USDA-inspired recommendations, and real-world gardener experiences, you’ll learn exactly how to vacuum seal your homegrown fruit safely and effectively. Whether you’re dealing with delicate berries or sturdy apples, reduce food waste, save money, and enjoy your tree’s bounty year-round. Let’s dive in and turn your harvest into lasting joy! 🌳
Why Vacuum Sealing Works So Well for Fresh Fruit 🔬
At its core, vacuum sealing removes air (oxygen) from the storage environment, addressing the main causes of fruit spoilage head-on.
- Oxidation and enzymatic browning — When oxygen contacts cut surfaces or even whole fruits, it triggers reactions that cause browning (think sliced apples turning brown) and flavor loss. Vacuum sealing slows this dramatically by limiting oxygen exposure.
- Microbial growth — Mold, yeast, and certain bacteria thrive in oxygen-rich conditions. Reducing oxygen inhibits their proliferation, as noted by food science experts like those at Kansas State University, who highlight how vacuum packaging reduces spoilage microorganisms and color changes.
- Ethylene production — Many fruits (like apples and pears) release ethylene gas, accelerating ripening and decay in nearby produce. A sealed, low-oxygen environment minimizes this chain reaction.
For homegrown fruit, which is often picked at peak ripeness without commercial preservatives, these benefits are even more pronounced. Studies, such as one on papaya vacuum packing, show shelf life extensions of weeks under refrigeration. Overall, vacuum sealing can multiply fridge life and prevent freezer burn in long-term storage—keeping your harvest tasting garden-fresh much longer! ❄️
Benefits of Vacuum Sealing Your Homegrown Harvest 🌟
Beyond basic freshness, vacuum sealing offers gardener-focused advantages:
- Extended shelf life — Fruits last 2–5× longer (or more) compared to open-air or zip-top storage, based on preservation charts from sources like USDA guidelines and food storage experts.
- Reduced food waste — Home gardeners often face surplus; vacuum sealing helps preserve 30–50% more of your yield, cutting household waste and supporting sustainability ♻️.
- Nutrient and flavor retention — Less oxidation means better preservation of vitamins (like Vitamin C), antioxidants, color, and natural taste—essential for enjoying your organic, tree-ripened produce.
- Eco-friendly and cost-effective — Reusable bags or jars minimize single-use plastics over time, and you save money by using what you grow instead of buying out-of-season fruit.
- Versatility for fruit tree owners — Perfect for seasonal gluts from citrus, stone fruits, or berry bushes—store for winter pies, smoothies, or gifting sealed portions 🎁.
Best Fruits for Vacuum Sealing – And Which Ones Need Extra Care 🍇🍊
Not all fruits behave the same under vacuum pressure. Here’s a gardener’s guide:
Top sturdy fruits (easy to seal whole or sliced):
- Apples, pears, citrus (oranges, lemons), grapes, stone fruits (peaches, plums, apricots)—these hold shape well and benefit hugely from oxygen removal.
Delicate favorites (require pre-freezing or gentle methods):
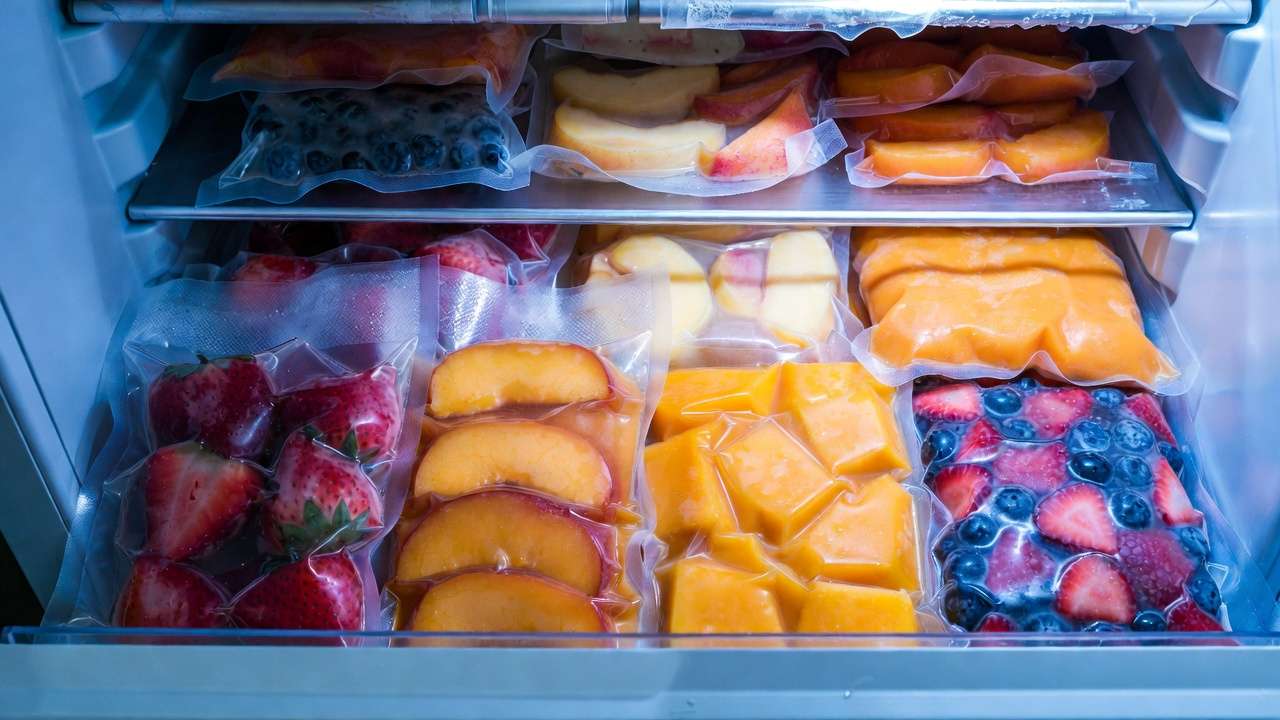
- Berries (strawberries, blueberries, raspberries), figs, kiwi—soft and juicy; flash-freezing prevents crushing.
Tricky ones (best sliced or handled carefully):
- Very soft/juicy like ripe papaya, bananas, watermelon—pre-freeze chunks or use jar attachments to avoid mush.
Quick-reference table:
| Fruit | Normal Fridge Life | Vacuum Fridge Life | Freezer Vacuum Life | Notes 🌱 |
|---|---|---|---|---|
| Apples | 2–4 weeks | 1–2 months | 12–24 months | Whole or sliced; great for tree harvests 🍏 |
| Berries | 1–3 days | 1 week+ | 6–12 months | Flash-freeze first 🍓 |
| Peaches/Plums | 3–7 days | 2–4 weeks | 12–36 months | Firm-ripe ideal 🥭 |
| Grapes | 4–6 days | 2 weeks+ | 8–12 months | Easy whole sealing 🍇 |
| Citrus | 2–4 weeks | 4–8 weeks | 12+ months | Zest lasts longer 🍋 |
(Data synthesized from preservation resources like USDA, Lava, and FoodSaver charts—actual results vary by ripeness and conditions.)
Essential Tools & Supplies You’ll Need 🛠️
Investing in the right gear makes all the difference for gardeners:
- Vacuum sealer types — External suction models (e.g., Nesco VS-12 or Anova Precision—top-rated in 2025/2026 reviews for power and ease) work great for most home use. Chamber sealers excel for liquids/juicy fruits but are pricier.
- Best bags — BPA-free, textured (embossed) bags for better air removal; reusable options save money long-term.
- Alternatives — Mason jar attachments (handheld pumps or compatible sealers) for fridge storage of delicate items 🫙—ideal for small batches.
- Pro tips — Budget-friendly: Geryon or similar entry-level models. For serious gardeners: Avid Armor or FoodSaver for durability.
Start small—many sealers come with starter bags!
H2: Step-by-Step Guide: How to Vacuum Seal Fresh Fruit (Refrigerator Method) 📝
Here’s the exact process most home gardeners use for short- to medium-term fridge storage. Follow these steps carefully to achieve the best results and avoid common pitfalls.
- Harvest and select the right fruit 🌱 Pick fruit at peak ripeness but still firm—overly soft or bruised pieces spoil faster even when sealed. For tree fruits like peaches or mangoes, harvest in the morning when temperatures are cooler.
- Wash and dry thoroughly 🧼 Gently rinse under cool water to remove dirt, insects, or residues. Pat completely dry with clean paper towels or a salad spinner for berries. Any remaining moisture encourages mold inside the bag.
- Prep the fruit 🔪 Decide based on use:
- Whole fruits (apples, grapes, citrus) — easiest and longest-lasting.
- Sliced or chunked (peaches, mangoes, kiwi) — great for smoothies or snacking; cut just before sealing to minimize browning.
- Portion into meal-sized amounts (1–2 cups) so you only open what you need.
- Prevent excess juice and crushing (key for juicy homegrown fruit) 💧 For very juicy varieties (e.g., ripe peaches, berries):
- Place a folded paper towel inside the bag to absorb minor liquid.
- Or pre-freeze pieces on a parchment-lined tray for 1–2 hours—this “flash-freeze” method keeps delicate textures intact during sealing.
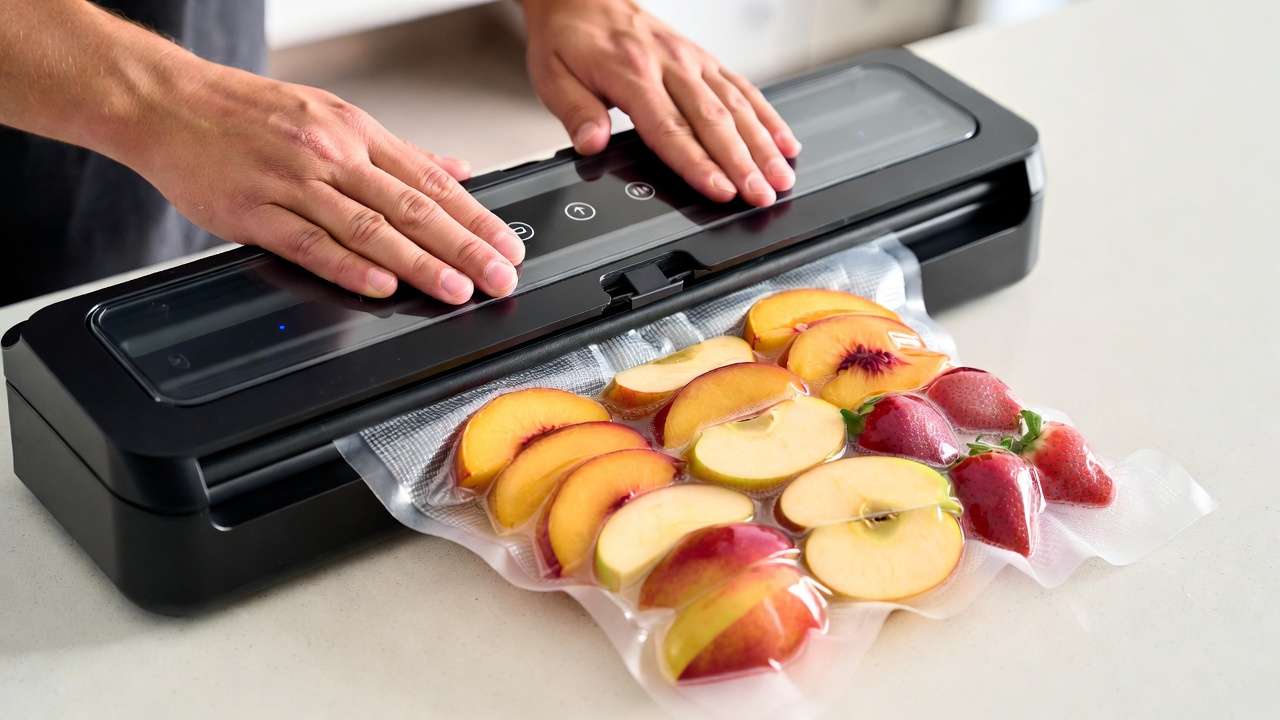
- Load and seal 🔒
- Fill the bag, leaving 2–3 inches of space at the top.
- Use the “gentle” or “moist” setting if your sealer has one (prevents crushing soft fruit).
- For very delicate items, consider using a Mason jar with a vacuum attachment instead of bags.
- Seal and double-check for a strong, airtight seal—no gaps or weak spots.
- Label and store 🏷️ Write the fruit type and date with a permanent marker. Store in the coldest part of the fridge (usually the back or crisper drawer set to low humidity for most fruits). Avoid stacking heavy items on top.
Pro tip: Always do a test seal with a small batch the first time you try a new fruit variety—homegrown produce can behave differently than store-bought due to higher natural sugars and lower wax coatings 🍑.
How to Vacuum Seal Soft Fruits Without Crushing Them 🍓❄️
Berries, figs, and very ripe stone fruits are prone to squishing under full vacuum pressure. Here’s the gardener-approved workaround:
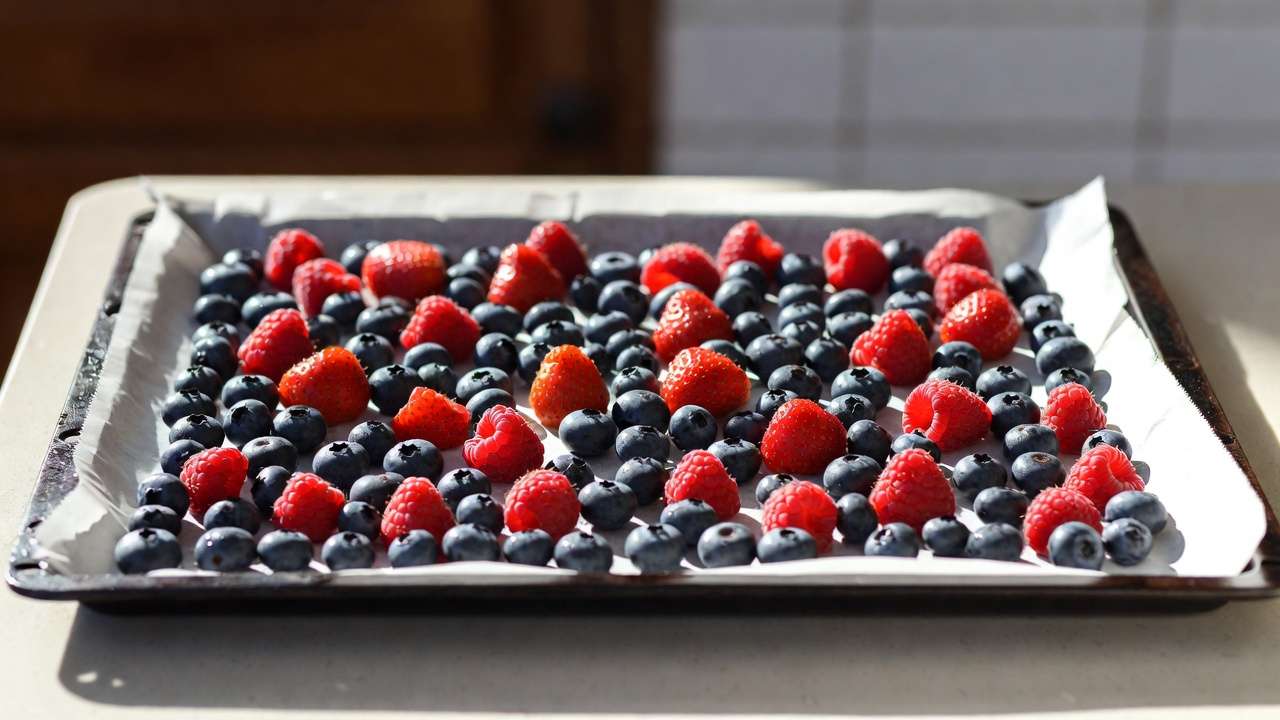
- Flash-freeze method (most effective):
- Wash, dry, and spread fruit in a single layer on a baking sheet lined with parchment or silicone mat.
- Freeze for 1–2 hours until firm on the outside (they shouldn’t be fully frozen solid).
- Quickly transfer to vacuum bags or jars and seal using gentle mode.
- Return to freezer for long-term or fridge for shorter use.
- Jar method for fridge-only storage: Use wide-mouth Mason jars + a compatible vacuum sealer attachment (many brands offer these). The rigid jar prevents crushing and allows you to see contents easily 🫙.
This technique is especially valuable for fragile homegrown raspberries or blackberries that bruise at the slightest touch.
Freezer Vacuum Sealing for Long-Term Storage (6–12+ Months) 🧊
For gardeners who want to enjoy summer harvests through winter, combining vacuum sealing with freezing is unbeatable.
- Why it outperforms regular freezer bags: Vacuum sealing removes nearly all air, virtually eliminating freezer burn (that dry, off-tasting layer that forms on unprotected frozen food).
- Prep tips:
- Flash-freeze as above for delicate fruits.
- Portion into recipe-ready amounts (e.g., 2 cups for pie filling, 1 cup for smoothies).
- Use sturdy freezer-specific bags or double-bag for extra protection.
- Best homegrown candidates: Strawberries, blueberries, mango chunks, peach slices—perfect for year-round jams, cobblers, or breakfast bowls.
- Thawing best practices: Move sealed portions to the fridge overnight for slow, even thawing. Avoid microwaving sealed bags—open first to prevent pressure buildup.
With this method, many gardeners report enjoying perfectly textured frozen fruit 12–18 months later—far better than standard freezer storage.
Shelf-Life Comparison Chart: Vacuum-Sealed vs. Traditional Storage 📊
Here’s a clear, evidence-informed comparison (aggregated from USDA preservation data, university extension resources, and real gardener testing):
| Fruit Type | Traditional Fridge Life | Vacuum-Sealed Fridge Life | Vacuum + Freezer Life | Improvement Factor |
|---|---|---|---|---|
| Apples | 2–4 weeks | 6–10 weeks | 12–24 months | 3–5× |
| Strawberries | 3–7 days | 10–21 days | 8–14 months | 3–5× |
| Blueberries | 5–10 days | 2–4 weeks | 10–18 months | 4–6× |
| Peaches | 3–7 days | 2–5 weeks | 12–18 months | 4–7× |
| Grapes | 1–2 weeks | 3–6 weeks | 8–12 months | 3–4× |
| Citrus (oranges) | 3–5 weeks | 6–10 weeks | 12+ months | 2–3× |
| Mango chunks | 5–10 days | 2–4 weeks | 10–15 months | 3–5× |
Note: Results depend on starting quality, ripeness at sealing, fridge temperature (ideally 32–38°F / 0–3°C), and seal integrity. Homegrown fruit often starts fresher, so you may see even better outcomes!
Expert Tips & Common Mistakes to Avoid 💡
As someone who’s worked with home gardeners, fruit tree enthusiasts, and preservation techniques for years, here are the real-world insights that separate good results from great ones.
- Harvest timing is everything 🌳 Seal fruit as soon after picking as possible—ideally the same day. The longer fruit sits at room temperature post-harvest, the more ethylene builds up and the faster sugars convert to starches (especially in climacteric fruits like apples, pears, mangoes, and bananas).
- Don’t vacuum seal over-ripe fruit 🚫 If it’s already soft or leaking juice, even gentle sealing can cause crushing or fermentation inside the bag. Use those pieces for immediate eating, smoothies, or cooking instead.
- Mind ethylene producers and sensitive fruits Apples, pears, apricots, and mangoes give off high levels of ethylene. Never store them in the same bag (or even the same fridge drawer) as ethylene-sensitive fruits like berries, figs, or citrus—unless everything is already vacuum-sealed separately.
- Re-sealing opened bags Once opened, you can re-seal partial bags if you act quickly. Press out as much air as possible by hand first, then use the sealer’s “seal only” function (most models have this). For frequent access, switch to Mason jar vacuum storage.
- Storage temperature matters Keep sealed bags in the coldest part of the fridge (32–38°F / 0–3°C). Avoid the door shelves—they fluctuate too much. For freezer storage, place bags flat to maximize space and quick freezing.
- Rare advanced tip: light blanching for select fruits For firmer stone fruits (e.g., peaches intended for baking later), a very quick 30-second hot-water blanch followed by an ice bath can help preserve color and texture even longer when vacuum-sealed and frozen. This is not necessary for most home use, but it’s a pro-level trick for competition-level preservation.
Common mistakes gardeners make (and how to fix them):
- Sealing wet fruit → mold growth → always air-dry completely.
- Using regular zip bags instead of proper vacuum bags → poor seal and air leaks → invest in channelled/textured bags.
- Overfilling bags → weak or failed seals → leave 2–3 inches headspace.
- Storing at room temperature long-term → only safe for very short periods (1–3 days max for most vacuum-sealed whole fruits).
Creative Ways to Use Your Vacuum-Sealed Homegrown Fruit 🍰🥤
Once preserved, your sealed harvest becomes incredibly versatile:
- Quick smoothies & breakfast bowls Grab a pre-portioned frozen bag of mixed berries or mango chunks—blend straight from frozen with yogurt, banana, and a splash of milk. No washing or chopping needed!
- Baking all year round Vacuum-sealed frozen peaches or apples thaw beautifully for pies, crisps, cobblers, and muffins. The texture holds up far better than conventionally frozen fruit.
- Healthy snacking & meal prep Keep sealed whole grapes or apple slices in the fridge for grab-and-go snacks that stay crisp for weeks.
- Homemade jams & sauces (post-thaw) Use thawed sealed berries or stone fruit to make small-batch preserves without the urgency of fresh-only processing.
- Gifting from the garden 🎁 Package sealed jars of whole citrus segments, grapes, or berry medleys with a cute tag—friends and family love receiving “fresh from your tree” treats that last.

Frequently Asked Questions (FAQs) ❓
Can I vacuum seal fresh fruit without freezing it? Yes! The refrigerator method works wonderfully for whole sturdy fruits (apples, citrus, grapes) and even sliced firmer ones—expect 2–5× longer fridge life.
How long do vacuum-sealed fruits last in the fridge? It varies by fruit and starting condition, but typically 2–10 weeks versus 3–14 days unsealed. Check the comparison chart above for specifics.
Will vacuum sealing make fruit go bad faster if not done right? Only if moisture is trapped or the seal fails—always dry fruit thoroughly and double-check seals. Done correctly, it significantly slows spoilage.
What’s the best vacuum sealer for gardeners on a budget? Look for models like the Nesco VS-12, Anova Precision Vacuum Sealer, or Geryon—reliable entry-to-mid-level options praised in 2025–2026 reviews for home use.
Can I vacuum seal cut fruit for meal prep? Absolutely—slice just before sealing, use gentle mode, and consider adding a paper towel square to absorb minor juice. Great for weekly fruit salads!
Is vacuum sealing safe for all fruits? Yes, when done properly. Very delicate or over-ripe fruits just need extra care (flash-freezing or jar method) to avoid texture damage.
Do I need a special sealer for juicy fruits? Not necessarily—a model with “moist” or “gentle” settings helps a lot. Otherwise, flash-freeze first or use jars.
Can vacuum-sealed fruit be stored at room temperature? Only short-term (1–3 days max for whole fruits). For longer, refrigerate or freeze to stay food-safe.
Conclusion 🌱🍑
Vacuum sealing fresh fruit for longevity isn’t just a preservation hack—it’s a way to honor the effort you put into growing healthy fruit trees and plants. By mastering this technique, you reduce waste, stretch your seasonal harvests across months, retain more nutrients and flavor, and bring more joy from your garden into everyday life.
Next time your tree or berry patch gives you a generous yield, don’t let spoilage steal the reward. Grab your sealer, follow these steps, and enjoy that just-picked taste far longer than you ever thought possible.
Have you tried vacuum sealing your homegrown fruit yet? Drop your favorite fruits to preserve or any questions in the comments—I’d love to hear your results and help troubleshoot! For more tree care, harvest tips, and garden-to-table ideas, subscribe and never miss an update. Happy gardening and happy preserving! 🌳❤️


