
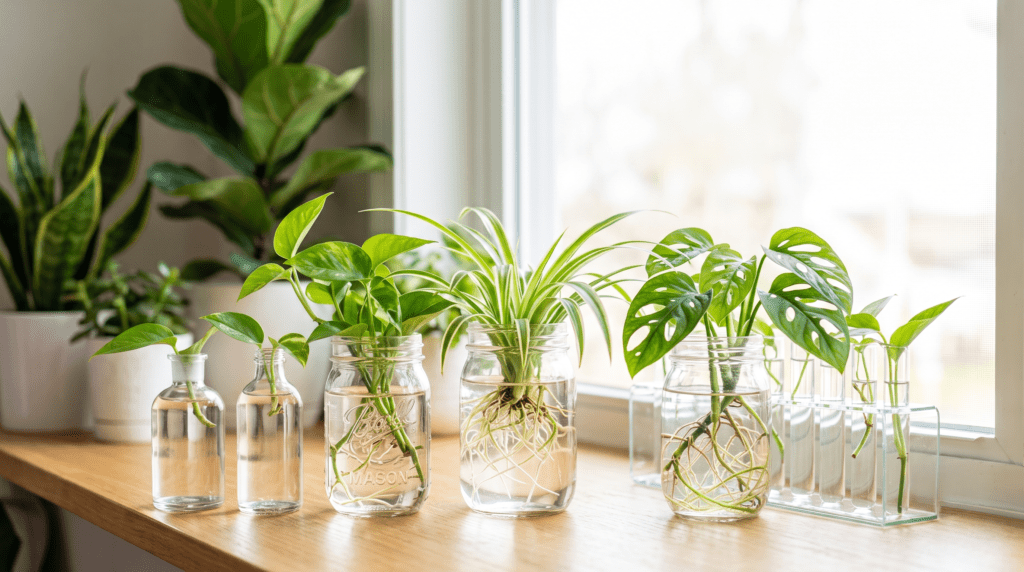
There is a distinct, almost magical thrill in snipping a piece off your favorite houseplant, placing it on your windowsill, and watching new life emerge day by day. But let’s be honest: that excitement can quickly turn into sheer heartbreak when you pull a prized cutting out of the water, only to find a smelly, mushy, black stem instead of fresh roots.
If you are struggling with stagnant water, decaying cuttings, and agonizingly slow growth, you are definitely not alone. Mastering water propagation in glass jars is an essential skill for any plant parent, but it requires a bit more nuance than simply filling a random cup from the tap.
As a plant care specialist who has successfully propagated thousands of cuttings—from stubborn, rare Monsteras to delicate trailing Philodendrons—I’ve spent years testing variables to develop a foolproof, rot-free method. In this comprehensive guide, I am going to walk you through the exact science, the best vessels to use, the hidden “secrets” to speeding up root growth, and how to transition your new plants to soil without shocking them. Let’s turn your windowsill into a thriving propagation station! ✨🪴
🔬 The Science Behind Water Propagation in Glass Jars
To become a propagation expert, it helps to understand what your plant is actually doing when you take a cutting. When a stem is severed from the mother plant, it goes into immediate survival mode. The plant hormones (specifically auxins) rush to the wound site, signaling the plant cells to stop producing foliage and start producing adventitious roots to find water and nutrients.

Water Roots vs. Soil Roots 🧬
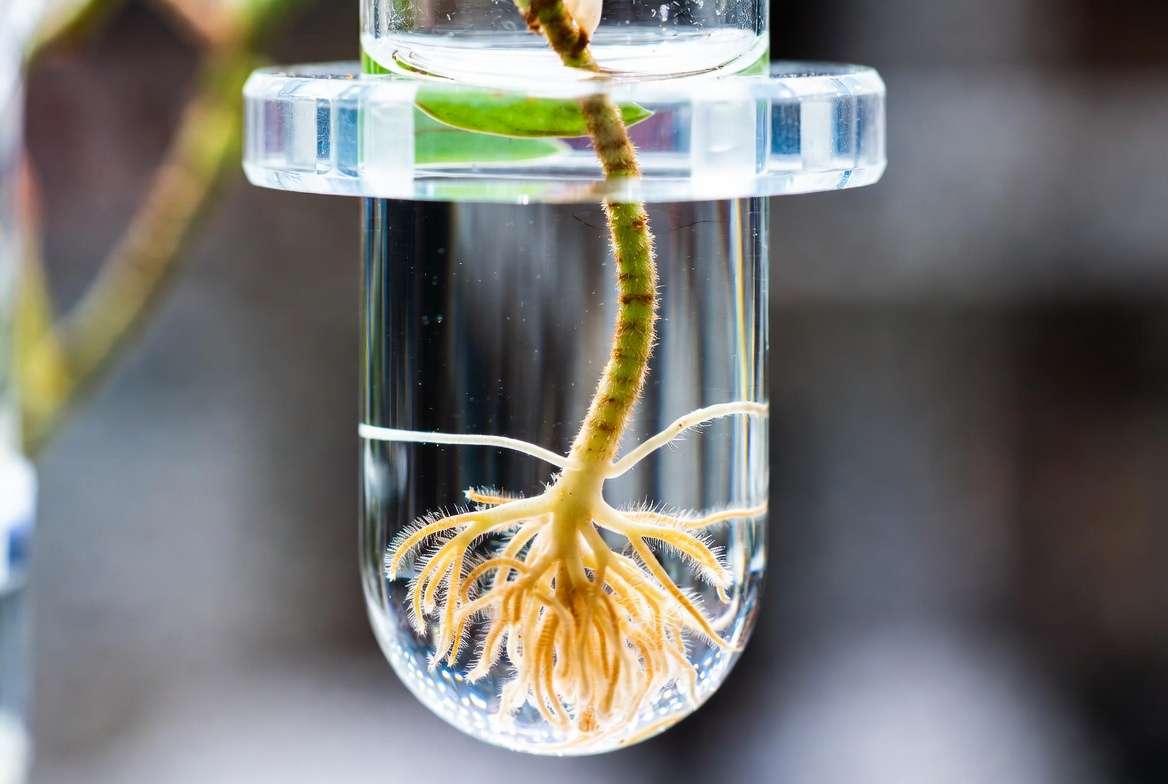
It is a common misconception that roots are all exactly the same. The roots your plant grows in a glass of water are anatomically different from the roots it grows in potting mix. Water roots are significantly thinner, more fragile, and lack the microscopic root hairs found on soil roots. They are specially adapted to absorb dissolved oxygen directly from an aquatic environment. This is why transitioning them to soil later requires a careful touch (which we will cover in a later section!).
Why Glass Jars? 🫙
While you can technically propagate plants in plastic cups, ceramic mugs, or metal tins, glass is the undisputed champion of water propagation for several scientific and practical reasons:
-
Visibility: The number one benefit of glass is that it allows you to monitor root health and water clarity daily without constantly pulling the cutting out and disturbing it. You can spot the earliest signs of rot and intervene immediately.
-
Sanitation: Glass is completely non-porous. Unlike plastic, which can harbor microscopic scratches where bacteria thrive, glass can be 100% sterilized, giving your cutting a perfectly clean environment to grow.
-
Aesthetics: Let’s face it—a row of sparkling glass jars with vibrant green cuttings catching the morning light is incredibly satisfying and beautiful! ☀️
🏺 Choosing the Perfect Glass Jar: Do Shape and Color Matter?
Not all glass jars are created equal when it comes to plant propagation. The vessel you choose plays a massive role in regulating light and supporting the physical structure of your cutting.
Clear Glass vs. Amber and Dark Glass 🤎
-
Clear Glass: Clear jars (like mason jars or upcycled jelly jars) are fantastic for monitoring root progress. However, because they let in 100% of the light, they also encourage rapid algae growth if placed in bright or direct sun. Algae competes with your cutting for oxygen, which can stall root development.
-
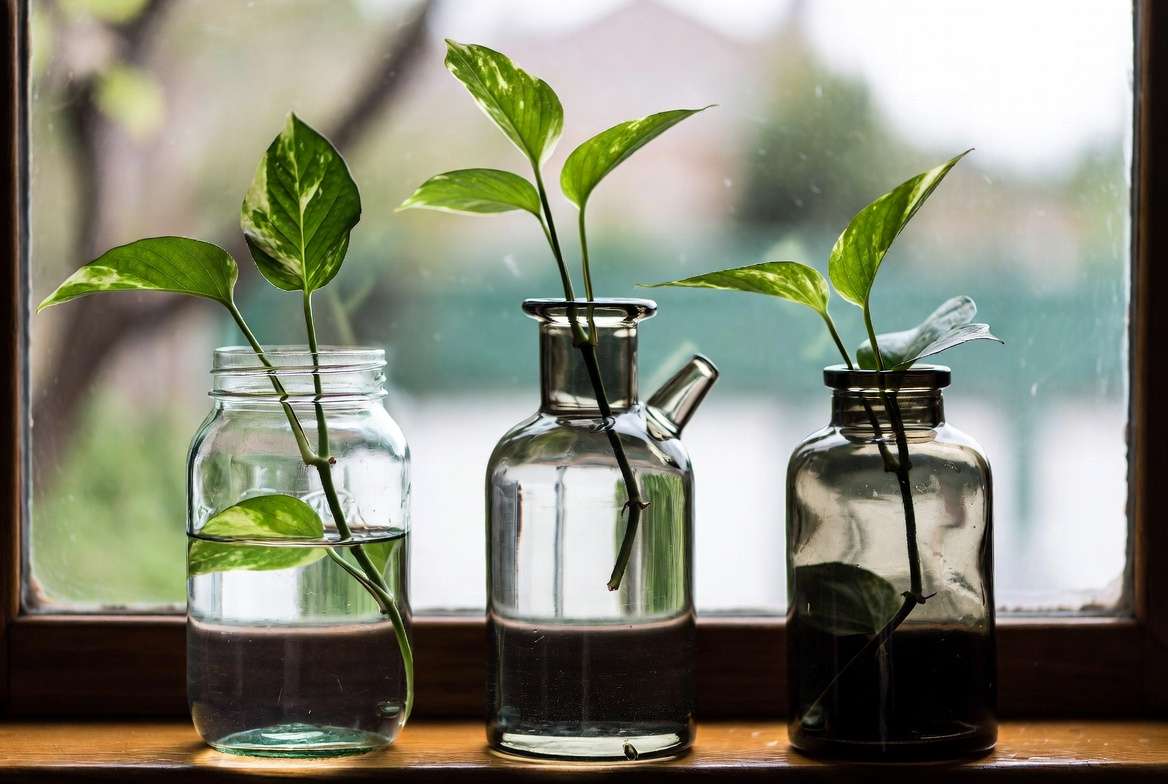
Amber or Dark Glass: Using amber, green, or blue glass (like vintage apothecary bottles or kombucha bottles) blocks a significant amount of UV rays. This slows down algae growth dramatically while still allowing you to hold the bottle up to the light to check on your roots.
Narrow Necks vs. Wide Mouths 🍾
-
Narrow Necks: These are the holy grail of propagation vessels. Jars with narrow necks or test tubes physically support the stem of your cutting. Crucially, they prevent the leaves from slipping down into the water. Leaves submerged in water are the fastest way to invite bacterial rot.
-
Wide Mouths: Wide-mouth mason jars evaporate water much faster, requiring constant refilling. Furthermore, small cuttings easily slip and drown in them unless you use a propagation cone, plastic wrap, or tape across the top to hold the stem in place.
🌿 Expert Insight: Always sanitize your glass jars with isopropyl alcohol or boiling water before use. Leftover bacteria or fungi from previous plants is the #1 hidden cause of rapid stem rot! Never assume a jar is clean just because it looks empty. 🧼
✂️ Step-by-Step: How to Prep Your Cuttings for Maximum Success
Even the perfect jar and purest water won’t save a cutting that was taken incorrectly. Here is exactly how to prep your plant for propagation.
1. Identifying the Node 📍
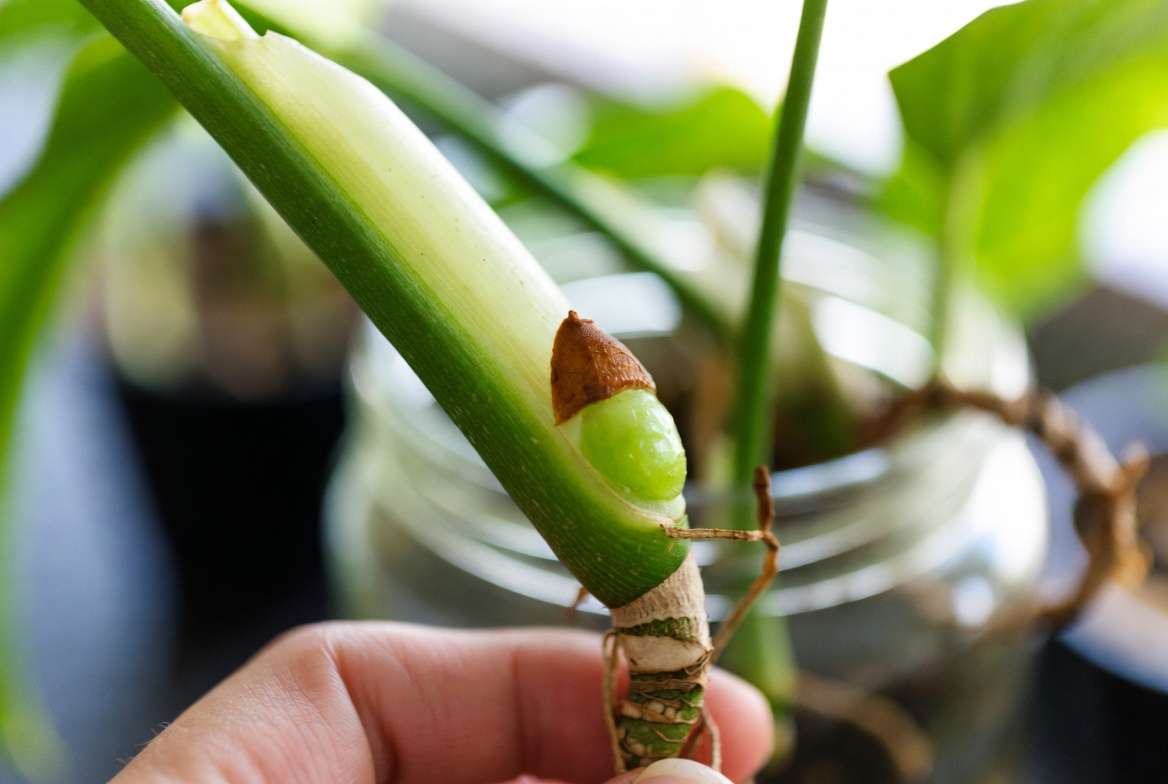
The “node” is the cellular powerhouse of your houseplant. It is the slightly swollen, knobby joint on the stem where leaves, aerial roots, and branches emerge. For 95% of tropical houseplants, roots will only grow from a node. If you simply cut a leaf with its petiole (stem) and no node, it might live in water for months like a bouquet flower, but it will never grow into a new plant. Look for the little brown bumps along the stem—those are waiting to become roots!
2. Making the Perfect Cut 🔪
Always use sharp, sterilized pruning shears or a florist’s knife. Dull scissors will crush the plant tissue rather than slicing it, creating damaged, dying cells that instantly begin rotting in water.
-
The Angle: Make your cut about ¼ inch (0.5 cm) below the node at a strict 45-degree angle. An angled cut prevents the flat bottom of the stem from sitting flush against the bottom of the glass jar, ensuring the plant’s vascular system (the xylem and phloem) has maximum surface area to pull up water.
3. The Callusing Rule ⏳
Most beginners skip this step, resulting in immediate mushy stems. When you cut a plant, it creates an open, fleshy wound. If you immediately plunge thick-stemmed plants (like Monsteras, large Philodendrons, or Ficus) into water, bacteria easily enter that open wound.
-
The Fix: Let your freshly snipped cutting sit out on a paper towel in a shady spot for 1 to 2 hours (or up to 24 hours for succulents). This allows the cut end to dry out and form a protective “callus” or seal. Once sealed, it is safe to place in your jar of water.
🛑 The “Rot-Free” Blueprint: 5 Secrets to Faster Roots
Now that your jar is clean and your cutting is perfectly prepped, it is time for the magic. These five advanced strategies are what separate a struggling, yellowing cutting from an explosive, rot-free root system.
Secret #1: The Pothos Catalyst (Your Natural Rooting Hormone) 🍃
If you are trying to root a notoriously slow grower, like a Ficus elastica (Rubber Tree) or a woody Hoya, you need a companion. Pothos plants (Epipremnum aureum) are incredibly vigorous growers because they naturally produce and exude high concentrations of auxin, a powerful plant rooting hormone.
-
The Hack: Take a fresh Pothos cutting and place it in the exact same glass jar as your stubborn cutting. The Pothos will leach its natural rooting hormones directly into the water, creating a bioactive rooting soup that acts as a catalyst, prompting the slower plant to push out roots much faster!
Secret #2: The Great Water Debate: Tap, Filtered, or Rain? 🚰
The liquid you put inside your propagation station matters immensely. Most municipal tap water is treated with chlorine, chloramine, and heavy fluoride. While mature houseplants can usually handle this, fragile, freshly cut stems can experience cellular shock.
-
The Solution: If you must use tap water, let it sit in an open container for 12 to 24 hours to allow the chlorine gas to evaporate (note: this does not remove chloramine).
-
The Best Option: Room-temperature rainwater or aquarium water. Aquarium water is an absolute goldmine for propagation—it is dechlorinated, oxygen-rich, and contains trace amounts of fish waste (natural nitrogen) that acts as a gentle, organic fertilizer for your water roots. 🐟
Secret #3: The Oxygen Factor (When and How to Change the Water) 🌬️
One of the most persistent myths in houseplant care is that you must completely dump and replace the water in your glass jars every single day. This actually harms your cuttings! When a cutting sits in water, it slowly builds up its own micro-environment, releasing beneficial rooting hormones into the jar. Dumping the water daily flushes all that hard work down the drain.
-
The Sweet Spot: Roots need dissolved oxygen to breathe and grow, but they also need those hormones. Instead of dumping the water daily, simply top off the evaporated water every few days with fresh, room-temperature water.
-
When to do a full change: Only completely wash the jar and change the water if it becomes severely cloudy, smells foul, or if you spot excessive algae growth.
Secret #4: The Hydrogen Peroxide Hack 🫧
If you have a history of your cuttings turning black and mushy, this is the most valuable trick in the book. Stem rot is caused by anaerobic bacteria—bacteria that thrive in oxygen-depleted environments.
-
The Fix: Add just 2 to 3 drops of standard 3% hydrogen peroxide (the kind you buy at the pharmacy) to a typical 8 oz glass jar of water. The hydrogen peroxide (H₂O₂) breaks down into water and pure oxygen. This extra burst of oxygen supercharges root development and acts as a mild antiseptic, instantly killing rot-causing bacteria before it can attack your node.
Secret #5: Temperature and Light Optimization ☀️
Water propagation is highly dependent on environmental cues.
-
Light: Cuttings have no root system to support them, so they rely entirely on the stored energy in their leaves to photosynthesize and generate new tissue. Place your glass jars in bright, indirect light. Direct sunlight will act like a magnifying glass through the glass jar, literally cooking the water and your cutting along with it!
-
Temperature: Warmth stimulates cellular division. If you are propagating in the winter, the cold water sitting by a drafty window will stall growth completely. Place a seedling heat mat underneath your glass jars to maintain a cozy 75°F (24°C) water temperature for explosive root growth. 🔥
🌿 Top Plants That Thrive in Water Propagation
If you are new to the propagation game, set yourself up for success by choosing plants that naturally love aquatic environments. These houseplants have an incredibly high success rate in glass jars:
-
Pothos (Epipremnum): The undisputed king of water propagation.
-
Monsteras (Deliciosa and Adansonii): Thick, hardy stems that push out thick, noodle-like water roots.
-
Trailing Philodendrons (Heartleaf, Micans, Brasil): Fast rooters that look beautiful cascading out of apothecary bottles.
-
Spider Plants (Chlorophytum comosum): Just snip the “spiderettes” off the main runner and let the base touch the water.
-
ZZ Plants (Zamioculcas zamiifolia): They will root in water perfectly, but they require extreme patience (often taking 2 to 4 months to form a rhizome!). 🐢
🌵 Plants You Should NEVER Propagate in Water
While water propagation in glass jars is versatile, it is a death sentence for certain plant families.
-
Succulents & Cacti: Plants like Echeveria, Jade, and Aloe vera hold massive amounts of water in their fleshy leaves and stems. Placing them in water causes their cells to rupture and rot almost instantly. They prefer dry soil or sphagnum moss propagation.
-
Woody-Stemmed Herbs & Plants: Plants with tough, bark-like stems (such as mature Rosemary, Lavender, or certain Ficus varieties) struggle to uptake water through woody tissue. They are much better suited for propagation in high-humidity propagation boxes with perlite or soil.
😱 Troubleshooting Common Propagation Nightmares
Even experts run into hiccups. Here is how to read the signs your cutting is giving you and how to save it:
White Fuzzy Stuff on the Stem ☁️
-
The Panic: “Oh no, my cutting is covered in mold!”
-
The Reality: Before you throw it away, look closely. If the white bumps look like tiny, hard cauliflowers clustered around the node, congratulations! That is not mold; it is root primordia. These are the very first cellular structures of your new roots bursting through the stem. Leave them alone!
The Water Smells Bad / Stem is Mushy 🤢
-
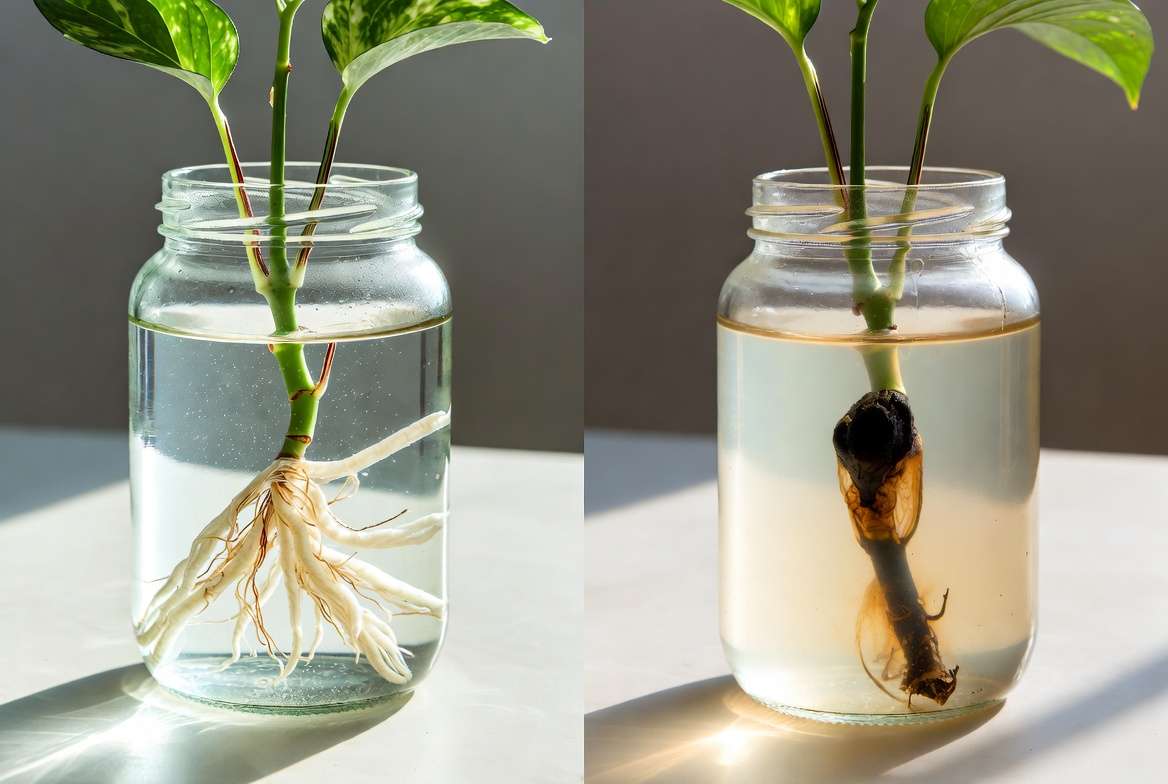
The Diagnosis: Classic stem rot. Anaerobic bacteria have taken over.
-
The Fix: Pull the cutting out and rinse it under the tap. Take your sterilized shears and cut the stem back until you only see firm, healthy green tissue. Throw the old water away, scrub the glass jar with hot soapy water, and start fresh using the Hydrogen Peroxide hack mentioned above.
Green Algae Covering the Glass and Roots 🦠
-
The Diagnosis: Too much light hitting the clear glass jar.
-
The Fix: A tiny bit of green algae is actually harmless and just a natural part of aquatic ecosystems. However, if it creates a thick blanket, it will suffocate the roots. Gently rinse the roots under a low-pressure tap (do not scrub them, water roots are fragile!). Wash the jar thoroughly, and move the propagation station slightly further away from the light source, or switch to an amber glass jar.
🪴 The Ultimate Test: Transitioning from Glass Jar to Soil
The most heartbreaking propagation mistake happens at the very end: moving a beautifully rooted cutting from its glass jar into a pot of soil, only to watch it shrivel up and die within a week. This happens due to transplant shock. Remember, water roots are not equipped to instantly handle dense, dry potting soil.
The 2-Inch Rule 📏
When is a cutting ready for soil? Do not rush it. Wait until the primary roots are at least 2 to 3 inches long. More importantly, look for secondary roots. These are the tiny, fuzzy offshoots growing out of the main white root. Once your plant has secondary roots, its root system is complex enough to survive in potting mix. Waiting too long (e.g., leaving a plant in water for a year) makes the transition much harder, as the plant becomes entirely dependent on an aquatic environment.
The Mud-Pie Method (Pro-Tip!) 🥧
To prevent shock, we need to bridge the gap between liquid water and dry soil.
-
Fill a small nursery pot with a chunky, well-draining aroid mix (potting soil mixed with plenty of perlite and orchid bark for maximum aeration).
-
Gently place your cutting into the pot and cover the fragile water roots.
-
For the first week, keep the soil heavily saturated—almost like a muddy soup.
-
Over the next 2 to 3 weeks, slowly taper off your watering schedule, allowing the soil to dry out a little bit more each time. This gradual transition gives the plant time to grow microscopic root hairs, effectively turning its water roots into strong, capable soil roots!
🙋♀️ Frequently Asked Questions (FAQs)
Do I need to add liquid fertilizer to my propagation jars? No, and you shouldn’t! Cuttings do not have the cellular structure to process heavy synthetic fertilizers, and adding them will usually burn the fragile root primordia. Plain water or aquarium water has all the trace minerals they need to get started.
Can a plant live in a glass jar of water forever? Yes, but with a catch. Many plants (like Pothos and Lucky Bamboo) can live hydroponically for years. However, because water lacks essential macronutrients, the plant will eventually stop growing and the leaves will remain small. If you want to keep them in water permanently, you must transition them to a dedicated hydroponic liquid fertilizer once a robust root system has formed.
How long does it take for roots to grow in water? This depends heavily on the plant species, the temperature, and the light. A fast-growing Pothos might push out roots in 5 to 7 days. A Monstera might take 3 to 4 weeks. A ZZ plant might test your patience for 3 months. Providing warmth and using the Pothos/Hydrogen Peroxide hacks will significantly speed up the timeline.
Can I put multiple different cuttings in the same jar? Absolutely! Mixing cuttings is a great way to save space, and as mentioned earlier, mixing fast rooters (like Pothos or Tradescantia) with slow rooters will actually benefit the slower plants via shared natural rooting hormones. Just ensure the jar isn’t so crowded that the roots become irreparably tangled.
💚 Conclusion: Multiplying Your Urban Jungle
Water propagation in glass jars is an art, a science, and arguably the most rewarding aspect of houseplant care. By understanding the importance of nodes, utilizing the right glass vessels, maintaining proper aeration, and knowing exactly when to transition to soil, you have unlocked the ability to multiply your urban jungle indefinitely—for free!
Remember, patience is your greatest tool. Don’t panic if nothing happens in the first week. Give your green friends the right conditions, keep an eye out for rot, and let nature do the rest.
What are you currently propagating on your windowsill? Let me know in the comments below, and if you are ready to pot up your new cuttings, check out my comprehensive guide on “The Ultimate Chunky Soil Mix for Aroids” to give your new plants the best home possible! Happy propagating! 🌱✨











