Every gardener knows the familiar, quiet heartbreak of the empty pot. You meticulously prepare your soil, carefully plant your watermelon seeds, and place the tray by the window. Days turn into weeks, and while your tomatoes and marigolds are vigorously pushing through the soil, the watermelon pots remain barren. When you finally lose patience and dig into the dirt to investigate, you usually find one of two things: a seed that looks exactly as it did the day you planted it, or a soggy, rotted casing.
If this has happened to you, you are far from alone. Watermelons are notoriously picky about their germination conditions compared to hardier garden staples like radishes, peas, or beans. After years of trial and error in the nursery, analyzing soil temperature data, and testing countless seed-starting mediums, I’ve cracked the code on melon germination.
The truth is, your seeds aren’t necessarily bad; they are just biologically hardwired to demand a very specific set of environmental triggers before they wake up. This guide covers exactly why your previous attempts may have failed, how to troubleshoot your soil conditions, and the foolproof, step-by-step secret to achieving a 95%+ germination rate this season. 🌱
The Biology of Watermelon Seeds: What They Actually Need to Wake Up 🧬
To understand why watermelon seeds fail, we first have to understand where they come from. Watermelons (Citrullus lanatus) trace their evolutionary roots back to the warm, arid climates of northeastern and southern Africa, including the Kalahari Desert region. Because they evolved in environments characterized by intense heat and distinct rainy seasons, their seeds developed specific biological mechanisms to ensure they only sprout when survival is guaranteed.
They are hardwired to wait for intense, consistent heat. If a watermelon seed sprouts during a cold snap, the resulting seedling will almost certainly perish. Therefore, to trigger the biological “wake up” call, we must perfectly balance the Germination Triangle:
-
Moisture: Seeds need water to soften the outer coat and activate the enzymes inside the endosperm. However, the moisture must be consistent, not suffocating. Sitting in stagnant water drowns the embryo.
-
Temperature: This is the non-negotiable factor. Watermelon seeds use temperature as their primary environmental cue. Without sufficient heat, they remain entirely dormant to protect themselves.
-
Oxygen: Respiration begins the moment a seed absorbs water. If the soil is too dense or waterlogged, oxygen cannot reach the seed, halting the cellular energy production needed to push out a taproot.
Expert Insight: Diploid vs. Triploid Seeds 🍉 If you are trying to grow seedless watermelons (triploids), you are facing a steeper uphill battle. Standard seeded watermelons (diploids) have relatively standard seed coats. Seedless varieties, however, are bred with much thicker, more stubborn seed coats and weaker embryos. They require even higher temperatures and stricter moisture control to germinate successfully.
5 Reasons Your Watermelon Seeds Aren’t Sprouting (Troubleshooting) 🛑
Before introducing the guaranteed germination method, it is crucial to audit your current process. Eliminating these five common mistakes will drastically improve your success rate in the garden.
1. The Soil Temperature is Too Cold (The #1 Culprit) 🥶
This is the single most common reason watermelon seeds fail to germinate. Novice gardeners often assume that because it is 75°F (24°C) outside, the soil is equally warm. Air temperature does not equal soil temperature, especially in the spring when the earth is still holding onto winter’s chill.
Watermelon seeds require a minimum soil temperature of 70°F (21°C) just to register that it might be time to wake up. At 70°F, germination is slow, often taking up to 10-14 days, which leaves the seed vulnerable to rot and pests. If the soil dips below 70°F, the seed goes completely dormant. The absolute optimal soil temperature for rapid, healthy watermelon germination is between 85°F and 90°F (29°C to 32°C). At these temperatures, a viable seed can sprout in as little as 3 to 4 days.
2. Overwatering and Pythium Rot (Drowning the Seed) 💦
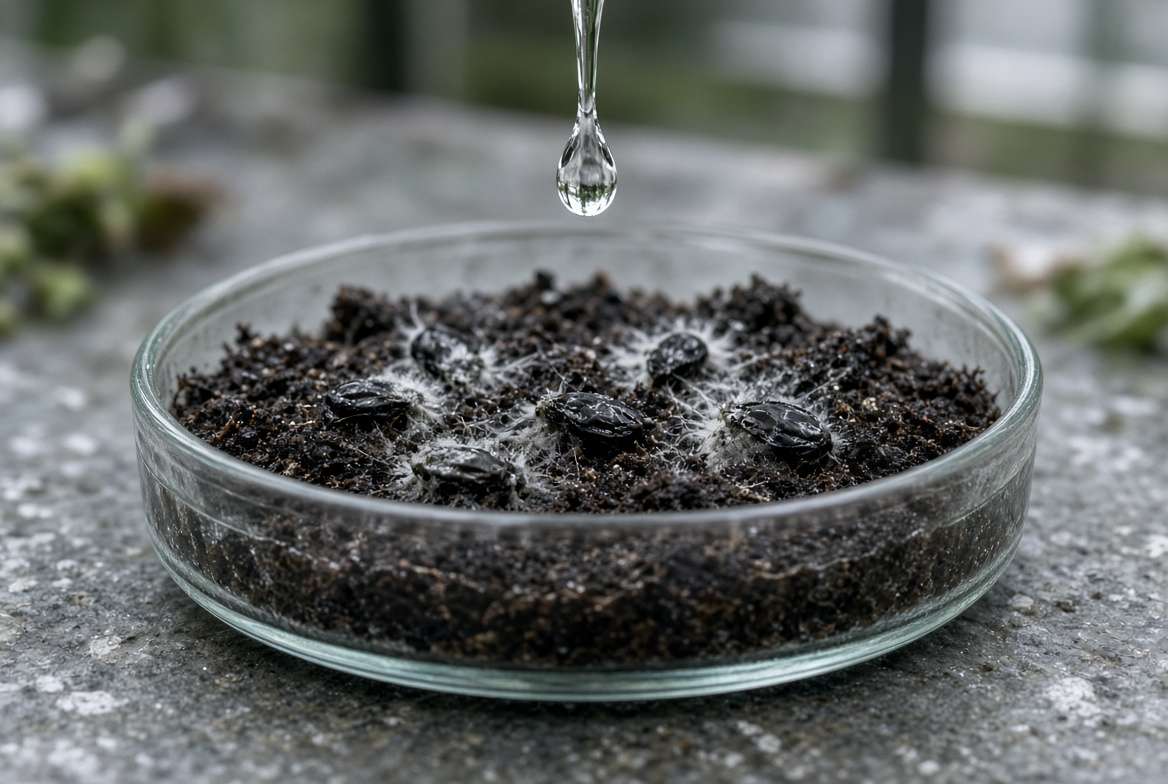
Water is essential, but too much of it is a death sentence. When you plant a seed in soil that is both cold and soggy, you create the perfect breeding ground for fungal pathogens, particularly Pythium and Rhizoctonia.
These pathogens cause seed rot and “damping-off” disease. The fungus attacks the seed before it even has a chance to sprout, turning the hard casing into a squishy, foul-smelling mush.
-
The Squeeze Test: To check your soil moisture, grab a handful of your potting mix and squeeze it hard. If water streams out, it is far too wet. If it falls apart instantly like dry dust, it’s too dry. You want it to feel like a well-wrung-out sponge—damp to the touch, holding its shape slightly, but yielding no dripping water.
3. Incorrect Planting Depth 📏
The energy stored inside a seed is finite. It only contains enough carbohydrates to push the initial sprout (the hypocotyl) through a certain amount of soil to reach the sunlight. Once it reaches the light, the cotyledons (seed leaves) open, and photosynthesis takes over.
The universal rule of thumb for planting depth is planting seeds twice as deep as their longest dimension. For most watermelon varieties, this means planting them exactly ½ inch to 1 inch deep. If you bury a watermelon seed two or three inches deep, it will germinate, push upward, run entirely out of stored energy, and die before it ever breaks the surface. Conversely, planting them too shallowly can cause them to dry out prematurely in the sun.
4. Using Old or Improperly Stored Seeds 📉
While it is true that properly stored melon seeds can remain viable for up to five years, improper storage drastically reduces their lifespan. If you kept your seed packets in a warm, humid garage, a greenhouse, or a sunny windowsill over the winter, their viability has likely plummeted.
High heat and fluctuating humidity cause the embryo inside the seed to use up its stored energy, eventually dying. For the best germination rates, always store leftover seeds in a cool, dark, and dry place—like a sealed mason jar in the back of your refrigerator with a silica gel packet.
5. The Hard Seed Coat Barrier 🛡️
Some specific heirloom varieties, particularly those adapted to severe drought conditions, have evolved incredibly hard, impermeable seed coats. This physical barrier prevents water from entering the seed to begin the hydration process (imbibition). If the seed cannot absorb water, the enzymatic breakdown of food reserves cannot start, no matter how warm the soil is.
The Secret to Guaranteed Germination: The “Warm & Damp” Method ☀️
If you are tired of playing a guessing game with your soil and hoping for the best, it is time to take complete control of the environment. By utilizing the “Warm & Damp” method, you bypass the unpredictability of potting soil and give your watermelon seeds exactly what they need to trigger germination. This method allows you to visually confirm viability before ever wasting a pot or an ounce of soil.
Step 1: Scarification and Pre-Soaking (For Stubborn Varieties) ✂️
If you are growing triploid (seedless) varieties or heirloom seeds known for notoriously thick coats, you need to give them a physical head start.
Scarification is the process of gently weakening the seed coat to allow water to penetrate. Take a standard emery board or clean nail clippers and carefully nick or scuff the rounded edge of the seed. You only want to scratch the very outer layer; do not cut deeply, or you risk damaging the delicate embryo inside.
Once scarified, drop the seeds into a small glass of warm (not hot) water for exactly 1 to 2 hours. This brief pre-soaking acts as a rapid hydration boost, signaling to the seed that the rainy season has arrived. Do not leave them soaking for more than two hours, as they will quickly deplete their oxygen supply and drown.
Step 2: The Paper Towel Trick (Pre-Sprouting) 🧻
This technique is the absolute gold standard for melon growers. It removes soil-borne pathogens from the equation entirely during the most vulnerable stage of the seed’s life.
-
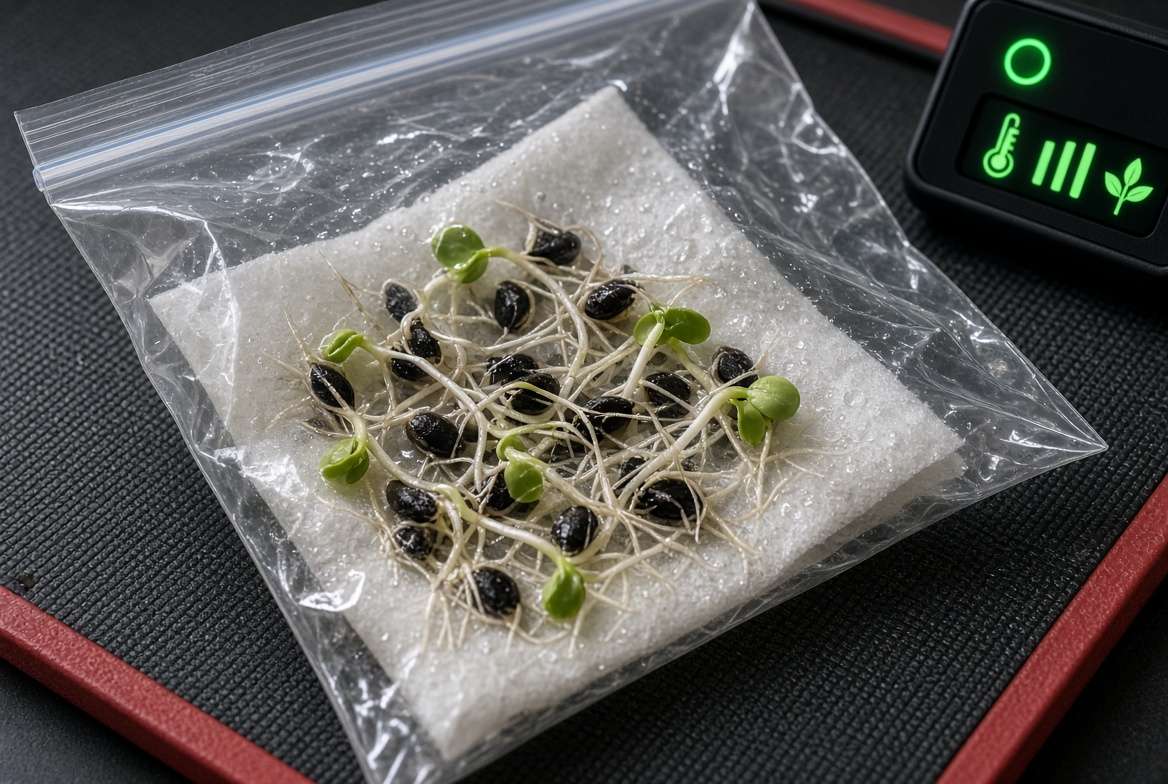
Take a high-quality paper towel and dampen it thoroughly with warm water.
-
Wring out the excess water until the towel feels like a moist sponge—it should be damp, but not dripping.
-
Lay the towel flat and space your pre-soaked watermelon seeds across half of it, leaving about an inch between each seed.
-
Fold the other half of the paper towel over the seeds, pressing gently to ensure the damp paper is making full contact with the seed coats.
-
Slide the folded paper towel into a plastic ziplock bag.
-
Seal the bag 90% of the way, leaving a small one-inch gap open to allow for essential airflow and oxygen exchange.
Step 3: Utilizing Heat Mats for Precision 🌡️
Now that you have perfect moisture, you need perfect heat. A seedling heat mat is arguably the best investment a gardener can make.
Place your plastic bag flat on the heat mat. Set the thermostat to the sweet spot: 85°F to 90°F (29°C to 32°C). Cover the bag lightly with a dark towel to simulate the darkness of being underground.
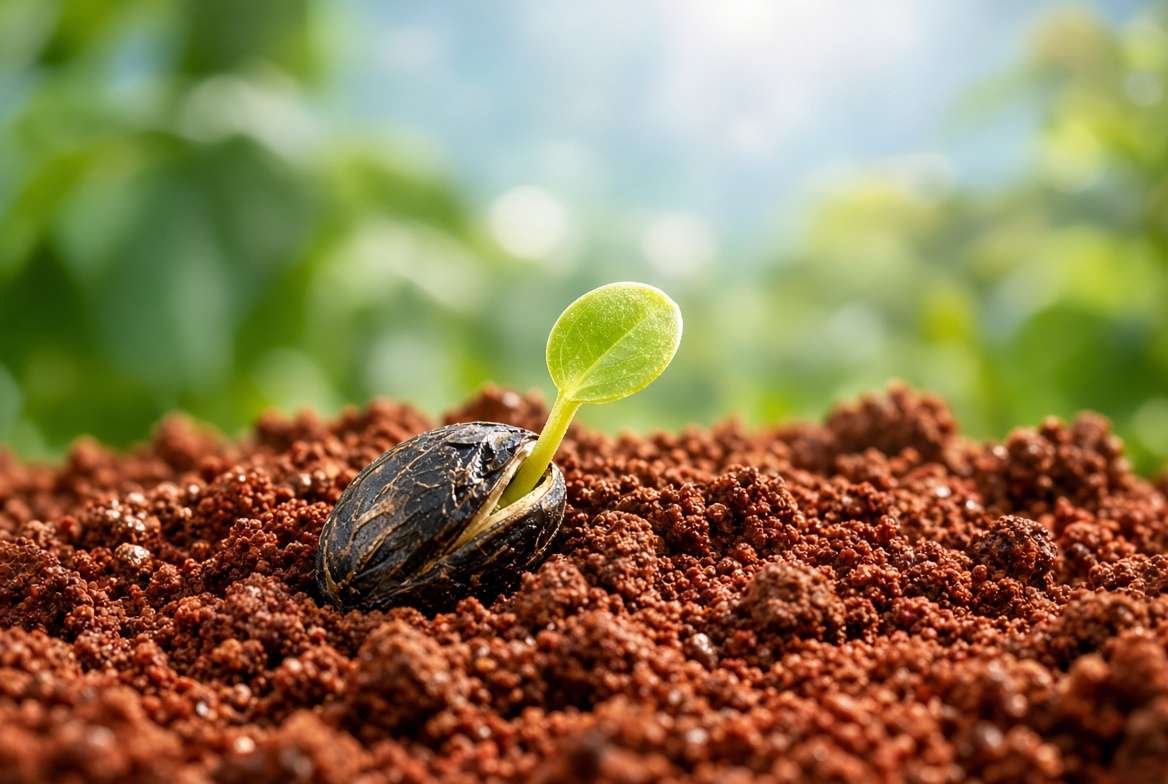
Check your seeds daily. Because the environment is perfectly calibrated, you will typically see the seed coat split and a healthy, white taproot emerge in just 3 to 4 days. If the paper towel begins to dry out, use a spray bottle to lightly mist it. Once the taproot is roughly ½ inch long, they are ready for the nursery.
Transitioning to Soil: Crafting the Perfect Nursery Environment 🪴
Moving your newly sprouted seeds into soil requires a delicate touch. The taproot is highly fragile; if it snaps, the seedling will die. Use tweezers or a small spoon to gently lift the sprouted seed from the paper towel.
Formulating a Light Seed-Starting Mix 🪨
Do not use heavy garden soil, compost, or standard potting soil for this step. These mediums hold too much water and compact easily, suffocating the young root system. You need a sterile, well-draining seed-starting mix.
To craft the ideal environment, blend equal parts of:
-
Peat moss or Coco coir: For lightweight moisture retention.
-
Perlite: To create air pockets and ensure rapid drainage.
-
Vermiculite: To hold onto nutrients while maintaining soil structure.
Fill your nursery pots with this mix, moisten it thoroughly (remember the squeeze test!), and use a pencil to poke a ½-inch hole. Gently place the sprouted seed into the hole with the white taproot pointing downward. Cover it loosely with a dusting of the mix.

Nailing the Lighting and Airflow 💡
The moment the green cotyledons break the surface of the soil, the plant’s needs shift dramatically from heat to light.
-
Lighting: A sunny window is rarely enough for watermelons. The glass filters the UV rays, and the seedlings will stretch desperately toward the light, resulting in “leggy,” weak stems that snap easily in a breeze. Position a full-spectrum LED grow light exactly 2 inches above the seedlings. Keep the lights on for 14 to 16 hours a day, raising the light panel as the plants grow.
-
Airflow: Set up a small, oscillating fan near your nursery setup. A gentle, continuous breeze forces the seedlings to build thicker, stronger cell walls in their stems. The airflow also keeps the soil surface dry, practically eliminating the risk of damping-off disease and mold.
Pro Tips for Transplanting Sprouted Seedlings Outdoors 🏡
Watermelons despise root disturbance. Unlike tomatoes, which can be aggressively repotted, watermelon seedlings will stunt or die if their roots are teased or damaged during transplanting.
To minimize transplant shock, many experts use biodegradable peat pots, which can be planted directly into the garden bed, roots and all. If you are using plastic nursery pots, gently squeeze the sides and slide the entire root ball out intact.
Before moving them into the garden, you must harden off your seedlings. This is a crucial 7-day transition period.
-
Days 1-2: Place the seedlings outdoors in a shaded, protected area for 2-3 hours, then bring them back inside.
-
Days 3-4: Introduce them to morning dappled sunlight for 4-5 hours.
-
Days 5-6: Move them into direct sunlight for most of the day, bringing them in at night if temperatures dip.
-
Day 7: Leave them out overnight, provided the outdoor soil temperature has consistently reached at least 70°F (21°C).
Only transplant your watermelons into the main garden beds once the soil is thoroughly warmed and all danger of frost has long passed.

Frequently Asked Questions (FAQs) About Watermelon Seeds ❓
How long does it take for watermelon seeds to germinate? Under optimal conditions (soil temperatures between 85°F and 90°F), watermelon seeds will germinate in 3 to 4 days. If the soil is closer to 70°F, germination can take 10 to 14 days. If the soil is colder than 70°F, they may never germinate at all.
Which end of the watermelon seed goes down? When planting directly in soil or transferring a sprouted seed, the pointed end should face downward. The taproot emerges from the pointed tip and naturally wants to grow down toward gravity, while the seed leaves (cotyledons) will push upward from the rounded end. If you plant them horizontally, nature will usually sort it out, but pointing them downward saves the plant valuable energy.
Do watermelon seeds need light to germinate? No. Like most large seeds, watermelon seeds need heat and moisture, not light, to germinate. They should remain in darkness (buried underground or covered on a heat mat) until the green shoot breaks the surface. Once the shoot appears, they immediately require intense, bright light to photosynthesize.
Can I plant seeds straight from a store-bought watermelon? Yes, but the results will be unpredictable. Most commercial watermelons are F1 hybrids. If you plant seeds saved from a hybrid fruit, the resulting plant will revert to the genetics of one of its parent plants. You will likely grow a watermelon, but it may look and taste completely different from the one you bought at the store. Additionally, commercial fields experience heavy cross-pollination. For reliable, predictable fruit, always purchase certified seed packets.
Ready to Grow the Sweetest Melons on the Block? 🍉
Mastering watermelon germination comes down to respecting the plant’s biological origins. By prioritizing intense soil heat, managing moisture to prevent rot, and utilizing the pre-sprouting paper towel method, you eliminate the guesswork and guarantee a robust start for your garden.
Try testing the paper towel and heat mat method this weekend with just a few seeds to see the explosive growth for yourself. Once those taproots emerge, handle them with care, give them plenty of light, and wait for the soil to warm up before taking them outside.
What watermelon variety are you most excited to grow this season? Are you tackling massive Sugar Babies or testing your skills with a seedless Crimson Sweet? Let me know in the comments below, and happy planting! 🌱