
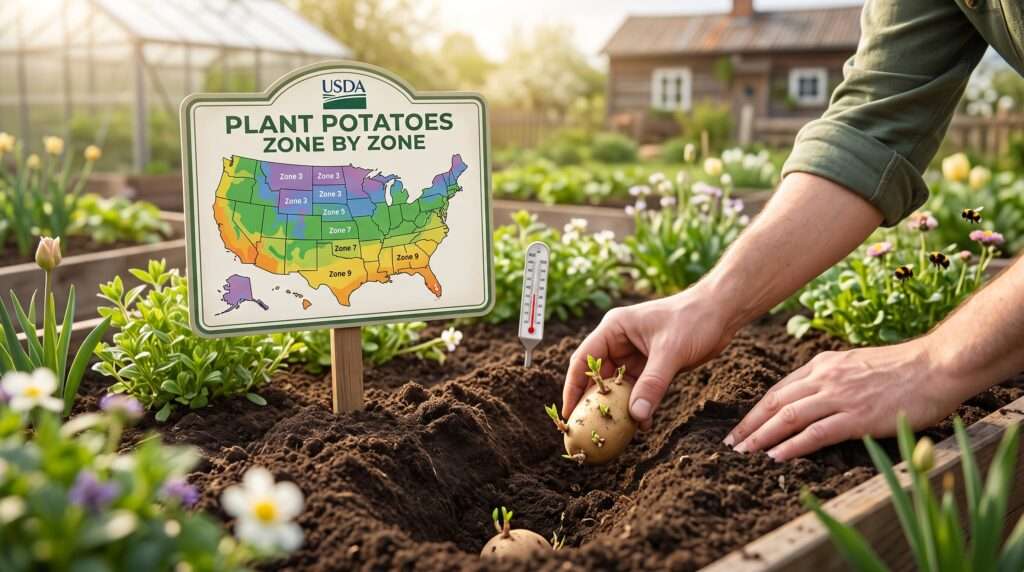
There is nothing quite as heartbreaking for a gardener as waiting four long weeks for lush green potato shoots to appear, only to gently dig into the soil and find mushy, rotten seed tubers. Most generic gardening calendars offer folksy advice like “plant your potatoes on St. Patrick’s Day.” However, this completely ignores the reality that a chilly spring in Maine is vastly different from a blazing spring in Florida. If you want to guarantee a massive, healthy harvest, you need to know exactly when to plant potatoes zone by zone, factoring in your specific regional climate, local frost dates, and actual soil conditions.
The golden rule of growing spectacular spuds is simple: potatoes do not read calendars. Instead, they respond strictly to soil temperature and day length. In this comprehensive master guide, we are going completely beyond generic advice. You will learn the exact planting windows for USDA Hardiness Zones 3 through 11, the biological soil signals you need to watch for, and how to protect unexpected early sprouts from late-season freezes.
Let’s dive into the science of timing so you can achieve your best potato harvest yet! 🚜✨
1. The Science of Timing: Soil Temperatures, Frosts, and Tuber Biology 🌡️
To master potato growing, you have to think like a tuber. The timing of your planting dictates everything from the plant’s immune system to the final size of your harvest. Here is the science behind why timing is the single most critical factor in your potato patch.

1.1 The 45°F – 55°F Rule (Why Soil Temp Beats Air Temp)
The biggest mistake new gardeners make is planting based on the ambient air temperature. A sunny, 60°F (15°C) day in early March might feel like spring to you, but the soil six inches down might still be a freezing 38°F (3°C).
Potatoes require a minimum soil temperature of 45°F (7°C) to begin waking up and growing. If you plant seed potatoes in cold, wet soil that is below 45°F, they will sit dormant. Worse, this cold, soggy environment is a breeding ground for destructive soil-borne pathogens like Pythium and Fusarium, which cause the seed pieces to rot before they ever sprout.
Pro Tip: Invest in a simple compost or soil thermometer. Take the soil temperature at a depth of 4 inches during the morning hours (around 9:00 AM). When the soil consistently registers between 45°F and 55°F for three to four consecutive days, you have a green light to plant. 🌡️
1.2 Sprout Emergence vs. Frost Tolerance
Many growers panic when a late spring frost is forecasted. But how vulnerable are your potatoes, really?
Before the green shoots break the surface of the soil, your seed tubers are incredibly well-insulated. The earth acts as a thermal blanket, meaning the seed pieces are completely safe during light, early spring freezes (28°F – 32°F).
However, once the tender green foliage emerges above ground, the rules change. Potato leaves are highly frost-sensitive and will blacken and die back when exposed to temperatures at or below 30°F (-1°C). The good news? While a late frost might kill the above-ground leaves and set the plant’s growth back by a week or two, the underground root crown usually survives and will push up new secondary shoots.
1.3 The “Heat Wall”: Why Planting Too Late Is Deadlier Than Planting Early
While planting too early risks rot, planting too late is a guaranteed yield-killer. This is due to a biological process called tuberization—the stage where the plant stops focusing solely on leafy green growth and starts forming the actual potatoes underground.
Potato plants simply do not set tubers when soil temperatures climb above 80°F (27°C). If you plant too late in the spring, your plants will hit this “heat wall” just as they should be forming potatoes. You will end up with giant, beautiful, bushy green plants with absolutely nothing underneath them.
The ultimate goal of potato timing is to maximize your leaf canopy growth during the cool, bright days of spring, giving the plant plenty of energy to form massive tubers before the brutal summer heat sets in. ☀️
2. Master Quick-Reference Chart: When to Plant Potatoes Zone by Zone 🗺️
To give you a quick, actionable overview, here is the master planting schedule based on USDA Hardiness Zones. Bookmark this chart or save it to Pinterest so you always have it on hand! 📌
3. Deep Dive: Tailored Planting Windows & Strategies by Zone 🏡
Now that we understand the baseline science, let’s get hyper-specific. Your microclimate dictates your strategy. Find your USDA Hardiness Zone below for a deep dive into your tailored planting protocol.
3.1 Cold & Short-Season Zones (Zones 3 – 4) ❄️
-
The Window: 2 to 3 weeks after your last expected hard frost (typically Mid-May through early June).
-
The Challenge: A frustratingly short growing season and soil that stays frozen late into the spring.
-
The Strategy: You need to cheat the system by pre-warming your garden beds. Two to three weeks before your target planting date, lay heavy-duty black plastic sheeting or dark tarps over your potato beds. The black plastic absorbs solar radiation, warming the top 6 inches of soil significantly faster than bare earth.
-
Top Varieties: You don’t have time for 120-day late-season potatoes. Stick to fast-maturing “first early” varieties that finish in 65–75 days, such as ‘Norland’, ‘Red Duke of York’, or ‘Irish Cobbler’.
3.2 Moderate Temperate Zones (Zones 5 – 6) 🌤️
-
The Window: 3 to 4 weeks before your average last spring frost (Late March to mid-April).
-
The Challenge: Unpredictable spring weather. You might have a balmy week in March followed by a blizzard in April.
-
The Strategy: This is the absolute sweet spot for growing classic mid-season and late-season storage potatoes. Because your ground thaws reliably in March, but summer heat doesn’t peak until July, you have a long, cool growing window.
-
Succession Tip: Maximize your harvest by planting a row of early varieties (like ‘Dark Red Norland’) in late March for a mid-summer harvest of baby potatoes, followed by your maincrop storage potatoes (like ‘Yukon Gold’ or ‘Kennebec’) in mid-April for a massive fall harvest.
3.3 Transition & Warm Zones (Zones 7 – 8) 🌿
-
The Window: Mid-February to Late March for the Spring crop; August for the Fall crop.
-
The Challenge: Squeezing the harvest in before the blistering June and July heat shuts down tuber production.
-
The Strategy: You have the distinct advantage of the “Dual-Crop.” Because your soil warms up quickly in late winter, you can plant early. The key here is heat mitigation. As May approaches, apply a heavy 4-to-6-inch layer of light-colored straw mulch around your plants. This reflects the sun and insulates the ground, keeping the soil temperatures cool enough to squeeze out a few extra weeks of tuber growth.
-
Fall Planting: In late summer (August), you can plant a second round of potatoes. The soil will be hot when you plant, so plant slightly deeper and keep them well-watered. As the plants mature, the weather will naturally cool down, resulting in a perfect Thanksgiving harvest. 🍂
3.4 Subtropical & Hot Climates (Zones 9 – 11) ☀️
-
The Window: September to November, and a secondary window in January.
-
The Challenge: Complete inversion of the traditional growing calendar. Planting in the spring in these zones is a recipe for crop failure, as tubers will rot in the extreme early summer heat.
-
The Strategy: Treat potatoes strictly as a winter crop. By planting in the fall (October/November), your plants will grow during the mild, pleasant winters typical of Florida, Southern Texas, and Southern California. The soil is naturally cooling down rather than heating up.
-
Sun Management: Even in the winter, the midday sun in Zone 10 can be intense. Consider planting in a location that receives full morning sun but partial afternoon shade to naturally moderate soil temperatures.
4. Potato Days-to-Maturity: Aligning Variety with Your Window ⏳
Understanding exactly when to plant potatoes zone by zone is only half the battle. The other half is selecting a potato variety whose “days to maturity” fits perfectly within your specific weather window. If you live in a hot climate (Zone 9) and plant a 130-day late-season potato, it will succumb to the summer heat before it ever finishes growing.
Potatoes are categorized into three main groups based on how fast they mature.
4.1 First Earlies (65–80 Days) ⏱️
First earlies are the sprinters of the potato world. They put on rapid growth and are ready to harvest in just over two months. These are usually harvested as tender, thin-skinned “new potatoes.”
-
Best for: Zones with frustratingly short summers (Zones 3 and 4) where you need a quick harvest before early fall frosts, or hot climates (Zones 8 and 9) where you need to beat the blistering summer heat.
-
Top Expert Picks: ‘Early Rose’, ‘Chieftain’, ‘Rocket’, and ‘Irish Cobbler’.
4.2 Second Earlies & Mid-Season (80–100 Days) 🥔
These varieties offer the perfect middle ground, providing a fantastic balance of excellent yields, good size, and decent winter storage capacity.
-
Best for: Reliable, heavy harvests across almost all growing zones. They are the backbone of most home gardeners’ potato patches.
-
Top Expert Picks: ‘Yukon Gold’, ‘Carola’, ‘Purple Viking’, and ‘Red Pontiac’.
4.3 Maincrop & Late-Season (100–130+ Days) 🧺
Maincrop potatoes take their sweet time, growing massive root systems and putting on serious bulk. These are your thick-skinned, long-storing winter survival potatoes.
-
Best for: Moderate climates (Zones 5 through 7) that offer a long, cool spring and a mild early summer, giving the plants 4 solid months to thrive.
-
Top Expert Picks: ‘Russet Burbank’, ‘German Butterball’, ‘Katahdin’, and ‘Kennebec’.
5. The Pre-Planting Countdown: 4 Weeks Out 📅
Successful potato farming doesn’t begin on planting day; it starts a full month prior. To ensure you hit your zone’s ideal planting window with perfectly prepped seeds, follow this 4-week countdown.
5.1 Week 4: Sourcing Certified Disease-Free Seed Tubers 🛒
Expert Warning: Do not plant sprouted potatoes from the grocery store! Supermarket potatoes are heavily treated with Chlorpropham, a chemical sprout inhibitor designed to stop them from growing eyes on the shelf. Even if they do manage to sprout, they are highly susceptible to commercial blights that can infect your garden soil for years. Always purchase “Certified Disease-Free Seed Potatoes” from a reputable nursery or seed catalog.
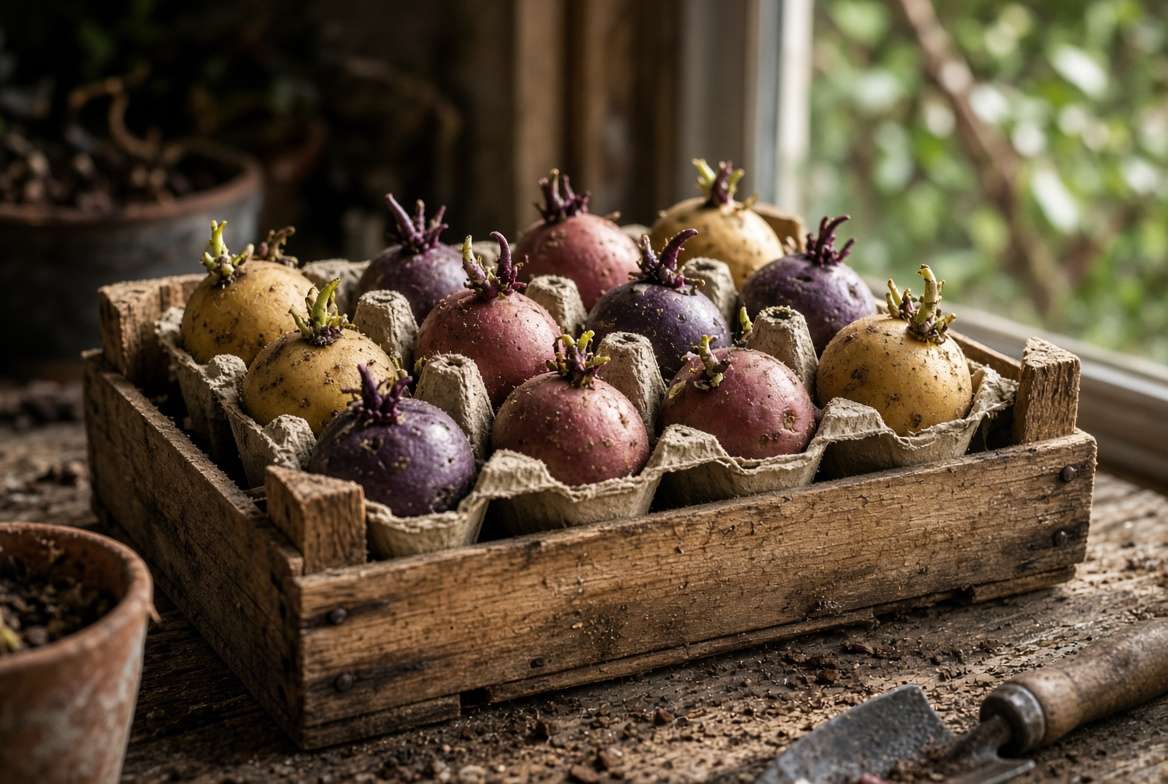
5.2 Week 3 to 2: The Art of “Chitting” (Pre-Sprouting) 🌿
“Chitting” is a traditional gardening technique used to give your potatoes a 10-to-14-day head start. It involves waking the potatoes up indoors before putting them in the cold ground.
-
How to do it: Place your seed potatoes in an open egg carton with the “rose end” (the side with the most dimples/eyes) pointing up.
-
The Environment: Keep them in a cool (50°F), bright room out of direct sunlight.
-
The Result: Over two weeks, they will develop stubby, robust, dark green or purple shoots. This ensures rapid emergence once planted!
5.3 Week 1: Cutting & Suberization (Curing) 🔪
If your seed potatoes are larger than a golf ball, you can cut them to multiply your yield.
-
Cutting: Use a sterilized knife to cut the potato into 1.5 to 2-ounce chunks. Ensure every single chunk has at least two healthy eyes (sprouts).
-
Suberization: This is a crucial, often-skipped step. Lay the cut pieces out in a well-ventilated room for 48 to 72 hours. The cut flesh will dry out and form a tough, leathery scab (callus). This protective layer acts as a shield, preventing soil bacteria and fungi from rotting the potato once it hits the damp earth.
6. How Your Planting Method Affects Your Timing 🪴
Did you know that how you plant can actually alter when you plant? Different growing methods create distinct micro-environments for your potatoes.
6.1 Grow Bags & Fabric Pots (The 2-Week Head Start) 🛍️
If you are growing in 10-gallon or 15-gallon fabric grow bags, you can actually start planting 7 to 10 days earlier than in-ground growers. The soil in above-ground dark containers warms up much faster under the spring sun.
-
Mobility Perk: If a rogue, hard freeze is in the forecast, you can literally drag your potato bags into the garage for the night!
6.2 Raised Beds vs. Traditional In-Ground Trenches 🪵
Raised garden beds drain excess spring rains incredibly fast. Because they do not stay waterlogged like traditional in-ground trenches often do, the soil warms up quicker and the risk of early-spring seed rot plummets. You can generally plant in raised beds 5 to 7 days earlier than flat earth.
6.3 The Ruth Stout No-Dig Method (Mulch Culture) 🌾
The famous Ruth Stout method involves laying seed potatoes directly on the surface of the soil and burying them under 8 to 12 inches of thick hay or straw. Because the straw acts as heavy insulation, it keeps the soil underneath quite cool. If using this method, wait an extra week or two beyond your standard zone planting date to ensure the ambient air and soil surface are sufficiently warm.
7. Emergency Response: When Mother Nature Breaks the Rules ⚠️
You checked your zone, you measured the soil temperature, and you planted perfectly. Then, out of nowhere, a freak Arctic blast threatens your emerging crop. Here is how to handle a spring weather crisis like a pro.
7.1 “The Forecast Says 25°F Tonight and My Greens Are Up!” 🥶
Do not panic. You have two highly effective rescue options:
-
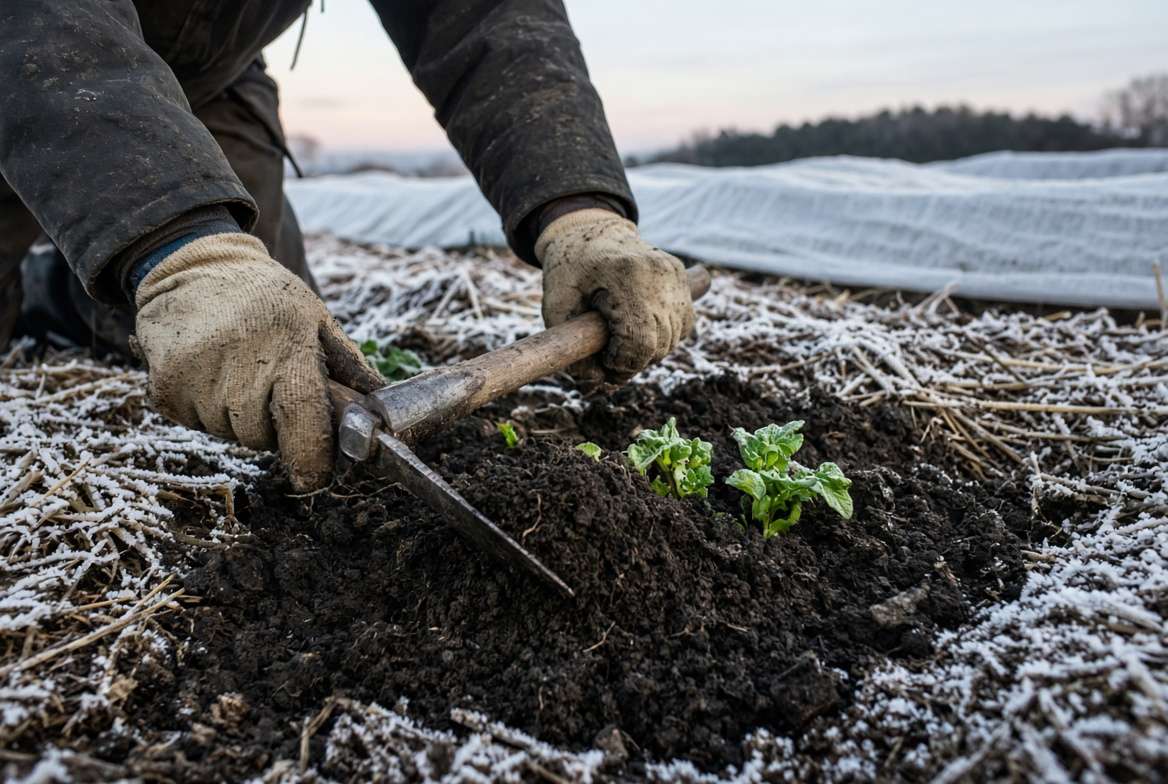
Emergency Hilling: If the shoots are still small (under 4 inches), simply grab a hoe and gently pull loose garden soil completely over the green shoots, burying them alive. The soil will insulate them from the freeze, and they will push right back through the dirt a few days later unharmed.
-
Double Covering: If the plants are too tall to bury, drape a layer of agricultural frost cloth (floating row cover) over the bed, followed by an outer layer of plastic sheeting. Crucial: Ensure the plastic does not touch the leaves directly, and remove it immediately the next morning when the sun comes up to prevent baking the plants.
7.2 “It’s Been 4 Weeks and No Greens Have Appeared” 🕵️♀️
Patience is a virtue, but four weeks is a long time. If you suspect your potatoes have rotted in cold, wet soil, it is time for an investigation.
-
The Finger Dig: Very gently dig down into the soil with your bare fingers following the stem path.
-
The Assessment: If you feel firm roots and a hard seed piece with upward shoots, stop digging! Cover it back up; it’s just growing slowly. If your finger goes straight into a foul-smelling, mushy pocket of slime, the seed has succumbed to rot and needs to be replanted immediately with a faster-maturing variety.
8. Frequently Asked Questions (FAQ) 💬
Q1: Can I plant potatoes in the fall? Absolutely, but it depends strictly on your zone. In cold climates (Zones 3-6), potatoes left in the ground will freeze and turn to mush. However, in mild winter climates (Zones 8-10), fall planting is actually the preferred method, yielding a fantastic late winter or early spring harvest.
Q2: What happens if I plant potatoes in frozen ground? Disaster. When a potato freezes, the water inside its cells expands and bursts the cell walls. Upon thawing, the potato turns into a liquefied, bacterial mess. Never plant until the soil is fully workable and holding at 45°F minimum.
Q3: How late in the year can I plant potatoes and still get a harvest? You can calculate this by counting backward! Take your first expected fall frost date and count back the number of “Days to Maturity” listed on your potato variety, then add a two-week buffer. If you have 80 days before a hard frost, an early variety like ‘Norland’ will finish just in time.
Q4: Do I water my seed potatoes immediately after planting in early spring? Usually, no. In most zones, early spring soil is already heavily saturated from snowmelt and spring showers. Watering freshly planted, un-sprouted potatoes in cold soil is a surefire way to induce rot. Wait to water until you see green shoots emerge above the surface. 💧
9. Conclusion & Master Grower’s Checklist 📝✨
Growing incredible, store-quality potatoes at home isn’t about luck; it is about reading the environmental signals. Don’t let a brilliantly sunny day in early March fool you into planting too soon, and don’t wait so long that the summer heat shuts down your tuber production. Grab your soil thermometer, check your local USDA zone guidelines, and choose the right variety for your specific seasonal window.
Your Pre-Planting Master Checklist:
-
[ ] Checked USDA Zone and identified target planting window.
-
[ ] Certified, disease-free seed tubers purchased.
-
[ ] Chitting completed (stubby, green/purple shoots formed).
-
[ ] Seed pieces cut and suberized (healed over) for 48 hours.
-
[ ] Soil temperature confirmed at 45°F+ at a 4-inch depth.
-
[ ] Frost protection (row covers or loose soil) on standby for emergencies.
Let’s Grow Together! 🌱 Still feeling unsure about your exact timing? Drop your city or USDA Hardiness Zone in the comments below, and we will give you a personalized variety recommendation and planting date! Happy growing! 🥔🚜











