
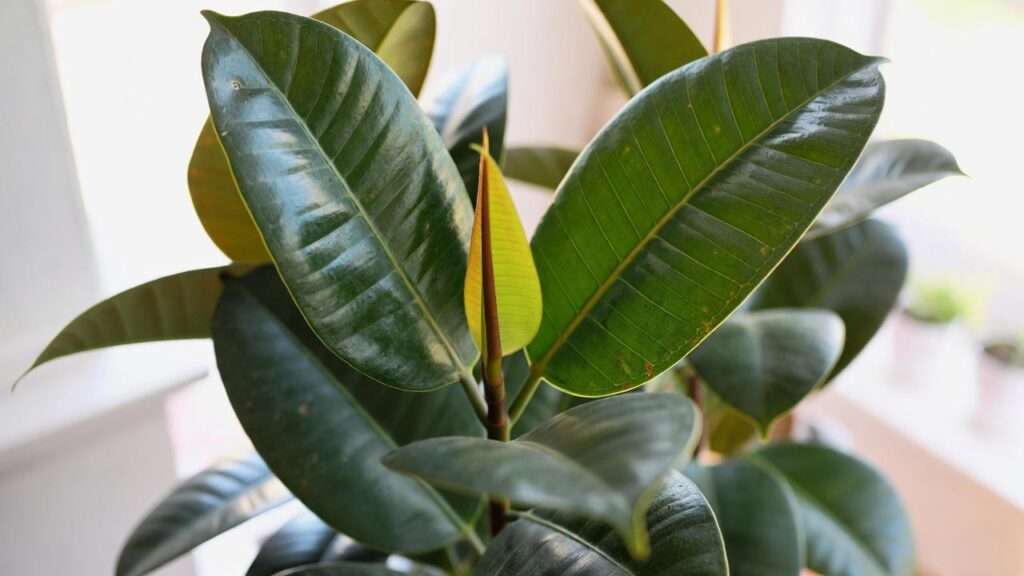
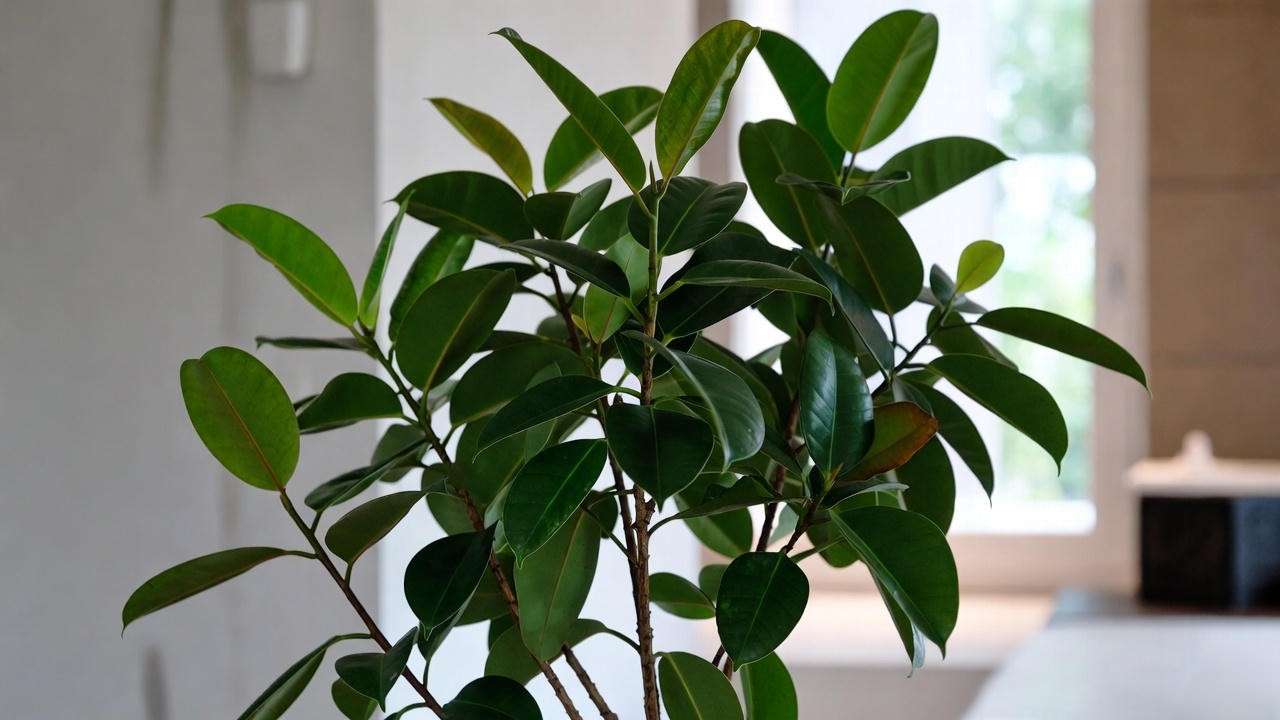
Have you ever stared at your beautiful, towering rubber plant (Ficus elastica) and wished you could have more of those glossy, deep-green leaves filling your home—without spending a single extra dollar? 🌱💚
Whether your rubber plant has grown too tall for its spot, developed leggy stems, or you simply want to share cuttings with friends and family, propagating a rubber plant is one of the most rewarding and budget-friendly houseplant projects you can tackle.
As a passionate plant parent and horticulturist with over 15 years of experience caring for hundreds of Ficus species, I’ve successfully propagated rubber plants using every common method—and I’m excited to share the exact techniques that consistently give me 90%+ success rates. In this ultimate guide, you’ll learn the best time to propagate, the tools you need, three proven methods (with detailed step-by-step instructions), aftercare tips, common mistakes to avoid, and expert secrets to help your new plants thrive.
Let’s turn your one rubber plant into a whole collection! Ready? Let’s dive in.
Why Propagate Your Rubber Plant? The Real Benefits 🌱
Propagating your own rubber plant isn’t just fun—it solves several common houseplant problems:
- Save money – New rubber plants can cost $30–$100+ depending on size. Free cuttings? Yes, please!
- Control size – An overgrown rubber plant can become top-heavy or hit the ceiling. Propagation lets you prune and create compact new plants.
- Encourage bushier growth – Cutting back the mother plant triggers branching for a fuller, more attractive shape.
- Create gifts – Handmade propagated plants make thoughtful, personal presents for fellow plant lovers.
- Rejuvenate older plants – Air layering or stem cuttings can give new life to a leggy or aging specimen.
In short, propagation is the ultimate way to multiply your favorite houseplant while keeping it healthy and vibrant.
Best Time to Propagate a Rubber Plant ⏰
While rubber plants can technically be propagated year-round indoors, timing matters for the highest success rate.
Ideal window: Spring and early summer (March–July)
- The plant is in active growth mode
- Warmer temperatures (65–85°F / 18–29°C) speed up root development
- Longer daylight hours provide more energy for rooting
You can propagate in fall or winter, especially with grow lights and a warm spot, but expect slower rooting (8–16 weeks instead of 4–8).
Pro tip: Avoid propagating during peak summer heat above 90°F (32°C) or during the plant’s natural dormancy in mid-to-late winter.
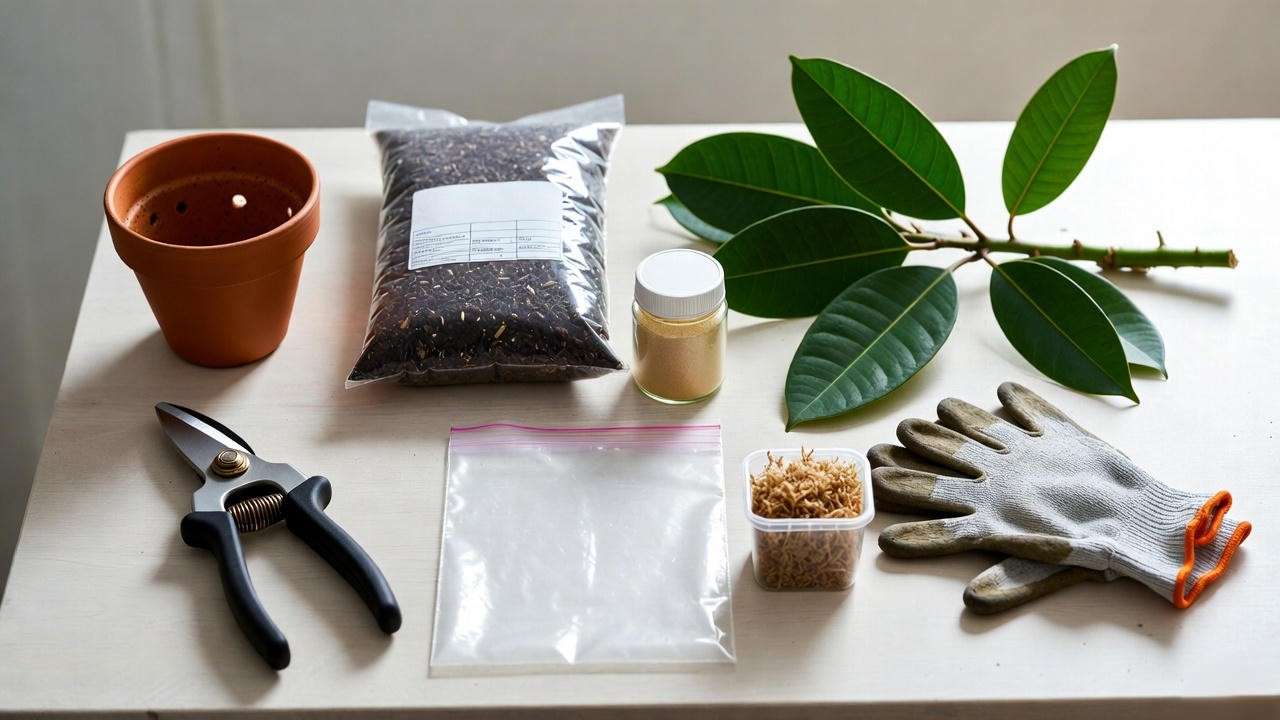
Tools & Materials You’ll Need 🛠️
Gather these items before you start—having everything ready makes the process smoother and increases success.
- Sharp, sterilized pruning shears or a clean knife (sterilize with rubbing alcohol)
- Rooting hormone powder or gel (optional but highly recommended)
- Well-draining potting mix (I love a 50/50 mix of peat/perlite or a cactus/succulent blend)
- Small pots or propagation trays with drainage holes
- Clear plastic bags, a humidity dome, or a clear plastic cup for mini-greenhouse effect
- Clean glass jars (for water propagation)
- Gardening gloves (rubber plant sap can irritate skin)
- Sphagnum moss (for air layering)
- Clear plastic wrap and twist ties (for air layering)
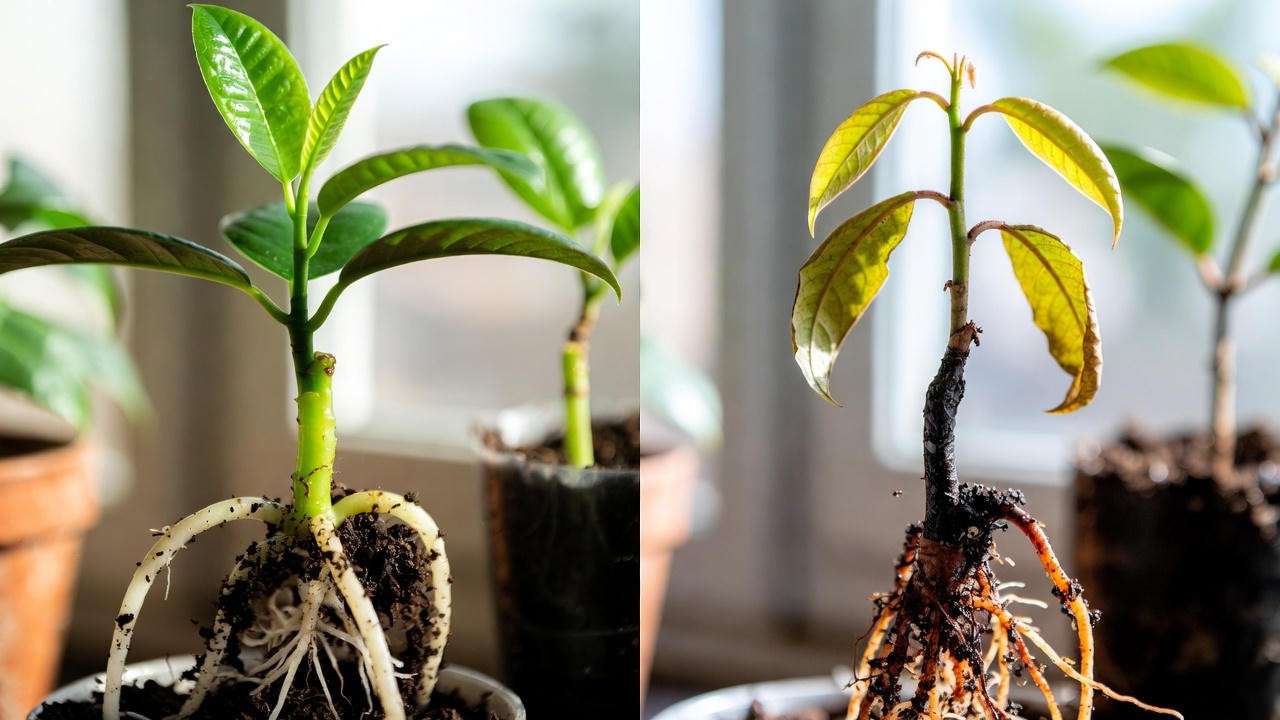
Method 1: Stem Cuttings in Soil – The Most Reliable Method 🌱
Soil propagation gives the strongest, most stable roots and the least transplant shock. This is my go-to method for consistent success.
Step-by-Step Instructions
- Select the right stem Choose a healthy, semi-woody stem 6–8 inches long with at least 2–4 leaves and one or more nodes (the bumps where leaves emerge).
- Make the cut Cut just below a node at a 45° angle using clean shears. The angle increases surface area for rooting.
- Remove lower leaves Strip off the bottom 2–3 leaves, leaving 2–3 leaves at the top to continue photosynthesis.
- Let it callus (optional but helpful) Allow the cut end to dry and form a callus for 1–2 hours. This prevents rot.
- Apply rooting hormone Dip the cut end in rooting hormone powder or gel. Tap off excess.
- Plant the cutting Insert into moist, well-draining potting mix, burying the node 1–2 inches deep. Gently firm the soil.
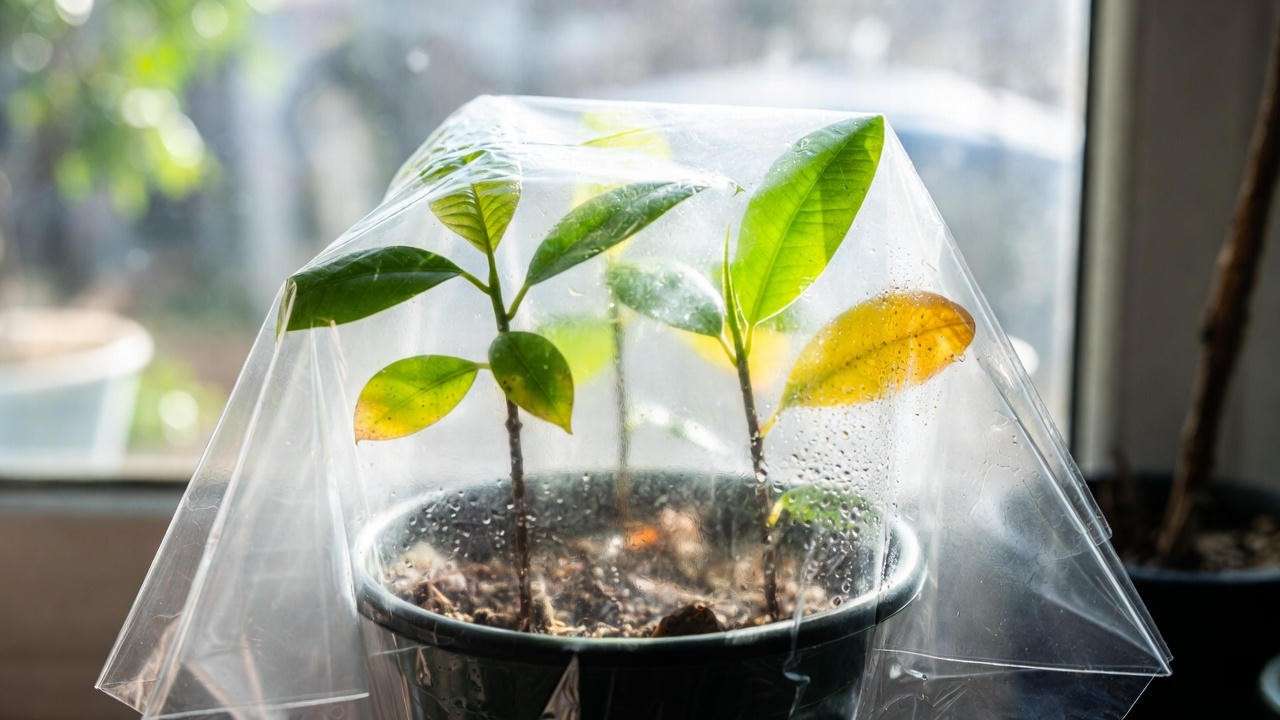
- Create humidity Cover the pot with a clear plastic bag or dome. Poke a few holes for airflow.
- Place in bright, indirect light Avoid direct sun, which can scorch the cutting. East- or north-facing windows work well.
- Water sparingly Keep soil lightly moist but never soggy. Mist leaves occasionally.
Roots typically form in 4–8 weeks. Tug gently—if there’s resistance, roots are there! Transplant into a larger pot once roots are 2–3 inches long.
Method 2: Stem Cuttings in Water – Fun & Visual! 💧
Water propagation is perfect for beginners because you can watch roots develop. Just note that water roots are more fragile when moved to soil.
Step-by-Step Instructions
- Take a 6–8 inch cutting as described above.
- Remove lower leaves so only the stem is submerged.
- Place in a clear jar with room-temperature water—keep the node submerged.
- Change the water every 5–7 days to prevent bacterial growth.
- Position in bright, indirect light (avoid direct sun).
- Roots usually appear in 4–12 weeks. When they reach 2–3 inches, transplant into soil.
Tip: Adding a drop of liquid fertilizer or a tiny piece of activated charcoal can help keep water cleaner longer.
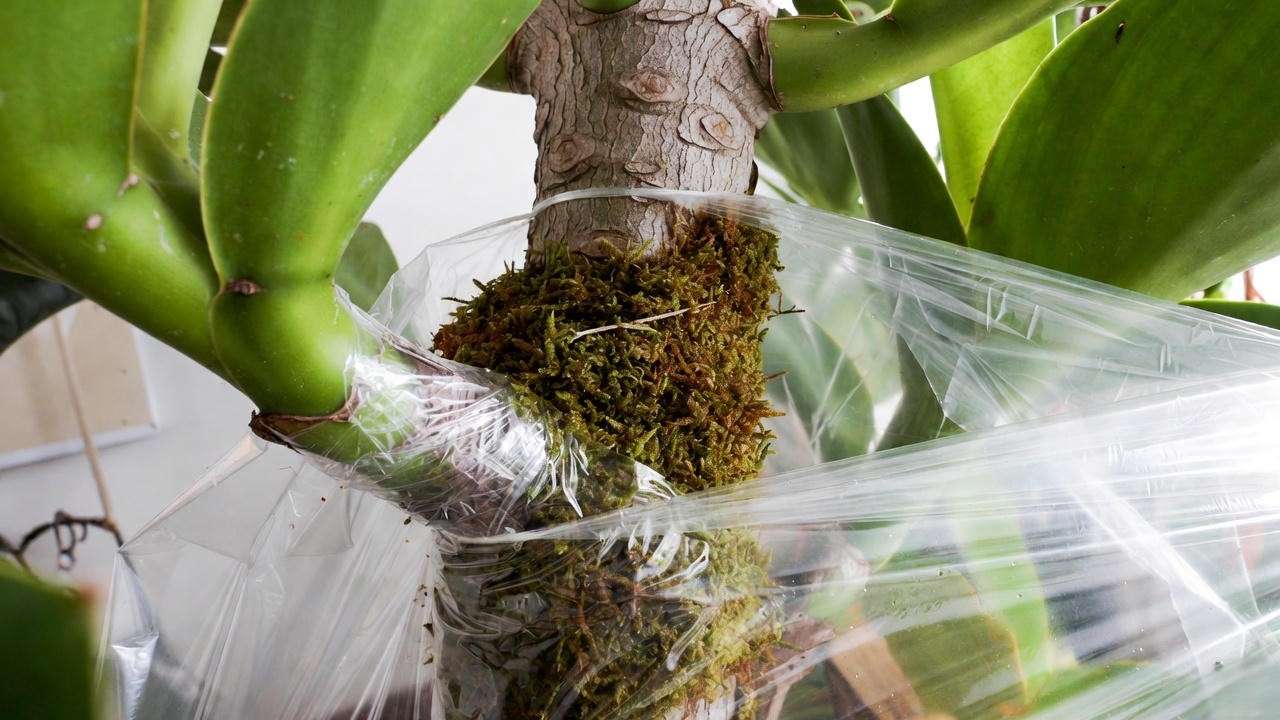
Method 3: Air Layering – Best for Tall or Large Rubber Plants ✂️
Air layering is the professional technique for propagating thick, tall stems without sacrificing the height of the mother plant. It produces a ready-to-pot new plant with an established root system.
Step-by-Step Instructions
- Choose a healthy stem 12–18 inches from the tip.
- Make two parallel cuts about 1–2 inches apart around the stem and remove the ring of bark (this is called girdling).
- Scrape away the green cambium layer to expose the inner tissue.
- Apply rooting hormone to the wounded area.
- Wrap the area with moist sphagnum moss, then cover with clear plastic wrap. Secure with twist ties or string.
- Keep the moss damp by misting through the plastic.
- Roots should appear in 4–12 weeks (you’ll see them through the plastic).
- Once roots are well-developed, cut below the new root ball and pot up immediately.
This method is especially useful when your rubber plant has reached the ceiling!
Aftercare for Your Newly Propagated Rubber Plants 🌿
Once your cuttings have rooted, treat them like mature rubber plants with a few extra considerations:
- Light: Bright, indirect sunlight (east or west windows are ideal). Too little light causes leggy growth; too much can scorch leaves.
- Water: Allow the top 1–2 inches of soil to dry between waterings. Overwatering is the #1 killer of young rubber plants.
- Humidity: 50–70% is perfect. Use a pebble tray, humidifier, or group plants together.
- Temperature: Keep above 60°F (15°C). Avoid cold drafts.
- Fertilizer: Start with half-strength balanced liquid fertilizer every 4–6 weeks during spring and summer. Skip in winter.
- Potting: Use a well-draining potting mix and a container with drainage holes.
Common Mistakes & How to Avoid Them ⚠️
- Cutting too early in the season → Wait for spring growth.
- Overwatering → Leads to rot. Always check soil moisture.
- Low humidity → Causes leaf drop and slow rooting.
- Ignoring the sap → Rubber plant sap is mildly toxic and can irritate skin. Wear gloves.
- Transplanting too soon → Wait until roots are at least 2 inches long.
- Using old or contaminated tools → Always sterilize shears to prevent disease.
Expert Tips for 90%+ Success Rates 💡
- Always include at least one node in every cutting—roots only grow from nodes.
- Take multiple cuttings as backups (rubber plants are forgiving, but not every cutting succeeds).
- Use perlite or vermiculite in your soil mix for faster, healthier rooting.
- After pruning the mother plant, apply a bit of cinnamon powder to the wound to help it heal and prevent infection.
- If you’re propagating in winter, use a heat mat set to 75–80°F (24–27°C) for faster results.
Frequently Asked Questions (FAQs) ❓
Can you propagate a rubber plant from a single leaf? No—rubber plants need a stem cutting with at least one node. Leaf-only cuttings won’t grow a new plant.
How long does it take for rubber plant cuttings to root? 4–8 weeks in soil, 4–12 weeks in water, and 4–12 weeks for air layering—depending on temperature, light, and humidity.
Is rubber plant sap toxic? Yes, the milky sap can cause skin irritation and is toxic if ingested. Keep away from pets and children.
What if my cuttings start to rot? Trim off any black or mushy parts, let the cut end callus again, and restart in fresh soil or water.
Can I propagate variegated rubber plants the same way? Yes! The methods are identical, but variegated varieties can be slightly slower to root.
How do I make my new rubber plant bushier? Pinch or prune the top growth once it’s established—this encourages branching.
Ready to grow your own rubber plant family? Grab those shears and get propagating today! 🌿✨
If you try any of these methods, drop a comment below—I’d love to see photos of your new baby rubber plants! Happy propagating! 💚


