
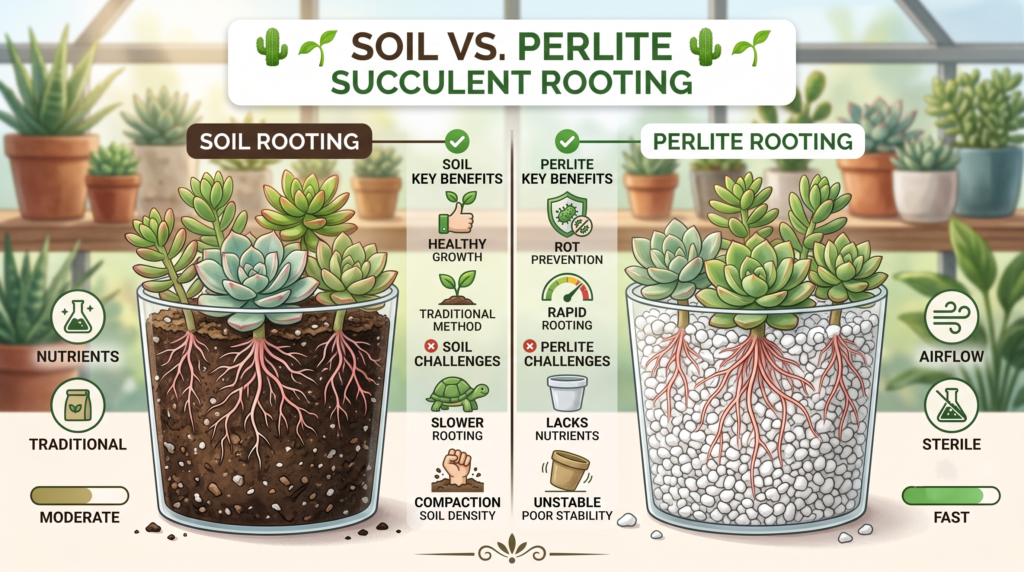
We have all been there. You carefully snip a beautiful, rare succulent cutting, let it sit on your windowsill, and wait patiently for tiny pink roots to emerge. But a few weeks later, instead of new life, you discover the stem has turned into a foul-smelling, black mush. Plant rot is the ultimate heartbreak for indoor gardeners. When it comes to soil vs. perlite succulent rooting, both sides have passionate defenders in the plant community. Which medium actually prevents rot and encourages rapid root growth?
As a plant care specialist who has propagated hundreds of succulents—from everyday Echeverias to finicky Haworthias—I have tested every rooting medium under the sun. Succulents are uniquely built to store water in their fleshy leaves and stems, making their unrooted cuttings incredibly susceptible to bacterial and fungal rot when exposed to incorrect moisture levels.
In this comprehensive guide, we are going to dive deep into the science of succulent root development. We will explore the pros and cons of traditional soil propagation, uncover why perlite has become an industry secret, and finally settle the debate on which method guarantees the highest success rate. Whether you are a beginner looking to multiply your Jade plant or an experienced collector trying to save a rotting stem, this guide will give you the exact blueprint for faster, rot-free propagation. 🪴✨
The Science of Succulent Roots: What Cuttings Actually Need 🔬💧
Before we compare rooting mediums, it is crucial to understand what is happening on a biological level when a succulent is separated from its main root system. By understanding the “why,” you will be much better equipped to manage the “how.”
Why Do Succulent Cuttings Rot? 🦠
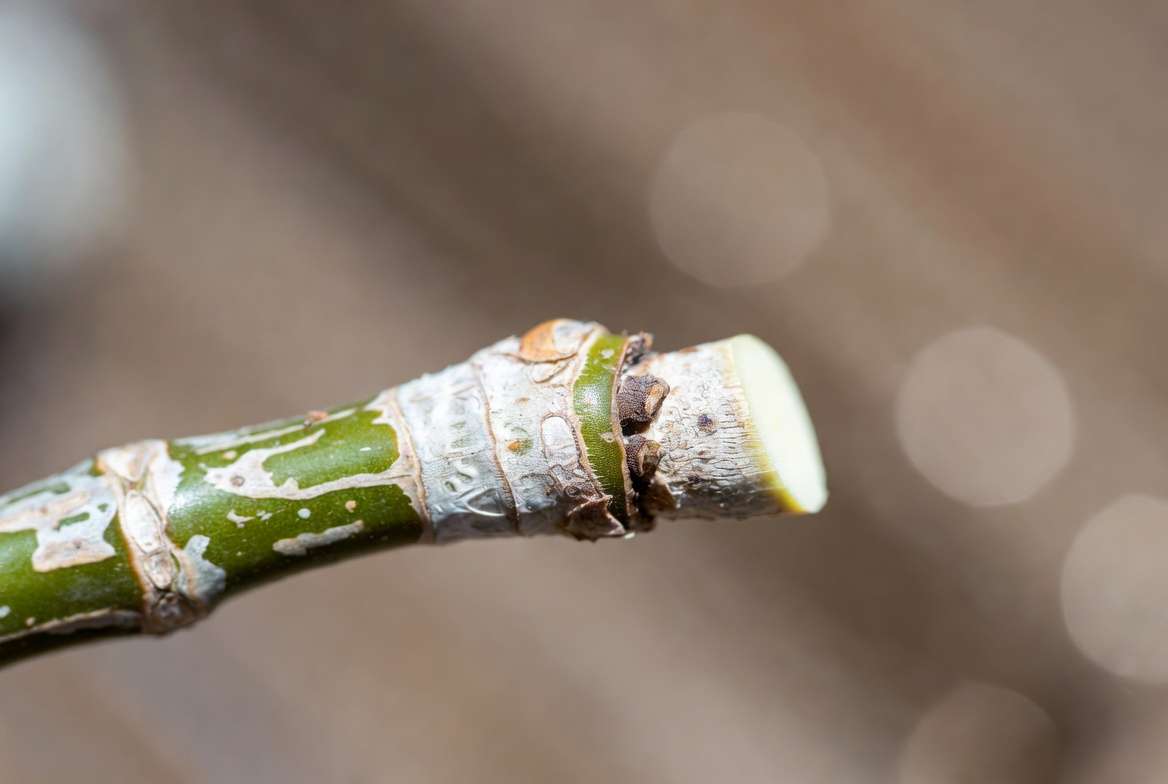
Succulent cuttings rot because of a fatal combination of open wounds, excessive moisture, and lack of airflow. When you cut a succulent, you expose its internal tissue. If this fresh wound is immediately introduced to a wet environment (like damp potting soil), it acts as an open door for pathogens. Bacteria and fungi thrive in wet, oxygen-deprived environments. Because the cutting has no roots to absorb the water you are providing, that water simply sits against the stem, suffocating the plant cells and causing the tissue to break down into mush.
The Oxygen-Moisture Balance ⚖️
New succulent roots need a very delicate balance to thrive. They require:
-
High Humidity: Moisture in the air signals to the plant’s cells to start producing root tissue that reaches out for water.
-
Ample Airflow (Oxygen): Roots need to breathe. If the medium is too dense, the roots suffocate.
The perfect rooting medium provides microscopic pockets of humidity while maintaining large air gaps for oxygen exchange. This balance is exactly why the debate between soil and perlite is so important.
Expert Tip 💡: The single most important step in succulent propagation happens before you place the cutting in any medium. You must let the cutting “callus.” Leave the fresh cutting in a dry, shaded spot for 3 to 7 days until the cut end forms a hard, dry scab. This callus acts as a protective shield against rot-causing bacteria, no matter which rooting method you choose!
Rooting Succulents in Soil: The Traditional Method 🪴
For decades, laying succulent leaves or planting stem cuttings directly into potting mix has been the standard method of propagation. After all, soil is where the plant will eventually live, so it makes intuitive sense to start the process there.
What is the “Soil Method”? 🌱
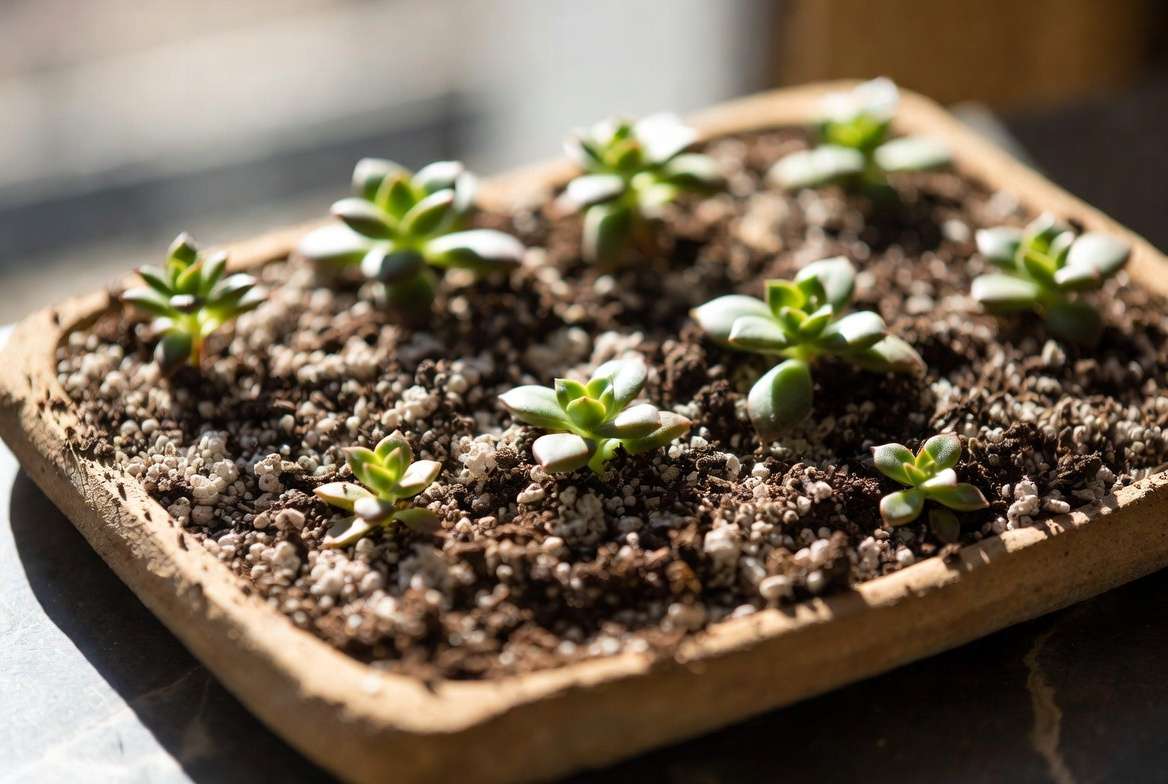
The soil method involves taking fully callused stem cuttings or leaf propagations and placing them in or on top of a succulent-specific potting mix. For stem cuttings, the callused end is gently nestled an inch into the dry soil. For leaf cuttings, the leaves are simply laid flat on the surface of the soil.
Pros and Cons of Soil Rooting ⚖️
Like any horticultural technique, rooting directly in soil comes with distinct advantages and notable drawbacks.
-
Pros:
-
Natural Environment: Soil closely mimics how succulents reproduce in the wild when a leaf drops to the ground.
-
No Transplant Shock: Once roots form, the plant is already in its permanent home. You do not have to disturb delicate new root hairs to move the plant.
-
Nutrient Availability: Quality succulent soil contains organic matter that provides essential nutrients as soon as the root system is capable of absorbing them.
-
-
Cons:
-
High Rot Risk: Soil naturally retains water. Even highly draining succulent mixes hold moisture against the stem, drastically increasing the risk of rot.
-
Poor Visibility: It is incredibly tempting to pull the cutting out of the soil to check for roots, which often breaks the microscopic root hairs that are trying to establish themselves.
-
Pest Potential: Damp soil can attract fungus gnats, whose larvae may feed on fragile new roots.
-
Step-by-Step Guide to Soil Propagation 📋
If you choose to use the traditional soil method, follow these precise steps to minimize your failure rate:
-
Prepare the Right Mix: Never use standard indoor potting soil. You must create a fast-draining mix. A standard expert recipe is 50% organic matter (like coconut coir or high-quality potting soil) and 50% inorganic grit (like coarse sand, pumice, or perlite).
-
Position the Cuttings: For stem cuttings, insert the callused end just deep enough so the cutting stands upright. For leaves, lay them gently on the surface; do not bury the tips.
-
The Watering Strategy: Do not water the soil! A plant with no roots cannot drink. Instead, wait two weeks. Once you gently tug on the cutting and feel resistance (indicating roots have formed), you can begin lightly watering the soil surface.
Common Mistake to Avoid 🚫: The most frequent error beginners make is heavily watering the soil immediately after planting an unrooted cutting. Keep the soil bone-dry until roots appear.
Rooting Succulents in Perlite: The Expert’s Secret Weapon 🪨
While soil is traditional, pure perlite has taken the rare plant and succulent collector community by storm. If you have a highly variegated, expensive, or rot-prone succulent, perlite is often the safest insurance policy you can buy.
What is Perlite and Why Do Propagators Love It? 🌋
Perlite is a naturally occurring volcanic glass that is heated to extreme temperatures until it “pops” and expands like popcorn. The resulting white, lightweight granules are sterile, pH-neutral, and highly porous.
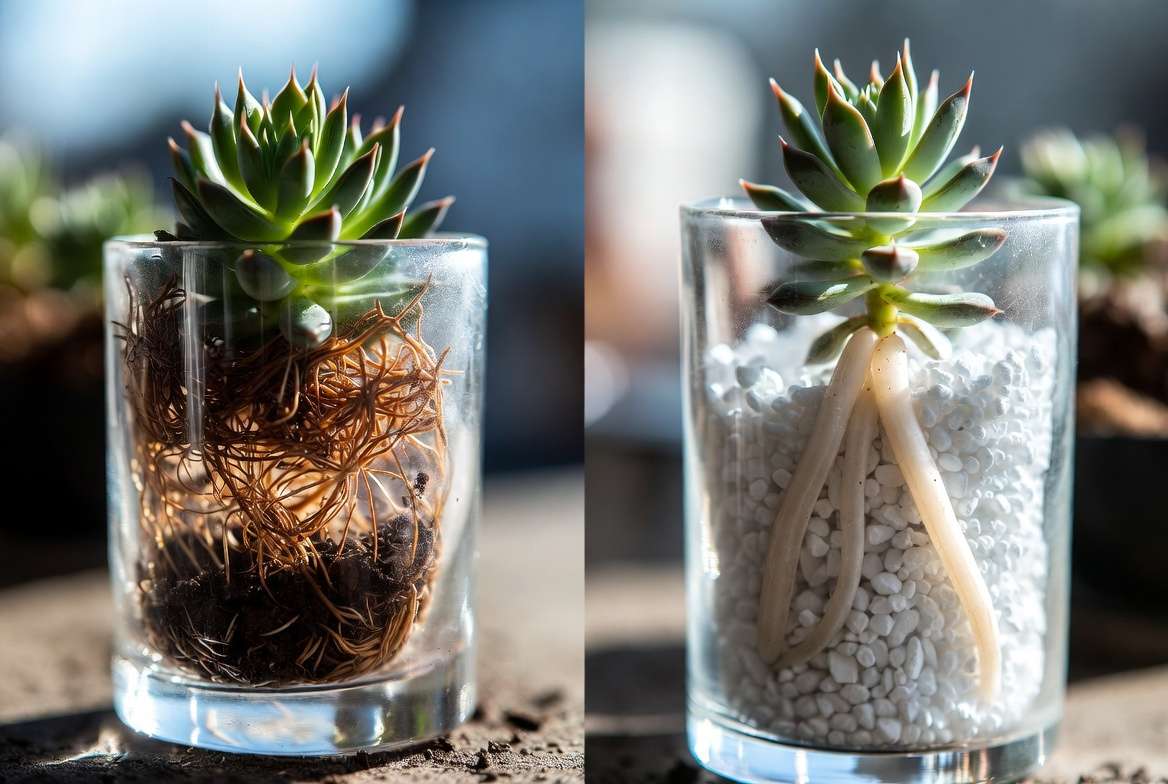
The magic of perlite lies in its structure. The microscopic nooks and crannies on the surface of each perlite granule hold onto water, creating a highly humid microclimate. However, because the granules are large and irregularly shaped, they do not pack tightly together. This creates massive air pockets, ensuring the cutting receives maximum oxygen.
Pros and Cons of 100% Perlite Rooting ⚖️
-
Pros:
-
Near-Zero Rot Risk: Because perlite provides so much airflow and is completely inorganic, it is nearly impossible for rot-causing fungi and bacteria to survive.
-
Rapid Root Growth: The roots actively stretch out through the airy gaps, seeking the moisture held by the perlite, leading to incredibly fast root development.
-
Easy Monitoring: You can easily lift the cutting out of the loose perlite to check on root progress without tearing the roots.
-
-
Cons:
-
Zero Nutrients: Perlite contains no organic matter. Once the plant has a strong root system, it must be transplanted to soil to get the nutrients it needs to grow leaves.
-
Instability: Because it is so lightweight, top-heavy stem cuttings can easily tip over in dry perlite.
-
Transplant Shock: Roots grown in pure perlite (often called “water roots”) are slightly more fragile than soil roots and need time to adapt when eventually moved to potting mix.
-
Step-by-Step Guide to Perlite Propagation 📋
-
Choose Coarse Perlite: Avoid fine horticultural perlite, which can compact. Look for “coarse” or “chunky” perlite. Safety Note: Always wear a mask when pouring dry perlite, as the dust is not safe to inhale. Rinse the perlite in a strainer before use.
-
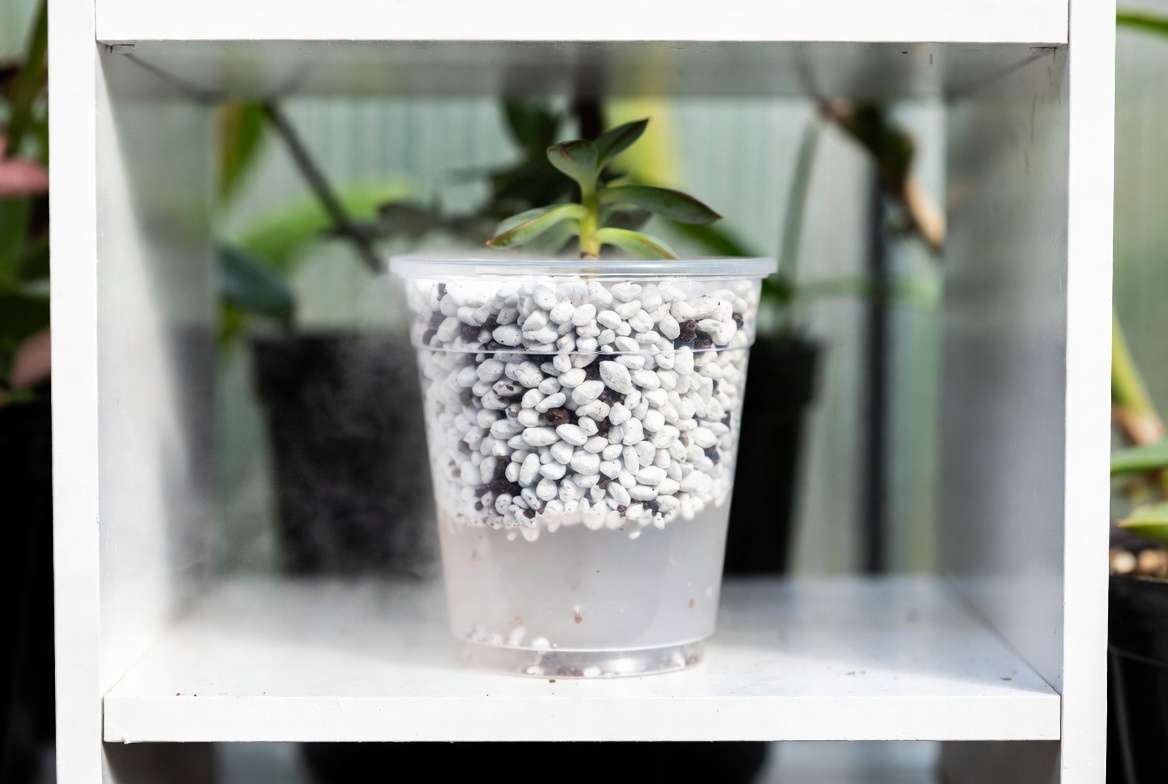
The “Damp Perlite” Method: Fill a small plastic cup (clear cups are great for watching root growth) with the rinsed perlite. Add just a tiny splash of water to the bottom of the cup—about a quarter of an inch. The perlite will wick this moisture upward, creating a humid environment without leaving the top layer soaking wet.
-
Place the Cutting: Nestle the callused stem cutting a few inches into the damp perlite. Place the cup in bright, indirect light and wait. Within 2 to 3 weeks, you should see a thick, robust root system pressing against the sides of the clear cup.
Head-to-Head Comparison: Soil vs. Perlite Succulent Rooting ⚔️🏆
To help you decide which method is best for your specific situation, here is a breakdown of how the two mediums stack up against each other.
| Feature | Soil Propagation | Perlite Propagation | The Winner |
| Rooting Speed | Moderate (3 to 6 weeks) | Fast (2 to 4 weeks) | Perlite |
| Rot Prevention | Low to Moderate | Extremely High | Perlite |
| Nutrient Content | High (Organic matter) | None (Inorganic) | Soil |
| Transplant Ease | Excellent (No moving required) | Moderate (Requires repotting) | Soil |
| Visibility | Poor (Hidden under dirt) | Excellent (Using clear cups) | Perlite |
Which Method is Faster? ⏱️
Perlite consistently wins the speed test. In a soil environment, moisture is distributed relatively evenly, so roots have no urgent need to stretch. In a perlite setup with a small water reservoir at the bottom, the roots sense the humidity gradient and actively grow downward at an accelerated rate to reach the water source.
Which Method is Safer (Rot Prevention)? 🛡️
Perlite is the undisputed champion of safety. Soil contains decomposing organic matter, which is a natural breeding ground for the microorganisms that cause rot. Perlite is a sterile volcanic glass. If you are trying to save a rotting plant by taking a clean cutting, putting it back into soil is a gamble. Putting it into perlite gives it the cleanest possible environment to heal and push out new roots.
The Transplanting Phase: Which is Easier? 🔄
Soil wins this category easily. When a succulent roots in soil, the roots naturally adapt to the density, moisture retention, and nutrient profile of that exact mix. When a plant roots in perlite, it grows slightly different, finer roots adapted to high airflow. Moving a heavily rooted perlite cutting into dense soil can cause temporary wilting as the plant adjusts.
The “Hybrid” Approach: Getting the Best of Both Worlds 🧪🌿
If you are torn between the safety of perlite and the long-term benefits of soil, you do not have to choose just one. Professional growers often utilize hybrid techniques to maximize success rates.
The 70/30 Grit-to-Soil Mix 🪨🪴
Instead of pure perlite or standard succulent soil, create a custom rooting substrate. Mix 70% coarse perlite (or pumice) with 30% high-quality succulent soil.
This blend leans heavily into the benefits of perlite. The massive amount of grit ensures excellent drainage and airflow, drastically reducing the chances of rot. However, that 30% soil inclusion provides just enough organic matter for the new roots to grab onto and feed from once they emerge. This completely eliminates the need for a stressful transplanting phase later on.
The “Top Dressing” Trick ✨
This is an advanced technique perfect for cuttings that are highly prone to stem rot.
-
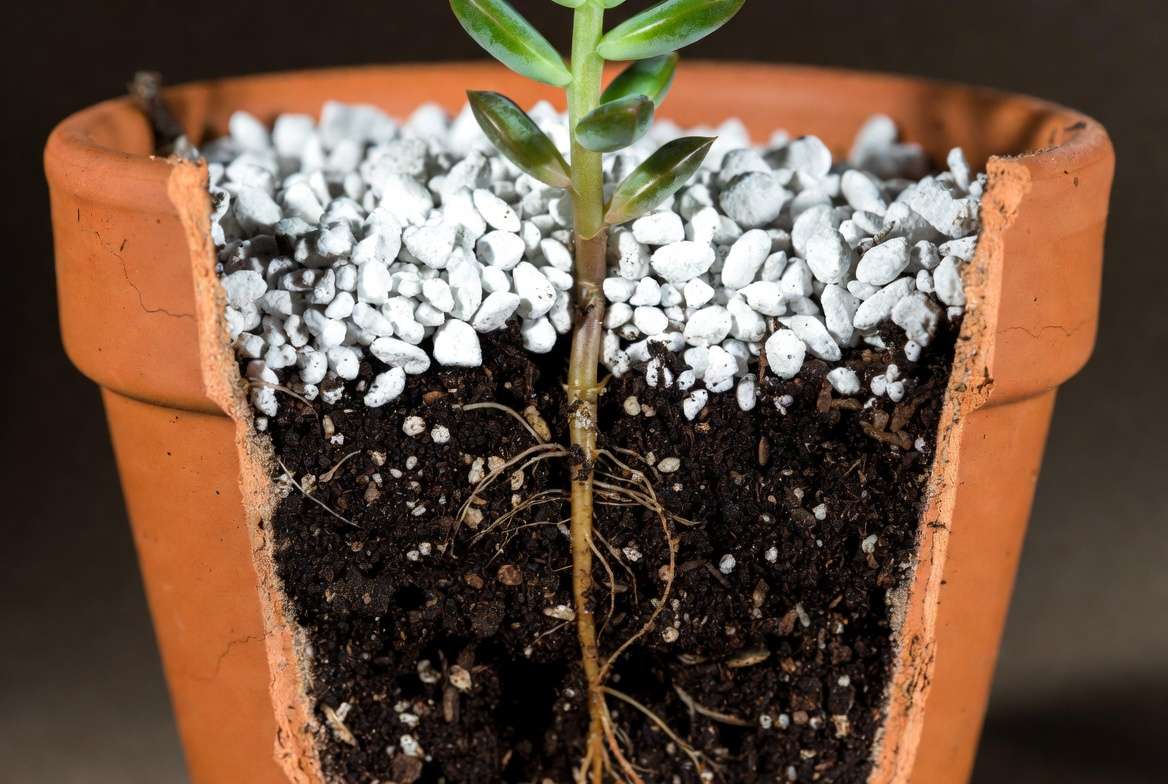
Fill your nursery pot 80% of the way to the top with your standard succulent soil mix.
-
Fill the remaining 20% (the top inch of the pot) with 100% pure, dry perlite.
-
Place your callused succulent cutting into the perlite layer.
Why this works: The stem of the succulent rests entirely in the sterile, dry perlite, keeping it safe from rot. As the plant senses the moisture from the soil below, it shoots strong roots down through the perlite layer and directly into the nutrient-rich soil. You get the rot-prevention of perlite and the nutritional benefits of soil all in one pot!
Troubleshooting Common Propagation Problems 🚑🔍
Even with the best rooting mediums, succulent propagation requires patience and observation. If things are not going according to plan, here is how to diagnose and fix the issue.
Shriveled, Wrinkled Leaves Before Roots Appear 🍂
The Cause: The cutting is losing moisture through transpiration faster than it can replace it (since it has no roots yet). This is often caused by placing the cutting in direct, hot sunlight, or a complete lack of ambient humidity.
The Fix: Move the cutting to bright but indirect shade. If rooting in perlite, ensure there is a small amount of water at the bottom of the cup to boost humidity. Do not soak the stem.
Black, Translucent, or Mushy Stems 🧟♀️
The Cause: This is classic stem rot. It means the cutting was exposed to too much water, planted in overly dense soil, or was not allowed to callus properly before planting.
The Fix: Pull the cutting immediately. Sterilize a sharp knife with rubbing alcohol and cut the stem an inch above the highest point of the rot. Discard the rotting bottom half. Let the new, healthy top half callus for a full week in a dry place, and try again using the 100% perlite method.
Lots of Roots, But No Baby Plant (Or Vice Versa) 🌿
The Cause: This usually happens with leaf propagations. Sometimes a leaf will grow a massive pink root system but never sprout a rosette (new leaves). Other times, it will grow a beautiful little baby plant without a single root. This is a quirk of succulent genetics and environmental triggers.
The Fix: Be patient. If you only have roots, ensure the leaf is getting enough bright, indirect light to trigger photosynthesis and leaf production. If you only have a rosette with no roots, ensure the medium provides a slight humidity gradient to coax roots to emerge. Eventually, the mother leaf will dry up and fall off.
Frequently Asked Questions (FAQs) 🤔
1. Can I root succulents in water instead of soil or perlite?
Yes, water propagation is popular on social media. You suspend the cutting above a glass of water, and it grows roots rapidly. However, water roots are incredibly fragile and adapted only to an aquatic environment. When you eventually transition a water-rooted succulent to soil, it often experiences severe transplant shock, and the roots may die off completely, forcing the plant to start over. Perlite is a safer middle-ground.
2. How long does it take for a succulent to root in perlite?
Under optimal conditions (bright indirect light, warm temperatures, and adequate humidity), you should start seeing tiny root nubs within 10 to 14 days. By weeks 3 to 4, you should have a robust root system ready for transplanting.
3. Should I water my succulent cuttings while they root?
If you are using the soil method, no. Keep the soil dry until you can confirm roots have formed, then water lightly. If you are using the perlite method, you should maintain a tiny reservoir of water at the very bottom of the cup to provide ambient humidity, but the water should never touch the stem itself.
4. Do I need rooting hormone for succulents?
Rooting hormone is generally not necessary for most common succulents like Graptopetalum, Sedum, or standard Echeverias; they root prolifically on their own. However, for stubborn, slow-growing varieties or woody-stemmed succulents like Jade (Crassula ovata), dipping the callused end in rooting hormone powder before placing it in perlite or soil can speed up the process.
Conclusion & Final Verdict 🏁🌟
Mastering the art of succulent propagation is one of the most rewarding parts of plant parenthood. Watching a single snipped stem transform into a thriving, independent plant feels like magic—but as we have learned, it all comes down to science, airflow, and moisture control.
So, where do we land in the great soil vs. perlite succulent rooting debate?
If you live in a very arid, dry climate, have excellent airflow in your home, and prefer a low-maintenance approach where you do not have to repot your new plants, the traditional soil method (using a highly gritty mix) will serve you well.
However, if you are a beginner, if you live in a humid environment, or if you are tired of watching your prized cuttings turn to mush, perlite is the ultimate winner. Its unique ability to provide high humidity alongside massive oxygen flow creates a near-perfect, rot-free incubator for fragile new roots.
For the absolute best results, try the “Top Dressing” trick mentioned above. By resting your cuttings on a layer of sterile perlite over a bed of nutritious soil, you truly get the best of both worlds: rapid, rot-free rooting and long-term, vigorous growth.
Happy propagating! May your succulents be plump, your roots be thick, and your pots remain completely rot-free. 🌵💚











