
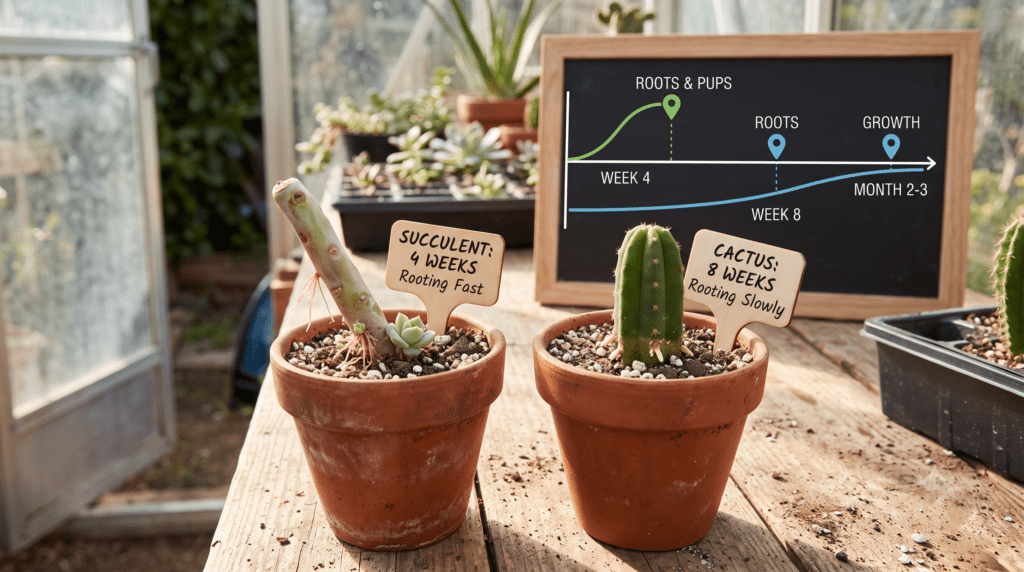
We have all been there: staring at a slightly shriveled leaf or a freshly chopped cactus pad for weeks, wondering if you should throw it away in defeat or keep waiting. The anxiety of plant propagation is real! 🥺 You start questioning your skills, your soil, and the temperature of your room. But the truth is, most beginners fail not because they did something wrong, but because they simply misunderstood the biological propagation timelines for cacti vs. succulents.
As a seasoned plant care specialist who has propagated hundreds of desert dwellers—from delicate Echeveria leaves to massive San Pedro columns—I can assure you that patience is the secret ingredient most people lack. Your cuttings are probably not dead; they are just operating on “desert time.”
In this comprehensive guide, we will break down the exact timelines you can expect when propagating both cacti and fleshy succulents. We will cover how to read their subtle signals, how to tell if a cutting is truly dead or just slow, and the expert environmental tweaks you can make to significantly speed up the rooting process. Let’s dive in! 🪴
II. The Biology of Waiting: Cacti vs. Succulents 🧬
To understand the propagation process, you have to understand the biology of the plants you are working with. While they share similar drought-tolerant characteristics, their internal clocks tick at very different speeds.
What Makes Them Different? 🤓
First, a quick botanical distinction: all cacti are succulents, but not all succulents are cacti. Succulents generally refer to plants with thick, fleshy leaves or stems that store water (like Jade plants, Aloe, and Sedum). Cacti are a specific family of succulents characterized by areoles—small, cushion-like bumps from which their spines grow.
Their native environments dictate their rooting speed. Leafy succulents are often native to regions where rainfall is brief and sporadic. They have evolved to root relatively quickly to grab surface moisture before it evaporates. Cacti, on the other hand, are built for the long haul. They rely on massive internal water reserves and often take their sweet time pushing out new roots, knowing they can survive for months without a drop of water.
Why Callusing is the Ultimate Time-Keeper 🩹
For both types of plants, propagation cannot begin until a “callus” forms. A callus is essentially a scab that forms over the cut tissue. If you place a fresh, wet cut directly into soil, soil-borne bacteria and fungi will invade the plant’s vascular system, leading to rapid, mushy rot. The time it takes for this scab to form is the first mandatory waiting period in your propagation timeline.
III. Propagation Timelines for Succulents (Fleshy Varieties) 🌿
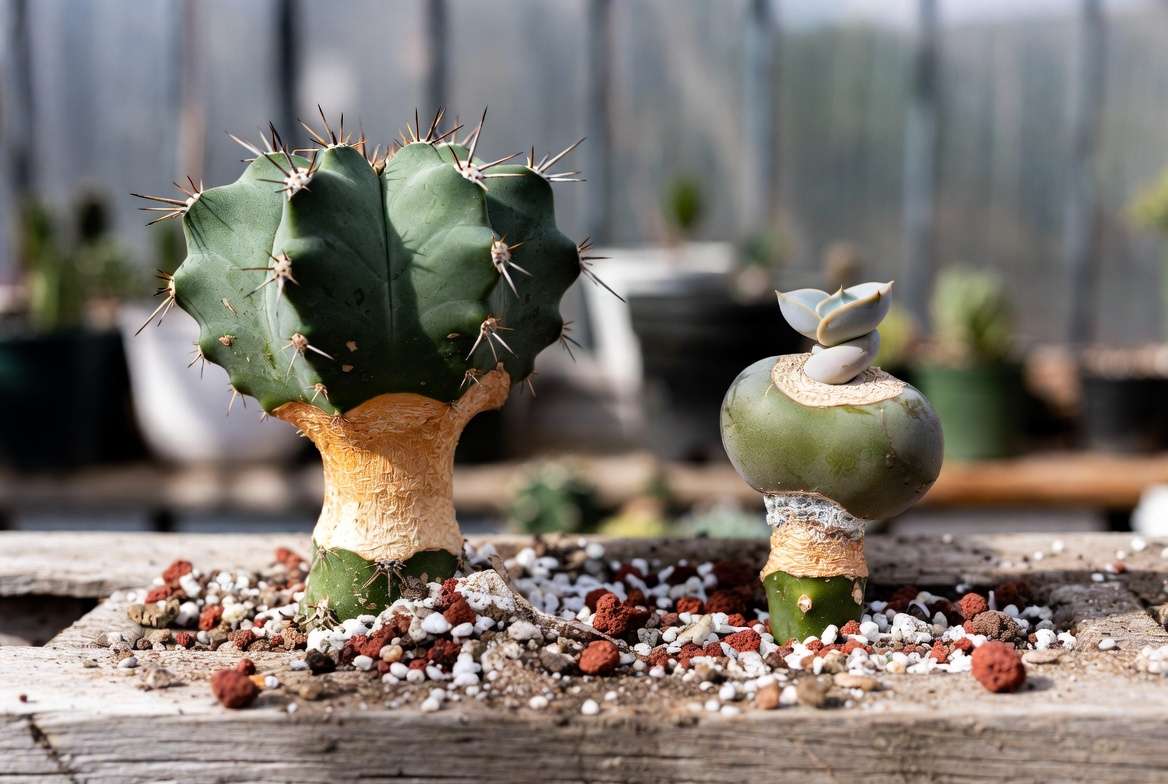
Fleshy succulents—such as Echeveria, Graptopetalum, Crassula (Jade), and Haworthia—are generally the fastest to propagate. Here is what you can expect when propagating them via different methods.
Leaf Propagation Timeline 🍃
Propagating from a single leaf is a magical process, but it requires serious restraint.
-
Days 1–5 (The Callusing Phase): During this time, you should be doing absolutely nothing. Leave the gently twisted-off leaf on a dry surface out of direct sunlight. The wound will dry and seal.
-
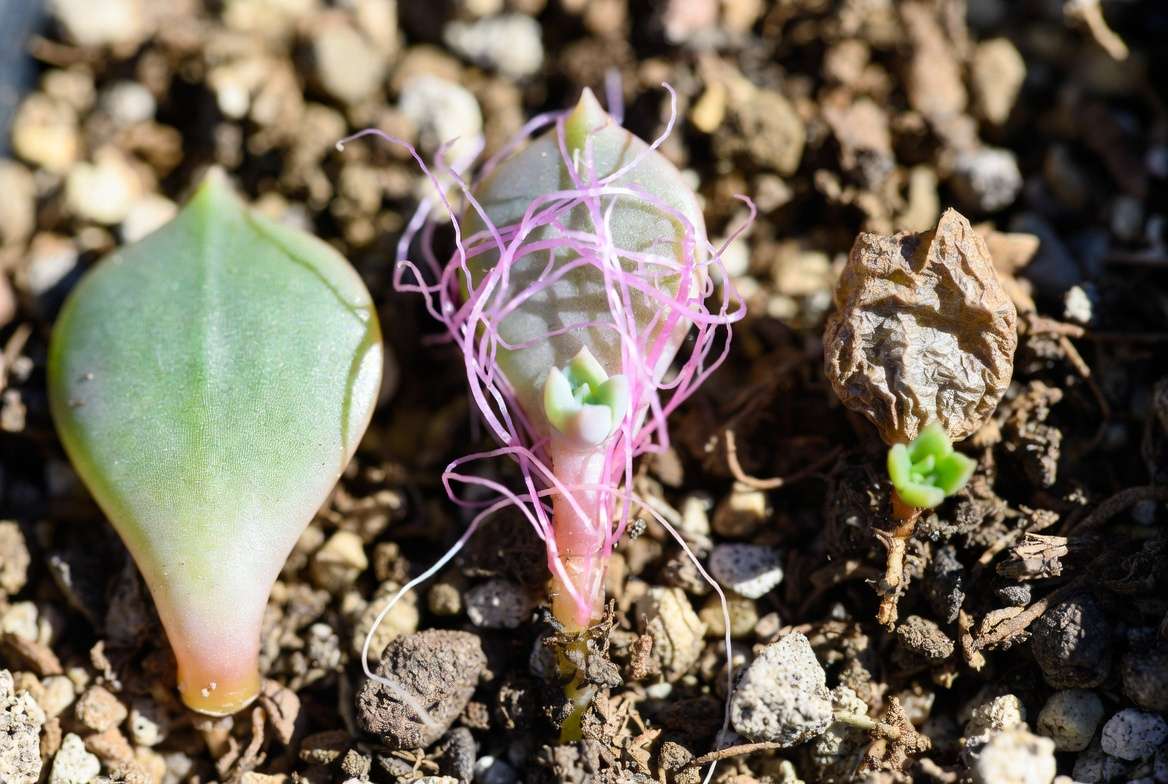
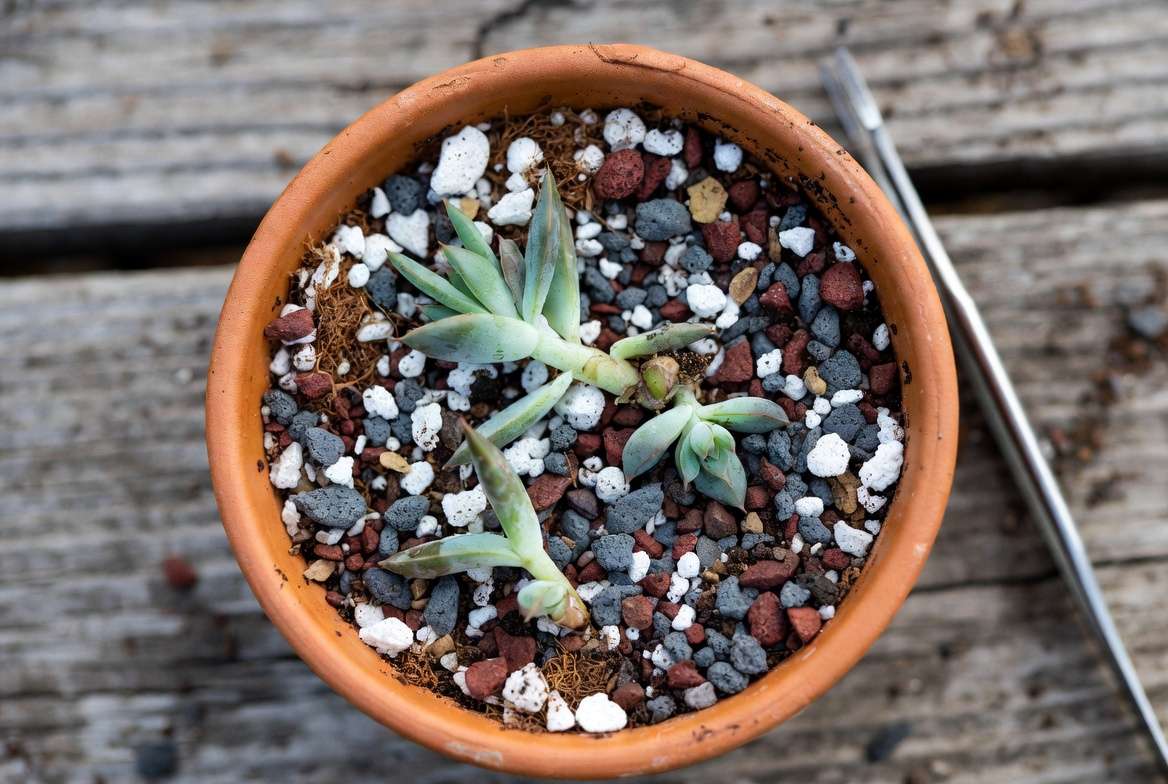
Weeks 2–3 (The Rooting Phase): You will begin to see tiny, hair-like pink or white roots sprouting from the callused end.
-
Weeks 4–6 (The Pup Phase): A microscopic “baby rosette” (often called a pup) will begin to form at the base of the roots.
-
Months 2–4 (The Independence Phase): The original mother leaf will transfer all its remaining water and nutrients to the new pup. The mother leaf will eventually turn crispy and fall off. Only then is the new plant ready for its own tiny pot.
-
Expert Tip: Do not mist your leaves during the first two weeks! Misting too early is the number one reason leaves turn translucent and rot before they can root. 🚫💧
Stem Cuttings (Beheadings) Timeline ✂️
When your succulent gets tall and leggy, “beheading” the top rosette is the best way to save it. Because a stem has more stored energy than a single leaf, it roots faster.
-
Days 1–7: The stem must callus. Thicker stems may take a full week to scab over completely.
-
Weeks 2–4: Vigorous root growth begins. Once you place the callused stem on top of dry succulent soil, it will aggressively seek out moisture, sending thick roots downward. By week 4, a gentle tug on the plant will reveal resistance, indicating successful rooting.
Offsets (Pups) Timeline 👶
Many succulents, like Aloe Vera and Sempervivum (Hens and Chicks), propagate themselves by throwing out pups around their base.
-
Immediate to 2 Weeks: Because these pups usually already have a rudimentary root system attached to the mother plant, dividing them is practically instant. Establishment and new growth in a fresh pot usually takes a mere 10 to 14 days.
IV. Propagation Timelines for Cacti 🌵
Cacti demand more patience. Popular varieties like Opuntia (Prickly Pear), Mammillaria, and columnar cacti operate on a much slower schedule.
Pad and Columnar Stem Cuttings Timeline 🔪
-
Weeks 1–3 (Extended Callusing): This is a crucial step. Cacti hold an immense amount of water. A thick columnar cutting might need up to three full weeks for the cut end to completely dry and form a hard, woody shield.
-
Weeks 4–8 (Root Nubs): You won’t see much happening on the surface. Below the soil (or hovering just above it), thick, sturdy root nubs will eventually push through the callus.
-
Months 2–3 (Anchoring and Growth): The roots will finally dive deep into the soil. You will know the cactus has successfully rooted when you see active top-growth (new bright green skin at the tip or new tiny spines forming).
-
Expert Tip: Cacti have a strict sense of “polarity.” If you accidentally plant a mid-section cactus cutting upside down, it will completely halt propagation. The roots will only grow from the tissue that originally faced the ground! 🙃
Offsets (Cactus Pups) Timeline 🍼
Just like leafy succulents, many cacti produce pups at their base.
-
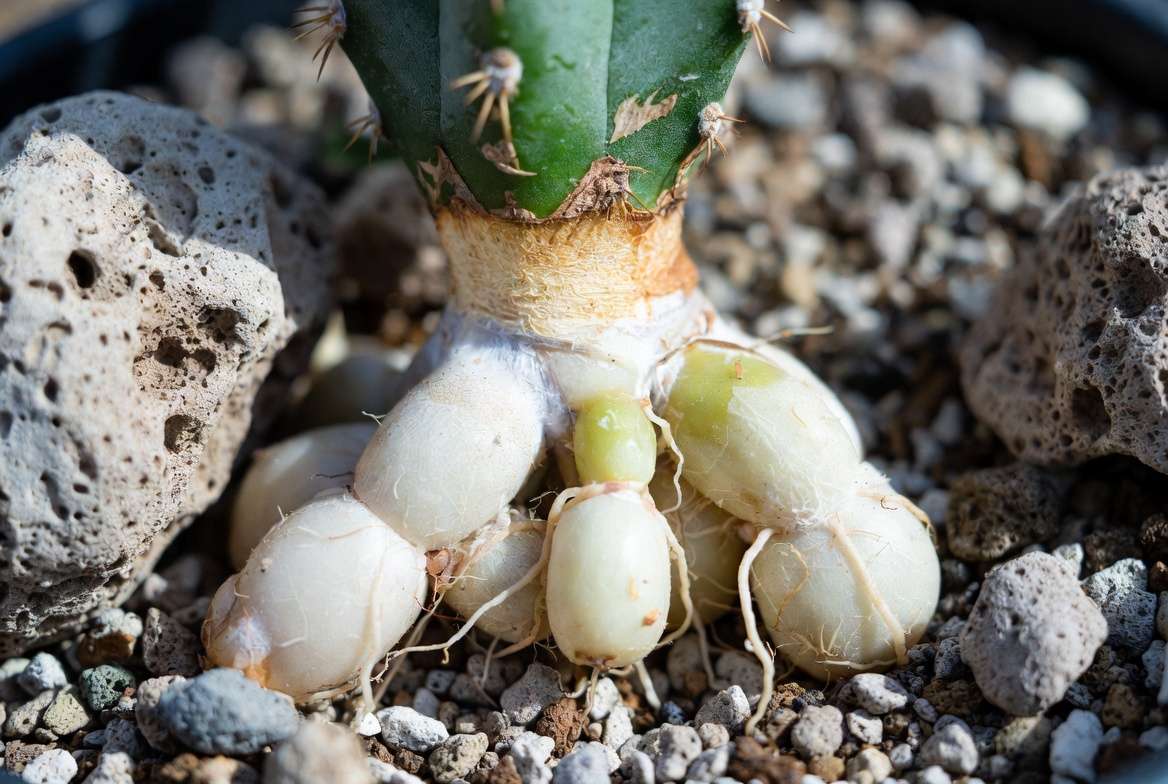
Weeks 2–4: Once detached with a clean, sterile knife and allowed to callus, cactus pups establish a root system fairly quickly compared to pad cuttings. You can expect them to anchor into the soil within a month.
Seed Propagation (The Marathon) 🏜️
While taking cuttings is the easiest route, true botanical enthusiasts often grow from seed. Note that this timeline is measured in years, not weeks. A cactus grown from seed may take 1 to 2 years just to reach the size of a marble. It is a rewarding process, but strictly for the ultra-patient.
V. Dead or Just Slow? How to Read the Signals 🔍
The most common question plant owners ask is, “Is it time to give up?” Use this expert diagnostic table to determine if your cutting is thriving, dying, or just taking a nap.
| Symptom | Diagnosis | What to Do Next 🛠️ |
|---|---|---|
| Wrinkled but firm, slight pink roots | Alive and rooting (Just slow) | Keep doing what you’re doing; the plant is using its stored water to create roots. Have patience! |
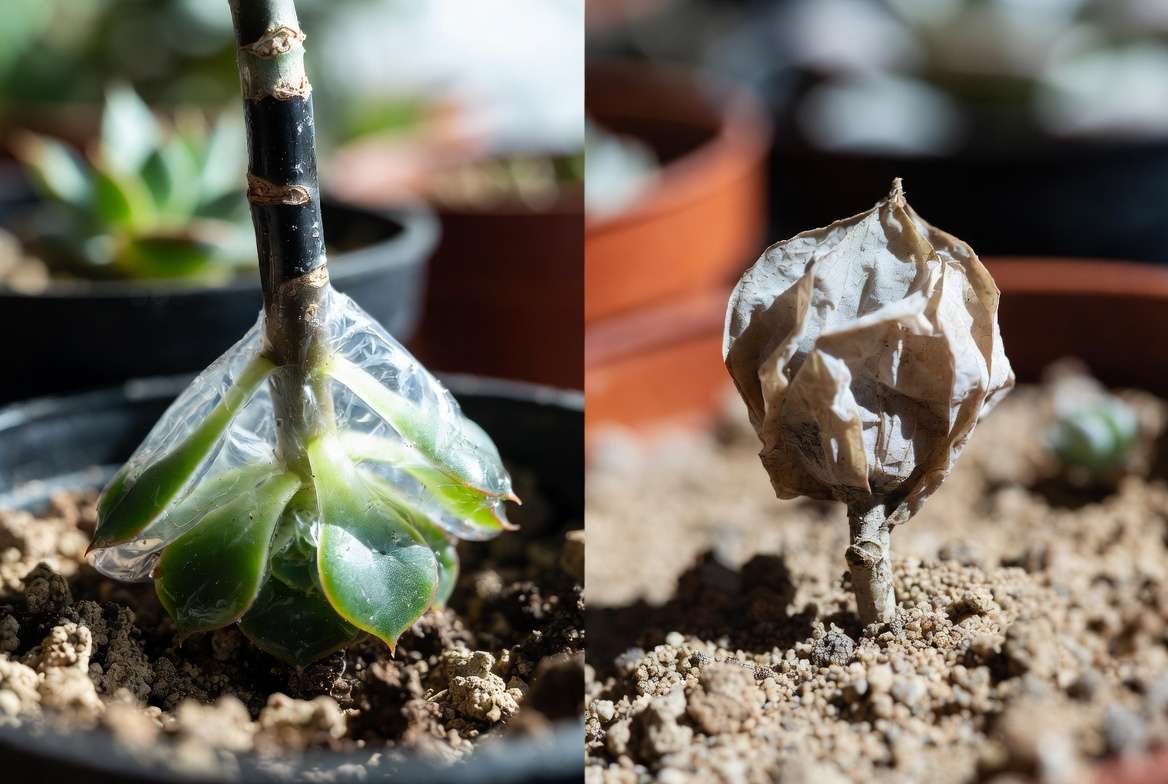
| Black, mushy, or translucent stem/leaf | Rot (Dead/Dying) | Discard immediately to prevent spreading bacterial rot to other cuttings. |
| Completely dried out, crispy like a potato chip | Desiccated (Dead) | Discard. It unfortunately didn’t have enough water reserves to survive the callusing phase. |
| Firm, callused, absolutely zero roots after 8 weeks | Dormant (Very slow) | Check the season and temperature; it is likely waiting for the right environmental cues to wake up. |
VI. 5 Expert Factors That Speed Up (or Slow Down) Rooting ☀️
If you want to shave weeks off your propagation timelines for cacti vs. succulents, you need to optimize their environment. Plants respond to triggers. Here are the five variables that dictate rooting speed.
1. Seasonality and Dormancy ❄️ vs. 🌸
Plants have a growing season and a resting season. If you try to propagate an Aeonium (a winter grower) in the dead of summer, it will sit there and do nothing for months. Conversely, propagating a cactus (a summer grower) in December without artificial heat/light will stall the process. Always research if your plant is a summer or winter grower and take cuttings at the beginning of their active growing season.
2. Temperature and Bottom Heat 🌡️
Warmth is a massive trigger for root growth. A simple seedling propagation mat placed under your nursery pots can provide consistent bottom heat (around 75°F to 80°F), which can literally shave weeks off cactus rooting times. Cold soil tells the plant to stay asleep.
3. The Light Balance 🌤️
Cuttings without roots cannot absorb water, which means they are highly susceptible to drying out if exposed to harsh light. Placing unrooted cuttings in scorching direct sun will burn them. Instead, provide them with bright, indirect light. A brightly lit room with a sheer curtain is the perfect sweet spot for energetic, safe propagation.
4. Soil Aeration (The Oxygen Factor) 🪨
Roots need oxygen just as much as they need water. If you place a cutting in dense, heavy potting soil or pure peat moss, it will suffocate and rot. You must use a highly aerated mix. Blending standard cactus soil with 50% pumice, perlite, or coarse sand creates the airy environment that newly forming roots crave.
5. Rooting Hormones: Worth It? 🧪
Synthetic auxins (rooting powders) can stimulate cell division. Botanist’s Insight: For succulent leaves, rooting powder is generally a waste of money—they root incredibly easily on their own. However, for stubborn, slow-growing cacti or woody stem cuttings (like thick Jade branches), dipping the callused end in a high-quality rooting hormone can significantly boost your success rate and speed up the timeline.
VII. Step-by-Step E-E-A-T Best Practices for 100% Success 🏆
To guarantee you are maximizing your chances of a successful, timely propagation, follow this expert checklist:
-
Sterilize Your Tools: Always wipe your pruning shears or knife with 70% isopropyl rubbing alcohol. This prevents transferring deadly fungal spores into the fresh wound of your cutting. 🧽
-
The Perfect Cut: Make a clean, swift cut. Jagged edges or crushed plant tissue take much longer to heal and are highly prone to rotting.
-
The Callus Waiting Room: Create a dedicated dry spot out of direct sun for your cuttings to heal. A cardboard box lid or an empty nursery tray works perfectly.
-
The Dry Potting Method: Once callused, place the cutting on completely dry succulent soil. Do not water it! Without roots, the plant cannot drink, so wet soil only invites rot.
-
Gradual Watering: Once you gently pull the cutting and feel resistance (meaning roots have grown 1 to 2 inches long), you can slowly begin transitioning to a regular deep-watering schedule. 🚿
VIII. Frequently Asked Questions (FAQs) ❓
Should I water succulent cuttings before they have roots? No. A plant without roots has no mechanism to absorb water from the soil. Watering unrooted cuttings is the fastest way to cause stem rot. Wait until roots appear before introducing moisture.
Can I propagate a cactus or succulent in water? Water propagation is a trendy topic. While some succulents can push out “water roots” when suspended over a glass of water, these roots are structurally different from soil roots. When transferred to soil, water roots often die off, forcing the plant to restart the process. Soil propagation is generally safer and more robust in the long run.
Why did my succulent leaf grow roots but no baby plant? This is a frustrating phenomenon known as a “blind leaf.” The leaf successfully roots and plumps up, but the meristem tissue (the cells responsible for creating the new rosette) was damaged when the leaf was pulled off the mother plant. It will live as a rooted “zombie leaf” for months, but it will never grow a new plant.
How long does it take for a prickly pear pad to root? Prickly pear (Opuntia) pads are notoriously robust but slow. Expect a 2 to 3-week callusing phase, followed by 4 to 6 weeks of resting on dry soil before vigorous roots anchor the pad.
IX. Conclusion & Next Steps 🪴
At the end of the day, patience is a plant parent’s greatest virtue. Understanding the distinct propagation timelines for cacti vs. succulents will save you from throwing away perfectly healthy plants that are simply taking their time. Remember: leafy succulents sprint, while thick, armored cacti run a marathon.
Provide your cuttings with the right environment—plenty of bright indirect light, excellent airflow, highly aerated soil, and perhaps a touch of bottom heat—and let nature do the rest. Losing a few cuttings along the way is entirely normal and a vital part of the learning curve. Don’t hover over your propagation trays; go read a book, tend to your mature plants, and before you know it, you will be repotting a brand new generation of desert beauties. Happy propagating! 🌱











