
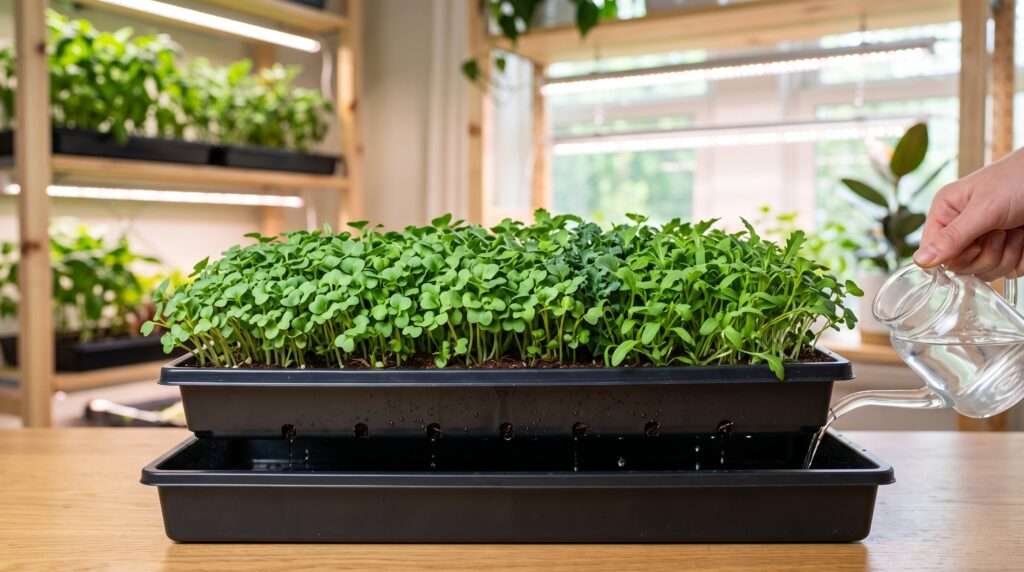
Picture this: you have finally set up your indoor garden on a sleek wire rack, perfectly positioned in your kitchen or apartment. You are ready for a lush, nutrient-dense harvest, but within a few days, your soil smells like a swamp, and your delicate seedlings are collapsing. If you are struggling to grow microgreens in shallow trays, you are not alone.
This is the exact dilemma many urban gardeners, hobbyists, and even commercial growers face. Shallow containers seem like the perfect space-saving solution for cultivating indoor superfoods. However, they present a unique set of challenges. The line between letting your soil dry out completely and turning it into a soggy, root-rot-infested mess is incredibly thin.
After years of cultivating indoor crops, testing dozens of growing mediums, and troubleshooting countless failed harvests, I have learned that shallow growing requires a very specific approach. This comprehensive guide will walk you through exactly how to master low-profile setups. By the end of this article, you will have a foolproof system to prevent disease, maximize your yields, and grow thriving, vibrant greens every single time.
Why Grow Microgreens in Shallow Trays? 🤔
Before we dive into the technical details of preventing root rot, it is important to understand why low-profile containers are worth the effort. Choosing the right equipment dictates the success of your entire indoor garden.
The Space-Saving Advantage 🏢
The primary reason growers flock to shallow 1020 or 1010 flats is vertical efficiency. When you are growing indoors, vertical real estate is highly valuable. Low-profile containers—typically measuring just one to one-and-a-half inches deep—allow you to stack more shelves on a single wire racking system. Instead of fitting four shelves of deep pots, you can comfortably fit six or seven tiers of shallow flats under your LED grow lights. This drastically increases your overall yield per square foot.
Lower Medium Costs & Sustainability 💰
Microgreens are harvested at the cotyledon stage (the first set of leaves) or just as their true leaves emerge. Because their lifespan is typically only 7 to 21 days, they do not require deep root systems to access complex nutrients.
-
Cost Efficiency: Using a container that is only one inch deep cuts your soil or coco coir usage in half compared to standard two-inch deep flats.
-
Better ROI: For commercial urban farmers, this reduction in recurring substrate costs significantly increases profit margins.
-
Eco-Friendly: Less waste is generated per harvest, making your indoor garden much more sustainable.
The Catch: The “Shallow Soil Vulnerability” ⚠️
The distinct advantage of using less substrate is also its biggest weakness. Less soil means a significantly smaller buffer for moisture and temperature fluctuations. In a deep pot, water can drain away from the topsoil, leaving a safe, aerated zone for stems. In a shallow setup, if you overwater by even a fraction, the entire root zone becomes instantly waterlogged. This lack of a moisture buffer is the primary reason beginners fail with this method.
Choosing the Right Tray & Growing Medium 📏
You cannot build a sturdy house on a weak foundation. For microgreens, your foundation consists of your container and your substrate.
What Defines a “Shallow” Tray? (And Why Drainage is Non-Negotiable) 🕳️
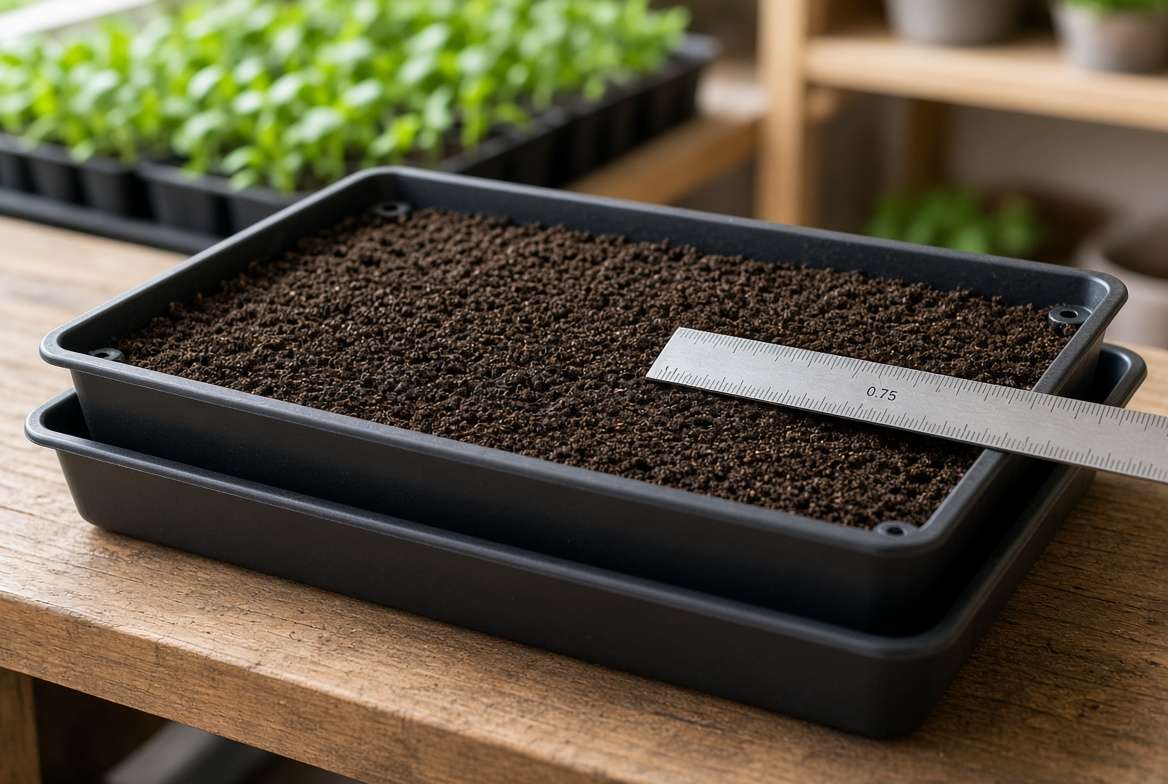
In the indoor farming industry, a “shallow tray” generally refers to flats with a depth of 1.25 inches or less. The standard dimensions are usually 10×20 inches (commonly called 1020 flats) or 10×10 inches.
The Golden Expert Rule: Your top planting tray must have drainage holes. Many beginners purchase solid bottom containers to avoid making a mess indoors, which is a fatal mistake for shallow soil. Without drainage slits or holes, excess water has nowhere to escape, creating a stagnant pool at the bottom where roots suffocate. Always use a nested system: a top tray with holes resting inside a bottom solid tray to catch runoff.
The Best Growing Mediums for Shallow Depths 🥥
Because you have less physical space, your growing medium must possess exceptional aeration and moisture-wicking properties. Heavy, compost-rich garden soil will compact tightly, choking out oxygen and leading directly to crop failure.
-
Coco Coir: This is arguably the best medium for shallow depths. It holds moisture beautifully while naturally retaining air pockets, making it difficult to accidentally suffocate your roots.
-
Fine-Sifted Seed Starting Mix: A peat-based mix infused with perlite works very well, provided it is sifted to remove large twigs and bark that can obstruct delicate root growth.
-
Hydroponic Grow Mats: Hemp, jute, and bamboo mats are excellent for low-profile setups. They are entirely soil-less, eliminating the mess, though they require much more precise watering schedules since they dry out rapidly.
Pro Tip: Never use heavy outdoor potting soil or topsoil in an indoor shallow flat. The lack of natural drainage and the high risk of soil-borne pathogens will almost always result in a ruined harvest.
The #1 Enemy: What Causes Root Rot in Shallow Trays? 🦠
To defeat root rot, you must understand exactly how it thrives. Root rot is not just “too much water”—it is a fungal disease, usually caused by Pythium, which flourishes in specific environmental conditions.
The Dangers of Overwatering & Poor Aeration 🌊
Roots require oxygen just as much as they require water. When you flood a one-inch deep container, the water displaces all the oxygen pockets in the substrate. The roots begin to suffocate and die. These decaying roots become the perfect food source for water mold pathogens. Once Pythium takes hold, it spreads rapidly across the flat, turning roots brown, slimy, and foul-smelling.
High Seed Density (The Overcrowding Effect) 🌾
One of the most common beginner mistakes is sowing seeds too thickly. It is tempting to blanket the soil completely to maximize your harvest, but overcrowding is a death sentence in shallow environments. When seeds are jammed together, the growing stems create a dense canopy that traps moisture against the soil surface. This lack of airflow creates a humid microclimate where fungus spores multiply exponentially.
Environmental Factors: Humidity and Stagnant Air 🌬️
Indoor environments often lack the natural breezes found outdoors. Stagnant air allows moisture to sit heavily on the leaves and soil surface. High ambient humidity combined with zero airflow is a recipe for damping-off disease (where stems rot at the soil line and collapse overnight). Adding a simple oscillating fan to your grow room is your strongest, most cost-effective defense against mold and rot.
Step-by-Step: Planting Microgreens in Shallow Trays Like a Pro 🧑🌾
Success with low-profile containers begins long before the first seed germinates. The setup process requires precision, as the margins for error are significantly tighter than when using deep garden pots. Here is the step-by-step methodology I use to guarantee an even, healthy canopy.
Step 1: Prepping the Tray & Leveling the Medium 🎚️
Start by placing your drainage tray (the one with holes) inside your solid bottom tray. Next, add your chosen growing medium—preferably fine coco coir or a high-quality seed starting mix. For a 1020 flat, you only need a depth of about 0.5 to 0.75 inches of substrate.
The Crucial Tamping Step: Do not just dump the soil in and start sowing. You must tamp (press down) the soil to create a perfectly flat, level surface. You can use a dedicated soil tamper, a piece of wood, or simply another empty tray pressed firmly on top. Why is this so important? If your soil surface is uneven, water will run off the high spots and pool in the divots. These tiny puddles create highly localized zones of waterlogged soil, which will inevitably become the starting point for root rot. A flat surface guarantees even moisture distribution.
Step 2: Calculating the Perfect Seed Density ⚖️
As discussed earlier, overcrowding is the enemy of shallow-tray growing. The goal is to sow seeds densely enough to support each other as they grow upright, but sparsely enough to allow critical airflow between the stems.
While seed density varies by crop, here is a reliable reference guide for a standard shallow 1020 tray:
-
Small Seeds (Broccoli, Kale, Arugula, Kohlrabi): 15 to 20 grams
-
Medium Seeds (Radish, Cilantro): 25 to 30 grams
Pro Tip: When adjusting to shallow containers for the first time, drop your normal seed density by 10%. Sacrificing a small fraction of your yield to ensure maximum airflow is a worthy trade-off to prevent losing the entire crop to dampening-off disease.
Step 3: Misting and The Blackout Period 🌑
Once your seeds are evenly broadcast across the flat soil, gently mist them with a spray bottle to ensure good seed-to-soil contact. Do not drench them; you just want to trigger the germination process.
Next comes the blackout period. Place an empty tray directly on top of the seeds, and add a small weight (like a brick or a heavy book). This weighted blackout phase mimics the pressure of being buried deep underground. It forces the seeds to drive their roots downward into your shallow soil profile rather than pushing themselves up and out of the tray. Keep them weighted in the dark for 3 to 4 days, misting lightly once a day.
The Golden Rule: Watering Shallow Trays (Without Drowning Them) 💧
If there is only one section of this guide you memorize, let it be this one. Your watering technique will make or break your harvest. Because shallow soil holds a limited volume of moisture, you must abandon traditional top-watering methods.
Why Bottom-Watering is Mandatory 🛁
Once your seeds have germinated, shed their hulls, and been moved under your LED grow lights, you must transition entirely to bottom-watering.
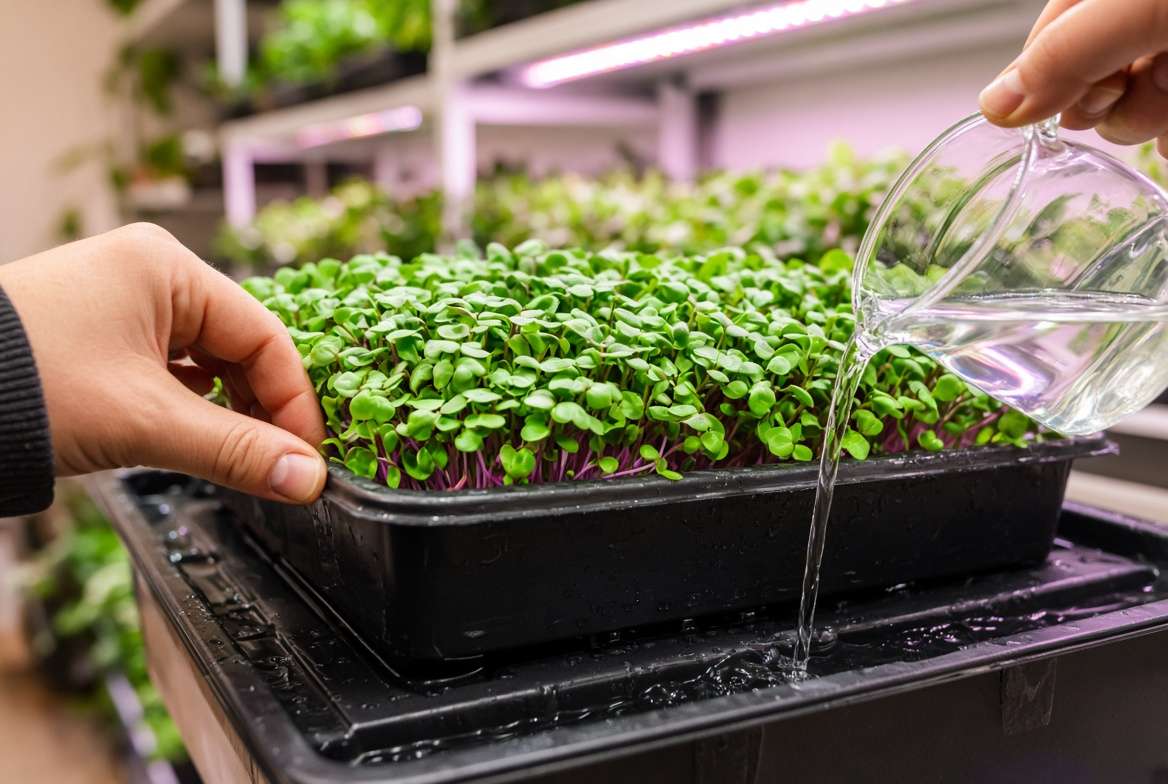
Bottom-watering utilizes the nested tray system. You simply lift the top tray (holding the plants and soil) and pour a measured amount of water directly into the bottom, solid tray. The soil in the top tray will absorb the water upward through the drainage slits via capillary action.
Why is overhead watering dangerous?
-
Stem Damage: Pouring water over delicate, densely packed stems can cause them to snap or fall over.
-
Foliage Moisture: Wet leaves in an indoor environment invite mildew and fungal growth.
-
Soil Surface Compaction: It keeps the top layer of soil constantly wet, which is the perfect breeding ground for mold and algae. Bottom-watering keeps the stems and topsoil dry while delivering moisture directly to the root zone where it is needed most.
The “Lift and Weigh” Technique 🏋️♂️
How do you know when it is time to water? Do not rely on poking the shallow soil with your finger. Instead, use the “Lift and Weigh” method utilized by commercial growers.
Lift the entire tray with your hands. When the soil is completely dry, the tray will feel incredibly light—almost like lifting an empty cardboard box. When it is fully saturated, it will feel heavy and substantial. You want to water only when the tray feels distinctly light. By familiarizing yourself with the dry weight versus the wet weight, you eliminate the guesswork and drastically reduce the risk of overwatering.
Watering Frequency in Shallow Soil ⏱️
Because of the restricted soil volume, shallow flats dry out much faster than deeper containers. You will likely need to water them more frequently—often once a day, and sometimes twice a day in warm, low-humidity environments. However, you must apply less water per session. A standard shallow 1020 tray generally requires only 1 to 2 cups of water poured into the bottom tray at a time. Let the roots drink it up; do not leave them sitting in a permanent puddle.
Best Microgreen Varieties for Shallow Trays 🥬
Not all crops are created equal when it comes to restricted root space. Setting yourself up for success means choosing varieties that naturally thrive in low-profile environments.
Quick-Growing Winners (Beginner Friendly) 🥇
For the best results, start with crops that have fine, delicate root systems and short life cycles (usually ready to harvest in 8 to 12 days). Because they grow so quickly, there is simply less time for pathogens to take hold.
-
Radish: Fast, aggressive germinators with a beautiful spicy kick.
-
Broccoli & Kale: The classic superfoods. They produce highly uniform canopies and thrive beautifully in one inch of soil.
-
Mustard: Incredibly fast-growing and resilient.
-
Arugula: Delivers excellent yields in low-profile trays, provided you monitor the moisture levels closely.
Varieties to Approach with Caution in Shallow Soil ⚠️
While it is entirely possible to grow any microgreen in a shallow container once you master your watering routine, large-seeded varieties present unique challenges.
-
Peas and Sunflowers: These crops produce massive, aggressive taproots. In a shallow tray, these thick roots hit the bottom quickly and begin coiling. If not properly weighted during the blackout phase, they can physically lift the entire soil block out of the tray. They also consume vast amounts of water, meaning a shallow tray will dry out rapidly, requiring you to monitor and water them multiple times a day to prevent wilting.
Troubleshooting Common Shallow Tray Problems 🛠️
Even with the best preparation, indoor gardening is a continuous learning process. When growing in restricted depths, problems can escalate quickly. Here is how to identify, diagnose, and fix the most common shallow-tray issues before they ruin your harvest.
Root Hairs vs. Mold: Don’t Panic! 🔍
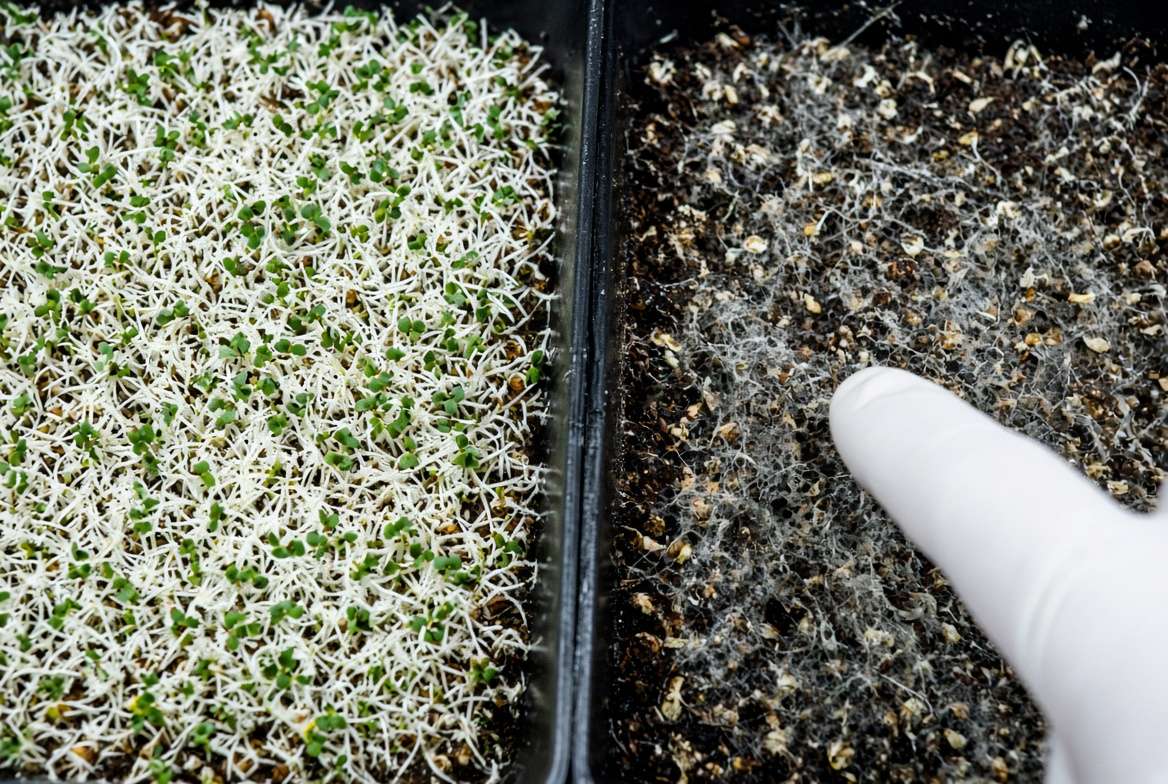
This is the number one source of panic for new growers. A few days into the blackout period, you check your seeds and see a mass of fuzzy white fluff covering the roots. Your first instinct is to assume it is mold—but it is highly likely they are just root hairs!
-
Root Hairs (Cilia): These are microscopic extensions of the plant’s root system designed to absorb water. They are bright white, fuzzy, and grow directly out of the taproot in a uniform pattern.
-
Mold/Cobweb Disease: Mold, on the other hand, looks like faint gray or white spiderwebs. It spreads across the soil surface and from seed to seed, rather than growing straight out of the root.
The Water Spray Test: If you are unsure, take your misting bottle and lightly spray the fuzzy area. Root hairs are delicate and will immediately collapse and disappear against the root when hit with water. Mold acts like a sponge; it repels the water and remains looking like a web. 💡
Yellowing Leaves & Stunted Growth 🍂
If your microgreen leaves are turning pale yellow (chlorosis) or simply halting their vertical growth, the culprit is almost always watering-related. In a shallow tray, soggy soil suffocates the root system. When roots lack oxygen, they experience “nutrient lockout” and cannot absorb the nitrogen needed to keep leaves green and stems growing.
The Fix: Immediately hold off on bottom-watering. Increase the airflow in your grow room by turning up your oscillating fan to help evaporate excess moisture from the topsoil. Let the tray dry out until it feels incredibly light before giving it another sip of water.
The Hydrogen Peroxide Rescue Spray 🚑
If you definitively identify a small patch of mold starting to form due to high humidity or dense seeding, you do not have to throw the whole tray away. You can use a targeted, food-safe rescue spray.
Mix a solution of 1 to 2 tablespoons of 3% food-grade hydrogen peroxide per quart of water in a spray bottle. Lightly mist the affected area. The hydrogen peroxide will bubble and neutralize the fungal spores without harming the plant tissue. As an added bonus, as the hydrogen peroxide (H2O2) breaks down, it releases an extra oxygen molecule directly into the root zone, which can help invigorate suffocated plants! ✨
Expert Insights: Pro Tips for Maximizing Yields 📈
To elevate your indoor garden from a casual hobby to a highly productive, skyscraper-level microgreen operation, it takes a few advanced tweaks to your environment.
Expert Insight: “In my experience, dropping your seed density by just 10% in shallow trays drastically improves airflow and almost entirely eliminates late-stage rotting. The slight reduction in potential seed volume is vastly outweighed by the 100% success rate of a disease-free canopy.” 🗣️
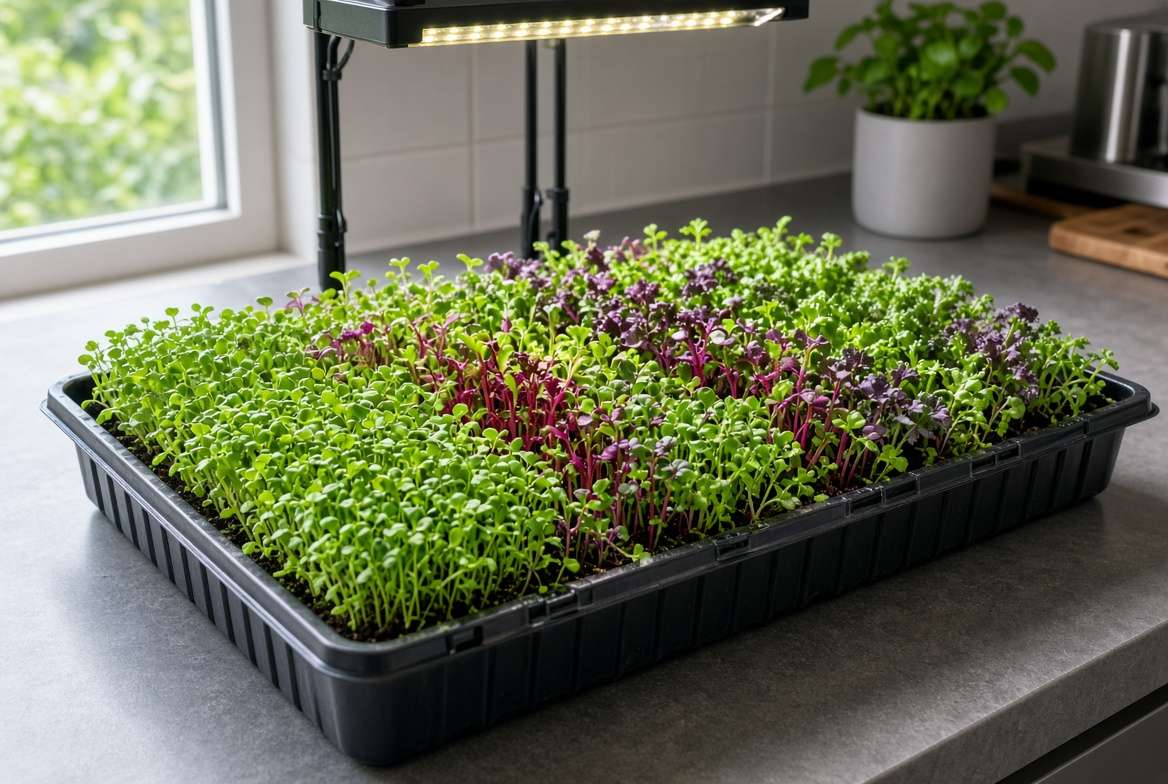
Optimizing Grow Light Distance 💡
When using low-profile containers, your plants are sitting further away from your lighting rigs compared to deep pots. If your LED grow lights are too high, your microgreens will stretch aggressively toward the light, resulting in weak, “leggy” stems that fall over easily. Keep your LED lights exactly 8 to 12 inches above the soil canopy. This ensures short, stout, and deeply colored stems that pack a satisfying crunch.
Frequently Asked Questions (FAQs) ❓
Can I use shallow trays without drainage holes? 🚫
Technically, yes, but it is highly discouraged unless you are an absolute expert at moisture control. Growing in solid trays requires you to measure your water input down to the milliliter to avoid pooling. For 99% of growers, skipping drainage holes is a direct path to root rot. Always use a nested tray system.
How much soil do I actually need for a shallow 1020 tray? 🥄
You need significantly less than you think! For a standard 1020 flat, aim for exactly 0.5 to 0.75 inches of leveled substrate. This typically equates to about 6 to 8 cups of lightly packed coco coir or potting mix. Any more than that, and you defeat the purpose of using a shallow container.
Can I reuse potting soil from my shallow microgreen trays? ♻️
It is not recommended to reuse soil immediately for another round of microgreens. Because the trays are shallow, the root mat becomes incredibly dense and entangled with the substrate. Plus, used soil can harbor mold spores and bacteria from the previous crop. Instead, toss the spent root mats into your outdoor compost bin—they break down beautifully into rich garden compost! 🐛
How long does it take for microgreens to grow in shallow trays? ⏳
The timeline is identical to deeper trays, as microgreens are harvested young. Fast varieties like radish, mustard, and broccoli will be ready to harvest in 7 to 12 days. Slower varieties like cilantro or basil can take up to 21 days.
Conclusion: Ready for Your Bountiful Harvest? 🥗
Growing microgreens in shallow trays does not have to be a frustrating cycle of soggy soil and failed harvests. By understanding the unique mechanics of low-profile environments, you can turn a small corner of your home into a highly productive, year-round superfood factory.
Let’s recap the three pillars of shallow-tray success:
-
Drainage is Non-Negotiable: Always use a top tray with holes nested inside a solid bottom tray.
-
Bottom-Water Only: Protect your delicate stems and foliage by feeding water directly to the root zone from below.
-
Respect the Seed Density: Give your greens room to breathe to eliminate stagnant humidity and mold.
Armed with the right containers, a high-quality substrate like coco coir, and the “lift and weigh” watering technique, you are fully equipped to avoid root rot and cultivate vibrant, thriving microgreens.
What is the first crop you are planning to grow in your shallow setup? Whether it is spicy radish or crunchy broccoli, let the indoor gardening journey begin! 🌱💚











