

Did you know that the world’s most universally beloved flavor comes from a stunning, climbing orchid that you can actually grow in your own living room? It’s true! The intoxicating aroma and sweet taste of real, fresh vanilla don’t just belong in tropical rainforests—they can thrive right in your home. However, growing a vanilla bean plant is often considered the holy grail of indoor gardening. Many houseplant enthusiasts dream of harvesting their own fragrant pods, but the plant’s reputation for being somewhat fussy and requiring manual hand-pollination often scares them away.
As an experienced plant care specialist and orchid enthusiast, I’m here to tell you that cultivating Vanilla planifolia (the botanical name for the commercial vanilla orchid) is entirely possible for home growers. With the right environment, a solid understanding of its unique growing habits, and a little bit of patience, anyone can transform a simple cutting into a blooming, pod-producing jungle vine.
In this ultimate, step-by-step skyscraper guide, we will walk you through exactly how to master vanilla orchid care, from creating the ideal humid habitat to the delicate art of hand-pollinating its elusive flowers. Let’s dive into the fascinating world of homegrown vanilla! ✨
The Hook & Foundation: Understanding Your Vanilla Bean Plant 🌱
Before you purchase your first cutting, it is crucial to understand exactly how this plant functions in the wild. Setting the right expectations is the first step to becoming a successful vanilla grower.
What is a Vanilla Orchid? 🌸
The vanilla bean plant (Vanilla planifolia) is a vining orchid native to the tropical forests of Mesoamerica (Central America and Mexico). Unlike most typical houseplants that grow straight out of potting soil, the vanilla orchid is a semi-epiphyte. In its natural habitat, it begins its life rooted in the rich, decaying leaf litter of the forest floor, but it quickly uses its aerial roots to scramble high up into the tree canopy.
These aerial roots are vital—they absorb moisture and nutrients straight from the humid air and the bark of the trees they cling to. Understanding this epiphytic nature is the golden rule for keeping your indoor vanilla vine alive.
The Realistic Timeline: Patience is Key ⏳
One of the most common mistakes new growers make is expecting instant results. I always advise my readers to view growing a vanilla orchid as a long-term relationship rather than a quick seasonal project.
-
From Cutting to Maturity: If you start with a standard 12-to-18-inch cutting, it will typically take 3 to 5 years of consistent growth before the vine is mature enough to produce flowers.
-
Size Matters: The vine usually needs to reach a length of at least 10 to 15 feet (and have a stem roughly the thickness of a marker) before it will even consider blooming.
But don’t let this deter you! Even before it flowers, the vanilla vine is a breathtaking, lush, trailing houseplant with thick, fleshy, emerald-green leaves that will instantly elevate your indoor jungle.
Essential Care: Cultivating an Indoor Jungle Environment 🌴
Because the vanilla bean plant hails from the tropics, replicating a warm, humid jungle environment is non-negotiable. Here is the expert breakdown of how to tailor your home environment to meet its needs.
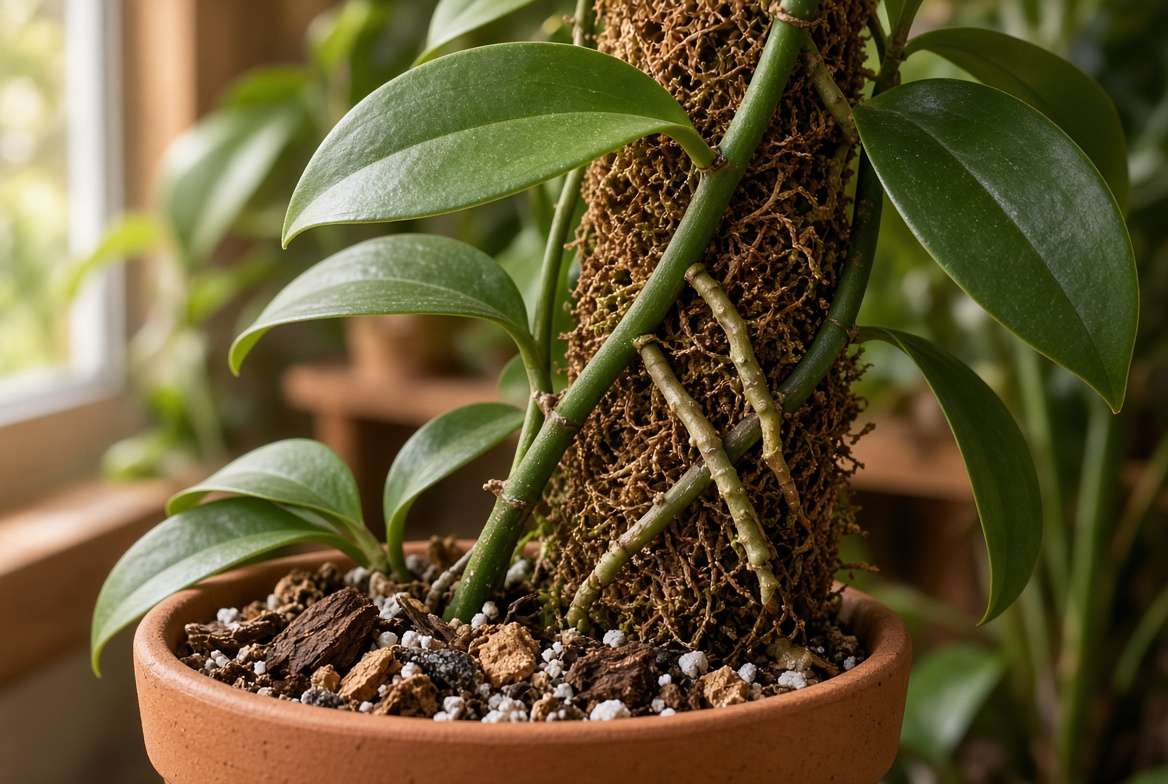
1. Climate, Temperature, and Light ☀️
To mimic the dappled light of a rainforest canopy, your vanilla plant needs bright, indirect sunlight.
-
Light: Direct, harsh afternoon sun will scorch the fleshy leaves, turning them yellow or brown. A large East-facing or East-South-East facing window is ideal. If you only have a South-facing window, use a sheer curtain to diffuse the light. During the winter, or in low-light homes, supplementing with a full-spectrum LED grow light can keep the plant actively growing.
-
Temperature: Vanilla orchids despise the cold. They thrive in daytime temperatures between 75°F and 90°F (24°C – 32°C) and nighttime temperatures no lower than 60°F (15°C). Keep them far away from drafty windows, air conditioning vents, and exterior doors during the winter.
2. The Perfect Potting Medium (Hint: It’s Not Soil) 🪴
If you plant your vanilla cutting in standard indoor potting soil, the roots will quickly suffocate and rot. Because they are epiphytes, they require massive amounts of oxygen at the root zone.
The Expert Vanilla Mix:
-
50% Medium-grade Orchid Bark (fir bark)
-
25% Sphagnum Moss (for moisture retention)
-
25% Perlite or Pumice (for drainage and aeration)
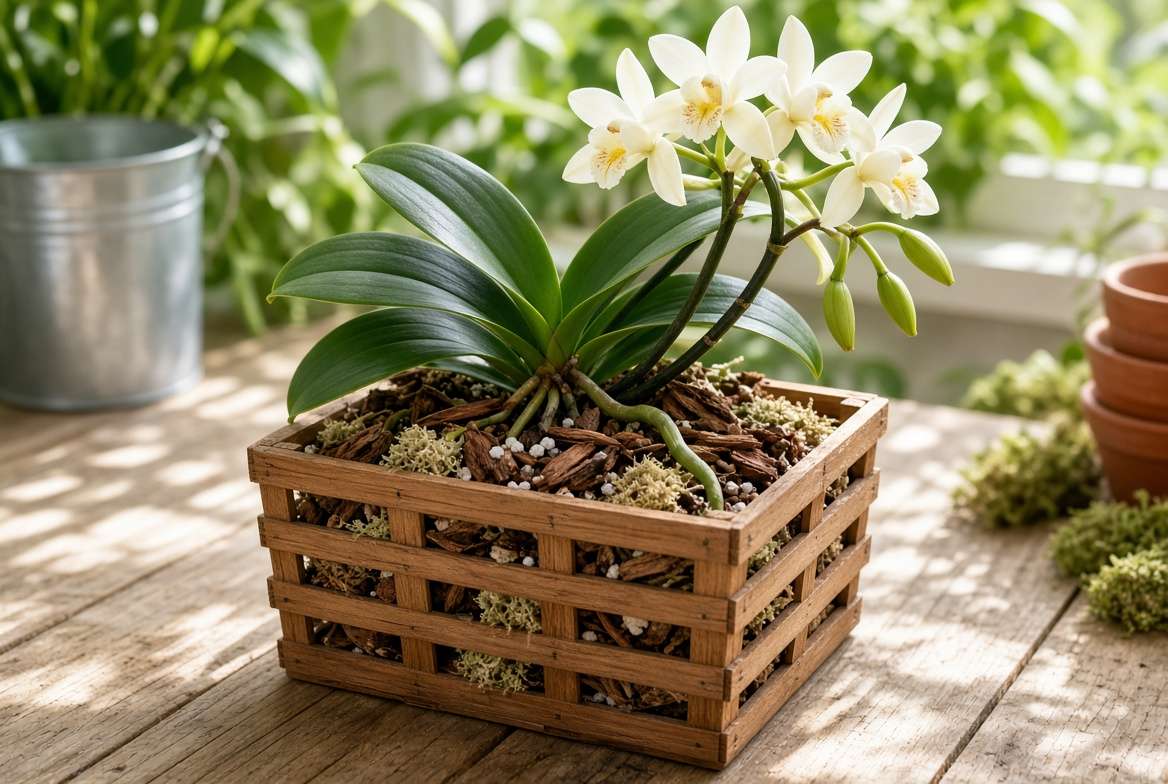
Use a pot with ample drainage holes. Some growers even prefer slatted wooden orchid baskets or terracotta pots with side holes to maximize airflow around the roots.
3. Watering and Humidity Mastery 🚿
Because your vanilla bean plant is an epiphyte with a dual-root system (terrestrial roots in the pot and aerial roots on the vine), your watering strategy needs to address both.
The “Soak and Dry” Method: Water the potting medium thoroughly until water runs freely out of the bottom of the pot. Then, allow the top two to three inches of the orchid bark mix to dry out completely before watering again. Vanilla orchids are highly susceptible to root rot if left sitting in soggy soil. During the active growing season (spring and summer), you might be watering once a week; in the winter, this may drop to every two weeks.
Mastering the 80% Humidity Rule: Vanilla vines are moisture-loving jungle natives. While they can tolerate standard household humidity (around 40-50%), they truly thrive and grow vigorously when humidity levels are kept between 70% and 80%.
-
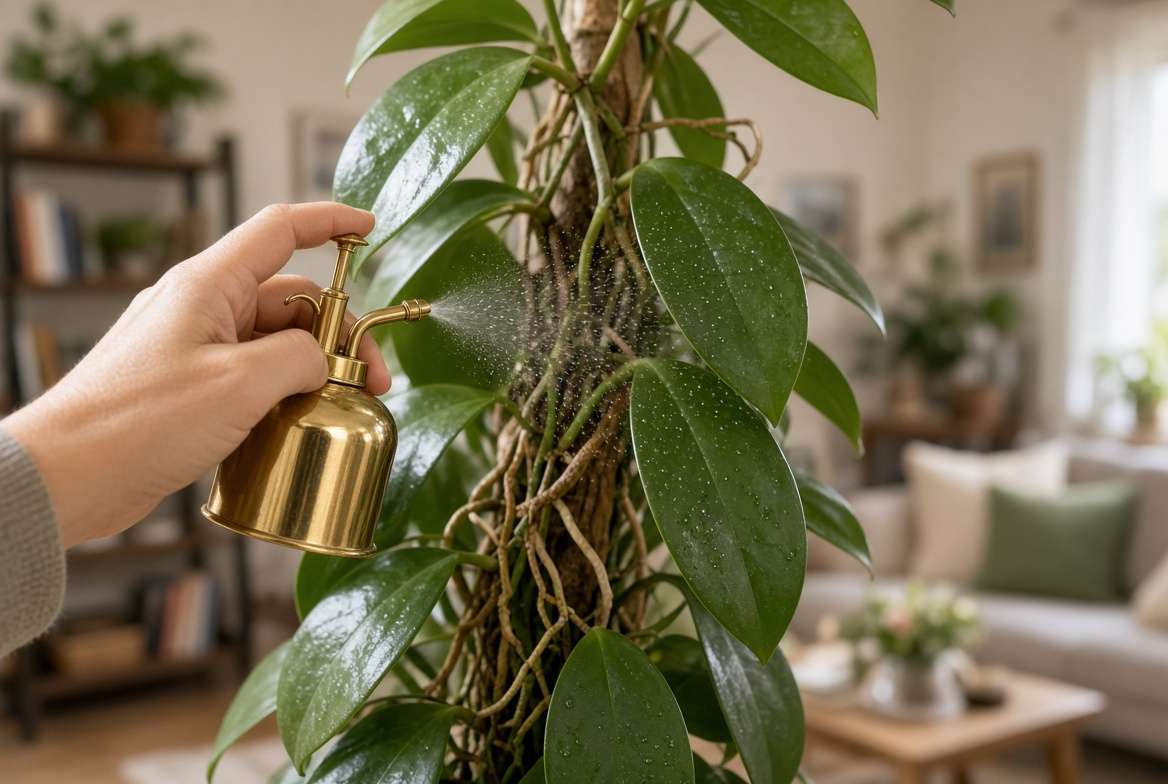
Misting: The secret to a thriving vine is hydrating the aerial roots. Mist the vine, specifically focusing on the aerial roots, daily with filtered or distilled water.
-
Humidifiers: Placing a small room humidifier near your indoor jungle setup is the most reliable way to maintain consistent moisture levels without constantly spraying.
4. The Trellising Secret (How to Trigger Blooms) 🧗♀️
You cannot grow a mature vanilla orchid in a hanging basket. Without a vertical support structure to climb, the plant will simply produce long, thin, weak vines and will never reach the maturity required to flower.
Building the Perfect Support: Provide a sturdy moss pole, a cedar plank, or a wooden trellis as soon as you pot your cutting. As the vine grows, gently tie it to the support using soft plant ties. The aerial roots will eventually grab onto the moss or wood, anchoring the plant just as they would on a tropical tree trunk.
The Downward Loop (Expert Secret!): Here is the industry secret that separates casual growers from actual vanilla bean harvesters: The plant needs physical stress to trigger blooming. Once your vine has climbed to the top of its 5-to-6-foot support (usually taking 2 to 3 years), do not let it keep climbing onto your ceiling! Instead, gently bend the growing tip of the vine downwards and loop it back down the trellis. This looping creates a hormonal shift in the plant. The plant senses that it has “run out of tree” and shifts its energy from vertical growth into reproducing—which means producing the beautiful, pale green-yellow flowers you are waiting for!
The Expert Challenge: Hand-Pollination and Curing 🌸
If you have been patient, provided excellent light, mastered your watering schedule, and looped your vine, you will eventually be rewarded with a cluster of buds. But the work doesn’t stop here. In fact, the most fascinating part is just beginning.
The 12-Hour Blooming Window ⏰
In their native habitat in Central America, vanilla flowers are pollinated by a specific species of Melipona bee. Unless you happen to live in a region where this exact bee resides, you must become the pollinator.
The catch? A vanilla flower opens for just one single morning a year. The bloom typically opens early in the morning and begins to wilt by mid-afternoon. If you do not hand-pollinate the flower during this critical 12-hour window, the bloom will drop off the next day, and no vanilla bean will form. Check your blooming plant every single morning!
The Toothpick Technique: Step-by-Step Pollination 🥢
Hand-pollinating sounds intimidating, but it is actually a simple mechanical process once you understand the flower’s anatomy. You will need a standard wooden toothpick and a gentle touch.
-
Understand the Anatomy: Inside the lip of the flower, you will find the reproductive column. The male part (the anther, holding the pollen) and the female part (the stigma) are separated by a tiny, protective flap of plant tissue called the rostellum.
-
Lift the Flap: Hold the flower gently with one hand. With your other hand, use the toothpick to gently lift the rostellum flap up and out of the way.
-
Press the Pollen: With the flap held back, use your thumb (or the side of the toothpick) to gently but firmly press the anther down onto the sticky stigma.
-
The Wait: You will know within 24 to 48 hours if you were successful. If the pollination worked, the flower will wilt but remain firmly attached to the stem, and the base of the flower will begin to swell. That swelling base is your future vanilla bean!

Harvesting & The Art of Curing 🍂
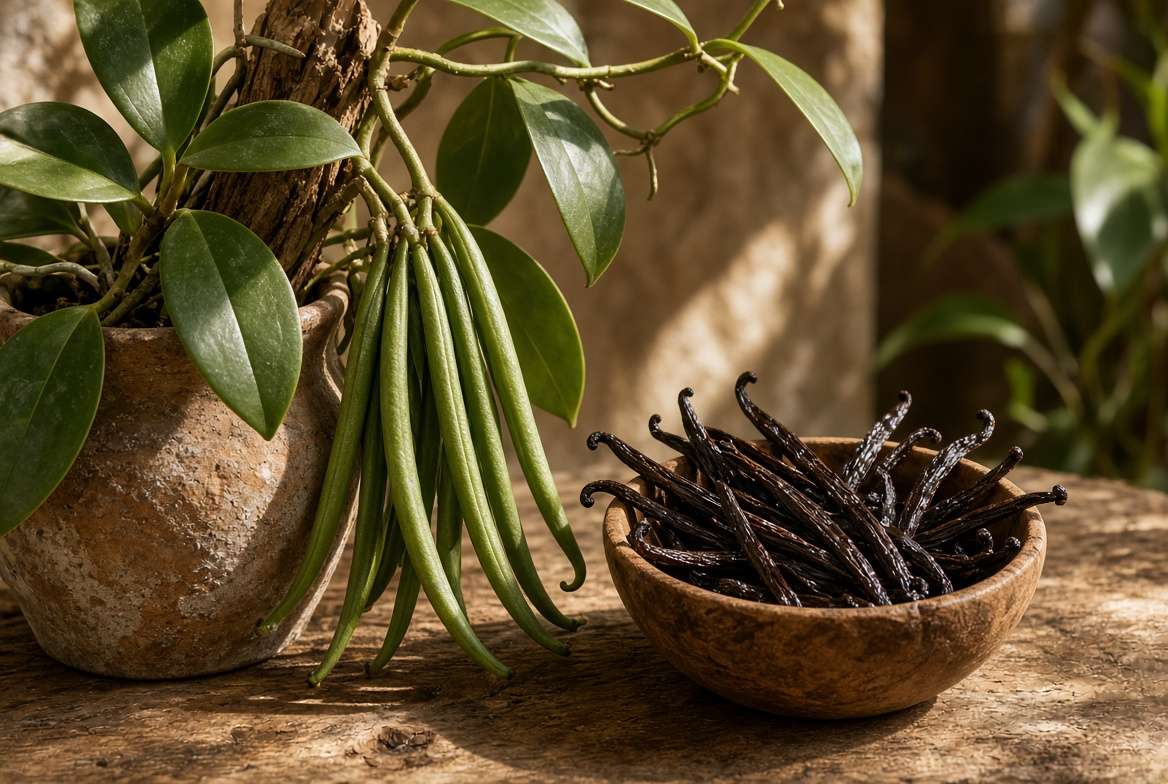
Your successfully pollinated flowers will slowly grow into long, green pods. But patience is required once again—these pods must stay on the vine for 7 to 9 months to fully mature.
When to Harvest: Do not pick the beans while they are entirely green. Wait until the very tip of the pod just starts to turn a pale yellow.
The Curing Process: A freshly harvested, green vanilla bean has absolutely no vanilla flavor or aroma. The iconic scent and taste are entirely the result of the curing process, which develops the organic compound known as vanillin. While commercial farms use large-scale methods, home growers can replicate the traditional process:
-
Blanching: Dip the green pods in hot water (around 150°F / 65°C) for a few minutes to stop the plant’s growth.
-
Sweating: Wrap the warm pods in a blanket or towel and place them in an insulated cooler. Every day, move them to the hot sun for a few hours, then wrap them back up to sweat overnight. This takes about a week to 10 days, during which the pods turn dark brown.
-
Drying: Slowly air-dry the pods in a shaded, well-ventilated area for several weeks until they are supple, leathery, and intensely fragrant.
Troubleshooting & FAQs for Vanilla Orchids 🩺
Even experts run into hiccups. Here are the most common issues you might face and how to fix them.
Preventing Root Rot 🛑
Symptoms: The most common killer of indoor orchids. Look for mushy, brown, foul-smelling roots, combined with yellowing, dropping leaves. The Fix: Immediately unpot the plant. Sterilize a pair of pruners and cut away all the squishy, rotting roots. Repot the plant in a fresh, dry orchid bark mix, and drastically reduce your watering frequency. Ensure the new pot has superior drainage and airflow.
Solving Bloom Failure 🥀
Symptoms: You have a massive, 15-foot vine that is several years old, but it absolutely refuses to put out a single flower spike. The Fix:
-
Check your light: A plant in deep shade will never bloom. Move it to a brighter location.
-
Did you loop it? Remember, vertical vines just keep climbing. You must train the vine to drape downwards to trigger the blooming hormones.
-
Fertilizer: Ensure you are using a balanced, water-soluble orchid fertilizer (like 20-20-20) diluted to half-strength during the spring and summer to provide the energy needed for flowering.
Top FAQs ❓
Q: Can I plant a vanilla bean from the grocery store to grow a vine? A: No! Store-bought vanilla beans have been blanched, sweated, and dried during the curing process. The seeds inside are completely dead. To grow a vanilla bean plant, you must purchase a live cutting or a rooted starter plant from a reputable nursery or orchid grower.
Q: Can it survive outdoors in my climate? A: Unless you live in USDA Hardiness Zones 10b to 11 (such as South Florida, Hawaii, or Puerto Rico), your vanilla orchid must be an indoor houseplant. It will not survive temperatures below 55°F (12°C) or freezing conditions.
Q: Are vanilla bean plants toxic to pets? A: Great news for pet owners! The Vanilla planifolia is non-toxic to cats and dogs according to the ASPCA. However, it’s always best to keep climbing vines out of reach of curious chewers to protect your plant’s precious growth.
Conclusion: Your Journey to Homegrown Vanilla ✨
Growing a vanilla bean plant at home is far more than just standard houseplant care; it is an incredibly rewarding horticultural journey. From carefully formulating the perfect epiphytic potting mix to the thrill of hand-pollinating a bloom that only lasts for a single morning, every step brings you closer to nature.
While it requires patience and a watchful eye, the payoff is immense. There is nothing quite like the pride of slicing open a leathery, deeply fragrant vanilla pod that you nurtured from a small green cutting all the way to your kitchen counter.
So, find a bright window, set up a sturdy moss pole, and start your indoor jungle today!
Have you ever tried growing a vining orchid, or are you preparing to buy your first vanilla cutting? Share your setup, your successes, or your troubleshooting questions in the comments below! We love helping our readers’ indoor jungles thrive. 🌿💚











