How to Use Peat Pellets for Seed Starting Success
If you want to achieve seed starting success, then it’s time to ditch the traditional methods and embrace the efficiency and convenience of using peat pellets. In this post, we’ll walk you through the benefits of using peat pellets for seed starting and provide you with step-by-step instructions on how to achieve maximum success. Say goodbye to the frustration of traditional seed starting and hello to a simpler, more effective method. Let’s dive in and revolutionize your seed starting process!
Table of Contents
ToggleUnderstanding Peat Pellets
A. What Are Peat Pellets?
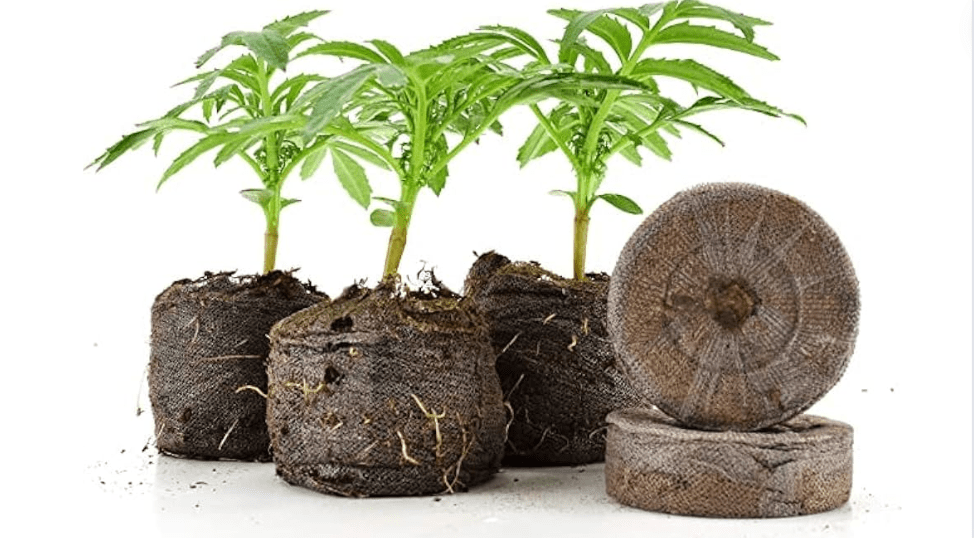
Peat pellets are a game-changer for seed starting. These small, compressed discs are made from peat moss and other organic materials, providing the perfect environment for seed germination. Not only do they save you time and space, but they also eliminate the need for messy soil and pots. Plus, they are biodegradable, making them an eco-friendly choice for your gardening needs.
B. Benefits of Using Peat Pellets
Using peat pellets offers a multitude of benefits for your seed starting process. Firstly, they provide the ideal environment for seed germination, promoting healthy and vigorous growth. They also save you precious time and space, as they do not require messy pots or soil. Additionally, peat pellets are eco-friendly, as they are biodegradable and made from organic materials. This makes them a sustainable and responsible choice for your gardening needs. Overall, using peat pellets is a convenient, efficient, and environmentally-friendly way to kickstart your seeds and ensure a successful garden.
C. Environmental Considerations
Furthermore, peat pellets help to conserve water and reduce the need for frequent watering, making them a cost-effective and efficient option. They also eliminate the risk of transplant shock, as the entire pellet can be planted directly into the ground, reducing stress on delicate seedlings. By choosing peat pellets, you are not only investing in the health and success of your plants, but also in the well-being of the environment. So, why settle for traditional seed starting methods when you can reap the benefits of using peat pellets? Make the switch today and experience the convenience, efficiency, and eco-friendly advantages for yourself. Your garden and the planet will thank you!
Choosing the Right Seeds for Peat Pellets
A. Types of Seeds Suited for Peat Pellets
When it comes to choosing the right seeds for peat pellets, the options are virtually endless. From flowers to vegetables to herbs, peat pellets are suitable for a wide variety of seeds. Whether you’re looking to start your garden from scratch or transplant seedlings, peat pellets are the perfect option for seed starting.
Not only do peat pellets provide a nutrient-rich environment for seeds to germinate and grow, but they also offer the convenience of easy transplanting. So whether you’re a seasoned gardener or just starting out, peat pellets are a versatile and eco-friendly choice for all of your seed starting needs.
So don’t limit yourself to traditional seed varieties – let peat pellets expand your gardening horizons and experience the benefits for yourself. Your plants, your garden, and the environment will thank you for making the switch to peat pellets. Happy planting!
B. Selecting High-Quality Seeds
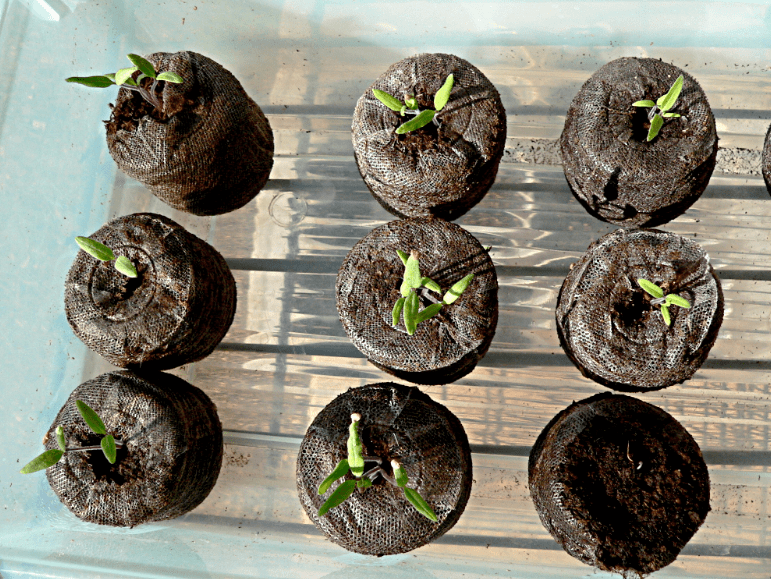
When it comes to starting your garden, using peat pellets is the clear choice for success. These remarkable little pellets provide the perfect environment for seeds to thrive and grow, giving your garden a strong and healthy start from the very beginning. And the convenience of easy transplanting means you can start your seeds indoors and then seamlessly move them outside when the time is right.
Whether you’re an experienced gardener or just beginning, peat pellets are the perfect option for all of your seed starting needs. They offer a nutrient-rich and eco-friendly solution that will benefit your plants, your garden, and the environment. Don’t limit yourself to traditional seed starting methods – make the switch to peat pellets and experience the incredible results for yourself. Your garden will thank you for it! Happy planting!
Preparing Peat Pellets for Planting
A. Hydrating the Peat Pellets
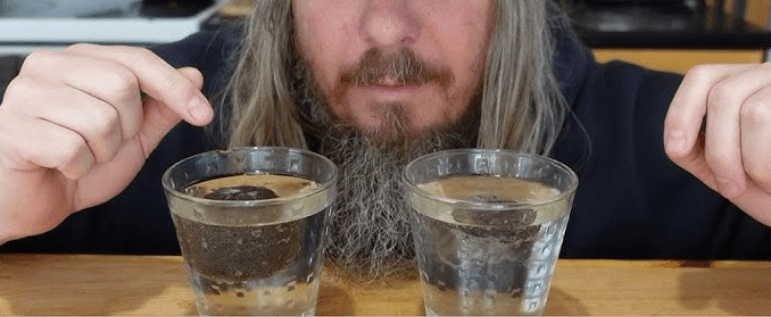
Hydrating the Peat Pellets is a simple and straightforward process. Just place the pellets in a tray, add water, and watch as they expand and become ready for planting. It’s quick, easy, and mess-free, making it the perfect option for anyone looking to start their seeds indoors. With peat pellets, you can ensure that your seeds have the best possible start, giving them the opportunity to thrive and grow into healthy, strong plants. So why wait? Make the switch to peat pellets and give your garden the care and attention it deserves. You won’t regret it!
B. Setting Up the Seed Tray
Setting Up the Seed Tray is a quick and easy process when using peat pellets. The first step is to choose a seed tray that has individual cells for each seed. Place the pellets in the tray, making sure to leave enough space between each one for the seeds to grow. Next, add water to the pellets and watch as they expand and become ready for planting. This method is clean and mess-free, making it a convenient option for anyone looking to start their seeds indoors.
Using peat pellets for seed starting is beneficial because they provide a healthy environment for seeds to grow. The pellets retain moisture and provide a stable environment for seed germination, ensuring that your seeds have the best possible start. This will give them the opportunity to thrive and grow into healthy, strong plants.
So why wait? Make the switch to peat pellets and give your garden the care and attention it deserves. You won’t regret it! The convenience, mess-free process, and the benefits to your plants make peat pellets the perfect option for starting seeds. Try them out and see the difference for yourself!
C. Common Mistakes to Avoid
When it comes to starting your garden, don’t make the mistake of using traditional seed-starting methods. Peat pellets provide the ideal environment for your seeds to germinate and grow into strong, vibrant plants. Don’t risk stunting your garden’s potential by using inferior methods. Make the switch to peat pellets today and watch your garden flourish like never before. You won’t regret it!
Sowing Seeds in Peat Pellets
A. Step-by-Step Planting Guide
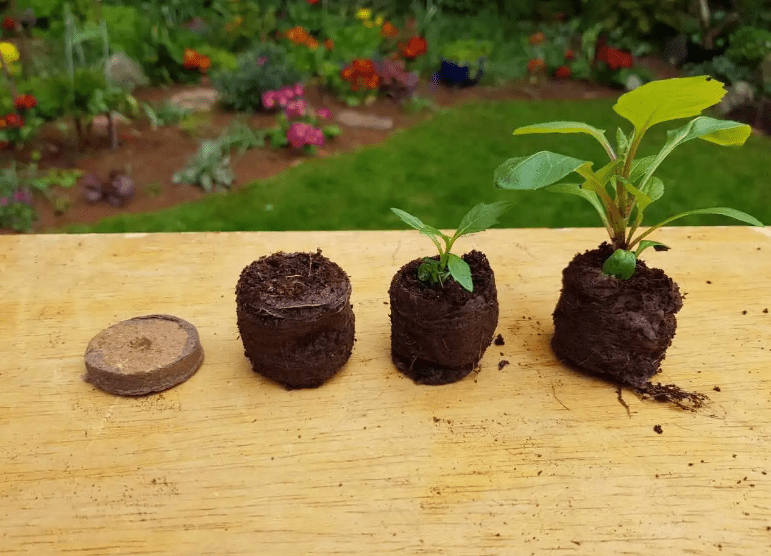
1. Moisten the pellets: Place the Peat discs in a tray and add warm water to expand them. Allow them to absorb the water and swell up.
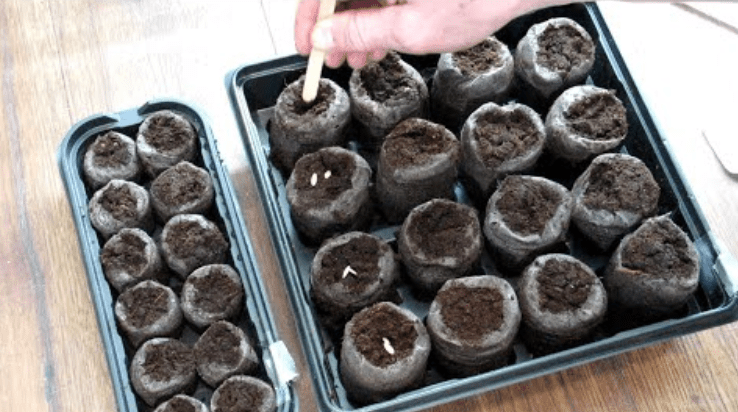
2. Plant the seeds: Once the pellets have expanded, place a few seeds in the center of each pellet and cover them lightly with soil.
3. Provide proper care: Place the tray in a warm, sunny location and keep the pellets moist by watering them regularly. Keep an eye on the seeds and ensure they have the proper conditions for germination.
4. Transplant seedlings: Once the seedlings have developed a few sets of true leaves, they are ready to be transplanted into larger pots or directly into your garden. Gently remove the seedlings from the pellets and plant them in their new location.
By following these simple steps and using Peat discs, you can achieve maximum success in starting your seeds and growing healthy, strong plants. Don’t let traditional methods hold you back – make the switch to peat pellets and set your garden up for success!
B. Labeling and Organization
Labeling and Organization are key to successful seed starting with peat pellets. When using Peat discs, it’s important to label each pellet with the type of seed you’ve planted to avoid any confusion once they start germinating. This will help you keep track of the progress of each seed and ensure that you are giving them the proper care and attention they need. Additionally, organizing your seed trays and keeping track of which seeds are planted where will make the transplanting process much easier when the time comes. By staying organized and labeling your Peat discs, you can set yourself up for success in your seed starting journey. With the right care and attention, Peat pods can help you achieve maximum success in starting your seeds and growing healthy, strong plants. So say goodbye to traditional methods and make the switch to Peat pods – your garden will thank you for it!
C. Covering Seeds Appropriately
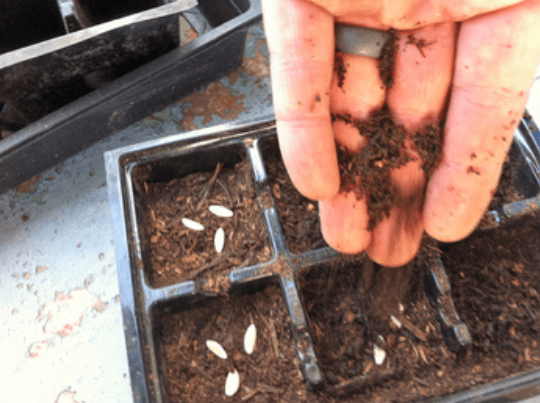
When it comes to starting seeds, covering them appropriately is key to their success. Using peat pellets for seed starting can help you achieve maximum success, but it’s important to cover the seeds correctly. After placing your seeds on top of the peat pellet, gently press them into the pellet to ensure good seed-to-soil contact. Then, lightly cover the seeds with a thin layer of soil or vermiculite. This will provide the seeds with the darkness and moisture they need to germinate. Make sure not to bury the seeds too deep, as they may struggle to reach the surface. By covering your seeds appropriately, you can set them up for healthy germination and strong growth. So, ditch the traditional methods and give Peat pods a try – your seedlings will thank you for it!
D. Tools and Accessories
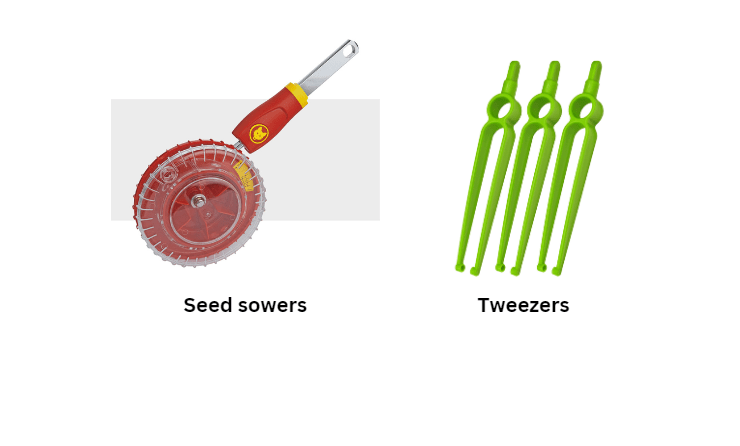
1. Recommended tools for precise sowing (e.g., seed sowers, tweezers)
Invest in the right tools for the job and take your sowing game to the next level! With precision tools like seed sowers and tweezers, you can ensure that each and every seed is placed exactly where it needs to be. No more worrying about uneven spacing or overcrowding. These tools will help you achieve the perfect sowing depth and placement, setting your seeds up for success right from the start. Don’t settle for guesswork when you can sow with precision – your plants will thank you for it!
Creating Optimal Conditions for Germination
A. Light and Temperature Requirements
When it comes to creating optimal conditions for germination, light and temperature are absolutely essential. Providing the right amount of light and maintaining a consistent temperature will give your seeds the best chance of success. By ensuring that your seeds have access to the correct amount of light and are kept at the ideal temperature, you are setting the stage for strong and healthy germination. Don’t leave it up to chance – take control of these crucial environmental factors and watch your seeds thrive!
B. Maintaining Moisture
In addition to light and temperature, maintaining moisture is another key factor in creating optimal conditions for germination. Without enough moisture, seeds will struggle to germinate and may even die before they have a chance to grow. By providing the right amount of water and ensuring the soil remains consistently moist, you are giving your seeds the best possible chance of success. Don’t risk leaving your seeds to dry out or drown in excess water – take the time to monitor and control the moisture levels and give your seeds the best start in life.
C. Troubleshooting Germination Issues
Don’t let germination issues hinder the growth of your seeds – take the time to troubleshoot and find solutions to ensure the success of your plants. Whether it’s adjusting the moisture levels, providing the right amount of light and temperature, or addressing any other potential issues, taking proactive steps to troubleshoot germination problems can make all the difference in the success of your garden. Don’t leave it up to chance – take control of these crucial environmental factors and watch your seeds thrive! By actively addressing any issues that arise, you can ensure the best possible conditions for germination and give your seeds the best chance of success. So don’t wait – take action and troubleshoot any germination issues to ensure a successful and thriving garden.
Nurturing Seedlings in Peat Pellets
A. Post-Germination Care
Take the time to nurture your seedlings in peat pellets to ensure their healthy growth and development. Once your seeds have germinated, it’s crucial to provide them with the proper care to support their growth. Keep a close eye on the moisture levels, providing the right amount of water to keep the Peat pods hydrated but not waterlogged. Consider adjusting the amount of light and temperature to ensure optimal conditions for your seedlings. Additionally, providing the appropriate nutrients and fertilizers can help promote strong and healthy growth. By taking the time to nurture your seedlings in Peat pods you can set them up for success and ensure a bountiful garden. So don’t neglect post-germination care – give your seedlings the attention they need to thrive and flourish.
B. Removing the Humidity Dome
It is absolutely essential to remove the humidity dome once your seeds have germinated. Keeping the dome on for too long can lead to mold and mildew growth, which can harm your seedlings. By removing the dome, you allow for proper air circulation and prevent the build-up of excess moisture. This step is crucial in ensuring the health and vitality of your seedlings as they continue to grow. So don’t hesitate – take off that dome and give your seedlings the fresh air they need to thrive!
C. Common Seedling Problems
As a gardener, it’s important to be aware of common seedling problems so you can address them quickly and effectively. From damping off to inadequate light and nutrient deficiencies, there are a myriad of issues that can arise as your seedlings begin to grow. By familiarizing yourself with these potential problems, you can take proactive measures to prevent them and ensure the successful growth of your plants. Don’t let common seedling problems hinder your gardening efforts – arm yourself with knowledge and stay ahead of the game!
Transplanting Seedlings from Peat Pellets
A. Determining Transplant Readiness
Transplanting your seedlings from Peat pods is a crucial step in their growth journey. It’s important to carefully assess the readiness of your seedlings before making the move. Look for strong, healthy root systems and sturdy stems to indicate that they are ready for transplanting. By waiting until your seedlings are sufficiently established, you can help ensure their successful transition to their new environment. Don’t rush this process – take the time to evaluate your seedlings and give them the best chance at thriving in their new home!
B. Hardening Off Seedlings
It’s essential to harden off your seedlings before transplanting them into the outdoor garden. This process helps acclimate your seedlings to the outdoor environment, preventing shock and stress. Exposing them to gradually increasing amounts of sunlight and outdoor conditions allows them to build up resistance and strength. By taking the time to harden off your seedlings, you are setting them up for success in their new outdoor home. Don’t risk transplanting your tender seedlings without properly hardening them off – it’s a crucial step in their growth process!
C. Transplanting to the Garden or Larger Containers
When it comes to transplanting your seedlings, it’s important to do it at the right time and in the right way. Transplanting them into the garden or larger containers allows them to continue growing and flourishing in a more spacious environment. It’s a crucial step in their development and ensures that they have the space and resources they need to thrive.
By transplanting your seedlings, you’re giving them the best chance at success. It allows their roots to spread out and access more nutrients, ultimately leading to healthier and stronger plants. Don’t neglect this important step in the growth process – take the time to transplant your seedlings into the garden or larger containers and watch them thrive!
In conclusion, using peat pellets for seed starting is a game changer. It’s a convenient, mess-free, and effective way to start your seeds and ensure successful germination. The step-by-step instructions provided in this post will guide you through the process and help you achieve maximum success in your seed starting endeavors. Say goodbye to traditional methods and embrace the efficiency and convenience of Peat pods for a bountiful garden. Try it out and see the difference for yourself!
Frequently Asked Questions (FAQs)
Peat pellets are small discs made of compressed peat moss that expand when soaked in water. They provide a convenient and effective way to start seeds for gardening.
To use peat pellets, simply place them in a tray or container and add water. Once they have expanded, plant your seeds in the center of the pellet and keep them moist until the seeds germinate.
Peat pellets already contain some nutrients, but you can add a diluted fertilizer solution after the seeds have germinated to provide additional nourishment for the seedlings.
Yes, peat pellets are biodegradable and can be planted directly into the soil once the seedlings are ready for transplanting. The peat pellets will break down and provide organic matter to the soil.
Peat pellets offer several advantages, including convenience, consistent moisture retention, and minimal transplant shock for seedlings. They are a great option for beginners and experienced gardeners alike.
Peat pellets typically expand within a few minutes of being soaked in water. Once they have fully expanded, excess water can be drained from the tray or container.
While peat pellets can be reused, it is important to sterilize them before using them again to prevent the spread of diseases or pests. Alternatively, you can compost the used peat pellets.
Peat pellets are available at garden centers, nurseries, and online retailers. Look for high-quality peat pellets from reputable brands for the best results in seed starting.
