
Imagine walking onto your sunny balcony or stepping into your backyard garden and plucking handfuls of vibrant, fiery red Thai chilies straight from a healthy Thai chili pepper plant. That intense heat and authentic flavor transforming your homemade Thai curries, stir-fries, and sauces — all grown by you. If you’ve ever wanted to grow your own spicy peppers but felt overwhelmed by the process, this comprehensive guide is for you.
The Thai chili pepper plant (Capsicum annuum), also known as Bird’s Eye chili, is a compact, high-yielding powerhouse beloved by home gardeners and cooking enthusiasts worldwide. With proper care, one plant can produce hundreds of peppers over a season. In this ultimate Thai chili pepper plant care guide, you’ll discover everything needed to go from seed to bountiful harvest — even if you’re a complete beginner or gardening in limited space.
With over 12 years of hands-on experience growing edible plants, including dozens of chili varieties in different climates, I’ve refined the techniques that deliver consistent success. Whether you’re dealing with container gardening challenges, pest issues, or simply want maximum yields, this guide provides practical, proven solutions. Let’s turn your Thai chili dreams into reality! 🌱✨
Understanding the Thai Chili Pepper Plant 🌶️
Botanical Profile and Characteristics
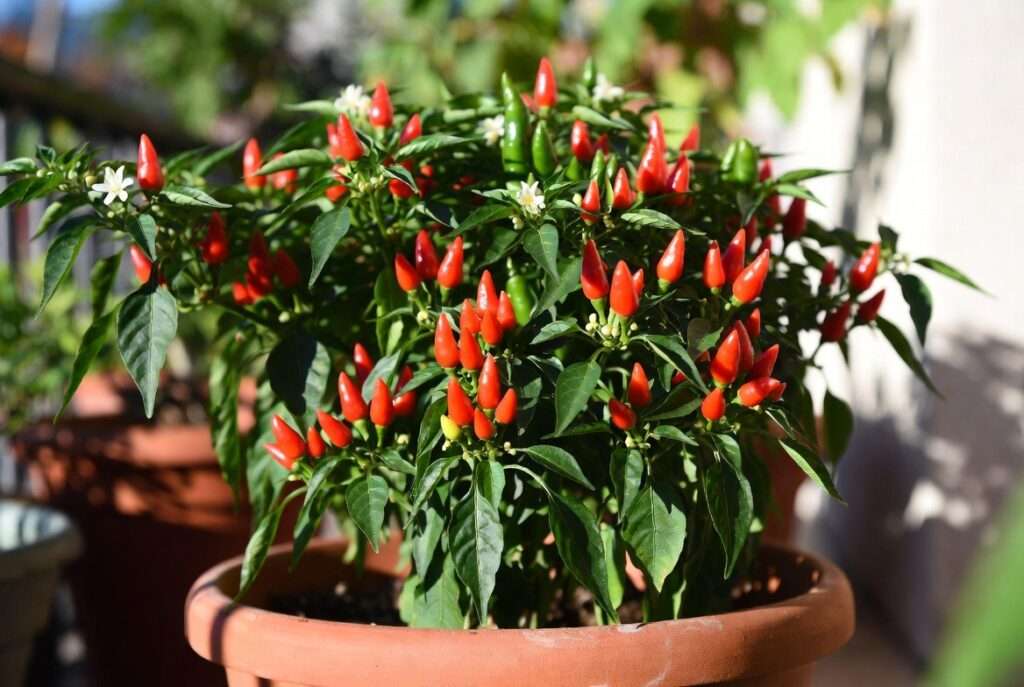
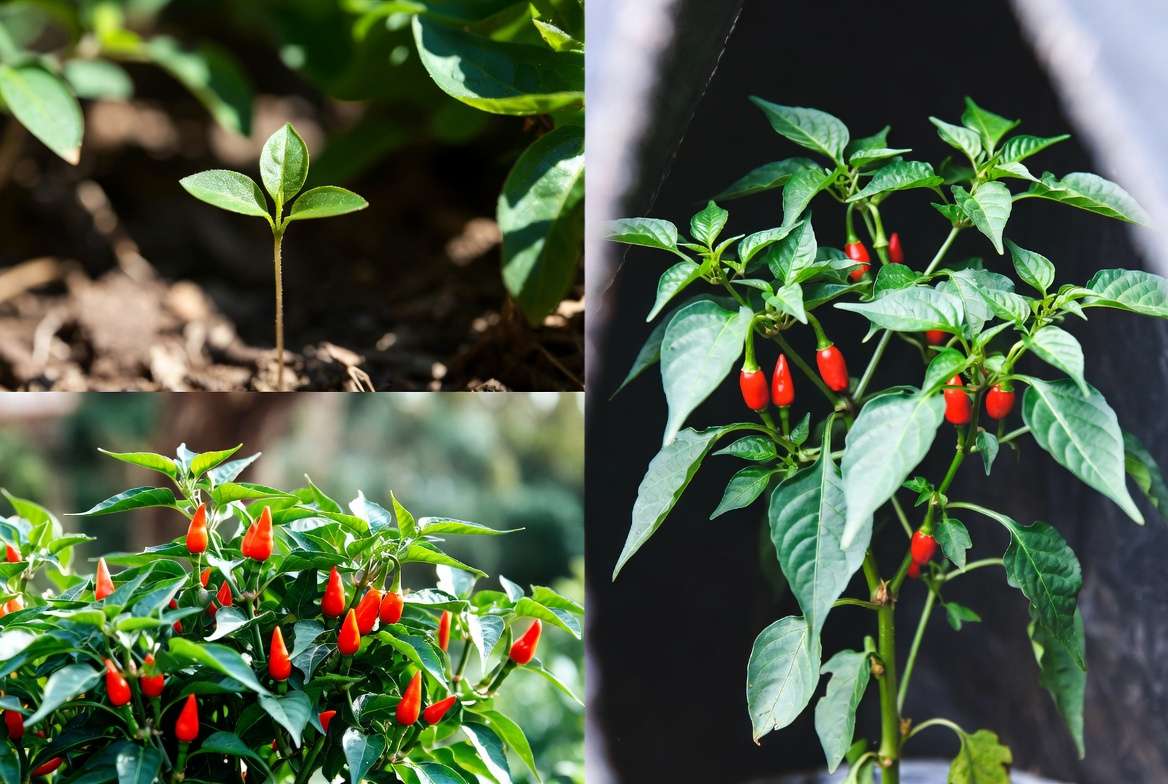
The Thai chili pepper plant is a perennial in warm climates but often grown as an annual in temperate zones. It typically reaches 2–4 feet tall with a bushy habit, making it ideal for pots and small gardens. Its slender, upright fruits start green and ripen to bright red (or sometimes orange), packing a serious Scoville heat rating of 50,000–100,000 units — significantly hotter than a jalapeño.
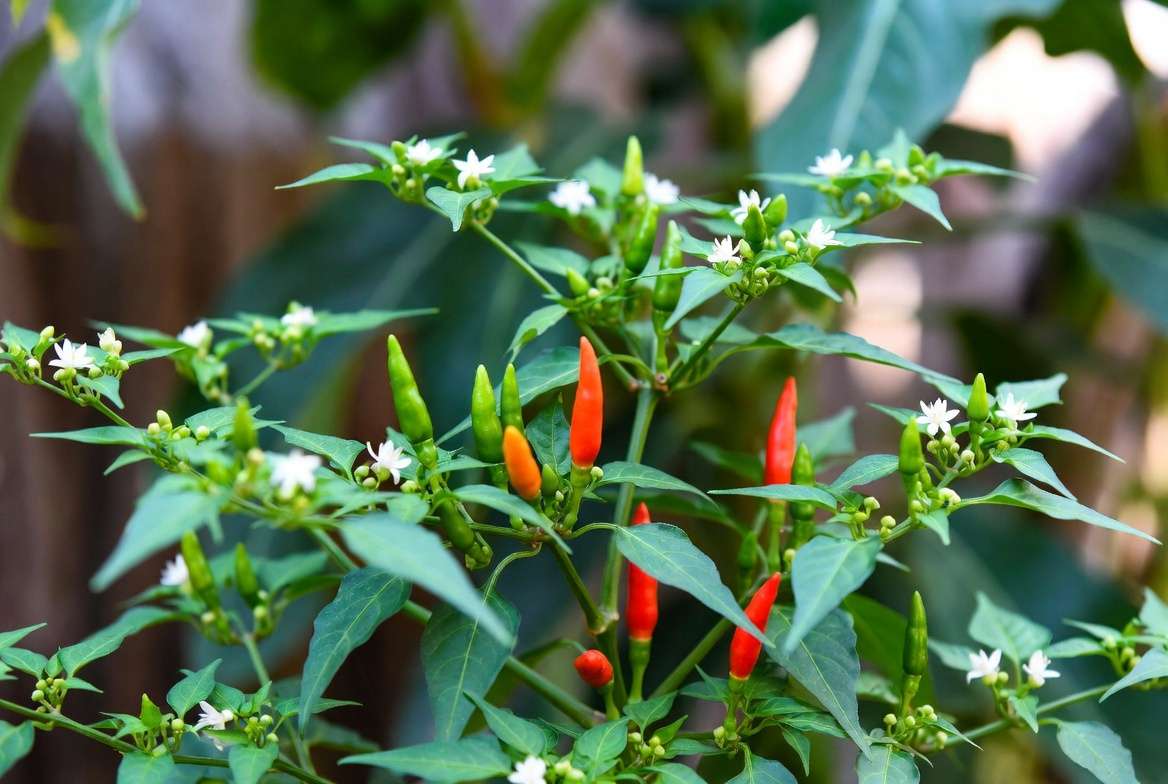
The plant features glossy green leaves and small white flowers that develop into peppers. Its compact size and ornamental appeal also make it a beautiful addition to patios and windowsills.
Why Grow Thai Chili Peppers?
Growing your own Thai chili pepper plants offers numerous benefits:
- Freshness and Flavor: Homegrown peppers taste far superior to store-bought ones.
- Cost Savings: One healthy plant can supply your kitchen for months.
- Ornamental Value: The colorful fruits look stunning in any garden.
- Health Benefits: Chilies are rich in vitamins A and C, antioxidants, and capsaicin, which may boost metabolism.
- Satisfaction: There’s nothing quite like harvesting your own spicy produce.
Compared to milder peppers like bell or banana varieties, Thai chilies bring authentic heat that elevates Asian and fusion cuisines. They’re also more resilient in hot weather than many other pepper types.
Popular Thai Chili Varieties
- Thai Hot: Classic variety with extra fiery pods.
- Bird’s Eye: Small, potent peppers widely used in Southeast Asian dishes.
- Thai Red Chili: Known for quick maturation and heavy fruiting.
Choose varieties suited to your growing zone and space for best results.
Choosing the Right Starting Method for Your Thai Chili Pepper Plant
Growing from Seeds vs. Buying Seedlings
Starting from seeds gives you more variety options and is more economical, but it requires patience (6–8 weeks to transplant size). Buying seedlings from nurseries offers a faster start, especially in shorter growing seasons.
For beginners, I often recommend starting with high-quality seedlings if this is your first Thai chili pepper plant. Once confident, move to seeds for greater control and satisfaction.
Best Time to Plant (Seasonal Guide by USDA Zones)
- Zones 9–11: Direct sow or transplant after last frost; enjoy year-round potential with protection.
- Zones 5–8: Start seeds indoors 8–10 weeks before last frost date.
- Ideal soil temperature for germination: 75–85°F (24–29°C).
Track your local frost dates using reliable extension service resources for precise timing.
Recommended Seeds and Where to Source Quality Plants
Look for organic, heirloom, or hybrid seeds from trusted suppliers like Burpee, Baker Creek, or local garden centers. Fresh seeds have higher germination rates — always check the packet date.
Pro Tip: Soak seeds in warm water for 12–24 hours before planting to speed up germination. 🌱
Planting Your Thai Chili Pepper Plant Like a Pro 🪴
Ideal Soil Mix and Container Choices
Thai chili pepper plants thrive in well-draining, nutrient-rich soil with a pH of 6.0–6.8. A great homemade mix includes:
- 50% high-quality potting soil
- 30% compost
- 20% perlite or vermiculite for drainage
For containers, choose pots at least 12–18 inches in diameter with drainage holes. Terracotta or fabric grow bags work excellently as they prevent root circling and allow good airflow.
Step-by-Step Planting Instructions (Indoors & Outdoors)
- Fill containers with moistened soil mix.
- Plant seeds ¼ inch deep, or transplant seedlings at the same depth they were growing.
- Space plants 18–24 inches apart outdoors.
- Water gently and place in a warm, bright location.
- Use a humidity dome or plastic wrap for seedlings until they sprout.
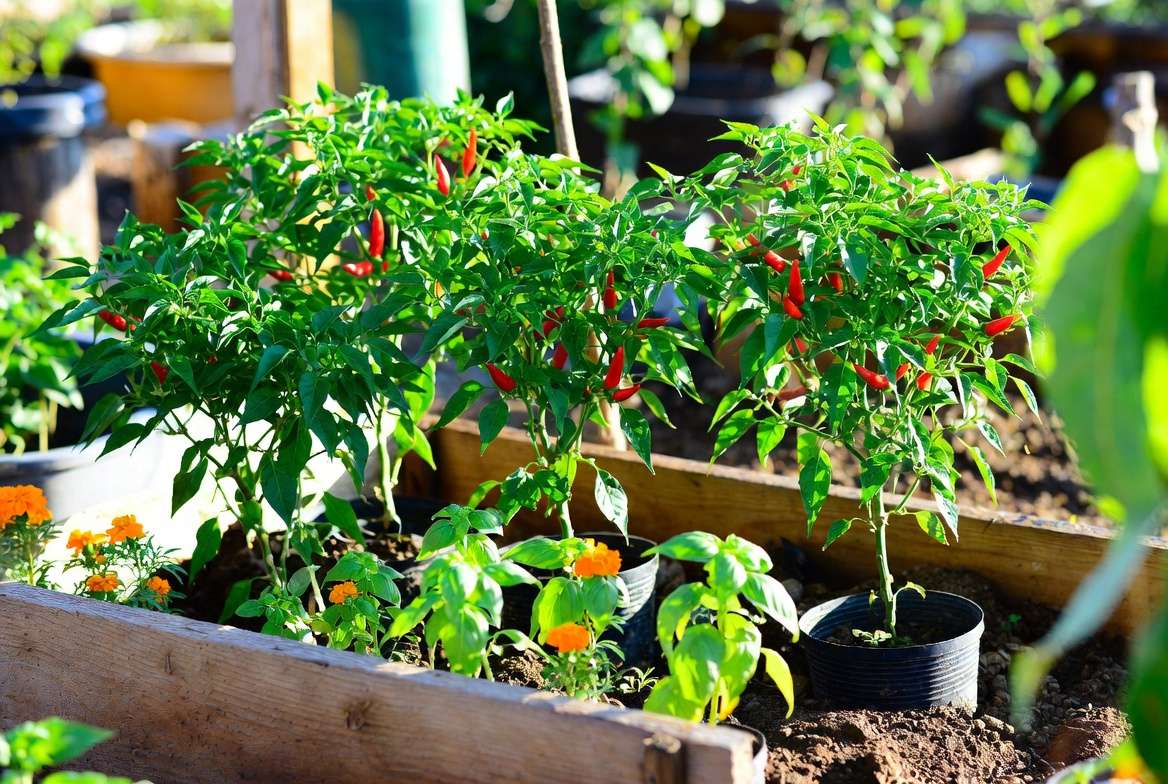
Spacing, Companion Planting, and Garden Layout Ideas
Companion plants like basil, marigolds, and onions help deter pests naturally. Avoid planting near fennel or brassicas, which can compete or attract unwanted insects.
In raised beds, follow a grid pattern for efficient space use. Vertical supports or cages help keep heavy fruiting branches stable.
Essential Care Requirements for Thriving Thai Chili Pepper Plants
Mastering daily and weekly care is the secret to transforming an average Thai chili pepper plant into a prolific producer. Here’s exactly what your plants need to flourish.
Sunlight Needs – How Much Light is Enough? ☀️
Thai chili pepper plants are sun lovers and require 6–8 hours of direct sunlight daily for optimal growth and fruit production. Insufficient light leads to leggy plants with few flowers.
- Outdoors: Choose a south-facing spot with full sun.
- Indoors/Balconies: Use grow lights (full-spectrum LED, 12–16 hours per day) if natural light is limited. Position lights 6–12 inches above the plants and adjust as they grow.
- Tip from Experience: In hotter climates (above 90°F/32°C), provide afternoon shade to prevent blossom drop and sunscald on fruits.
Watering Schedule – Avoid Common Mistakes
Consistency is key, but overwatering is one of the most common killers of Thai chili pepper plants.
- Water deeply when the top 1–2 inches of soil feels dry (usually every 2–4 days depending on weather).
- Early morning watering reduces evaporation and fungal issues.
- Use room-temperature water to avoid shocking roots.
- Excellent drainage is non-negotiable — soggy soil quickly causes root rot.
Pro Insight: During flowering and fruiting stages, slightly reduce watering stress (while still keeping soil moist) to encourage hotter peppers, as mild drought stress boosts capsaicin production.
Soil, Fertilizer, and Nutrient Management
Thai chilies are heavy feeders. Start with rich soil, then supplement:
- Vegetative Stage (first 4–6 weeks after transplant): Balanced fertilizer (e.g., 10-10-10) or fish emulsion every 2 weeks.
- Flowering & Fruiting: Switch to a higher phosphorus and potassium formula (5-10-10 or tomato/vegetable fertilizer) to support blooms and peppers.
- Organic options: Compost tea, worm castings, or kelp meal work wonderfully.
Monitor leaves for deficiencies:
- Yellowing older leaves → Nitrogen deficiency
- Purple stems or poor fruit set → Phosphorus shortage
I recommend soil testing annually for long-term success.
Temperature, Humidity, and Climate Considerations
- Ideal daytime temperature: 70–85°F (21–29°C)
- Nighttime: Above 60°F (15°C)
- High humidity (50–70%) is beneficial but ensure good airflow to prevent disease.
In cooler climates, use row covers or bring pots indoors when temperatures drop. Overwintering is possible — more on that later.
Pruning Techniques for Bushier Growth and Higher Yields ✂️
Pruning encourages branching and more flower sites.
- When the plant reaches 12 inches tall, pinch the top growing tip.
- Remove lower leaves that touch the soil.
- Thin out overcrowded branches for better air circulation.
- Stake or cage taller varieties to support heavy fruit loads.
In my experience, properly pruned Thai chili pepper plants can yield 2–3 times more peppers than unpruned ones.
Advanced Growing Techniques for Maximum Harvests
Pollination Tips (Hand Pollination for Indoor Plants)
Thai chili flowers are self-pollinating but benefit from help indoors. Gently shake plants daily or use a small paintbrush to transfer pollen between flowers. This simple step dramatically increases fruit set.
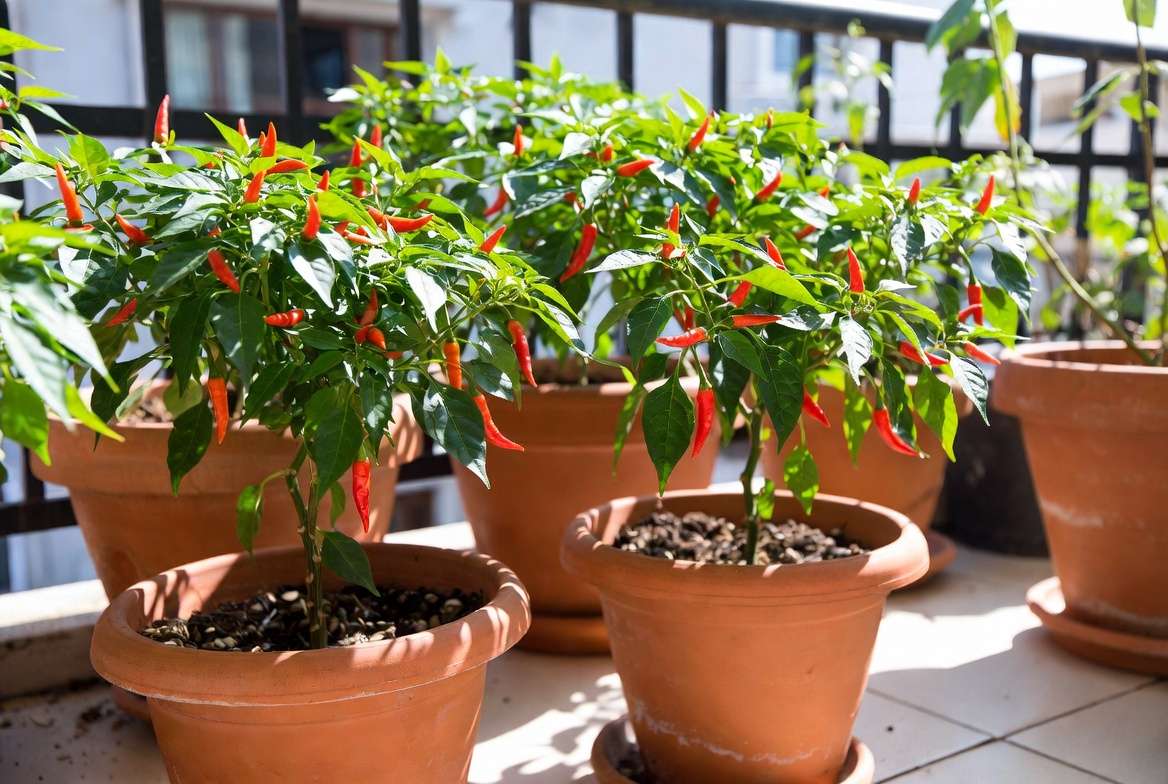
Container Growing Secrets for Balconies & Small Spaces
Container-grown Thai chili pepper plants can be just as productive as in-ground ones when cared for correctly. Use high-quality potting mix, fertilize more frequently (containers leach nutrients faster), and rotate pots for even sun exposure. Fabric pots are excellent because they air-prune roots and stay cooler.
Vertical Gardening and Support Systems
Train plants on trellises or use tomato cages. This saves space and keeps fruits off the ground, reducing rot and pest access.
Extending the Growing Season (Greenhouses, Cloches, Overwintering)
- Use cloches or cold frames in spring/fall.
- In frost-prone areas, bring plants indoors before temperatures drop below 50°F. They can live for 2–3 years with proper care, producing earlier harvests the following season.
- Reduce watering and fertilizer during winter dormancy, then gradually reintroduce them to light and warmth in spring.
Common Problems with Thai Chili Pepper Plants & Expert Solutions
Even experienced gardeners face challenges. Here’s how to diagnose and fix the most frequent issues.
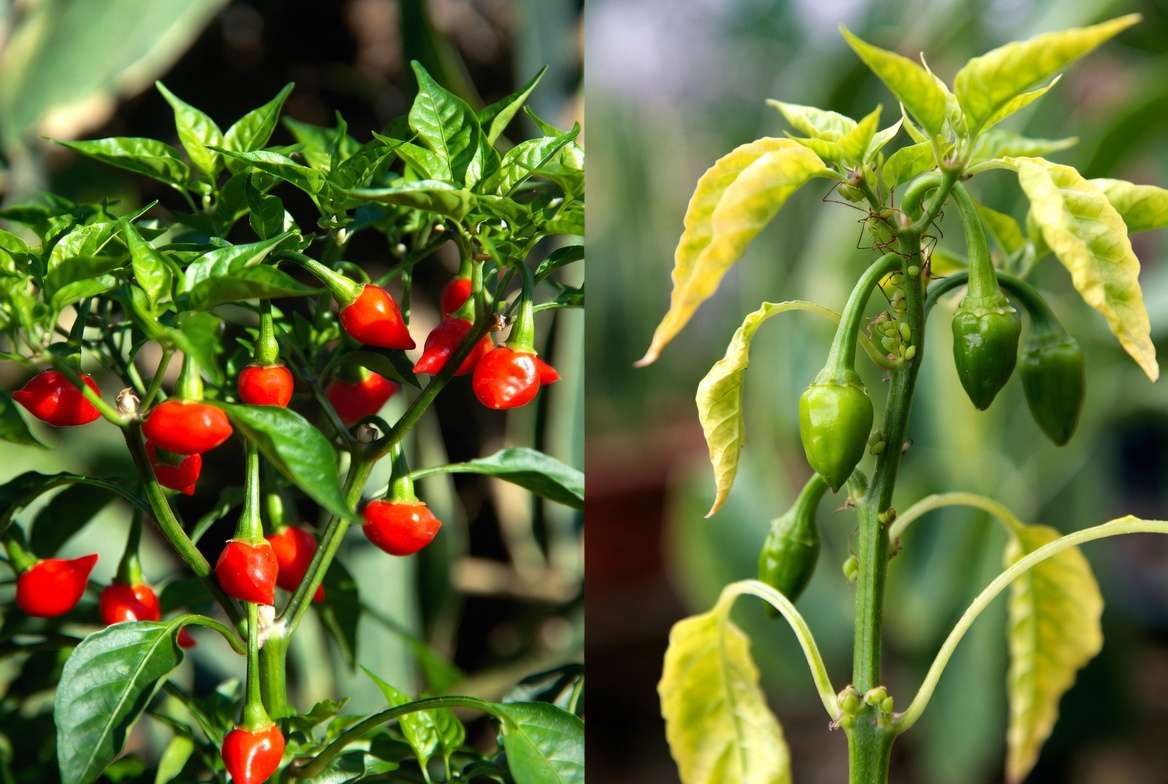
Yellow Leaves, Wilting, and Nutrient Deficiencies
Yellowing can stem from overwatering, underwatering, or nutrient imbalance. Check soil moisture first. For deficiencies, apply a balanced organic fertilizer and adjust pH if needed. Healthy Thai chili pepper plants have deep green, vibrant foliage.
Pests (Aphids, Spider Mites, Whiteflies) – Natural & Organic Controls 🐛
- Aphids: Blast with water or use neem oil/insecticidal soap.
- Spider Mites: Increase humidity and apply horticultural oil.
- Prevention: Companion planting with marigolds and regular inspection of leaf undersides.
Avoid broad-spectrum chemicals that harm beneficial insects and pollinators.
Diseases (Blossom End Rot, Powdery Mildew, Bacterial Spot)
- Blossom End Rot: Often caused by calcium deficiency or irregular watering. Add crushed eggshells or gypsum to soil and maintain consistent moisture.
- Powdery Mildew: Improve airflow and apply a baking soda spray (1 tbsp baking soda + 1 tsp soap per quart of water).
- Bacterial Spot: Remove affected leaves and avoid overhead watering.
Early intervention is crucial — remove diseased parts promptly and sanitize tools.
No Flowers or Fruit? Troubleshooting Flowering & Fruit Set
Common causes include:
- Too much nitrogen fertilizer (promotes leaves over flowers)
- Extreme temperatures
- Lack of pollination
- Insufficient sunlight
Adjust care accordingly, and most plants respond within 1–2 weeks.
Quick Troubleshooting Table (for easy reference):
| Symptom | Likely Cause | Solution |
|---|---|---|
| Yellow leaves | Overwatering/Nitrogen lack | Check drainage, fertilize |
| No flowers | Excess nitrogen/poor light | Switch fertilizer, add sunlight |
| Fruit drop | Temperature stress | Provide shade or protection |
| Small peppers | Insufficient potassium | Use fruiting fertilizer |
Harvesting, Preserving, and Enjoying Your Thai Chilies
When and How to Harvest for Best Flavor and Heat
Harvest Thai chilies when they turn fully red for maximum heat and sweetness. Use sharp scissors to cut stems cleanly — pulling can damage the plant. Wear gloves! The capsaicin oils can irritate skin.
Regular harvesting encourages the Thai chili pepper plant to keep producing new flowers and fruits.
Successive Harvesting Techniques for Continuous Yield
Pick peppers as they ripen throughout the season. A single healthy plant can yield 100–300+ chilies over several months in ideal conditions.
Drying, Freezing, Pickling, and Making Chili Flakes/Powder
- Drying: Air-dry on strings or use a dehydrator at low temperature.
- Freezing: Whole or chopped in airtight bags.
- Pickling: Quick vinegar brine for refrigerator pickles.
- Homemade Chili Flakes: Dry and crush for versatile seasoning.
Recipe Idea: Spicy Thai Chili Oil — Infuse dried chilies in warm oil with garlic for a delicious condiment that lasts months.
Seasonal Care Calendar for Thai Chili Pepper Plants 📅
A structured calendar helps ensure nothing is overlooked throughout the growing cycle.
Early Spring (Indoor Start)
- Start seeds indoors 8–10 weeks before last frost.
- Provide warmth (heat mat if needed) and strong light.
- Begin fertilizing lightly once true leaves appear.
Late Spring / Early Summer (Transplanting)
- Harden off seedlings for 7–10 days.
- Transplant into final containers or garden beds after frost risk passes.
- Mulch around plants to retain moisture and suppress weeds.
Mid-Summer (Peak Growth & Fruiting)
- Consistent watering and feeding every 1–2 weeks.
- Prune lightly and monitor for pests daily.
- Harvest regularly as peppers ripen.
Late Summer / Early Fall
- Continue harvesting and reduce nitrogen.
- Prepare for cooler nights with protection if needed.
- Save seeds from your best-performing plants for next season.
Winter (Overwintering or Rest)
- Move indoors to a sunny windowsill or under grow lights.
- Reduce watering and stop fertilizing until new growth resumes in spring.
- Prune back leggy branches for a compact shape.
Adjust this calendar based on your specific climate zone for best results.
Eco-Friendly and Sustainable Growing Practices
Growing Thai chili pepper plants doesn’t have to harm the environment. Here are sustainable approaches I strongly recommend:
- Composting: Add kitchen scraps and garden waste to create nutrient-rich amendment.
- Water Conservation: Use drip irrigation or ollas (unglazed clay pots buried in soil) for efficient deep watering.
- Natural Pest Control: Encourage ladybugs, lacewings, and birds with diverse planting. Neem oil and insecticidal soaps derived from plants are effective and biodegradable.
- Seed Saving: Select the healthiest, most productive plants to save seeds from — this preserves desirable traits over generations.
- Pollinator Support: Interplant with flowers like borage and nasturtiums to attract bees and butterflies.
These methods not only reduce your carbon footprint but often result in healthier, more resilient Thai chili pepper plants.
Frequently Asked Questions (FAQs) ❓
How long does it take for a Thai chili pepper plant to produce fruit? From seed, expect 90–120 days to first harvest. Transplants mature faster, often in 60–80 days after planting outdoors.
Can Thai chili plants grow indoors year-round? Yes! With sufficient light (grow lights recommended), proper watering, and occasional pruning, they thrive indoors and can produce peppers continuously.
Why are my peppers not turning red? They may need more time, warmth, or sunlight. Some varieties stay green longer. Ensure consistent care and patience — cooler temperatures can slow ripening.
What is the best fertilizer for Thai chilies? A balanced liquid fertilizer during growth, then high-phosphorus during flowering/fruiting. Organic options like compost tea or seaweed extract work very well.
How to overwinter Thai chili plants? Bring indoors before frost. Place in bright light, reduce watering, and maintain 60–70°F temperatures. Prune lightly and resume normal care in spring.
Are Thai chili pepper plants toxic to pets? The plants contain capsaicin, which can irritate mouths and stomachs if ingested. Keep out of reach of curious cats and dogs.
How many peppers does one Thai chili pepper plant produce? A healthy plant can yield 100–300+ peppers per season depending on care, variety, and growing conditions.
My plant has flowers but no fruit — what’s wrong? Likely poor pollination or temperature extremes. Hand-pollinate and ensure daytime temps stay between 70–85°F.
Can I grow Thai chilies in hydroponics? Absolutely. They respond well to hydroponic systems, often producing faster growth and higher yields with proper nutrient management.
What’s the difference between Thai chilies and other hot peppers? Thai varieties are smaller, thinner-walled, and significantly hotter with a sharp, clean heat ideal for Asian cuisine.
Conclusion
Growing a thriving Thai chili pepper plant is one of the most rewarding experiences for any home gardener or cooking enthusiast. By following this detailed guide — from understanding the plant’s needs to mastering advanced techniques and troubleshooting challenges — you’re now equipped to enjoy abundant, fiery harvests season after season.
Remember, success comes from consistent care, observation, and a little patience. Start small, learn from each season, and don’t be afraid to experiment. Your future self (and taste buds) will thank you when you’re harvesting fresh Thai chilies for homemade meals.
Ready to get started? Share your Thai chili pepper plant journey in the comments below — I’d love to see your progress and offer personalized tips. For more expert plant care advice, explore our other guides on container gardening, companion planting, and growing delicious edibles at home.
Happy gardening and spicy cooking! 🌶️🪴✨


