
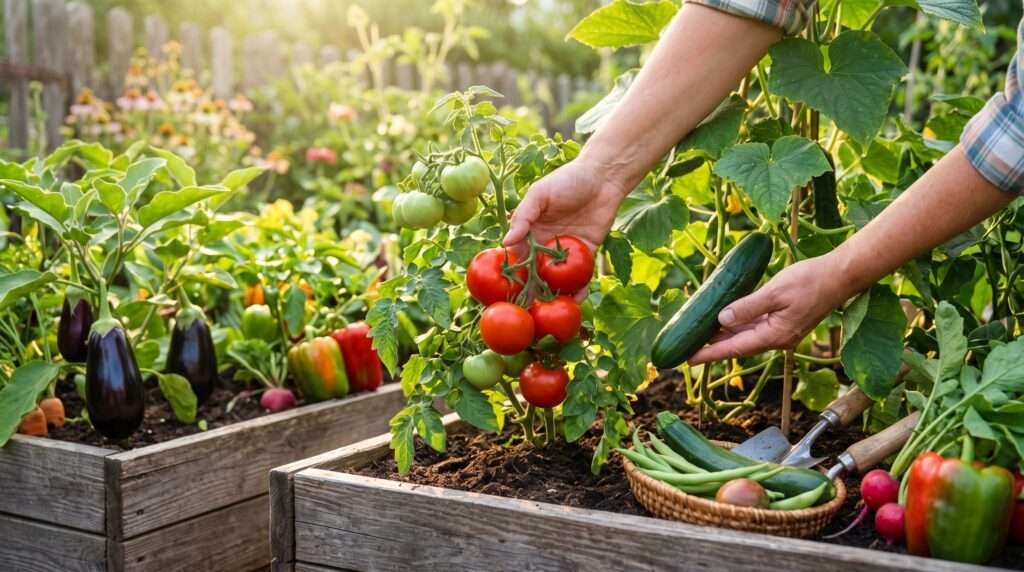
Every gardener has experienced the ultimate harvest heartbreak at least once. You spend months painstakingly nurturing your garden—testing your soil health, meticulously watering, and fending off pests. Finally, you spot a massive, seemingly perfect green tomato or a zucchini the size of a baseball bat. You proudly bring it into the kitchen and slice into it, only to find the tomato is rock-hard and sour, while the prized zucchini is spongy, bitter, and full of oversized seeds.
It is incredibly frustrating. While growing a healthy plant is half the battle, understanding harvest timing is the true secret to peak flavor, optimal nutrition, and maximum garden yield. If you are tired of playing a guessing game with your crops, you are in the right place. In this comprehensive guide, we are going to explore the most reliable signs your vegetables are ready to pick. Drawing on years of soil science and hands-on plant care experience, I will teach you how to read your garden’s biological cues so you can move from harvest anxiety to guaranteed homegrown success. 🌱
🔬 Why Timing Your Harvest Matters
Knowing when to harvest vegetables isn’t just about avoiding a mushy cucumber; it is a critical component of crop management that directly impacts the quality of your food and the overall lifespan of your garden.
1. Flavor Profiles and Chemical Conversions 👅
Vegetables are living organisms with dynamic internal chemistry. For certain crops, like sweet corn and garden peas, the sugars responsible for their sweetness rapidly convert to starches as soon as they pass peak maturity. Pick them a day late, and they taste chalky rather than sweet. Conversely, fruits treated as vegetables (like tomatoes and peppers) need time for their starches to convert into complex sugars and acids, which create that rich, unmistakable homegrown flavor.
2. The Nutritional Peak 📈
When you harvest your homegrown produce at the precise maturity stage, you are locking in the highest possible concentration of vitamins, minerals, and antioxidants. Studies show that vegetables harvested at their peak and consumed quickly contain significantly higher levels of Vitamin C and phytonutrients compared to store-bought produce that was picked prematurely for transport.
3. Plant Vigor and the “Pick-and-Come-Again” Rule 🔄
This is a crucial concept in professional plant care: your vegetable plant’s primary goal is not to feed you; its goal is to reproduce. If you leave mature fruit on the vine, the plant registers that it has successfully produced viable seeds. It will then enter a phase called senescence, where it diverts energy away from producing new flowers and focuses entirely on ripening those existing seeds. By harvesting frequently and at the right time, you signal the plant to keep producing, vastly increasing your total crop yield for the season.
🔎 The 7 Clear Signs Your Vegetables Are Ready to Pick
Forget the calendar. While seed packets offer a “Days to Maturity” estimate, environmental factors like temperature, sunlight, and soil moisture will always shift this timeline. Instead, rely on these seven physical signs.
1. The Color Shift & Vibrancy Test 🍅
The most obvious indicator of the ripening process is a shift in pigmentation, signaling the breakdown of chlorophyll (green) and the development of compounds like lycopene (red) or anthocyanins (purple/blue).
-
Tomatoes: Look for the “breaker stage.” This is when a green tomato first shows a blush of pink or yellow at the blossom end (the bottom). Expert Tip: Once a tomato reaches the breaker stage, it has sealed itself off from the main vine. You can safely pick it and let it finish ripening on your kitchen counter. It will taste identical to a vine-ripened tomato, but you will save it from splitting in the rain or being eaten by squirrels! 🐿️
-
Bell Peppers: While you can eat them green, true sweetness and maximum Vitamin C develop when they transition to their final vibrant hue of red, yellow, orange, or purple.
-
Pumpkins and Winter Squash: The color should be deep, uniform, and entirely opaque, with no lingering streaks of bright green.
2. Size, Girth, and Firmness 🥒
When it comes to the vegetable picking guide, bigger is rarely better. Overgrown vegetables often suffer from diluted flavor, tough skins, and pithy centers. You are looking for a firm, crisp texture that doesn’t yield to gentle pressure.
-
Zucchini and Summer Squash: Pick these when they are small and tender, ideally between 6 to 8 inches in length. At this size, the skin is delicate, and the seeds are virtually non-existent.
-
Cucumbers: Harvest when they are uniformly green and firm. If they begin to turn yellow at the base or swell drastically in the middle, they have become overripe and will taste bitter.
-
Root Crops (Carrots, Radishes, Beets): Gently brush the soil away from the base of the stem to expose the “shoulders” of the root. Radishes are ready when they are about the size of a large marble or golf ball. Carrots are typically ready when their shoulders are about 3/4 to 1 inch in diameter.
3. The Skin Texture and Sheen (The Gloss Test) 🍆
The epidermis (skin) of your crops tells a detailed story about what is happening inside. The gloss test is particularly crucial for members of the nightshade and squash families.
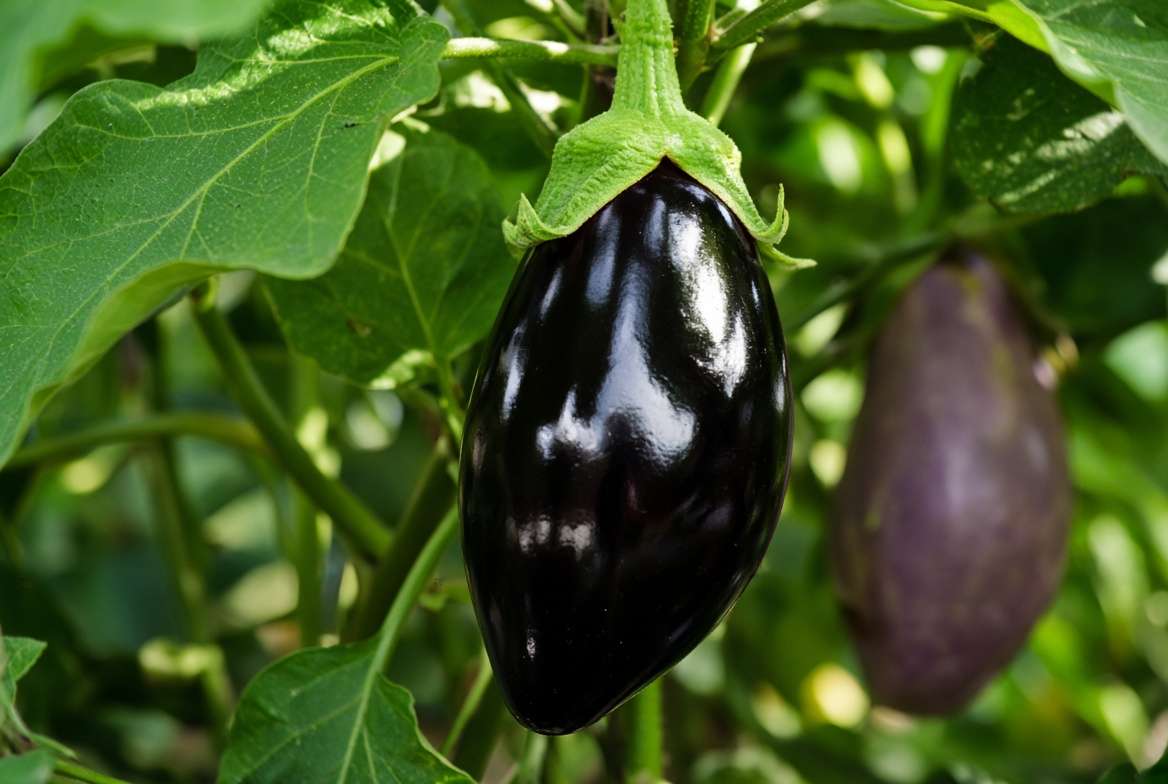
-
Eggplants: An eggplant is ready when its skin is highly glossy, taut, and deeply colored. If the skin becomes dull, matte, or heavily wrinkled, it is overripe. The flesh inside will be spongy, and the seeds will have turned hard and bitter.
-
Winter Squash (Butternut, Acorn) & Pumpkins: These require a different approach—the “Thumbnail Test.” Press your thumbnail firmly into the skin of the squash. If your nail easily pierces the skin, it needs more time on the vine. If the skin is tough, hard, and resists your nail, it is fully mature and ready to be cured for winter storage. 🍂
4. Stem and Vine Desiccation (The Brown-Out) 🍉
Sometimes, the plant tells you it’s time to harvest by naturally shutting down the delivery system to the fruit.
-
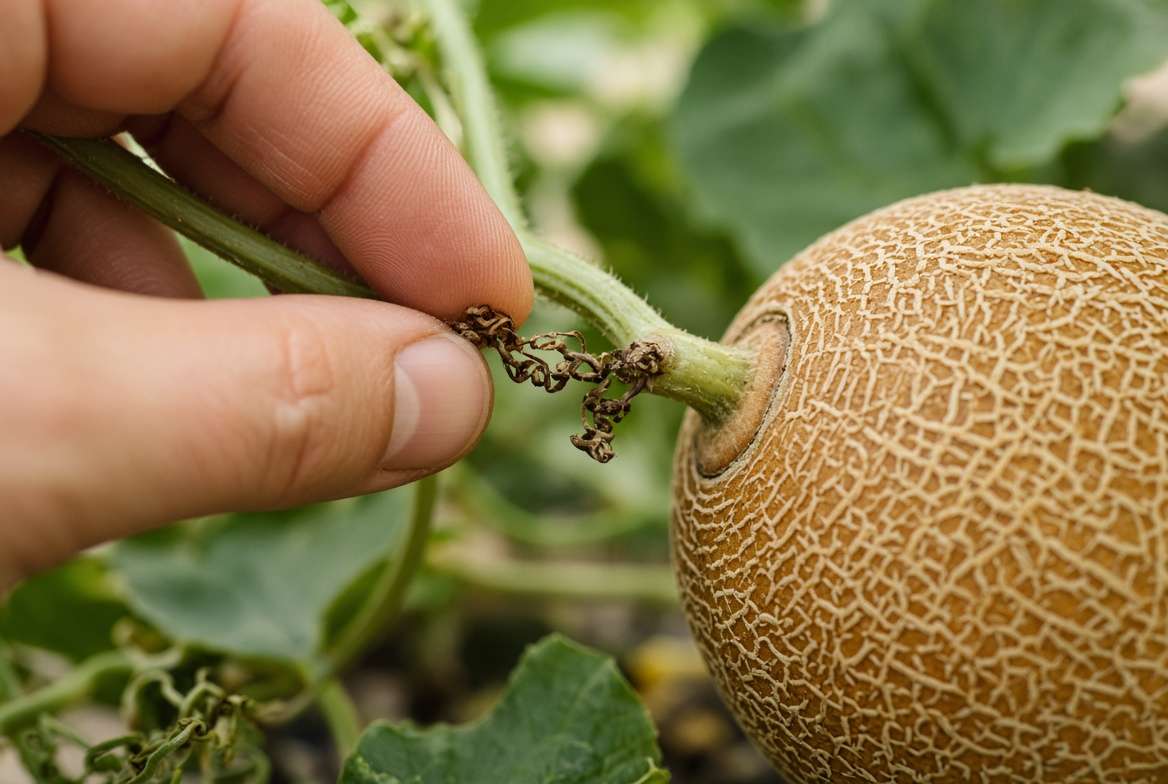
Watermelons and Muskmelons: Look at the curly little tendril located exactly where the fruit’s stem attaches to the main vine. When that specific tendril turns completely brown and dries up, the melon is ready.
-
Onions and Garlic: These are ready for harvest when 50% to 75% of their green, tubular top foliage naturally turns yellow, dries out, and flops over onto the soil.
-
A Note on Soil Health: Be careful not to confuse harvest-readiness with nutrient distress. If your entire plant is yellowing prematurely while the fruit is still small, you may be dealing with a nitrogen deficiency or a watering issue, not a mature crop. 💧
5. The “Tug Test” (Ease of Separation) 🫛
As fruit reaches peak maturity, the plant often begins to form an abscission layer—a specialized layer of cells that naturally severs the connection between the stem and the fruit. Because of this, a ripe vegetable usually wants to leave the mother plant.
-
Muskmelons and Cantaloupes: These are the gold standard for the tug test. You are looking for the “full slip” stage. When you apply gentle pressure with your thumb against the stem where it meets the melon, the fruit should pop off completely cleanly, leaving a neat, bowl-shaped depression. If it tears or requires force, leave it alone.
-
Snap Beans and Peas: While they won’t fall off on their own, a ripe pod should snap away from the main vine with a crisp, clean break when bent backward slightly. If the vine stretches, bends, or tries to come with the pod, it needs another day.
6. Scent and Sound Development 🍈
Sight and touch are critical, but experienced homesteaders know that utilizing your other senses can perfectly dial in your harvest timing.
-
The Smell Test (Melons): A fully ripe cantaloupe or muskmelon will emit a rich, sweet, musky aroma at the blossom end (the side opposite the stem). If it smells like nothing, it is underripe. If it smells overly fermented or sickeningly sweet, it has passed its prime.
-
The Thump Test (Watermelons): Tap the belly of the watermelon firmly with your knuckles. An underripe melon will yield a high-pitched, metallic, or solid “ping.” An overripe melon sounds like a dull, flat “thud.” The perfect, juicy watermelon will produce a deep, hollow “thump,” indicating that the cellular structure is bursting with water but hasn’t yet gone mushy. 🍉
7. Seed Development and Pod Swell 🌽
For crops where we eat the seeds or the pods containing the seeds, feeling the internal structure is your best harvest cue.
-
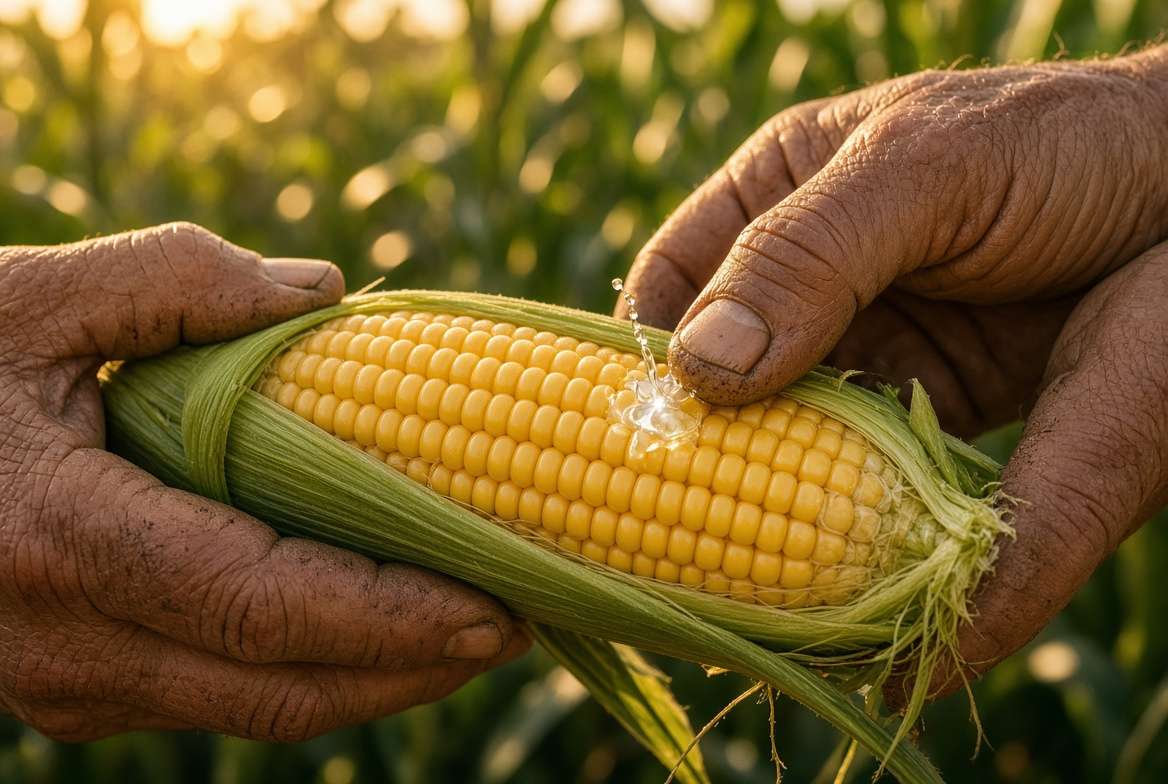
Sweet Corn: Finding the perfect ear of corn feels like a high-stakes game. Wait until the silks at the top of the husk have turned completely dark brown and dry. Feel the ear—it should feel blunt and full all the way to the tip. To be absolutely sure, peel back a small section of the husk and pierce a single kernel with your fingernail. If a clear, watery liquid squirts out, it’s not ready. If a milky white sap appears, harvest immediately! 🌽
-
Green Beans (Snap Beans): For standard green beans, you want to pick them before the seeds inside begin to visibly bulge through the pod. The pod should feel smooth and firm. Once the seeds swell, the outer pod becomes tough and stringy. (Note: This rule reverses if you are growing shelling beans, where you want maximum pod swell).
📋 Quick Reference: Crop-by-Crop Cheat Sheet
Keep this handy vegetable picking guide bookmarked on your phone as you walk through your garden. Remember, “Days to Maturity” is just a guideline; trust the physical signs first!
| Vegetable Name 🥕 | Key Harvest Sign 🎯 | Days to Maturity (Average) ⏳ |
| Tomatoes | “Breaker stage” color shift at the blossom end. | 60 – 85 days (from transplant) |
| Zucchini | 6-8 inches long; firm with delicate skin. | 45 – 55 days |
| Cucumbers | Uniformly green, firm, before yellowing occurs. | 50 – 70 days |
| Bell Peppers | Full color change (red/yellow) for max sweetness. | 70 – 90 days (from transplant) |
| Eggplant | Skin is highly glossy and taut; firm to touch. | 65 – 80 days (from transplant) |
| Carrots | Shoulders are 3/4 to 1-inch wide at soil line. | 60 – 80 days |
| Green Beans | Pods are smooth; seeds are not bulging. | 50 – 60 days |
| Garlic/Onions | 50-75% of green tops have dried and fallen over. | 90 – 120 days |
| Winter Squash | Cannot easily pierce the skin with a thumbnail. | 85 – 110 days |
| Sweet Corn | Silks are brown/dry; kernels produce milky sap. | 70 – 90 days |
✂️ Common Harvesting Mistakes to Avoid
Even if you know when to harvest vegetables, how you do it matters just as much for the continued health of your garden.
-
Pulling Instead of Snipping: Never yank a stubbornly attached vegetable from the plant. Tearing stems creates jagged, open wounds that act as a welcome mat for garden pests and bacterial diseases. Always use a pair of sterilized pruning shears or sharp scissors to make clean cuts. ✂️
-
Harvesting in the Heat of the Day: The absolute best time to pick produce is in the early morning, just after the dew has dried but before the midday sun hits. Overnight, plants replenish their cellular water pressure (turgor). Morning-harvested greens and vegetables will be significantly crisper and last much longer in storage than those picked at 2 PM, which will quickly wilt.
-
Waiting for the “Perfect” Grocery Store Look: Commercial vegetables are genetically bred for thick skins and uniform shapes to survive hundreds of miles in a transport truck. Homegrown heirloom varieties might be lumpy, slightly scarred, or oddly shaped. Don’t let an imperfect shape trick you into leaving a perfectly ripe vegetable on the vine!
💡 Expert Tips: What to Do After You Pick
Proper plant care doesn’t stop once the vegetable is off the vine. Post-harvest handling dictates how long your hard work will last in the kitchen.
-
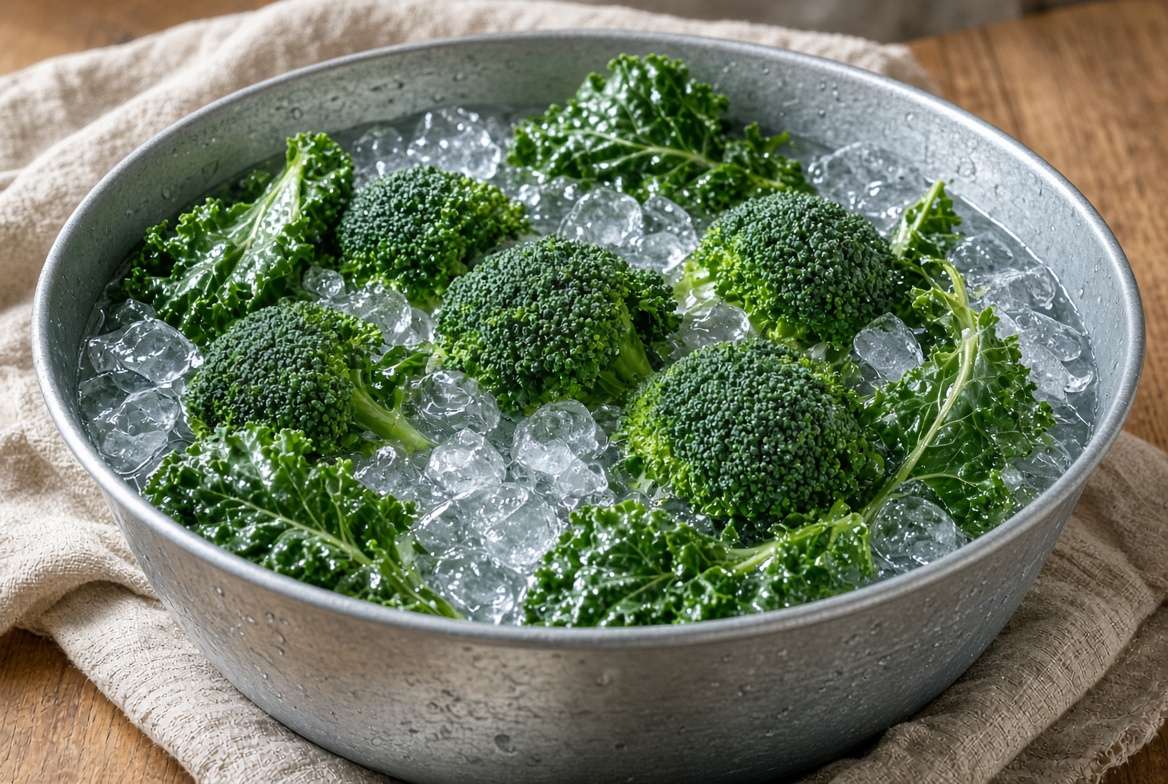
The Rapid Cool Down: Heat is the enemy of freshly picked produce. Get your vegetables out of the direct sun immediately. For leafy greens and broccoli, submerging them in an ice-water bath (hydro-cooling) stops the degradation process instantly.
-
The “No-Wash” Rule for Roots and Berries: It is tempting to scrub your carrots, potatoes, and tomatoes right away. Don’t! Washing removes the natural protective epidermal layers and introduces excess moisture, which is the leading cause of rot. Brush off loose dirt, store them dry, and only wash them immediately before eating or cooking. 🚰
🙋♀️ Frequently Asked Questions (FAQs)
Can you eat vegetables if you pick them too early?
Yes, most underripe vegetables are perfectly safe to eat, though they may lack the complex sugars and robust flavor profiles of a fully mature crop. Underripe squash and green peppers are common examples. However, avoid eating underripe (green) potatoes, as they contain higher levels of solanine, which can cause digestive upset.
Will green tomatoes ripen if I pick them now?
It depends on the maturity stage. If the tomato is completely solid green and hard, it will likely just rot on your counter. But if it has reached the “breaker stage” (showing the faintest hint of pale green, yellow, or pink at the bottom), it produces its own ethylene gas and will perfectly ripen off the vine at room temperature.
What happens if I leave my vegetables on the plant too long?
Leaving vegetables on the plant too long triggers senescence. The fruit will become tough, woody, or mushy as the plant pumps all its energy into maturing the seeds inside. Furthermore, it signals the main plant to stop producing new flowers, drastically shortening your harvest season.
🌱 Conclusion
Learning the subtle signs your vegetables are ready to pick elevates you from a casual gardener to a true master of your backyard homestead. It takes a little bit of practice, observation, and patience to learn the unique language of your plants. But once you master the tug test, the thumbnail trick, and the color shift, you will be rewarded with the most vibrant, nutrient-dense, and flavorful food possible.
Don’t let that beautiful zucchini turn into a bitter baseball bat! Head out to your garden early tomorrow morning and put these seven signs to the test.
What is the trickiest vegetable you struggle to harvest on time? Drop a comment below and let’s troubleshoot your garden together, or subscribe to our newsletter for weekly deep-dives into expert plant care and soil health! 🌿💚











