

There is a unique, undeniable magic in bringing the outdoors inside during the winter holidays. Creating a breathtaking christmas tree of light using a living, potted evergreen is one of the most rewarding ways to celebrate the season. However, pairing delicate, living foliage with electric lights and dry indoor heating often leads to a tragic end: crispy, dropping needles and severely stressed root systems. Through careful soil health management and strategic lighting, you can transform a sturdy conifer into a radiant holiday centerpiece without sacrificing its vitality.
🌲 Choosing and Prepping Your Potted Evergreen
The secret to a long-lasting indoor display begins well before the first bulb is strung. Selecting the right species and properly acclimatizing it is crucial for preserving the plant’s health and ensuring it survives to see the spring.
-
Select Resilient Species: Opt for sturdy, adaptable varieties like the Dwarf Alberta Spruce (Picea glauca ‘Conica’) or the tropical-leaning Norfolk Island Pine (Araucaria heterophylla).
-
Prioritize Soil Health: Ensure the container features excellent drainage. A rich, well-aerated soil matrix mixed with organic compost helps retain necessary moisture without waterlogging the delicate feeder roots.
-
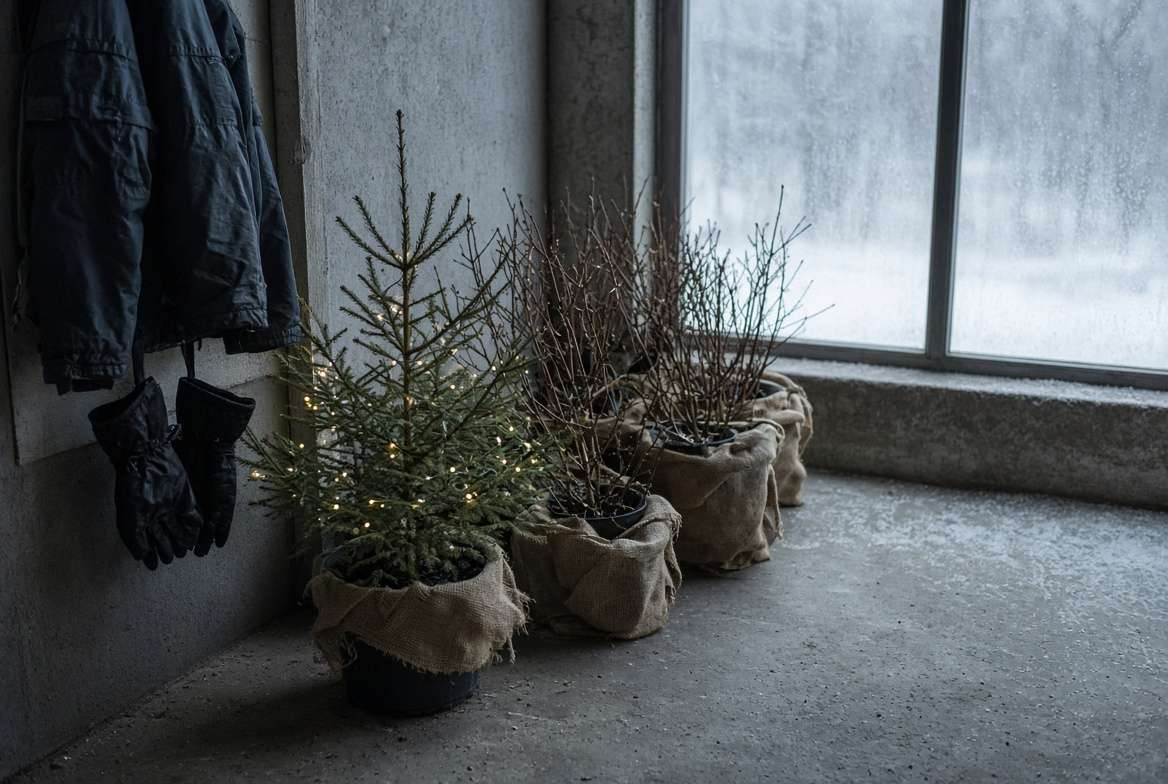
Gradual Acclimation: Never move a conifer directly from freezing outdoor temperatures to a heated living room. Transition the tree through an unheated garage or enclosed porch for several days to prevent severe environmental shock.
-
Strategic Placement: Position your evergreen far away from direct heat sources such as radiators, glowing fireplaces, and blowing HVAC vents.

💡 Designing the Illumination (Phase 1)
Achieving that perfect, glowing aesthetic requires careful selection of lighting equipment. Traditional incandescent bulbs generate excessive heat, rapidly accelerating transpiration and burning delicate foliage.
-
Cool-Touch Technology: Always utilize high-efficiency, cool-touch LED string lights to completely eliminate heat damage.
-
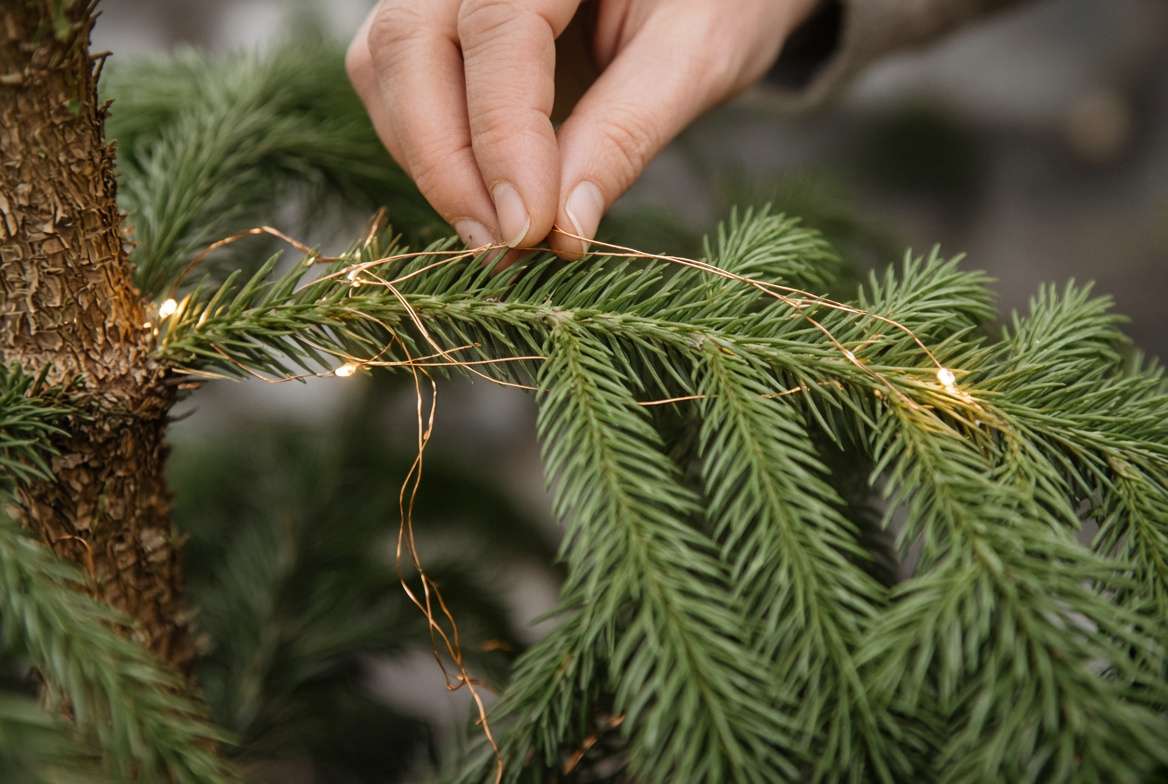
Lightweight Wiring: Select micro-LEDs on ultra-thin copper wire to reduce the physical weight burden on the branches.
The Gentle Wrapping Technique 🎀
Once you have your cool-touch LEDs, the application method is just as critical as the bulbs themselves. A common mistake is tightly winding standard heavy cables around the delicate tips of the branches, which can snap the tender new growth or suffocate the foliage.
Instead, practice the “trunk-outward” weaving method. Begin at the base of the tree and weave the lightweight wire up the central trunk. For each main branch, gently guide the wire outward toward the tip, and then loosely back toward the trunk before moving to the next branch. This technique not only hides the wires deep within the foliage for a professional, seamless look, but it also minimizes structural stress on the plant. Ensure the wires are loose enough to allow the branches to naturally flex and breathe; tight constriction can damage the vascular tissue (the cambium layer) just beneath the bark, restricting nutrient flow.
Capturing the Glow: Photography Tips for Your Masterpiece 📸
After putting in the effort to nurture and design a stunning botanical display, you will likely want to photograph it. Capturing the perfect, luminous aesthetic for a beautifully curated Pinterest pin or an engaging YouTube thumbnail requires a specific approach to lighting.
Cameras often struggle to balance the bright LEDs with the dark foliage of the evergreen. To get that quintessential, magical glow, do not shoot in complete darkness. Instead, shoot during the “blue hour” (just after sunset) or dim your ambient room lighting to about 30%. This allows the camera sensor to pick up the rich, emerald greens of the needles and the intricate texture of the soil surface, while still making the cool-toned LED lights pop brilliantly. Tap your screen to focus directly on a cluster of lights and lower the exposure slightly to prevent the bulbs from blowing out into white, featureless halos.
The Importance of Automated Timers ⏱️
Evergreens, like all living organisms, operate on circadian rhythms. They require a period of complete darkness to undergo proper respiration and rest. Leaving your lights on 24/7 disrupts their natural cycle and unnecessarily extends the subtle heat exposure, even from LEDs. Plug your light strings into an automated smart plug or a simple analog timer. Set the illumination period for 6 to 8 hours maximum—typically during the evening when you are home to enjoy it. This dark period is essential for the tree’s metabolic health and helps prevent premature breaking of dormancy.
💧 Essential Maintenance: Hydration and Micro-Climates
The number one enemy of a living indoor conifer is dry winter air. Central heating acts like a giant dehydrator, pulling moisture out of the plant’s needles faster than the roots can absorb it from the soil. This process, known as transpiration, must be carefully managed.
Mastering the Soil Moisture Balance ⚖️
You must become hyper-vigilant about watering during the tree’s indoor stay. Check the root zone daily by inserting your finger about two inches deep into the soil matrix.
-
Avoid the Extremes: The soil should feel consistently similar to a wrung-out sponge. If it feels dusty and dry, water it thoroughly until liquid escapes the drainage holes. If it feels soggy or muddy, hold off immediately.
-
The Ice Cube Trick (Debunked): While popular on social media, placing ice cubes on the soil to slowly water the plant is highly detrimental to evergreens. The freezing water shocks the sensitive feeder roots, mimicking a deep freeze and causing severe cellular damage. Always use room-temperature water.
Creating a Localized Humid Zone 🌫️
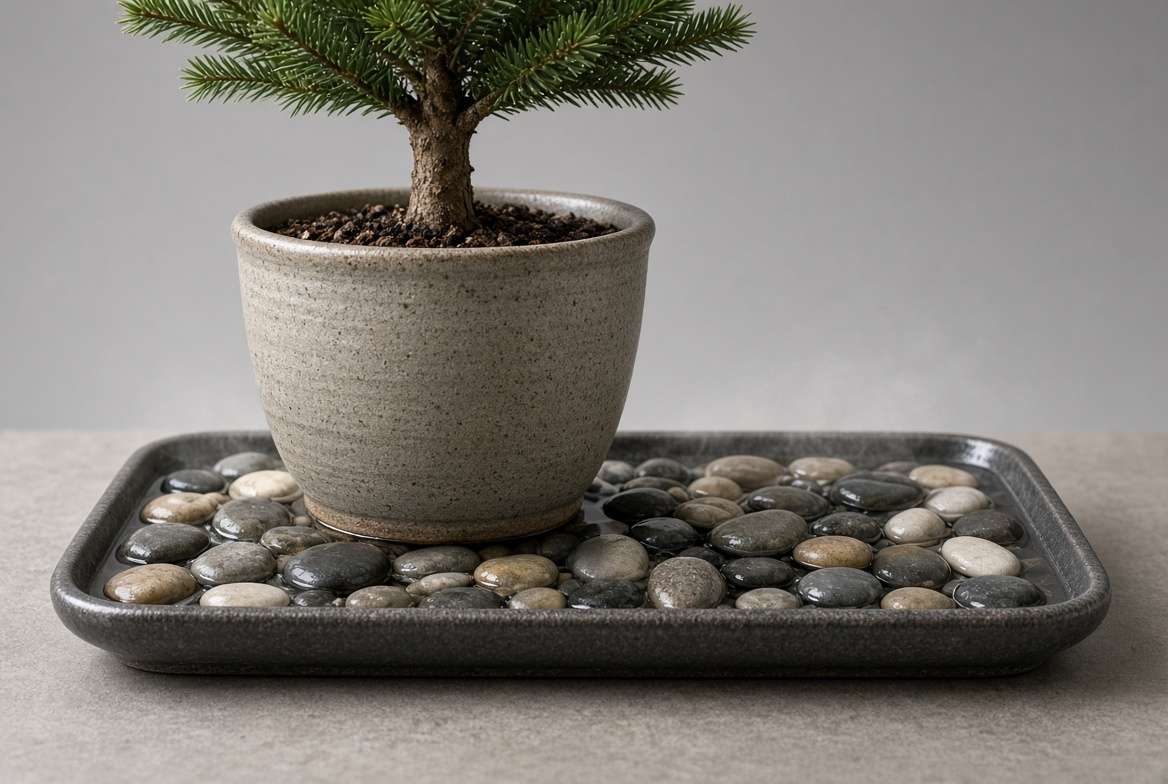
Because you cannot comfortably raise the ambient humidity of your entire living room to the 50-60% range that conifers prefer, you must create a micro-climate. The most effective, non-intrusive method is the pebble tray.
-
Take a wide, shallow waterproof tray (wider than the tree’s canopy).
-
Fill it with a single, even layer of decorative river rocks or gravel.
-
Pour water into the tray so it fills just below the top of the stones.
-
Place your potted tree on top of the stones.
As the water evaporates, it creates a localized cloud of humidity that travels directly up through the foliage, dramatically reducing needle crisping and drop, all without the soil ever sitting in standing water (which would cause root rot).
❄️ The Reverse Acclimation: Transitioning Your Tree Outdoors
The most critical moment in the lifespan of your living holiday centerpiece is the transition back to the outdoor environment. After enjoying the warmth of your home, the tree is highly vulnerable. If plunged directly back into freezing winter temperatures, the sudden shock will almost certainly cause severe cellular damage and lead to the plant’s demise.
To ensure your evergreen thrives for years to come, you must execute a careful, staged reverse acclimation process.
Step 1: The Transition Zone 🚪
Just as you slowly introduced the tree to the indoors, you must slowly introduce it back to the cold. Move the potted tree to a sheltered, unheated space that bridges the temperature gap between your cozy living room and the harsh outdoors. An insulated but unheated garage, a closed-in porch, or a protected sunroom is ideal. Leave the tree in this transition zone for at least 7 to 10 days.
Step 2: Managing Dormancy 💤
Your goal during the indoor display period was to prevent the tree from breaking its natural winter dormancy. If you notice bright green, soft new growth (called “candles”) pushing out from the branch tips while it is still indoors, the tree has unfortunately broken dormancy, believing spring has arrived. If this happens, you cannot put it back into freezing temperatures, as the new growth will immediately freeze and die. You will need to keep the tree in a cool, bright indoor location (like a 50°F sunroom) until the threat of frost has completely passed in the spring.
Step 3: Outdoor Placement and Insulation 🪴
If the tree successfully remained dormant, you can move it outdoors after the 10-day transition period. If you plan to keep it in a container year-round, cluster it with other potted plants against a sheltered wall of your house to protect it from harsh, drying winter winds. Since the roots in a pot are exposed above the frost line, heavily mulch the top of the soil and consider wrapping the outside of the pot with burlap or bubble wrap to insulate the fragile root system.
If your ground is not yet frozen solid and you intend to plant it in your landscape, dig the hole immediately. Water it deeply once planted, and apply a thick 3-to-4-inch layer of organic mulch around the base (keeping the mulch a few inches away from the trunk to prevent rot).
🔍 Expert Diagnostics & Plant Care FAQs
To ensure your audience has every tool necessary for success, let’s address the most common, high-level questions regarding the care and diagnostic troubleshooting of living indoor conifers.
How can I identify the absolute earliest signs of needle desiccation?
Plant diagnostics rely on keen observation. Do not wait until the needles turn brown and fall off; by then, the vascular system is severely compromised. The earliest sign of desiccation is a subtle shift in color and texture. The vibrant, glossy emerald green will begin to look slightly dull, gray, or “dusty.” If you gently squeeze a cluster of needles, healthy foliage should feel pliable and bounce back. If it feels stiff, papery, or brittle, the tree is actively suffering from acute dehydration, and you must immediately check your soil moisture and pebble tray.
Should I apply liquid fertilizers during the indoor holiday display?
Absolutely not. 🧪 This is a critical rule of soil health and winter plant care. Your tree is—or should be—in a state of dormancy. Applying nitrogen-heavy fertilizers during this resting phase forces the plant to expend vital energy trying to produce new growth in a sub-optimal environment (low light, low humidity). This stresses the plant immensely and makes it highly susceptible to pests and diseases. Wait until the early spring, just before the new buds begin to swell, to apply a slow-release, acid-loving organic fertilizer.
What is the maximum safe indoor duration for a living conifer?
To guarantee the highest survival rate, strict time management is required. The golden rule among horticulturists is the 10-to-14 Day Limit. 🕰️ Anything beyond two weeks dramatically increases the risk of the tree breaking dormancy due to the prolonged exposure to ambient household temperatures. Plan your decorating schedule accordingly: bring the tree indoors just a few days before your main holiday celebration, and begin the reverse acclimation process shortly after the new year begins.
✨ Conclusion: A Sustainable, Radiant Holiday Tradition
Crafting a living christmas tree of light is an incredibly rewarding endeavor that marries festive design with mindful horticulture. By prioritizing cool-touch LED technology, mastering indoor soil moisture balance, and strictly adhering to acclimation protocols, you bypass the tragedy of disposable, dying greens. Instead, you cultivate a magnificent, glowing botanical specimen that can grace your home for the holidays and continue to flourish in your garden for generations.
Embrace this sustainable approach this season, and enjoy the unparalleled beauty of a healthy, radiant evergreen that truly captures the spirit of life and light! 🎄











