Have you ever flipped through a spring seed catalog, dreaming of biting into a crisp, homegrown slice of summer, only to realize you simply don’t have the sprawling acreage required for traditional watermelon vines? As a horticulturist and urban gardener who has spent years trialing container-friendly crops on small patios, I know this frustration intimately. But there is a mini marvel perfectly suited for your balcony or raised bed. Enter the golden midget watermelon—the ultimate space-saving, beginner-friendly heirloom variety that takes the guesswork out of both growing and harvesting.
In this comprehensive guide, we will dive deep into the specific care requirements of this unique fruit. Whether you are battling limited square footage, short growing seasons, or just the age-old anxiety of picking an under-ripe melon, you will learn exactly how to prep, plant, trellis, and harvest this exceptional variety for a heavy, sweet yield. 🪴
Meet the Golden Midget Watermelon: A Mini Marvel 🌟
Before we get our hands dirty in the potting soil, it helps to understand the unique genetics and history of this plant. Understanding its origins is the key to unlocking its full growing potential.
History & Heirloom Origins 📜
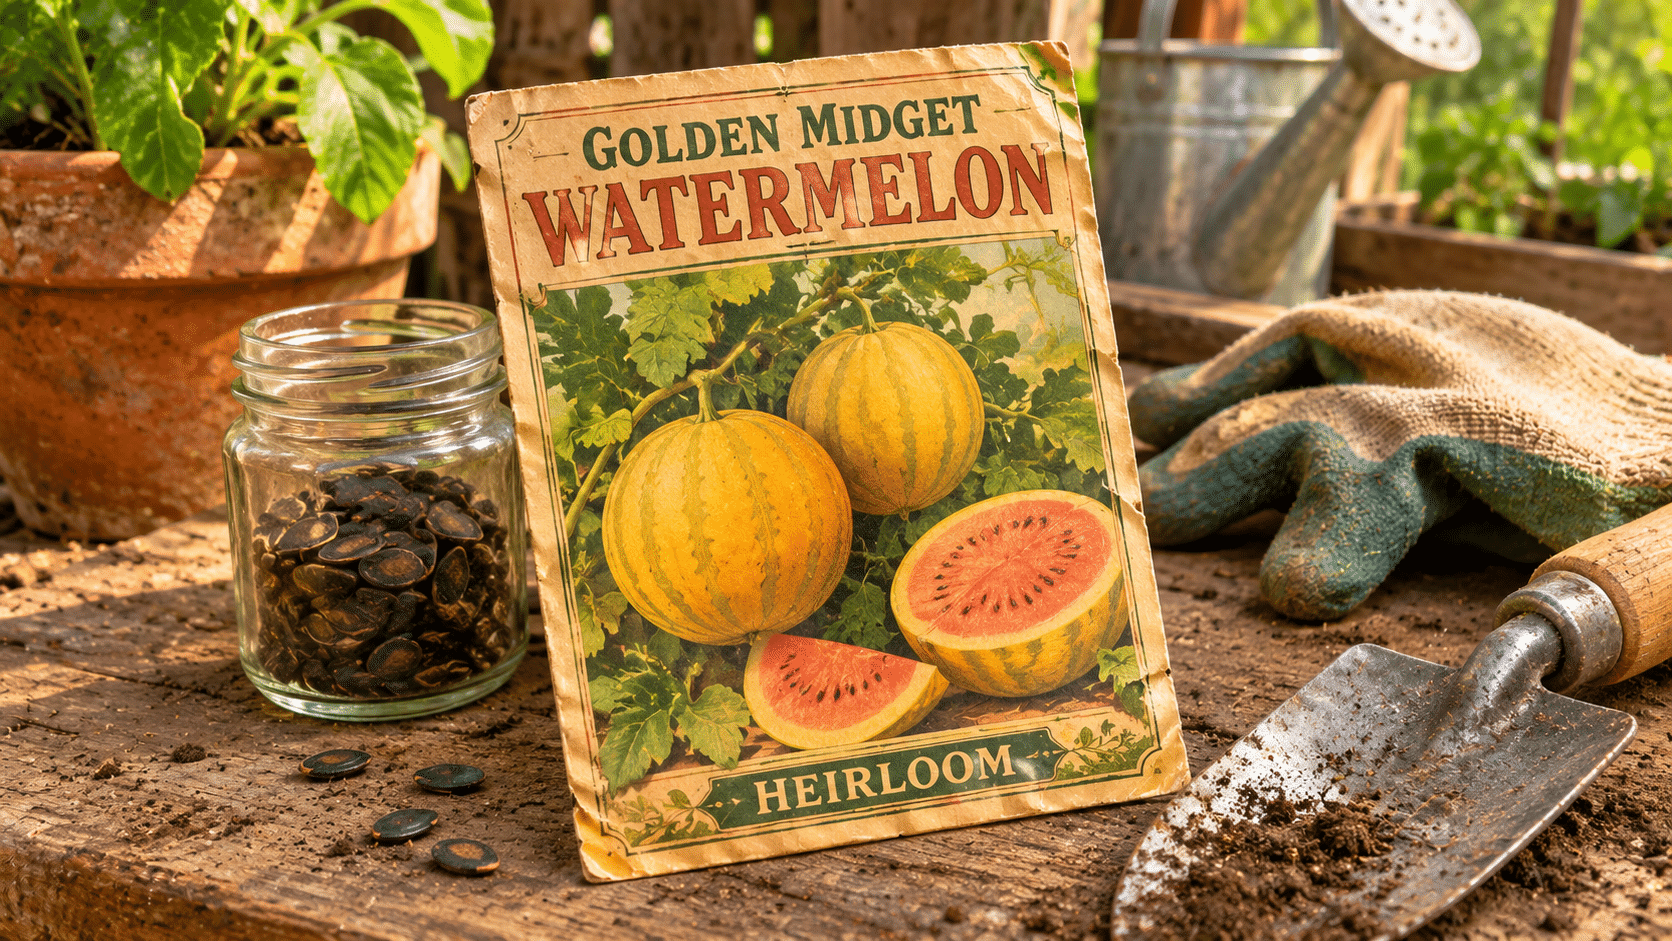
The Golden Midget is not a modern hybrid or a genetic anomaly; it is a meticulously bred heirloom with a rich agricultural history. It was developed in 1959 by two legendary plant breeders, Elwyn Meader and Albert Yeager, at the University of New Hampshire. Their goal was highly specific: create a fast-maturing, cold-tolerant watermelon that could thrive in the short northern summers of New England.
Because it is a true heirloom, its seeds are open-pollinated. This means that if you save the seeds from this year’s harvest, they will produce the exact same high-quality fruit next year—a massive benefit for sustainable and organic gardeners looking to build their own seed banks.
Plant Profile & Specs 📊
Here is a quick reference guide to what you can expect when cultivating this specific cultivar:
Why This Variety is Perfect for Small Gardens 🏙️
If you have previously written off growing melons because you only have a sunny deck or a few square feet in a community garden, this variety will change your perspective entirely.
Compact Vines & Container Friendliness 🪴
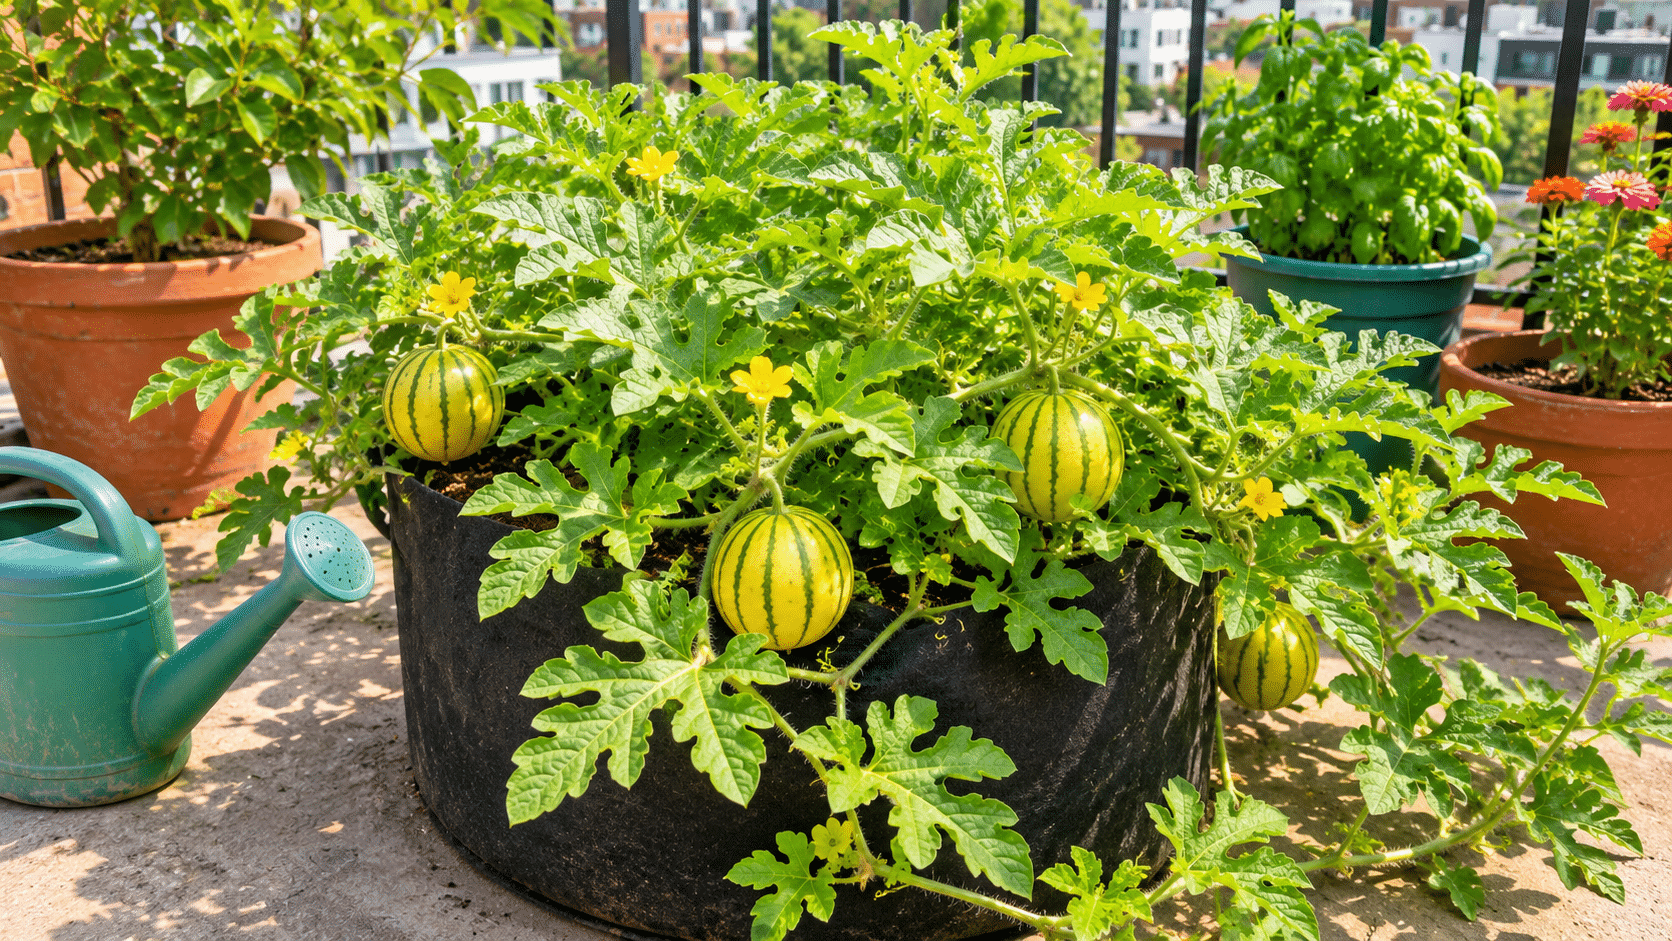
Traditional watermelon varieties, like the Crimson Sweet or Jubilee, boast vigorous vines that can easily sprawl 15 to 20 feet, suffocating neighboring plants and taking over entire garden beds. The Golden Midget is bush-like in comparison. Its vines generally cap out at a highly manageable 3 to 4 feet. This restricted growth habit makes it the premier choice for urban agriculture. It thrives in raised beds, large patio containers, and even heavy-duty grow bags, allowing urban dwellers to maximize their vertical and horizontal space.
The “Built-In” Ripeness Indicator 🟡
Perhaps the most anxiety-inducing part of growing watermelons is the harvest. Is it ready? Will it be white and flavorless inside? Do I thump it?
The Golden Midget solves this problem with a spectacular visual cue. When the fruit reaches peak ripeness, the rind undergoes a dramatic color shift, transforming from a pale, striped green to a bright, glowing golden-yellow. This “built-in” indicator makes it virtually foolproof. When it turns gold, it’s ready to slice.
Setting the Stage: Soil, Light, and Prep Work ☀️
A successful harvest begins weeks before a seed ever touches the dirt. Because these plants are small and fast-growing, they require a highly optimized environment right from the start to produce sweet, viable fruit.
Sunlight Requirements for Maximum Sweetness 🌞
Watermelons are heat-loving crops, and this mini variety is no exception. To achieve high Brix levels (the measurement of sugar content in the fruit’s flesh), your plant must receive a minimum of 6 to 8 hours of direct, unobstructed sunlight per day. If you are growing on a balcony, observe your light patterns before placing your pot. Morning sun is excellent for drying dew off the leaves (which prevents fungal diseases), while intense afternoon sun fuels the photosynthesis required for sugar production.
Crafting the Perfect Soil Mix 🌱
Watermelons despise “wet feet.” In heavy clay or compacted soils, their fragile, shallow root systems will quickly succumb to root rot. They prefer a slightly acidic soil pH ranging between 6.0 and 6.8.
Expert Tip 💡: If you are growing in containers or raised beds, do not use standard garden dirt. Instead, blend this custom, high-drainage soil recipe for optimal results:
-
40% High-Quality Compost: Provides slow-release nutrients and beneficial microbes.
-
40% Loamy Potting Soil or Coco Coir: Ensures moisture retention without waterlogging.
-
20% Perlite or Coarse Sand: Guarantees rapid drainage and root aeration.
Choosing the Right Container 🪣
Do not let the word “midget” fool you into using a tiny pot. While the fruits are small, the root system still needs space to support the heavy water demands of melon production.
-
Minimum Size: Use a container that holds at least 7 to 10 gallons of soil per plant. A half-whiskey barrel or a 10-gallon fabric grow bag is ideal.
-
Drainage is Non-Negotiable: Ensure your container has several large drainage holes at the bottom. Fabric grow bags are particularly beneficial for this variety, as they naturally air-prune the roots and prevent water from pooling at the base.
Planting Guide: From Seed to Soil 🌱
With your soil mixed and your containers chosen, it is time to get your Golden Midget watermelon seeds started. Because watermelons are famously sensitive to cold soil and root disturbance, how you plant them is just as critical as where you plant them.
Starting Seeds Indoors vs. Direct Sowing 🗓️
Your planting strategy will largely depend on your USDA Hardiness Zone and the length of your local growing season.
-
Direct Sowing (For Warm Climates): If you live in a region with long, hot summers, direct sowing is always the preferred method. Wait until all danger of frost has passed and the soil temperature has consistently warmed to at least 70°F (21°C). Plant seeds roughly 1/2 to 1 inch deep in small mounds (or “hills”).
-
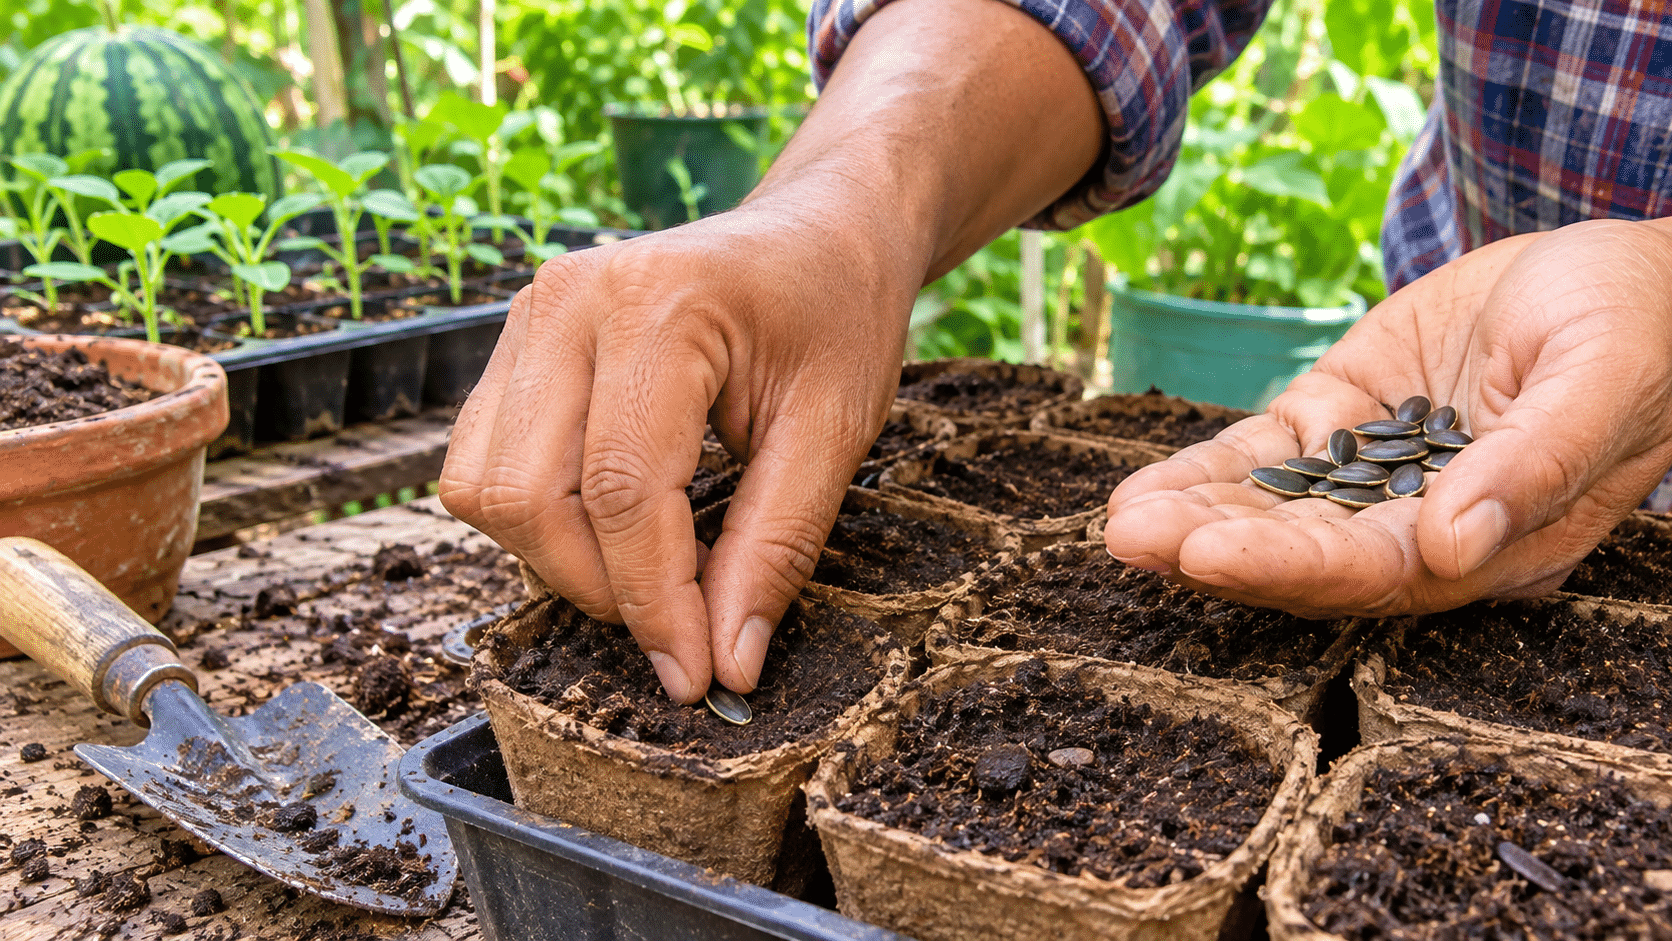
Starting Indoors (For Short Seasons): If you live in a cooler climate with a brief summer, you can give your plants a head start by sowing seeds indoors 2 to 4 weeks before your last expected spring frost.
Critical Transplanting Rule: Watermelons possess incredibly delicate taproots and suffer easily from transplant shock. If you start seeds indoors, absolutely use biodegradable peat pots or cowpots. When it is time to move them outside, you can plant the entire pot directly into the soil without ever disturbing the root ball.
Spacing and Trellising Setup 🪜
While the Golden Midget is a compact variety, proper spacing is vital for airflow to prevent fungal diseases. If planting in a raised bed or traditional garden row, space your plants about 2 to 3 feet apart.
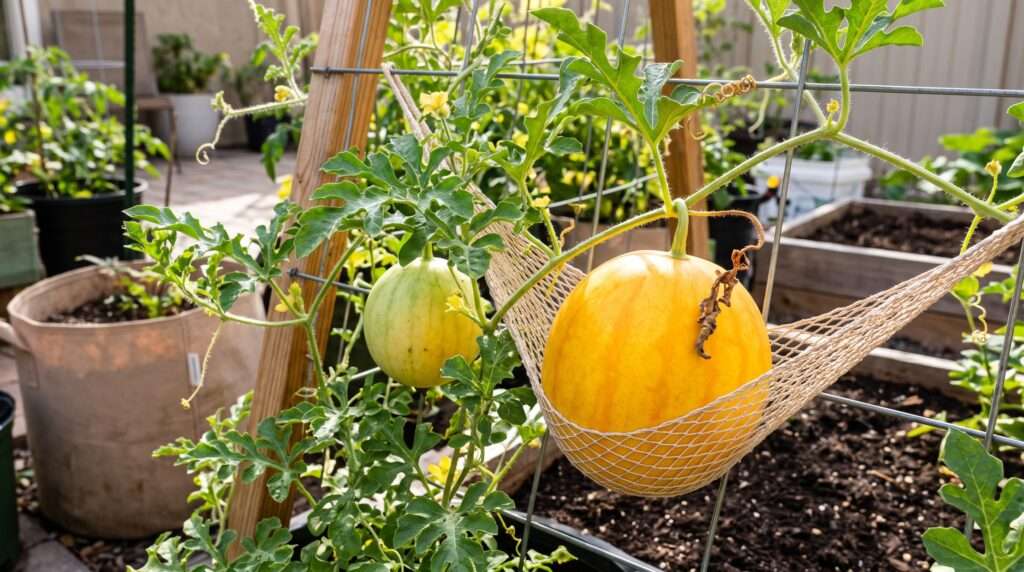
The Skyscraper Urban Garden Trick: Vertical Trellising To save maximum space and keep your fruit safe from soil-dwelling pests, grow your Golden Midgets vertically!
-
The Support: Install a sturdy A-frame trellis, a cattle panel arch, or heavy-duty tomato cages.
-
Training the Vines: As the vines grow, gently weave them through the trellis or tie them loosely with soft garden twine.
-
Melon Hammocks: When the watermelons begin to form, they will eventually reach around 3 pounds. To prevent the weight of the fruit from snapping the fragile vine, create a “melon hammock.” Repurpose old pantyhose, mesh onion bags, or macramé netting to cradle the growing melon, tying the ends securely to the sturdy trellis frame.
Expert Care & Maintenance for Heavy Yields 💧
Once your vines are established, they enter their rapid growth phase. Golden Midgets are heavy feeders and drinkers, requiring attentive care to maximize both yield and sugar production.
Watering Mastery: Avoiding Split Fruit 💦
Consistent moisture is the secret to a healthy watermelon plant, but erratic watering is a recipe for disaster.
-
The Routine: Provide 1 to 2 inches of water per week. Water deeply at the base of the plant (using a drip irrigation system or a soaker hose if possible) rather than overhead. Keeping the leaves dry prevents mildew.
-
The Crucial Pre-Harvest Rule: About 7 to 10 days before you expect to harvest your fruit, deliberately cut back on watering. By mildly stressing the plant at this late stage, you force the fruit to concentrate its natural sugars (increasing the Brix levels). Overwatering just before harvest will result in diluted, watery flavor, and can even cause the fast-expanding fruit to dramatically split open right on the vine!
The Feeding Schedule 🧪
To support vigorous leaf growth and eventual fruiting, implement a two-stage fertilizing strategy:
-
Early Growth: Apply a nitrogen-rich, organic liquid fertilizer (like fish emulsion or kelp tea) every two weeks to encourage strong, green vine development.
-
Flowering & Fruiting: As soon as the first yellow blossoms appear, switch to a fertilizer high in phosphorus and potassium (such as bone meal or a specialized tomato/vegetable bloom feed). This shifts the plant’s energy away from making leaves and toward producing blossoms and sweet fruits.
Pollination Tricks for Urban Growers 🐝
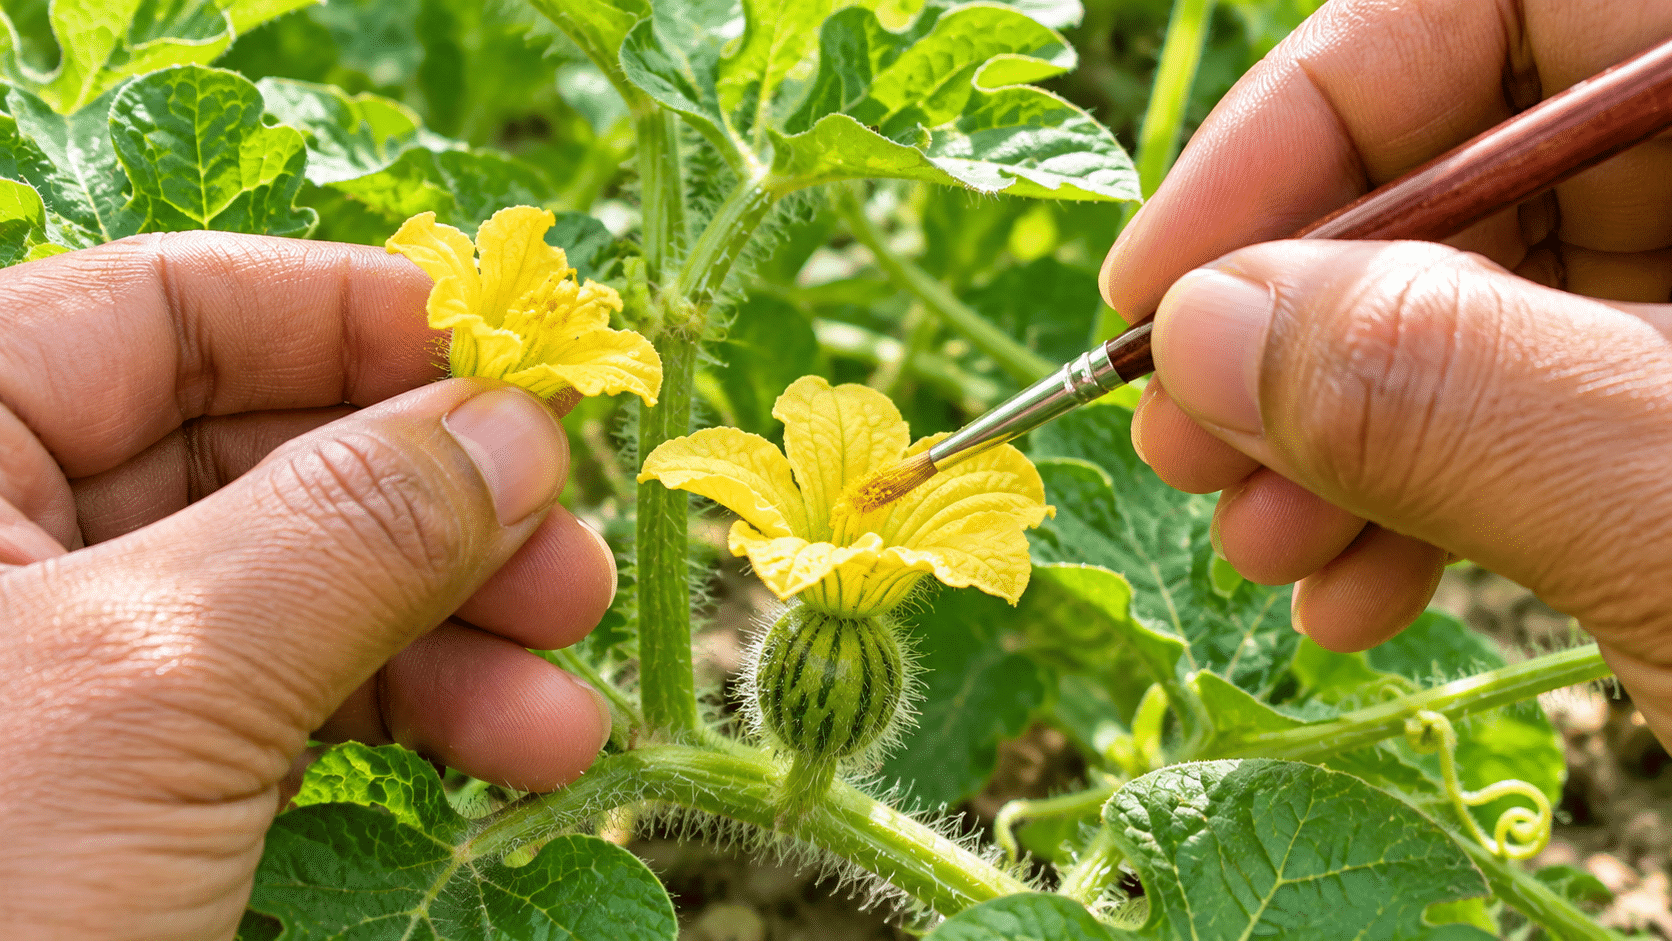
Watermelons produce both male and female flowers on the same vine, relying heavily on bees to transfer pollen. If you are growing on a high-rise balcony or in a pest-netted enclosure, you may notice flowers blooming and dropping off without forming fruit. This is a pollination failure.
How to Hand-Pollinate: Identify the female flower—it will have a tiny, swollen, miniature watermelon at the base of the blossom. The male flower will just have a straight, thin stem. Early in the morning, pluck a fully open male flower, peel back its petals to expose the pollen-covered stamen, and gently rub it against the center stigma of the female flower. Alternatively, you can use a small, clean paintbrush or a Q-tip to transfer the pollen.
Pests & Diseases: Keeping Your Vines Healthy 🐛
Even the hardiest heirlooms face threats from the local ecosystem. Vigilance is your best defense.
Common Culprits 🪲
-
Cucumber Beetles: These striped or spotted yellow bugs chew on leaves and, more dangerously, transmit bacterial wilt. Control them early with organic Neem oil sprays or by utilizing floating row covers until the female flowers appear.
-
Squash Vine Borers: These pests lay eggs at the base of the stem; the hatched larvae then bore inside, causing the whole vine to suddenly collapse. Wrap the base of the stems in aluminum foil or sprinkle diatomaceous earth around the soil line as a preventative barrier.
-
Aphids: Small sap-sucking insects that cluster under leaves. Wash them away with a sharp blast of water or introduce ladybugs to your garden space.
Fungal Issues (Powdery Mildew) 🍄
If you see white, dusty spots forming on your leaves, you have powdery mildew. It thrives in humid environments with poor airflow. Prevent it by spacing plants properly, pruning away dead or overlapping foliage, and exclusively bottom-watering. If an infection breaks out, treat the leaves promptly with an organic copper fungicide or a DIY baking soda spray.
The Golden Rule of Harvesting: Picking It Perfectly 🔪
We have finally arrived at the most rewarding stage: the harvest. As mentioned earlier, the Golden Midget takes the anxiety out of harvesting, but you still need to know exactly what to look for.
Watching for the Color Change 🎨
Around 70 days after planting, keep a close eye on the pale green rind. Over the course of a few days, it will begin to flush with a vibrant, glowing golden-yellow hue. Once the entire fruit has turned yellow, it is signaling peak ripeness.Note: As the fruit ripens, you may notice the leaves closest to the melon beginning to yellow and die back. Do not panic! This is a natural process called senescence, where the plant redirects all its final energy into ripening the seed-bearing fruit.
Backup Ripeness Tests 🎶
Even with the color change, it never hurts to double-check using traditional watermelon wisdom:
-
The Tendril Test: Look at the curly tendril (the little pig-tail vine) closest to where the melon attaches to the main stem. If it is green and flexible, the melon is not ready. If it has turned brown, dry, and brittle, it’s harvest time.
-
The Thump Test: Give the golden rind a gentle tap. You want to hear a deep, hollow “thump” rather than a high-pitched, solid “thwack.”
Taste Profile & Culinary Uses 🍽️
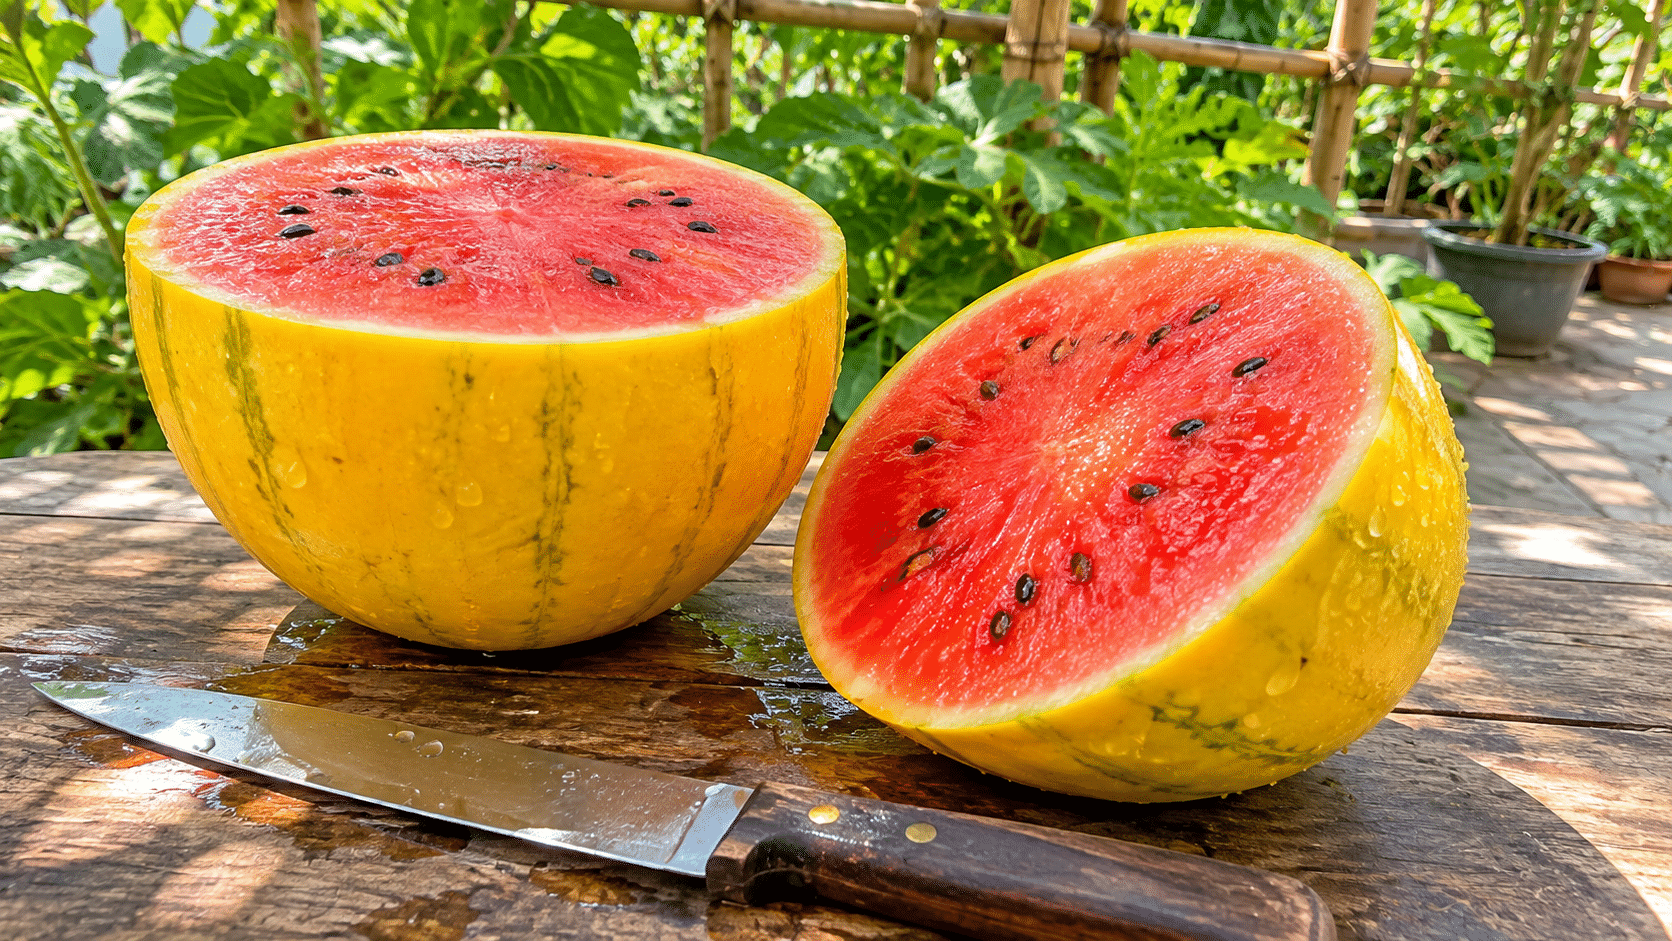
Slice into the golden rind and you will be greeted by stunning, salmon-pink flesh. The Golden Midget is exceptionally crisp, hydrating, and packed with an old-fashioned, sugary sweetness that rivals any massive grocery store melon. Because of its 3-pound personal size, it is perfect for chilling in the fridge and eating fresh. It also shines in summer salads paired with feta cheese, mint, and balsamic glaze, or blended into refreshing, ice-cold watermelon margaritas.
Frequently Asked Questions (FAQ) ❓
To ensure you have every piece of information you need, let’s answer the most common questions growers ask about the Golden Midget:
Can I grow Golden Midget Watermelon in a 5-gallon bucket? While 5 gallons is the absolute minimum, it is possible. However, you must drill ample drainage holes and commit to daily watering during the peak summer heat, as a 5-gallon bucket will dry out incredibly fast. A 10-gallon container is vastly superior for a stress-free harvest.
How many watermelons does a Golden Midget plant produce? Under optimal conditions—with plenty of sun, rich fertilizer, and good pollination—a single Golden Midget vine will typically yield 4 to 6 personal-sized watermelons over the course of the season.
Why did my Golden Midget split open before turning yellow? Splitting is almost always caused by irregular watering. If the plant experiences a dry spell followed by a heavy rainstorm or overwatering, the flesh expands faster than the rind can stretch, causing a rupture. Maintain consistent moisture levels until the final week before harvest.
Are the seeds edible or good for saving? Yes to both! The large black seeds can be roasted with a little salt just like pumpkin seeds. Because this is an open-pollinated heirloom, you can absolutely rinse, dry, and save the seeds in a cool, dark place to plant next year.
Conclusion & Next Steps 🏁
Growing the Golden Midget watermelon is a deeply rewarding project that proves you do not need a massive backyard to enjoy a classic summer harvest. With its space-saving vines, stunning golden ripeness indicator, and reliably sweet pink flesh, it is the perfect crop for urban farmers, patio gardeners, and anyone looking for a foolproof foray into melon growing.
By providing plenty of sunshine, rich, well-draining soil, and consistent moisture, you will be slicing into your own homegrown mini-melons in just over two months.
We want to see your harvest! Have you tried growing Golden Midget watermelons in a container or on a vertical trellis? Drop a comment below with your experience, or tag us in your golden harvest photos on social media! And if you are looking to maximize your small-space garden even further, be sure to subscribe to our newsletter and check out our companion guide on How to Grow High-Yield Container Cucumbers. Happy gardening! 🌱🍉