
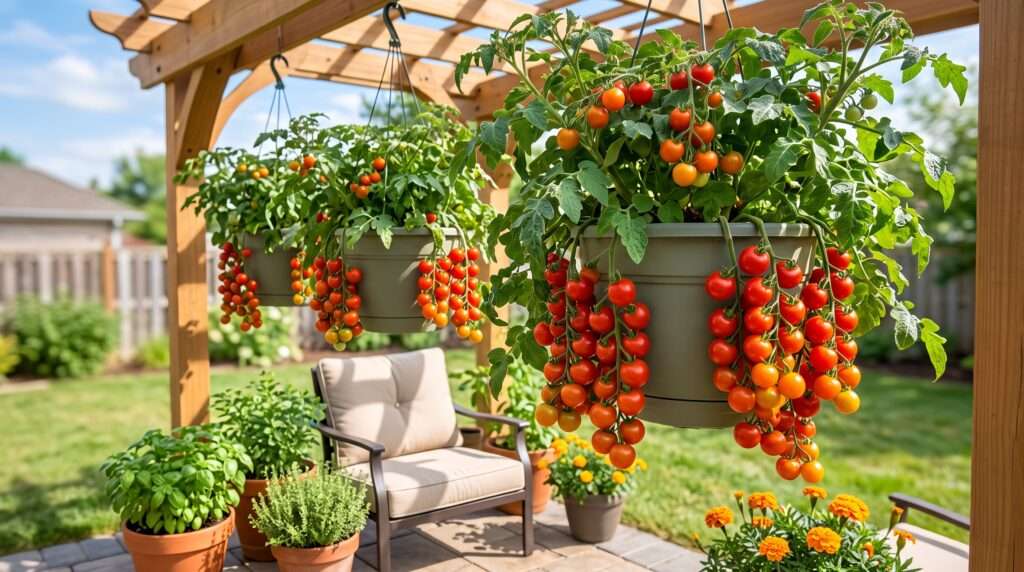
Are you dreaming of plucking sun-warmed, juicy tomatoes right off the vine, but feel limited by a cramped patio, a tiny balcony, or poor backyard soil? You aren’t alone. Traditional tomato gardening requires significant ground space, massive pots, heavy staking, and a constant battle against soil-borne diseases. But there is a brilliant, highly efficient alternative: vertical container gardening.
By flipping the script (and the plant), you can bypass these common hurdles entirely. In this comprehensive guide, we are sharing 7 expert upside-down tomato planter tips to help you maximize your yield without sacrificing a single square inch of ground space. Whether you are building a lush balcony oasis or just trying to outsmart the local garden pests, mastering this space-saving hack will transform your summer harvest. 🌿🏢
Why Grow Tomatoes Upside Down? Understanding the Science 🔬🌱
Before diving into the methodology, it’s crucial to understand exactly why this vertical gardening technique works. As plant care enthusiasts know, a thriving garden relies heavily on creating the ideal environment for roots and foliage. Hanging planters aren’t just a quirky visual novelty—they are rooted in solid agricultural science.
The Gravity Advantage 🌍
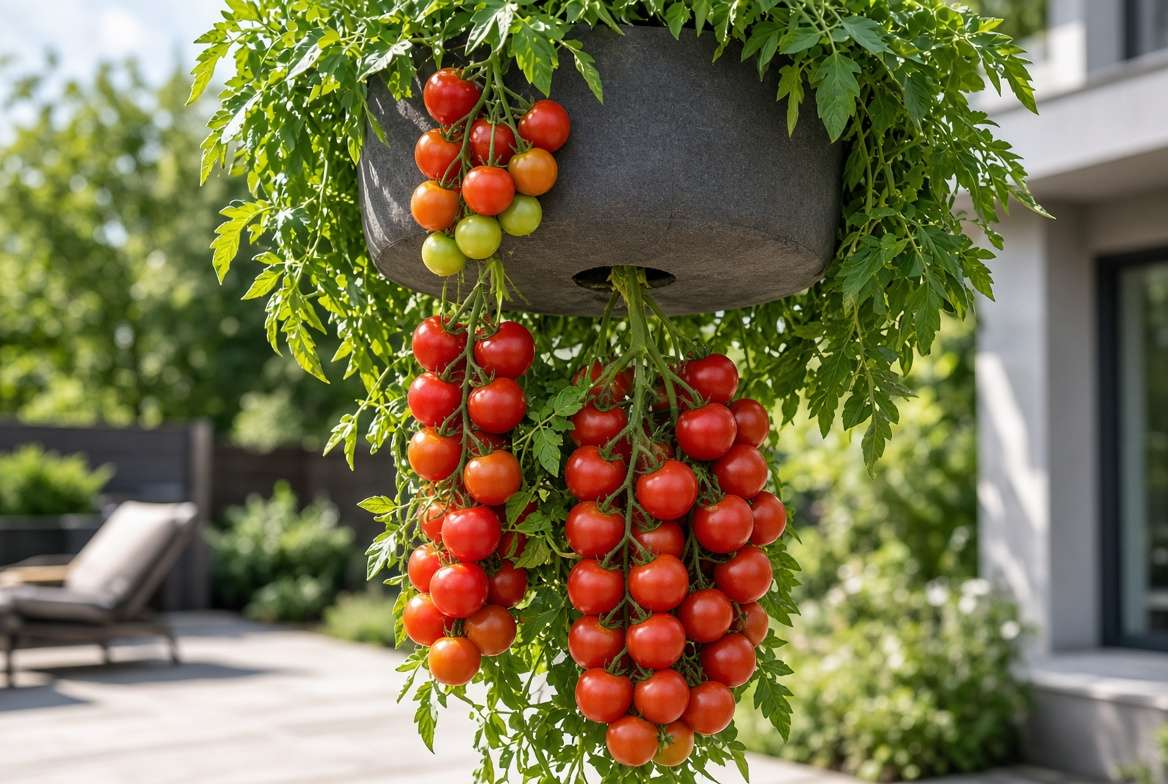
In a traditional garden bed, tomatoes are fighting gravity. They require extensive trellising, cages, and tying to prevent the heavy vines from snapping or collapsing onto the dirt. When you grow a plant upside down, gravity does the heavy lifting for you. The plant’s natural weight gently pulls the vines downward, preventing stem breakage and eliminating the need for expensive, cumbersome stakes.
Disease and Pest Prevention 🐛🛡️
A significant portion of tomato diseases—such as early blight and Septoria leaf spot—are caused by soil splashing onto the lower leaves during heavy rain or watering. By suspending your plant in the air, you completely remove it from the splash zone. Furthermore, ground-dwelling pests like cutworms, slugs, and hornworms have an incredibly difficult time reaching a plant suspended six feet in the air.
Improved Air Circulation 🌬️
Fungal diseases thrive in stagnant, humid air. Hanging planters naturally expose your tomato plant’s foliage to 360-degree breezes. This constant air circulation keeps the leaves dry and dramatically reduces the likelihood of powdery mildew and other moisture-loving pathogens taking hold.
The 7 Expert Upside-Down Tomato Planter Tips 🏆🍅
To achieve a photogenic, Pinterest-worthy planter that also bursts with delicious fruit, you need to approach your hanging garden with a solid strategy. Here are the foundational tips for success.
Tip 1: Choose the Right Tomato Varieties (Size Matters!) 🍒
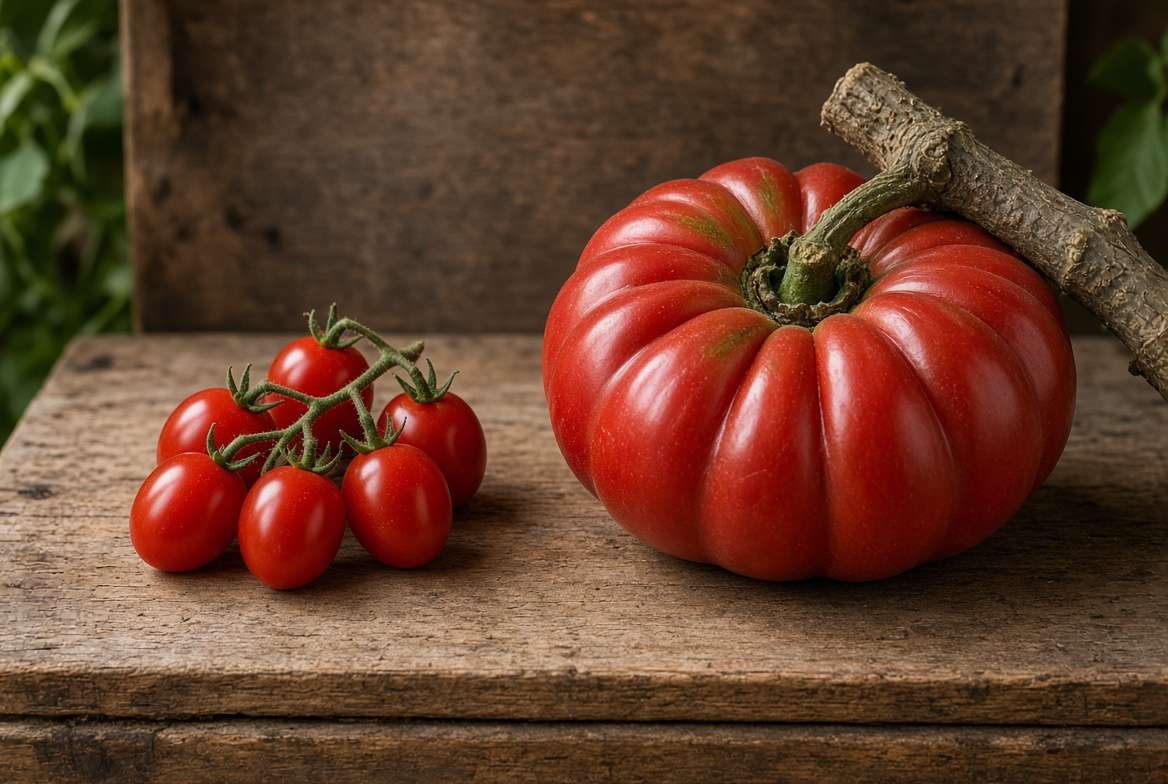
One of the biggest mistakes novice vertical gardeners make is planting the wrong variety. While it is tempting to try and grow massive, two-pound Beefsteak or Brandywine tomatoes upside down, it almost always ends in heartbreak.
The stems of large, heavy slicing tomatoes are simply not designed to support the immense weight of their fruit while hanging. The branches will snap long before the fruit ripens. Furthermore, you want to focus on determinate varieties (bush types that grow to a set size and produce all at once) or compact trailing varieties, rather than sprawling indeterminate vines that will eventually hit the floor.
The Best Varieties for Upside-Down Planters:
-
Cherry and Grape Tomatoes: Sweet Million, Sungold, or Super Sweet 100. These produce abundant, lightweight clusters that cascade beautifully.
-
Trailing Tomatoes: Tumbler or Tumbling Tom are bred specifically for hanging baskets and naturally cascade over the edges without stress.
-
Dwarf/Patio Varieties: Tiny Tim or Patio Princess stay compact and have sturdy, manageable root systems perfect for confined spaces.
Tip 2: Master the Soil Mix (Keep it Light and Fluffy) ☁️🪴
When it comes to container gardening, soil health is everything. Because your plant’s roots are confined to a small bag or bucket, the medium you choose dictates the health of the entire plant. You absolutely cannot use ordinary garden topsoil. It is too heavy, lacks proper drainage, and will compact into a dense brick, suffocating the root system. Plus, heavy soil makes the hanging planter dangerously heavy.
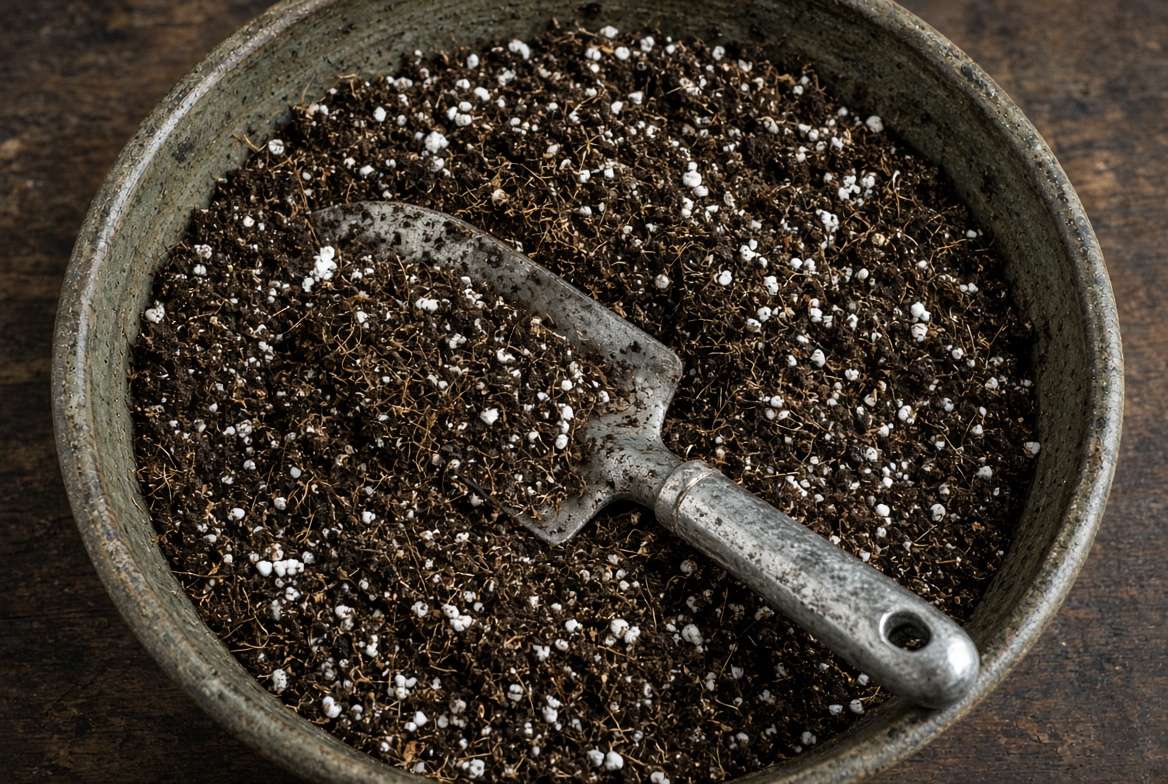
To build a thriving root microbiome in a hanging environment, you need a custom, lightweight potting mix that balances moisture retention with aggressive aeration.
The Ultimate Upside-Down Potting Recipe:
-
50% Peat Moss or Coco Coir: This provides the lightweight, moisture-holding bulk of the mix. (Coco coir is a fantastic, sustainable alternative to peat).
-
25% Perlite or Vermiculite: This ensures the soil remains fluffy, allowing oxygen to reach the roots and preventing waterlogging.
-
25% High-Quality Compost or Worm Castings: This provides the essential organic matter and microbial life necessary for vigorous early growth.
Expert Hack: Hanging planters dry out much faster than ground soil. To give your plant a fighting chance during peak summer heat, mix in a handful of moisture-retaining hydrogel crystals into the soil, or place a natural sea sponge right at the bottom of the planter to catch and slowly release water! 🧽💧
Tip 3: Perfect the Planting Technique (Protect the Stem) 🛡️🌿
Threading a fragile, young tomato seedling through a small hole at the bottom of a planter is nerve-wracking. One wrong move, and the stem snaps.
The Step-by-Step Planting Strategy:
-
Prep the Seedling: Choose a sturdy seedling about 6 to 8 inches tall. Pinch off the bottom few leaves so you have a long, bare stem. Tomatoes can grow roots all along their buried stem, which anchors them securely.
-
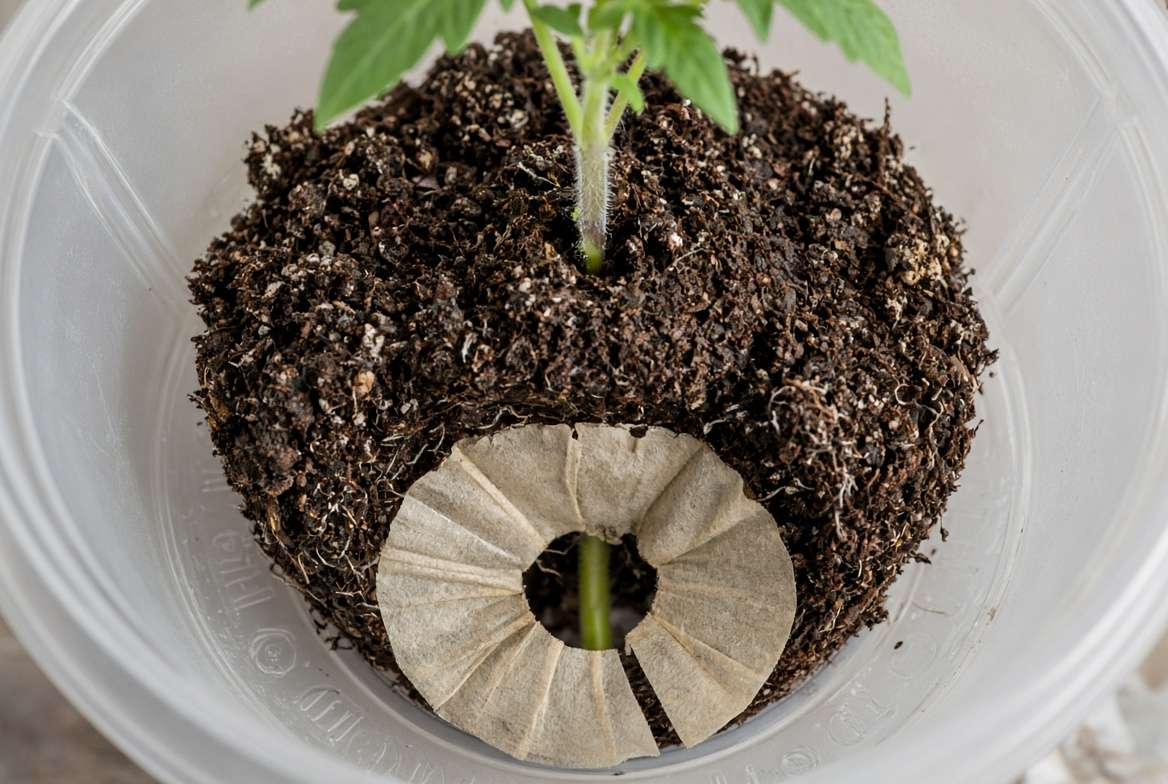
The Coffee Filter Trick: Before inserting the plant, take a standard paper coffee filter, cut a slit to the center, and gently wrap it around the stem of the seedling.
-
Positioning: Thread the leafy top of the plant down through the bottom hole of the planter from the inside, so the roots remain inside the container. The coffee filter acts as a barrier, resting flat against the inside of the hole to stop your fluffy new soil mix from pouring out while the roots establish themselves.
-
Fill and Tamp: Gently add your lightweight soil mix around the root ball, pressing down lightly to remove massive air pockets, but taking care not to compact the soil.
Tip 4: Secure Heavy-Duty Hanging Hardware ⚓🛠️
When setting up your vertical garden, it is incredibly easy to underestimate the sheer physics involved. A heavy-duty plastic or fabric planter filled with moist potting soil, a mature root system, thick foliage, and a dozen ripening tomatoes is shockingly heavy. A fully mature hanging tomato plant can easily weigh between 30 to 50 pounds!
If you hang this setup from a flimsy shepherds hook, a weak tree branch, or a thin aluminum gutter, it will inevitably collapse—destroying your plant and potentially causing property damage.
Hardware Best Practices for Vertical Planters:
-
Find a Solid Anchor: Always mount your planter to a solid, structural wood joist, a heavy load-bearing beam on your patio, or a masonry wall using appropriate masonry anchors.
-
Use Swivel Hooks: As the plant grows, you want it to receive even sunlight. Using a heavy-duty swivel hook allows you to easily rotate the planter 180 degrees every few days so all sides of the foliage get adequate solar exposure. 🌞
-
Carabiners and Heavy Chain: Skip cheap plastic ropes or thin twine, which can degrade and snap under harsh UV rays. Use weather-resistant zinc-plated chains and locking carabiners for maximum security and peace of mind.
Tip 5: Implement a Strict, Daily Watering Routine 💧⏰
Watering is the undisputed make-or-break factor in container gardening. In a traditional garden bed, the surrounding earth insulates the roots and acts as a massive sponge, holding moisture for days. In an upside-down tomato planter, you face two distinct challenges:
-
Gravity: Water naturally channels straight down and out the bottom hole.
-
Wind Exposure: Suspended containers are constantly exposed to ambient breezes, which aggressively evaporate moisture through the sides of the planter (especially if you are using porous fabric grow bags).
The Expert Watering Strategy:
-
Daily Hydration: Expect to water your hanging tomatoes every single day. During intense summer heatwaves (over 85°F/29°C), you may even need to water twice a day—once in the morning and once in the late afternoon.
-
Water Slowly: If you dump a gallon of water into the top all at once, it will channel down the sides and instantly pour out the bottom, leaving the root ball bone dry. Water slowly, allowing the lightweight soil mix time to absorb the moisture like a sponge. Keep watering until you see a steady trickle coming out of the bottom hole.
-
The Drip Irrigation Hack: If a daily manual watering routine doesn’t fit your schedule, invest in a simple automated drip irrigation system. Running a 1/4-inch drip emitter tube from an outdoor faucet timer to the top of your planter ensures consistent, stress-free moisture delivery. 🚿
Tip 6: Feed Them Aggressively (The Liquid Fertilizer Strategy) 🍽️✨
Tomatoes are notoriously heavy feeders, meaning they require a tremendous amount of nutrients (nitrogen, phosphorus, and potassium) to fuel their rapid growth and fruit production. In an upside-down setup, you encounter a phenomenon known as “nutrient leaching.” Because you are watering so frequently, the essential nutrients are constantly being flushed out of the bottom of the container.
If you rely solely on the compost you mixed into the soil on day one, your plant will starve by mid-summer.
The Feeding Schedule:
-
Ditch the Granules: Slow-release granular fertilizers sit on the top of the soil and often get washed out before they can break down. Instead, use a high-quality, water-soluble liquid fertilizer.
-
Frequency: Feed your plants a diluted liquid fertilizer every 10 to 14 days.
-
Focus on Phosphorus and Potassium: Once the plant begins setting blossoms, switch to a “bloom booster” fertilizer formula that is lower in nitrogen and higher in phosphorus and potassium. Too much nitrogen will give you beautiful, massive green leaves but zero tomatoes! 🚫🍅
-
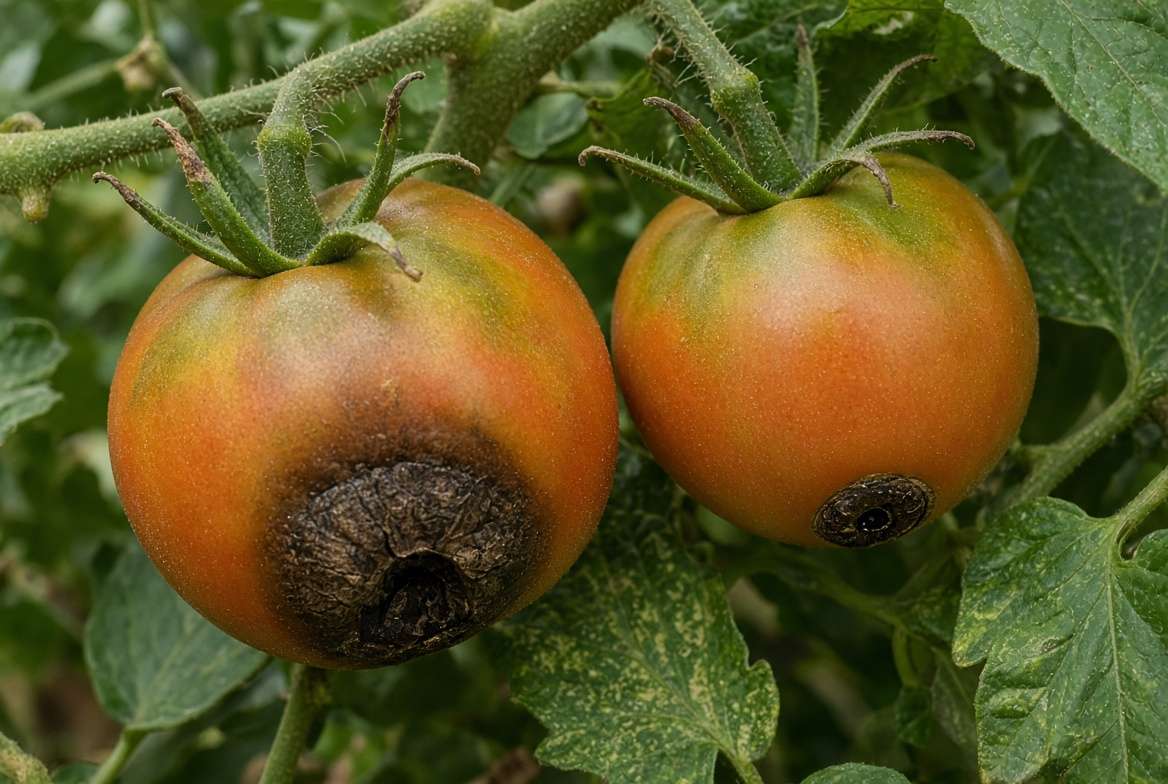
Prevent Blossom End Rot: Container tomatoes are highly susceptible to blossom end rot (a condition where the bottom of the tomato turns black and rots). This is caused by a calcium deficiency triggered by uneven watering. To prevent this, supplement your feeding routine with a liquid calcium-magnesium (Cal-Mag) solution or add a handful of bone meal to the soil at planting time. 🦴
Tip 7: Prune for Yield, Not Just Looks ✂️📈
Pruning upside-down tomatoes requires a slightly different approach than ground-planted vines. Because gravity is pulling the plant downward, the foliage can easily become a dense, tangled curtain that blocks sunlight and traps humidity.
Strategic Pruning Techniques:
-
Manage the “Suckers”: Suckers are the small shoots that grow in the “V” joint between the main stem and a branch. If you planted a determinate (bush) variety as recommended in Tip 1, you should generally leave the suckers alone, as they will produce fruit. However, if the plant becomes incredibly dense, thin out a few non-producing inner branches to improve airflow. 🌬️
-
Trim Yellowing Leaves: Always prune away any yellow, brown, or diseased foliage immediately. These dying leaves drain energy from the plant that should be directed toward ripening fruit.
-
Sunlight Maximization: If dense upper leaves are completely shading the fruit clusters dangling below, carefully trim back a few of the offending leaves. Tomatoes require direct sunlight on the foliage to photosynthesize, but the fruit itself also benefits from warmth to ripen properly.
Bonus Pro Tip: Maximize Space with Companion Planting on Top 🌼🌿
To elevate your upside-down tomato planter from “good” to “expert-level,” you need to utilize every inch of available space. Once your tomato is hanging happily out the bottom, you are left with an entire surface area of bare soil at the top of the planter!
Leaving this soil bare is a missed opportunity and leads to faster water evaporation. Instead, practice companion planting.
The Best Companions for the Top Canopy:
-
Herbs: Shallow-rooted herbs like basil, thyme, or oregano thrive in the sunny, well-draining top section. Plus, the scent of basil is scientifically proven to confuse and deter certain tomato pests! 🌿
-
Marigolds: Planting bright marigolds at the top adds a gorgeous pop of color and acts as a powerful natural pest deterrent against nematodes and whiteflies. 🌼
-
Living Mulch: These companion plants act as a “living mulch,” shading the topsoil from the harsh sun and drastically reducing the rate of water evaporation.
Troubleshooting Common Upside-Down Tomato Problems 🚑🔍
Even with the best preparation, vertical gardening can throw a few curveballs. Here is how to diagnose and fix the most common issues:
1. The “U-Turn” (Phototropism) ↪️
-
The Issue: A few days after planting, your tomato stem starts curving upward toward the sky instead of hanging straight down.
-
The Fix: Don’t panic! This is completely natural. Plants are genetically wired to reach for the sun (phototropism). As the plant grows and sets heavy fruit, the weight will naturally pull the vines back downward. Do not try to force or bend the stem straight, or you will snap it.
2. Blossoms Dropping Without Fruit 🥀
-
The Issue: Your plant produces beautiful yellow flowers, but they dry up and fall off without a tomato forming.
-
The Fix: This is usually due to temperature stress (nights too cold or days too hot) or lack of pollination. Because they are suspended, upside-down planters sometimes miss out on ground-level pollinators. Give the hanging planter a very gentle shake every morning to help the pollen drop inside the flowers and fertilize them. 🐝
3. Wilting Despite Watering 🥀
-
The Issue: You are watering daily, but the leaves look limp and sad.
-
The Fix: Check your drainage. If the bottom hole is clogged by roots or compacted soil, the water might be pooling inside, drowning the roots (root rot). Ensure water runs completely clear out the bottom when you water. If it’s draining fine, the plant may simply be experiencing mid-day heat stress; consider moving it to a spot that receives afternoon shade. 🌤️
Frequently Asked Questions (FAQs) 🙋♀️💡
Do upside-down tomato planters really work? Absolutely. While they require a different watering and feeding strategy than ground soil, upside-down planters are a highly effective, space-saving method that yields fantastic results, particularly for smaller, determinate tomato varieties.
How much sun does a hanging tomato plant need? Like all tomatoes, they are sun-worshippers. Ensure your planter is hung in a location that receives a minimum of 6 to 8 hours of direct, unfiltered sunlight every day for optimal fruit production. ☀️
Can I reuse the potting soil next year? It is highly recommended that you empty the planter and start with fresh, sterilized potting mix each season. Reusing old soil drastically increases the risk of carrying over fungal spores or depleted nutrients from the previous year.
Can you grow cucumbers or peppers upside down? Yes! The exact same principles apply. Vining plants like cucumbers, small melons, and certain pepper varieties perform wonderfully in vertical, gravity-fed planters. 🥒🌶️
Conclusion: Ready to Hang Your First Harvest? 🎉🍅
Growing tomatoes in an inverted planter is more than just a clever gardening trick; it is a highly practical, scientifically sound solution for urban gardeners, balcony growers, and anyone looking to maximize their yield in a limited footprint. By selecting the right compact varieties, crafting a lightweight and moisture-retentive soil mix, and committing to a strict watering and feeding schedule, you can enjoy a bumper crop of fresh tomatoes right outside your door.
Gravity is on your side—no stakes, no cages, and no soil-borne diseases required!
Are you ready to try out these upside-down tomato planter tips this season? If you are setting up your vertical garden, we want to see it! Share your setup in the comments below, or check out our comprehensive guide on [Internal Link: How to Start Tomato Seeds Indoors] to get a head start on your next growing season. Happy hanging! 🪴✨











